state of north dakota of north dakota module 6 ... asset management helps automate the business...
TRANSCRIPT
State of North Dakota
Module 6 - Assets PeopleSoft Financials 9.0
Office of Management & Budget - Fiscal Management
01/01/2011

Introduction
The PeopleSoft Financials Training Guide was produced by using the User Productivity
Kit (UPK) / On Demand Training application. The Training Guide is comprised of 3
levels:
Module – PeopleSoft component
Lesson – Description level
Topic - Procedure
All levels are identified with the prefix “ST” for STATE.
PeopleSoft Financial Modules Training Guides are available on the Office of
Management & Budget website: www.nd.gov/fiscal/accounting/manuals.
The PeopleSoft Financials Module Online Tutorials and Job Aids are available by
clicking on the Help menu in PeopleSoft Financials.
Notice to Users:
All Training Guide content was recorded in the PeopleSoft Test environment
(NDFT). The NDFT logo will appear on the screen shots in this document;
however, this will not be seen in the Production environment.
The PeopleSoft Tools upgrade was implemented in October 2010. This change
does not affect the actual material represented in the Training Guides/Job Aids;
however, the main menu screens in the training material may look different than
the actual PeopleSoft Production environment.

Training Guide Module 6 - Assets
Page iii
Table of Contents ST Module 6 - Assets......................................................................................................... 1
ST Lesson 6.1 - Adding and Maintaining Assets ..................................................................... 1 ST 6.1.1 - Adding an Asset Using Basic Add ......................................................................................... 2 ST 6.1.2 - Adding an Asset Using Express Add ................................................................................... 22 ST 6.1.3 - Copying an Asset ................................................................................................................. 30 ST 6.1.4 - Searching for an Asset ......................................................................................................... 37
ST Lesson 6.2 - Adjusting and Transferring Assets .............................................................. 41 ST 6.2.1 - Adjusting Asset Information ................................................................................................ 42 ST 6.2.2 - Modifying Pending Asset Transactions ............................................................................... 52 ST 6.2.3 - Deleting Pending Asset Transactions .................................................................................. 61
ST Lesson 6.3 - Reviewing Asset Information ....................................................................... 69 ST 6.3.1 - Viewing Depreciation .......................................................................................................... 69 ST 6.3.2 - Viewing Cost Information ................................................................................................... 74
ST Lesson 6.4 - Retiring Assets ............................................................................................... 79 ST 6.4.1 - Retiring Assets ..................................................................................................................... 79 ST 6.4.2 - Reinstating Assets ................................................................................................................ 85
ST Lesson 6.5 - Running Reports and Queries...................................................................... 89 ST 6.5.1 - Running Reports .................................................................................................................. 89 ST 6.5.2 - Running Queries ................................................................................................................ 123


Training Guide Module 6 - Assets
Page 1
ST Module 6 - Assets Assets Module
Asset Management helps automate the business processes involved in asset acquisition and
disposal by maintaining accounting integrity and enhancing reporting capabilities. Assets may be
maintained in various books for different reporting and tracking purposes.
PeopleSoft Asset Management features several key functions:
Adding Assets
Depreciating Assets
Adjusting and Transferring Assets
Retiring Assets
Reporting Assets
To view or print the Assets Training Guide, click on OMB's training webpage:
(http://www.nd.gov/fiscal/accounting/manuals)
ST Lesson 6.1 - Adding and Maintaining Assets Adding and Maintaining Assets
Assets may be added by Express Add or Basic Add. Assets can be initially added through
Express Add and additional details can be added through Basic Add; or the entire entry can be
done through Basic Add.
There are two main advantages to adding assets through Express Add. The first is the ease in
which you can create a funding split for an asset. The second is when in Express Add, once you
press the Save button the asset is automatically capitalized if it is over $5,000. The main
disadvantage in using Express Add is that once you click the Save button, you cannot make any
changes to certain fields.
In Basic Add, both funding splits and capitalizing assets require much more work on the part of
the employee adding the asset, but you can save what you have entered and still make changes to
all fields if you have not yet clicked the Capitalize Asset button. We will cover both methods.
Page 2
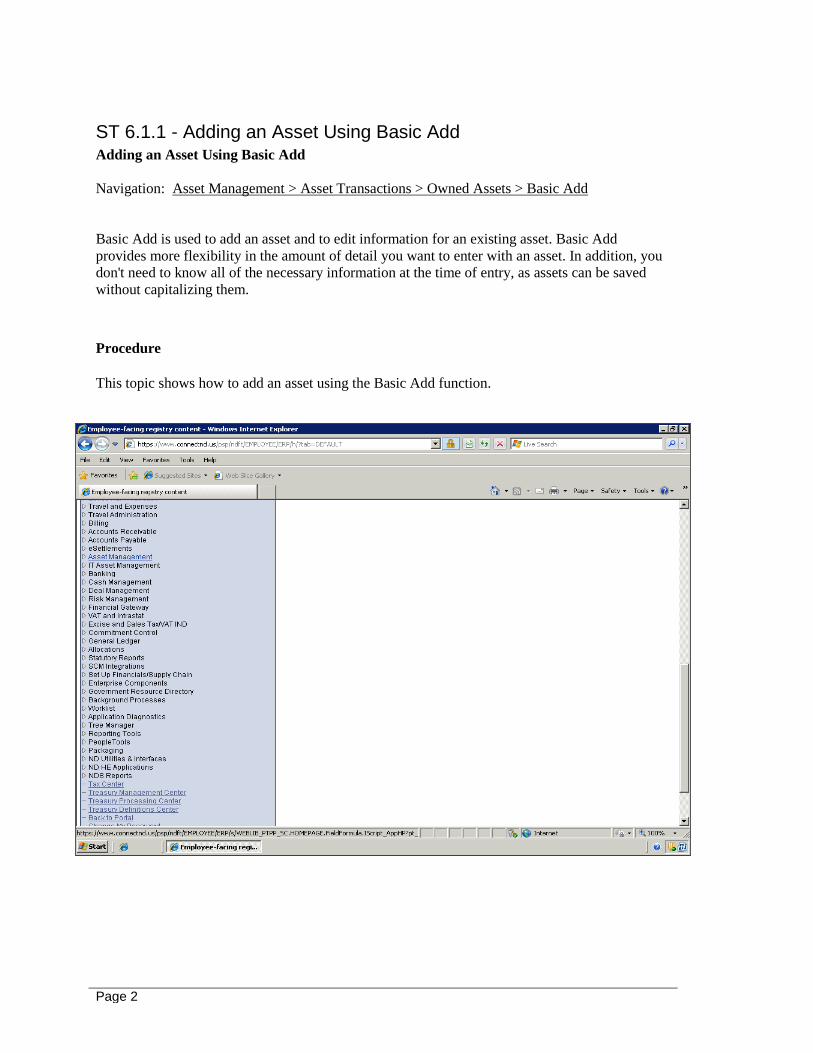
ST 6.1.1 - Adding an Asset Using Basic Add Adding an Asset Using Basic Add
Navigation: Asset Management > Asset Transactions > Owned Assets > Basic Add
Basic Add is used to add an asset and to edit information for an existing asset. Basic Add
provides more flexibility in the amount of detail you want to enter with an asset. In addition, you
don't need to know all of the necessary information at the time of entry, as assets can be saved
without capitalizing them.
Procedure
This topic shows how to add an asset using the Basic Add function.

Training Guide Module 6 - Assets
Page 3
Step Action
1. Click the Asset Management link.
Step Action
2. Click the Asset Transactions link.
3. Click the Owned Assets link.
4. Click the Basic Add link.

Page 4
Step Action
5. Enter the Asset ID to be modified or select Add a New Value.
Click the Add a New Value tab.
6. Click the Add button.
Training Guide Module 6 - Assets
Page 5
Step Action
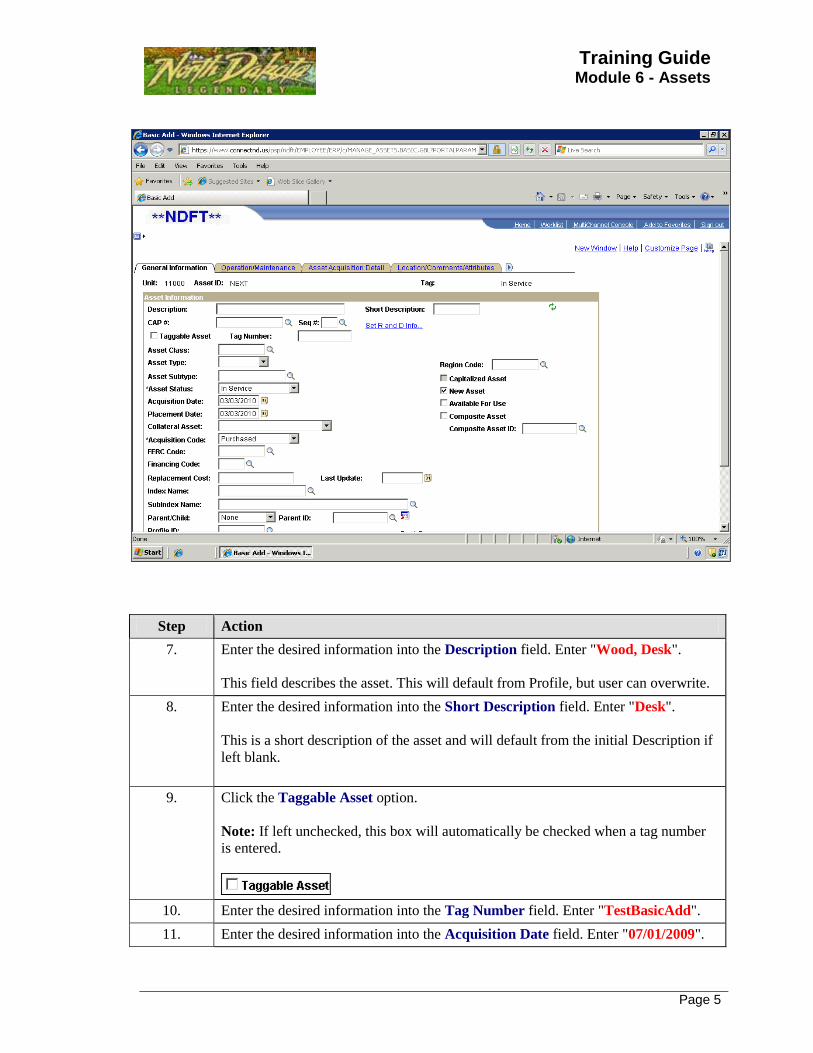
7. Enter the desired information into the Description field. Enter "Wood, Desk".
This field describes the asset. This will default from Profile, but user can overwrite.
8. Enter the desired information into the Short Description field. Enter "Desk".
This is a short description of the asset and will default from the initial Description if
left blank.
9. Click the Taggable Asset option.
Note: If left unchecked, this box will automatically be checked when a tag number
is entered.
10. Enter the desired information into the Tag Number field. Enter "TestBasicAdd".
11. Enter the desired information into the Acquisition Date field. Enter "07/01/2009".

Page 6
Step Action
12. Enter the desired information into the Placement Date field. Enter "07/01/2009".
13. Click the Asset Type list.
Step Action
14. Click the Equipment list item.
Training Guide Module 6 - Assets
Page 7
Step Action
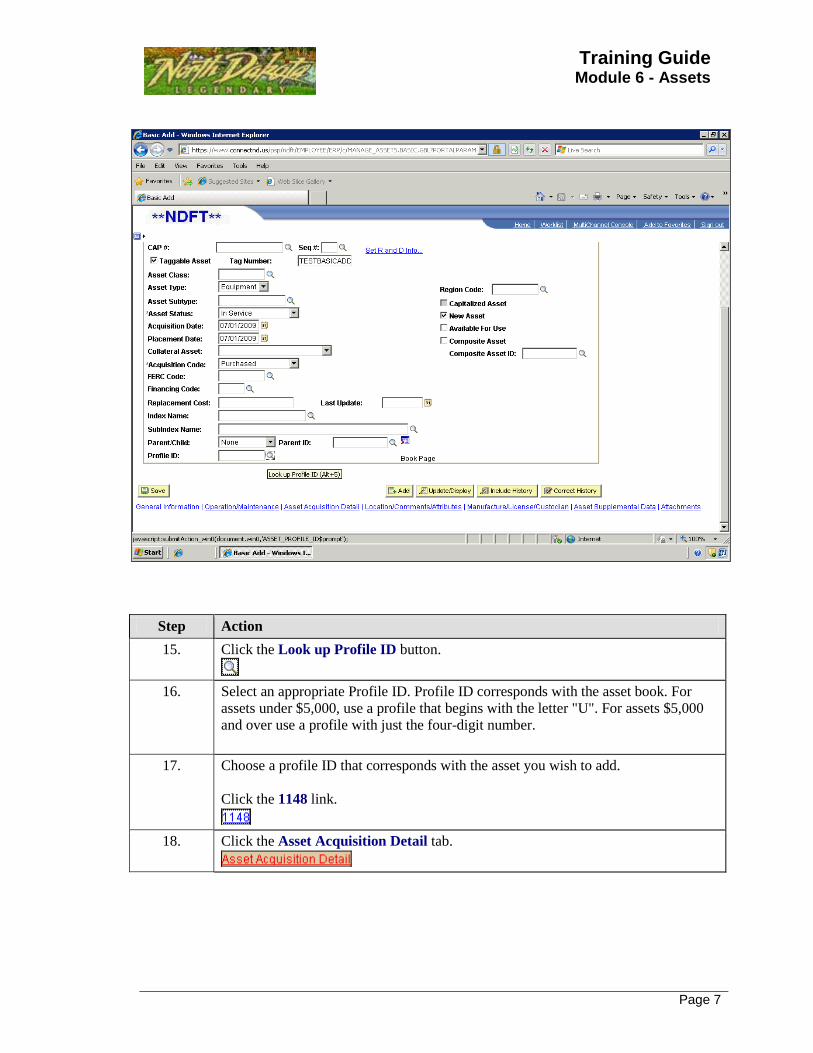
15. Click the Look up Profile ID button.
16. Select an appropriate Profile ID. Profile ID corresponds with the asset book. For
assets under $5,000, use a profile that begins with the letter "U". For assets $5,000
and over use a profile with just the four-digit number.
17. Choose a profile ID that corresponds with the asset you wish to add.
Click the 1148 link.
18. Click the Asset Acquisition Detail tab.

Page 8
Step Action
19. Enter the desired information into the Description field. Enter "Wood Desk".
20. Enter the desired information into the Amount field. Enter "10000.00".

Training Guide Module 6 - Assets
Page 9
Step Action
21. Description - Enter a description of the asset.
System Source - Leave Blank.
Quantity - Enter the quantity being added.
Amount - Enter the total cost of the asset.
Capitalize - Leave as To be Capitalized
regardless of cost.
Vendor ID - Enter Vendor ID from list. (optional)
Vendor Name - Defaults from Vendor ID.
If Vendor ID is left blank, a name can be typed in.
(optional)
22. Enter the desired information into the Trans Date field. Enter "07/01/2009".

Page 10
Step Action
23. Enter the desired information into the Acctg Date field. Enter "07/01/2009".
24. Click the Accum Depr in Current Pd option.
25. Click the Location/Comments/Attributes tab.
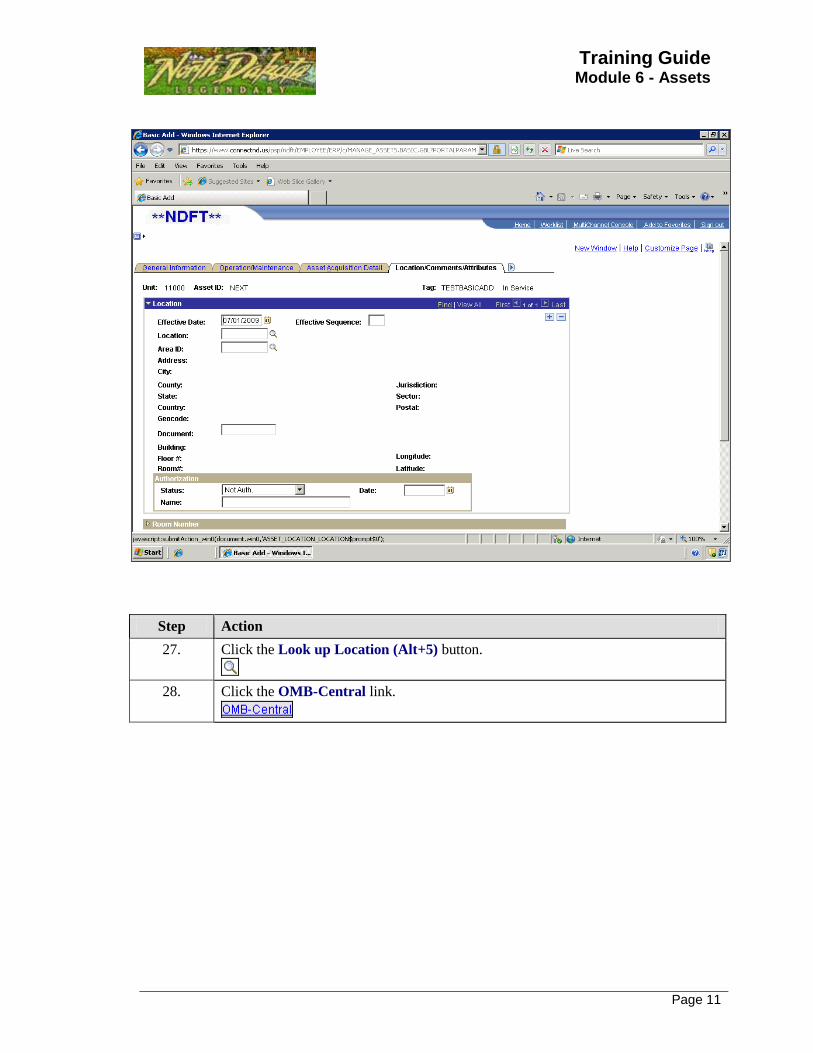
26. This page is used to enter the physical Location of the asset, any Comments
pertaining to the asset, and the Physical Attributes of the asset.
Effective Date - The date the asset was placed in this location.
Location - Enter the location from the list provided.
Document Field - Free-form field with a limit of ten characters to add any
additional description needed. Can be used to enter additional location information.
The Comments and Physical Attributes sections are free-form fields and can be
filled out as desired.
Training Guide Module 6 - Assets
Page 11
Step Action
27. Click the Look up Location (Alt+5) button.
28. Click the OMB-Central link.

Page 12
Step Action
29. Click the Show following tabs button.
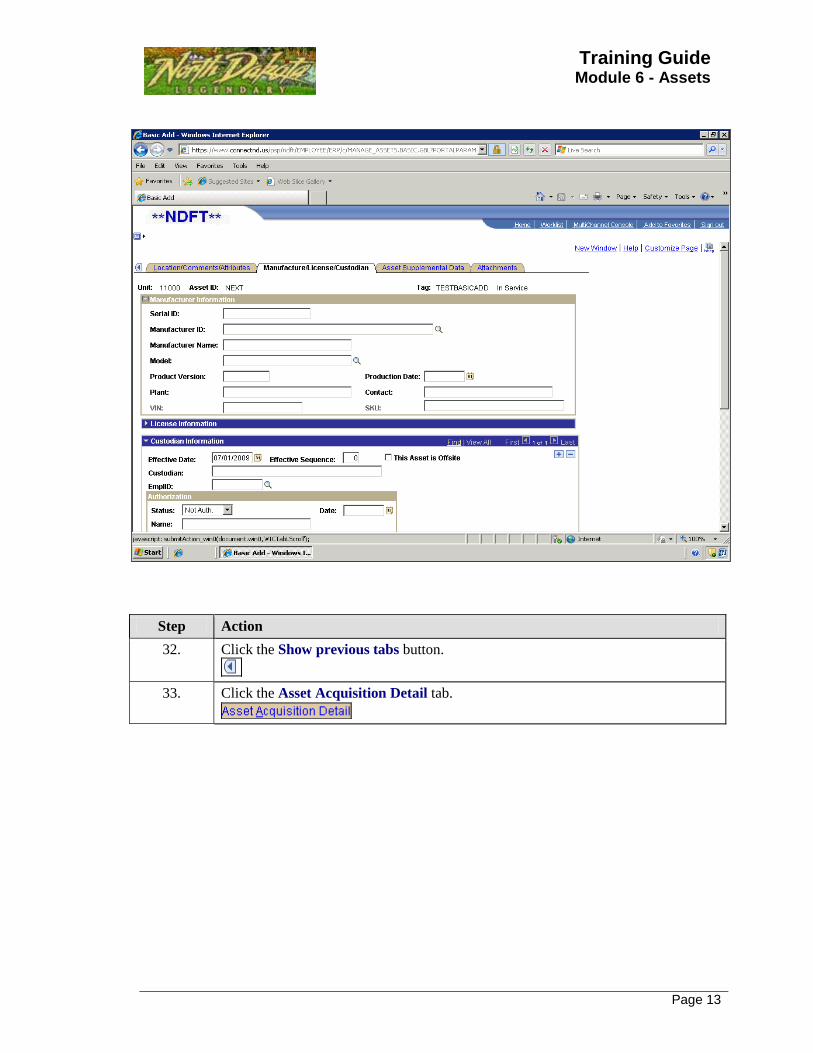
30. Click the Manufacture/License/Custodian tab.
31. This page is used to record various Manufacturer Information, License
Information, and Custodian Information, as desired.
Note: As assets move among locations or custodians, PeopleSoft Asset Management
allows you to keep a complete history of all locations and/or custodians and make
comments.
Click the + to Add a New Row in the Locations, Comments, or Custodian
Information box. In this new row, you can enter in the new information, without
losing the previous information.
Training Guide Module 6 - Assets
Page 13
Step Action
32. Click the Show previous tabs button.
33. Click the Asset Acquisition Detail tab.

Page 14
Step Action
34. Click the Capitalize button.
35. Decision: Please make a selection from the options listed below.
One Funding Source
Go to step 36 on page 15
Split Funding
Go to step 48 on page 18
Training Guide Module 6 - Assets
Page 15
Step Action
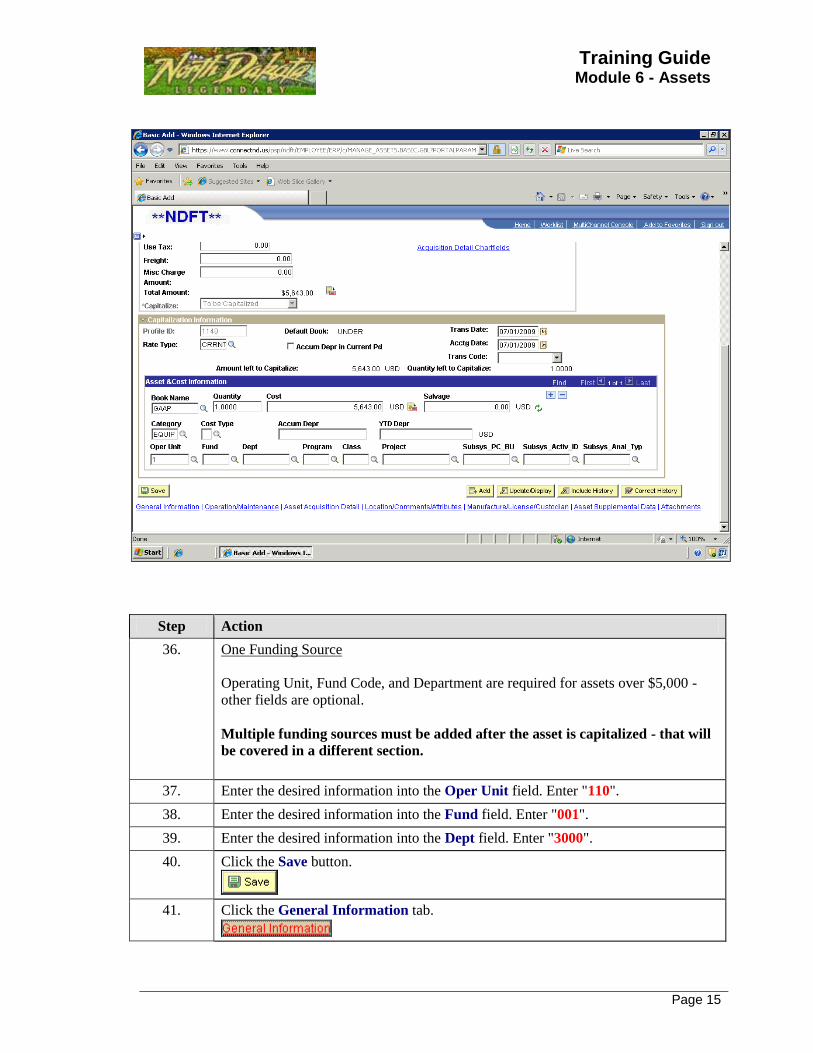
36. One Funding Source
Operating Unit, Fund Code, and Department are required for assets over $5,000 -
other fields are optional.
Multiple funding sources must be added after the asset is capitalized - that will
be covered in a different section.
37. Enter the desired information into the Oper Unit field. Enter "110".
38. Enter the desired information into the Fund field. Enter "001".
39. Enter the desired information into the Dept field. Enter "3000".
40. Click the Save button.
41. Click the General Information tab.

Page 16
Step Action
42. Click the Book Page link.
43. Click the Yes button.
44. The useful life of the asset should always be verified here. The useful life will
default to a number based on the profile ID selected. This number is listed in months
so if the life of the asset is 8 years you will enter 96 here.

Training Guide Module 6 - Assets
Page 17
Step Action
45. Enter the desired information into the Useful Life field. Enter "96".
46. Click the Save button.
47. This topic showed how to Add an Asset Using Basic Add.
End of Procedure. Remaining steps apply to other paths.

Page 18
Step Action
48. Split Funding
Click the Add a new row at row 1 button.
49. Enter the desired information into the Quantity field. Enter ".50".
50. Enter the desired information into the Cost field. Enter "5000.00".
51. Operating Unit, Fund and Department are required for assets over $5,000 - other
fields are optional.
52. Enter the desired information into the Oper Unit field. Enter "110".
53. Enter the desired information into the Fund field. Enter "001".
54. Enter the desired information into the Dept field. Enter "3000".
55. Enter the desired information into the Book Name field. Enter "Gaap".
56. Enter the desired information into the Quantity field. Enter ".50".
57. Enter the desired information into the Cost field. Enter "5000.00".
Training Guide Module 6 - Assets
Page 19
Step Action
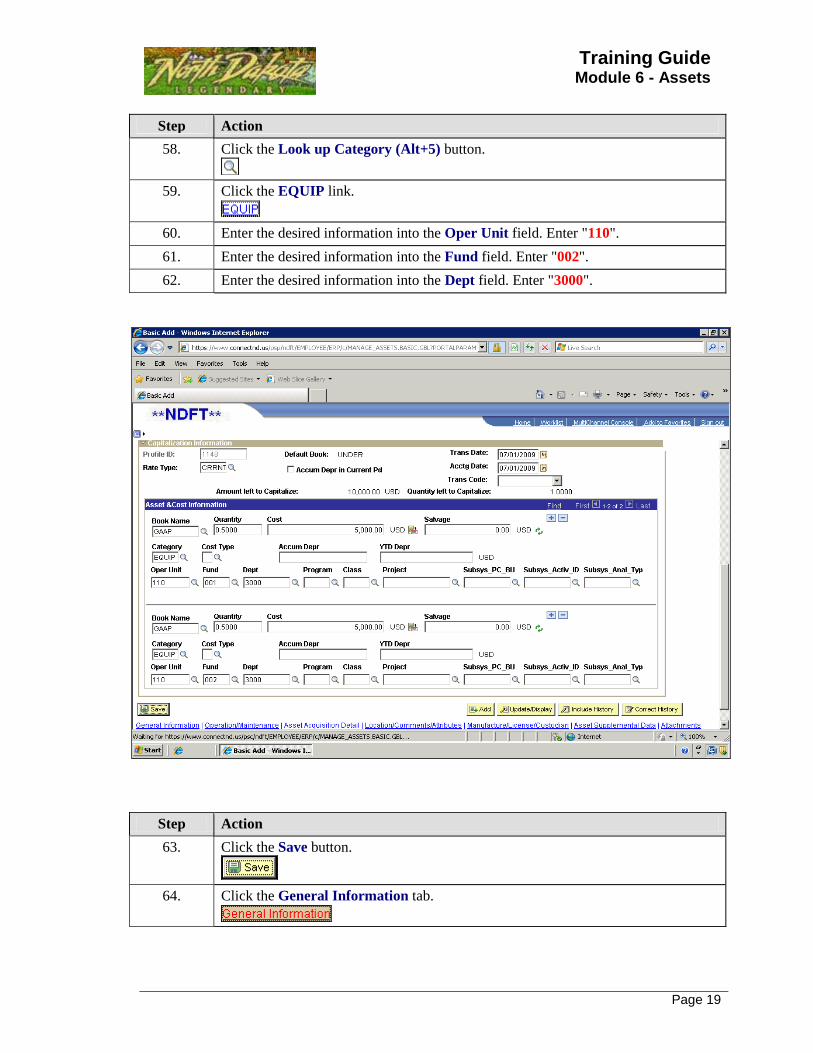
58. Click the Look up Category (Alt+5) button.
59. Click the EQUIP link.
60. Enter the desired information into the Oper Unit field. Enter "110".
61. Enter the desired information into the Fund field. Enter "002".
62. Enter the desired information into the Dept field. Enter "3000".
Step Action
63. Click the Save button.
64. Click the General Information tab.
Page 20
Step Action
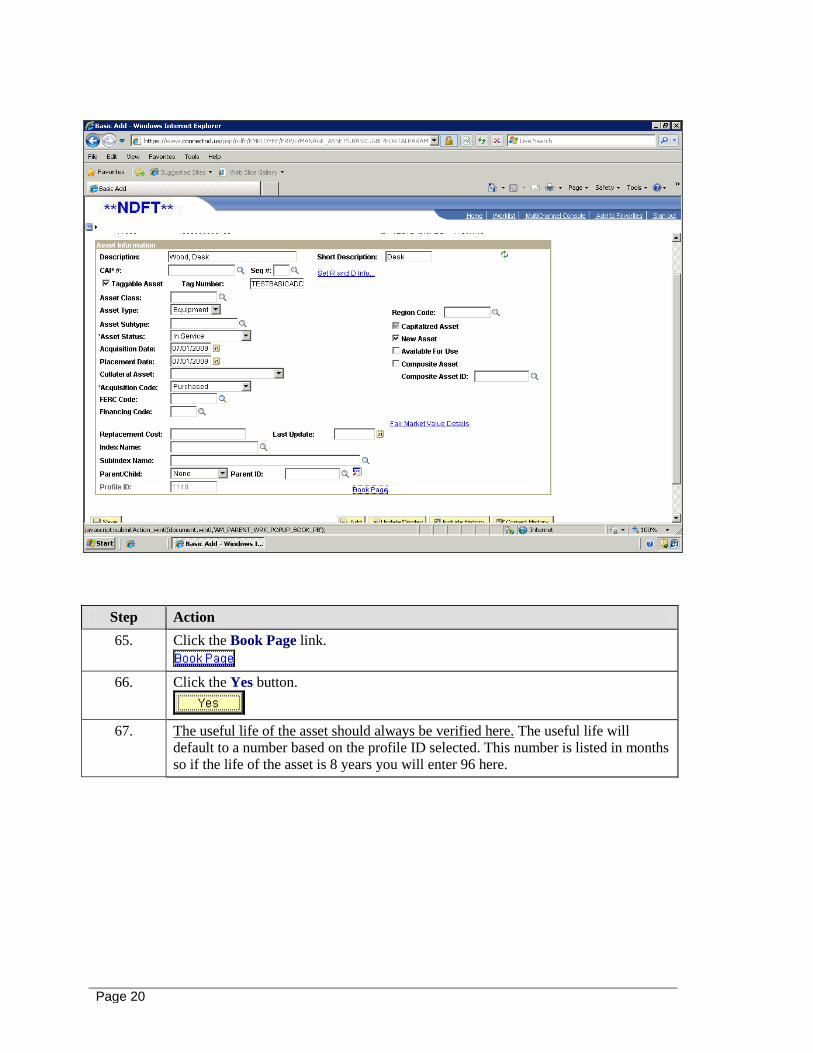
65. Click the Book Page link.
66. Click the Yes button.
67. The useful life of the asset should always be verified here. The useful life will
default to a number based on the profile ID selected. This number is listed in months
so if the life of the asset is 8 years you will enter 96 here.

Training Guide Module 6 - Assets
Page 21
Step Action
68. Enter the desired information into the Useful Life field. Enter "96".
69. Click the Save button.
70. This topic showed how to Add an Asset Using Basic Add.
End of Procedure.

Page 22
ST 6.1.2 - Adding an Asset Using Express Add Adding an Asset Using Express Add
Navigation: Asset Management > Asset Transactions > Owned Assets > Express Add
When using Express Add, assets are added and capitalized upon saving with minimal effort.
Additional details can be added later utilizing Basic Information.
Procedure
This topic shows how to Add an Asset Using Express Add.
Step Action
1. Click the Asset Management link.
Training Guide Module 6 - Assets
Page 23
Step Action
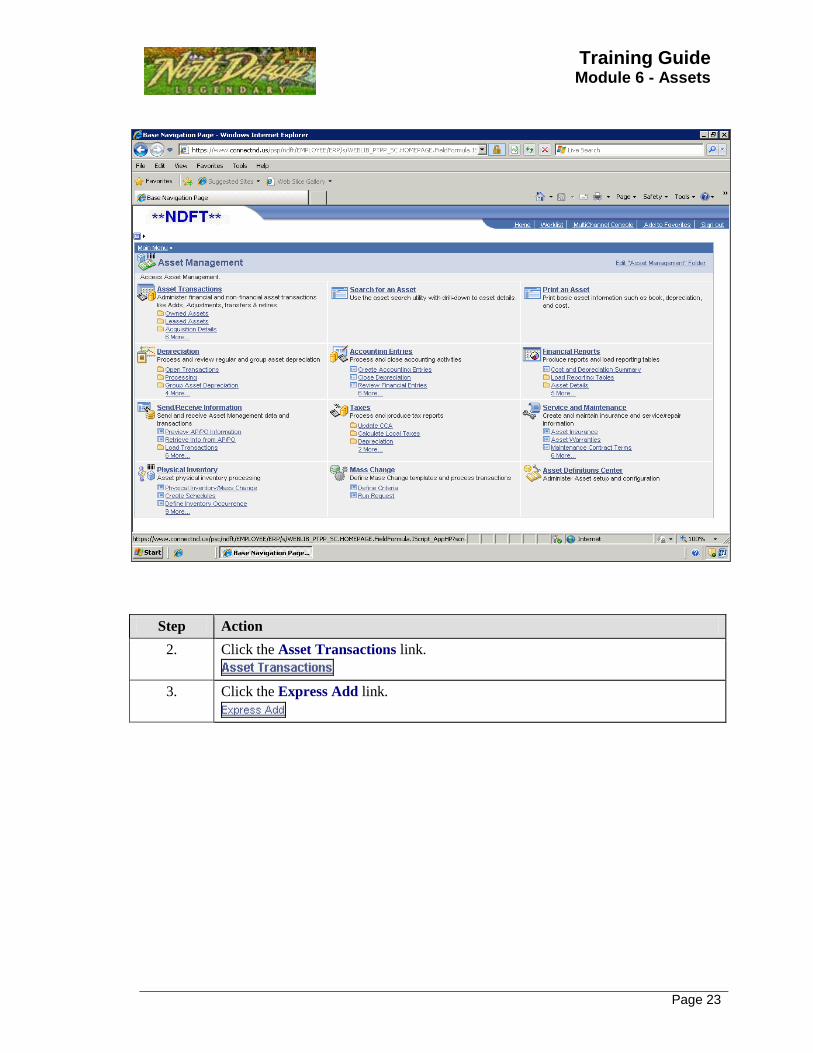
2. Click the Asset Transactions link.
3. Click the Express Add link.

Page 24
Step Action
4. Click the Add button.

Training Guide Module 6 - Assets
Page 25
Step Action
5. Click the Look up Profile ID (Alt+5) button.
6. Choose the appropriate Profile ID.
Profile ID - Identifies a profile set up in the Asset Profile table. The current asset
will default to all financial and tax depreciation information defined in that profile.
Any of these defaults may be overridden. For assets under $5,000, use a profile that
begins with the letter "U". For assets $5,000 and over, use a profile with just the
four-digit number.
Click the Desk, wood link.
7. Enter the desired information into the Description field. Enter "Wood Desk".
Page 26
Step Action
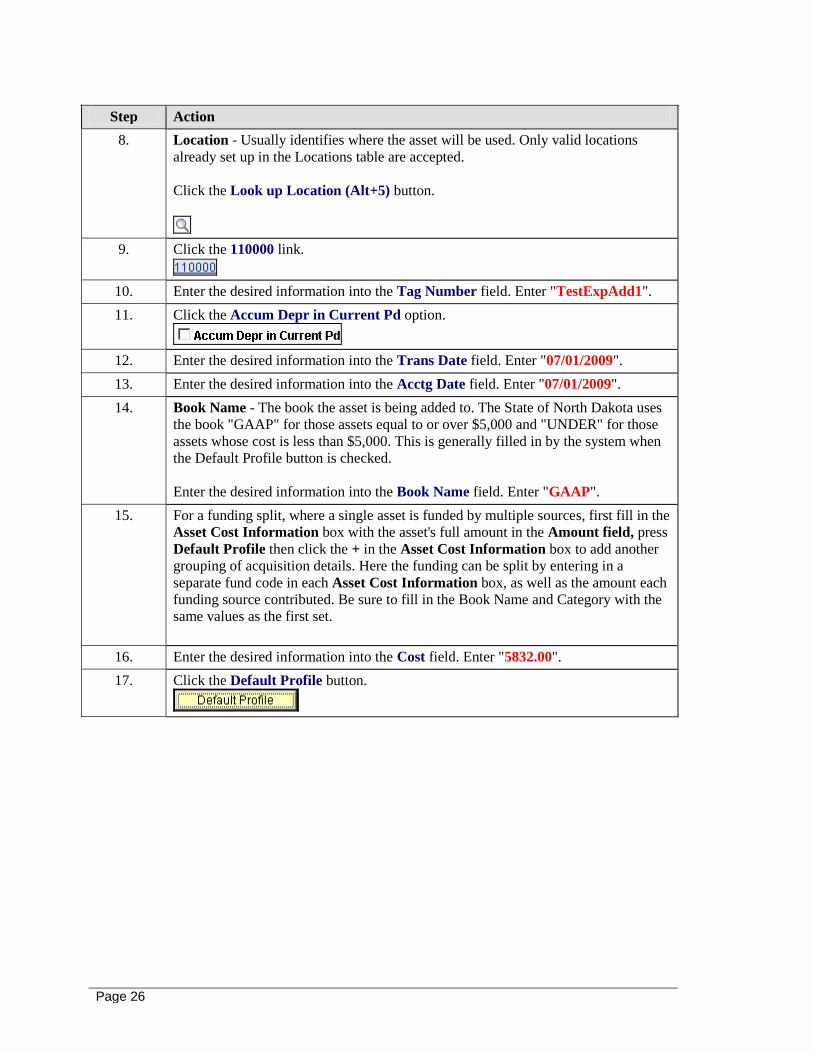
8. Location - Usually identifies where the asset will be used. Only valid locations
already set up in the Locations table are accepted.
Click the Look up Location (Alt+5) button.
9. Click the 110000 link.
10. Enter the desired information into the Tag Number field. Enter "TestExpAdd1".
11. Click the Accum Depr in Current Pd option.
12. Enter the desired information into the Trans Date field. Enter "07/01/2009".
13. Enter the desired information into the Acctg Date field. Enter "07/01/2009".
14. Book Name - The book the asset is being added to. The State of North Dakota uses
the book "GAAP" for those assets equal to or over $5,000 and "UNDER" for those
assets whose cost is less than $5,000. This is generally filled in by the system when
the Default Profile button is checked.
Enter the desired information into the Book Name field. Enter "GAAP".
15. For a funding split, where a single asset is funded by multiple sources, first fill in the
Asset Cost Information box with the asset's full amount in the Amount field, press
Default Profile then click the + in the Asset Cost Information box to add another
grouping of acquisition details. Here the funding can be split by entering in a
separate fund code in each Asset Cost Information box, as well as the amount each
funding source contributed. Be sure to fill in the Book Name and Category with the
same values as the first set.
16. Enter the desired information into the Cost field. Enter "5832.00".
17. Click the Default Profile button.

Training Guide Module 6 - Assets
Page 27
Step Action
18. Category - Describes the general type of asset. Defined by the Profile. Must be
previously established. This is generally filled in by the system when the Default
Profile button is checked.
Accum Depr - The amount of depreciation already recognized. If you are adding
assets that have depreciation from prior years, enter that amount in this field.
YTD Depr - (Year to Date Depreciation) If any portion of the accumulated
depreciation amount applies to the current fiscal year, enter the amount of that
portion. this is generally not used.
* Oper Unit - Used to designate the appropriation. Charged when the asset was
purchased.
*Fund Code - The fund(s) that was charged when the asset was purchased. The
fund is 3 digits, unless the asset was purchased with federal funds, in which case the
fund is 5-digit grant number.
*Dept - Used to designate the reporting level charged when asset was purchased.
* Required field for assets in GAAP book.
19. Enter the desired information into the Oper Unit field. Enter "110".
20. Enter the desired information into the Fund field. Enter "001".

Page 28
Step Action
21. Enter the desired information into the Dept field. Enter "3000".
22. Click the Save button.
23. Click the Depreciation Information tab.

Training Guide Module 6 - Assets
Page 29
Step Action
24. Useful life is measured in months. If the life of the asset is 8 years you will enter 96
months.
Enter the desired information into the Useful Life field. Enter "96".
25. Click the Save button.
26. This topic showed how to Add an Asset Using Express Add.
End of Procedure.

Page 30
ST 6.1.3 - Copying an Asset Copying an Asset
Navigation: Asset Management > Asset Transactions > Owned Assets > Copy Existing Asset
You can copy an existing asset if its financial and physical information is similar to the new asset
you want to create.
Procedure
This topic shows how to Copy an Asset.
Step Action
1. Click the Asset Management link.

Training Guide Module 6 - Assets
Page 31
Step Action
2. Click the Asset Transactions link.
3. Click the Owned Assets link.
4. Click the Copy Existing Asset link.
Step Action
5. Enter the Asset ID or Tag Number to be copied and then click Search.
Enter the desired information into the Tag Number field. Enter "Test".
Page 32
Step Action
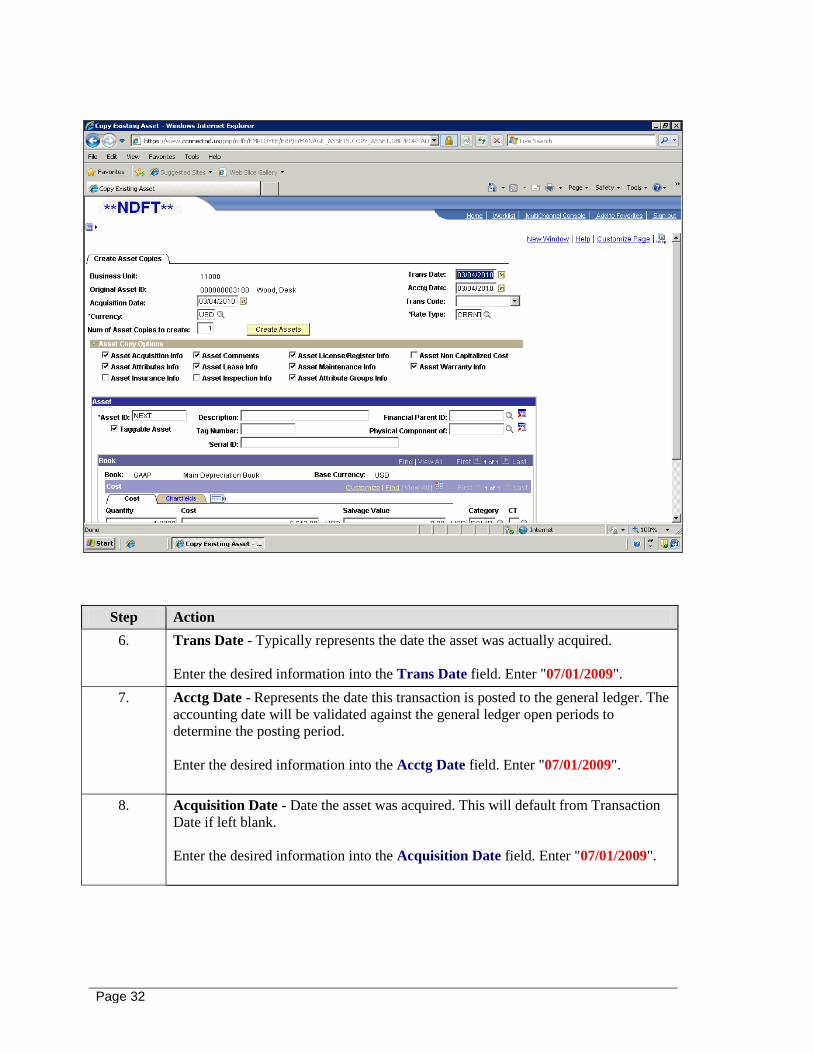
6. Trans Date - Typically represents the date the asset was actually acquired.
Enter the desired information into the Trans Date field. Enter "07/01/2009".
7. Acctg Date - Represents the date this transaction is posted to the general ledger. The
accounting date will be validated against the general ledger open periods to
determine the posting period.
Enter the desired information into the Acctg Date field. Enter "07/01/2009".
8. Acquisition Date - Date the asset was acquired. This will default from Transaction
Date if left blank.
Enter the desired information into the Acquisition Date field. Enter "07/01/2009".

Training Guide Module 6 - Assets
Page 33
Step Action
9. Enter the desired information into the Num of Asset Copies to create field.
Enter "5".
Click the Create Assets button.
Step Action
10. Click the Create Assets button.
11. Asset ID - Defaults in as NEXT.
Do not change this information.
12. Enter the desired information into the Tag Number field. Enter "TestCopy1".
13. Enter the desired information into the Description field. Enter "Wood Desk".
14. Enter the desired information into the Description field. Enter "Wood Desk".
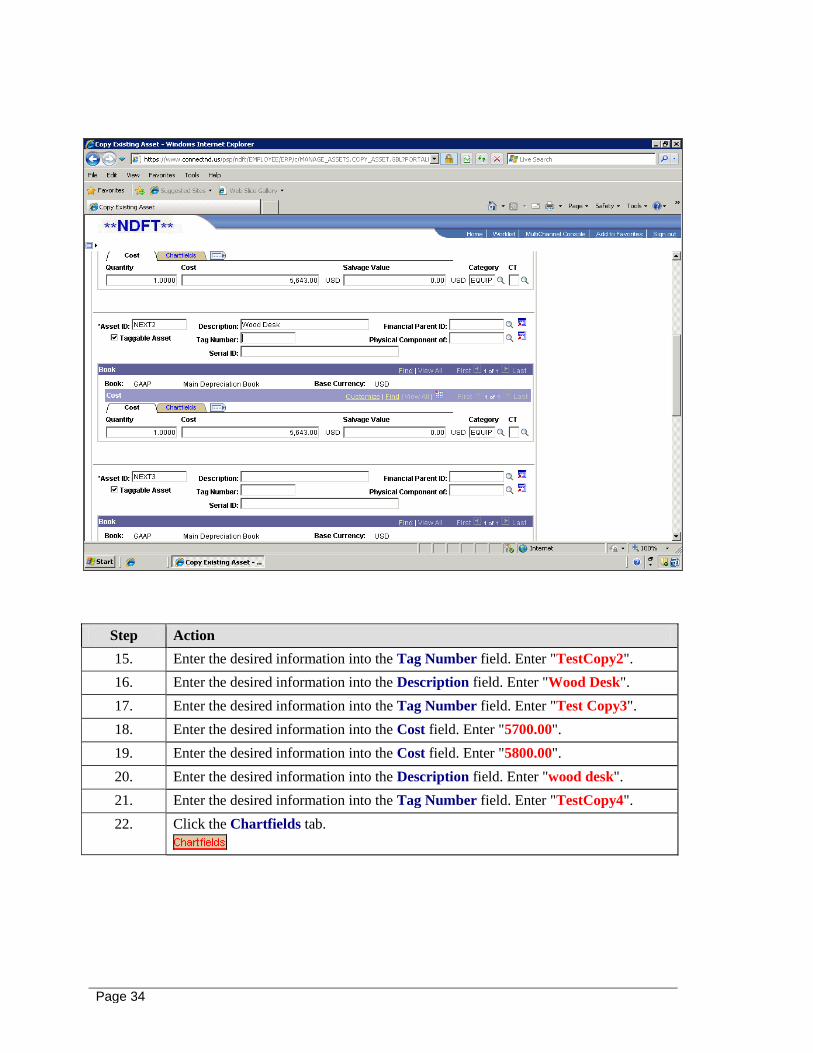
Page 34
Step Action
15. Enter the desired information into the Tag Number field. Enter "TestCopy2".
16. Enter the desired information into the Description field. Enter "Wood Desk".
17. Enter the desired information into the Tag Number field. Enter "Test Copy3".
18. Enter the desired information into the Cost field. Enter "5700.00".
19. Enter the desired information into the Cost field. Enter "5800.00".
20. Enter the desired information into the Description field. Enter "wood desk".
21. Enter the desired information into the Tag Number field. Enter "TestCopy4".
22. Click the Chartfields tab.

Training Guide Module 6 - Assets
Page 35
Step Action
23. Oper Unit, Fund, and Dept are required for assets > $5,000.00. When copying an
asset this will stay the same as the original asset. Alter if necessary.
Click the Cost tab.
24. You can verify and/or change any necessary information in the new assets.
Enter the desired information into the Cost field. Enter "6000.00".
25. Enter the desired information into the Description field. Enter "Wood Desk".
26. Enter the desired information into the Tag Number field. Enter "TestCopy5".
27. Click the Save button.

Page 36
Step Action
28. Click the Return to Search button.
Step Action
29. Enter the desired information into the Tag Number field. Enter "Test".
30. Click the Search button.
31. After the copied assets have been saved you can ensure the assets have been created
by exiting to this menu and searching for the assets. They should now be available.
32. This topic showed how to Copy an Asset.
End of Procedure.

Training Guide Module 6 - Assets
Page 37
ST 6.1.4 - Searching for an Asset Searching for an Asset
Navigation: Asset Management > Search for an Asset
Asset Management provides a search utility that enables you to search for an asset using multiple
search criteria. After you find the asset, you can review detailed information for the asset under
different Asset Management components.
Procedure
This topic shows how to Search for an Asset.
Page 38
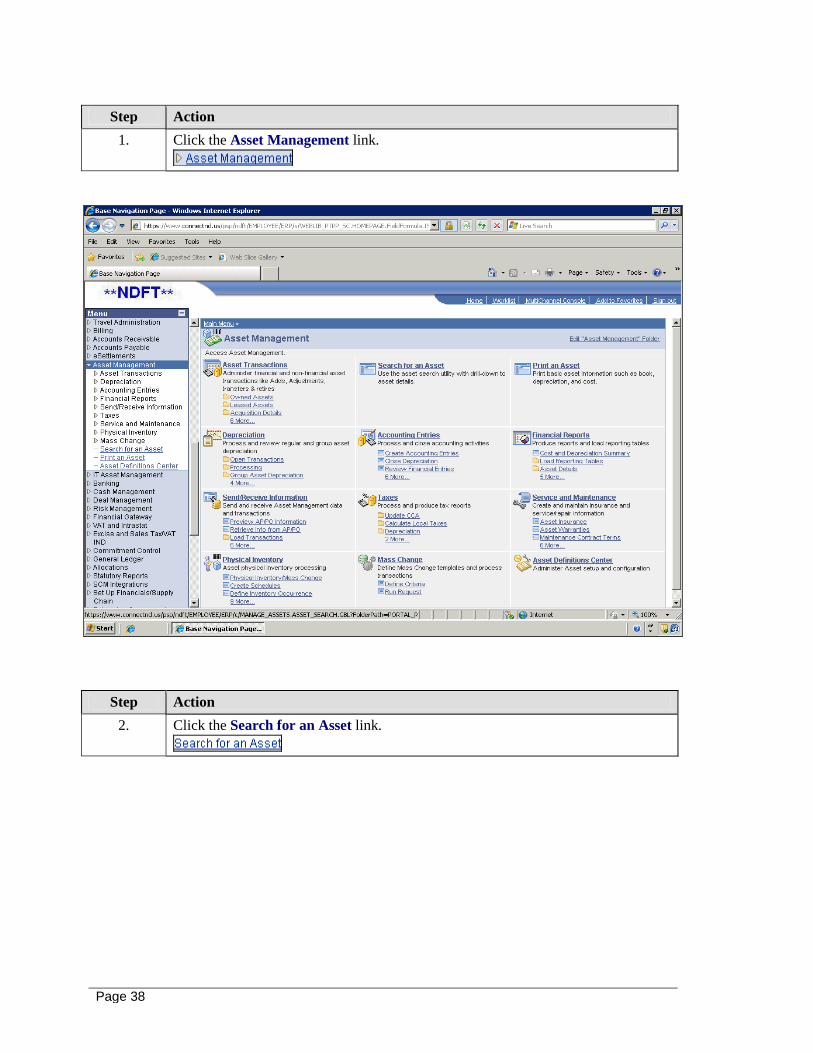
Step Action
1. Click the Asset Management link.
Step Action
2. Click the Search for an Asset link.
Training Guide Module 6 - Assets
Page 39
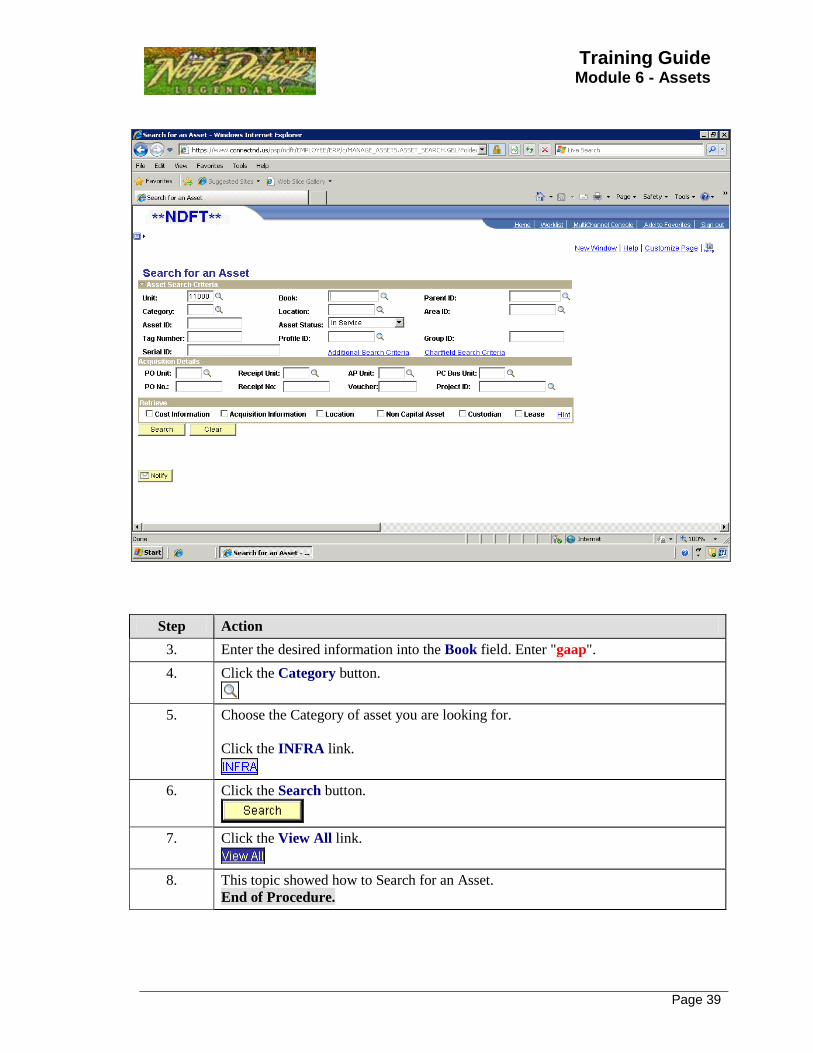
Step Action
3. Enter the desired information into the Book field. Enter "gaap".
4. Click the Category button.
5. Choose the Category of asset you are looking for.
Click the INFRA link.
6. Click the Search button.
7. Click the View All link.
8. This topic showed how to Search for an Asset.
End of Procedure.

Page 40

Training Guide Module 6 - Assets
Page 41
ST Lesson 6.2 - Adjusting and Transferring Assets Adjusting and Transferring Assets
Adjusting Cost and Quantity
Asset Management allows you to adjust cost and/or quantity using several options:
By change in net cost or net quantity
By change in percentage of net cost
By net cost per row
By new quantity per row
By cost change per row
Pending Trans Update/Delete
Asset Management allows you to update or delete assets that have not gone through the
depreciation calculation process (recently added).
This provides an opportunity for data validation and correction prior to processing.
Page 42
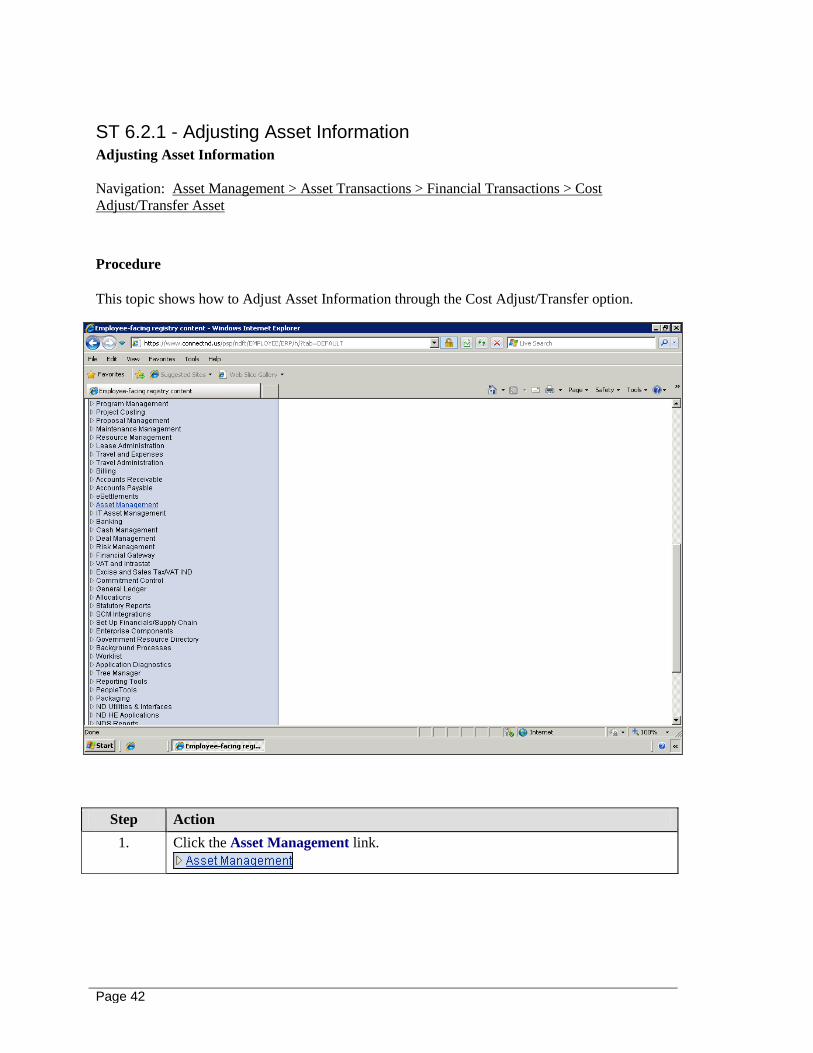
ST 6.2.1 - Adjusting Asset Information Adjusting Asset Information
Navigation: Asset Management > Asset Transactions > Financial Transactions > Cost
Adjust/Transfer Asset
Procedure
This topic shows how to Adjust Asset Information through the Cost Adjust/Transfer option.
Step Action
1. Click the Asset Management link.
Training Guide Module 6 - Assets
Page 43
Step Action
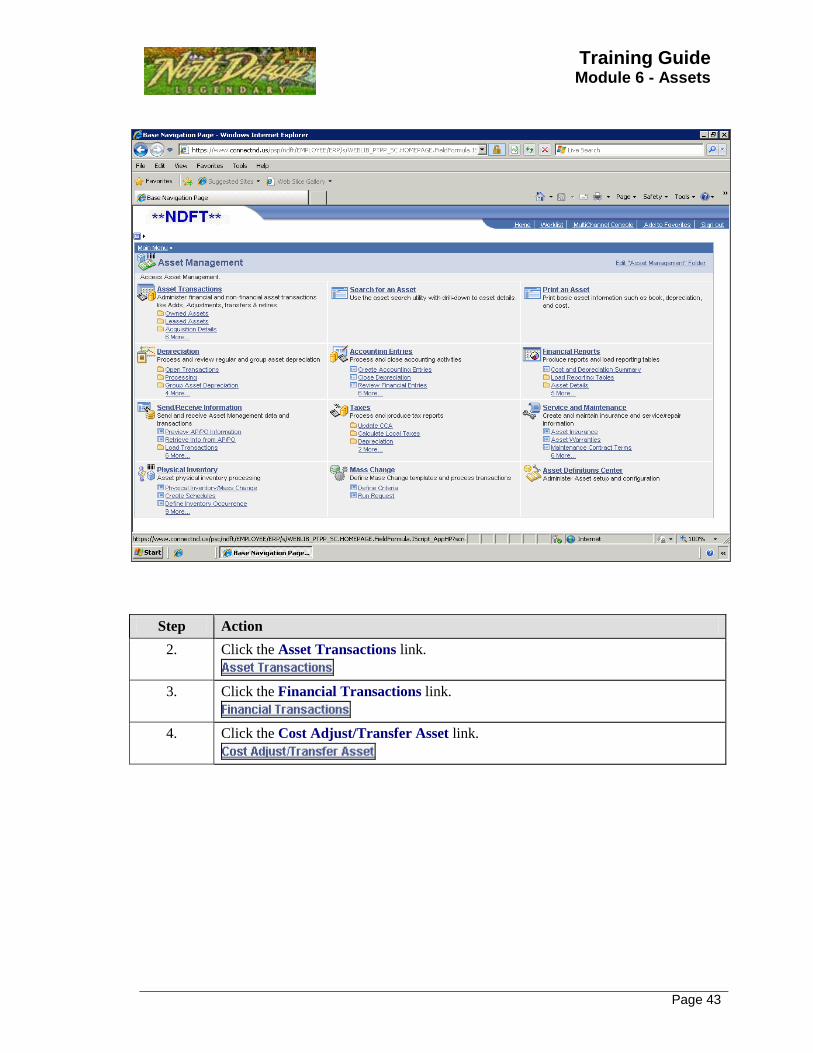
2. Click the Asset Transactions link.
3. Click the Financial Transactions link.
4. Click the Cost Adjust/Transfer Asset link.

Page 44
Step Action
5. Enter the desired information into the Tag Number field. Enter "Test".
6. Click the Search button.
7. Click the TESTCOPY2 link.
8. Transaction Code - is optional.
Rate Type, Copy Changes to Other Books, and Adjust other books by should be
left with their default values.
Select Action of "Adjustment" and click Go.
Training Guide Module 6 - Assets
Page 45
Step Action
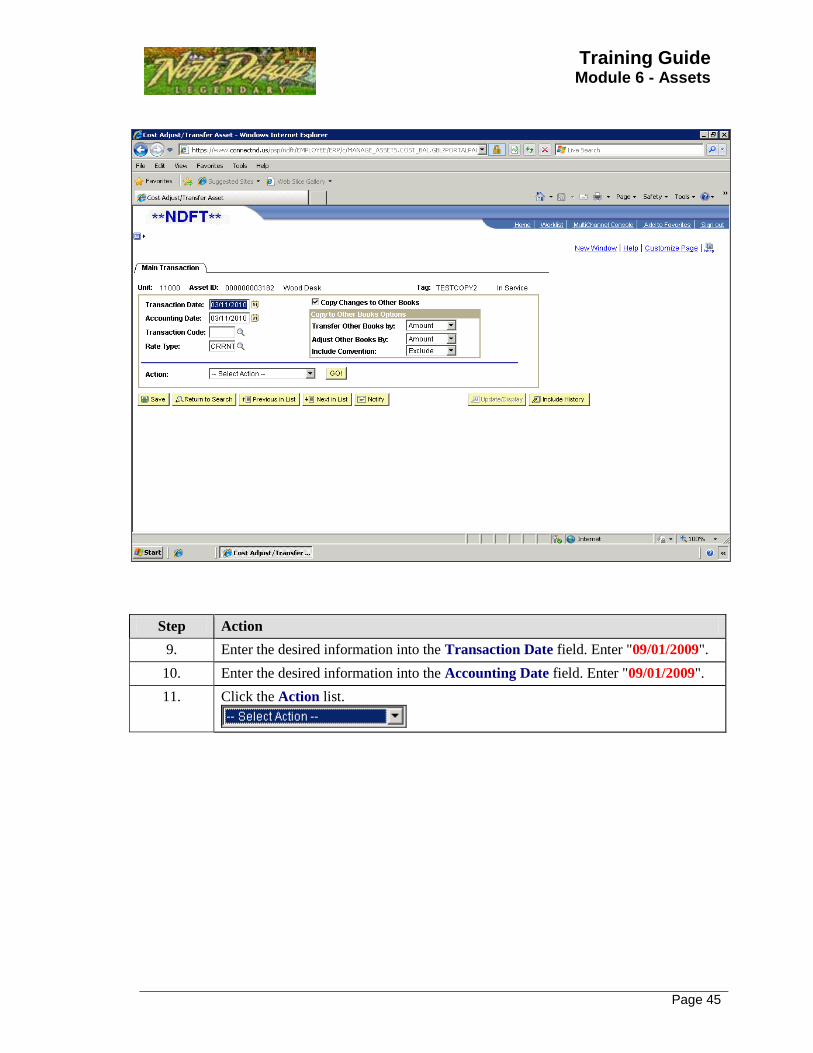
9. Enter the desired information into the Transaction Date field. Enter "09/01/2009".
10. Enter the desired information into the Accounting Date field. Enter "09/01/2009".
11. Click the Action list.

Page 46
Step Action
12. Click the Adjustment list item.

Training Guide Module 6 - Assets
Page 47
Step Action
13. Click the GO! button.
14. Adjust All Rows By - Allows you to adjust multiple rows by the same value:
Percent, Quantity, or Cost.
Enter adjustment then click Apply to show the change reflected on all rows. Each
individual row can then be edited before saving the adjustment.
To adjust a single row, enter the adjusted value into the appropriate field: Quantity,
Cost, or Salvage.
Adjust Current Row By - Allows you to adjust the cost by entering the adjustment
amount (positive or negative) and clicking Apply.
Save the adjustment.

Page 48
Step Action
15. Enter the desired information into the Cost field. Enter "6000.00".
16. Click the Save button.
17. Click the Return to Search button.

Training Guide Module 6 - Assets
Page 49
Step Action
18. Click the Expand (Ctrl+Y) Menu button.
19. Navigation - Asset Management > Asset Transactions > History > Review Cost
Click the History link.

Page 50
Step Action
20. Click the Review Cost link.

Training Guide Module 6 - Assets
Page 51
Step Action
21. Enter the desired information into the Tag Number field. Enter "Test".
22. Click the Search button.
23. Click the TESTCOPY2 link.
24. Adjustments made to assets will not be reflected on the Basic Add page. The full
history of the asset can be reviewed here. For example, the $300 adjustment that was
just completed is shown.
25. This topic showed how to Adjust Asset Information through the Cost
Adjust/Transfer option.
End of Procedure.

Page 52
ST 6.2.2 - Modifying Pending Asset Transactions Modifying Pending Asset Transactions
Navigation: Asset Management > Asset Transactions > Financial Transactions > Change/Delete
Pending Trans
Procedure
This topic shows how to Modify Pending Asset Transactions.
Step Action
1. Click the Asset Management link.
2. Click the Asset Transactions link.
3. Click the Financial Transactions link.

Training Guide Module 6 - Assets
Page 53
Step Action
4. Click the Change/Delete Pending Trans link.
Step Action
5. Click the Search button.
6. Click the 000000003184 link.

Page 54
Step Action
7. To update a chartfield, quantity, or cost information, click the Update... button.
8. Update the appropriate information.

Training Guide Module 6 - Assets
Page 55
Step Action
9. Enter the desired information into the Cost field. Enter "8542.00".
10. Click the OK button.

Page 56
Step Action
11. Click the OK button.
Training Guide Module 6 - Assets
Page 57
Step Action
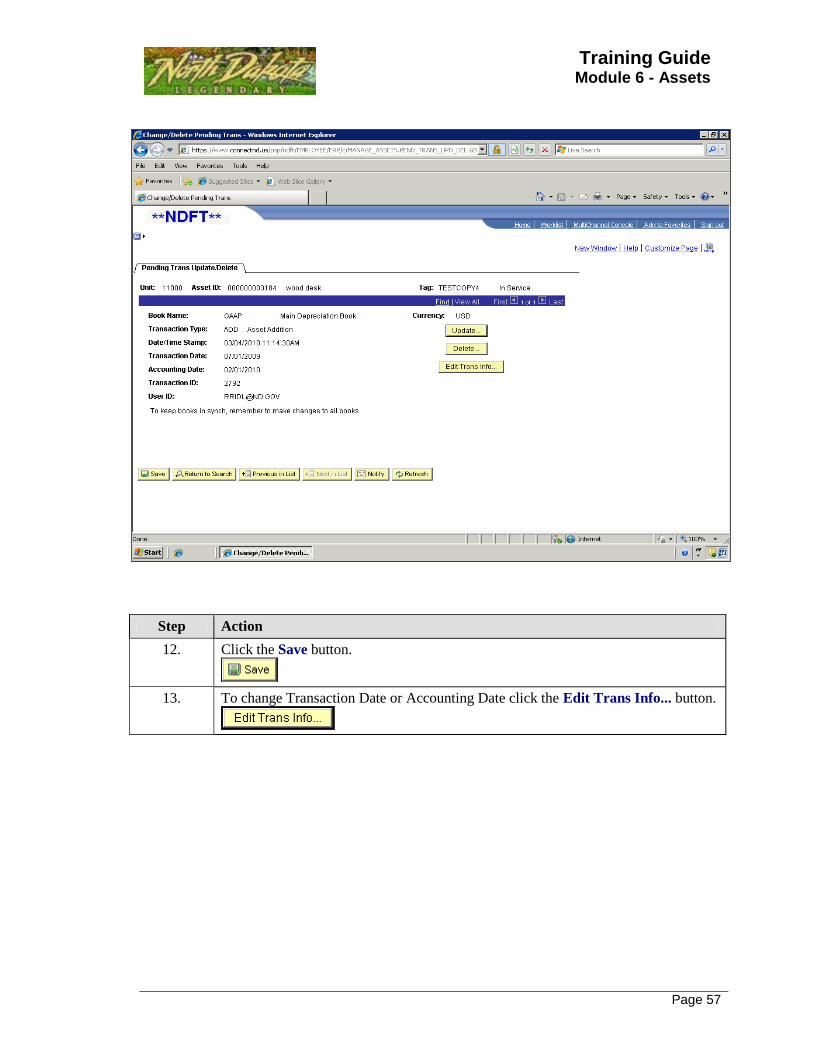
12. Click the Save button.
13. To change Transaction Date or Accounting Date click the Edit Trans Info... button.

Page 58
Step Action
14. Enter the desired information into the Acctg Date field. Enter "07/01/2009".
15. Click the OK button.
Training Guide Module 6 - Assets
Page 59
Step Action
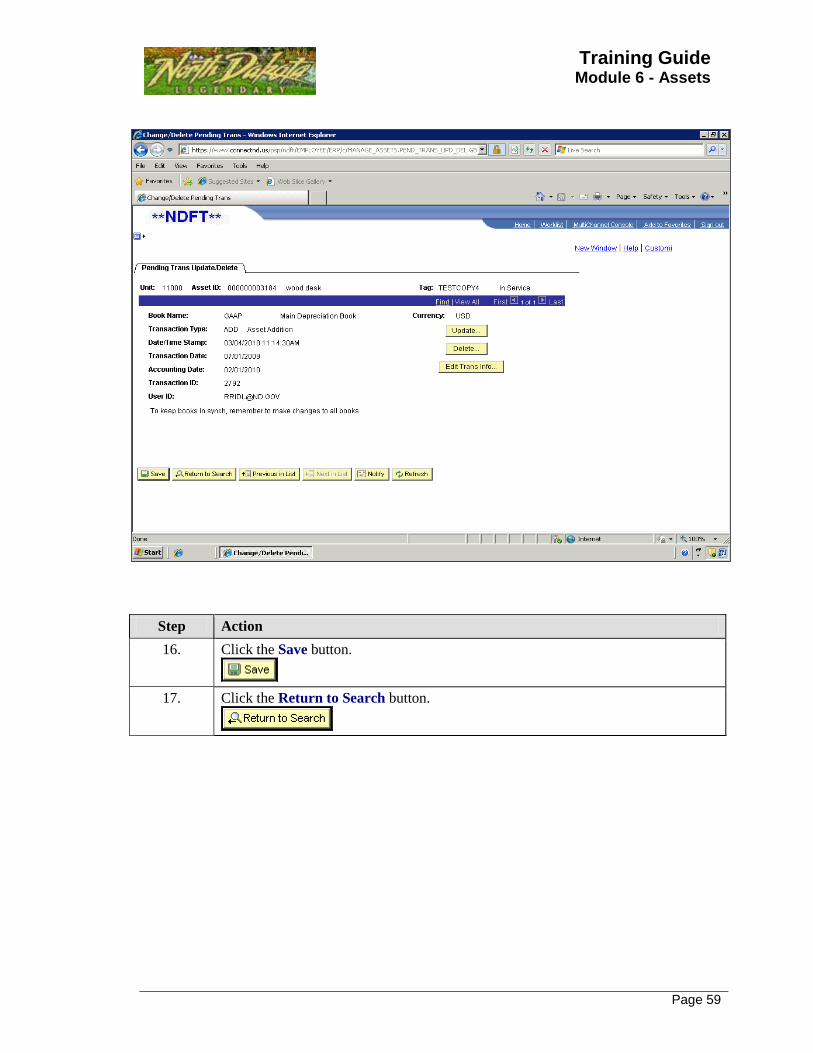
16. Click the Save button.
17. Click the Return to Search button.

Page 60
Step Action
18. Click the Search button.
19. This topic showed how to Modify Pending Asset Transactions.
End of Procedure.

Training Guide Module 6 - Assets
Page 61
ST 6.2.3 - Deleting Pending Asset Transactions Deleting Pending Asset Transactions
Navigation: Asset Management > Asset Transactions > Financial Transactions > Change/Delete
Pending Trans
Procedure
This topic shows how to Delete a Pending Asset Transaction.
Step Action
1. Click the Asset Management link.

Page 62
Step Action
2. Click the Asset Transactions link.
3. Click the Financial Transactions link.
4. Click the Change/Delete Pending Trans link.
5. You can search for the asset you wish to delete by Business Unit and Asset
Identification number. If you search just by Business Unit it will give you all your
recently added assets. In this case we will just search by Business Unit as we do not
have many recently added assets.

Training Guide Module 6 - Assets
Page 63
Step Action
6. Click the Search button.
7. Select the asset you wish to delete. In this case we will select Asset ID 3185.
8. Click the 000000003185 link.

Page 64
Step Action
9. Click the Delete... button.

Training Guide Module 6 - Assets
Page 65
Step Action
10. Click the OK button.
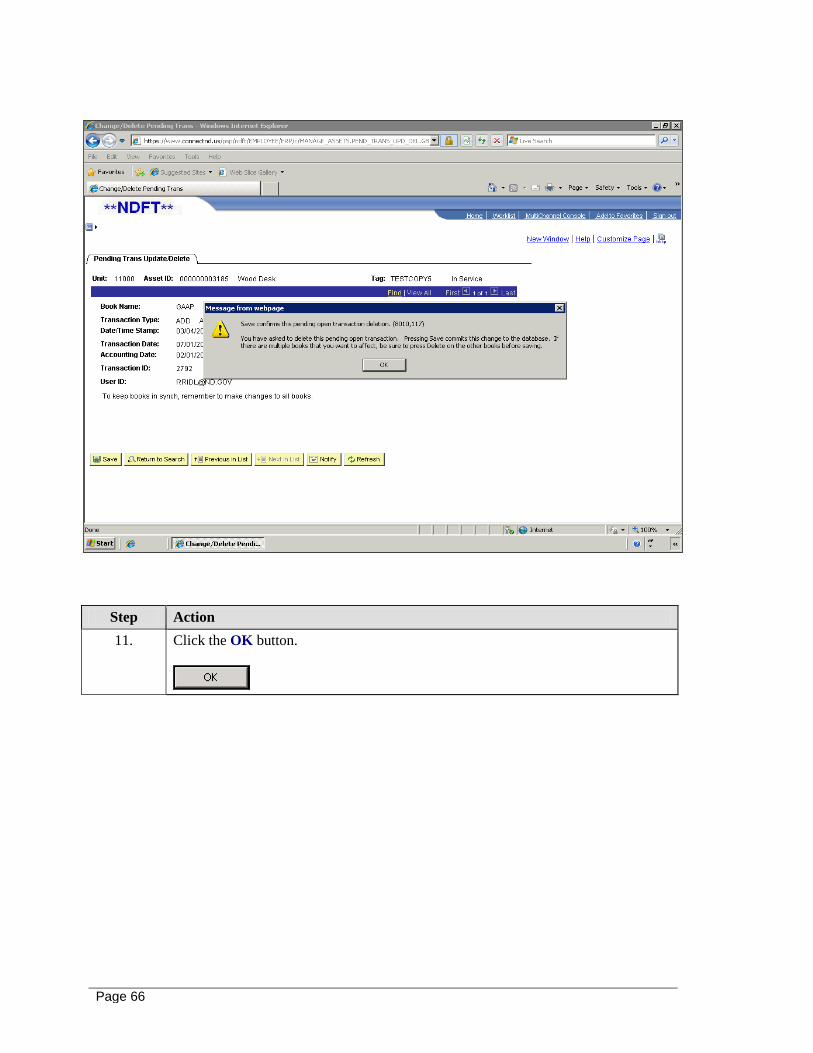
Page 66
Step Action
11. Click the OK button.

Training Guide Module 6 - Assets
Page 67
Step Action
12. Click the Save button.
13. Click the Return to Search button.
14. Once the asset has been Saved, it should no longer show up in this list since it was
deleted.

Page 68
Step Action
15. Click the Search button.
16. This topic showed how to Delete a Pending Asset Transaction.
End of Procedure.

Training Guide Module 6 - Assets
Page 69
ST Lesson 6.3 - Reviewing Asset Information Reviewing Asset Information
Asset information is stored on PeopleSoft in 3 different components. General physical
information on the asset (i.e. location, manufacturer, physical attributes) is stored in the Basic
Add Pages mentioned previously. The Asset Cost/Acquisition details and Depreciation details are
stored in the two sections detailed below.
ST 6.3.1 - Viewing Depreciation Viewing Depreciation
Navigation: Asset Management > Depreciation > Review Depreciation Info > Asset
Depreciation
Procedure
This topic shows how to View Depreciation on any given asset.

Page 70
Step Action
1. Click the Asset Management link.
Step Action
2. Click the Depreciation link.
3. Click the Review Depreciation Info link.
4. Click the Asset Depreciation link.

Training Guide Module 6 - Assets
Page 71
Step Action
5. Search for the asset of which you wish to review its depreciation.
Enter the desired information into the Tag Number field. Enter "Bldg".
6. Click on the approprate link for the asset you are wishing to review.
Click the CAPITOL BUILDING link.

Page 72
Step Action
7. Click the Depreciation tab.
Training Guide Module 6 - Assets
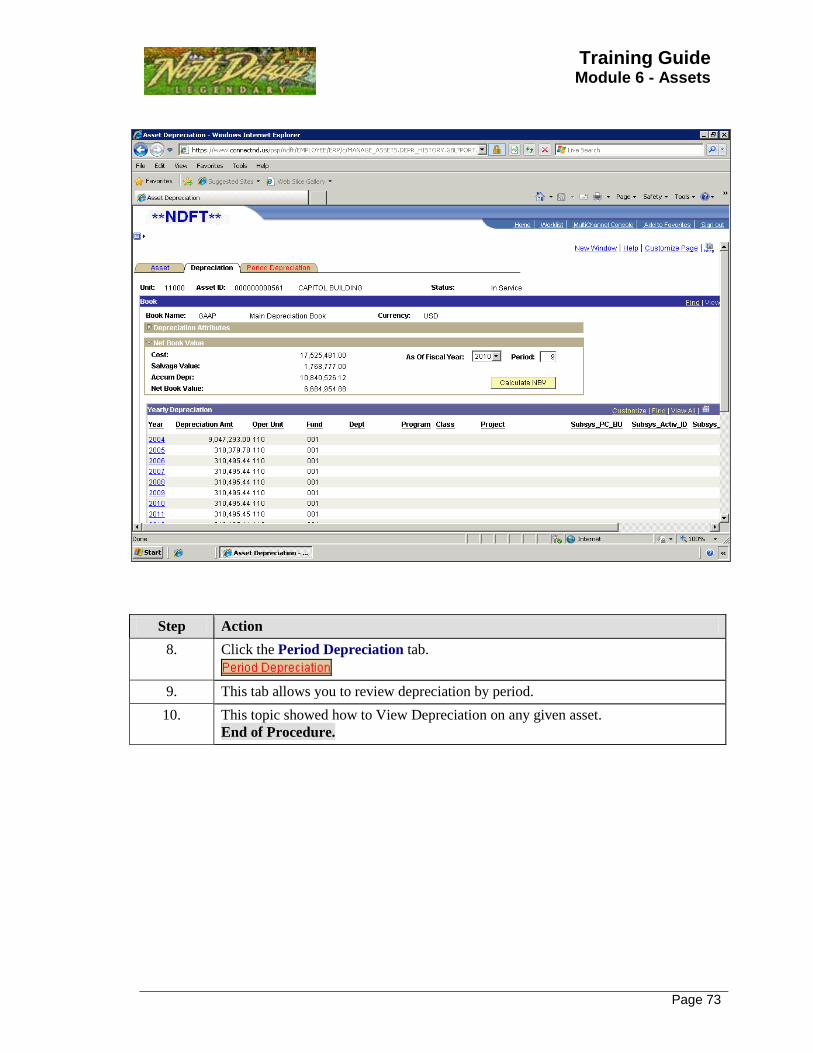
Page 73
Step Action
8. Click the Period Depreciation tab.
9. This tab allows you to review depreciation by period.
10. This topic showed how to View Depreciation on any given asset.
End of Procedure.
Page 74
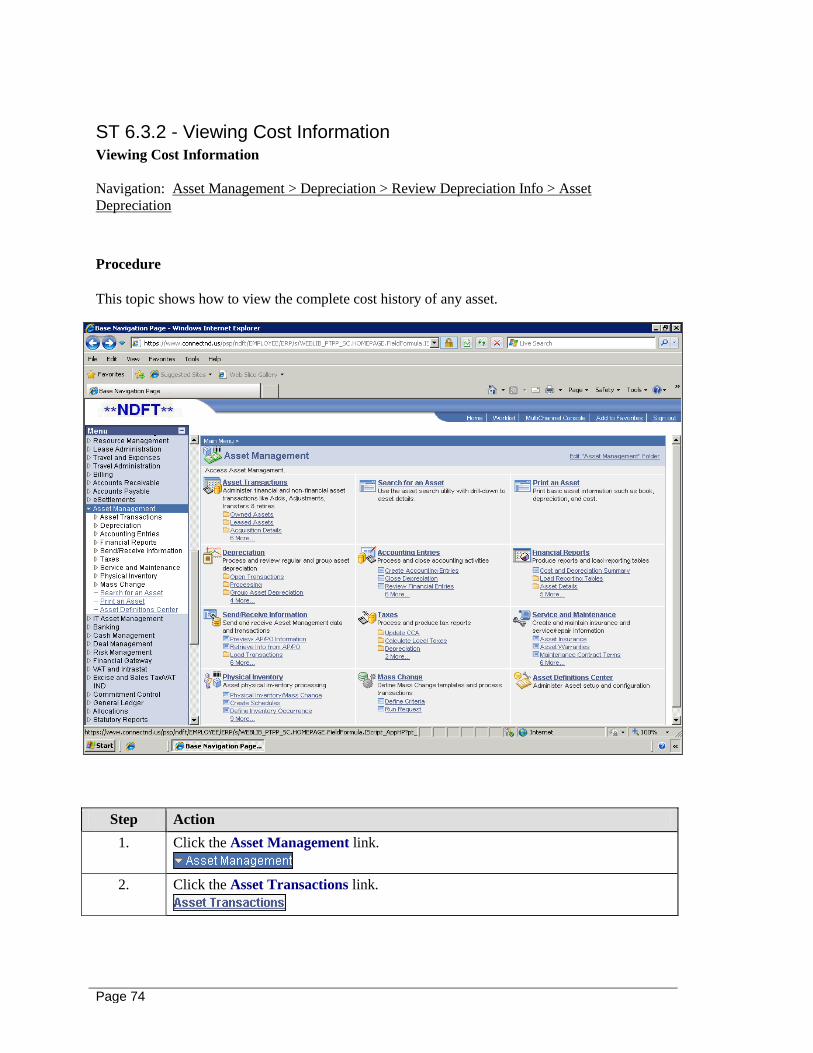
ST 6.3.2 - Viewing Cost Information Viewing Cost Information
Navigation: Asset Management > Depreciation > Review Depreciation Info > Asset
Depreciation
Procedure
This topic shows how to view the complete cost history of any asset.
Step Action
1. Click the Asset Management link.
2. Click the Asset Transactions link.
Training Guide Module 6 - Assets
Page 75
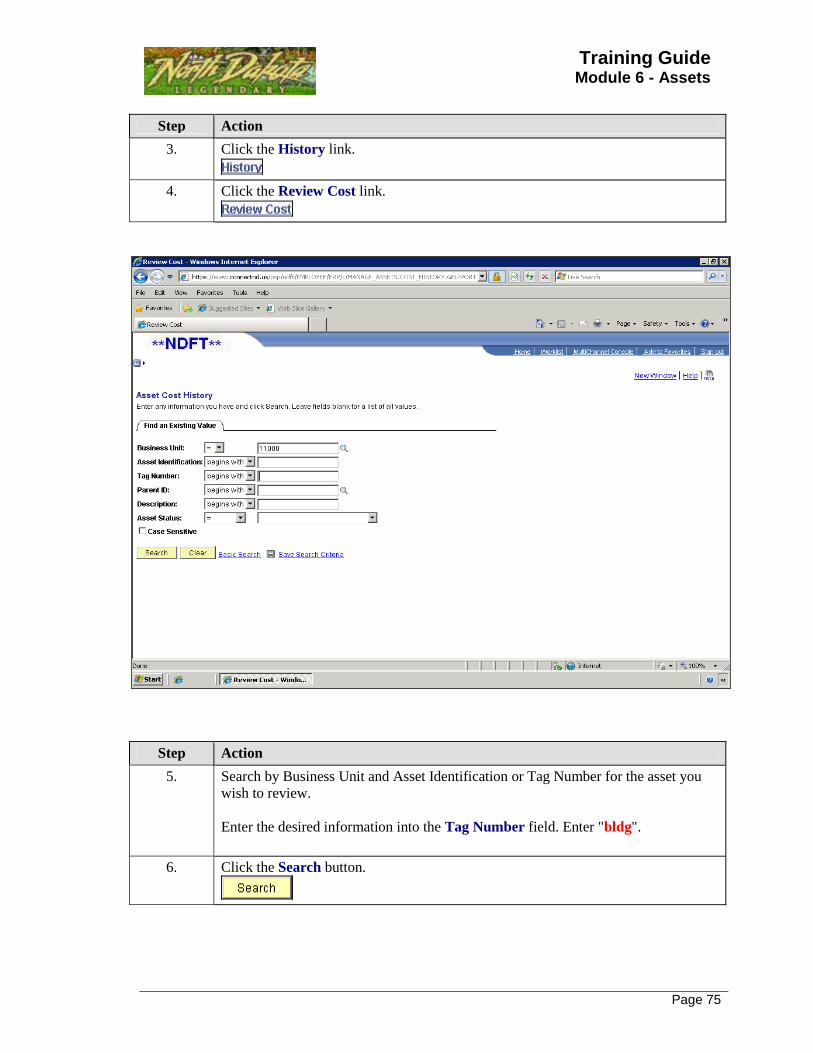
Step Action
3. Click the History link.
4. Click the Review Cost link.
Step Action
5. Search by Business Unit and Asset Identification or Tag Number for the asset you
wish to review.
Enter the desired information into the Tag Number field. Enter "bldg".
6. Click the Search button.

Page 76
Step Action
7. Select the asset you wish to review.
Click the CAPITOL BUILDING link.
Step Action
8. Click the Cost History Detail tab.
Training Guide Module 6 - Assets
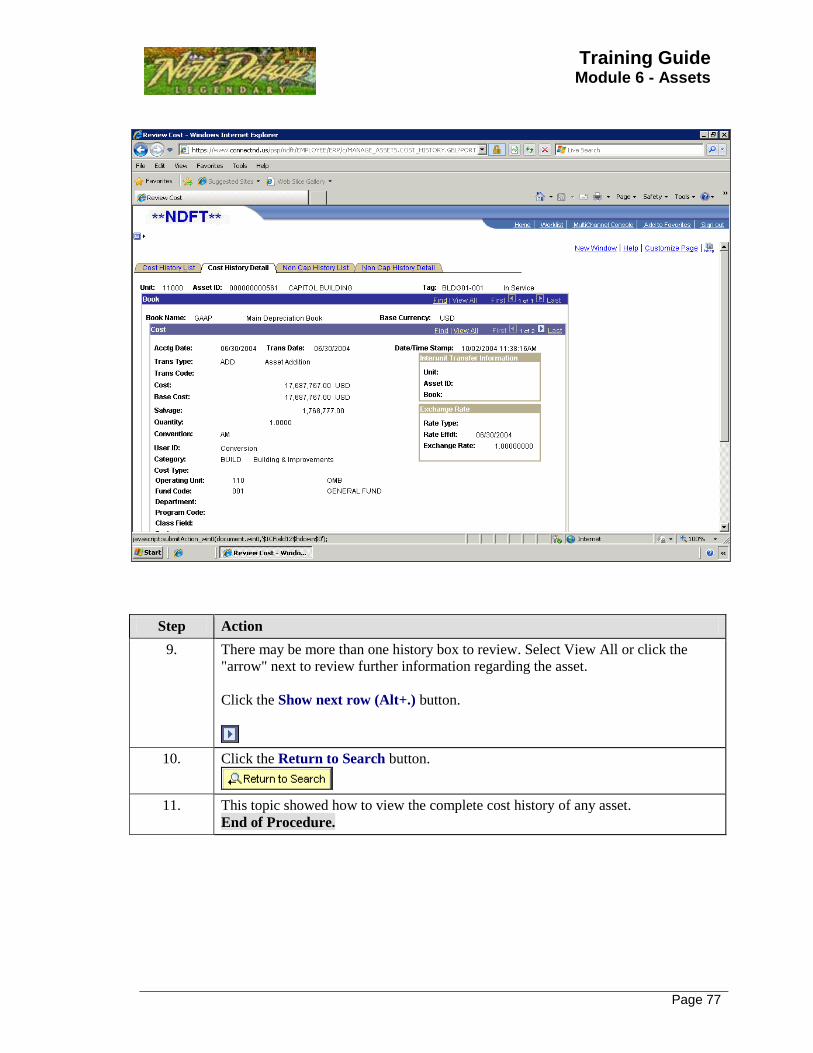
Page 77
Step Action
9. There may be more than one history box to review. Select View All or click the
"arrow" next to review further information regarding the asset.
Click the Show next row (Alt+.) button.
10. Click the Return to Search button.
11. This topic showed how to view the complete cost history of any asset.
End of Procedure.

Page 78

Training Guide Module 6 - Assets
Page 79
ST Lesson 6.4 - Retiring Assets Retiring Assets
PeopleSoft Asset Management enables you to fully or partially retire assets in the past, present, or
future. Occasionally, you may need to reverse a retirement transaction. For these occasions, we
also provide the ability to reinstate a retired asset using the pages within the Asset Retirements
component.
When all units and all costs of an asset are retired, the asset is considered fully retired. The asset
is taken off your books after the retirement has been fully processed and accounting entries have
been created. No further depreciation will accrue.
You can partially retire an asset by either quantity or cost. Depreciation continues to be processed
for the amount that remains.
ST 6.4.1 - Retiring Assets Retiring Assets
Navigation: Asset Management > Asset Transactions > Asset Disposal > Retire/Reinstate Asset
Procedure
This topic shows how to Retire an Asset.

Page 80
Step Action
1. Click the Asset Management link.
2. Click the Asset Transactions link.
3. Click the Asset Disposal link.
4. Click the Retire/Reinstate Asset link.

Training Guide Module 6 - Assets
Page 81
Step Action
5. Enter the desired information into the Tag Number field. Enter "Test".
6. Click the Search button.
7. Click the TESTBASICADD link.
8. The Retire As must always be "Retirement by Sale".
Note: Use the "Trans Code" drop down. The "Trans Code" will become available
for selection as soon as the "Go" button is pressed.
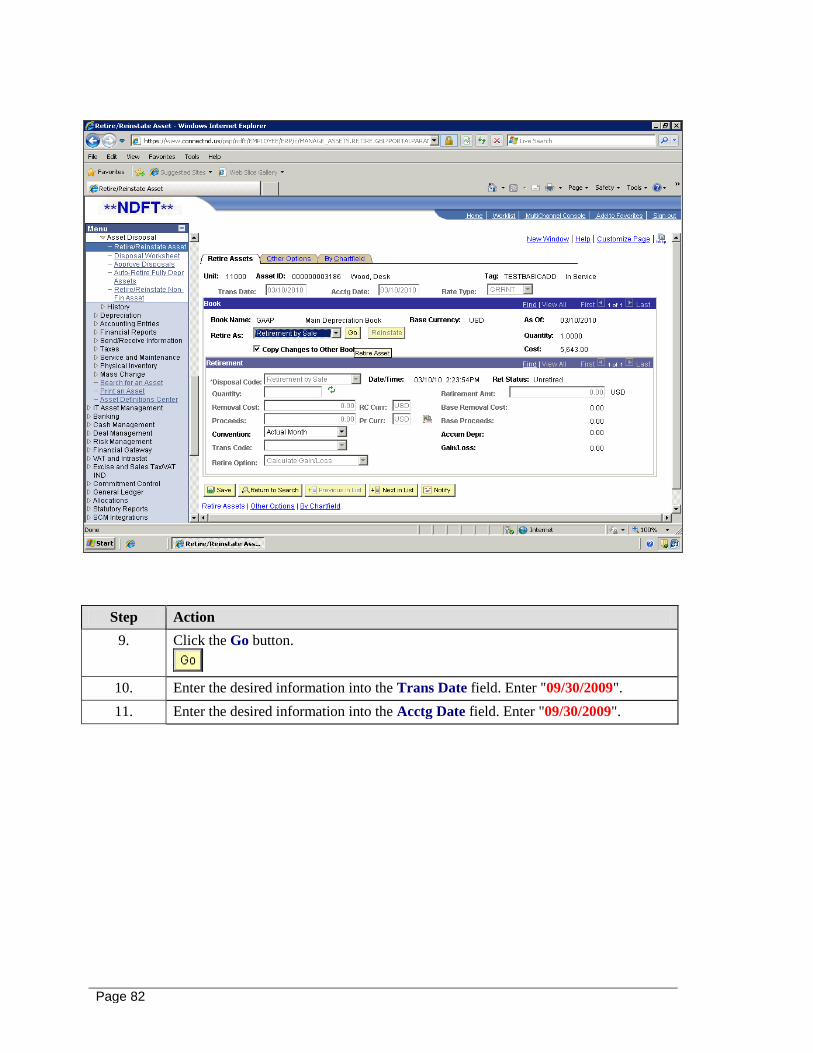
Page 82
Step Action
9. Click the Go button.
10. Enter the desired information into the Trans Date field. Enter "09/30/2009".
11. Enter the desired information into the Acctg Date field. Enter "09/30/2009".

Training Guide Module 6 - Assets
Page 83
Step Action
12. Some Trans Codes should not be used in state government - Donated, Inventory, and
Revaluation cannot be used as a trans code for Retiring an Asset.
Click the Surplus list item.

Page 84
Step Action
13. Click the Save button.
14. Once you have saved the asset this will now show the asset is "Disposed". Before
the asset is retired this should say "In Service".
15. This topic showed how to Retire an Asset.
End of Procedure.

Training Guide Module 6 - Assets
Page 85
ST 6.4.2 - Reinstating Assets Reinstating Assets
Navigation: Asset Management > Asset Transactions > Asset Disposal > Retire/Reinstate Asset
Procedure
This topic shows how to Reinstate an Asset.
Step Action
1. Click the Asset Management link.
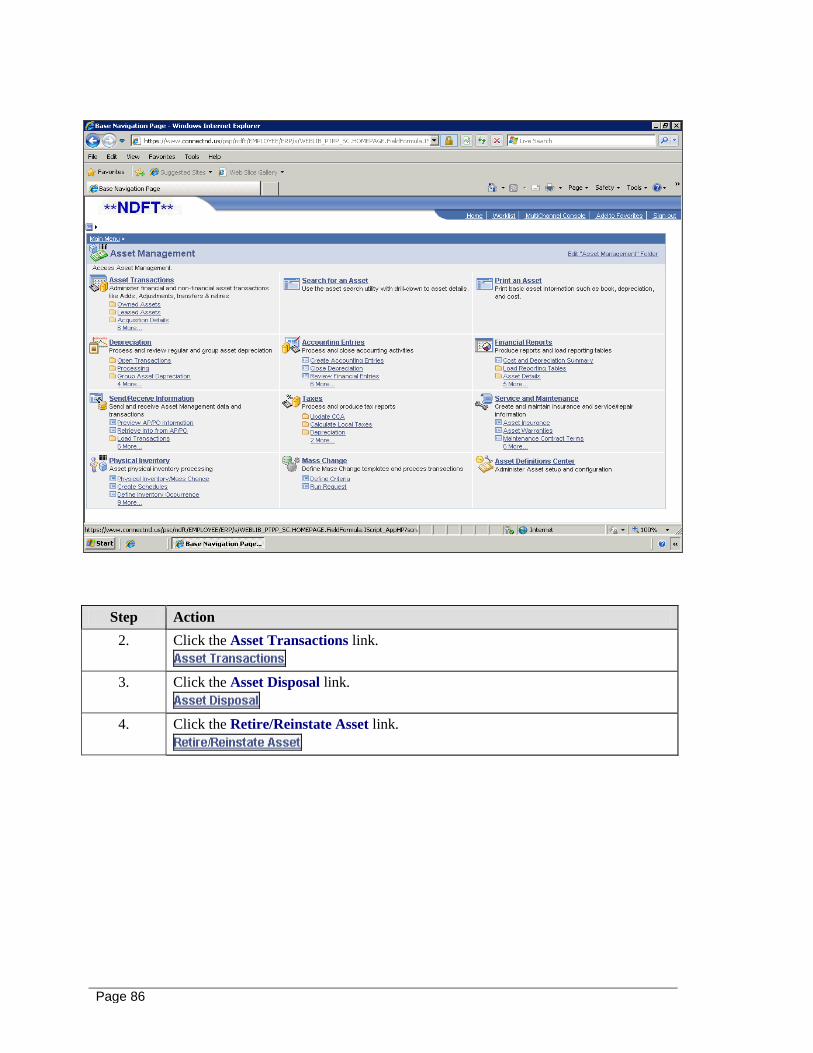
Page 86
Step Action
2. Click the Asset Transactions link.
3. Click the Asset Disposal link.
4. Click the Retire/Reinstate Asset link.

Training Guide Module 6 - Assets
Page 87
Step Action
5. Search for the asset to reinstate by Business Unit and Asset Identification or Tag
Number.
Enter the desired information into the Tag Number field. Enter "Test".
6. Click the TESTBASICADD link.

Page 88
Step Action
7. Click the Reinstate button.
8. Input the date you wish to reinstate the asset.
Enter the desired information into the Acctg Date field. Enter "09/30/2009".
9. Click the Save button.
10. This will now state the asset is "In Service" and no longer "Disposed".
11. This topic showed how to Reinstate an Asset.
End of Procedure.
Training Guide Module 6 - Assets
Page 89
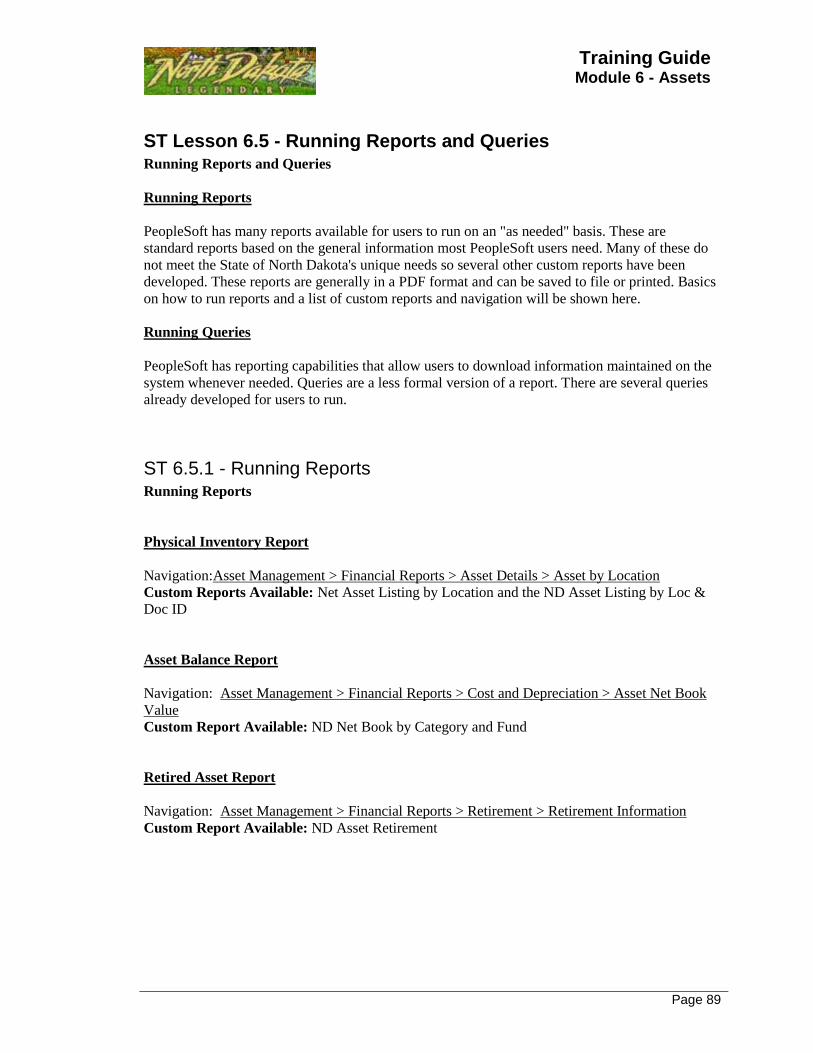
ST Lesson 6.5 - Running Reports and Queries Running Reports and Queries
Running Reports
PeopleSoft has many reports available for users to run on an "as needed" basis. These are
standard reports based on the general information most PeopleSoft users need. Many of these do
not meet the State of North Dakota's unique needs so several other custom reports have been
developed. These reports are generally in a PDF format and can be saved to file or printed. Basics
on how to run reports and a list of custom reports and navigation will be shown here.
Running Queries
PeopleSoft has reporting capabilities that allow users to download information maintained on the
system whenever needed. Queries are a less formal version of a report. There are several queries
already developed for users to run.
ST 6.5.1 - Running Reports Running Reports
Physical Inventory Report
Navigation:Asset Management > Financial Reports > Asset Details > Asset by Location
Custom Reports Available: Net Asset Listing by Location and the ND Asset Listing by Loc &
Doc ID
Asset Balance Report
Navigation: Asset Management > Financial Reports > Cost and Depreciation > Asset Net Book
Value
Custom Report Available: ND Net Book by Category and Fund
Retired Asset Report
Navigation: Asset Management > Financial Reports > Retirement > Retirement Information
Custom Report Available: ND Asset Retirement

Page 90
Additions Report
Navigation: Asset Management > Financial Reports > Asset Details > Acquisitions
Custom Report Available: ND Asset Adds and Adjustments
Procedure
This topic shows how to Run a Report.
Step Action
1. Click the Asset Management link.

Training Guide Module 6 - Assets
Page 91
Step Action
2. Click the Financial Reports link.
3. Decision: Select the Report you wish to run.
Physical Inventory Report
Go to step 4 on page 91
Asset Balance Report
Go to step 21 on page 100
Retired Asset Report
Go to step 41 on page 108
Additions Report
Go to step 60 on page 116
4. Click the Asset Details link.
5. Click the By Location link.

Page 92
Step Action
6. After navigating to a report, the user will be asked to enter a Run Control ID:
The Run control is a database record that allows a user to define criteria for a
specific process. The Run Control is saved after it is created and can be used again,
or modified, the next time the same process is run. Run Controls are unique to a user
ID.
The first time a report is run you will need to Add a New Value. The Run Control
can be any alpha/numeric combination but cannot have spaces. Once the Run
Control is entered you will proceed to the parameters page.
Step Action
7. Click the Add a New Value tab.
8. Enter the desired information into the Run Control ID field. Enter "Ridl".
Training Guide Module 6 - Assets
Page 93
Step Action
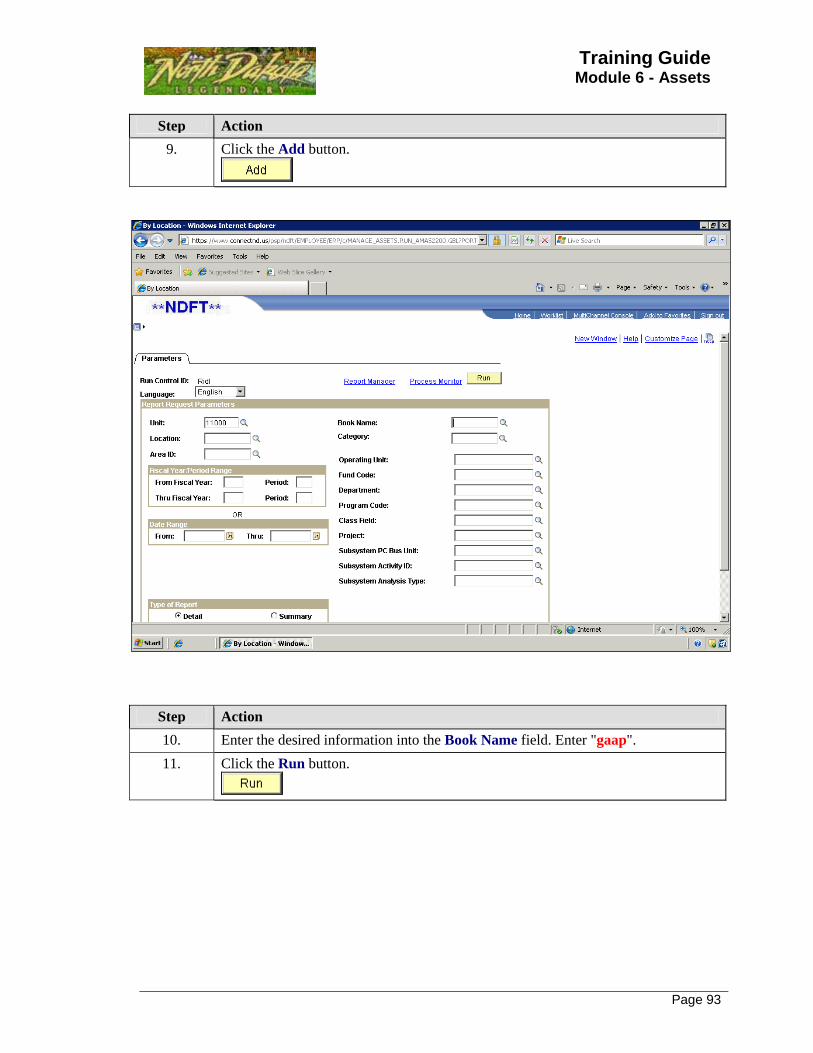
9. Click the Add button.
Step Action
10. Enter the desired information into the Book Name field. Enter "gaap".
11. Click the Run button.
Page 94
Step Action
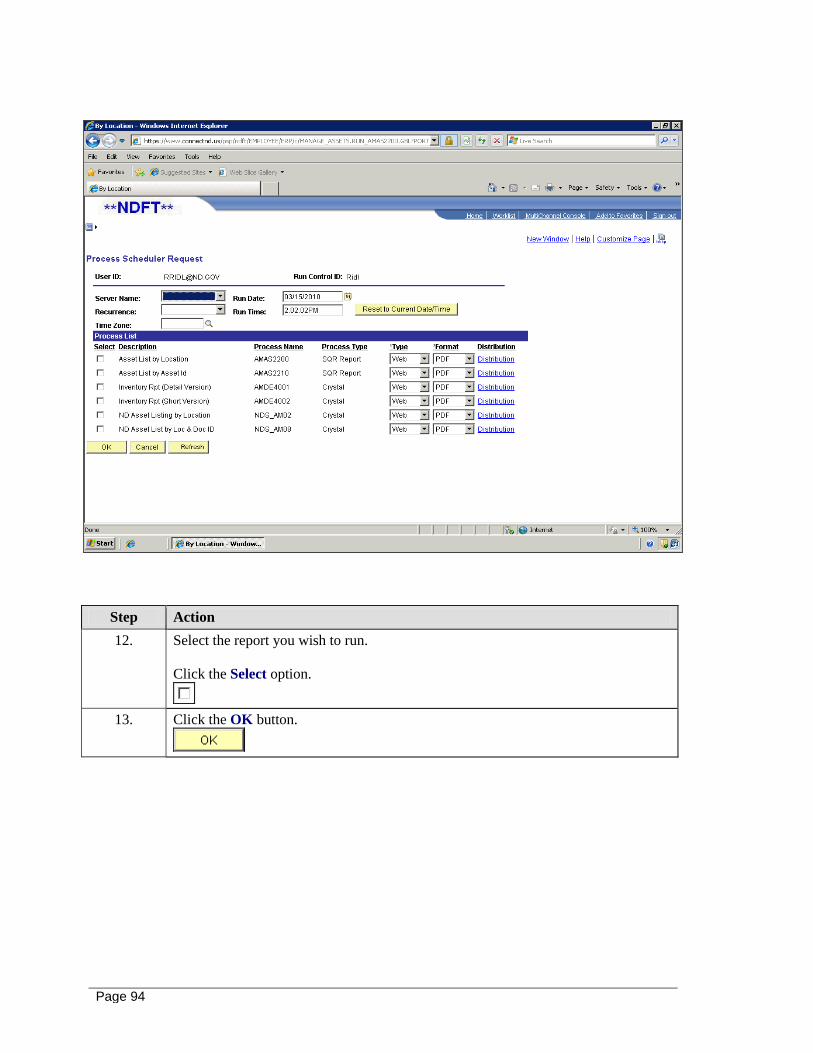
12. Select the report you wish to run.
Click the Select option.
13. Click the OK button.

Training Guide Module 6 - Assets
Page 95
Step Action
14. Click the Process Monitor link.

Page 96
Step Action
15. Click Refresh periodically to update the Run Status. Once the Status is Success and
the Distribution Status is Posted, click on the Details hyperlink.
Click the Refresh button.
16. Click the Details link.

Training Guide Module 6 - Assets
Page 97
Step Action
17. Click the View Log/Trace link.
Page 98
Step Action
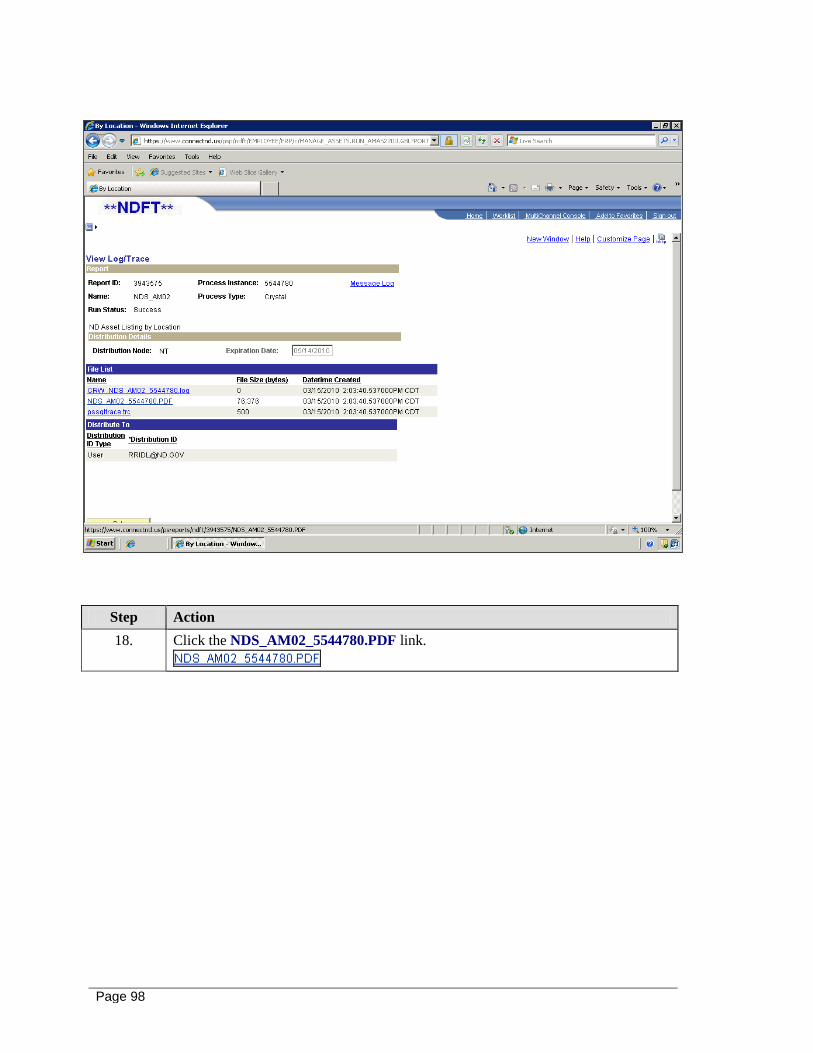
18. Click the NDS_AM02_5544780.PDF link.

Training Guide Module 6 - Assets
Page 99
Step Action
19. Click the Maximize/Restore button.
20. This topic showed how to Run a Physical Inventory Report.
End of Procedure. Remaining steps apply to other paths.
Page 100
Step Action
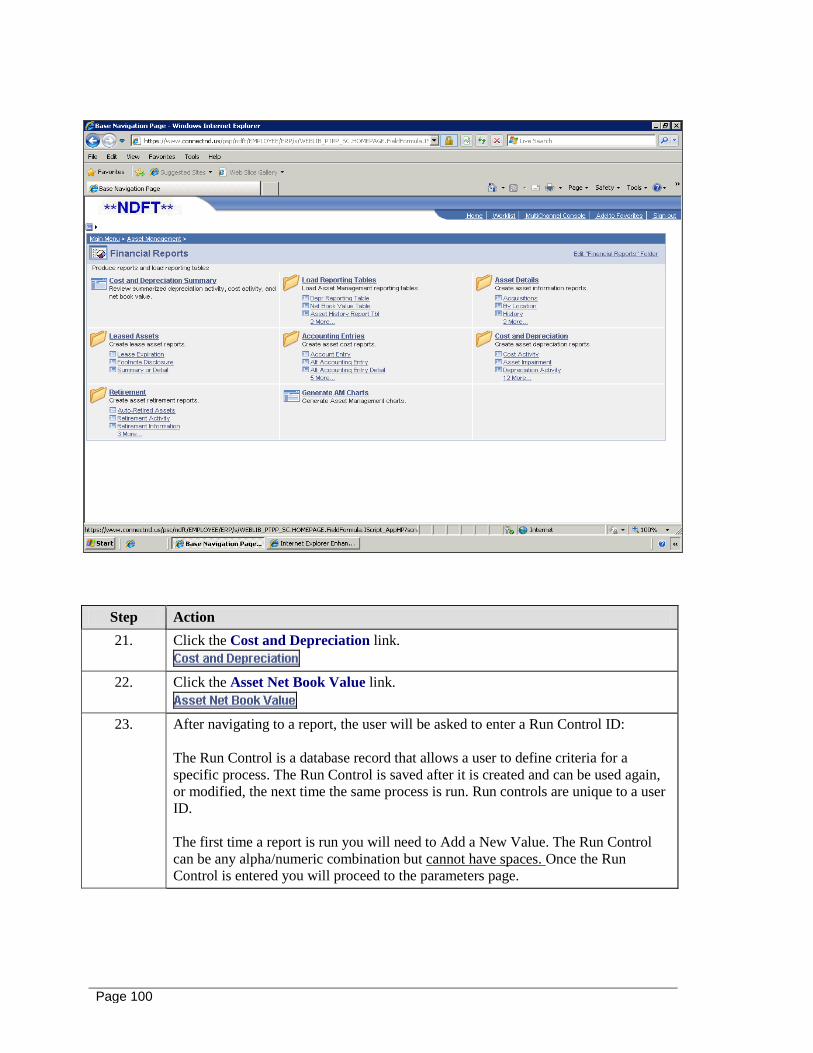
21. Click the Cost and Depreciation link.
22. Click the Asset Net Book Value link.
23. After navigating to a report, the user will be asked to enter a Run Control ID:
The Run Control is a database record that allows a user to define criteria for a
specific process. The Run Control is saved after it is created and can be used again,
or modified, the next time the same process is run. Run controls are unique to a user
ID.
The first time a report is run you will need to Add a New Value. The Run Control
can be any alpha/numeric combination but cannot have spaces. Once the Run
Control is entered you will proceed to the parameters page.
Training Guide Module 6 - Assets
Page 101
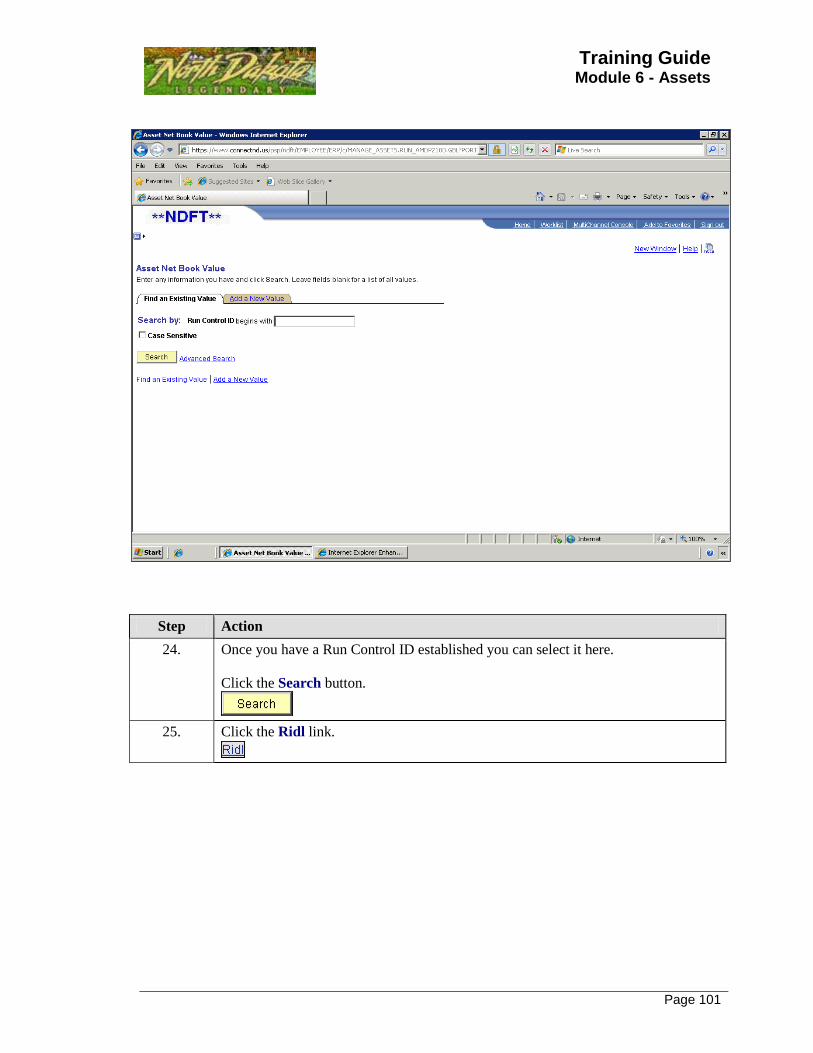
Step Action
24. Once you have a Run Control ID established you can select it here.
Click the Search button.
25. Click the Ridl link.

Page 102
Step Action
26. Enter the desired information into the Book Name field. Enter "gaap".
27. Enter the desired information into the As Of Fiscal Year field. Enter "2009".
28. Enter the desired information into the Period field. Enter "12".
29. Click the Expand section button.
30. Select option to run Report by.
In this case we will select "Account".
Click the Report By list.
31. Click the Run button.

Training Guide Module 6 - Assets
Page 103
Step Action
32. Select the report you wish to run.
Click the Select option.
33. Click the OK button.

Page 104
Step Action
34. Click the Process Monitor link.

Training Guide Module 6 - Assets
Page 105
Step Action
35. Click Refresh periodically to update the Run Status. Once the Status is Success and
the Distribution Status is Posted, click on the Details hyperlink.
Click the Refresh button.
36. Click the Details link.

Page 106
Step Action
37. Click the View Log/Trace link.

Training Guide Module 6 - Assets
Page 107
Step Action
38. Click the NDS_AM01_5544792.PDF link.
39. An example of this report is shown.
40. This topic showed how to Run an Asset Balance Report.
End of Procedure. Remaining steps apply to other paths.

Page 108
Step Action
41. Click the Retirement link.
42. Click the Retirement Information link.
43. After navigating to a report, the user will be asked to enter a Run Control ID:
The Run Control is a database record that allows a user to define criteria for a
specific process. The Run Control is saved after it is created and can be used again,
or modified, the next time the same process is run. Run controls are unique to a user
ID.
The first time a report is run you will need to Add a New Value. The Run Control
can be any alpha/numeric combination but cannot have spaces. Once the Run
Control is entered you will proceed to the parameters page.

Training Guide Module 6 - Assets
Page 109
Step Action
44. Enter the desired information into the begins with field. Enter "Ridl".
45. Click the Search button.
Page 110
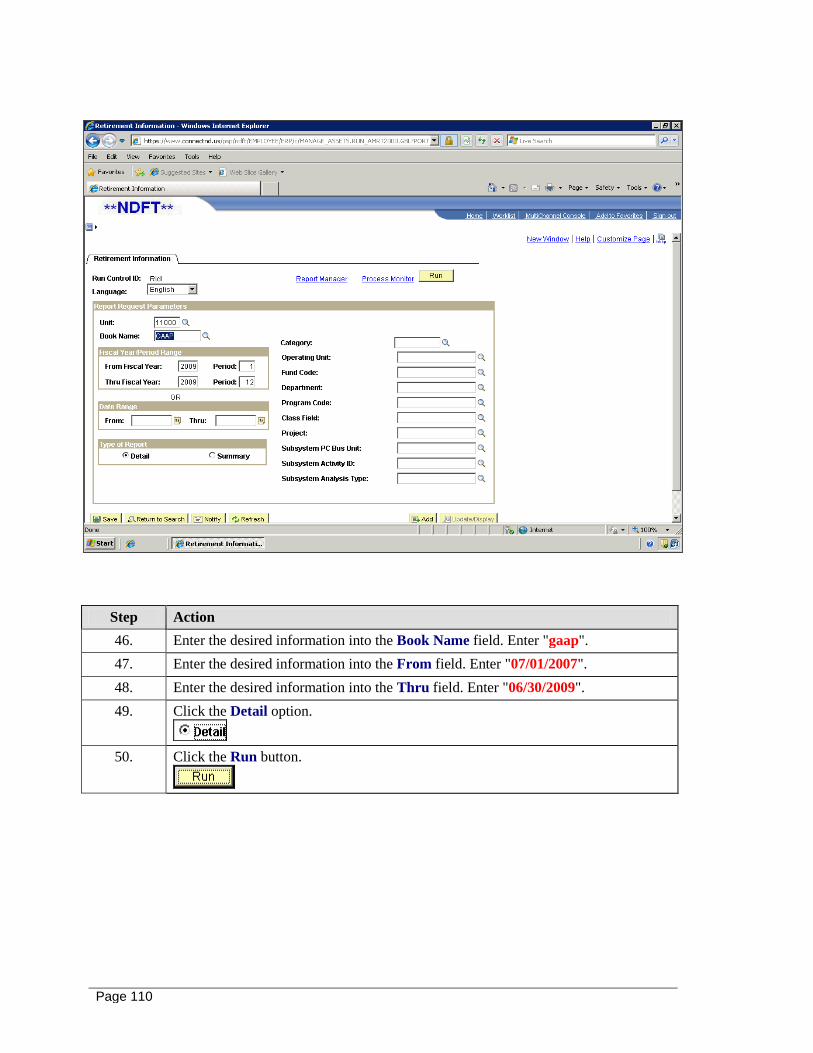
Step Action
46. Enter the desired information into the Book Name field. Enter "gaap".
47. Enter the desired information into the From field. Enter "07/01/2007".
48. Enter the desired information into the Thru field. Enter "06/30/2009".
49. Click the Detail option.
50. Click the Run button.
Training Guide Module 6 - Assets
Page 111
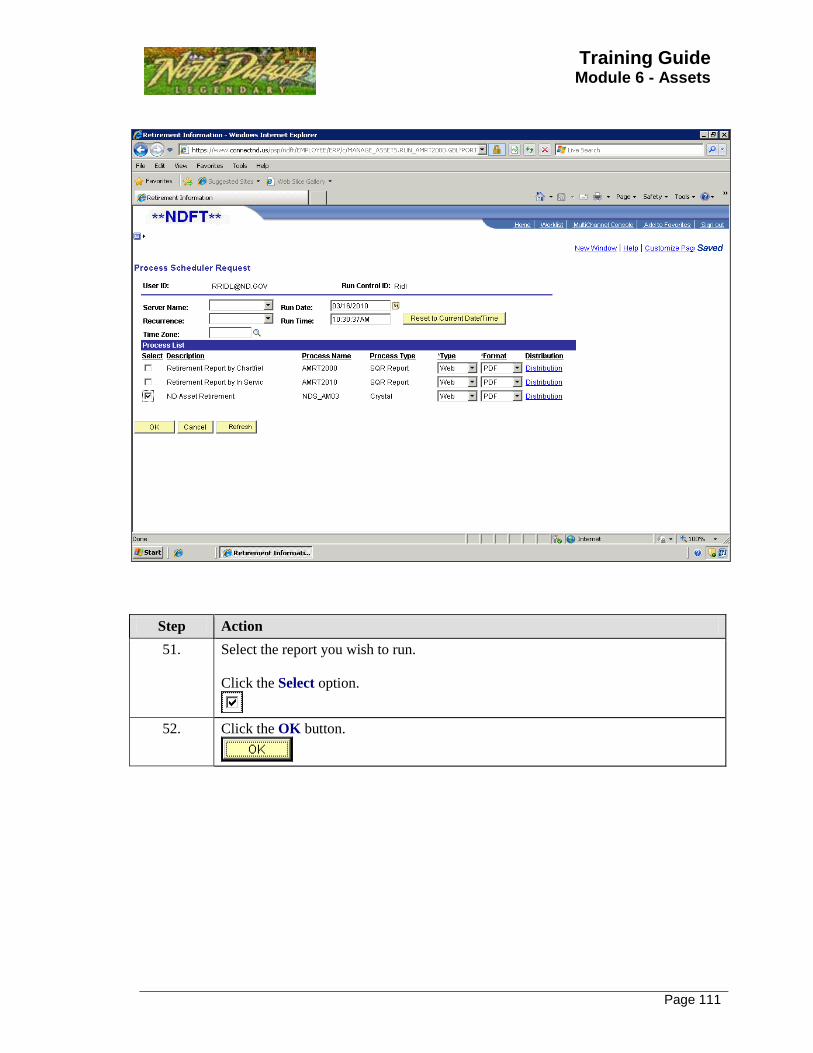
Step Action
51. Select the report you wish to run.
Click the Select option.
52. Click the OK button.
Page 112
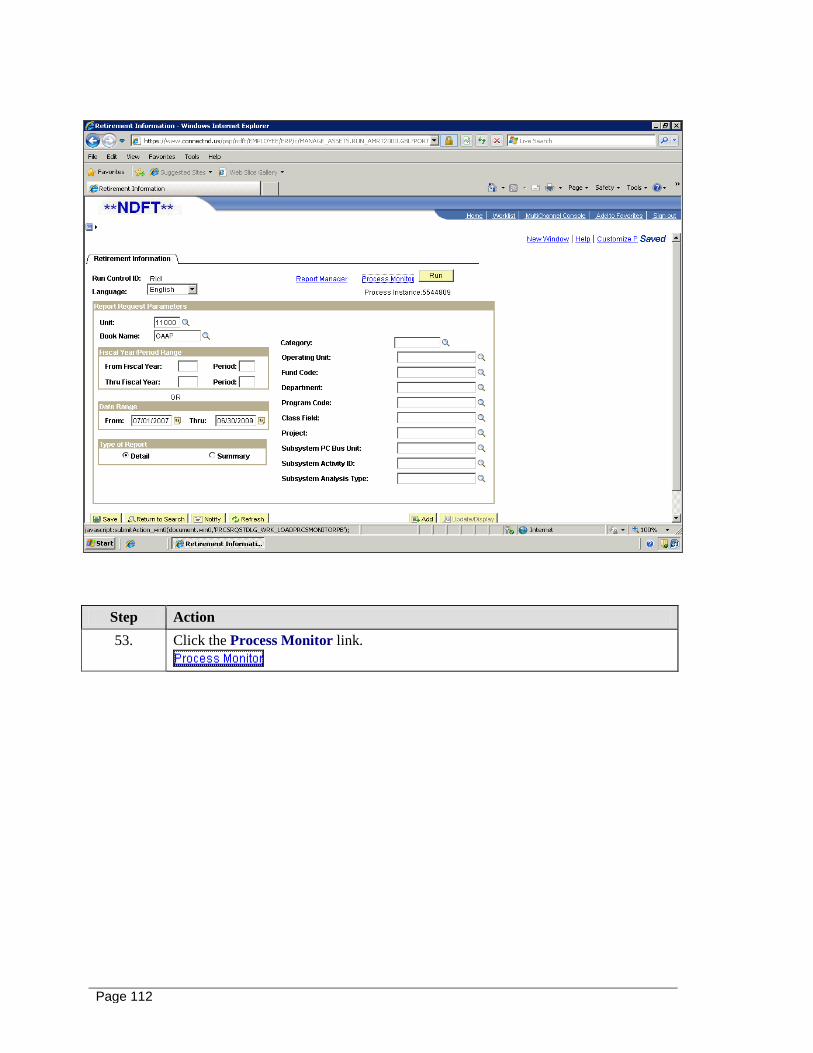
Step Action
53. Click the Process Monitor link.
Training Guide Module 6 - Assets
Page 113
Step Action
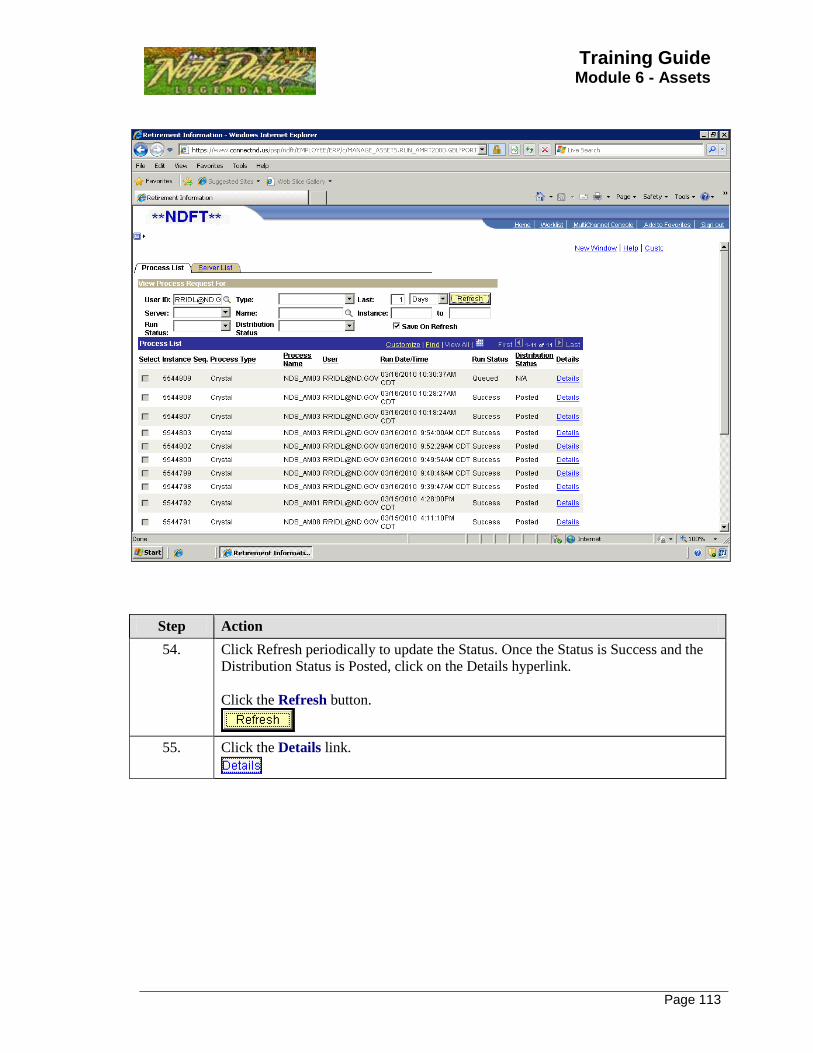
54. Click Refresh periodically to update the Status. Once the Status is Success and the
Distribution Status is Posted, click on the Details hyperlink.
Click the Refresh button.
55. Click the Details link.

Page 114
Step Action
56. Click the View Log/Trace link.
Training Guide Module 6 - Assets
Page 115
Step Action
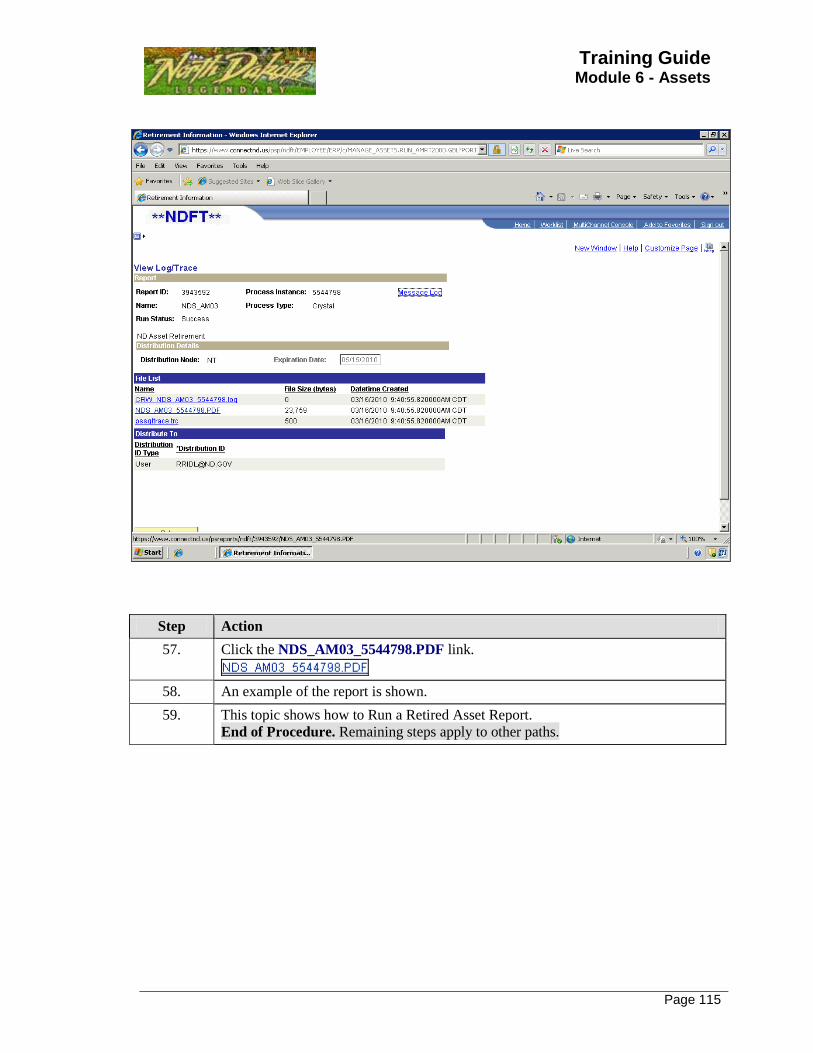
57. Click the NDS_AM03_5544798.PDF link.
58. An example of the report is shown.
59. This topic shows how to Run a Retired Asset Report.
End of Procedure. Remaining steps apply to other paths.
Page 116
Step Action
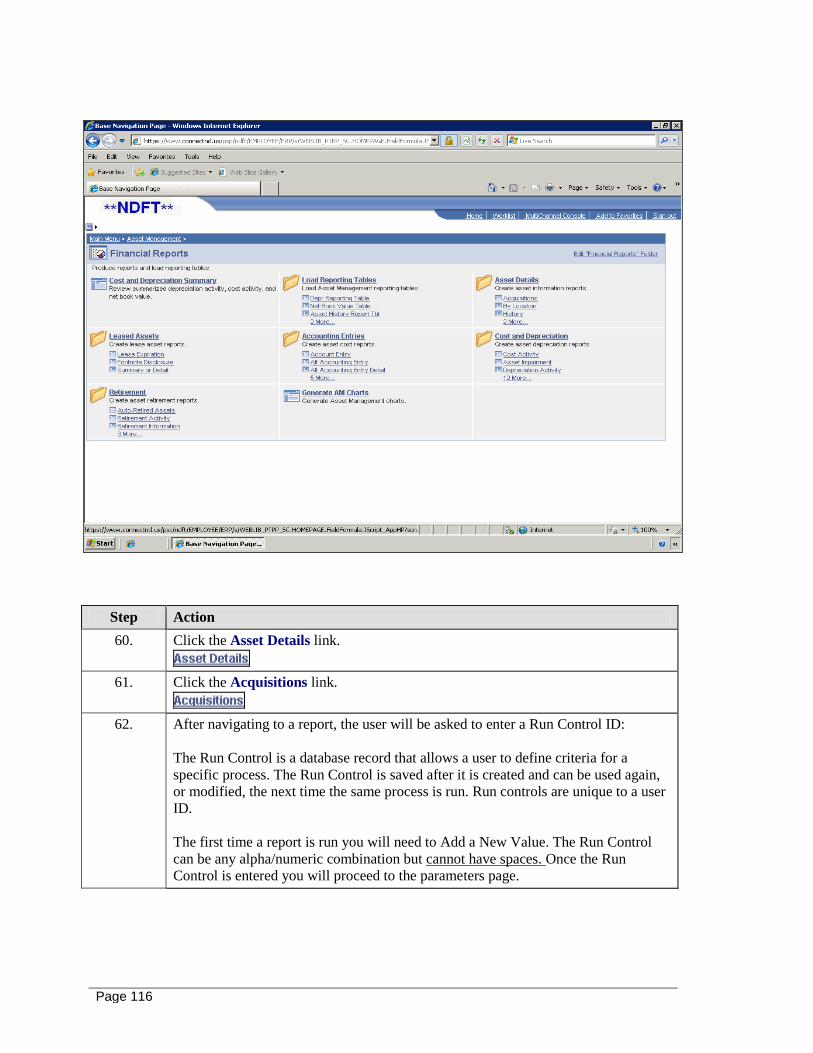
60. Click the Asset Details link.
61. Click the Acquisitions link.
62. After navigating to a report, the user will be asked to enter a Run Control ID:
The Run Control is a database record that allows a user to define criteria for a
specific process. The Run Control is saved after it is created and can be used again,
or modified, the next time the same process is run. Run controls are unique to a user
ID.
The first time a report is run you will need to Add a New Value. The Run Control
can be any alpha/numeric combination but cannot have spaces. Once the Run
Control is entered you will proceed to the parameters page.

Training Guide Module 6 - Assets
Page 117
Step Action
63. Enter the desired information into the begins with field. Enter "Ridl".
Step Action
64. Click the Expand section button.
65. For this report enter the Book Name and Date Range for the fiscal year.
66. Click the Run button.

Page 118
Step Action
67. Select the report you wish to run.
Click the Select option.
68. Click the OK button.
Training Guide Module 6 - Assets
Page 119
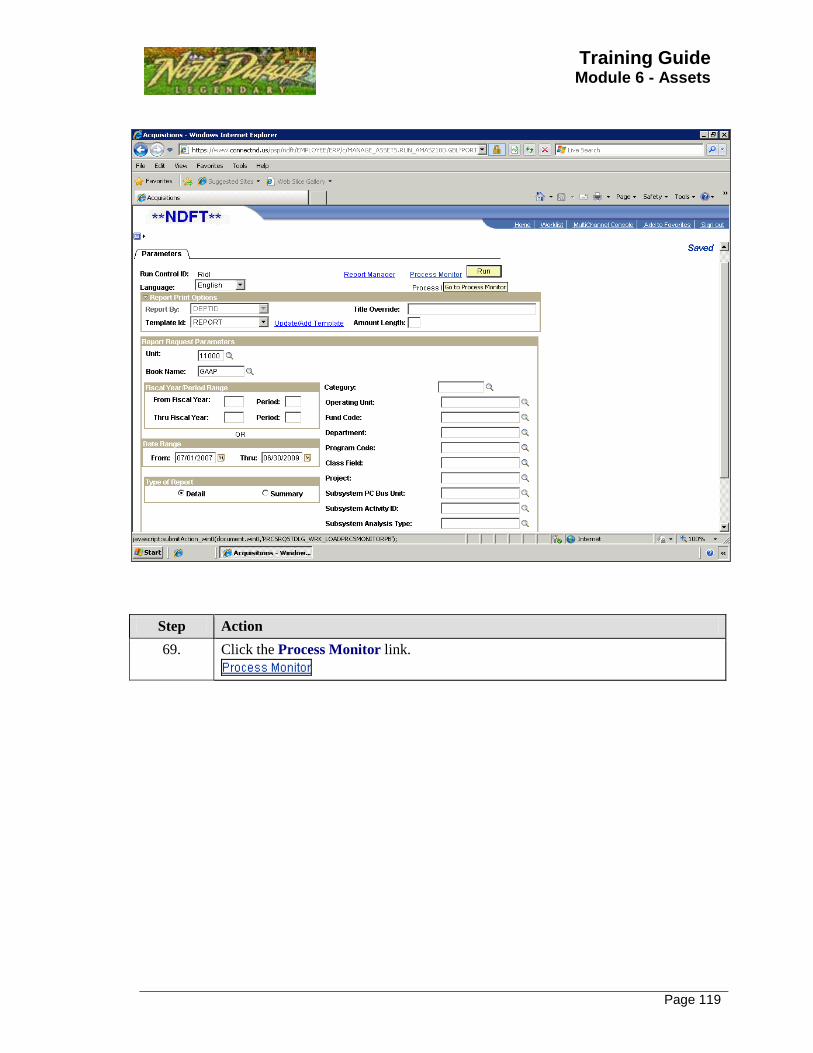
Step Action
69. Click the Process Monitor link.
Page 120
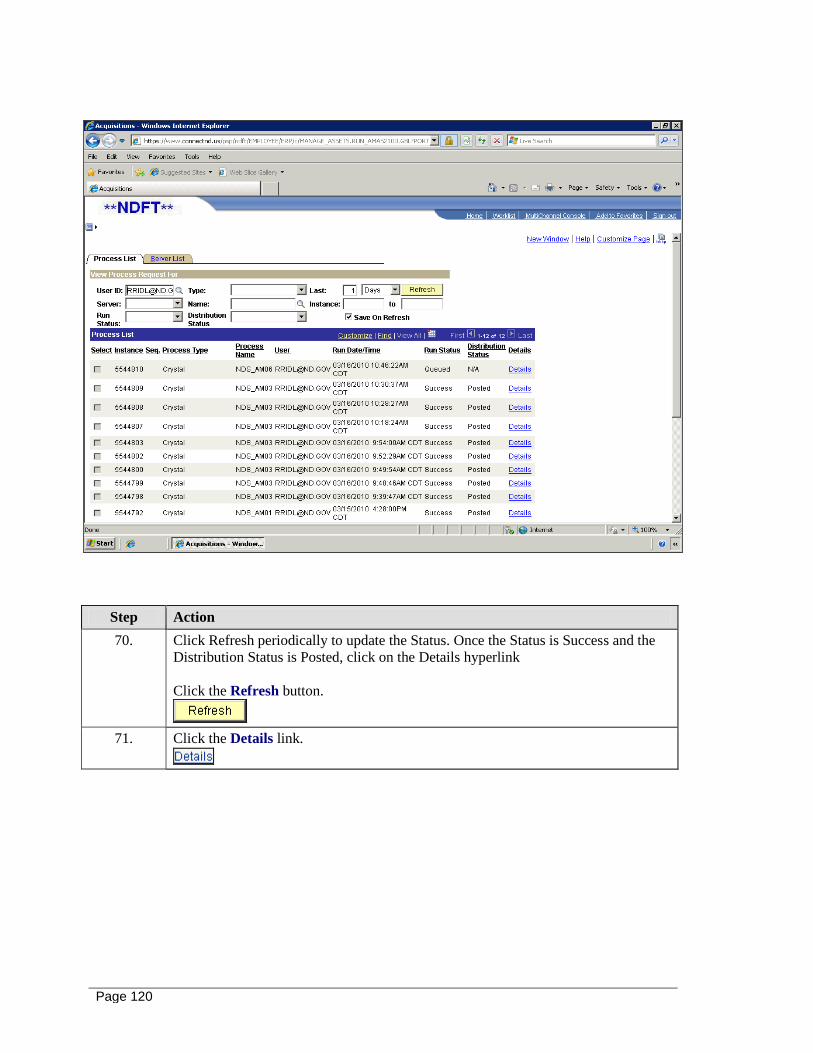
Step Action
70. Click Refresh periodically to update the Status. Once the Status is Success and the
Distribution Status is Posted, click on the Details hyperlink
Click the Refresh button.
71. Click the Details link.

Training Guide Module 6 - Assets
Page 121
Step Action
72. Click the View Log/Trace link.

Page 122
Step Action
73. Click the NDS_AM06_5544810.PDF link.
74. An example of this report is shown here.
75. This topic shows how to Run an Additions Report.
End of Procedure.

Training Guide Module 6 - Assets
Page 123
ST 6.5.2 - Running Queries Running Queries
Several queries have been made available for Asset Management. All Asset Management queries
begin with NDS_AM.
Navigation: Reporting Tools > Query> Query Viewer
Procedure
This topic shows how to Run a Query.
Step Action
1. Click the Reporting Tools link.

Page 124
Step Action
2. Click the Query link.
3. Click the Query Viewer link.
Training Guide Module 6 - Assets
Page 125
Step Action
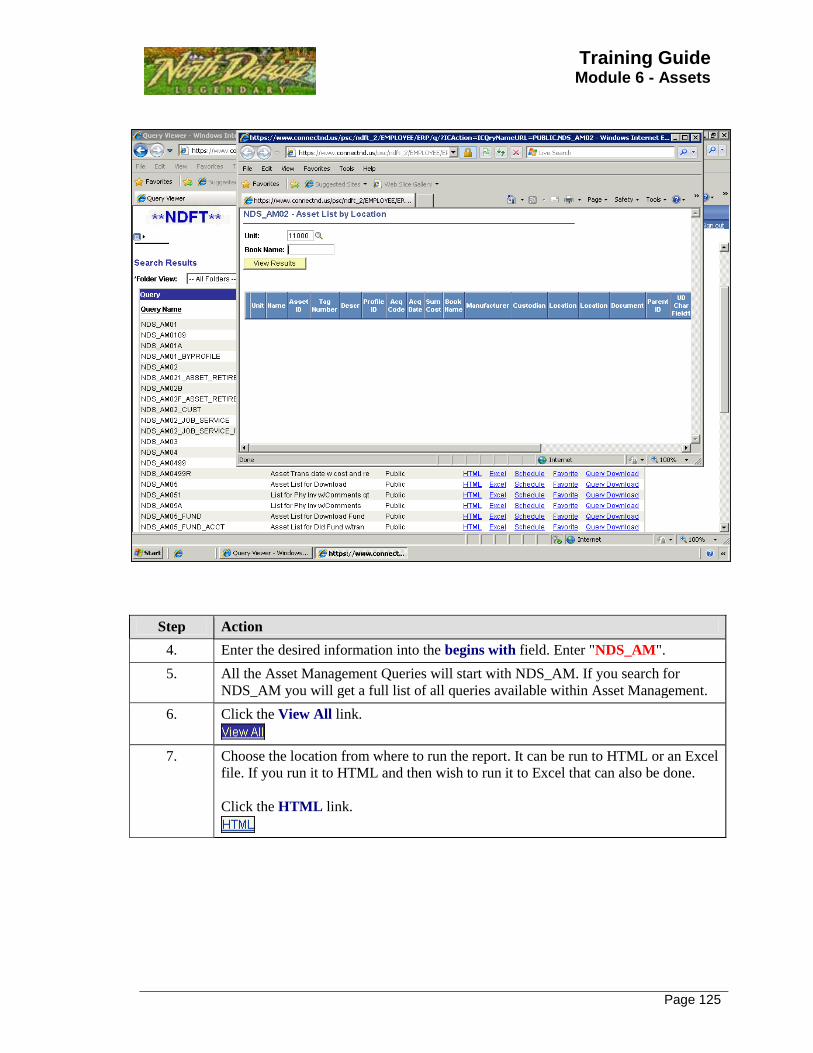
4. Enter the desired information into the begins with field. Enter "NDS_AM".
5. All the Asset Management Queries will start with NDS_AM. If you search for
NDS_AM you will get a full list of all queries available within Asset Management.
6. Click the View All link.
7. Choose the location from where to run the report. It can be run to HTML or an Excel
file. If you run it to HTML and then wish to run it to Excel that can also be done.
Click the HTML link.
Page 126
Step Action
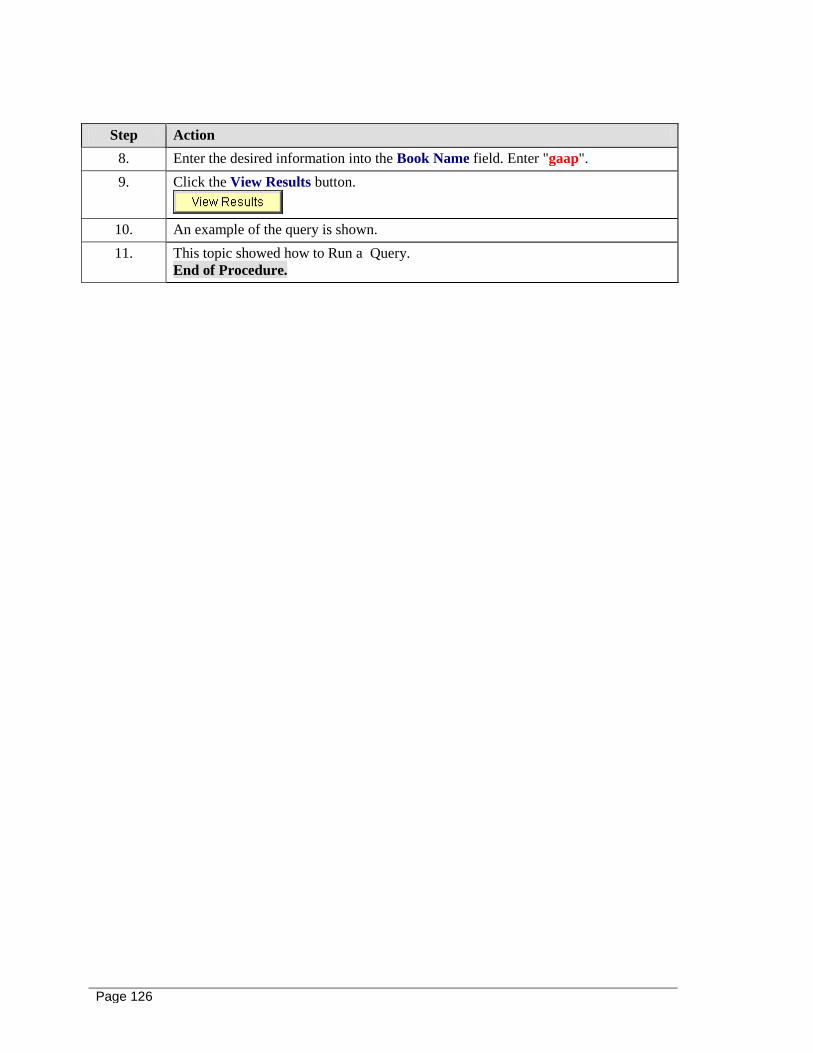
8. Enter the desired information into the Book Name field. Enter "gaap".
9. Click the View Results button.
10. An example of the query is shown.
11. This topic showed how to Run a Query.
End of Procedure.