sink and faucet - ashlar-vellum™ · cobalt, xenon & argon sink and faucet tutorial 9 after...
TRANSCRIPT

1-(800) 877-2745 | www.Ashlar-Vellum.com
Copyright © 2008-2014 Vellum Investment Partners dba Ashlar-Vellum, All rights reserved.
Sink and Faucet Tutorial Using Cobalt™, Xenon™
Ashlar-Vellum Cobalt, Xenon & Argon
Sink and Faucet Tutorial
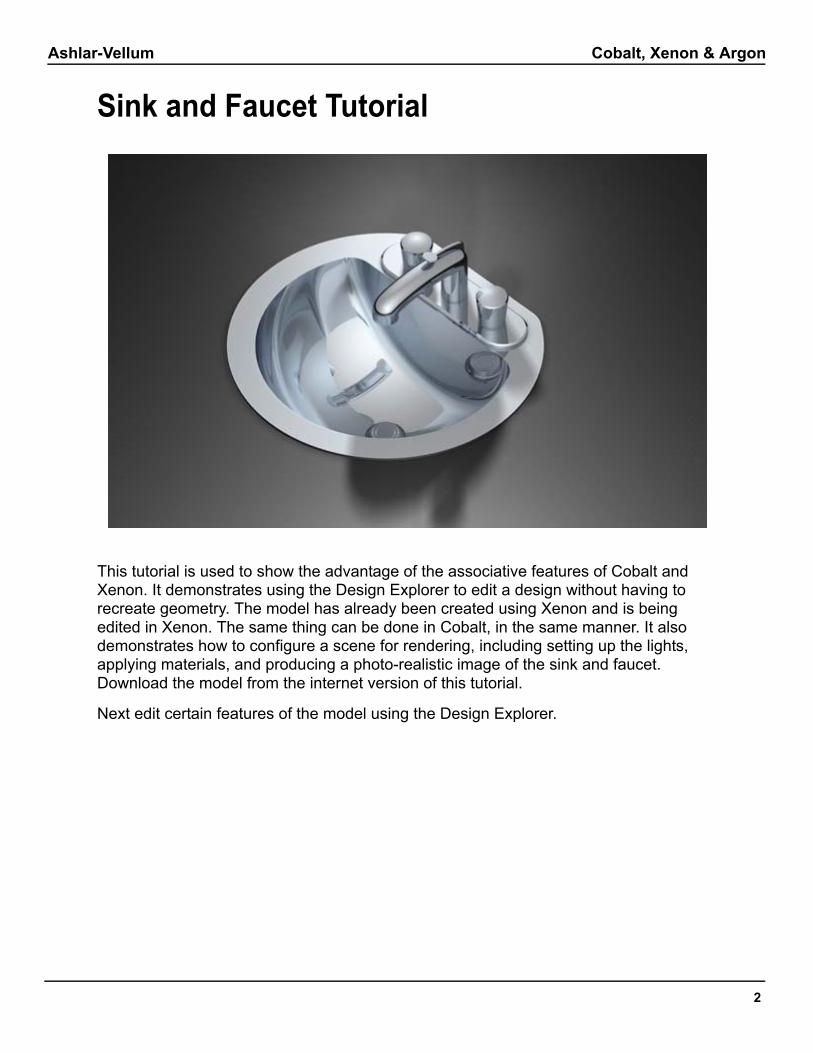
This tutorial is used to show the advantage of the associative features of Cobalt and Xenon. It demonstrates using the Design Explorer to edit a design without having to recreate geometry. The model has already been created using Xenon and is being edited in Xenon. The same thing can be done in Cobalt, in the same manner. It also demonstrates how to configure a scene for rendering, including setting up the lights, applying materials, and producing a photo-realistic image of the sink and faucet. Download the model from the internet version of this tutorial.
Next edit certain features of the model using the Design Explorer.
2

Cobalt, Xenon & Argon Sink and Faucet Tutorial
Editing Features with the Design ExplorerStart Xenon or Cobalt and open the file downloaded. Your screen should look similar to the one below.
In order to get a better idea of what is going on in the model, make a preview rendering of it. Go to PhotoRender>Raytrace Preview Render [Shadows Off] to get a quick rendering of what is in the model.
3

Ashlar-Vellum Sink and Faucet Tutorial
4
The part that we are going to be most interested in right now are the knobs. To get a better view of them go to the front view of the drawing by selecting Front View from the drop-down list at the bottom of the Trackball.
As shown on the next page, the knobs are a revolved profile with a chamfer applied to the top and some grooves subtracted out of the side.
Let's say that when the design was reviewed, the statement was made that having the grooves in the design "complicated the process of cleaning the fixture. Using Xenon or Cobalt, making design changes is simple. It can be done using the Design Explorer. If it is not already open go to Window>Design Explorer to open it.
Cobalt, Xenon & Argon Sink and Faucet Tutorial
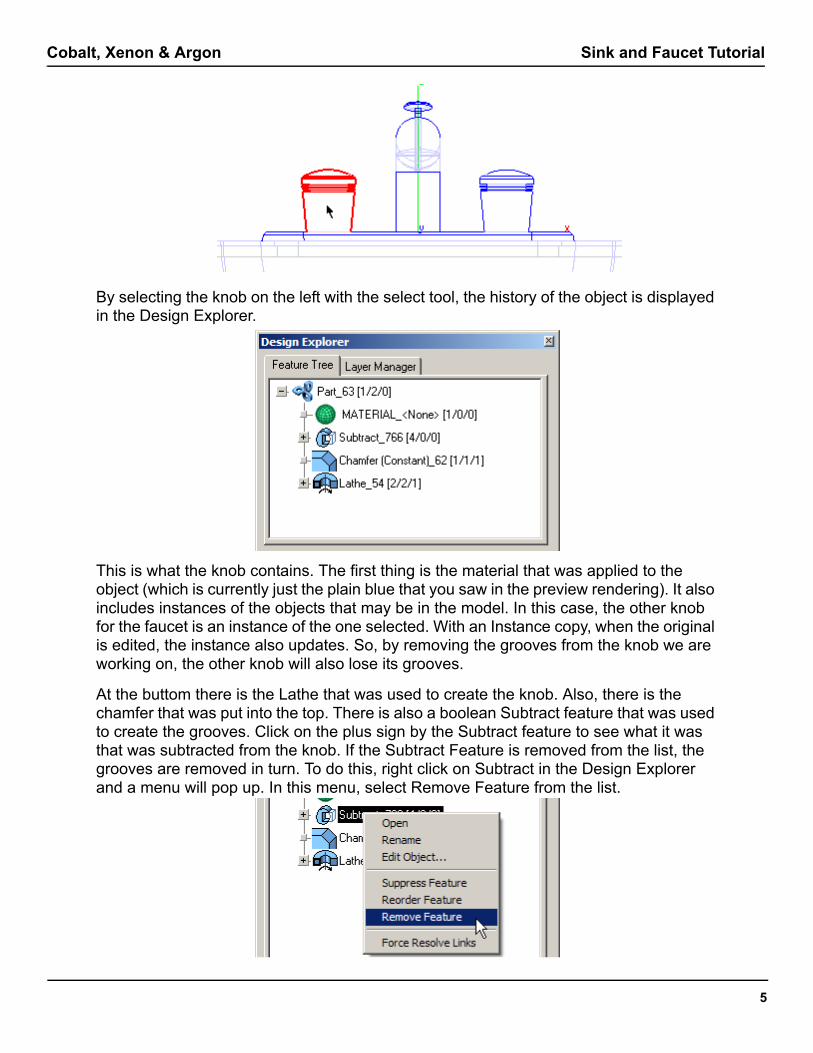
By selecting the knob on the left with the select tool, the history of the object is displayed in the Design Explorer.
This is what the knob contains. The first thing is the material that was applied to the object (which is currently just the plain blue that you saw in the preview rendering). It also includes instances of the objects that may be in the model. In this case, the other knob for the faucet is an instance of the one selected. With an Instance copy, when the original is edited, the instance also updates. So, by removing the grooves from the knob we are working on, the other knob will also lose its grooves.
At the buttom there is the Lathe that was used to create the knob. Also, there is the chamfer that was put into the top. There is also a boolean Subtract feature that was used to create the grooves. Click on the plus sign by the Subtract feature to see what it was that was subtracted from the knob. If the Subtract Feature is removed from the list, the grooves are removed in turn. To do this, right click on Subtract in the Design Explorer and a menu will pop up. In this menu, select Remove Feature from the list.
5

Ashlar-Vellum Sink and Faucet Tutorial
6
The grooves have disappeared. The pipes that were used to create the grooves are now there on the screen. Since they are no longer needed, delete them from the model. Looking at the model a little further, it may be necessary to change the size of that chamfer. Making it smaller may create a better design. When working with a program that doesn't offer a history of the design, exploring this idea would require creating another knob and applying a smaller chamfer to it just to see how it would look. With Cobalt and Xenon, it is possible to edit the chamfer created. To do this, double click on the Chamfer feature in the Design Explorer. This will open the Edit Object dialog. Select the Geometry tab. The chamfer is a half inch.
We can change this amount by selecting the edge and changing the value in the Length field. Change the number to .125. This will make the chamfer 1/8 inch all the way around.
Make it smaller or bigger. There is a limit however, it is not possible to put a 10 inch chamfer on a 2 inch knob. Set an appropriate value, select Apply and Close. That's it, the knob is edited and the other knob updated with it.
Was design ever this easy?
Next we will begin setting up the scene for a rendering by placing lights in the scene.
Cobalt, Xenon & Argon Sink and Faucet Tutorial
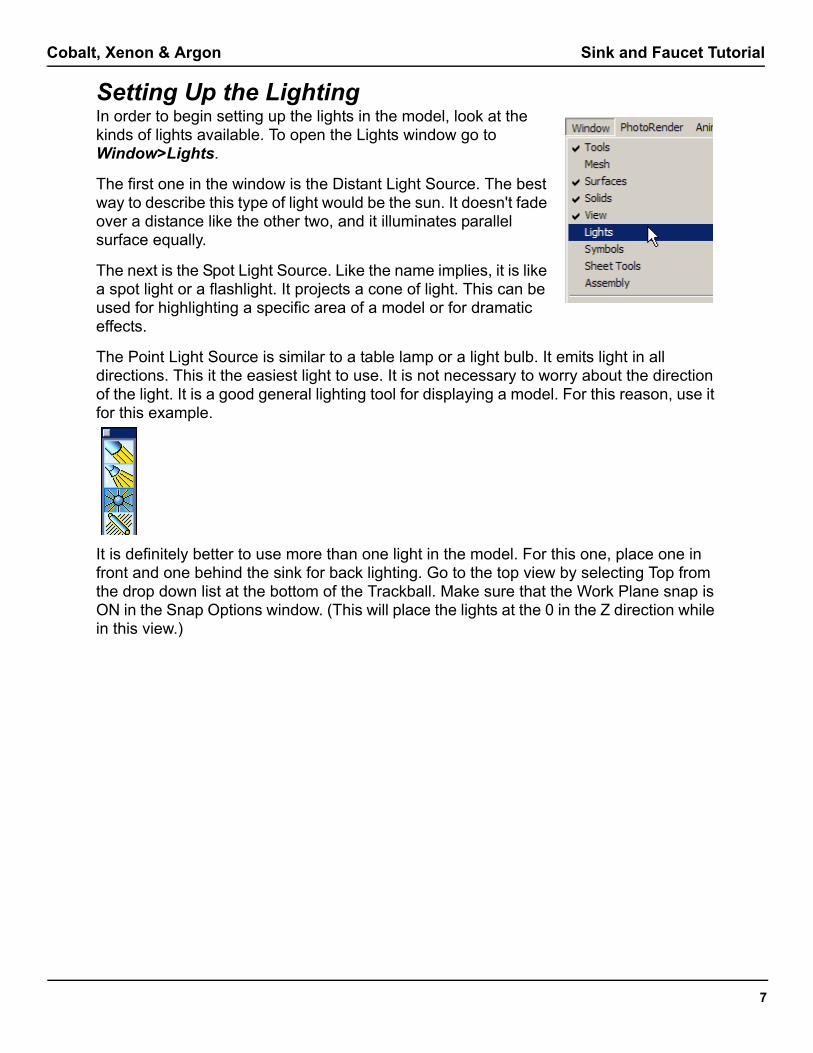
Setting Up the LightingIn order to begin setting up the lights in the model, look at the kinds of lights available. To open the Lights window go to Window>Lights.
The first one in the window is the Distant Light Source. The best way to describe this type of light would be the sun. It doesn't fade over a distance like the other two, and it illuminates parallel surface equally.
The next is the Spot Light Source. Like the name implies, it is like a spot light or a flashlight. It projects a cone of light. This can be used for highlighting a specific area of a model or for dramatic effects.
The Point Light Source is similar to a table lamp or a light bulb. It emits light in all directions. This it the easiest light to use. It is not necessary to worry about the direction of the light. It is a good general lighting tool for displaying a model. For this reason, use it for this example.
It is definitely better to use more than one light in the model. For this one, place one in front and one behind the sink for back lighting. Go to the top view by selecting Top from the drop down list at the bottom of the Trackball. Make sure that the Work Plane snap is ON in the Snap Options window. (This will place the lights at the 0 in the Z direction while in this view.)
7
Ashlar-Vellum Sink and Faucet Tutorial
8
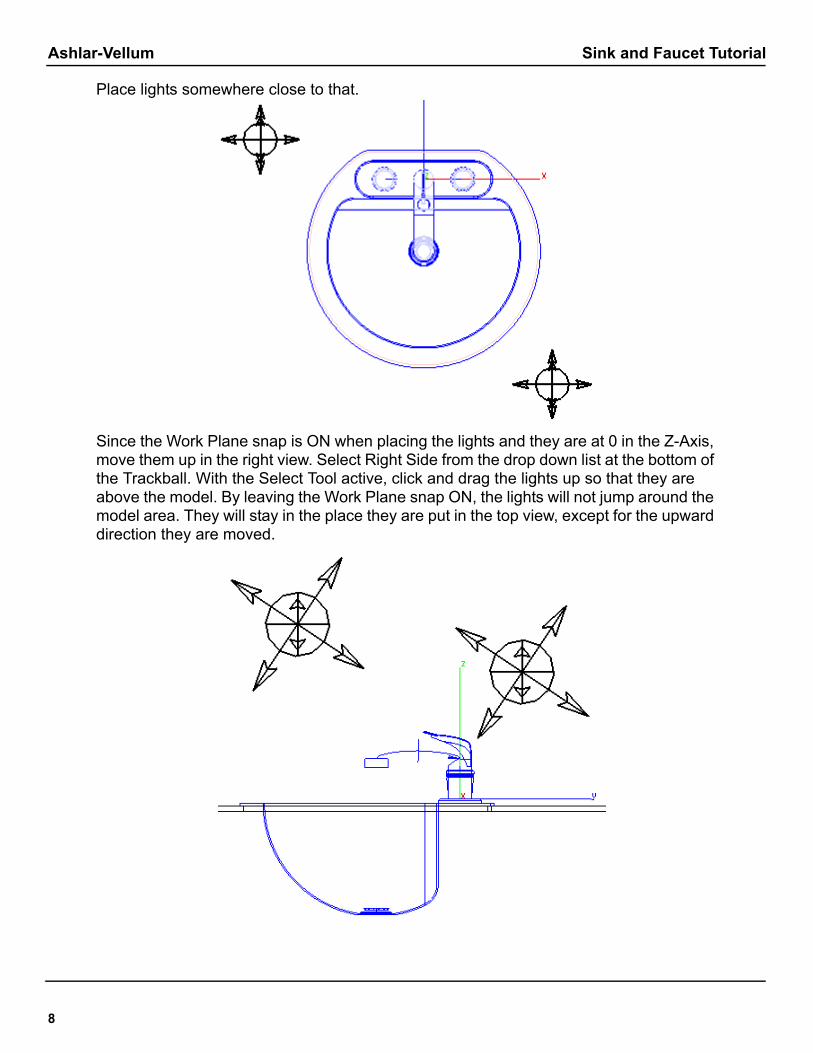
Place lights somewhere close to that.
Since the Work Plane snap is ON when placing the lights and they are at 0 in the Z-Axis, move them up in the right view. Select Right Side from the drop down list at the bottom of the Trackball. With the Select Tool active, click and drag the lights up so that they are above the model. By leaving the Work Plane snap ON, the lights will not jump around the model area. They will stay in the place they are put in the top view, except for the upward direction they are moved.
Cobalt, Xenon & Argon Sink and Faucet Tutorial
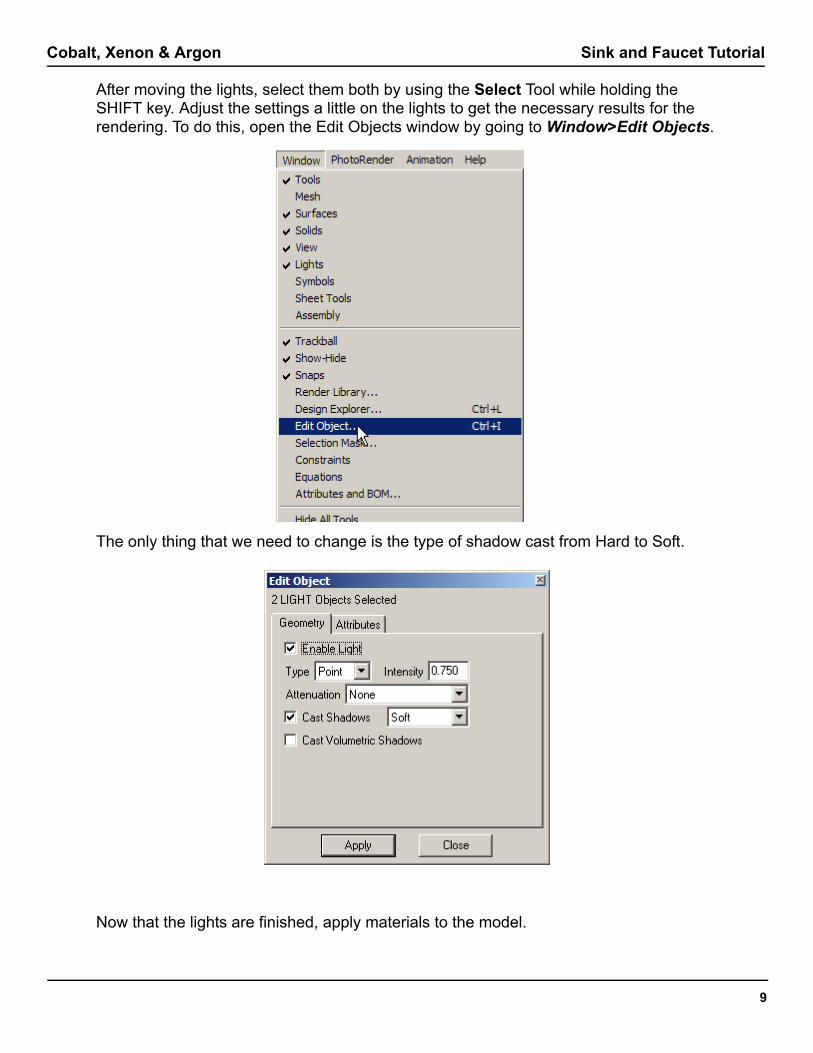
After moving the lights, select them both by using the Select Tool while holding the SHIFT key. Adjust the settings a little on the lights to get the necessary results for the rendering. To do this, open the Edit Objects window by going to Window>Edit Objects.
The only thing that we need to change is the type of shadow cast from Hard to Soft.
Now that the lights are finished, apply materials to the model.
9

Ashlar-Vellum Sink and Faucet Tutorial
10
Applying MaterialsApplying materials is simple with the Render Library. All that is necessary to do is to drag and drop the material to apply onto the object.
First, open the Render Library by going to Window>Render Library.
Set the first drop down list to Materials and the second to Metal
There is a large variety of metals from which to choose. The fourth sphere in the library is a material called Chromium. For all intents and purposes this is the best one to use for chrome.

Cobalt, Xenon & Argon Sink and Faucet Tutorial
Click on the material and drag it to the sink. The icon will change to a small hand and the item that the material will be applied to will turn red. When the correct object is highlighted let go of the mouse button. That's all there is to it. Apply the Chromium material to all of the sink and faucet parts (all that is shown in blue.) Check by doing a Preview Render from the PhotoRender menu.
There is also a large flat piece in the model. For our picture, this piece represents the counter surrounding the sink. It is a block that has a cutout in which the sink lies. Give it a somewhat flat, hardly noticeably texture so that is creates a soft look to the image. The best material for this is the opaque, rough plastic. To look at the plastic options, change the second drop down list to Plastic.
11
Ashlar-Vellum Sink and Faucet Tutorial
12
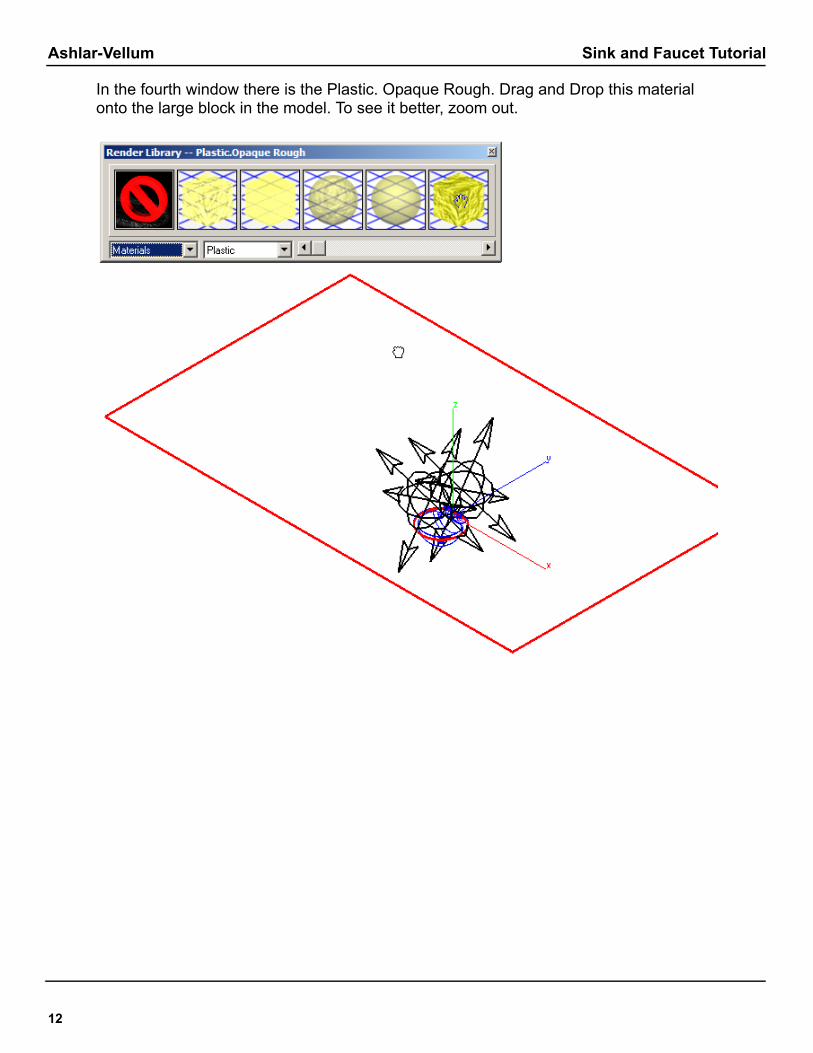
In the fourth window there is the Plastic. Opaque Rough. Drag and Drop this material onto the large block in the model. To see it better, zoom out.
Cobalt, Xenon & Argon Sink and Faucet Tutorial
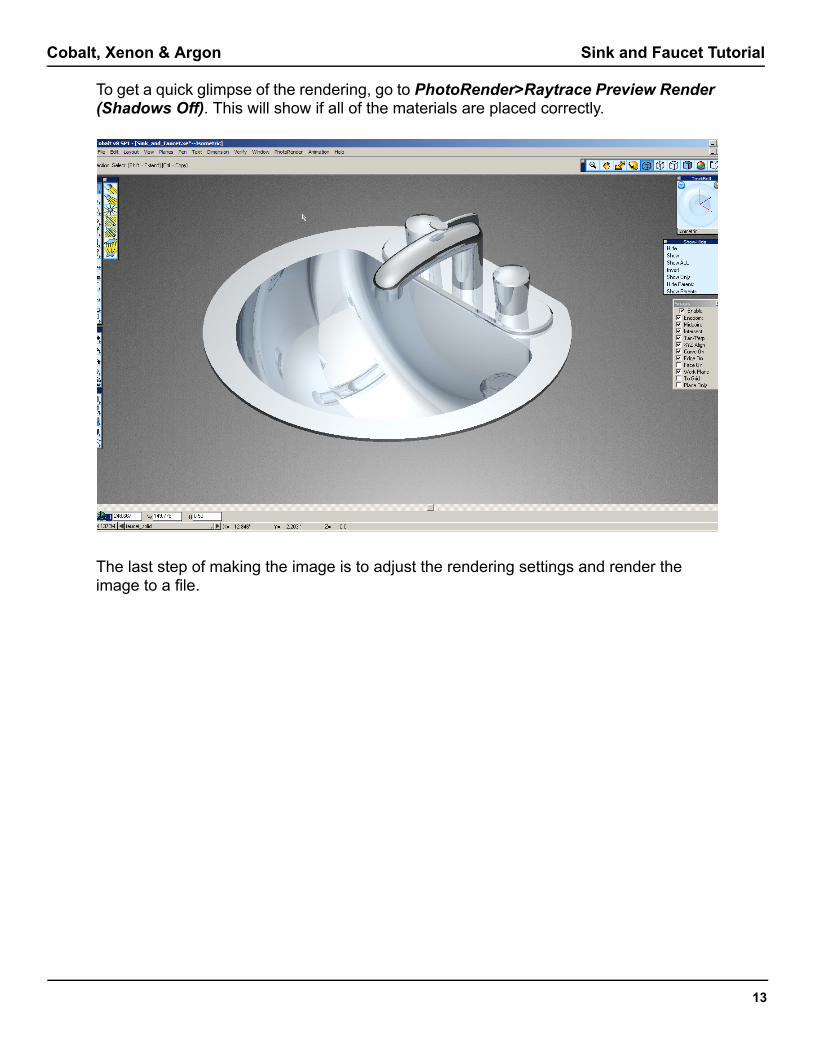
To get a quick glimpse of the rendering, go to PhotoRender>Raytrace Preview Render (Shadows Off). This will show if all of the materials are placed correctly.
The last step of making the image is to adjust the rendering settings and render the image to a file.
13
Ashlar-Vellum Sink and Faucet Tutorial
14
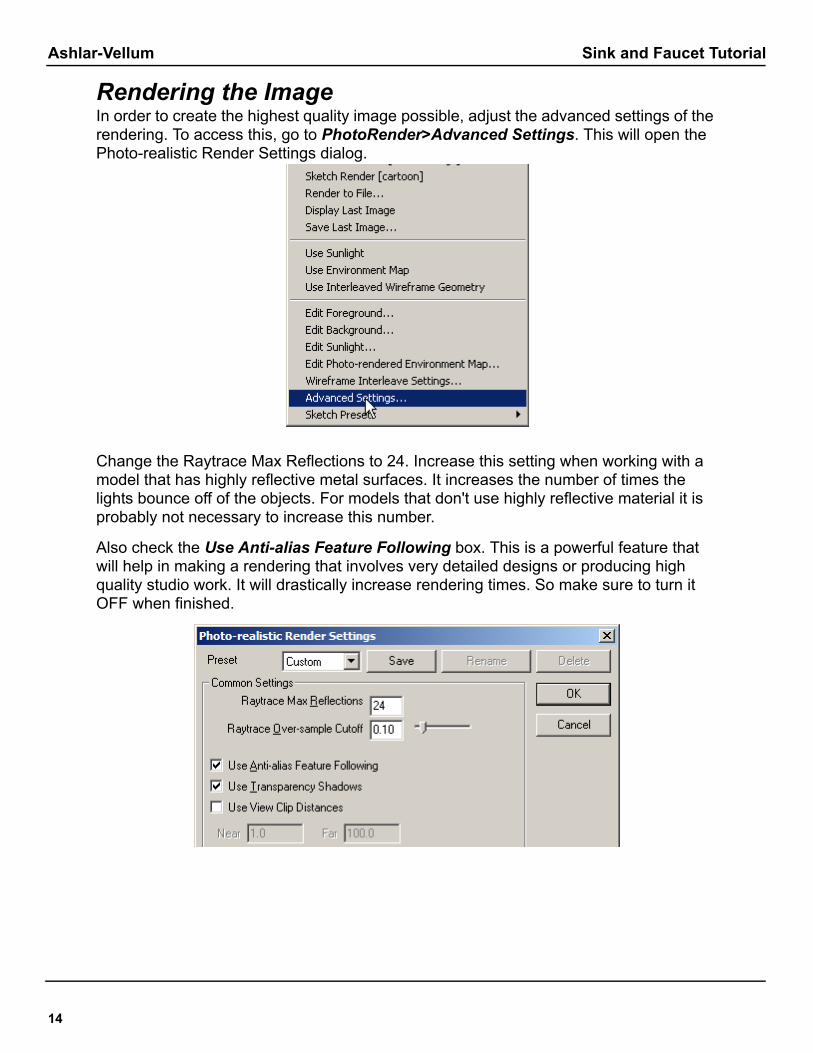
Rendering the ImageIn order to create the highest quality image possible, adjust the advanced settings of the rendering. To access this, go to PhotoRender>Advanced Settings. This will open the Photo-realistic Render Settings dialog.
Change the Raytrace Max Reflections to 24. Increase this setting when working with a model that has highly reflective metal surfaces. It increases the number of times the lights bounce off of the objects. For models that don't use highly reflective material it is probably not necessary to increase this number.
Also check the Use Anti-alias Feature Following box. This is a powerful feature that will help in making a rendering that involves very detailed designs or producing high quality studio work. It will drastically increase rendering times. So make sure to turn it OFF when finished.
Cobalt, Xenon & Argon Sink and Faucet Tutorial
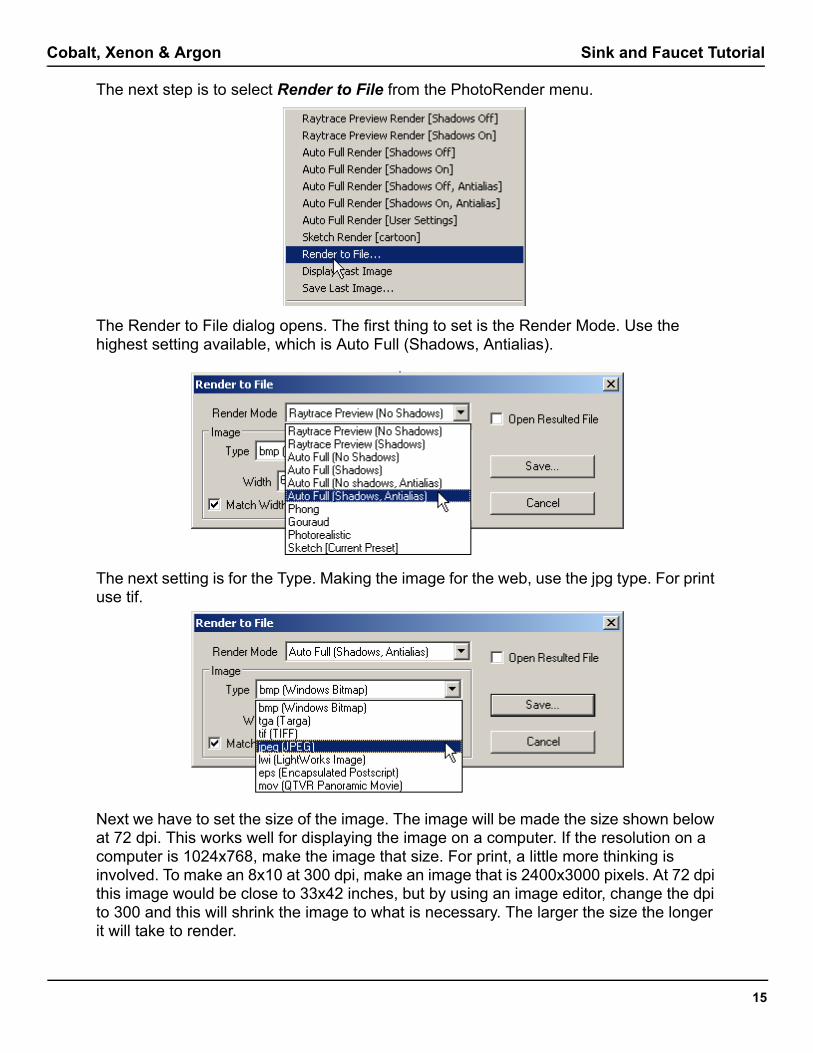
The next step is to select Render to File from the PhotoRender menu.
The Render to File dialog opens. The first thing to set is the Render Mode. Use the highest setting available, which is Auto Full (Shadows, Antialias).
The next setting is for the Type. Making the image for the web, use the jpg type. For print use tif.
Next we have to set the size of the image. The image will be made the size shown below at 72 dpi. This works well for displaying the image on a computer. If the resolution on a computer is 1024x768, make the image that size. For print, a little more thinking is involved. To make an 8x10 at 300 dpi, make an image that is 2400x3000 pixels. At 72 dpi this image would be close to 33x42 inches, but by using an image editor, change the dpi to 300 and this will shrink the image to what is necessary. The larger the size the longer it will take to render.
15
Ashlar-Vellum Sink and Faucet Tutorial
16
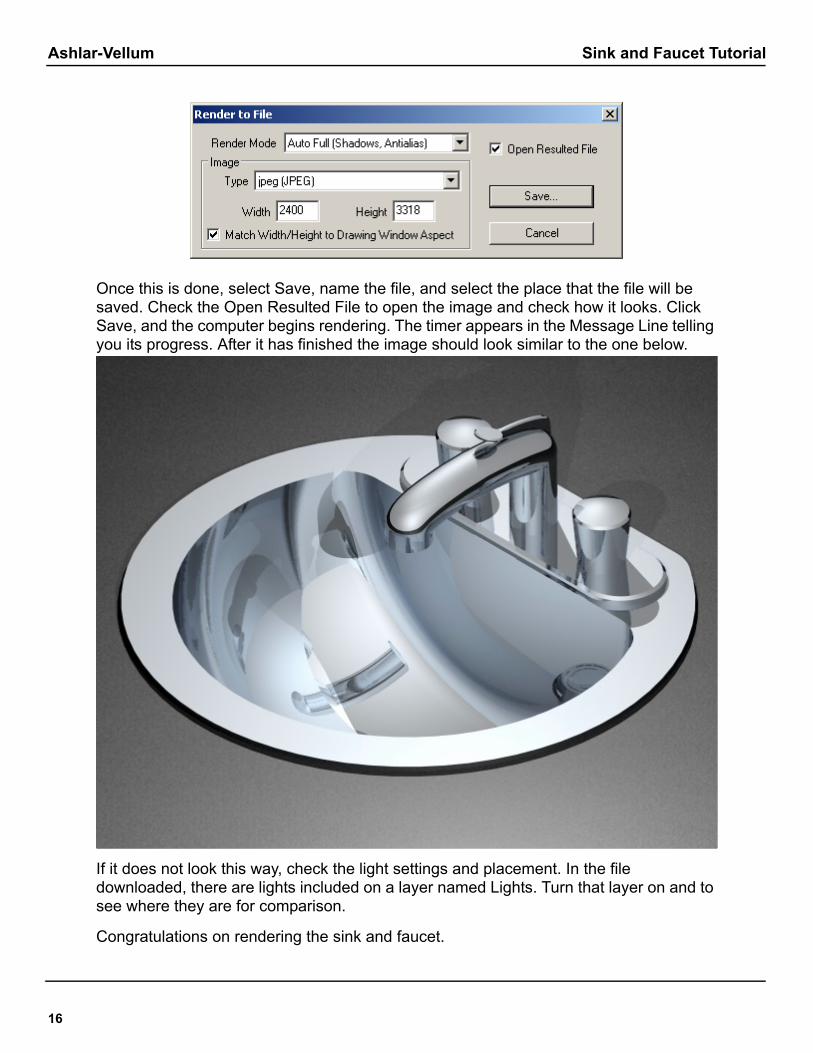
Once this is done, select Save, name the file, and select the place that the file will be saved. Check the Open Resulted File to open the image and check how it looks. Click Save, and the computer begins rendering. The timer appears in the Message Line telling you its progress. After it has finished the image should look similar to the one below.
If it does not look this way, check the light settings and placement. In the file downloaded, there are lights included on a layer named Lights. Turn that layer on and to see where they are for comparison.
Congratulations on rendering the sink and faucet.