sapui5: the comprehensive guide (sap press) | reading sample
TRANSCRIPT

Reading SampleUser experience plays an important role when creating and conceptualizing applications. In this reading sample, we’ll discuss some of the most widely used SAPUI5 application patterns and their attributes. We’ll begin by looking at the different layouts and floorplans that can be implemented, then provide steps for running these applications in SAP Fiori Launchpad.
Christiane Goebels, Denise Nepraunig, Thilo Seidel
SAPUI5: The Comprehensive Guide672 Pages, 2016, $79.95 ISBN 978-1-4932-1320-7
www.sap-press.com/3980
First-hand knowledge.

7
Contents
Acknowledgments ............................................................................................ 15Preface ............................................................................................................. 17
PART I Introduction
1 SAPUI5 at a Glance ................................................................... 23
1.1 What It Is and Where to Get It ...................................................... 231.2 History and Evolution .................................................................... 241.3 Features ........................................................................................ 25
1.3.1 SAPUI5 Demo Kit ............................................................. 251.3.2 Model-View-Controller in SAPUI5 ................................... 291.3.3 Cross-Browser Compatibility ............................................ 291.3.4 Theming ........................................................................... 311.3.5 Localization ...................................................................... 321.3.6 Accessibility ..................................................................... 331.3.7 Open Source in SAPUI5 .................................................... 33
1.4 Use Cases ...................................................................................... 341.5 Product Comparison ...................................................................... 371.6 SAPUI5 and OpenUI5 .................................................................... 381.7 Summary ....................................................................................... 39
2 Architecture ............................................................................... 41
2.1 The Libraries .................................................................................. 412.2 MVC Overview .............................................................................. 44
2.2.1 MVC Interaction .............................................................. 442.2.2 View Instantiation and the Controller Lifecycle ................. 45
2.3 Architecture of a Typical SAPUI5 Application ................................ 462.4 Class Hierarchy .............................................................................. 49
2.4.1 Inheritance for Controls .................................................... 502.4.2 Inheritance for Models ..................................................... 52
2.5 Summary ....................................................................................... 55

8
Contents
PART II SAPUI5 In Action—Building Apps
3 Hello, SAPUI5 World ................................................................. 59
3.1 Coding Guidelines ......................................................................... 593.1.1 Global Variables ............................................................... 603.1.2 Private Object Members ................................................... 613.1.3 Code Formatting .............................................................. 613.1.4 Variable Naming Conventions .......................................... 62
3.2 Setup ............................................................................................. 633.2.1 Setting Up Your HTML Start Page ..................................... 633.2.2 Bootstrapping SAPUI5 ...................................................... 64
3.3 Adding a Simple Control ................................................................ 663.4 Defining an Event Handler ............................................................. 68
3.4.1 Simple Event Handler ....................................................... 683.4.2 Using Event Information within an Event Handler ............. 71
3.5 Complex Controls .......................................................................... 733.5.1 Aggregations .................................................................... 733.5.2 Associations ..................................................................... 75
3.6 Controls API .................................................................................. 773.7 Layouts .......................................................................................... 783.8 Summary ....................................................................................... 84
4 Building MVC Applications ....................................................... 85
4.1 Models, Views, and Controllers ..................................................... 854.2 Structure ....................................................................................... 86
4.2.1 Application Overview ....................................................... 884.2.2 Building the First Page ...................................................... 904.2.3 Table Coding .................................................................... 94
4.3 Building a Simple View .................................................................. 954.3.1 Namespaces and Resource Path ...................................... 974.3.2 Creating the Master JavaScript View ................................. 984.3.3 Creating the Master Controller ......................................... 1004.3.4 Creating a Detail View and Controller .............................. 104
4.4 View Types .................................................................................... 1094.4.1 XML Views ....................................................................... 1164.4.2 Transforming JavaScript Views into XML Views ................ 117
4.5 Components .................................................................................. 1264.5.1 Creating the Component File ............................................ 1274.5.2 Adding a Shell Around the Component ............................ 130
Contents
9
4.5.3 Enhancing the Look of a Table .......................................... 1334.5.4 Component Metadata ...................................................... 1344.5.5 Storing the Hard-Coded Model Data in
a Separate data.json File ................................................... 1344.6 Routing ......................................................................................... 137
4.6.1 Routing Configuration ...................................................... 1384.6.2 Router Initialization .......................................................... 1404.6.3 Adjusting the App View ................................................... 1414.6.4 Using Routing inside the Master Controller ...................... 1414.6.5 Using Routing inside the Detail Controller ........................ 143
4.7 Application Descriptor ................................................................... 1454.8 Summary ....................................................................................... 150
5 Models and Bindings ................................................................ 153
5.1 Using Models: A JSON Sample ...................................................... 1535.1.1 Instantiation and Loading of Data .................................... 1545.1.2 Accessing Model Values ................................................... 156
5.2 Property Binding ........................................................................... 1625.2.1 Methods for Binding a Control’s Property ........................ 1625.2.2 Using Data Types ............................................................. 1665.2.3 Defining a Custom Data Type ........................................... 171
5.3 Using Formatters ........................................................................... 1745.4 Aggregation Binding ...................................................................... 183
5.4.1 bindAggregation .............................................................. 1885.4.2 Using a Factory ................................................................ 189
5.5 Element Binding ............................................................................ 1955.6 Expression Binding and Calculated Fields ....................................... 196
5.6.1 Calculated Fields .............................................................. 1965.6.2 Expression Binding ........................................................... 199
5.7 Resource Models and Internationalization ..................................... 2005.7.1 File Location .................................................................... 2005.7.2 File Naming Convention ................................................... 2015.7.3 Code Page ........................................................................ 2015.7.4 Using a Resource Model ................................................... 202
5.8 View Models and the Device Model .............................................. 2065.8.1 Using View Models .......................................................... 2075.8.2 Using the Device Model ................................................... 212
5.9 Summary ....................................................................................... 214

10
Contents
6 CRUD Operations ...................................................................... 217
6.1 What Is REST? What Is CRUD? ...................................................... 2176.2 Connecting to REST Services .......................................................... 218
6.2.1 Configuring the Mock Service ........................................... 2206.2.2 Extending the JSON Model .............................................. 223
6.3 Using CRUD Operations ................................................................ 2256.3.1 Editing an Existing Entry ................................................... 2256.3.2 Creating a New Entry ....................................................... 2356.3.3 Deleting an Entry ............................................................. 245
6.4 Sorting, Filtering, and Grouping in JSON Models ........................... 2476.4.1 Sorting ............................................................................. 2486.4.2 Filtering ........................................................................... 2526.4.3 Grouping .......................................................................... 259
6.5 Summary ....................................................................................... 262
7 Using OData .............................................................................. 263
7.1 OData at a Glance ......................................................................... 2637.1.1 Northwind OData Service ................................................. 2647.1.2 Service Document ............................................................ 2667.1.3 Service Metadata Document ............................................ 2677.1.4 Accessing Data ................................................................. 269
7.2 OData Model at a Glance .............................................................. 2757.2.1 Service Metadata ............................................................. 2777.2.2 Instantiating the OData Model in the SAP Web IDE ......... 279
7.3 Reading Data ................................................................................. 2827.3.1 Reading Data Manually .................................................... 2827.3.2 Accessing Data via Data Binding ....................................... 2877.3.3 Best Practices ................................................................... 2907.3.4 Displaying Additional Product Information ....................... 2957.3.5 Displaying Navigation Properties ...................................... 296
7.4 Filter, Sort, Expand, and Group ...................................................... 2997.4.1 Filtering with $filter ......................................................... 2997.4.2 Sorting with $orderby ..................................................... 3057.4.3 Expanding with $expand .................................................. 3087.4.4 Grouping with group ........................................................ 312
7.5 Paging and Thresholds ................................................................... 3137.6 Batch Mode ................................................................................... 3187.7 One-Way and Two-Way Bindings .................................................. 320
7.7.1 One-Way Binding ............................................................. 320
Contents
11
7.7.2 Two-Way Binding ............................................................ 3237.8 Writing Data ................................................................................. 326
7.8.1 Creating an Entry ............................................................. 3297.8.2 Updating an Entry ............................................................ 3347.8.3 Deleting an Entry ............................................................. 336
7.9 Function Imports ........................................................................... 3377.10 Concurrency Control ...................................................................... 3417.11 Summary ....................................................................................... 344
8 Application Patterns and Examples .......................................... 347
8.1 Layouts .......................................................................................... 3488.1.1 Full-Screen Layout: sap.m.App ......................................... 3528.1.2 Split Screen Layout: sap.m.SplitApp ................................. 355
8.2 Floorplans ..................................................................................... 3598.2.1 Worklist ........................................................................... 3608.2.2 Master-Detail ................................................................... 368
8.3 Additional Application Features ..................................................... 3788.3.1 Not Found Handling ......................................................... 3798.3.2 Error Handling .................................................................. 3848.3.3 Busy Handling .................................................................. 3868.3.4 Letterboxing ..................................................................... 3898.3.5 Headers and Footers ........................................................ 390
8.4 Running Apps in SAP Fiori Launchpad ........................................... 3938.4.1 SAP Fiori Launchpad Sandbox .......................................... 3938.4.2 Cross-Application Navigation ........................................... 3988.4.3 Register and Run in Production ........................................ 399
8.5 SAP Fiori Reference Apps .............................................................. 4028.5.1 Manage Products App ...................................................... 4038.5.2 Shop App ......................................................................... 404
8.6 Summary ....................................................................................... 405
9 Advanced Concepts ................................................................... 407
9.1 Writing Your Own Controls ........................................................... 4079.1.1 SAPUI5 Control Structure ................................................. 4089.1.2 Implementing a Composite Control .................................. 414
9.2 Using Fragments ............................................................................ 4239.2.1 Creating Fragments .......................................................... 4249.2.2 Embedding Fragments into Views .................................... 4279.2.3 Using Dialogs in Fragments .............................................. 432

12
Contents
9.3 SAP OData Annotations ................................................................ 4359.3.1 Custom SAP OData 2.0 Annotations ................................ 4359.3.2 OData 4.0 Annotations .................................................... 438
9.4 Smart Controls ............................................................................... 4399.4.1 Smart Tables and Smart Filters Bar .................................... 4459.4.2 Smart Form and Smart Fields with Value Help .................. 448
9.5 Smart Templates ............................................................................ 4499.6 Summary ....................................................................................... 452
PART III Finishing Touches
10 Making Applications Enterprise-Grade .................................... 457
10.1 Theming ........................................................................................ 45710.1.1 Manual Restyling .............................................................. 45810.1.2 UI Theme Designer ........................................................... 462
10.2 Security ......................................................................................... 46810.2.1 Input Validation ............................................................... 46810.2.2 Cross-Site Scripting .......................................................... 46810.2.3 URLs and Whitelist Filtering ............................................. 46910.2.4 frameOptions and Central Whitelisting ............................. 470
10.3 Performance .................................................................................. 47110.3.1 Bundling and Component Preload .................................... 47210.3.2 Minification and Uglification ............................................ 472
10.4 Accessibility ................................................................................... 48610.4.1 Importance of Inclusion and Accessibility ......................... 48610.4.2 SAPUI5 Accessibility Features ........................................... 49010.4.3 Making Your Applications Accessible ............................... 493
10.5 Summary ....................................................................................... 495
11 Debugging and Testing Code .................................................... 497
11.1 Debugging ..................................................................................... 49811.1.1 Tricks to Know ................................................................. 49811.1.2 Debugging Support Tools ................................................. 501
11.2 Writing Unit Tests ......................................................................... 50711.2.1 Setting up a QUnit Test Page ............................................ 50911.2.2 Writing a Unit Test for a Custom Control .......................... 51111.2.3 Unit Tests for Apps ........................................................... 516
11.3 One-Page Acceptance Tests ........................................................... 52411.3.1 Architecture ..................................................................... 524
Contents
13
11.3.2 OPA Test Structure ........................................................... 52511.3.3 Writing waitFor Functions ................................................ 52611.3.4 Writing an OPA Test ........................................................ 53111.3.5 Application Lifecycle Handling ......................................... 53611.3.6 Structuring Tests with Page Objects ................................. 53711.3.7 Full Application Test Setup ............................................... 538
11.4 Mocking Data: Using the Mock Server ........................................... 54211.4.1 Basic Instantiation and Configuration ............................... 54311.4.2 Advanced Concepts and Configuration ............................. 544
11.5 Linting Code .................................................................................. 54711.6 Summary ....................................................................................... 550
12 Don’ts ........................................................................................ 551
12.1 Worst Practices ............................................................................. 55112.1.1 Getting Application Styling All Wrong .............................. 55112.1.2 Ignoring General Rules in SAPUI5 Application
Development ................................................................... 55512.1.3 Performance Breakers ....................................................... 556
12.2 How to Break your Apps during Updates ....................................... 55712.2.1 Using Private and Protected Methods or Properties
in SAPUI5 ........................................................................ 55812.2.2 Using Deprecated or Experimental APIs ........................... 55812.2.3 Extend SAPUI5 Controls ................................................... 559
12.3 Summary ....................................................................................... 559
Appendices ....................................................................................... 561
A IDE Setup ................................................................................................ 563A.1 SAP Web IDE ................................................................................ 563A.2 WebStorm ..................................................................................... 579
B Accessing and Connecting to the Backend ............................................... 589B.1 Same-Origin Policy ........................................................................ 589B.2 Disable Web Security in Google Chrome ....................................... 594B.3 SAP HANA Cloud Platform Destinations ........................................ 596
C App Deployment ..................................................................................... 605C.1 SAP HANA Cloud Platform ............................................................ 605C.2 SAP Web IDE and SAP HANA Cloud Connector ............................. 615C.3 ABAP Server .................................................................................. 625C.4 Other Web Servers ........................................................................ 636

14
Contents
D Cheat Sheets ............................................................................................ 639D.1 Starting the App ............................................................................ 639D.2 Referencing Elements .................................................................... 640D.3 JSON Model .................................................................................. 642D.4 OData Model ................................................................................ 643D.5 Bindings ........................................................................................ 646D.6 Coding Conventions ...................................................................... 647D.7 JSDoc ............................................................................................ 648D.8 Controls Cheat Sheet ..................................................................... 650
E Additional Resources ............................................................................... 651E.1 openSAP Courses ........................................................................... 651E.2 Documentation ............................................................................. 651E.3 Websites ....................................................................................... 652E.4 Books/E-Bites ................................................................................ 653E.5 Communities ................................................................................. 653E.6 GitHub Repositories ...................................................................... 654E.7 JavaScript Playgrounds ................................................................... 654E.8 Tools ............................................................................................. 655E.9 Google Chrome Plugins ................................................................. 655
F The Authors ............................................................................................. 657
Index ............................................................................................................... 659

Reading SampleUser experience plays an important role when creating and conceptualizing applications. In this reading sample, we’ll discuss some of the most widely used SAPUI5 application patterns and their attributes. We’ll begin by looking at the different layouts and floorplans that can be implemented, then provide steps for running these applications in SAP Fiori Launchpad.
Christiane Goebels, Denise Nepraunig, Thilo Seidel
SAPUI5: The Comprehensive Guide672 Pages, 2016, $79.95 ISBN 978-1-4932-1320-7
www.sap-press.com/3980
First-hand knowledge.
The Authors
Index
Contents
“Application Patterns and Examples”

347
Chapter 8
Application development in general must close the gap between technolog-ical feasibility and the best possible support for a given usage scenario. Therefore, we must not only know about technology but also have a deep understanding of user requirements and constraints. In this chapter, we’ll approach the topic of application patterns from both design and technical perspectives.
8 Application Patterns and Examples
Application development with SAPUI5 benefits from the well-defined design pat-terns and overall application concepts found in the SAP Fiori design guidelines,available at https://experience.sap.com/fiori-design/. From a design perspective, thisinformation provides clear guidance on how to structure your content, define usagepatterns, and define interaction flows, allowing you to concentrate on your specificscenario implementation, building on top of best practices. From an applicationdeveloper’s point of view, SAPUI5 supports the implementation of these guidelinesby providing controls and the right APIs that are built based on the overall designrequirements.
Although it’s been said that good user experience can never be achieved simplyby technology alone, technical aspects and decisions do play an important role.As previously stated, SAP Fiori design concepts and SAPUI5 grew up together.While SAP Fiori emphasized the implementation of small, single-purpose applica-tions, SAPUI5 served as the tailored technology for these application.
For us, this means that we should always try to build individual and focusedapplications. For example, in a scenario in which our users can create, approve,and analyze leave requests, we should create three applications.
In this chapter, we’ll explore general application concepts and patterns found inSAPUI5. We’ll start with general application layouts, then dig deeper and exploremore detailed floorplans. Finally, we’ll look into specific application types andexplore shared application features. We’ll always start from a design perspectiveand build knowledge for use cases and underlying assumptions. Then, we’ll start

Application Patterns and Examples8
348
to explore technical assets like controls that are provided by SAPUI5 and that easethe implementation of these design patterns.
In the final section of this chapter, you’ll learn how SAP Fiori Launchpad serves asthe central access point for SAPUI5 applications in many scenarios and will gainsome hands-on experience with its developer features.
8.1 Layouts
Laying out applications generally happens at different levels. Think of a grid usedto cut the screen into pieces that will later be assigned individual content. Thisconcept is common in web development.
When building full-blown applications, you might still use a grid-based approach.However, you should first think about the general cut of your application, mean-ing the overall number of content areas you’ll need to leverage to enrich userexperience and to streamline the tasks your users will have to complete using theapplication you build. Therefore, the first decision you make should be simplywhether you want to build a full-screen or split-screen application. Differentiatingbetween full-screen and split-screen options might seem like a no-brainer at firstglance, but we’ll discuss these difference to a greater extent in this section. Thechoice isn’t as simple as it may seem initially.
These applications can be derived from the task, sequence of usage, and targetgroup of your application. This first decision will ultimately help you understandthe underlying usage scenario of your application in greater detail. We’ll outlinethe important questions to ask when choosing a layout in this section, and thenwe’ll build example implementations using SAPUI5 controls. To begin, we’ll usea simple application skeleton that can be generated from a template in the SAPWeb IDE.
The generation of templates in the SAP Web IDE is covered in Appendix D of thisbook. Please look up the general wizard functionality there. What we want togenerate now is the SAPUI5 Application template (see Figure 8.1).
This template provides the right folder structure and all the files needed to buildour first prototypes. Most of it should look familiar from the previous examplesin the book. We use this template frequently to test new controls or even to test
Layouts 8.1
349
complex patterns isolated from the actual project we’re working on. With somesmall changes, it can also serve as a base for application development.
Figure 8.1 SAPUI5 Template in Template Wizard
Let’s first look into the Main.view.xml file in the view folder of the project. Thisis defined as the rootView in manifest.json and will therefore be loaded at appli-cation startup (see Listing 8.1).
<mvc:ViewcontrollerName="my.app.controller.Main"xmlns:html=http://www.w3.org/1999/xhtmlxmlns:mvc="sap.ui.core.mvc"xmlns="sap.m"><App><pages>
<Page title="{i18n>title}"><content></content>
</Page></pages>
</App></mvc:View>
Listing 8.1 Initial Main.view.xml
The app control serves as a root control for the template application. However, italready has a sap.m.Page element prefilled in its pages aggregation. In applicationdevelopment, we use routing in SAPUI5 to display individual views and cantherefore delete the page and all its content. In addition, we’ll add an ID to theroot control that we can use later in the routing configuration (see Listing 8.2).

Application Patterns and Examples8
350
<mvc:ViewcontrollerName="my.app.controller.Main"xmlns:html=http://www.w3.org/1999/xhtmlxmlns:mvc="sap.ui.core.mvc"xmlns="sap.m"><App id="rootControl"/>
</mvc:View>
Listing 8.2 Main.view.xml: Adapted
We still need to set up some basic routing configuration to enable the dynamicdisplay of content in the root control. For this, we’ll add a routing block into thesap.ui5 namespace in manifest.json (see Listing 8.3). This block should hold theID of the root control and some generic settings, such as controlAggregation andthe path to the root view. Refer back to Chapter 4 for more details.
"sap.ui5": {"_version": "1.1.0","rootView": {
"viewName": "my.app.view.Main","type": "XML"
},"routing": {
"config": {"routerClass": "sap.m.routing.Router","controlId": "rootControl","controlAggregation" : "pages","viewPath": "my.app.view","viewType": "XML","async": true
}},
Listing 8.3 Basic Routing Configuration
Although the SAPUI5 controls from the sap.m library we will use come with built-in support for different form factors, like mobile and desktop devices, we stillhave to tell the toolkit for what device it should optimize the display. This willhappen dynamically based on what the sap.ui.Device API has identified. Toenable this functionality, we’ll add the check shown in Listing 8.4 to the onInitevent of the main controller.
onInit : function() {var sContentDensityClass = "";if (jQuery(document.body).hasClass("sapUiSizeCozy") || jQuery(documen
t.body).hasClass("sapUiSizeCompact")) {sContentDensityClass = "";
Layouts 8.1
351
} else if (!Device.support.touch) {sContentDensityClass = "sapUiSizeCompact";
} else {sContentDensityClass = "sapUiSizeCozy";
}this.getView().addStyleClass(sContentDensityClass);
}
Listing 8.4 Content Density Check in Main.controller.js
Finally, we’ll add a configuration for the creation of a sap.ui.model.odata.v2.ODataModel instance that uses an SAP NetWeaver demo OData service providedby SAP as dataSource into manifest.json. We’ll use this model later to display realdata when building the floorplans and example applications. For now, it will becreated silently without any effect.
{"sap.app" : {"dataSources": {
"mainService": {"uri": "/destinations/ES4/sap/opu/odata/IWBEP/GWSAMPLE_BASIC/","type": "OData","settings": {
"odataVersion": "2.0"}
}}
..},"sap.ui5":{"models": {
"": {"dataSource": "mainService","settings": {
"metadataUrlParams": {"sap-documentation": "heading, quickinfo"
}}
}}
}}
Listing 8.5 Excerpt from manifest.json with OData Model Creation
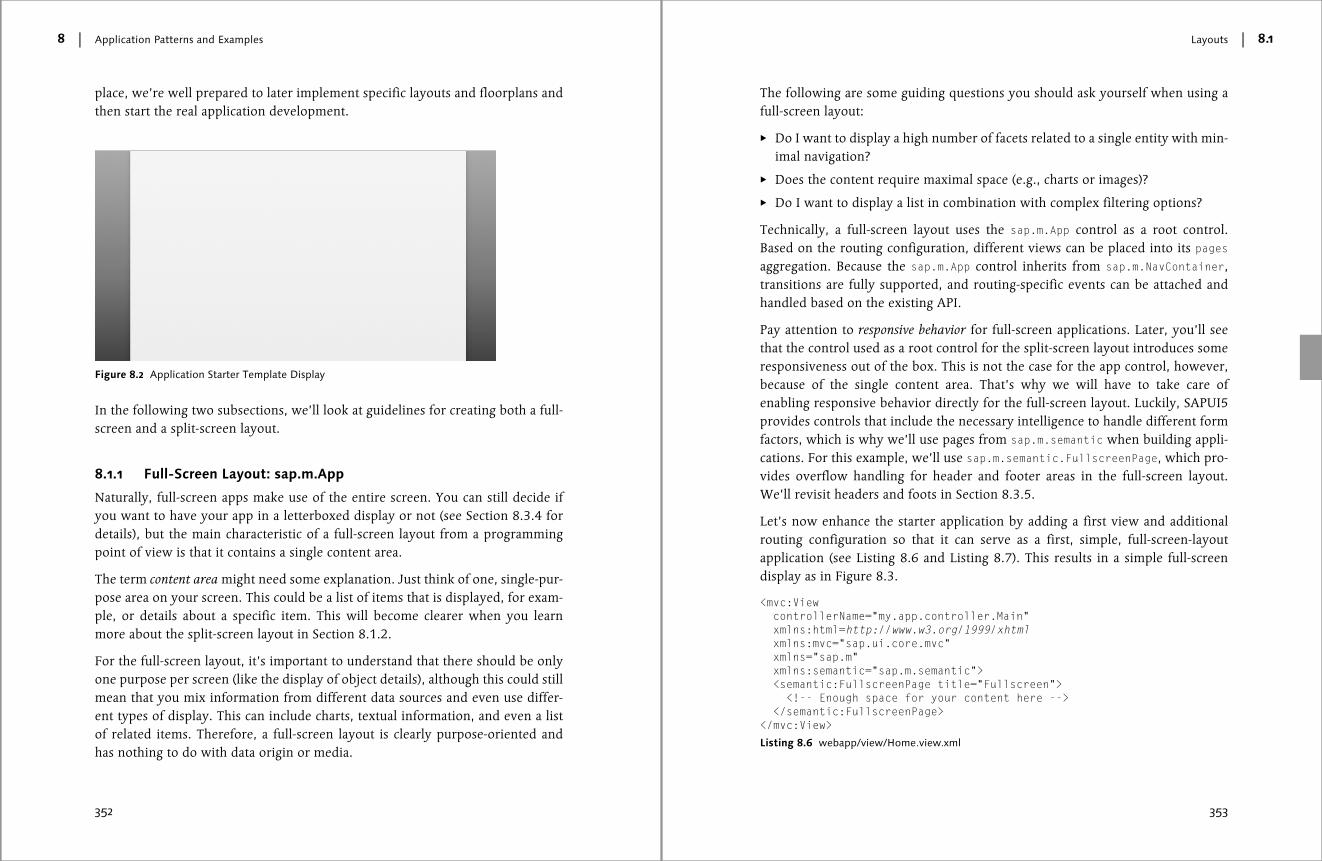
The result should now look like Figure 8.2: a simple, letterboxed sap.ui.core.UIComponent display that’s still unspectacular. However, with this foundation in
Application Patterns and Examples8
352
place, we’re well prepared to later implement specific layouts and floorplans andthen start the real application development.
Figure 8.2 Application Starter Template Display
In the following two subsections, we’ll look at guidelines for creating both a full-screen and a split-screen layout.
8.1.1 Full-Screen Layout: sap.m.App
Naturally, full-screen apps make use of the entire screen. You can still decide ifyou want to have your app in a letterboxed display or not (see Section 8.3.4 fordetails), but the main characteristic of a full-screen layout from a programmingpoint of view is that it contains a single content area.
The term content area might need some explanation. Just think of one, single-pur-pose area on your screen. This could be a list of items that is displayed, for exam-ple, or details about a specific item. This will become clearer when you learnmore about the split-screen layout in Section 8.1.2.
For the full-screen layout, it’s important to understand that there should be onlyone purpose per screen (like the display of object details), although this could stillmean that you mix information from different data sources and even use differ-ent types of display. This can include charts, textual information, and even a listof related items. Therefore, a full-screen layout is clearly purpose-oriented andhas nothing to do with data origin or media.
Layouts 8.1
353
The following are some guiding questions you should ask yourself when using afull-screen layout:
� Do I want to display a high number of facets related to a single entity with min-imal navigation?
� Does the content require maximal space (e.g., charts or images)?
� Do I want to display a list in combination with complex filtering options?
Technically, a full-screen layout uses the sap.m.App control as a root control.Based on the routing configuration, different views can be placed into its pagesaggregation. Because the sap.m.App control inherits from sap.m.NavContainer,transitions are fully supported, and routing-specific events can be attached andhandled based on the existing API.
Pay attention to responsive behavior for full-screen applications. Later, you’ll seethat the control used as a root control for the split-screen layout introduces someresponsiveness out of the box. This is not the case for the app control, however,because of the single content area. That’s why we will have to take care ofenabling responsive behavior directly for the full-screen layout. Luckily, SAPUI5provides controls that include the necessary intelligence to handle different formfactors, which is why we’ll use pages from sap.m.semantic when building appli-cations. For this example, we’ll use sap.m.semantic.FullscreenPage, which pro-vides overflow handling for header and footer areas in the full-screen layout.We’ll revisit headers and foots in Section 8.3.5.
Let’s now enhance the starter application by adding a first view and additionalrouting configuration so that it can serve as a first, simple, full-screen-layoutapplication (see Listing 8.6 and Listing 8.7). This results in a simple full-screendisplay as in Figure 8.3.
<mvc:ViewcontrollerName="my.app.controller.Main"xmlns:html=http://www.w3.org/1999/xhtmlxmlns:mvc="sap.ui.core.mvc"xmlns="sap.m"xmlns:semantic="sap.m.semantic"><semantic:FullscreenPage title="Fullscreen"><!-- Enough space for your content here -->
</semantic:FullscreenPage></mvc:View>
Listing 8.6 webapp/view/Home.view.xml

Application Patterns and Examples8
354
"routing": {"config": {
"controlId": "rootControl","controlAggregation" : "pages","viewPath": "my.app.view","viewType": "XML"
},"routes": [{
"name" : "home","pattern": "","target": ["home"]
}],"targets": {
"home": {"viewName": "Home"
}}
},
Listing 8.7 Simple Full-Screen Routing Configuration in manifest.json
Figure 8.3 Simple Full-Screen Layout
Layouts 8.1
355
This is obviously not rocket science: You could easily build upon this foundationwith what you’ve learned in this book already and extend this view now withcontrols and content.
Now, let`s look at what floorplans, defined by the SAP Fiori design guidelines,make use of the full-screen layout:
� Initial pageSingle object display based on user input (search, barcode scanning).
� WorklistSee Section 8.2.1.
� List reportMulti-object display with extended filtering/sorting capabilities.
8.1.2 Split Screen Layout: sap.m.SplitApp
Now, let’s turn our attention to the split-screen layout in SAPUI5. A split screenconsists of at least two content areas displayed side by side. However, this doesnot mean that the two areas are separate from each other; in fact, both contentareas need to be orchestrated such that they’re dependent on each other. One fre-quently used and well-established floorplan in SAP Fiori is the master-detail pat-tern. The selection in the master list determines the display of details of theselected item in the object view. We will look into this pattern in more detail inSection 8.2.2.
One use case that benefits the most from using a split-screen layout is one inwhich you expect your application users to review a high number of items—forexample, in approval scenarios. In this case, you generally want to assure thatusers do not have to execute a high number of back and forth navigations andtherefore want to display the list to select from next to the details to review, all onone screen. Most of us use this pattern on a daily basis; for example, it’s a defaultsetting in most of the local email clients available.
The general build-up of a split-screen layout is similar to what you’ve already seenfor the full-screen layout in Section 8.1.1, with some slight modifications. We canagain make use of the application starter template we created in Section 8.1.

Application Patterns and Examples8
356
We’ll start by using a different root control and some other slight modificationsdown the line. First, we’ll use the sap.m.SplitApp control in Main.view.xml (seeListing 8.8).
<mvc:ViewcontrollerName="my.app.controller.Main"xmlns:html=http://www.w3.org/1999/xhtmlxmlns:mvc="sap.ui.core.mvc"xmlns="sap.m"><SplitApp id="rootControl"/>
</mvc:View>
Listing 8.8 Main.view.xml for Split-Screen Layout
The sap.m.SplitApp control is a pretty clever composite control that providestwo sap.m.NavContainer elements internally as hidden aggregations that can bepopulated by making use of two public aggregations: masterPages and detail-Pages. We can therefore use the routing configuration to handle the placement ofviews into these aggregations and again use routing events if needed. The mas-terPages and detailPages are derived from the internal navigation containersthat are wrapped and exposed by the sap.m.SplitApp control. Before we lookinto the routing configuration in detail, let’s first create two views. For the splitscreen with sap.m.SplitApp, we can use specific semantic page controls—one forthe masterPages aggregation (see Listing 8.9), and one for detailPages (see Lis-ting 8.10).
<mvc:Viewxmlns:html=http://www.w3.org/1999/xhtmlxmlns:mvc="sap.ui.core.mvc"xmlns="sap.m"xmlns:semantic="sap.m.semantic"><semantic:MasterPage title="Master">
<!-- Enough space for your content here --></semantic:MasterPage>
</mvc:View>
Listing 8.9 Master.view.xml with sap.m.semantic.MasterPage
<mvc:Viewxmlns:html=http://www.w3.org/1999/xhtmlxmlns:mvc="sap.ui.core.mvc"xmlns="sap.m"xmlns:semantic="sap.m.semantic"><semantic:DatailPage title="Detail">
Layouts 8.1
357
<!-- Enough space for your content here --></semantic:DetailPage>
</mvc:View>
Listing 8.10 Detail.view.xml with sap.m.semantic.DetailPage
Now, let’s modify and enhance the existing routing configuration. We want toensure that both Master.view.xml and Detail.view.xml are displayed in therespective aggregations of the root control when the application is started.
To achieve this, let’s quickly revisit what you learned in Chapter 4, Section 4.7about how routing works in SAPUI5. The routing configuration is built up by con-figuring the router globally in the config setting and can then be enriched forspecific routes and targets. In that sense, the configuration for targets is more spe-cific than the one for routes, and configuration options can even be overridden.For the current scenario, we’ll therefore have specific targets that define theirown aggregations to address the two content areas in sap.m.SplitApp accord-ingly. Compared to the routing configuration for the full-screen layout, we’ll havetwo additional targets for every route. Here, the sequence makes a difference.This is because sap.m.SplitApp handles the display of views based on the currentscreen size and therefore includes responsiveness across form factors out of thebox. Figure 8.4 shows that the control displays differently across device types.
Figure 8.4 Responsiveness of sap.m.SplitApp
You can influence this control behavior with the routing configuration. To do so,define the targets per route in the right sequence with the target you want to havedisplayed on a phone, on which only one content area will be displayed, for this
Phone Tablet (portrait) Tablet (landscape)

Application Patterns and Examples8
358
route in the array of targets. For the default route, with an empty hash, you’llmost likely choose the master view. In that case, on a tablet in portrait mode,you’ll see the details view and a button in the header; clicking on that button willslide in the master view (see Listing 8.11).
"routing": {"config": {
"controlId": "rootControl","viewPath": "my.app.view","viewType": "XML"
},"routes" : [
{"pattern" : "","name" : "main","target" : ["detail", "master"]
}],"targets" : {
"master" : {"viewName" : "Master","controlAggregation" : "masterPages"
},"detail" : {
"viewName" : "Detail","controlAggregation" : "detailPages"
}}
},
Listing 8.11 Routing Configuration in manifest.json
sap.m.SplitAppModes
In addition to its default behavior, sap.m.SplitApp offers four different modes for han-dling the masterPages aggregation display on mobile devices. The mode property canbe set either as static on the declaration of the control in the XML or as dynamic in Java-Script using the default setter. The modes include the following:
� ShowHideMode (default)Master hidden in portrait mode
� StretchCompressModeMaster in a compressed version in portrait mode
� PopoverModeMaster shown in a popover in portrait mode
Floorplans 8.2
359
� HideModeMaster initially hidden in portrait and landscape
In SAPUI5, there are several controls that can be used to create an applicationwith more than one content area. Most of these examples are part of thesap.ui.layout library:
� sap.ui.layout.Splitter
� sap.ui.layout.DynamicSideContent
� sap.ui.layout.ResponsiveSplitter
In this section, we walked through the split-screen layout. In the next section,we’ll use the skeleton layouts of our full- and split-screen layouts in floorplans.
8.2 Floorplans
In this section, we’ll take the layout skeletons we built in Section 8.1 and extendthem to match their respective floorplans with all the needed functionality. We’llactually take this one step further and build two applications that we can later usein Section 8.4 to integrate into SAP Fiori Launchpad and make use of some of thefeatures the launchpad provides for cross-application navigation.
In Section 8.2.1, we’ll build a worklist that displays data from SalesOrder enti-tySet in a demo service. Because each SalesOrder item is associated with a spe-cific BusinessPartner in the service, we’ll also build a business partner addressbook in Section 8.2.2 using the master-detail layout.
Note
In the following sections, we outline the most important features and cornerstones ofSAPUI5 application development. Because application development with SAPUI5 couldeasily fill more than a single chapter, we’ll only give examples of certain application pat-terns here. We’ll also describe some shared application features in Section 8.3. Here isa list of application best practices that should be followed but could not be described orused in the scope of this chapter:
� Usage of i18n textsDo not use hard-coded strings in XML or JavaScript to be displayed in the view.Always use texts that can be translated centrally.

Application Patterns and Examples8
360
� Usage of fixed IDs for controlsAlways add a fixed ID to all controls that are not used as templates in aggregations.
8.2.1 Worklist
In this section, we’ll take the full-screen layout we created in Section 8.1.1 andextend the coding to match the worklist floorplan. The worklist floorplan can beused for all applications that should display a number of work items. Work itemsare items that need to be processed by the user. For example, stock managementis a use case in which users have to ensure a balanced stock level and can triggeractions on individual items. Applications should display the most relevant infor-mation in a list of all items on the first screen, allow users to review more detailedinformation per item on a second screen, and generally offer processing options.If we stay with the stock management use case, these processing options couldinclude reordering or discontinuing items. The SAPUI5 Demo Kit includes a tuto-rial covering how to build this use case.
We’ll now lay the foundation for a worklist by creating the views and adding theessential controls.
Worklist Table
The actual worklist is technically a responsive table (sap.m.Table). We’ll add thetable to the Home.view.xml file created in Section 8.1, but will rename it to Work-list.view.xml. The user should be offered additional options to limit or refine theresults displayed in the worklist. This can be achieved by using filters, search, orsorting capabilities, which can be triggered by controls displayed via sap.m.Tool-bar. sap.m.Toolbar can be added to the headerToolbar aggregation of the respon-sive table.
For a nice display, we’ll also add a responsive-margin-css class provided bySAPUI5 and bind it to SaleOrderSet in the OData service. To have a minimal foot-print on the screen, we’ll also show some bound properties via sap.m.Column-ListItem and add a custom action to the table using sap.m.Button.
The simple version shown in Listing 8.12 leads to the display shown in Figure 8.5.
Floorplans 8.2
361
Note
Custom actions on the worklist are an optional way to provide direct access to com-monly used functionality for the user. You can decide to add the actions directly on thelist based on whether the information available initially justifies an action to be trig-gered. Another option is to require actions to be performed initially in every case.
<Tableid="table"class="sapUiResponsiveMargin"width="auto"items="{path : '/SalesOrderSet'
}"><headerToolbar><Toolbar>
<TitleId="title"text="Manage Sales Orders"/>
<ToolbarSpacer/><SearchFieldwidth="auto"/>
<OverflowToolbarButton icon="sap-icon://filter"/><OverflowToolbarButton icon="sap-icon://sort"/>
</Toolbar></headerToolbar><columns><Column>
<Text text="Customer"/></Column><Column>
<Text text="Net Amount"/></Column><Column/>
</columns><items><ColumnListItem vAlign="Middle">
<cells><Link text="{CustomerName}"/><Text text="{NetAmount}"/><Button text="Create Incoive"/>
</cells></ColumnListItem>
</items></Table>
Listing 8.12 sap.m.Table as Worklist

Application Patterns and Examples8
362
Figure 8.5 Simple Worklist Page
Now, let`s add two more things to the application in this step: an item count inthe list indicated next to the table title and search functionality.
Item Count in Table Title
Here, we need to update the displayed item count number whenever the bindingof the responsive table is updated. Luckily, this event exists on the table control,and we can simply attach to it by adding updateFinished="onTableUpdateFin-ished" to the control constructor in the view. We can then implement the han-dler function on the controller, as shown in Listing 8.13. Here, we can receive thetotal count of items available on the backend based on the current filter as aparameter from the argument of the callback. With this information, we canupdate the title control.
To achieve a nice display, as shown in Figure 8.6, we need two numbers here. Inaddition to the total number of items available in this collection, we also can display
Floorplans 8.2
363
the number of items currently displayed on the screen. This makes sense if thegrowing feature of the list is enabled and if your users most likely will have to dealwith a high number of items.
onTableUpdateFinished : function(oEvent) {var sTitle = "Sales Orders",
oTable = this.getView().byId("table");//catch cases where the backend is not supporting remote countif(oTable.getBinding("items").isLengthFinal()) {
var iCount = oEvent.getParameter("total"),iItems = oTable.getItems().length;
sTitle += " (" + iItems + "/" + iCount + ")";}this.getView().byId("title").setText(sTitle);
}
Listing 8.13 Event Handler Function to Set Number of Items
Figure 8.6 Item Count with Two Numbers
Handle Search Input and Filter the Table
Search capabilities give users the feeling of direct control over the displayed list.To increase the effect of this capability even more, we’ll use the liveSearch eventthat sap.m.SearchFiled provides and will pass a handler function to it by addingliveChange="onSearch" to the constructor in the XML. Technically, we’ll use fil-tering on the binding in this handler function. These work equally as well as sim-ply implementing a predefined filter with the buttons directly.
In the handler function to be implemented on the controller (see Listing 8.14),we’ll receive the query string entered and instantiate a new sap.ui.model.Filterobject that will get this query string, a sap.ui.model.FilterOperator element ofchoice and the property to be filtered against. Because it’s likely that applicationusers do not want to search on only one column, we’ll create a filter that will per-form a search on several columns. The buildup is a little more complex, but it’sreally nothing more than wrapping several sap.ui.model.Filter objects intoone, which is later handed over to the filter function on the binding. For this

Application Patterns and Examples8
364
filter function, we can also choose between the filter modes. In Figure 8.15, we’llset it to Application, which will come at the cost of an additional round-trip tothe server with every new filter request. This can be costly, especially when livesearch is used, and might lead to a bad user experience, especially for applicationsmostly used on mobile devices. The alternative method is to use Client, whichwould trigger only local filtering. The result is shown in Figure 8.7.
onSearch : function(oEvent) {var sSearchValue = oEvent.getSource().getValue(),aFilters = [];if(sSearchValue.length > 0) {
var oFilterName = new Filter("CustomerName", sap.ui.model.FilterOperator.Contains, sSearchValue);
var oFilterID = new Filter("SalesOrderID", sap.ui.model.FilterOperator.Contains, sSearchValue);
aFilters.push(new Filter({filters : [oFilterID, oFilterName],And : false}));
}this.getView().byId("table").getBinding("items").filter(aFilters,
"Application");}
Listing 8.14 Handler Function for Search Functionality
Figure 8.7 Search Handling in Worklist
Now that we’ve added the worklist table functionality for the worklist floorplan,in the next section, we’ll provide functionality for navigation to the detail view.
Navigation and Detail View
In general, a worklist can offer two different types of navigation: Inner-applicationnavigation, triggered by clicking on one of the list items, which brings the user toa second screen within the application that shows details for the selected item;and cross-application navigation, which can jump to a second application. We’lllook into cross-application navigation in more detail in Section 8.4. Jumping to
Floorplans 8.2
365
an external website triggered by clicking a link can be a valid use case for a work-list, but this functionality should not be seen as mandatory and should be imple-mented based on user requirements.
Now, let’s build a simple second screen and set up the routing to ensure that nav-igation within the application based on a click as well as deep links is possible.We’ve covered how to do this in code multiple times up to this point throughoutthe book. However, we’ll now perform these functions based on the DescriptorEditor provided by the SAP Web IDE. This tool offers UI-based configuration ofthe manifest.json file and opens by default when opening any manifest.json filein the SAP Web IDE. Based on the work we’ve done already, when you open theDescriptor Editor and click on the Routing tab, the Descriptor Editor should looklike Figure 8.8.
Figure 8.8 Descriptor Editor in SAP Web IDE

Application Patterns and Examples8
366
First, let’s add a new route. To do so, click on the + button in the Routes section,and a new route will appear. Change the name for the new route; let’s call itsalesOrder. Because we want to have deep link capabilities for the new route,we’ll also define a pattern here. Any string would work here, but we suggest mak-ing the link transparent to the user and calling it SalesOrder/{SalesOrderID}.The identifier in curly brackets now will be used to identify the distinct salesorder to be displayed and handed over to the navigation step. This route nowneeds a target.
Note
The number of identifiers used in application patterns is determined by the number ofidentifiers defined in the metadata for the specific entity set. Otherwise, single entitiescannot be addressed correctly.
In the Manage Targets section (refer to Figure 8.8), click on + and a popup willopen (see Figure 8.9) in which you can define the name for the new target. Let’scall it salesOrder.
Figure 8.9 Add Target
This target is created instantly, so we can configure it now. Here, all we have todo is define the View Name (SalesOrder) and we’re done. Finally, we need toassociate this target with the route. To do so, click on + in line with the route; apopup will open, and you can select salesOrder (see Figure 8.10).
Figure 8.10 Target Assignment in the Descriptor Editor
Floorplans 8.2
367
Now, save the changes and run the application with a hash like so: #SalesOrder/4711. You’ll see an error in the console indicating that SalesOrder.view.xml couldnot be loaded, which tells us that we did everything correctly and have to createthe view now.
We’ve performed similar tasks related to navigation in previous chapters (seeChapter 4), so we don’t want to repeat the individual steps here; instead, try toimplement it on your own. When doing so, please keep in mind to separate con-cerns. The navigation step in particular may tempt you to build a close interactionbetween the two controllers. Use the router here to abstract the interaction bycalling the navTo function on one controller and attaching two patternMatchedevents on the other controller. The complete code can be found in the Git repos-itory that accompanies this book. Here’s a brief outline of the steps to follow:
1. Create a new view called SalesOrder.view.xml in the view folder, and add somecontrols and relative binding. Don’t forget to add Back button handling.
2. Attach the patternMatched event in the controller for this view and bind theview to the SalesOrderID in the hash. Ensure that the metadata is alreadyloaded (use metadataLoaded promise on the OData Model; see Listing 8.15).
this.getOwnerComponent().getRouter().getRoute("salesOrder").attachPatternMatched(function(oEvent) {
var that = this;var sSalesOrderID =
oEvent.getParameter("arguments").SalesOrderID;this.getView().getModel().metadataLoaded().then(function(){var sObjectPath =
that.getView().getModel().createKey("SalesOrderSet", {SalesOrderID : sSalesOrderID
});that.getView().bindElement({
path : "/" + sObjectPath,parameters : {
expand : "ToLineItems"}
});});
}.bind(this));
Listing 8.15 Handling Binding on the SalesOrder.controller.js
3. Implement a press handler function that triggers navigation when an item inthe worklist is clicked on.

Application Patterns and Examples8
368
Figure 8.11 shows how the final result looks like, based on the coding in the Gitrepository. Still, there are lots of variations possible, and the service we’re usingallows for displaying lots of related and additional information. For example, youcould display the list of products associated in the sales orders here, the geo infor-mation of the supplier, and much more.
Figure 8.11 Worklist and SalesOrder Views
8.2.2 Master-Detail
In this section, we’ll extend the split-screen layout we built in Section 8.1.2 andextend it to a master-detail floorplan. The master-detail floorplan, because of itsdifferent dependent content areas, is complex to implement, and its details andpitfalls could fill an entire book on its own. Therefore, we’ll only explore its com-plexity and learn how to overcome some trouble areas of the master-detail floor-plan—just enough to get a better understanding of SAPUI5 application develop-ment for this complex pattern overall. If you want to build a master-detailapplication in one of your projects, we highly recommend using the templateavailable in the SAP Web IDE. The SAP Web IDE covers best practice implemen-tation for all these little, but sometimes annoying details.
Before we dive deeper into the technical details for this floorplan, let’s first dis-cuss valid use cases in which master-detail should be your floorplan of choice.The buildup is pretty simple: We always have a list in the master section that dis-plays a set of items. Based on what’s selected in this list, a detail area providesmore relevant information for the selected item. If you think of software you useon a daily basis, you’ll find some examples of master-detail floorplans in action.
Worklist.view.xml SalesOrder.view.xml
Floorplans 8.2
369
Think of email clients, local as well as web-based: Most of them have a list ofemails on the left showing the most important information, and when one emailis selected, the entire email text appears in a bigger content area on the right. Or,if you’re an iPad user, you can see the master-detail pattern at work in yourdevice settings.
From these examples, we can derive some golden rules for deciding when to usemaster-detail floorplans in applications. First, master-detail is helpful in cases thatrequire minimal navigation, such as when you want your application users to beable to quickly switch between different business objects while always keepingthe overview of the complete set of objects available.
However, this makes only sense if the amount of data displayed on the detailsscreen is easy to consume. In the email client, the email content displayed uponselection is something a user can handle. The user clicks on an email stub and seesthe entire email displayed. This pattern would simply not work if not only thisemail but six other related emails were displayed at once. This means that weshould only use the master-detail floorplan if the amount of data to be displayed onthe details side is strongly related to the content to be displayed on the master list.
Master List
Now, let’s move into some hands-on work with the master-detail floorplan bycreating the master list. We’ll start by creating the controllers for the master viewand the detail view, then we’ll register them in the view, and then add the files tothe controller folder. (We created the application skeleton with a sap.m.SplitAppcontrol and basic routing that displays the empty master and detail pages in Sec-tion 8.1.)
In this section, we’ll first concentrate on the master list and extend Mas-ter.view.xml (see Listing 8.16) with sap.m.List that we’ll bind to BusinessPart-nerSet in the OData service. sap.m.List offers several modes for single or multiselect and some that affect general appearance. We’ll use sap.m.List as Single-SelectMaster, the optimized mode for single selection on desktop devices. Indi-vidual items in this list will be displayed using sap.m.ObjectListItem to show aminimal set of details per item in a nice, card-like display. We’ll also add a searchfield in the subHeader of the semantic page. (We covered search handling in Sec-tion 8.2.1.) Listing 8.14 provides the binding and event handlers.

Application Patterns and Examples8
370
<semantic:subHeader><Bar id="headerBar">
<contentMiddle><SearchField id="searchField" search="onSearch"
width="100%"/></contentMiddle>
</Bar></semantic:subHeader></semantic:content><Listid="list"selectionChange="onItemPressed"mode="SingleSelectMaster"growing="true"growingScrollToLoad="true
items="{path: '/BusinessPartnerSet'
}"><items>
<ObjectListItemtitle="{CompanyName}"intro="{WebAddress}"/>
</items></List></semantic:content>
Listing 8.16 Master List with Binding and Event Handlers in Place
Object View
For Detail.view.xml, we’ll opt for a minimal display for now and will addsap.m.ObjectHeader with one bound property, which we’ll bind later to themodel relative to the selected item. Doing this requires one simple line of code inthe content aggregation of sap.m.semantic.SemanticDetailPage: <ObjectHeadertitle="{CompanyName}"/>.
Synchronize Master and Detail
Because we now have some basic content for our two content areas in place, weneed to orchestrate these two content areas in such a way that any selection in themaster view reflects the content that is displayed in the detail view. To do so, weneed to implement three features: handling of master list selections, full supportfor deep links, and handling of the default route. Finally, we have to follow somesteps to ensure the master-detail floorplan can function for mobile scenarios aswell.
Floorplans 8.2
371
Note
For now, we’ll only address ideal cases. Error handling and “not found” handling scenar-ios will be covered in Section 8.3.
Handling of Master List Selections
Currently, the application has a master list with data, but no visible details aboutthis data and no selectable content. In this section, we’ll add some depth to themaster list by providing details for its data upon selection. The first thing we wantto do is create a new route, called detail, which will use a pattern from which wecan extract the item ID later (see Listing 8.17). The targets we established previ-ously can be reused; only the sequence is important. In Section 8.1.2, you learnedthat the first target defined in routes that are used with sap.m.SplitApp is to bedisplayed on mobile devices. It can be assumed that a user opening an applicationwith a deep link wants to see the details page and not the master page first, sowe’ll add the detail target first and the master target second into the array.
{"name": "detail","pattern": "BusinessPartner/{BusinessPartnerID}","greedy": false,"target": ["master", "detail"]
}
Listing 8.17 Master-Detail Route for Deep Links
We will now add the function (onItemPressed) to handle selections in Mas-ter.controller.js (see Listing 8.18). We’ve done something similar several othertimes in this book (see Chapter 4). One particular function of the selection-Change event that we’re using now is that you get the list item that was pressed asa parameter in the callback argument instead of calling oEvent.getTarget().From this list item, we get the entity ID from the binding context and trigger nav-igation to the detail route that gets this ID as a parameter.
onItemPressed : function(oEvent) {var oItem = oEvent.getParameter("listItem");var sID = oItem.getBindingContext().getProperty("BusinessPartnerID");this.oRouter.navTo("detail", {BusinessPartnerID : sID
}, false);},
Listing 8.18 Handling of Press Event on Master List

Application Patterns and Examples8
372
We’ll now attach to the patternMatched event in the Detail.controller.js and bindthe view based on the parameter we just received (see Listing 8.19). Becausesap.ui.model.OData.V2.ODataModel offers some functionality to create the keythat can be used to bind the view (which is handy, especially for entity sets withmore than one key), we can use this function. You just have to be aware that theactual key generated is dependent on the metadata.xml file already loaded andprocessed. We can use a promise provided by sap.ui.model.OData.V2.OData-Model here to secure this.
onInit : function() {this.oRouter = this.getOwnerComponent().getRouter();this.oRouter.getRoute("detail").attachPatternMatched(this.
onDetailRouteHit.bind(this));},
onDetailRouteHit : function(oEvent) {var sID = oEvent.getParameter("arguments").BusinessPartnerID;this.getView().getModel().metadataLoaded().then(function(){
var sObjectPath =this.getView().getModel().createKey("BusinessPartnerSet", {
BusinessPartnerID : sID});this.getView().bindElement({path: "/" + sObjectPath,
});}.bind(this)
}
Listing 8.19 Binding of Detail.view.xml Based on Navigation
Full Support for Deep Links
If you run what we have so far, it will appear as if nothing has changed. The masterlist appears with all the items, and no details are displayed. However, once youselect an item in the list, the detail content area will be updated and will displaywhat we have bound to the list item. We can even see in the URL that the patternwe defined before is filled, and the ID of the selected object is included there. Ifyou now click Refresh in the browser, the detail matching the browser is dis-played, but the focus on the master list for the selected item is not set. Now, let’sselect any item again. It becomes even more obvious that we missed something ifwe change the browser hash manually (e.g., from #/BusinessPartner/0100000000to #/BusinessPartner/0100000004). The detail changes, but the selection on themaster list stays the same.
Floorplans 8.2
373
This is awkward for the user, but luckily we can fix this problem in the Mas-ter.controller.js. Here, we’ll attach to the patternMatched event of the detail routeand handle it in a function we’ll call onDetailRouteHit. Because we’ll have tohandle different cases now and some exceptions, let’s build our example up stepby step. First, we’ll create the functions described previously, (patternMatchedand onDetailRouteHit) plus one additional function that we’ll use to search itemsbased on the key to review all the items the list (see Listing 8.20). The idea is nowto call selectAnItem once the detail route is hit in order to support a deep link.
onInit : function() {// reuse variablesthis.oList = this.byId("list");this.oRouter = this.getOwnerComponent().getRouter();
this.oRouter.getRoute("detail").attachEvent("patternMatched",this.onDetailRouteHit.bind(this));
},onDetailRouteHit : function(oEvent) {var sBusinessPartnerID =oEvent.getParameter("arguments").BusinessPartnerID;this.selectAnItem(sBusinessPartnerID);
}selectAnItem : function(sBusinessPartnerID) {var sKey = this.getView().getModel().createKey("BusinessPartnerSet", {
BusinessPartnerID : sBusinessPartnerID});var oItems = this.oList.getItems();oItems.some(function(oItem) {if (oItem.getBindingContext() && oItem.getBindingContext().
getPath() === "/" + sKey) {this.oList.setSelectedItem(oItem);return;
}}, this);
},
Listing 8.20 Handling Simple Deep Links: First Try
We should now expect that the deep links should work. However, when we startthe application to test it with a deep link (e.g., #/BusinessPartner/0100000000),the deep link doesn’t work. An analysis with the (F12) tools in your browser andadding a breakpoint to the selectAnItem function uncovers that when we call thisfunction, there are no items in the list yet (see Figure 8.12). This is rather inter-esting and offers more insight into the lifecycle of routing itself. When the event

Application Patterns and Examples8
374
triggered, the list binding had not yet been resolved. Therefore, the list had noitems to select from.
Figure 8.12 Analysis of Item-Selection Failure
We’ll need to ensure that sap.m.List resolves its binding and that items are avail-able to select from before the event is thrown. The easiest way to do this is tohook into an event called updateFinished that we can attach to. This event isthrown once the list binding update has completed. Therefore, we can be surethat there are items in the list by that point:
this.oList.attachEventOnce("updateFinished", function() {this.selectAnItem(sBusinessPartnerID);}.bind(this));
With this change, the deep links should work. However, we’ll still run into issueslater when we want to handle errors or “not found” cases, because we do nothave this error as a status we can request at any time. We can solve this issueusing a JavaScript promise (see Listing 8.21). This becomes a little complex,because we have to ensure two things now: First, that the view already has itsbinding, for which we’ll use eventDelegate functionality to attach to an event ofthe parent control; and second, that the dataRequest event can be used to iden-tify error cases. Now, we also can react when no data could be loaded for any rea-son. We’ll implement this later in Section 8.3.2. Add the code in Listing 8.21 tothe onInit method of Master.controller.js now.
Floorplans 8.2
375
var that = this;this.oListBindingPromise = new Promise(function(resolve, reject) {
that.getView().addEventDelegate({onBeforeFirstShow: function() {that.oList.getBinding("items").attachEventOnce("dataReceived",function(oEvent) {if(oEvent.getParameter("data")){
resolve();} else {
reject();}
}, this);}.bind(that)
});});
Listing 8.21 Promise to Decouple Navigation from Events
We now simply select an item programmatically once oListBindingPromise hasresolved. However, changing the hash manually does not change the selection.We’ll need to add some more logic to the onDetailRouteHit function to get thisright.
We’ll now handle these three cases individually. First, we’ll handle the case inwhich a user selects an item manually. In this case, we simply do nothing. In thesecond case, the classical deep link scenario, we select an item once the bindinghas resolved. For all other cases, mainly the manual hash change is handled here,and we can simply select the item straight away (see Listing 8.22).
onDetailRouteHit : function(oEvent) {var sBusinessPartnerID =oEvent.getParameter("arguments").BusinessPartnerID;var oSelectedItem = this.oList.getSelectedItem();if (oSelectedItem && oSelectedItem.getBindingContext().getProperty("BusinessPartnerID") === sBusinessPartnerID) {return;
} else if (!oSelectedItem) {this.oListBindingPromise.then(function() {
this.selectAnItem(sBusinessPartnerID);}.bind(this));
} else {this.selectAnItem(sBusinessPartnerID);
}},
Listing 8.22 Optimized Detail Route Handling

Application Patterns and Examples8
376
Handling the Default Route: Empty Pattern
As a last step, we want to cover the empty pattern route. An empty pattern routeis hit whenever an application starts without a hash. In such a case, the currentapplication doesn’t display anything, which is not preferred; the preferred optionis to display the first list item details. In addition, we’ll also show that the firstitem is selected. Most of the code in Listing 8.23 should make sense by now andthe function will be called once the master route was hit. Again, we have toensure that the promise is resolved before we can determine the first item andtrigger the navigation for the detail.
onMasterRouteHit : function() {this.oListBindingPromise.then(function() {
var oItems = this.oList.getItems();this.oList.setSelectedItem(oItems[0]);this.oRouter.navTo("detail", {
BusinessPartnerID : oItems[0].getBindingContext().getProperty("BusinessPartnerID")
});}.bind(this));
},
Listing 8.23 Empty Pattern Route Handling
Support for Mobile Devices
For desktop devices and tablets in landscape mode, our application should workfine. Still, we also have to plan for devices that do not offer enough real estate tofit an entire master-detail layout on one screen. To do so, we’ll make use ofdynamic expressions in XML and the sap.ui.Device API that identifies devicetype, touch support, and much more on application startup.
If you now run this application in device emulation mode in Google Chrome withan empty hash, you’ll see that it instantly jumps to the detail screen for the firstitem, which is not our intent. We want it to stay on the master list if the mainroute is hit. The following simple return statement that only comes into play onmobile devices in the function that handles the main route will fix this problem:
if(sap.ui.Device.system.phone){ return;}
If you rerun the application in Google Chrome now, you’ll land on the master list.If you select an item in the master list, the navigation brings you to the detailscreen.
Floorplans 8.2
377
Everything seems to work, but from the detail screen there is no easy way to getback to the master list page. We have to add a Back button to Detail.view.xml andensure that it will only be displayed on phones. Again, we’ll use the sap.ui.DeviceAPI, this time as a dynamic expression directly in XML and based on the same pathwe used previously in the return statement:
showNavButton="{= ${device>/system/phone}}"navButtonPress="onNavButtonPressed"
We’ve also added the name of a handler function that will navigate back to themaster list; we’ll will implement this function in Detail.controller.js like this:
onNavButtonPressed : function(){this.oRouter.navTo("master");}
If you click on the Back button in the top left of the detail view now, you’rereturned to the master list. However, one slightly unfortunate detail is that thelast item selected is still selected in the master list. This makes no sense, becausewe don’t have something that reflects the selection on the detail side of thescreen. We can suppress this selection in the list by using a different listMode.We now have listMode set to SingleSelectMaster. We’ll also use another expres-sion to set listMode to None on mobile devices, like so:
mode="{= ${device>/system/phone} ? 'None' : 'SingleSelectMaster'}"
This change will make some more changes necessary, because the listMode set toNone will also result in the selectionChange event no longer being thrown. So far,we’ve used this event to handle clicks on list items. Now, we’ll have to add apress handler for individual list items instead. It’s possible to handle clicks onmobile devices differently from clicks on desktop devices by simply defining twohandler functions. However, in the case, the same function will work for bothtypes of devices. We also have to dynamically set the type of the list items toActive on mobile devices to make the items clickable, like so:
type="{= ${device>/system/phone} ? 'Active' : 'Inactive'}"press="onItemPressed"
We need to make one more adaption to the handler function. Because the selec-tionChange event returns the list and the item as a parameter and the press eventon an individual item returns itself as the source of the event, we’ll have to coverboth cases in the handler:

Application Patterns and Examples8
378
var oItem = oEvent.getParameter("listItem") || oEvent.getSource();
One last feature we want to handle differently on mobile devices is the way theuser can refresh the master list. For desktop devices, we already display a Refresh
button in the Search field, but for touch-supported devices, we should to use apull-to-refresh feature to handle refreshing the master list. This feature is fairlysimple to add. On sap.m.SearchField, we can add a dynamic expression that willset the showRefreshButton property for us:
showRefreshButton="{= !${device>/support/touch} }"
We’ll also add a sap.m.PullToRefresh control to the content aggregation of thesemantic page. Again, we’ll let a dynamic expression handle the visibility for us:
<PullToRefresh id="pullToRefresh"refresh="onRefresh"visible="{device>/support/touch}"/>
To make sap.m.PullToRefresh work, we have to do two more things:
1. Hide the control once the refresh is over (ideally in the updateFinished eventon the list), like so:
this.byId("pullToRefresh").hide();
2. Perform the actual refresh on the list binding (in the refresh event handler),like so:
this.oList.getBinding("items").refresh();
Note
sap.m.PullToRefresh has to be used as the first element in the content aggregation ofthe first sap.m.ScrollContainer on the page. Otherwise, you might experience severerendering issues that might break the usability of your application completely.
The control also could be used on nontouch devices, resulting in the display of a click-able Refresh area.
8.3 Additional Application Features
Independent from any floorplan, the apps within certain layouts generally havesome qualities or features that are always needed. Application users take most ofthese features for granted. We have to confess that if we put ourselves into the
Additional Application Features 8.3
379
position of application users—which we are, in fact, on a daily basis—we wouldexpect, for example, to be notified if something goes wrong in an app. Many of uswould associate this with some technical error—for example, when writing datato the backend—whereas others may first think about some deep link that couldnot be resolved as expected. Error handling and “not found” handling only formthe tip of the iceberg.
However, there is much more to be considered in application development ingeneral—not only ensuring that applications work as expected from a technicalperspective, but also ensuring that they provide the user with the best possiblesupport to fulfill daily routines.
In the following sections, we provide a quick rundown of technical and userexperience-related shared application qualities and how SAPUI5 offers support intheir implementation.
8.3.1 Not Found Handling
Error code 404 may be the only status code that even casual users understand.Many websites and web apps tend to spit out this technical information on thescreen whenever the page a user wants to access is not available. Although therehas been a trend in recent years to enrich these “not found” pages with funnydesigns, the numeric code seems never to disappear.
In this section, you’ll learn about “not found” handling within the master-detailfloorplan. Since version 1.28, SAPUI5 has provided a page to be displayed in notfound cases, which is sap.m.MessagePage; it should be used as a single control ina view, like so:
<mvc:View xmlns:mvc="sap.ui.core.mvc" xmlns="sap.m"><MessagePage/></mvc:View>
Figure 8.13 shows the default display of this page.
Admittedly, its design is very business-like, but it’s fit for its purpose. We’ll learnhow to tweak it a bit later, but first, let’s look at some use cases.
On websites, you will typically have only one notFound page that handles all linksthat can’t be resolved. When using business applications, more precise feedbackfor the user is desirable, and with a well-defined, single-purpose application, it’s

Application Patterns and Examples8
380
easy to narrow down cases to be handled. We’ll look at how to do so in the fol-lowing subsections.
Figure 8.13 sap.m.MessagePage with Default Settings
BusinessPartnerNotFound Scenario
In routing with SAPUI5, you can define routes that have specific patterns thatshould be reflected in the URL. That’s what we call a deep link.
Because these patterns often hold the ID that matches a specific data set that couldlater be used to bind it to a view (for a master-detail example, see Listing 8.24),we have to handle all those cases in which individual IDs can’t be found in thedatabase. The aim is to show a not found page that gives some details about whatwent wrong and offers a link back to the application in a valid state whenever theuser enters the application with a deep link to a business partner that does notexist.
{"name": "detail","pattern": "BusinessPartner/{BusinessPartnerID}","greedy": false,"target": ["master", "detail"]}
Listing 8.24 Route with ID in Pattern
Additional Application Features 8.3
381
Now, let’s define a target that should be displayed when a specific business partnercan’t be found. We’ll need a new view to handle these cases (see Listing 8.25). We’llreference a new view in the route and call it BusinessPartnerNotFound.view.xml.
"businessPartnerNotFound": {"viewName": "BusinessPartnerNotFound","controlId": "rootControl","controlAggregation": "detailPages"
},
Listing 8.25 Target for ObjectNotFound Scenarios
We’ll create this view accordingly and also customize sap.m.MessagePage a littleto create a nice display (see Listing 8.26). Because the view will be displayed inthe detailPages aggregation, we again have to make sure that navigation back ispossible on mobile devices and must use an expression to show a button for suchnavigation.
<mvc:ViewcontrollerName="my.app.controller.Main"xmlns:mvc="sap.ui.core.mvc"xmlns="sap.m"><MessagePageicon="sap-icon://doctor"navButtonPress="backToHome"showNavButton="{device>/system/phone}"text="BusinessPartner not found"title="Something went wrong"><customDescription>
<Link text="click here to get back to main page"press="backToHome"/>
</customDescription></MessagePage>
</mvc:View>
Listing 8.26 BusinessPartnerNotFound.view.xml
We’ll simplify a bit by using the existing Main.controller.js file to implement thehandler functions for not found cases. In a real application, it might make sense tohave an shared controller for these cases. For the back navigation, we’ll use thesame logic as in Section 8.2.2. To achieve this behavior and the resulting display,shown in Figure 8.14, we have to add some logic to Detail.controller.js, in theDetailRouteHit function. We’ll use events of the binding to implement the backnavigation and extend the call of bindElement with the change event. We’ll then

Application Patterns and Examples8
382
display the BusinessPartnerNotFound target whenever no bindingContext is seton the view, indicating some error, as in Listing 8.27.
this.getView().bindElement({path: "/" + sObjectPath,events: {
change: function(){var oView = this.getView();if(!oView.getElementBinding().getBoundContext())){this.oRouter.getTargets().display("businessPartnerNotFound");}
}.bind(this)}
});
Listing 8.27 Handling Business Partner Not Found Scenario
Figure 8.14 Business Partner Not Found Display
Additional Application Features 8.3
383
catchAll Scenario
The second situation we have to handle is generic not found cases, also referredto as catchAll cases. These are cases in which the user has tried to enter the appli-cation with a URL that does not match any pattern defined in the routing config-uration. Luckily, this scenario is easier to implement than the previous scenariobecause it’s not dependent on the application data from the backend. SAPUI5routing provides a generic bypassed route for catchAll. The target(s) that shouldbe displayed in all these cases can simply be handed over to the config.bypassedproperty in the routing configuration, as in Listing 8.28. The target that will bedeclared for bypassed has to be created as well. This can be done as in Listing8.25, but we recommend using a different target and view for generic cases. Thiswill help the user differentiate between the two situations.
"routing": {"config": {"bypassed": {
"target": ["notFound", "master"]}
}}
Listing 8.28 Bypassed Configuration for Generic notFound Cases
Finally, we need to handle existing selections on the master list. Imagine some-one manipulating the hash manually to something that is not defined in any pat-tern. The correct not found page will be displayed, but the selected item remainsthe same. To handle this deselection, attach to the bypassed event routing pro-vided, and release the selection on the master list (see Listing 8.29). The resultshould then be as shown in Figure 8.15.
this.oRouter.attachEvent("bypassed", function() {this.oList.removeSelections(true);
}.bind(this));
Listing 8.29 Handling of List Selections for Bypassed Cases

Application Patterns and Examples8
384
Figure 8.15 Customized sap.m.MessagePage for catchAll Cases
8.3.2 Error Handling
You’ve seen that not found cases and error cases have to be differentiated, andnow we’ll draw a clear line between them. In error cases, a technical error occursthat leads to the application no longer being usable. This also means that the noti-fication for the user should occur in a more disruptive way. Best practice wouldbe to make sure there is a clear indication that they should reload the application.Therefore, we will use a modal dialog for notifying the user. SAPUI5 providessap.m.MessageBox as a convenient API that wraps sap.m.Dialog and additional
Additional Application Features 8.3
385
controls. We’ll handle two cases in the following subsections, but both will bedisplayed in the same sap.m.MessageBox. Therefore, we’ll use a function to bringup the notification and reuse it for both cases (see Listing 8.30). We’ll implementthis function in the Component.js file of our application. Please note that theremay be more than one error raised by the application. To ensure that there will beonly one sap.m.MessageBox displayed, we’ll use a simple flag that indicates that anotification is already present.
_showServiceError: function(sDetails) {if (this._bMessageOpen) {return;
}this._bMessageOpen = true;MessageBox.error("An Error Occurred",{
details: sDetails,actions: [MessageBox.Action.CLOSE],onClose: function() {this._bMessageOpen = false;
}.bind(this)}
);}
Listing 8.30 Generic Error Notification Function
Error Response Specification
In SAP NetWeaver and SAP Gateway OData services, there is an SAP-specific responseprotocol that ensures that all server messages are returned with predictable formatting.This function is handled by sap.ui.model.odata.ODataMessageParser, and all mes-sages can then be accessed through sap.ui.core.message.MessageManager. Becausethese functions currently cover validation-related messages only, generic handling forerror messages cannot be described at this point in time; such handling might varybased on your service implementation and other factors.
We’ll also disable the automatic closing of dialogs on the router target handler,which could be controversial. However, because we will display dialogs and spe-cific pages, and because it’s not possible to synchronize the two events (routingand data requests), disabling automatic dialog closing is a valid option for most ofuse cases. Disable automatic dialog closing as follows:
this.getRouter().getTargetHandler().setCloseDialogs(false);

Application Patterns and Examples8
386
Handling Metadata Errors
For SAPUI5 applications built on top of OData services, there will always be casesin which a metadata call did not result in a success. Let’s handle such cases now.We can simply attach to the metadataFailed event provided by sap.ui.model.V2.ODataModel and display a message box showing details. Let’s also display thegeneric not found page:
this.getModel().attachEvent("metadataFailed", function(oEvent) {this._showServiceError(oEvent.getParameters().getResponse);this.getRouter().getTargets().display("notFound");}.bind(this));
Handling Service Errors
For service errors, we’ll need some more logic, although the overall patternremains the same. We’ll again attach to a model event—in this case, the request-Failed event. However, because this event is thrown for cases we already han-dled using the not found implementation, we’ll have to exclude such cases.Therefore, we’ll make the following assumptions based on the error code theevent provides as part of the parameters: All 404 cases (not found) and all 400cases (parsing error on the server) will not be handled by the error handling,because they’re already covered by the not found handling, resulting in the han-dler function in Listing 8.31.
this.getModel().attachRequestFailed(function(oEvent) {var oParams = oEvent.getParameters();if (oParams.response.statusCode !== "400" &&oParams.response.statusCode !== "404") {
this.getRouter().getTargetHandler().setCloseDialogs(false);this.getRouter().getTargets().display("notFound");this._showServiceError(oParams.response);
}}, this);
Listing 8.31 Handling Request Errors
8.3.3 Busy Handling
As a user, busy handling gives you the feeling that the hard work is done for youby showing a busy indicator. Busy handling is not only the real work an applica-tion is doing but also the responses you get in general regarding the state yourapplication is currently in. We bet there are more apps out there that fake actual
Additional Application Features 8.3
387
busy time just to display nice busy animations than you might imagine. The rea-son for this may be that the screen flickers if the actual request only takes milli-seconds, and the busy indicator will be shown and hidden again instantly. InSAPUI5, there is a default busyIndicatorDelay property on all controls thatdefaults to 500 milliseconds; we should keep it that way instead of delaying theresponse artificially.
Busy handling is important for the perceived performance of an application, espe-cially at startup. It’s good to assume your user has a slow Internet connection. Abusy indicator showing the user that there is some work being done behind thescenes will keep him patient.
Handling the Metadata Call
As for error handling, we can differentiate two cases or, more precisely for thissection, two phases of loading data. First, the OData metadata.xml file isrequested. During this time, the application is not ready to work at all. We’lltherefore set the outer view (Main.view.xml) as busy during this phase. The easi-est way to do so is to set busy as the default behavior in the XML (busy="true")for our root control, and later, when the metadata is loaded or loading failed, sim-ply call setBusy(false), as in Listing 8.32.
// handling the good casethis.getOwnerComponent().getModel().metadataLoaded().then(function() {oRootControl.setBusy(false);
});// handling the bad casethis.getOwnerComponent().getModel().attachMetadataFailed(function() {oRootControl.setBusy(false);
});
Listing 8.32 Metadata Request: Busy Handling
Handling Calls on Individual Controls
While the metadata call is happening, individual requests are triggered only onceat application startup, but binding refresh will occur multiple. Therefore, weshould ensure that busy handling for these cases is in place.
For sap.m.List and sap.m.Table, busy handling is already implemented as adefault, so we don’t have to do anything for these controls. For all other controls,

Application Patterns and Examples8
388
we should use the appropriate events to manage busy handling. However, indi-vidual requests are triggered only once at application startup, but binding refreshwill occur multiple. One rule of thumb for determining this information is tohave all controls bound against the same entity. If we look at the master-detailexample, this entity would be the entire detail page in the current state. However,in real applications, you would most likely fill up the detail screen and may evenexpand the displayed data to a related entity in the service. Possibilities for theservice we’ve been using in this example are shown in Figure 8.16. Now, let’sassume we want to display a list of sales orders next to the business partnerdetails on the details page. In this case, we would handle the busy state for thisarea within the screen separately from the sap.m.ObjectHeader element in whichwe’re displaying the business partner details currently.
Figure 8.16 Related Entities to Business Partners
For handling the busy state, technically, we’d use binding events, as previouslystated. The most appropriate choice would be to set the control to busy once datais requested and release the busy state once data is received by the control. Anexample implementation for this setup can be found in Listing 8.33. Here, we’veimplement the functions in the controller for the view that declares the controlsand added the handler functions to the controls at declaration in XML. The actualimplementation for this minimal example in master-detail is in Listing 8.34.
onDataRequested: function(oEvent) {oEvent.getSource().setBusy(true);
},onDataReceived: function(oEvent) {oEvent.getSource().setBusy(false);
}
Listing 8.33 Generic Busy Handling
this.getView().bindElement({path: "/" + sObjectPath,
Additional Application Features 8.3
389
events: {change: function(){
if(!this.getView().getElementBinding().getBoundContext()){this.oRouter.getTargets().display("businessPartnerNotFo
und");}
}.bind(this),dataRequested: function() {this.getView().setBusy(true);
},dataReceived: function() {
this.getView().setBusy(false);}
}});
Listing 8.34 Master Detail Busy Handling: Minimal Example
8.3.4 Letterboxing
Letterboxing is a term often associated with filming to ensure the original aspectratio when transferring video material across screens with different ratios. This isachieved by using black bars, mostly displayed on the top and bottom of thescreen to narrow the actual screen and fill the spaces that aren’t covered by thefilm itself.
In application development, letterboxing has become a good practice for all caseswhen content is limited. Think of a simple master-detail application that only dis-plays some details for a selected item. In such a case, it’s much easier to ensuregood design for the content on the screen if you can rely on a fixed content area,even on big screens. In addition, your application users will gain a more focusedview.
The application examples we’ve presented so far have always run in sap.m.Shell,which uses a letterboxed display for applications to center the content by default.However, letterboxing can be disabled, because it’s reflected in a property calledappWidthLimited in the shell. This letterbox option provides a width of 1,280 pxreserved for the content, and the rest of the screen displays the default applica-tion background. This background can be customized based on either the themeused or settings in the shell itself.
In order to change the behavior as shown in Figure 8.17, configure the propertieson instantiation in sap.m.Shell, as shown in Listing 8.35.

Application Patterns and Examples8
390
Figure 8.17 Letterboxing and Custom Background on sap.m.Shell
Unfortunately, there is no Explored app example for the control. Additionaloptions include backgroundImage, backgroundRepeat, and backgroundOpacity.
// not letterboxednew sap.m.Shell({appWidthLimited : false,app: new sap.ui.core.ComponentContainer({height : "100%",name : "myCompany.myApp"
})}).placeAt("content");
// custom backgroundnew sap.m.Shell({backgroundColor : "rgb(0,153,204)",app: new sap.ui.core.ComponentContainer({height : "100%",name : "myCompany.myApp"
})}).placeAt("content");
Listing 8.35 Appearance Configuration for sap.m.Shell
8.3.5 Headers and Footers
Headers and footers generally provide access to certain functionality for applica-tions users. This functionality can impact entire content areas. For example, ifyour application view contains a form, the button to save the form content to thebackend should be displayed in the footer. This also ensures applications havefocused content areas, so you’re not tempted to overload your screens.
In SAPUI5, headers and footers are mainly part of sap.m.Page or other relatedcontrols. In this chapter, we’ve mainly used pages from sap.m.semantic, but wehaven’t yet looked into the main benefit they deliver: predefined buttons, so-called actions that implement design guidelines like predefined icons, texts, tool-tips, and even overflow handling (also clustering on the screen according to their
Custom Background Original Background Not Letterboxed
Additional Application Features 8.3
391
distinct usage). For example, the Back navigation button is left in the header, andall actions related to collaboration (e.g., SendEmailAction) are hidden in an over-flow and display upon clicking the Overflow Indicator button in a popover.Certain actions like PositiveAction are displayed in the app, making use ofsemantic colors. This highly improves development routines when designingnew screens and ensures minimal distraction from implementing underlyingfunctionality. Each action has a press handler that points to the controller for theview and fires the matching function there, just like it’s always handled inSAPUI5.
In addition, you can add custom content in the headers and footers of the seman-tic pages, because they offer the customHeaderContent and customFooterContentaggregations and a subHeader aggregation for ambitious projects. There is even acustomShareMenuContent aggregation that allows you to add custom actions intothe popover described previously.
Let’s now look at a sample sap.m.semantic.FullscreenPage installation withsome actions and custom content; this page could be used for a simple shoppingcart checkout page (Figure 8.18).
Figure 8.18 Header and Footer Options with Semantic Page

Application Patterns and Examples8
392
The XML to achieve this setup is pretty simple. You might have to get used to thehigh number of aggregations that are used here, making the API a little superflu-ous overall, but once you’ve adjusted to it, it works very well (see Listing 8.36).
<mvc:Viewxmlns:html=http://www.w3.org/1999/xhtmlxmlns:mvc="sap.ui.core.mvc"xmlns="sap.m"xmlns:semantic="sap.m.semantic"><semantic:FullscreenPage
title="Shopping Cart Checkout"showNavButton="true"><semantic:subHeader>
<Toolbar><ToolbarSpacer/>
<Text text="6 Items ready for checkout"/><ToolbarSpacer/>
</Toolbar></semantic:subHeader><semantic:sendEmailAction>
<semantic:SendEmailAction press="onSendMailPressed"/></semantic:sendEmailAction><semantic:printAction>
<semantic:PrintAction press="onPrintPressed"/></semantic:printAction><semantic:positiveAction>
<semantic:PositiveAction text="Checkout Cart" press="onCheckoutPressed"/>
</semantic:positiveAction><semantic:negativeAction>
<semantic:NegativeAction text="Discart Cart" press="onDiscartPressed"/>
</semantic:negativeAction><semantic:customShareMenuContent>
<OverflowToolbarButton icon="sap-icon://message-popup" text="send IM" press="onPress"/>
</semantic:customShareMenuContent></semantic:FullscreenPage>
</mvc:View>
Listing 8.36 XML Declaration for Header and Footer Options with Semantic Page
The additional application features described in the current section allow you tocontrol errors and wait times and to implement letterboxing and adjust headersand footers.
In the next section, we’ll look at how to run apps in SAP Fiori Launchpad.
Running Apps in SAP Fiori Launchpad 8.4
393
8.4 Running Apps in SAP Fiori Launchpad
In this chapter, you’ve learned that building application families that distributefunctions across single-purpose-based apps is better than building one large,monolithic, multipurpose app. We have successfully built at least the outline oftwo small, single-purpose applications.
SAP Fiori Launchpad offers user management, application provisioning, naviga-tion and integration of new applications, and maybe even third-party technolo-gies. The launchpad’s main purpose is to provide access to several applicationsand application types via one simple user interface. What sounds like a link list atfirst is actually a challenge not only from a technological standpoint but also froma user experience perspective. Just think of the challenge to support older tech-nologies like Web GUI transactions as well as modern web applications like theones we build with SAPUI5.
For our SAPUI5 applications, SAP Fiori Launchpad offers tight integration,because SAP Fiori Launchpad is itself based on SAPUI5 technology. SAP FioriLaunchpad offers a lot of functionality, not only for application users but also forapplication developers. Cross-application navigation from one application toanother and the ability to programmatically create bookmarks that reflect a cer-tain application state are just two features that come to mind. It soon becomesobvious that integration of at least a sandboxed SAP Fiori Launchpad early onduring implementation will pay off later.
In this section, we’ll start with the implementation of a simple standalone SAPFiori Launchpad sandbox demo application and then extend it to include morethan one application together in one sandboxed SAP Fiori Launchpad. Fromthere, we’ll add simple cross-application navigation using SAP Fiori Launchpad’sAPI. Finally, we’ll try out productive usage when we deploy our app to SAP HCPvia the SAP Web IDE.
8.4.1 SAP Fiori Launchpad Sandbox
SAP Fiori Launchpad, when used productively, has several backend dependenciesthat can’t be simulated in the context of single app development easily. That’swhy an SAP Fiori Launchpad sandbox is available that offers the most widely usedfeatures with a minimal footprint but still allows for testing during development.The display can be seen in Figure 8.19.

Application Patterns and Examples8
394
Figure 8.19 Generic SAP Fiori Launchpad Sandbox UI
There are several options to run your application in an SAP Fiori Launchpad sand-box. It’s important to understand that within SAP Fiori Launchpad, you will notneed a dedicated HTML file per application anymore; you’ll simply register yourapplication to the sandbox itself.
In this section, we’ll look at running an application in a sandbox SAP FioriLaunchpad via the SAP Web IDE and in a custom-built sandbox SAP Fiori Launch-pad.
SAP Fiori Launchpad Sandbox Runner in SAP Web IDE
The most convenient option to run your application in the SAP Fiori Launchpadsandbox is to use the built-in component runner provided by the SAP Web IDE.This feature offers a simple SAP Fiori Launchpad sandbox in which you can
Running Apps in SAP Fiori Launchpad 8.4
395
currently run one application component at a time. To do so, right-click on Com-
ponent.js, and the context menu opens as shown in Figure 8.20; then selectRun � Run as � SAP Fiori Component on Sandbox, and your component will belaunched in a minimal sandbox, as shown Figure 8.19. Here, you can test that theapplication still runs within SAP Fiori Launchpad. The scope of this option is stilllimited, and integrations such as cross-application navigation are not supported.
Figure 8.20 Usage of SAP Fiori Launchpad Sandbox Component Runner
Custom-Built SAP Fiori Launchpad Sandbox: Experimental
To test cross-application features in the SAP Web IDE, you can bootstrap yourown sandbox. Note that this approach should be used for testing purposes only;any productive usage is not encouraged. However, this is a simple way to avoiddeploying every change. Be sure to test early in the process directly in the work-space.
To do create a custom sandbox, we’ll first create a new folder in our workspace.In this folder, we’ll add a new HTLM file called FLPSandbox.html. In this file,we’ll place a script block that will handle the SAPUI5 bootstrap as we did for allrunnable files before (see Listing 8.37). In addition, we’ll add some configurationfor the SAP Fiori Launchpad sandbox and load an additional bootstrap script. Theonly important point to note here is to pay attention to the application’s propertyblock within the configuration. We’ll add more here to register the applicationcomponents to the sandbox in the next step.
<!DOCTYPE HTML><html><head><meta http-equiv="X-UA-Compatible" content="IE=edge" />

Application Patterns and Examples8
396
<meta charset="UTF-8"><title>FLP Sandbox</title><script>
window["sap-ushell-config"] = {defaultRenderer : "fiori2",renderers: {fiori2: {componentData: {config: {search: "hidden"
}}
}},applications: {};
</script>
<script src="../test-resources/sap/ushell/bootstrap/sandbox.js" id="sap-ushell-bootstrap"></script><!-- Bootstrap the UI5 core library --><script id="sap-ui-bootstrap"src="../../resources/sap-ui-core.js"data-sap-ui-libs="sap.m, sap.ushell, sap.collaboration"data-sap-ui-theme="sap_bluecrystal"data-sap-ui-compatVersion="edge">
</script>
<script>sap.ui.getCore().attachInit(function() {// initialize the ushell sandbox componentsap.ushell.Container.createRenderer().placeAt("content");});
</script></head>
<body class="sapUiBody" id="content"/></html>
Listing 8.37 SAP Fiori Launchpad Sandbox Initialization
In the same folder, we’ll create a new folder for every app we want to run withinthe custom SAP Fiori Launchpad sandbox and give each one a meaningful name.Into these folders, we’ll copy the respective webapp folders of the applications wewant to run—for example, for the Sales Orders and Business Partners applicationswe created in Section 8.2.
Let’s now register our applications to the sandbox. To do so, we’ll add a new keyreferencing an object for every application to the applications settings block
Running Apps in SAP Fiori Launchpad 8.4
397
you’ve seen before. This key serves as the hash to be resolved by the SAP FioriLaunchpad on navigation later. The settings for each application should be easy tounderstand: We need to give the component a namespace, a type, and a relativeURL for where to find the component. The title can be chosen freely and will laterbe displayed on a tile. The coding to add the Sales Orders and Business Partnersapplications is found in Listing 8.38.
"SalesOrder-display": {additionalInformation: "SAPUI5.Component=sales.order.app",applicationType: "URL",url: "./SalesOrders/webapp/",title: "Sales Orders"
},"BusinessPartner-display": {additionalInformation: "SAPUI5.Component=business.partner.app",applicationType: "URL",url: "./BusinessPartners/webapp/",title: "Business Partners"
}
Listing 8.38 Registering Applications to SAP Fiori Launchpad Sandbox
If you run the registered applications now, they should look like Figure 8.21. Youcan test the application, and if you click on the individual tiles, the applicationsshould open and be displayed as we left them.
Figure 8.21 Custom SAP Fiori Launchpad Sandbox

Application Patterns and Examples8
398
8.4.2 Cross-Application Navigation
With the custom-built SAP Fiori Launchpad sandbox, we can now test the cross-application navigation function as a simple feature example for what the SAPFiori Launchpad generally provides. When someone clicks on the link to onebusiness partner in the Sales Orders application worklist screen, the BusinessPartner application should open with the chosen business partner selected.
Let’s first look at the Sales Order application that triggers the navigation. For this,we’ll add a click handler to the link on the worklist table like so:
<Link text="{CustomerName}" press="onCustomerPressed"/>
The matching event handler (see Listing 8.39) in Worklist.controller.js shouldthen make use of the navigation service provided by SAP Fiori Launchpad and callthe toExternal function with some parameters. We’ll use the settings we justmade in Listing 8.38 (BusinessPartner-display) to identify the applicationduring navigation. We’ll also hand over the ID of the business partner we want tonavigate to as an additional parameter.
To retrieve the ID, we have to think outside the box a little. Because we can’t usethe ID of the SalesOrder we’re currently using, we have to retrieve the Business-PartnerID to properly handle the navigation on the other app. Therefore, we’lladd an expand parameter to the binding of the table—parameters : { expand :'ToBusinessPartner'}—and add the ID of the BusinessPartner as custom data inthe link itself—data:id="{ToBusinessPartner/BusinessPartnerID}. Then, wecan retrieve the ID in the handler directly from the element itself (see Listing8.39).
onCustomerPressed: function(oEvent) {var BusinessParnterId = oEvent.getSource().data().id;var oCrossAppNavigator =sap.ushell.Container.getService("CrossApplicationNavigation");oCrossAppNavigator.toExternal({target: {
semanticObject: "BusinessPartner",action: "display",params: {BusinessPartner : BusinessParnterId
}}
});}
Listing 8.39 Cross-Application Navigation Handler
Running Apps in SAP Fiori Launchpad 8.4
399
If you click on the Business Partner link in the Sales Order application now, nav-igation to the Business Partners application is triggered and it hits the masterroute. In the URL, the ID is visible as a parameter. We now only have to handlethe selection based on the parameter we handed over on the other side. To do so,we’ll retrieve the ID as startupParamters on the instance of the application com-ponent.
We’ll add additional logic to the resolving promise in the handler of the masterroute that then checks for the existence of startup parameters and navigates to thematching detail if startup parameters are available, as in Listing 8.40.
var aBusinessPartner = this.getOwnerComponent().getComponentData().startupParameters.BusinessPartner;
var sId;if (aBusinessPartner) {
sId = aBusinessPartner[0];} else {
sId = this.oList.getItems().getBindingContext().getProperty("BusinessPartnerID");
}this.selectAnItem(sId);this.oRouter.navTo("detail", {BusinessPartnerID: sId
});
Listing 8.40 Handling Cross-Application Navigation in Target
8.4.3 Register and Run in Production
With all the pieces in place and working in the sandbox, we can deploy the twoapplications straight out of the SAP Web IDE into SAP HCP. However, first wehave to locate each application in the root of our workspace again. Use the con-text menu triggered by right-clicking on the application root folder and selectDeploy � Deploy to HANA Cloud Platform. First, we’ll deploy the BusinessPartner application. In the popup (see Figure 8.22), you can set some details andalso see the application status and whether it’s already deployed. We do not needto make any changes here; simply click Deploy. For more details on deployingand managing application versions, see Appendix D.
After a while, you’ll see a success notification with a prominent button markedRegister to SAP Fiori Launchpad. Click on this button, and a dialog opens inwhich you can perform all the needed steps to set up your application in SAPFiori Launchpad.

Application Patterns and Examples8
400
Figure 8.22 Application Deployment on SAP HCP
On the first screen (see Figure 8.23), we will mainly set up the navigation to thisapplication within the SAP Fiori Launchpad in the Intent settings; we definedthese settings in Listing 8.39 when we set up the cross application. We have touse the same settings now again for the Semantic Object and the Action. Then,click on Next.
Figure 8.23 Set Up Navigation within SAP Fiori Launchpad
Running Apps in SAP Fiori Launchpad 8.4
401
On the next screen (see Figure 8.24), we can set up the appearance of the tile forthis application in the SAP Fiori Launchpad. You can choose between two differ-ent tile types (static and dynamic), define an icon, and set a title and subtitle to bedisplayed. We’ll just change the title here and delete the placeholder for the sub-title. Again, proceed by clicking on Next.
Figure 8.24 Set Up Tile Appearance within SAP Fiori Launchpad
In the last step (see Figure 8.25), we’ll finally assign this new tile that representsthe application and allows the user to open it to our launchpad. We can onlycover some basics here, so we don’t want to get into the details of these settings.SAP Fiori Launchpad as an entry point to applications uses roles to provideaccess, while the allocation of applications is done via catalogs. This means that abusiness role like—for example, for procurement—has one or many cataloguesassigned. Each of these catalogues consists of a set of applications. An administra-tor can then assign catalogues to a role, and each employee is assigned to a role aswell. This then defines what applications are to be part of their SAP Fiori Launch-pad. Let’s keep the default settings and click on Next.
Figure 8.25 Assign Application to the SAP Fiori Launchpad
Application Patterns and Examples8
402
We’ll now perform the same tasks for the Sales Orders application. Based on yoursettings, the final result should look like Figure 8.26. If all intents are set to matchour cross-application navigation settings, it should now be possible to performthe navigation between the two apps as implemented in Section 8.4.2.
Figure 8.26 Application in SAP Fiori Launchpad at SAP HCP
8.5 SAP Fiori Reference Apps
So far, we’ve explored application development from different angles: In Section8.2, we created application skeletons, and we refined them in Section 8.3. How-ever, thus far we have not built full-blown applications but have only gained anunderstanding of the different building blocks that matter in application develop-ment.
In this section, we want to look at the SAP Fiori reference applications that can beevaluated directly in the SAP Web IDE. Specifically, we’ll look at the ManageProducts and Shop apps.
All applications are built using best practices for SAP Fiori development. Thismeans they are component-based, come with an SAP Fiori sandbox set up, andmake use of controls from the sap.m library. However, note that these applicationare built on SAPUI5 version 1.28, and therefore, for example, manifest.json isn’tused. For the full list of applications available, see Figure 8.27. You can open this
SAP Fiori Reference Apps 8.5
403
wizard by clicking File in the menu bar, then New, and then Project from Sam-
ple Application.
Figure 8.27 SAP Fiori Reference Apps in SAP Web IDE
8.5.1 Manage Products App
The Manage Products application (see Figure 8.28) uses the master-detail floorplan.The master list is implemented as in Section 8.2.2, but comes with additionalfiltering, sorting, and grouping functionality. In the detail content area aresap.m.ObjectHeader and two sap.m.Panel controls displaying different types ofdata within static forms related to the selected item. Footer buttons are addedthat allow you to switch from detail view to edit mode. You also can delete orcopy any selected item.
The Manage Products application is a good example of how to build an applica-tion designed to change, add, or delete business objects. It makes good use of themaster-detail floorplan; you can quickly navigate between the different products.In addition, the display on the details side is highly sorted and not overloaded.
From a coding perspective, you can see that several helper files are needed, mostof them dealing with CRUD operations. Because the coding is extensively docu-mented using inline comments, we won’t go into details here.

Application Patterns and Examples8
404
Figure 8.28 Manage Products Reference Application
8.5.2 Shop App
The SAP Fiori reference Shop application is built on top of the worklist floorplan.The scenario that is implemented here is a simple Shop application where a usercan browse different items and add them to a shopping cart. In Figure 8.29, youcan see that it looks familiar to what we created in Section 8.2.1.
In the worklist, an action is implemented where the user can add items to theirshopping cart straight out of the item list without browsing any details. One addi-tional control that is used here to refine the items to be displayed is asap.ui.comp.smartfilterbar.SmartFilterBar. We will provide more detailsabout the capabilities of smart controls in SAPUI5 in Chapter 9.
The navigation in the Shop application has two additional views displaying theitems in the shopping cart as well a view that is used to place an order once theuser is ready to checkout.
Summary 8.6
405
Figure 8.29 Shop Reference Application
It is interesting to see how items are to be added to this cart. One might assumethat there is an additional model involved here. However, there is actually a func-tion import on the OData model being used in this scenario. We have alreadylearned about this OData feature in Chapter 7. Here, OData can be used for add-ing items to a shopping cart as well as for placing an order.
8.6 Summary
In this chapter, you’ve seen the complexity of application development first-hand. SAPUI5 helps to build applications, and SAP Fiori Launchpad launchesapplications into an environment that eases their orchestration and provisioning.Beyond just looking at the technical aspects of application patterns, it’s importantnot to forget the needs of your application users. Therefore, within this chapterwe spent some time on the general layout of applications, explained how to makeuse of existing application floorplans, reviewed user experience best practices,and outlined some of the most important nonfunctional application capabilities
Application Patterns and Examples8
406
every user expects. During this process, you built two application skeletons andlearned how all the technical concepts explained in the previous chapters can beused in combination.
With this chapter, we’ve concluded the chapters on the pure basics in SAPUI5; inthe next chapter, we’ll look into more advanced concepts that build on top ofwhat you’ve learned so far.

659
Index
_onDisplay, 238_onObjectMatched, 238_onRouteMatched, 238@sapUiDarkestBorder, 460/UI5/UI5_REPOSITORY_LOAD, 625
deployment, 631$expand, 308, 310, 311
XML view, 312$filter, 299$orderby, 305, 306
$top, 314$skip, 314$top, 314, 316
$orderby, 314$skip, 315
A
ABAPbackend, 622deployment, 627repository, 626server, 625
ABAP Workbench, 629Absolute binding paths, 288, 290Access-Control-Allow-Origin, 655Accessibility, 33, 486
alternative texts and tooltips, 494benefits, 489colors, 495correct labels, 494features, 487, 490keyboard handling, 492legal regulations, 490roles, 493sizing, 495titles, 495
Actions, 390, 530addAggregationName, 74addButton, 73Additional resources, 651Addressable, 437addStyleClass, 552
Advanced concepts, 407Advanced REST client, 655Aggregation binding, 120, 183, 184, 200
factory, 189Aggregations, 73, 77, 410, 541
add to control metadata, 410adding children, 73cardinality, 74default, 185, 186, 411hidden, 417sorting, 248table, 192
Allow-Control-Allow-Origin, 595alt, 494Analysis Path Framework (APF), 35AnalyticalTable, 42Angular, 37, 580Annotations, 439
attributes, 437entity types, 436OData 2.0, 435OData 4.0, 438smart controls, 439smart templates, 449
annotationsLoaded, 53Anonymous function, 69API, 409
classes, 54controls, 77deprecated and experimental, 558documentation, 29experimental, 558OData model documentation, 54SAP Fiori Launchpad, 393sap.ui.Device, 350whitelist filtering, 469
Applicationaccessibility, 493architecture, 46break, 557directory structure, 49features, 378lifecycle handling, 536Manage Products app, 403

660
Index
Application (Cont.)migrate settings, 148patterns, 347project settings, 614startup, 639styling, 551templates, 623view, 141
Application Descriptor, 47, 88, 97, 145, 149, 150, 290, 572
AppModel, 223, 233, 236, 239, 243Architecture, 41, 46Array.prototype.splice, 246Assertion types, 507Associations, 73, 75, 77, 263, 268, 412Asynchronous module definition (AMD), 101Atom, 563attachInit, 639, 640Attributes
common annotations, 437
B
Backendaccess and connection, 279, 589, 625destination, 597simple example, 590
bAdd, 258Batch
mode, 318request, 319response, 319
batchRequestCompleted, 53bindAggregation, 188, 189, 193, 646bindElement, 144, 196, 209, 646bindingContext, 209bindingMode, 213bindItems, 93bindProperty, 53, 162, 164, 167, 174,
198, 647bindView, 196Body, 639Bookmarking, 137, 393Bootstrapping, 64, 395, 510, 639Breakpoints, 504, 505Bundling, 472
BusinessPartnerNotFound, 380Busy handling, 386, 387
generic, 388master-detail, 389metadata call, 387on individual controls, 387
busyIndicatorDelay, 387Bypassed, 383
C
Calculated fields, 196, 197, 199Cardinality, 73catchAll, 383, 384Chain functions, 539Change handler, 419Cheat sheets, 639Class hierarchy, 49Code completion, 563, 573, 580, 583, 586Coding
conventions, 647formatting, 61guidelines, 59setup, 63
Color palette, 457Colors, 495, 552Column headers, 250CommonJS, 101Complex controls, 73
aggregations, 73associations, 75
Complex type, 328Component preload, 111, 472, 483, 485Component.js, 87, 136, 149, 291, 584ComponentContainer, 47componentLauncher, 533, 536Components, 126
container, 129conventions, 136enhancing tables, 133file, 127metadata, 134shell, 130
Composite controls, 414constructor, 416define dependencies, 415
Index
661
Composite controls (Cont.)instantiate member controls, 416methods and events, 418renderer, 421structure, metadata, and dependencies, 414
Concurrency control, 341config, 139console.log(), 61Content area, 352Content delivery network (CDN), 24, 630Content density check, 351Controller, 44, 85, 86
conventions, 109detail, 104, 247edit, 235edit view, 232formatter code, 175lifecycle, 45lifecycle methods, 143master, 100testing, 519
Controls, 25, 27, 72aggregations, 410API, 77behavior, 413binding, 162cheat sheet, 650child, 73complex, 73composite, 414custom, 512custom control unit tests, 511DOM reference, 642extend, 559image control, 66inheritance, 50keyboard handling, 492layout, 78lifecycle methods, 413localization, 32metadata, 409parents, 73properties, 409property binding settings, 163renderer, 421rendering, 413responsiveness, 31
Controls (Cont.)sap.m.Button, 28settings, 162simple, 66skeleton, 408structure, 408using in app, 422writing your own, 407
Core, 41CORS, 592Createable, 436createContent, 99, 136Cross Origin Resource Sharing (CORS), 225Cross-application navigation, 364, 393, 398
handler, 398targets, 399
Cross-browser compatibility, 29Cross-Origin Resource Sharing (CORS), 591Cross-site scripting (XSS), 468CRUD, 263, 403, 518
creating a new entry, 235delete entry, 245editing an existing entry, 225operations, 217, 225, 266
CSS, 551, 552class, 79custom, 459, 495
Custom data types, 171
D
Dataaccess, 269access via data binding, 287load, 154navigation, 272read, 282, 644read manually, 282, 283types, 166, 167write, 326, 644
Data binding, 27, 93, 110, 153, 156, 431, 646data access, 287manual, 646one-way and two-way, 320retrieve information, 647

662
Index
Data typescustom, 171definition, 173exceptions, 168functions, 168
Data.json, 134data-sap-ui-libs, 66data-sap-ui-theme, 65Debugging, 109, 125, 497, 498
support tools, 501YouTube tutorial, 500
Deep links, 371, 372, 373, 380defaultSpan, 81Deferred, 286Deletable, 437deleteEntry, 245Dependencies, 49, 223, 520Deployment, 605
ABAP server, 625SAP HANA Cloud Connector, 615SAP HANA Cloud Platform, 605SAP Web IDE, 615
Descriptor Editor, 366Desktop screen, 30Destination, 279, 598, 601
es4 Demo Gateway, 602new, 597Northwind, 600simple backend, 597
Detail controller, 104, 105, 107, 143Detail view, 104, 105detailPages, 356Developer Guide, 72Device model, 206, 212
binding, 214implementation, 212instantiate, 213
Device-agnostic framework, 29Dialogs, 433Directory, 49div, 79Documentation, 651DOM
abstraction, 507attribute, 63elements, 553manipulation, 33
E
Eclipse, 563Element binding, 195Elements
global, 640ID, 640inside a controller, 641reference, 640
Embedded HTML, 110Empty pattern route, 376Enterprise-grade applications, 457Entity
read, 271types, 263
Entity sets, 264, 267metadata, 268read, 270
Entity typescommon annotations, 436
Entrydelete, 336update, 334
Errorcases, 384handling, 379, 384notification, 385response, 385
Error handlers, 283ESLint, 61, 548, 549, 550Etag, 341, 342, 343Event handler, 67, 68, 71, 369
simple, 68Event listener, 110Events, 71, 72, 412
listening, 643, 645requestSent, 156
Expandingcategories, 310entries, 308
Explored app, 27, 30, 390Expression binding, 196, 199, 295Ext.js, 38Extending, 407
Index
663
F
Faceless components, 126, 127Factory, 189, 429Fake
individual responses, 547timers, 518, 521XMLHTTPRequests, 518
FakeRest, 220, 222download, 221
Features, 25Filtering, 252, 299, 363
adding and removing from binding, 258applying and unsetting, 254custom, 254JSON model, 247Master.controller.js, 304Master.view.xml, 303operations, 255predefined operators, 255smart filter, 446smart tables, 443unit price, 300
Floorplans, 359Master-detail, 355, 368Worklist, 360
fnTest, 253Footers, 390, 391formatOptions, 170Formatter, 174, 178, 180, 182, 198
nonanonymously, 174Formatting, 171, 174formatValue, 168Fragments, 407, 423, 425, 472
create, 424definition, 425display data, 426embed in views, 427lazy loading, 429, 434simple form, 424suffix, 424using dialogs, 432, 433XML views, 428
frameOptions, 470Full-screen layout, 348, 352, 354
guidelines, 353routing configuration, 354
Full-screen layout (Cont.)Worklist, 360
Function imports, 337controller, 340view, 339
G
GET request, 219getMetadata, 51getObject, 53getProperty, 77, 158, 161Getters, 78, 643Git repository, 605GitHub, 220, 414, 654Global variables, 60Glup, 580Google Chrome
Developer Tools, 159developer tools, 499disable web security, 594plugins, 655
Grouping, 259, 312, 313button, 261initial, 260smart tables, 443user input, 260
Growing, 315, 316growingScrollToLoad, 317growingThreshold, 315, 317growingTriggerText, 317properties, 317
Grunt, 474, 580global installation, 476minification, 476run, 483setup, 475
Gruntfile.js, 476, 478, 479grunt-openui5, 474, 480Gulp, 474
H
Handling calls, 387Headers, 390, 391Hello, World!, 59

664
Index
HideMode, 359Hierarchical structure, 160HTML, 29, 95, 109
fragments, 424starter page, 64view, 115
HTTP requests, 474Hungarian notation, 62, 647, 648
I
i18n, 359i18n_de_AT.properties, 201i18n_de.properties, 201i18n_en_GB.properties, 201i18n_en.properties, 201i18n.properties, 201Icons, 29ID, 93, 126IFrame, 470Inclusion, 486index.html, 85, 89Inner-application navigation, 364Input validation, 468Integration, 538Internal class styling, 553Internationalization, 200
J
JavaDOC, 648JavaScript, 29, 33, 59, 109, 653
aggregation binding, 184coding guidelines, 648fragments, 424global variables, 60master view, 98, 118playgrounds, 654promise, 374, 375view, 96, 98, 99, 114XML views, 117
JAWS, 487JetBrains, 563, 579Journeys, 539jQuery, 33, 507
jQuery.sap.declare, 60jQuery.sap.resources, 206JSBin, 654JSDoc, 648, 649JSFiddle, 654JSON, 29, 95, 109, 153, 154, 223
instantiating model, 154models, 154, 247sample applications, 157sorting and filtering, 247tools, 655view, 115
JSON model, 223, 235create, 642getter and setter, 643listening to events, 643
JSONView, 655
L
labelFor, 494labelSpan, 230Language, 205
determination, 205determination fallback, 201
LATIN-1, 201Layout, 78
controls, 78, 81data, 81
Layouts, 348full-screen layout, 352sap.m.App, 352sap.m.SplitApp, 355split-screen layout, 355
Leave Request Management app, 35Letterboxing, 131, 132, 389, 390Libraries, 25, 41
sap.m, 42, 66, 73sap.m.List, 317sap.suite, 42sap.ui.base, 50sap.ui.commons, 43sap.ui.comp, 42sap.ui.core, 41, 42, 50sap.ui.layout, 42, 192sap.ui.richtexteditor, 43
Index
665
Libraries (Cont.)sap.ui.suite, 43sap.ui.table, 42sap.ui.unified, 42sap.ui.ux3, 43sap.ui.vk, 43sap.ushell, 42sap.uxap, 43sap.viz, 42
Lifecycle hooks, 45Linting, 547List binding, 166Live value, 164Load, 47loadData, 155, 156, 158Localization, 32Logical
filtering, 301operators, 300
M
Manage Products app, 403ManagedObject, 51, 75, 77manifest.json, 87, 612Margin, 461Massive online open courses (MooCs), 651Master controller, 100
press handler, 108Master JavaScript view, 98Master list, 371, 383Master page
create, 93Master view, 103, 104, 106, 237
press handler, 107Master.controller.js, 96Master.view.js, 96, 100Master-detail, 355, 368, 379
deep links, 372default route, 376master list, 369, 371mobile devices, 376Object View, 370
Master-Detail app, 464, 476, 477masterPages, 356Matchers, 528
Metadata, 409call, 387errors, 386metadataLoaded, 53
Meteor, 580Methods, 52Microcontrollers, 475Minification, 472, 473, 480
Grunt-based task runner, 474SAP Web IDE, 485
Mobile, 31Mock data, 221Mock server, 440, 542, 544, 577
advanced concepts and configuration, 544control options, 545extend, 546instantiation and configuration, 543skeleton, 545
Mock service, 218, 220, 221, 222Mocking data, 542
instantiation and configuration, 543Mocks, 517, 518Models, 29, 45, 85, 150, 153
accessing values, 156binding control property to value, 162inheritance, 52instantiating and loading data, 154node path, 161usage, 153
Modularization, 97Modules
dependent, 102loading, 102
MVC, 29, 85application, 88components, 126create data and model, 91detail controller, 177detail view, 177first page, 90folder structure, 87, 96formatter, 178hierarchical overview, 89index.html, 89structure, 86, 89

666
Index
N
Nabisoft, 652Namespaces, 97, 116, 422, 436, 554
define, 98error, 585methods, 60
Navigation properties, 263, 266, 268back, 381binding, 298display, 296
navTo, 227neo-app.json, 279Network
request, 282trace, 592traffic, 104
Node.js, 474advantages, 474setup, 475
Northwind, 269destination, 600
Not found handling, 379npm, 580
O
Object header, 197Object view, 370ObjectNotFound, 381Octotree, 656OData, 52, 154, 155, 263, 653
2.0, 4352.0 annotations, 4354.0, 4354.0 annotations, 438accessing data, 269, 286annotations, 435best practices App.view.xml, 294best practices Component.js, 292best practices folder structure, 291best practices index.html, 294best practices manifest.json, 293best practices master.view.xml, 294class inheritance, 52concurrency control, 341
OData (Cont.)create model, 334destination, 290display, 266expanding, 308expression binding, 295filtering, 299function imports, 337grouping, 312model differences, 276Northwind, 264, 267one-way and two-way binding, 320overview, 263reading data, 282SAP Web IDE, 279, 284Shop app, 405sorting, 305update model, 336write-enabled, 337write-support, 327writing data, 326
OData modelcreate, 643listening to events, 645
ODBC, 264onAfterRendering, 45, 51onBeforeRendering, 46, 51OneTab, 656One-way binding, 153, 320, 321
controller, 322onExit, 45onInit, 45, 224, 257, 428, 641onPress, 250onPressImage, 71onSave, 244OPA5, 498, 524, 532
actions, 530architecture, 524, 525extend, 535folder structure, 538matchers, 528mock server, 544page objects, 538test, 531test structure, 525waitFor, 527
Open source, 33
Index
667
OpenAjax, 60openSAP, 651
smart templates, 452OpenUI5, 23, 25, 38, 39, 439
CDN, 637homepage, 652openui5_preload, 474, 480SDK, 580Slack channel, 653to-do app, 654
Optimistic concurrency, 341implement, 341
Optimized network requests, 483Origin, 589, 591oTemplate, 95Overflow, 391Overstyling, 553, 554
P
Package.json, 480Padding, 461Page control, 226Page objects, 537, 540, 541
shared, 542Pageable, 437Paging, 207, 313, 315parseError, 169parseValue, 168patternMatched, 373Payload, 331, 335
GET, 332POST, 332
Performance, 471, 496worst practices, 556
Pessimistic concurrency, 341Phoenix, 24Platform as a Service (PaaS), 563, 605Plunker, 655PopoverMode, 358Postman, 326, 327, 655
create entry, 331Press event, 69Private methods, 558Private object members, 61Product information, 295
Projectsettings, 614types, 614
Property binding, 162bindProperty, 164control settings, 163data types, 166format options, 171JSON model, 166
Protected methods, 558Purchase Order app, 35
Q
Quality, 547QUnit, 497, 498, 507, 508, 524, 525, 531,
534, 550constructor outcome, 513DOM structure, 535test files, 511test page, 509test skeleton, 512tests, 510
R
RadioButtonGroup, 73, 75React, 37, 580Relative binding paths, 289Render manager, 42, 413, 492Renderer, 421Representational State Transfer (REST), 217requestFailed, 234requestSent, 53RequireJS, 101Resource
folder, 97path, 97
Resource bundle, 200, 235code page, 201file locations, 200file naming, 201
Resource model, 200code page, 201detail view, 204instantiate, 203

668
Index
Resource model (Cont.)usage, 202
Response headers, 591CORS-enabled, 593
Responsive behavior, 353REST, 217
connect to services, 218service, 217stateless, 217
RGB color, 461Rich Internet Applications (RIA), 493RichTextEditor, 43rootView, 150Routing, 27, 137, 139, 150, 366, 376
configuration, 138detail controller, 143, 145empy patterns, 376handling, 376initialization, 140master controller, 141pattern, 142
Routing configuration, 227, 349, 350, 357, 358
S
Same origin policy, 277, 279, 589SAP Blue Crystal, 465SAP Business Suite, 43SAP Community Network, 564SAP Community Network (SCN), 653SAP Developers, 652SAP Fiori, 34, 42, 95, 131, 347, 355, 452, 564
apps library, 652demo cloud edition, 652design guidelines, 347, 355, 650, 653implementation and development, 653Manage Products app, 402, 403openSAP course, 651reference apps, 402, 404, 652SCN, 653Shop app, 402, 404, 405
SAP Fiori Launchpad, 46, 97, 126, 359, 393, 555assign application, 401catalogs, 401
SAP Fiori Launchpad (Cont.)cross-application navigation, 398custom-built sandbox, 395intialize sandbox, 396navigation, 400registration, 397roles, 401running apps, 393, 399sandbox runner in SAP Web IDE, 394sandbox UI, 394static and dynamic tiles, 401tile setup, 401
SAP Gateway, 653SAP HANA Cloud Connector, 615
architecture, 616deployment, 626local access, 617openSAP course, 620settings, 616
SAP HANA Cloud Platform, 23, 59, 65, 280, 563app deployment, 605application log, 608cockpit, 566, 567, 606courses, 567create an account, 564create destination, 621deploy custom theme, 467deployment, 605, 610destinations, 596home page, 564minification, 485openSAP course, 651resource consumption, 608running an application, 607same-origin policy, 590SAP Fiori Launchpad, 393, 399services, 568UI Theme Designer, 462, 465
SAP HANA XS, 474SAP HANA XS Advanced (XSA), 474SAP S/4HANA, 95SAP Service Marketplace, 23SAP Smart Business cockpits, 34SAP Technology Rapid Innovation
Group (RIG), 620
Index
669
SAP Web IDE, 59, 225, 279, 348, 563, 615access, 567app deployment, 605application development, 570backend access, 279console output, 628console view, 628Descriptor Editor, 365destination folder, 613ESLint, 549export application, 631instantiating an OData model, 281Layout Editor, 111linting, 548master-detail, 368minification, 485Northwind service, 283same-origin policy, 590SAP Fiori Launchpad sandbox, 394SAP Fiori reference apps, 403SAP HANA Cloud Connector, 619SAP HCP destinations, 597saving ZIP file, 632SCN, 653setup, 563templates, 569, 570, 575UI Theme Designer, 462, 466welcome screen, 569workspace, 572
sap.m, 116, 150sap.m.App, 122, 352sap.m.CheckBox, 51sap.m.Checkbox, 253sap.m.Dialog, 97, 433sap.m.Input, 163sap.m.Label, 494sap.m.List, 374sap.m.MessageBox, 384sap.m.MessagePage, 380
catchAll, 384sap.m.Page, 105sap.m.PullToRefresh, 378sap.m.semantic, 390sap.m.Shell, 390sap.m.SplitApp, 355, 369
responsiveness, 357sap.m.SplitAppModes, 358
sap.m.Table, 88, 188, 360sap.m.Text, 174sap.ui, 150sap.ui.base.EventProvider, 51, 53sap.ui.base.ManagedObject, 165sap.ui.base.Object, 50, 51, 53sap.ui.core, 42sap.ui.core.Component, 46sap.ui.core.Control, 51sap.ui.core.Element, 51sap.ui.core.Fragment, 642sap.ui.core.ManagedObject, 51sap.ui.core.Model, 53sap.ui.core.routing.Router, 47sap.ui.define, 102sap.ui.layout, 116sap.ui.layout.form.SimpleForm, 229sap.ui.layout.Grid, 78sap.ui.layout.GridData, 81sap.ui.model.FilterOperator, 301sap.ui.model.odata.ODataModel, 276sap.ui.model.odata.V2.ODataModel, 53sap.ui.model.odata.v2.ODataModel, 276sap.ui.model.SimpleType, 171, 172sap.ui.model.Sorter, 261sap.ui.model.type.Boolean, 167sap.ui.model.type.Date, 167sap.ui.model.type.DateTime, 167sap.ui.model.type.Float, 167sap.ui.model.type.Integer, 167sap.ui.model.type.String, 167sap.ui.model.type.Time, 167sap.ui.namespace, 60sap.ui.require, 102sap.ui5, 150SAPUI5, 23
architecture, 41CDN, 629data types, 167features, 25history, 24libraries, 42open source, 33overview and access, 23product comparison, 37SCN, 653use cases, 34

670
Index
SAPUI5 Demo Kit, 423, 459SAPUI5 Diagnostics, 501, 502SAPUI5 Flexibility Services, 444SAPUI5 Technical Information, 501sap-ui-theme, 457Screen sizes, 30Search handling, 364Security, 468
central whitelisting, 470frameOptions, 470input validation, 468SAPUI5 guidelines, 471validate URLs, 469, 470whitelist filtering, 469
Selectors, 554Selenium, 524Semicolon, 62Sencha, 38Service
document, 266errors, 386metadata, 277, 281metadata document, 267URL, 280
setAggregation, 417setAggregationName, 74setData, 154setProperty, 77, 158Setter, 643Setters, 78Shopping Cart app, 35ShowHideMode, 358Sight, 656SimpleForm, 229, 298, 422
fragments, 424sinon, 220, 221, 517, 519Skipping, 315sLocalPath, 244Smart controls, 407, 439
information, 449tutorials, 445
Smart field, 448Smart filter, 445Smart form, 448
edit mode, 448smart template, 450value help, 448
Smart group, 448Smart table, 440, 445, 447
add, hide, reorder, 442dirty, 446filtering, 443grouping, 443metadata, 441personalization, 442sorting, 443
Smart templates, 449, 451develop apps, 449openSAP, 452smart form, 450smart table, 450
Sorting, 305aggregations, 248buttons, 250custom, 252functions, 251JSON model, 247Master.view.xml, 306multiple, 252smart tables, 443table items, 248
sPageId, 125Spies, 517Split-screen layout, 348, 355
Main.view.xml, 356master-detail, 368
src, 65, 77, 639StretchCompressMode, 358String, 110
filtering, 301Stubs, 517, 521Sublime, 563
T
Tablescoding, 94components, 133create, 93header, 94responsive margins, 133rows, 95sort and group, 260
Tablet screen, 30
Index
671
Targets, 140, 366Task runner, 474Templates, 95, 110, 349, 352, 623Tern.js, 563Testing, 497, 521, 522, 523
assets, 509callback functions, 517constructor outcome, 513doubles, 517full application setup, 538page objects, 537setters, 515strategy pyramid, 497
Text directions, 555Theming, 31, 457
base, 457Base theme, 457custom CSS, 459High-Contrast Black, 459, 491, 495manual restyling, 458selection, 463theme parameters, 460, 553theme-dependent CSS classes, 460
Thresholds, 313, 315Transaction
SE38, 632SE80, 629, 635
Translate, 555Tutorials, 27Two-way binding, 153, 320, 323, 325
controller, 325manifest.json, 323view, 324
U
Uglification, 472, 473UglifyJS, 473UI components, 126UI development toolkit for HTML5, 23UI Theme Designer, 32, 420, 461, 462
deploying custom themes, 465manipulating themes, 463Quick mode, 464SAP HANA Cloud Platform subscription, 462SAP Web IDE, 466
UI Theme Designer (Cont.)setup, 462
UI5 Inspector, 287, 501, 506, 655UI5Con 2016, 654unbindElement, 196unbindProperty, 189Undeclared variables, 61Unit tests, 507, 577
apps, 516custom controls, 511results, 508setters, 515
Untyped variant, 165Updateable, 436URL
patterns, 137service-based, 270
V
validateValue, 168Variables, naming conventions, 62Vertical layout, 192View model, 206, 207, 211
binding, 209instantiate, 208navigation functions, 211
Views, 29, 45, 85, 86conventions, 117create, 95detail, 104display mode, 430embed fragments, 427instantiation, 45types, 96, 109
Virtual host, 620Visibility, 552Vocabularies, 441
W
waitFor, 526, 541configuration, 531
Web Accessibility Initiative (WAI), 490, 652Web security, 594Web servers, 605, 636

672
Index
WebSockets, 474WebStorm, 563, 579, 587
adding libraries, 582create project, 581setup, 587version, 580
Whitelist filtering, 469API, 469
Whitelisting, 470service, 471
Work items, 360Worklist, 360
detail view, 364filtering, 363item count, 362navigation, 364sap.m.Table, 361search input, 363table, 360
Worklist (Cont.)views, 368
Worklist app, 574configuration, 576mock data, 577
Worldwide Web Consortium (W3C), 490writeEscaped, 468
X
XML, 29, 95, 109, 392fragments, 424JavaScript views, 117nodes, 271tools, 655views, 95, 110, 111, 114, 115, 116, 118, 428
XmlHTTPRequests, 222XOData, 264, 328, 655

First-hand knowledge.
We hope you have enjoyed this reading sample. You may recommend or pass it on to others, but only in its entirety, including all pages. This reading sample and all its parts are protected by copyright law. All usage and exploitation rights are reserved by the author and the publisher.
Christiane Goebels has been in web development ever since starting her career at SAP in 2000. She led her own internet agency from 2005 to 2010, and re-joined SAP in 2012 as part of the central SAPUI5 development team. She is an experienced speaker and has been giving numerous trainings and talks on JavaScript and SAPUI5 at SAP and at international conferences.
Denise Nepraunig is a software developer at SAP in Walldorf, Germany, where she creates SAPUI5 applica-tions and was involved in the development of the SAP Web IDE. She is an experienced speaker, SAPUI5 coach, and SAP Mentor. She loves to explore new technologies, and in her free time tinkers around with SAP HCP and SAP HANA.
Thilo Seidel is the product owner of SAP Fiori Launch-pad on the weekdays and an occasional hacker on the weekends. He built his first web page back in 2002 and instantly fell in love with the browser. He has taken on various roles since then, including sales, designer thinker, traveler, student, and project manager.
Christiane Goebels, Denise Nepraunig, Thilo Seidel
SAPUI5: The Comprehensive Guide672 Pages, 2016, $79.95 ISBN 978-1-4932-1320-7
www.sap-press.com/3980