sap r/3 enterprise on unix : oracleway2sapbasis.com/upload/4.7ext_200_on_unix_with_oracle.pdf ·...
TRANSCRIPT

SAP® R/3 Enterprise
on UNIX : Oracle
Using SAP R/3 Enterprise Core 4.70, SAP R/3 Enterprise Extension Set 2.00, Service Release 1
Document Version 1.10 – June 10, 2005
Installation Guide

SAP AG Neurottstraße 16 69190 Walldorf Germany T +49/18 05/34 34 24 F +49/18 05/34 34 20 www.sap.com
© Copyright 2004 SAP AG. All rights reserved. SAP, R/3, mySAP, mySAP.com, xApps, xApp, SAP NetWeaver, and other SAP products and services mentioned herein as well as their respective logos are trademarks or registered trademarks of SAP AG in Germany and in several other countries all over the world. All other product and service names mentioned are the trademarks of their respective companies. Data contained in this document serves informational purposes only. National product specifications may vary.
No part of this publication may be reproduced or transmitted in any form or for any purpose without the express permission of SAP AG. The information contained herein may be changed without prior notice. Some software products marketed by SAP AG and its distributors contain proprietary software components of other software vendors.
Microsoft, Windows, Outlook, and PowerPoint are registered trademarks of Microsoft Corporation. These materials are subject to change without notice. These materials
are provided by SAP AG and its affiliated companies ("SAP Group") for informational purposes only, without representation or warranty of any kind, and SAP Group shall not be liable for errors or omissions with respect to the materials. The only warranties for SAP Group products and services are those that are set forth in the express warranty statements accompanying such products and services, if any. Nothing herein should be construed as constituting an additional warranty
IBM, DB2, DB2 Universal Database, OS/2, Parallel Sysplex, MVS/ESA, AIX, S/390, AS/400, OS/390, OS/400, iSeries, pSeries, xSeries, zSeries, z/OS, AFP, Intelligent Miner, WebSphere, Netfinity, Tivoli, and Informix are trademarks or registered trademarks of IBM Corporation in the United States and/or other countries. Oracle is a registered trademark of Oracle Corporation.
SAP Library document classification: PUBLIC. UNIX, X/Open, OSF/1, and Motif are registered trademarks of the
Open Group.
Citrix, ICA, Program Neighborhood, MetaFrame, WinFrame, VideoFrame, and MultiWin are trademarks or registered trademarks of Citrix Systems, Inc.
Disclaimer Some components of this product are based on Java™. Any code change in these components may cause unpredictable and severe malfunctions and is therefore expressively prohibited, as is any decompilation of these components.
HTML, XML, XHTML and W3C are trademarks or registered trademarks of W3C®, World Wide Web Consortium, Massachusetts Institute of Technology.
Any Java™ Source Code delivered with this product is only to be used by SAP’s Support Services and may not be modified or altered in any way.
Java is a registered trademark of Sun Microsystems, Inc.
JavaScript is a registered trademark of Sun Microsystems, Inc., used
under license for technology invented and implemented by Netscape. Documentation in the SAP Service Marketplace You can find this documentation at the following Internet address: service.sap.com/instguidesMaxDB is a trademark of MySQL AB, Sweden.

Terms for Included Open Source Software This SAP software contains also the third party open source software products listed below. Please note that for these third party products the following special terms and conditions shall apply.
SAP License Agreement for STLport SAP License Agreement for STLport
between
SAP Aktiengesellschaft Systems, Applications, Products in Data Processing
Neurottstrasse 16 69190 Walldorf
Germany ( hereinafter: SAP )
and
you
( hereinafter: Customer ) 1. Subject Matter of the Agreement
a. SAP grants Customer a non-exclusive, non-transferable, royalty-free license to use the STLport.org C++ library (STLport) and its documentation without fee.
b. By downloading, using, or copying STLport or any portion thereof Customer agrees to abide by the intellectual property laws, and to all of the terms and conditions of this Agreement.
c. The Customer may distribute binaries compiled with STLport (whether original or modified) without any royalties or restrictions.
d. Customer shall maintain the following copyright and permission notices on STLport sources and its documentation unchanged: Copyright 2001 SAP AG
e. The Customer may distribute original or modified STLport sources, provided that: • The conditions indicated in the above permission notice
are met; • The following copyright notices are retained when
present, and conditions provided in accompanying permission notices are met:
Copyright 1994 Hewlett-Packard Company Copyright 1996,97 Silicon Graphics Computer Systems, Inc. Copyright 1997 Moscow Center for SPARC Technology. Copyright 1999,2000 Boris Fomitchev Copyright 2001 SAP AG Permission to use, copy, modify, distribute and sell this software and its documentation for any purpose is hereby granted without fee, provided that the above copyright notice appear in all copies and that both that copyright notice and this permission notice appear in supporting documentation. Hewlett-Packard Company makes no representations about the suitability of this software for any purpose. It is provided "as is" without express or implied warranty. Permission to use, copy, modify, distribute and sell this software and its documentation for any purpose is hereby granted without fee, provided that the above copyright notice appear in all copies and that both that copyright notice and this permission notice appear in supporting documentation. Silicon Graphics makes no representations about the suitability of this software for any purpose. It is provided "as is" without express or implied warranty. Permission to use, copy, modify, distribute and sell this software and its documentation for any purpose is hereby granted without fee, provided that the above copyright notice appear in all copies and that both that copyright notice and this permission notice appear in supporting documentation. Moscow Center for SPARC

Technology makes no representations about the suitability of this software for any purpose. It is provided "as is" without express or implied warranty. Boris Fomitchev makes no representations about the suitability of this software for any purpose. This material is provided "as is", with absolutely no warranty expressed or implied. Any use is at your own risk. Permission to use or copy this software for any purpose is hereby granted without fee, provided the above notices are retained on all copies. Permission to modify the code and to distribute modified code is granted, provided the above notices are retained, and a notice that the code was modified is included with the above copyright notice. Permission to use, copy, modify, distribute and sell this software and its documentation for any purpose is hereby granted without fee, provided that the above copyright notice appear in all copies and that both that copyright notice and this permission notice appear in supporting documentation. SAP makes no representations about the suitability of this software for any purpose. It is provided with a limited warranty and liability as set forth in the License Agreement distributed with this copy. SAP offers this liability and warranty obligations only towards its customers and only referring to its modifications.
2. Support and Maintenance
SAP does not provide software maintenance for the STLport. Software maintenance of the STLport therefore shall be not included. All other services shall be charged according to the rates for services quoted in the SAP List of Prices and Conditions and shall be subject to a separate contract.
3. Exclusion of warranty As the STLport is transferred to the Customer on a loan basis and free of charge, SAP cannot guarantee that the STLport is error-free, without material defects or suitable for a specific application under third-party rights. Technical data, sales brochures, advertising text and quality descriptions produced by SAP do not indicate any assurance of particular attributes.
4. Limited Liability a. Irrespective of the legal reasons, SAP shall only be liable for
damage, including unauthorized operation, if this (i) can be compensated under the Product Liability Act or (ii) if caused due to gross negligence or intent by SAP or (iii) if based on the failure of a guaranteed attribute.
b. If SAP is liable for gross negligence or intent caused by employees who are neither agents or managerial employees of SAP, the total liability for such damage and a maximum limit on the scope of any such damage shall depend on the extent to which its occurrence ought to have anticipated by SAP when concluding the contract, due to the circumstances known to it at that point in time representing a typical transfer of the software.
c. In the case of Art. 4.2 above, SAP shall not be liable for indirect damage, consequential damage caused by a defect or lost profit.
d. SAP and the Customer agree that the typical foreseeable extent of damage shall under no circumstances exceed EUR 5,000.
e. The Customer shall take adequate measures for the protection of data and programs, in particular by making backup copies at the minimum intervals recommended by SAP. SAP shall not be liable for the loss of data and its recovery, notwithstanding the other limitations of the present Art. 4 if this loss could have been avoided by observing this obligation.
f. The exclusion or the limitation of claims in accordance with the present Art. 4 includes claims against employees or agents of SAP.

Typographic Conventions Icons Type Style Represents
Example Text Words or characters that appear on the screen. These include field names, screen titles, pushbuttons as well as menu names, paths and options.
Cross-references to other documentation
Example text Emphasized words or phrases in body text, titles of graphics and tables
EXAMPLE TEXT Names of elements in the system. These include report names, program names, transaction codes, table names, and individual key words of a programming language, when surrounded by body text, for example, SELECT and INCLUDE.
Example text Screen output. This includes file and directory names and their paths, messages, names of variables and parameters, source code as well as names of installation, upgrade and database tools.
Example text Exact user entry. These are words or characters that you enter in the system exactly as they appear in the documentation.
<Example text>
Variable user entry. Pointed brackets indicate that you replace these words and characters with appropriate entries.
EXAMPLE TEXT Keys on the keyboard, for example, function keys (such as F2) or the Enter key.
Icon Meaning
Caution
Example
Note
Recommendation
Syntax

SAP R/3 Enterprise 4.70 Ext. 2.00 SR 1 on UNIX : Oracle
6 August 2004
Contents
SAP R/3 Enterprise Core 4.70 Extension Set 2.00 Service Release 1 on UNIX : Oracle ..............................................................8
1 General Information ..........................................................................11 1.1 SAP R/3 Enterprise Architecture......................................................... 11 1.2 New Features........................................................................................ 12 1.2 Naming Conventions ........................................................................... 16
2 Installation Checklists ......................................................................17 2.1 Installation Checklist for SAP R/3 Enterprise (Central System)....... 20 2.2 Installation Checklist for SAP R/3 Enterprise (Distributed System) ....................................................................................................... 25 2.3 Installation Checklist for a Dialog Instance ....................................... 32 2.4 Installation Checklist for a Gateway Instance.................................... 34 2.5 Installation Checklist for Additional Components ............................ 37
3 Installation Preparations ..................................................................38 3.1 Required Documentation..................................................................... 38
3.1.1 SAP Installation Notes ................................................................................................38 3.1.2 Information in the SAP Service Marketplace ..............................................................39 3.1.3 Accessing the SAP Library .........................................................................................41
3.2 Installation of Multiple Components in One Database...................... 41 3.3 Hardware and Software Requirements............................................... 43
3.3.1 Requirements Checklist for a Central Instance ..........................................................44 3.3.2 Requirements Checklist for a Database Instance ......................................................46
Oracle System Configuration ............................................................................................48 3.3.3 Requirements Checklist for a Dialog Instance............................................................50
3.4 Creating Operating System Users Manually...................................... 52 3.5 Setting Up File Systems and Raw Devices ........................................ 53 3.6 Preparing the System for SAPinst ...................................................... 58 3.7 Preparing the Installation CDs / DVDs................................................ 61
3.7.1 Using the CD Browser Dialog .....................................................................................63 3.8 Preparing the Active Directory............................................................ 64
4 Installation Process ..........................................................................66 4.1 Prerequisites before Starting SAPinst ............................................... 66 4.2 Running SAPinst .................................................................................. 69 4.3 Starting the Script rootpre.sh (AIX only)............................................ 74 4.4 Installing the Oracle 9.2.0 Database Software ................................... 76 4.5 Checking Settings for OS Users (AIX only) ....................................... 79 4.6 Creating a User for LDAP Directory Access ...................................... 79 4.7 Activating sapcpe................................................................................. 80
5 Post-Installation Activities ...............................................................81

SAP R/3 Enterprise 4.70 Ext. 2.00 SR 1 on UNIX : Oracle
August 2004 7
5.1 Editing Shell Scripts (HP Tru64 UNIX only) ....................................... 81 5.2 Starting and Stopping the SAP System ............................................. 82 5.3 Logging On to the SAP System .......................................................... 85 5.4 Checking SAP System Services ......................................................... 86 5.5 Installing the SAP Online Documentation.......................................... 87 5.6 Installing the SAP License .................................................................. 87 5.7 Configuring SAProuter and SAPNet – R/3 Frontend......................... 88 5.8 Completing and Checking the Oracle Installation............................. 89 5.9 Configuring the Transport Management System .............................. 90 5.10 Performing Basic Operations............................................................ 91 5.11 Configured Number of Work Processes .......................................... 91 5.12 Installing Additional Languages ....................................................... 92 5.13 Activating the integrated Internet Transaction Server.................... 93 5.14 Importing Support Packages............................................................. 93 5.15 Performing Operating System Adjustments.................................... 94 5.16 Performing File and Directory Adjustments .................................... 94 5.17 Enabling Remote Monitoring............................................................. 94 5.18 Editing sapmsg.ini for LDAP............................................................. 95 5.19 Scheduling Asynchronous Indexing and Deindexing..................... 96
5.19.1 Checking for Problems in IMS Monitoring ................................................................98 5.20 Performing the Client Copy............................................................... 99 5.21 Performing a Full Installation Backup .............................................. 99 5.22 Changing Passwords of Created Users ......................................... 101
6 Additional Information....................................................................102 6.1 Remote Installation with SAPinst ..................................................... 102
6.1.1 Starting SAPinst on the Remote Host.......................................................................102 6.1.2 Starting SAPinst GUI on the Local Host ...................................................................103
6.2 Interrupted Installation with SAPinst................................................ 106 6.3 Deletion of an SAP System Installation (ABAP) .............................. 109
6.3.1 Deleting a (J2EE) Dialog Instance............................................................................110 6.3.2 Deleting a Central Instance ......................................................................................112 6.3.3 Deleting an Oracle Database Installation .................................................................114
1 General Information
1.1 SAP R/3 Enterprise Architecture
SAP R/3 Enterprise Core 4.70 Extension Set 2.00 Service Release 1 on UNIX : Oracle Purpose This documentation explains how to install SAP R/3 Enterprise Core 4.70 Extension Set 2.00 Service Release 1 (SAP R/3 Enterprise) on UNIX when your database is Oracle.
SAP R/3 Enterprise is based on SAP Web Application Server (SAP Web AS) 6.40 technology, which is the underlying technology of almost all solutions of mySAP Business Suite. For more information on the technology provided by SAP Web AS, see SAP Service Marketplace at service.sap.com/NetWeaver.
This documentation focuses on the ABAP part of the SAP R/3 Enterprise installation. The ABAP part is required for the installation of SAP R/3 Enterprise ABAP and SAP R/3 Enterprise ABAP+Java.
If you want to install the Java part of SAP R/3 Enterprise, you have to install SAP Web AS 6.40 Java. This is because the technology of the Java part of SAP R/3 Enterprise is the same as that of Sap Web AS 6.40. The installation of SAP Web AS Java 6.40 is described in the documentation Installation Guide – SAP Web Application Server Java 6.40 on UNIX: Oracle on SAP Service Marketplace at: service.sap.com/instguidesnw04
Before you continue reading this documentation, you must have read the documentation Planning Guide – SAP R/3 Enterprise Core 4.70 Extension Set 2.00 Service Release 1 on SAP Service Marketplace at service.sap.com/instguides SAP Components SAP R/3 Enterprise SAP R/3 Enterprise Core 4.70 / Ext. Set 2.00 (SR1)
The Planning Guide enables you to meet the decisions that are required during the planning phase of the SAP R/3 Enterprise installation, like:
• Choosing a basic system variant of SAP R/3 Enterprise
• Defining the SAP instances you want to install
• Deciding how to distribute those SAP instances to installation hosts
• Deciding which optional installation features you want to use
Also, you will have collected the installation parameters that the installation tool SAPinst prompts you to enter during the installation process.
After you have worked through the Planning Guide, you can continue reading the documentation at hand.
The documentation SAP R/3 Enterprise Core 4.70 Extension Set 2.00 Service Release 1 on UNIX : Oracle consists of the following parts:
• General Information [page 11]
Here, you can find information about new features for the installation and naming conventions used in the documentation.
• Installation Checklists [page 17]
Before you start your installation, make sure that you read this section. It provides you with a list of all actions that you must perform to install your SAP system successfully.
8 August 2004

1 General Information
1.1 SAP R/3 Enterprise Architecture
The actions are listed chronologically in checklists, which you use to navigate through the installation.
• Installation Preparations [page 52]
• Installation Process [page 66]
• Post-Installation Activities [page 81]
• Additional Information [page 102]
Constraints
Before you continue reading this documentation, you must have read the documentation Planning Guide – SAP Supplier Relationship Management Server 5.0 on UNIX: Oracle on SAP Service Marketplace at service.sap.com/instguides SAP Components SAP R/3 Enterprise SAP R/3 Enterprise Core 4.70 / Ext. Set 2.00 (SR1)
Before starting the installation, you must have prepared the installation hosts as described in the section Hardware and Software Requirements. Particularly you have to check/adapt the OS kernel parameters on UNIX as described in the documentation SAP Software on UNIX: OS Dependencies, section <Your OS>. If you do not check the UNIX kernel parameters, there might be unpredictable problems with your system during or after the installation.
You must only use the SAP installation tools according to the instructions and for the purposes described in the SAP installation documentation. Improper use of the SAP installation tools can damage files and systems already installed.
The following constraints should be taken into consideration before you begin the SAP system installation:
• This documentation only applies if you are installing an Oracle database with a UNIX operating system.
• SAP system installations should only be performed by SAP Technical Consultants, who are certified for your operating system, your database, and the SAP system you are installing.
• Downward-compatible releases of DB/OS platforms for SAP products
SAP plans to regularly release the newest database (DB) and operating system (OS) versions of SAP products. These releases are downward-compatible with earlier SAP system releases.
Be aware that, for already shipped SAP components, we only support the installation for database versions proposed by the installation tool. Therefore, you must install a
August 2004 9
1 General Information
1.1 SAP R/3 Enterprise Architecture
SAP component or perform a system copy using a downward-compatible database as follows:
Install the component with the old proposed database version.
Upgrade the old database version to the downward-compatible new version.
10 August 2004

1 General Information
1.1 SAP R/3 Enterprise Architecture
1 General Information The following sections provide you with general information:
• New Features [page 12]
• Naming Conventions [page 16]
Before you start your SAP system installation, read the Installation Checklists [page 17].
1.1 SAP R/3 Enterprise Architecture SAP R/3 Enterprise is built on the principle of optimizing the stable and mature core processes and infrastructure and making new enhancements optional and deployable when needed.
Optional new functionalenhancements(SAP R/3 Enterprise Extensions)
Tuned core, optimized for performance – based on 4.6C(SAP R/3 Enterprise Core)
Application of SAP Netweaver(SAP Web Application Server)
This version of SAP R/3 Enterprise consists of:
• SAP R/3 Enterprise Extension Set 2.00 SR 1
An SAP R/3 Extension Set includes all SAP R/3 Enterprise Extensions with the same release.
• SAP R/3 Enterprise Core (4.70)
• SAP R/3 Plug-In PI 2004_1_470 SP 1 and PI_BASIS 2004_1_620 SP 3
• SAP Web Application Server 6.40 Kernel
• SAP Web Application Server 6.20 ABAP Basis
All SAP R/3 Enterprise Extensions get installed, but to use the functions contained in the SAP R/3 Enterprise Extensions or industry solutions each can be activated separately. This means you can implement only those new developments that you require.
For more information about SAP R/3 Enterprise, see SAP Service Marketplace at service.sap.com/enterprise
August 2004 11

1 General Information
1.2 New Features
1.2 New Features New Features for SAP R/3 Enterprise 4.7 Ext. 2.00 SR1
Area Description
SAP System Installation
Kernel SAP R/3 Enterprise 4.70 (Ext. Set 2.00) SR 1 has a downward-compatible kernel (DCK) from SAP Web AS 6.40.
New SAPinst Features
For the installation with SAPinst, you no longer have to create an installation directory as SAPinst normally creates automatically an installation directory directly below the temporary directory ($TEMP or $TMP or /tmp).
Integration of SAP Internet Transaction Server (SAP ITS)
As of Sap Web AS 6.40 the SAP Insternet Transaction Server (SAP ITS) is an integrated part of SAP Web Application Server.
Integration of the installation of SAP Internet Graphic Server (IGS)
As of SAP Web AS 6.40 the installation of the SAP Internet Graphic Server (IGS) is integrated into the installation of SAP Web Application Server 6.40.
Distribution of Components
For SAP Web AS ABAP+Java, the central services instance always gets installed on the central instance host.
Operating Systems
Support of Operating Systems
See SAP Service Marketplace at service.sap.com/platforms Product Availability Matrix. (Alias /pam)
Oracle Installation
New functions in Oracle 9i
As of the installation of SAP Web AS ABAP or ABAP+Java, new functions of the Oracle 9i database release are used. For more information, see SAP Note 598678.
New Features for SAP Web AS 6.30 or lower and for components based on it:
Area Description
SAP System Installation
12 August 2004

1 General Information
1.2 New Features
Installation CDs
The installation is started from the SAP Installation Master CD.
New Java development environment
The SAP NetWeaver Developer Studio introduces SAP’s own environment for developing Java-based, multiple-layered business applications. The new development environment is based on Eclipse, an open source product, whose open plug-in architecture provides a suitable platform for incorporating specific functions. For more information, see the SAP Library [page 41] and choose Application Platform (SAP Web Application Server) Java Technology in SAP Web Application Server Development Manual
Introduction to the SAP NetWeaver Developer Studio.
New installation tool SAPinst
SAP provides a new installation tool called System Landscape Implementation Manager, also referred to as SAPinst.
The main advantages compared with the previous installation tool R3SETUP are:
• SAPinst does not abort due to errors. Instead, it stops the installation and you can retry the installation after having solved the problem. Alternatively, you can abort the installation manually if you want.
• SAPinst continues an aborted installation directly from the point of failure.
• SAPinst records installation progress in a single log file, called sapinst.log.
• SAPinst has a graphical user interface (GUI) called the SAPinst GUI which allows you to watch the progress of the installation and see all messages issued by SAPinst. As the SAPinst GUI is Java based, you need a Java Runtime Environment (JRE) or a Java Development Kit (JDK). A What's this? help is integrated in the SAPinst GUI. To use this,
choose and click the field for which you want more information.
You can start the SAPinst GUI on a remote computer if you want.
August 2004 13

1 General Information
1.2 New Features
Area Description
Support of Unicode
Unicode unifies the encoding systems for characters on computer systems.
Without Unicode, there are hundreds of conflicting encoding systems. That is, two encoding systems can use the same number for two different characters, or use different numbers for the same character. Any given computer needs to support many different encoding systems. Whenever data is passed between different encoding systems or platforms, there is a risk of corruption.
Unicode removes this risk by providing a unique number for every character independent of:
• Platform,
• Program,
• Language.
We use the single-source approach for transparent Unicode support. That is, ABAP coding runs identically on non-Unicode and Unicode SAP systems.
• Non-Unicode SAP system
All characters are represented binary with only one Byte.
• Unicode SAP system
All characters are represented binary with 2 or 4 Byte.
For more information about Unicode SAP systems and their availability, see SAP Notes 79991 and the SAP Service Marketplace at service.sap.com/Unicode.
Integration of J2EE Engine
A Java 2 Enterprise Edition (J2EE) standards-based engine is provided and supported by SAP as a runtime environment for the Java-based SAP components. It is an optional part of SAP Web Application Server as of release 6.20, which delivers a reliable and scalable e-business environment with native Java support that is fully J2EE compliant.
The J2EE Engine integrated into the SAP system provides the following features:
• J2EE compliance
• Enterprise JavaBeans
• Web and Internet enabling
• XML support
For more information, see Application Platform(SAP Web Application Server) Java Technology in SAP Web Application Server in the SAP Library [page 41].
14 August 2004

1 General Information
1.2 New Features
Area Description
Support of Multiple Components in One Database
SAP offers the installation of Multiple Components in one Database (MCOD) for Oracle 8.1.7 or higher. That is, you can install your new SAP system into an existing SAP system database.
For an MCOD installation, you can only combine systems for which the MCOD feature is released by SAP.
For more information, see section Installation of Multiple Components in One Database [page 41].
LDAP support for ReliantUNIX
SAP no longer supports LDAP (Lightweight Directory Access Protocol) directory services on ReliantUNIX. See SAP Note 443003 for more information.
Operating Systems
HP Tru64 UNIX
The former name of HP Tru64 UNIX is Compaq Tru64 UNIX.
Oracle Installation
Database schema ID
The database schema ID (<SCHEMA_ID>) can be different from the SAP system ID (<SAPSID>). As a result, the name of SAP<SAPSID> changed to SAP<SCHEMA_ID>.
New backup file system for Oracle offline redo logs
/oracle/<DBSID>/oraarch is the new standard file system for Oracle offline redo logs.
The file system /oracle/<SAPSID>/saparch still persists but now only contains brbackup log files.
Oracle sapdata file systems
Only four sapdata file systems (sapdata1 to sapdata4) are required for the Oracle database.
Oracle tablespace implement. method
As of Oracle 8.1.7, a new, effective method of implementing tablespaces is used. With this new tablespace implementation, only the following three database tablespaces are created:
• PSAP<SCHEMA_ID>
• PSAP<SCHEMA_ID><RELEASE>
• PSAP<SCHEMA_ID>USR
All three tablespaces are created with AUTOEXTEND ON and EXTENT MANAGEMENT LOCAL AUTOALLOCATE.
For more information, see SAP Note 355771.
Database system ID
As of SAP Web Application Server 6.10, there is an Oracle database system ID <DBSID> that can be different from the SAP system ID <SAPSID>. As a result, the database administrator name (that is, the owner of files) has changed from ora<sapsid> to ora<dbsid>.
Furthermore, the database owner name (that is, the owner of tables) changed to SAP<SCHEMA_ID>.
August 2004 15

1 General Information
1.2 Naming Conventions
SAP system ID is C11, the corresponding Oracle database system ID is D11 and the database schema ID is DS1. Then, the SAP system administrator is c11adm, the Oracle database administrator is orad11 and the Oracle database owner is SAPDS1.
1.2 Naming Conventions In this documentation, the following naming conventions apply.
Terminology
o The term SAP system is the same as SAP R/3 Enterprise.
o SAP Web AS Java is a synonym for SAP Web AS Java for SAP R/3 Enterprise .
o SAP R/3 Enterprise ABAP + Java is a synonym for SAP Web AS ABAP+J2EE.
Variables
Variables Description <CD-DIR> Directory on which a CD / DVD is mounted
<DBSID> Database system ID in uppercase letters
<dbsid> Database system ID in lowercase letters
<host_name> Name of the corresponding host
<INSTDIR> Installation directory for the SAP system
<OS> Operating system name within a path
<SAPinst_INSTDIR> Installation directory for the SAP installation tool SAPinst
<SAPSID> SAP system ID in uppercase letters
<sapsid> SAP system ID in lowercase letters
<SCHEMA_ID> Database schema ID
The following examples show how the variables are used:
“Log on as user <sapsid>adm and change to the directory /usr/sap/<SAPSID>.”
If your SAP system ID is C11, log on as user c11adm and change to the directory /usr/sap/C11.
16 August 2004

2 Installation Checklists
1.2 Naming Conventions
“Change to the directory <CD-DIR>/IM2/UNIX/<OS>.”
If the CD is mounted on /sapcd1 and your operating system is Sun Solaris, change to /sapcd1/IM2/UNIX/SUNOS_64.
2 Installation Checklists Purpose You need to perform the following phases when you install your SAP system:
Installation PreparationsInstallation Preparations
Installation ProcessInstallation Process
Post-Installation ActivitiesPost-Installation Activities
You use the checklists in the following sections to work through these installation phases.
Prerequisites Before you start the installation, you must have planned your installation. The options for the basic system variants and for the distribution of instances on hosts are described in the documentation Planning Guide – SAP R/3 Enterprise on UNIX : Oracle - Using SAP R/3 Enterprise Core 4.70, SAP R/3 Enterprise Extension Set 2.00, Service Release 1 on SAP Service Marketplace at service.sap.com/instguides SAP Components SAP R/3 Enterprise SAP R/3 Enterprise Core 4.70 / Ext. Set 2.00 (SR1).
Using this document, you also specify the parameters you need for the installation process.
Process Flow ...
1. You choose and print out the relevant installation checklist(s) for one of the following system variants:
SAP R/3 Enterprise ABAP:
Installation Option Installation Checklist
SAP R/3 Enterprise as a central system:
Central instance and database instance of SAP R/3 Enterprise are installed on a single host
Installation Checklist for SAP R/3 Enterprise (Central System) [page 20]
August 2004 17

2 Installation Checklists
1.2 Naming Conventions
SAP R/3 Enterprise as a distributed system:
Central instance and database instance of SAP R/3 Enterprise are installed on two hosts
...
Installation Checklist for SAP R/3 Enterprise (Distributed System) [page 25]
Dialog Instance(s) for SAP R/3 Enterprise
Installation Checklist for a Dialog Instance [page 32]
Gateway Instance(s) Installation Checklist for a Gateway Instance [page 34]
Additional Components Installation Checklist for Additional Components [page 37]
SAP R/3 Enterprise ABAP+Java:
For the installation of SAP R/3 Enterprise ABAP+Java, also installation checklists in the documentation Installation Guide – SAP Web Application Server Java 6.40 on UNIX: Oracle are required.
Installation Option Installation Checklist
SAP R/3 Enterprise as a central system:
Central instance, central services instance and database instance of the SAP R/3 Enterprise are installed on a single host
...
1. Installation Checklist for SAP R/3 Enterprise (Central System) [page 20]
2. Installation Checklist for SAP R/3 Enterprise – J2EE Add-In (Central System) available in the documentation Installation Guide – SAP Web Application Server Java on UNIX: Oracle.
18 August 2004

2 Installation Checklists
1.2 Naming Conventions
SAP R/3 Enterprise as a distributed system:
Central instance, central services instance and database instance of the SAP R/3 Enterprise are installed on two hosts
...
1. Installation Checklist for SAP R/3 Enterprise (Distributed System) [page 25]
2. Installation Checklist for SAP R/3 Enterprise – J2EE Add-In (Distributed System) available in the documentation Installation Guide – SAP Web Application Server Java on UNIX: Oracle.
August 2004 19
2 Installation Checklists
1.2 Naming Conventions
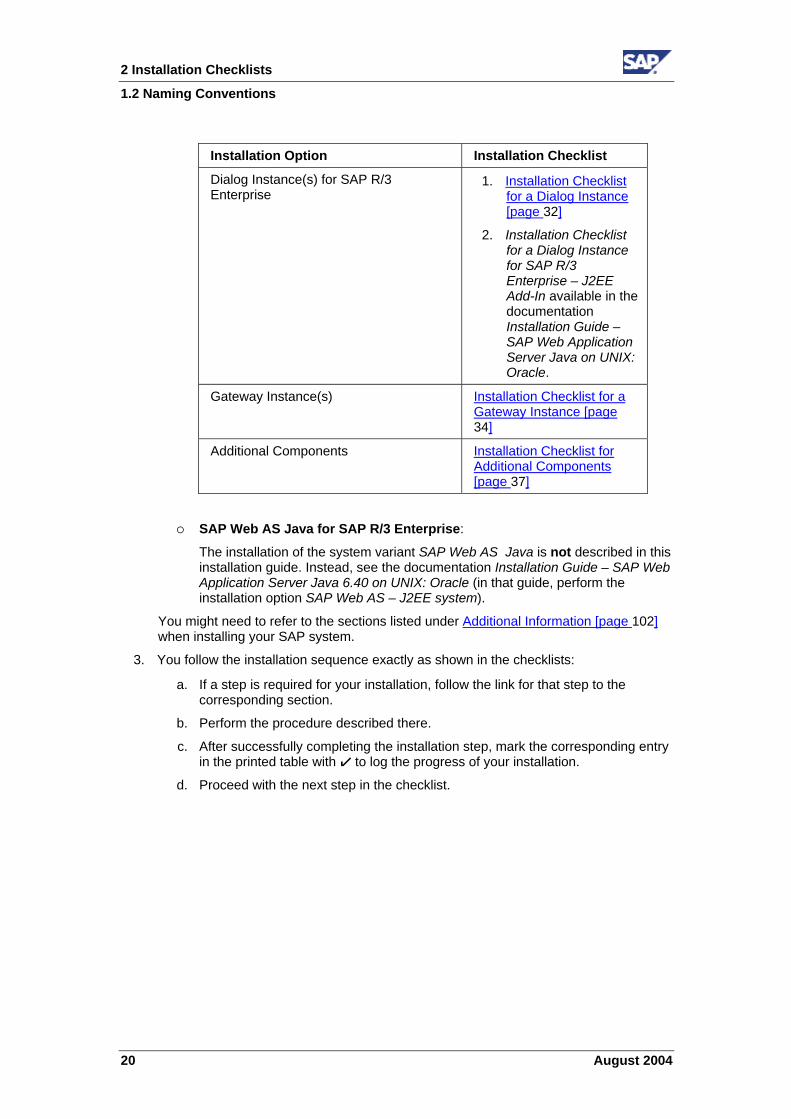
Installation Option Installation Checklist
Dialog Instance(s) for SAP R/3 Enterprise
...
1. Installation Checklist for a Dialog Instance [page 32]
2. Installation Checklist for a Dialog Instance for SAP R/3 Enterprise – J2EE Add-In available in the documentation Installation Guide – SAP Web Application Server Java on UNIX: Oracle.
Gateway Instance(s) Installation Checklist for a Gateway Instance [page 34]
Additional Components Installation Checklist for Additional Components [page 37]
SAP Web AS Java for SAP R/3 Enterprise:
The installation of the system variant SAP Web AS Java is not described in this installation guide. Instead, see the documentation Installation Guide – SAP Web Application Server Java 6.40 on UNIX: Oracle (in that guide, perform the installation option SAP Web AS – J2EE system).
You might need to refer to the sections listed under Additional Information [page 102] when installing your SAP system.
3. You follow the installation sequence exactly as shown in the checklists: ...
a. If a step is required for your installation, follow the link for that step to the corresponding section.
b. Perform the procedure described there.
c. After successfully completing the installation step, mark the corresponding entry in the printed table with ! to log the progress of your installation.
d. Proceed with the next step in the checklist.
20 August 2004

2 Installation Checklists
2.1 Installation Checklist for SAP R/3 Enterprise (Central System)
2.1 Installation Checklist for SAP R/3 Enterprise (Central System) Purpose You use the following checklist when you want to install a central system (that is, you install a central instance and a database instance on the central system host).
Process Flow ! Action
Installation Preparation
Make sure that you have planned the system configuration of your installation as described in the documentation Planning Guide SAP R/3 Enterprise on UNIX : Oracle - Using SAP R/3 Enterprise Core 4.70, SAP R/3 Enterprise Extension Set 2.00, Service Release 1 on SAP Service Marketplace at service.sap.com/instguides SAP Components SAP R/3 Enterprise SAP R/3 Enterprise Core 4.70 / Ext. Set 2.00 (SR1).
You obtain the required documentation [page 38] for the SAP system installation. Particularly, request the current SAP Notes for the installation.
If you want to install a Unicode SAP system, make sure to read SAP Note 544623 and to perform the additional installation steps described there.
If you decided to perform an installation of multiple components in one database (MCOD), see Installation of Multiple Components in One Database [page 41].
You check the Hardware and Software Requirements [page 43].
For the distribution of the Oracle database on hard disks, also check the Oracle System Configuration [page 48].
For the installation, make sure that the front end software is installed on at least one host machine in your system environment. To simplify administration of your SAP system, we recommend you to do this on the central instance host.
For more information on installing the front end software, see the separate documentation:
• SAP Front End Installation Guide (English version)
• SAP Frontend-Installationsleitfaden (German version)
You can optionally create the operating system users [page 52] <sapsid>adm and/or ora<dbsid> manually before the installation.
If you do not create these users manually, they get created automatically by SAPinst during the installation.
August 2004 21

2 Installation Checklists
2.1 Installation Checklist for SAP R/3 Enterprise (Central System)
! Action
You modify UNIX kernel parameters and swap space.
For more information, see the following sections in the documentation SAP Software on UNIX: OS Dependencies:
• <Your OS>: Checking and Modifying the UNIX Kernel
• For AIX: AIX: Checking and Modifying the UNIX Kernel and Creating UNIX Groups and Users
• For Linux: Linux: Checking the UNIX Kernel
If you do not check the UNIX kernel parameters, there might be unpredictable problems with your system during or after the installation.
You check SAP Note 306408 if you require an interim patch for the Oracle database installation. In this case, make sure you have the corresponding Perl version as stated in that SAP Note.
You set up file systems or raw devices [page 53] listed under SAP File Systems and Oracle File Systems.
You prepare the system for SAPinst [page 58].
You prepare installation CDs / DVDs [page 61].
If you decided to use LDAP for SAP Logon or Microsoft Management Console (MMC):
• Make sure that an LDAP directory is available on the network. The Active Directory is part of a Windows 2000 installation and is automatically available on all Domain Controllers. A generic LDAP directory is an additional component that has to be installed separately on a UNIX or Windows Server.
• Active Directory: Prepare the Active Directory for use with the SAP system [page 64].
• Generic LDAP Directory: Make sure that the generic LDAP directory is prepared so that it can store SAP data. The preparation involves extending the directory schema and creating a container for the SAP data.
Installation Process
You set the library path environment variable as described in section Prerequisites before Starting SAPinst [page 66].
You make sure that umask is set to 022 for user root. As user root, enter the following command: umask 022
22 August 2004

2 Installation Checklists
2.1 Installation Checklist for SAP R/3 Enterprise (Central System)
! Action
If you install a system into an existing database (MCOD), make sure that the SYSTEM tablespace contains at least 350 MB of free space. If there is not enough space left, increase the size of this tablespace with BRSPACE.
You run SAPinst [page 69] and select SAP R3E 4.7x200 SR1 ABAP System <Unicode or non-Unicode> Install a Central Instance.
You run SAPinst [page 69] and select SAP R3E 4.7x200 SR1 ABAP System <Unicode or non-Unicode> Install a Database Instance.
If you install a system into an existing database (MCOD), see section Installation of Multiple Components in One Database [page 41] for more information.
SAPinst stops the installation and prompts you for the Oracle database installation.
You start the Script rootpre.sh (AIX only) [page 74].
This action is not required if you install a system into an existing database (MCOD).
You install the Oracle database software [page 76].
This action is not required if you install a system into an existing database (MCOD).
You continue the database instance installation by choosing Ok in the SAPinst GUI of the database instance installation.
You check settings for OS users [page 79] (AIX only).
If you decided to use a generic LDAP directory, you create an user for LDAP directory access [page 79].
August 2004 23

2 Installation Checklists
2.1 Installation Checklist for SAP R/3 Enterprise (Central System)
! Action
Post-Installation Activities
To complete the installation, you have to perform a number of actions. Some of these actions are mandatory, others are optional and serve to activate features that might be useful.
HP Tru64 UNIX only:
Edit shell scripts [page 81].
You check that you can start and stop the SAP system [page 82].
You check that you can log on to the SAP system [page 85].
You check that the SAP system services [page 86] are present.
You install the SAP Online Documentation [page 87].
You install the SAP License [page 87].
You configure SAProuter and SAPNet − R/3 Frontend [page 88].
You complete and check the Oracle installation [page 89].
You configure the domain controller in the Transport Management System [page 90] (TMS).
You perform basic operations [page 91] in your SAP system.
You check and, if required, adapt the configured number of work processes [page 91].
You activate or deactivate the integrated Internet Transaction Server (ITS) [page 93].
If required, you install additional languages [page 92].
If required, you import Support Packages [page 93].
You perform operating system adjustments [page 94].
You perform file and directory adjustments [page 94].
For the installation, you have set permissions of directory /usr/sap/trans to 775 on the central instance host (see section Setting up File Systems and Raw Devices [page 53]). For security reasons, set the permissions of /usr/sap/trans to 771 after the installation.
If the Oracle security setup defined by the standard installation is not restrictive enough for your purposes, see SAP Note 186119 to configure the Oracle listener to accept only connections from specific hosts.
24 August 2004

2 Installation Checklists
2.1 Installation Checklist for SAP R/3 Enterprise (Central System)
! Action
Unicode SAP system installation only:
Make sure to perform the post-installation steps described in SAP Note 544623.
If you install SAP R/3 Enterprise as basis for an SAP component that uses the Knowledge Provider (KPRO) component (for example, SAP BW or SAP KW), you schedule asynchronous indexing and deindexing [page 96] using the report RSTIRIDX).
You perform the client copy [page 99].
You perform a full installation backup [page 99].
If you install SAP R/3 Enterprise ABAP+Java, you could perform the full installation backup after the installation of the J2EE Engine.
When the newly installed SAP system goes into production, we recommend that you immediately change passwords of created users [page 101] according to the SAP Security Guide.
Additional Steps
If you want to install SAP R/3 Enterprise ABAP+Java, perform the steps in the Installation Checklist for SAP Web AS – J2EE Add-In (Central System) available in the documentation Installation Guide – SAP Web Application Server Java 6.40 on UNIX: Oracle.
SAP_BAS_620 and SAP_ABA_620 SP41 are prerequisites for the J2EE Add-In installation.
After central system installation you can install the following if required:
• Dialog Instance [page 32]
• Gateway Instance [page 34]
• Additional Components [page 37]
Once you have completed and checked the SAP system installation, you need to prepare the SAP system for using business applications. This process includes customizing the basis system and the various business components. For more information, see the SAP Library [page 41] and choose Solution Life Cycle Management → Customizing.
August 2004 25

2 Installation Checklists
2.2 Installation Checklist for SAP R/3 Enterprise (Distributed System)
2.2 Installation Checklist for SAP R/3 Enterprise (Distributed System) Purpose You use the following checklist when you want to install a distributed SAP system (that is, you install a central instance on the central instance host and the database instance on the database instance host).
Process Flow ...
1. You perform the following steps on the central instance host: ! Action
Installation Preparation
Make sure that you have planned the system configuration of your installation as described in the documentation Planning Guide – SAP R/3 Enterprise on UNIX : Oracle - Using SAP R/3 Enterprise Core 4.70, SAP R/3 Enterprise Extension Set 2.00, Service Release 1 on SAP Service Marketplace at service.sap.com/instguides SAP Components SAP R/3 Enterprise SAP R/3 Enterprise Core 4.70 / Ext. Set 2.00 (SR1).
You obtain the required documentation [page 38] for the SAP system installation. Particularly, request the current SAP Notes for the installation.
If you want to install a Unicode SAP system, make sure to read SAP Note 544623 and to perform the additional installation steps described there.
If you decided to perform an installation of multiple components in one database (MCOD), see Installation of Multiple Components in One Database [page 41].
If you decided to use LDAP (Lightweight Directory Access Protocol) for SAP Logon or the Microsoft Management Console (MMC), see Integration of LDAP Directory Services [page 42].
You check the hardware and software requirements [page 43].
For the installation, make sure that the front end software is installed on at least one host machine in your system environment. To simplify administration of your SAP system, we recommend you to do this on the central instance host.
For more information on installing the front end software, see the separate documentation:
• SAP Front End Installation Guide (English version)
• SAP Frontend-Installationsleitfaden (German version)
26 August 2004
2 Installation Checklists
2.2 Installation Checklist for SAP R/3 Enterprise (Distributed System)
! Action
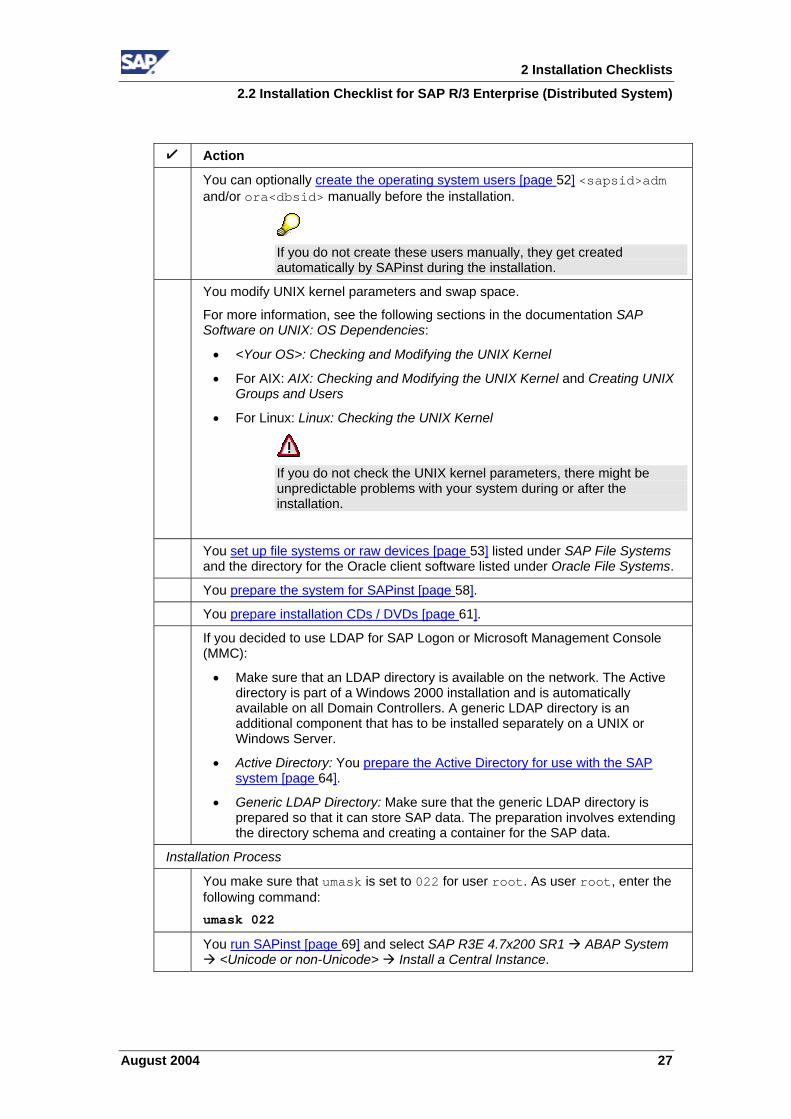
You can optionally create the operating system users [page 52] <sapsid>adm and/or ora<dbsid> manually before the installation.
If you do not create these users manually, they get created automatically by SAPinst during the installation.
You modify UNIX kernel parameters and swap space.
For more information, see the following sections in the documentation SAP Software on UNIX: OS Dependencies:
• <Your OS>: Checking and Modifying the UNIX Kernel
• For AIX: AIX: Checking and Modifying the UNIX Kernel and Creating UNIX Groups and Users
• For Linux: Linux: Checking the UNIX Kernel
If you do not check the UNIX kernel parameters, there might be unpredictable problems with your system during or after the installation.
You set up file systems or raw devices [page 53] listed under SAP File Systems and the directory for the Oracle client software listed under Oracle File Systems.
You prepare the system for SAPinst [page 58].
You prepare installation CDs / DVDs [page 61].
If you decided to use LDAP for SAP Logon or Microsoft Management Console (MMC):
• Make sure that an LDAP directory is available on the network. The Active directory is part of a Windows 2000 installation and is automatically available on all Domain Controllers. A generic LDAP directory is an additional component that has to be installed separately on a UNIX or Windows Server.
• Active Directory: You prepare the Active Directory for use with the SAP system [page 64].
• Generic LDAP Directory: Make sure that the generic LDAP directory is prepared so that it can store SAP data. The preparation involves extending the directory schema and creating a container for the SAP data.
Installation Process
You make sure that umask is set to 022 for user root. As user root, enter the following command: umask 022
You run SAPinst [page 69] and select SAP R3E 4.7x200 SR1 ABAP System <Unicode or non-Unicode> Install a Central Instance.
August 2004 27

2 Installation Checklists
2.2 Installation Checklist for SAP R/3 Enterprise (Distributed System)
! Action
You check Settings for OS Users [page 79] (AIX only).
If you decided to use a generic LDAP directory, you create an user for LDAP directory access [page 79].
2. You perform the following steps on the database instance host:
If you install a system into an existing database (MCOD), see section Installation of Multiple Components in One Database [page 41] for more information.
! Action
Installation Preparation
You check the hardware and software requirements [page 43]. For the distribution of the Oracle database on hard disks, also check the Oracle System Configuration [page 48].
You can optionally create the operating system users [page 52] <sapsid>adm and/or ora<dbsid> manually before the installation.
If you do not create these users manually, they get created automatically by SAPinst during the installation.
You modify UNIX kernel parameters and swap space.
For more information, see the following sections in the documentation SAP Software on UNIX: OS Dependencies:
• <Your OS>: Checking and Modifying the UNIX Kernel
• For AIX: AIX: Checking and Modifying the UNIX Kernel and Creating UNIX Groups and Users
• For Linux: Linux: Checking the UNIX Kernel
If you do not check the UNIX kernel parameters, there might be unpredictable problems with your system during or after the installation.
You check SAP Note 306408 if you require an interim patch for the Oracle database installation. In this case, make sure you have the corresponding Perl version as stated in that SAP Note.
You set up file systems or raw devices [page 53] listed under Oracle File Systems. Also mount the global transport directory /usr/sap/trans as listed under SAP File Systems.
28 August 2004

2 Installation Checklists
2.2 Installation Checklist for SAP R/3 Enterprise (Distributed System)
! Action
Installation Process
You make sure that the prerequisites before starting SAPinst [page 66] are met:
• Set the library path environment variable as described in section For Database Instance only.
• Mount directories from the central instance as described in section For Distributed Instances only.
You make sure that umask is set to 022 for user root. As user root, enter the following command: umask 022
If you install a system into an existing database (MCOD), make sure that the SYSTEM tablespace contains at least 350 MB of free space. If there is not enough space left, increase the size of this tablespace with BRSPACE.
You run SAPinst [page 69] and select SAP R3E 4.7x200 SR1 ABAP System <Unicode or non-Unicode> Install a Database Instance.
If you install a system into an existing database (MCOD), see section Installation of Multiple Components in One Database [page 41] for more information.
SAPinst stops the installation and prompts you for the Oracle database installation.
You start the Script rootpre.sh (AIX only) [page 74].
This action is not required if you install a system into an existing database (MCOD).
You install the Oracle database software [page 76].
This action is not required if you install a system into an existing database (MCOD).
You continue the database instance installation by choosing Ok in the SAPinst GUI.
You prepare the system for SAPinst [page 58].
You prepare installation CDs / DVDs [page 61].
August 2004 29

2 Installation Checklists
2.2 Installation Checklist for SAP R/3 Enterprise (Distributed System)
! Action
Post-Installation Activities
To complete the installation, you have to perform a number of actions. Some of these actions are mandatory, others are optional and serve to activate features that might be useful.
HP Tru64 UNIX only:
Edit shell scripts [page 81].
You complete and check the Oracle installation [page 89].
You perform file and directory adjustments [page 94].
You enable remote monitoring [page 94].
If the Oracle security setup defined by the standard installation is not restrictive enough for your purposes, see SAP Note 186119 to configure the Oracle listener to accept only connections from specific hosts.
3. You perform the following steps on the central instance host: ! Action
Post-Installation Activities
To complete the installation, you have to perform a number of actions. Some of these actions are mandatory, others are optional and serve to activate features that might be useful.
HP Tru64 UNIX only:
Edit shell scripts [page 81].
You check that you can start and stop the SAP system [page 82].
You check that you can log on to the SAP system [page 85].
You check that the SAP system services [page 86] are present.
You install the SAP Online Documentation [page 87].
You install the SAP License [page 87].
You configure SAProuter and SAPNet − R/3 Frontend [page 88].
You configure the domain controller in the Transport Management System [page 90] (TMS).
You perform basic operations [page 91] in your SAP system.
30 August 2004

2 Installation Checklists
2.2 Installation Checklist for SAP R/3 Enterprise (Distributed System)
! Action
You activate or deactivate the integrated Internet Transaction Server (ITS) [page 93].
You check and, if required, adapt the configured number of work processes [page 91].
If required, you install additional languages [page 92].
If required, you import Support Packages [page 93].
You perform operating system adjustments [page 94].
You perform file and directory adjustments [page 94].
For the installation, you have set permissions of directory /usr/sap/trans to 775 on the central instance host (see section Setting up File Systems and Raw Devices [page 53]). For security reasons, set the permissions of /usr/sap/trans to 771 after the installation.
August 2004 31

2 Installation Checklists
2.2 Installation Checklist for SAP R/3 Enterprise (Distributed System)
! Action
Unicode SAP system installation only:
Make sure to perform the post-installation steps described in SAP Note 544623.
If you install SAP R/3 Enterprise as basis for an SAP component that uses the Knowledge Provider (KPRO) component (for example, SAP BW or SAP KW), you schedule asynchronous indexing and deindexing [page 96] using the report RSTIRIDX).
You perform the client copy [page 99].
You perform a full installation backup [page 99] of both the central instance (on the central instance host) and the database instance (on the database instance host).
If you install SAP R/3 Enterprise ABAP+Java, you could perform the full installation backup after the installation of the J2EE Engine.
When the newly installed SAP system goes into production, we recommend that you immediately change passwords of created users [page 101] according to the SAP Security Guide.
Additional Steps
If you want to install SAP R/3 Enterprise ABAP+Java, perform the steps in the Installation Checklist for SAP Web AS – J2EE Add-In (Distributed System) available in the documentation Installation Guide – SAP Web Application Server Java 6.40 on UNIX: Oracle.
SAP_BAS_620 and SAP_ABA_620 SP41 are prerequisites for the J2EE Add-In installation.
After the central instance installation, you can install the following if required:
• Dialog Instance [page 32].
• Gateway Instance [page 34]
• Additional Components [page 37]
Once you have completed and checked the SAP system installation, you need to prepare the SAP system for using business applications. This process includes customizing the basis system and the various business components. For more information, see the SAP Library [page 41] and choose Solution Life Cycle Management → Customizing.
32 August 2004

2 Installation Checklists
2.3 Installation Checklist for a Dialog Instance
2.3 Installation Checklist for a Dialog Instance Purpose You use the following checklist when you want to install a dialog instance on the dialog instance host.
Process Flow
! Action
Installation Preparation
Make sure that you have planned the system configuration of your installation as described in the documentation Planning Guide SAP R/3 Enterprise on UNIX : Oracle - Using SAP R/3 Enterprise Core 4.70, SAP R/3 Enterprise Extension Set 2.00, Service Release 1 on SAP Service Marketplace at service.sap.com/instguides SAP Components SAP R/3 Enterprise SAP R/3 Enterprise Core 4.70 / Ext. Set 2.00 (SR1).
You obtain the required documentation [page 38] for the SAP system installation. Particularly, request the current SAP Notes for the installation.
You check the hardware and software requirements [page 43].
You can optionally create the operating system users [page 52] <sapsid>adm and/or ora<dbsid> manually before the installation.
if you do not create these users manually, they get created automatically by SAPinst during the installation.
If you install the dialog instance on a standalone host, you modify UNIX kernel parameters and swap space.
For more information, see the following sections in the documentation SAP Software on UNIX: OS Dependencies:
• <Your OS>: Checking and Modifying the UNIX Kernel
• For AIX: <Your OS>: Checking and Modifying the UNIX Kernel and Creating UNIX Groups and Users
• For Linux: Linux: Checking the UNIX Kernel
If you do not check the UNIX kernel parameters, there might be unpredictable problems with your system during or after the installation.
You set up file systems or raw devices [53] listed under SAP File Systems and the directory for the Oracle client software listed under Oracle File Systems.
You prepare the system for SAPinst [page 58].
August 2004 33

2 Installation Checklists
2.3 Installation Checklist for a Dialog Instance
! Action
You prepare installation CDs / DVDs [page 61].
Installation Process
You make sure that umask is set to 022 for user root. As user root, enter the following command: umask 022
You make sure that the prerequisites before starting SAPinst [page 66] are met:
• Set the library path environment variable as described in section For Database Instance only.
• Mount directories from the central instance as described in section For Distributed Instances only.
You run SAPinst [page 69] and select SAP R3E 4.7x200 SR1 ABAP System <Unicode or non-Unicode> Install a Dialog Instance.
You check settings for OS users [page 79] (AIX only).
You activate sapcpe if required [page 80].
Post-Installation Activities
HP Tru64 UNIX only:
Edit shell scripts [page 81].
You check that you can start and stop the SAP system [page 82].
You check that you can log on to the SAP system [page 85].
If required, you import Support Packages [page 93].
You activate or deactivate the integrated Internet Transaction Server (ITS) [page 93].
You perform file and directory adjustments [page 94].
You perform a full installation backup [page 99].
When the newly installed SAP system goes into production, we recommend that you immediately change passwords of created users [page 101] according to the SAP Security Guide.
Additional Steps
If you want to install a dialog instance for SAP R/3 Enterprise ABAP+Java, perform the steps in the Installation Checklist for a Dialog Instance for SAP Web AS – J2EE Add-In available in the documentation Installation Guide – SAP Web Application Server Java 6.40 on UNIX: Oracle.
SAP_BAS_620 and SAP_ABA_620 SP41 are prerequisites for the J2EE Add-In installation.
34 August 2004
2 Installation Checklists
2.4 Installation Checklist for a Gateway Instance
After dialog instance installation, you can install the following if required:
• Install another dialog instance, see Installation Checklist for a Dialog Instance [page 32].
• Gateway Instance [page 34]
• Additional Components [page 37]
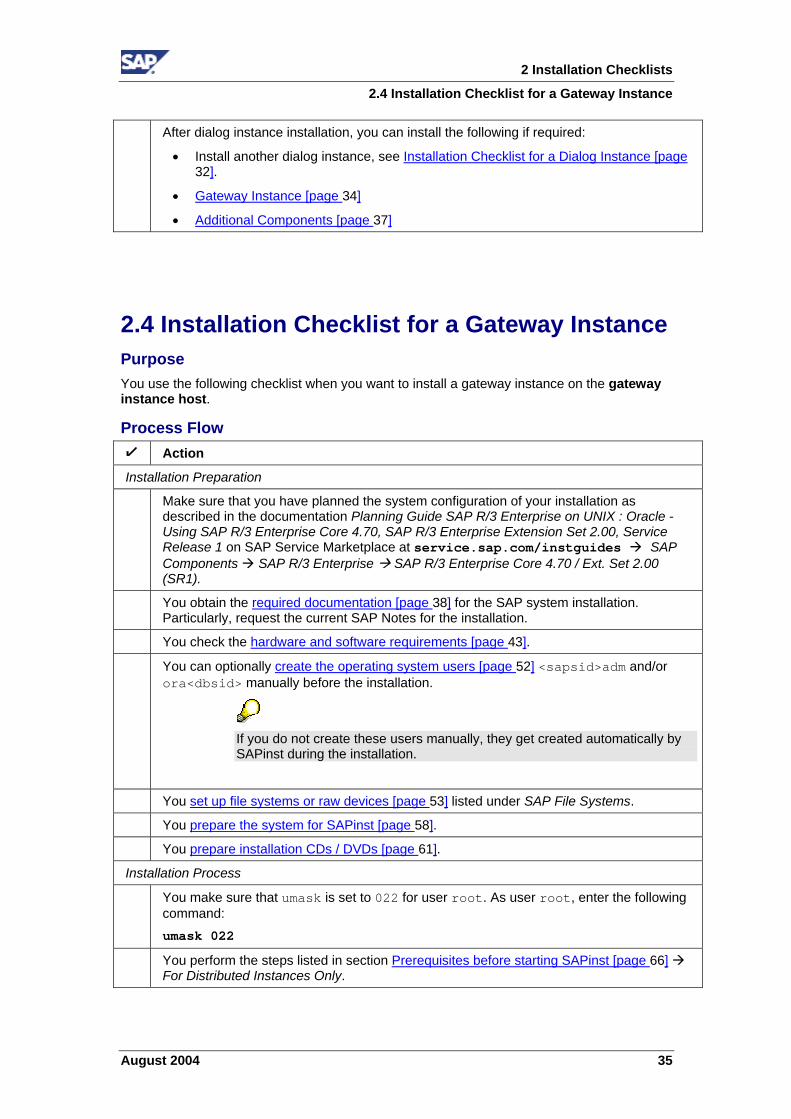
2.4 Installation Checklist for a Gateway Instance Purpose You use the following checklist when you want to install a gateway instance on the gateway instance host.
Process Flow ! Action
Installation Preparation
Make sure that you have planned the system configuration of your installation as described in the documentation Planning Guide SAP R/3 Enterprise on UNIX : Oracle - Using SAP R/3 Enterprise Core 4.70, SAP R/3 Enterprise Extension Set 2.00, Service Release 1 on SAP Service Marketplace at service.sap.com/instguides SAP Components SAP R/3 Enterprise SAP R/3 Enterprise Core 4.70 / Ext. Set 2.00 (SR1).
You obtain the required documentation [page 38] for the SAP system installation. Particularly, request the current SAP Notes for the installation.
You check the hardware and software requirements [page 43].
You can optionally create the operating system users [page 52] <sapsid>adm and/or ora<dbsid> manually before the installation.
If you do not create these users manually, they get created automatically by SAPinst during the installation.
You set up file systems or raw devices [page 53] listed under SAP File Systems.
You prepare the system for SAPinst [page 58].
You prepare installation CDs / DVDs [page 61].
Installation Process
You make sure that umask is set to 022 for user root. As user root, enter the following command: umask 022
You perform the steps listed in section Prerequisites before starting SAPinst [page 66] For Distributed Instances Only.
August 2004 35

2 Installation Checklists
2.4 Installation Checklist for a Gateway Instance
You run SAPinst [page 69] and select Install SAP Gateway.
You check settings for OS users [page 79] (AIX only).
If you decided to use a generic LDAP directory, you create a user for LDAP directory access [page 79].
36 August 2004

2 Installation Checklists
2.4 Installation Checklist for a Gateway Instance
! Action
Post-Installation Activities
To complete the installation, you have to perform a number of actions. Some of these actions are mandatory, others are optional and serve to activate features that might be useful.
HP Tru64 UNIX only:
Edit shell scripts [page 81].
You check that you can start and stop the SAP system [page 82].
You check that you can log on to the SAP system [page 85].
If required, you import Support Packages [page 93].
You activate or deactivate the integrated Internet Transaction Server (ITS) [page 93].
You perform file and directory adjustments [page 94].
You perform a full installation backup [page 99].
When the newly installed SAP system goes into production, we recommend that you immediately change passwords of created users [page 101] according to the SAP Security Guide.
Additional Steps
After the gateway instance installation, you can install the following if required:
• Dialog Instance [page 32]
• Additional Components [page 37]
August 2004 37

2 Installation Checklists
2.5 Installation Checklist for Additional Components
2.5 Installation Checklist for Additional Components Purpose You use the following checklist when you want to install one or more SAP software development kits (additional components) on the central instance host.
Before you install additional components, you must have successfully performed the installation of the central instance and of the database.
Process Flow ! Action
Installation Preparation
Make sure that you have planned the system configuration of your installation as described in the documentation Planning Guide SAP R/3 Enterprise on UNIX : Oracle - Using SAP R/3 Enterprise Core 4.70, SAP R/3 Enterprise Extension Set 2.00, Service Release 1 on SAP Service Marketplace at service.sap.com/instguides SAP Components SAP R/3 Enterprise SAP R/3 Enterprise Core 4.70 / Ext. Set 2.00 (SR1).
You check the required documentation [page 38] for the SAP system installation. Particularly, request the current SAP Notes for the installation.
You prepare the system for SAPinst [page 58].
You prepare installation CDs / DVDs [page 61].
Installation Process
You make sure that umask is set to 022 for user root. As user root, enter the following command: umask 022
You run SAPinst [page 69] on the central instance host and select SAP System Additional Components.
The optional components can only be installed on the central instance host. (The directory <sapmnt>/<SAPSID> must be located on a local file system.)
You perform file and directory adjustments [page 94].
Additional Steps
After the installation of additional components, you can install the following if required:
• Dialog Instance [page 32]
• Gateway Instance [page 34].
38 August 2004

3 Installation Preparations
3.1 Required Documentation
3 Installation Preparations
Make sure that you read the Installation Checklists [page 17] before you start installation preparations.
3.1 Required Documentation The following sections describe the documentation you require for the installation.
• SAP Installation Notes [page 38]
• Information in the SAP Service Marketplace [page 39]
• Accessing the SAP Library [page 41]
3.1.1 SAP Installation Notes You must read the following SAP Notes before you start the installation. They contain the most recent information regarding the installation, as well as corrections to the installation documentation.
Make sure that you have the most recent version of each SAP Note. They are located on SAP Service Marketplace at service.sap.com/notes.
SAP Note Number
Title Description
750984 SAP R/3 Enterprise 4.7 Ext. 2.00 Service Release 1 Installation on UNIX
Information about the SAP system installation and corrections to this documentation.
668604 SAP Web AS 6.40 ABAP / Java Installation on UNIX : Oracle
Oracle-specific information about the SAP system installation.
668603 SAP Web AS 6.40 ABAP Installation on UNIX
UNIX-specific information about the SAP system installation.
668602 SAP Software on UNIX - OS Dependencies
Operating-system-specific information about the SAP system installation and corrections to this documentation.
611361 Hostnames of SAP servers
Requirements concerning host name length and allowed characters for SAP server hosts.
598678 Composite SAP note: New functions in Oracle 9i
Information about new functions in Oracle 9i that are used as off the installation of SAP Web AS ABAP or ABAP+Java 6.40.
August 2004 39

3 Installation Preparations
3.1 Required Documentation
544623 New Installation of Unicode SAP systems
This SAP Note contains supplementary information about Unicode-specific installation steps.
171356 Linux only: SAP software on Linux: Essential comments
This SAP Note is only required for installations on Linux. It contains Linux-specific information about the SAP system installation.
98252 Installing two Oracle databases on a host
This SAP Note is only required if you plan to install more than one Oracle database on the same host.
79991 Multi Language Support / Unicode
Information about Unicode SAP systems and their availability. It is only required if you plan to install a Unicode SAP system.
73606 R/3 language combinations (non-Unicode)
Information about multiple languages on one SAP system.
42305 RSCPINST (NLS installation tool)
Information about language and code page settings in your SAP system.
3.1.2 Information in the SAP Service Marketplace Information on the following areas is available on SAP Service Marketplace.
Description Internet Address Title
SAP Notes service.sap.com/notes –
Released platforms service.sap.com/platforms –
Operating system dependencies
service.sap.com/instguidesNW04 Installation
SAP Software on UNIX: OS Dependencies
Media Information for Installation or Upgrade of SAP R/3 Enterprise
service.sap.com/instguides SAP Components SAP R/3 Enterprise SAP R/3 Enterprise Core 4.70 / Ext. Set 2.00 (SR1)
Media Information for SAP R/3 Enterprise
Planning the Installation of a SAP R/3 Enterprise system
service.sap.com/instguides SAP Components SAP R/3 Enterprise SAP R/3 Enterprise Core 4.70 / Ext. Set 2.00 (SR1)
Planning Guide – SAP R/3 Enterprise on UNIX : Oracle - Using SAP R/3 Enterprise Core 4.70, SAP R/3 Enterprise Extension Set 2.00, Service Release 1
Installation of the Java system for an SAP R/3 Enterprise system
service.sap.com/instguidesNW04 Installation
Installation Guide – SAP SAP Web Application Server Java on UNIX: Oracle
Patching of SAP NetWeaver’04 scenarios
service.sap.com/instguidesNW04→ Operations
Support Package Stack Guide – SAP NetWeaver’04 Support
40 August 2004

3 Installation Preparations
3.1 Required Documentation
Package Stack <current version>
Upgrade to R/3 Enterprise
service.sap.com/instguides SAP Components SAP R/3 Enterprise SAP R/3 Enterprise Core 4.70 / Ext. Set 2.00 (SR1)
Component Upgrade Guide : SAP R/3 Enterprise UNIX
Installation of a dialog instance (ABAP) or a gateway instance as part of an SAP system upgrade
service.sap.com/instguidesNW04→ Installation
Installation Guide – Additional Instances on <Platform>
Installation of SAP Net Weaver Developer Workplace
service.sap.com/instguidesNW04 Installation
Installation Guide – SAP NetWeaver Developer Workplace
Installation of SAP NetWeaver Developer Studio
service.sap.com/instguidesNW04 Installation
Installation Guide – SAP NetWeaver Developer Studio
Installation of the SAP System Landscape Directory (SLD)
service.sap.com/instguidesNW04 Installation
Post-Installation Guide – SAP System Landscape Directory on SAP Web AS Java 6.40
Homogeneous and heterogeneous system copy
service.sap.com/instguidesNW04→ Installation
Homogeneous and Heterogeneous System Copy for SAP Systems based on SAP Web Application Server 6.40
Unicode SAP systems and their availability
service.sap.com/unicode
See also SAP Note 79991.
–
Technical infrastructure –configuration scenarios and related aspects such as security, load balancing, availability, and caching
service.sap.com/ti –
Network infrastructure service.sap.com/network –
System sizing service.sap.com/sizing Quick Sizer tool
Front-end installation
service.sap.com/instguidesNW04
Installation
Front End Installation Guide (also contained on the respective Presentation CD)
High availability service.sap.com/ha –
Security service.sap.com/security –
Information on SAP Support Package Stacks
Service.sap.com/sp-stacks –
August 2004 41

3 Installation Preparations
3.2 Installation of Multiple Components in One Database
3.1.3 Accessing the SAP Library For more information on the SAP Web Application Server, access the SAP Library from the SAP Help Portal at help.sap.com/nw4
1. Select the required language
2. Choose SAP NetWeaver
In the SAP Help Portal at help.sap.com you can also find online documentation for all SAP Solutions.
...
3.2 Installation of Multiple Components in One Database You decided to install multiple SAP components in a single database (MCOD).
For more information, see the documentation Planning Guide for SAP Web Application Server on UNIX: Oracle Installation of Multiple Components in One Database.
Here you get instruction how to perform the MCOD installation.
All differences in the installation procedure for MCOD are marked in the corresponding sections of this documentation.
Installing the First SAP System into a New Database ...
1. Perform the central instance installation as usual.
For example, you install the central instance with SAP system ID C11.
2. Start the database instance installation.
3. When SAPinst prompts for Database Instance Type, choose Install (first) SAP System into a new database.
For example, you install the database instance C11.
On some platforms, you can choose a database instance ID that is different from the SAP system ID, for example D11.
4. Finish the installation.
Installing an Additional SAP System into an Existing Database ...
1. Perform the central instance installation as usual.
42 August 2004

3 Installation Preparations
3.2 Installation of Multiple Components in One Database
For example, you install the central instance with SAP system ID C12.
2. When SAPinst prompts for the Name of the database instance, enter exactly the database instance <DBSID> of the existing – that is, the first – database.
3. Start the database instance installation.
4. When you are prompted for Database Instance Type, choose Install (additional) SAP System into an existing database.
5. When SAPinst prompts you for the Name of the database instance, enter exactly the database instance <DBSID> of the existing (that is, first) database.
When SAPinst prompts for the database instance name, for example enter C11.
6. Finish the installation.
Due to the MCOD installation, some installation steps are not required and therefore do not appear. These steps are marked in the Parameter Tables (see Planning Guide for SAP Web Application Server on UNIX Oracle Installation Overview; <your installation option> Parameter Table: <your installation option>)
August 2004 43

3 Installation Preparations
3.3 Hardware and Software Requirements
3.3 Hardware and Software Requirements Purpose You check the hardware and software requirements using the requirements checklists in the following sections. They give the minimum requirements for small SAP system installations and do not take customer data into account. Depending on the amount of data involved, the requirements might change. For a more precise sizing definition that reflects your particular system load:
• Use the SAP Quick Sizer tool available on SAP Service Marketplace. You enter information on your planned system and the tool calculates the requirements.
For more information, see SAP Service Marketplace at service.sap.com/sizing.
• Contact a hardware vendor. The vendor analyzes the load and calculates suitable hardware sizing.
• Contact the person in charge of installation or your Competence Center.
Process Flow ...
1. You see the checklists of the SAP system instances you want to install:
Central instance [page 44]
If you want to install SAP R/3 Enterprise ABAP+Java, also take into account the requirements of the central services instance listed in the documentation Installation Guide – SAP Web Application Server Java on UNIX: Oracle, section Requirements Checklist for Central Services Instance.
Database instance [page 46]
Dialog or gateway instance [page 50], if you want to install additional dialog instances or a gateway instance
If you install multiple SAP system instances on one host, you need to add up the requirements.
2. You check the network requirements. For more information, see the documentation Network Integration of SAP Servers on SAP Service Marketplace at
service.sap.com/network.
For more information on SAP software in PC networks, see SAP Note 5324.
If you do not fully meet the relevant requirements, you might experience problems when working with the SAP system.
44 August 2004

3 Installation Preparations
3.3 Hardware and Software Requirements
3.3.1 Requirements Checklist for a Central Instance The central instance host must meet the following requirements:
Requirement Type Requirement
Hardware Requirements
• DVD drive
• Hard disk drives with sufficient space for the central instance (see Setting Up File Systems and Raw Devices [page 53] SAP File Systems).
• Hard disk drives with sufficient space for swap:
32-bit SAP Kernel: 3 * RAM, minimum 3 GB
Linux only: As a rule, if your system has 4 GB RAM or more, 2 GB of swap space suffice, as the system is then mainly occupied with memory paging.
64-bit SAP Kernel: At least 20 GB is recommended for standard installations (for more information, see SAP Note 153641). If you want to install only a small system, contact your hardware partner for appropriate swap space values.
• 4.3 GB of temporary disk space for every required installation CD / DVD you have to copy to a local hard disk (see Preparing the Installation CDs / DVDs [page 61]).
• 1.2 GB of temporary disk space on separate hard disks for SAP system.
• Minimum RAM:
Central instance of SAP R/3 Enterprise ABAP:
Non-Unicode SAP system: At least 512 MB
Unicode SAP system: At least 768 MB
Central instance of SAP R/3 Enterprise ABAP+Java:
Non-Unicode SAP system: At least 768 MB
Unicode SAP system: At least 1152 MB
• RAM for the J2EE Engine (if required):
Between 64 MB and 4096 MB RAM are required, depending on the load of your SAP system.
Make sure not to enter a value larger than the maximum Java heap size of your platform (see the corresponding documentation of your Java Development Kit - JDK).
August 2004 45

3 Installation Preparations
3.3 Hardware and Software Requirements
Requirement Type Requirement
Software Requirements
• Operating system (OS):
For supported OS releases, see SAP Service Marketplace at service.sap.com/platforms Product Availability Matrix
For more information on OS requirements, see the documentation SAP Software on UNIX: OS Dependencies, section <Your OS>: Requirements Checklist on SAP Service Marketplace at service.sap.com/instguidesNW04 Installation.
Before you start the installation, make sure that you check the UNIX kernel parameters, as described in the documentation above. Otherwise there might be unpredictable problems with your system during and after the installation.
Contact your OS vendor for the latest OS patches.
• If application servers are installed decentralized, Network File System (NFS) must be installed.
• Make sure that the required fonts/code pages are installed.
• Make sure that NLS and corresponding saplocales are installed.
Other Requirements • Make sure that the host name fulfills the requirements listed in SAP Note 611361 (for example, the host name must not be longer than 13 characters).
• Check your keyboard definitions.
• If you want to install a printer on a decentralized host for the SAP system, make sure that the printer can be accessed under UNIX.
46 August 2004

3 Installation Preparations
3.3 Hardware and Software Requirements
3.3.2 Requirements Checklist for a Database Instance The database instance host must meet the following requirements:
Requirement Type Requirement
Hardware Requirements
• DVD drive
• For security reasons (system failure), the file systems must be distributed physically over at least 3 (recommended: 5) hard disks For more information, see Oracle System Configuration [page 48].
• Hard disk drives with sufficient space for the database instance (see Setting Up File Systems and Raw Devices [page 53] Oracle File Systems).
• Hard disk drives with sufficient space for swap: 3 * RAM + 500 MB
• 4.3 GB of temporary disk space for every required installation CD / DVD you have to copy to a local hard disk (see Preparing the Installation CDs / DVDs [page 61]).
• 1.2 GB of temporary disk space on separate hard disks for SAP system.
• Minimum RAM:
Database instance for non-Unicode SAP system: At least 256 MB
Database instance for Unicode SAP system: At least 384 MB
August 2004 47

3 Installation Preparations
3.3 Hardware and Software Requirements
Requirement Type Requirement
Software Requirements
• Operating system (OS):
For supported OS releases, see SAP Service Marketplace at service.sap.com/platforms Product Availability Matrix.
For more information on OS requirements, see the documentation SAP Software on UNIX: OS Dependencies, section <Your OS>: Requirements Checklist on SAP Service Marketplace at service.sap.com/instguidesNW04 Installation.
Before you start the installation, make sure that you check the UNIX kernel parameters, as described in the documentation above. Otherwise there might be unpredictable problems with your system during and after the installation.
Contact your OS vendor for the latest OS patches.
• If application servers are installed decentralized, Network File System (NFS) must be installed.
• Make sure that the required fonts/code pages are installed.
• Make sure that NLS and corresponding saplocales are installed.
• On the database host, a graphical user interface (GUI) is required for the Oracle database software installation with runInstaller.
• For the Oracle installation and importing Oracle patches, a C compiler and the make utility must be installed. (Does not apply to Solaris.)
Other Requirements • Make sure that the host name fulfills the requirements listed in SAP Note 611361 (for example, the host name must not be longer than 13 characters).
• Check your keyboard definitions.
• If you want to install a printer on a decentralized host for the SAP system, make sure that the printer can be accessed under UNIX.
48 August 2004

3 Installation Preparations
3.3 Hardware and Software Requirements
Oracle System Configuration To decide how many hard disks are required for your Oracle database, take into account the information in the following sections.
Security Issues • For data security reasons, the redo logs should be distributed to different fail-safe
areas (for example, on different disks). This can be achieved either by the hardware or by the operating system.
• A production system must run in archive log mode.
• If a test system does not run in archive log mode, data written since the last complete backup will be lost after a system crash.
• If an advanced disk array is available (for example, RAID), contact your hardware vendor to make sure that the data security requirements are covered by this technology.
Performance Issues • For performance reasons, it is recommended to distribute archive files, redo log files
and sapdata files to separate disks.
• It is recommended to distribute the archive files and the redo log files to fail-safe areas with high I/O performance. Since the redo logs are written synchronously, they cause more I/O activity than any other database files.
Minimal Configuration
This configuration should only be used at small installations for test or demo systems.
Device 1: Backup of redo logs Device 2: Redo logs and database data Device 3: Mirrored redo logs and database data
BackupBackup ofoflog log filesfiles
RedoRedologslogs
DB DB datadata DB DB datadata
MirroredMirrored Redo logs Redo logs
Although this "minimal configuration" satisfies the SAP security requirements, it has the following disadvantages:
August 2004 49

3 Installation Preparations
3.3 Hardware and Software Requirements
• Security
The minimal configuration does not ensure that both the database files and redo log files will not be lost if there is a single device failure.
The minimal configuration makes sure that no data will be lost, but recovery will be complicated and time-consuming.
• Performance
The I/O-intensive redo logs are on the same device as the data files.
50 August 2004

3 Installation Preparations
3.3 Hardware and Software Requirements
3.3.3 Requirements Checklist for a Dialog or Gateway Instance The dialog instance or gateway instance host must meet the following requirements:
Requirement Type Requirement
Hardware Requirements
• DVD drive
• Hard disk drives with sufficient space for the dialog instance (see Setting Up File Systems and Raw Devices [page 53] SAP File Systems).
• Hard disk drives with sufficient space for swap: 3 * RAM + 500 MB
• 4.3 GB of temporary disk space for every required installation CD / DVD you have to copy to a local hard disk (see Preparing the Installation CDs / DVDs [page 61]).
• Minimum RAM:
Dialog instance for SAP R/3 Enterprise ABAP:
Non-Unicode SAP system: At least 256 MB
Unicode SAP system: At least 384 MB
Dialog instance for SAP R/3 Enterprise ABAP+Java:
Non-Unicode SAP system: At least 512 MB
Unicode SAP system: At least 768 MB
Gateway instance:
256 MB
• RAM for the J2EE Engine (if required):
Between 64 MB and 4096 MB RAM are required, depending on the load of your SAP system.
August 2004 51

3 Installation Preparations
3.3 Hardware and Software Requirements
Requirement Type Requirement
Software Requirements
• Operating system (OS):
For supported OS releases, see SAP Service Marketplace at service.sap.com/platforms Product Availability Matrix.
For more information on OS requirements, see the documentation SAP Software on UNIX: OS Dependencies, section <Your OS>: Requirements Checklist on SAP Service Marketplace at service.sap.com/instguidesNW04 Installation.
Before you start the installation, make sure that you check the UNIX kernel parameters, as described in the documentation above. Otherwise there might be unpredictable problems with your system during and after the installation.
Contact your OS vendor for the latest OS patches.
• Network File System (NFS) must be installed.
52 August 2004

3 Installation Preparations
3.4 Creating Operating System Users Manually
Requirement Type Requirement
Other Requirements • Ensure that the host name fulfills the requirements listed in SAP Note 611361 (for example, the host name must not be longer than 13 characters).
• Check your keyboard definitions.
• If you want to install a printer on a decentralized host for the SAP system, ensure that the printer can be accessed under UNIX.
3.4 Creating Operating System Users Manually Use You can optionally create the operating system users <sapsid>adm and/or ora<dbsid> manually before the installation.
If you do not create them manually, they get created automatically by SAPinst during the installation.
Procedure Create the users according to the documentation SAP Software on UNIX: OS Dependencies, section <Your OS>: Creating UNIX Groups and Users (for Linux, this section is called Linux: Creating Linux Groups and Users). Take account of the following requirements for the user creation:
• The user ID must be the same on all hosts.
• The group IDs must be the same on all hosts.
• <sapsid>adm must be a member of the groups sapsys (primary group), oper and dba.
On HP Tru64 UNIX, it must also be a member of the group mem.
• ora<dbsid> must be a member of the groups dba (primary group) and oper.
August 2004 53

3 Installation Preparations
3.5 Setting Up File Systems and Raw Devices
3.5 Setting Up File Systems and Raw Devices Use You need to set up the following file systems and/or raw devices:
For SAP R/3 Enterprise ABAP+Java or Java 6.40, the central services instance always gets installed on the central instance host.
Required File Systems for each Installation Host
Installation Host Required File Systems
Central system:
Central system host
Set up the file systems listed under SAP File Systems and Oracle File Systems.
Distributed system:
Central instance host
• Set up the file systems listed under SAP File Systems.
• Set up the directory for the Oracle client software and the home directory for Oracle instance <DBSID> listed under Oracle File Systems.
Distributed system:
Database host
• Mount the global transport directory /usr/sap/trans listed under SAP File Systems.
• Set up the file systems listed under Oracle File Systems.
Dialog instance host • Set up the file systems listed under SAP File Systems.
• Set up the directory for the Oracle client software and the home directory for Oracle instance <DBSID> listed under Oracle File Systems.
Gateway instance host Set up the file systems listed under SAP File Systems.
Additional components:
Central instance host
No additional file systems are required.
54 August 2004

3 Installation Preparations
3.5 Setting Up File Systems and Raw Devices
The creation and mounting of file systems and the creation of raw devices are described in the documentation SAP Software on UNIX: OS Dependencies, section <Your OS>: File Systems, Raw Devices and Swap Space.
The listed file system sizes are initial SAP requirements.
Depending on your operating system, you might also have to add space for administrative purposes.
Procedure
SAP File Systems
Set up file systems for the SAP system before the installation. The file systems are global; that is, they are accessed by all hosts in the SAP system.
File System Name Description Space Required
<sapmnt>/<SAPSID> Software and data for one SAP system
• Central instance and gateway instance: 400 MB
• Dialog instance (same platform as central instance): no file system required
• Dialog instance (different platform) or central services instance: 340 MB
/usr/sap/<SAPSID> Instance-specific data, symbolic links to the data for one system
• Dialog instance with sapcpe in use: 680 MB
• Other instances: 1100 MB
/usr/sap/trans Global transport directory for all SAP systems
This value heavily depends on the use of your SAP system. For production systems, it is recommended to use as much free space as available (at least 2 GB) as the space requirement normally grows dynamically.
For the installation, you can also just use 200 MB for each SAP instance and enlarge this file system afterwards.
August 2004 55

3 Installation Preparations
3.5 Setting Up File Systems and Raw Devices
56 August 2004
In your mySAP.com system landscape, a global transport directory for all SAP systems is required.
• If this global transport directory already exists (if in doubt, ask your system administrator):
...
a. Make sure that it is exported on the global transport directory host.
b. Mount it on the SAP instance installation host.
• Otherwise: ...
a. Create the transport directory (either on the central instance host or on a file server).
b. Export it on the global transport directory host.
c. If you didn't create the transport directory on your SAP instance installation host, mount it there.
Exporting the Transport Directory ...
1. Log on as user root to the host on which the global transport directory /usr/sap/trans resides.
2. Make sure that /usr/sap/trans belongs to the group sapsys and to the user root and has the permissions 775.
3. If not already done, export the directory using Network File System (NFS). For more information, see documentation SAP Software on UNIX: OS Dependencies, section <Your OS>: Mounting Directories via NFS.
For security reasons, set the permissions of the directory /usr/sap/trans to 771 after the installation.
Mounting the Transport Directory
You do not need to mount the directory if it resides on your local SAP instance installation host.
...
1. Log on as user root to the central or dialog instance host on which /usr/sap/trans is to be mounted.
2. Create the mount point /usr/sap/trans.
3. Mount /usr/sap/trans using Network File System (NFS) from the exporting host. For more information, see documentation SAP Software on UNIX: OS Dependencies, section <Your OS>: Mounting Directories via NFS.
4. Check that the user root has write permissions: touch /usr/sap/trans/write_test rm /usr/sap/trans/write_test

3 Installation Preparations
3.5 Setting Up File Systems and Raw Devices
Oracle File Systems
Be aware that Unicode systems require additional hardware resources. You can find more information about Unicode SAP systems on SAP Service Marketplace at service.sap.com/unicode.
Set up required file system for the Oracle database before the installation.
File System Name Description Space Required
/oracle Oracle Base directory 50 MB for Oracle software
Oracle 9.2.x:
/oracle/client/92x_32 or /oracle/client/92x_64
Directory for Oracle client software.
The used Oracle client software version is contained in the name of the file <Kernel CD>/K*/UNIX/<OS>/ OCL<Client_Version>.SAR.
100 MB
/oracle/stage/920_32 or /oracle/stage/920_64
Installation and upgrade directory for database software (staging area).
This directory is also used for Oracle upgrades and should not be deleted after the installation.
1600 MB
/oracle/<DBSID> Home directory of user ora<dbsid>.
/oracle/<DBSID> should not reside in the root directory. Also, it must reside in a file system with support of large files (for more information about how to create file systems larger than 2 GB on your operating system, see the documentation SAP Software on UNIX: OS Dependencies). Therefore, either create /oracle/<DBSID> as separate file system with support of large files or create /oracle as file system with support of large files and create /oracle/<DBSID> as directory in /oracle.
100 MB for files of user ora<dbsid> (for example, log files)
August 2004 57

3 Installation Preparations
3.5 Setting Up File Systems and Raw Devices
/oracle/<DBSID>/920_32 or /oracle/<DBSID>/920_64
Home directory <ORACLE_HOME> for Oracle instance <DBSID>.
<ORACLE_HOME> must reside on a local disk. It cannot be a softlink.
• Database instance : 2 GB
• All other instances: 140 MB Make sure that this file system has permissions 777.
/oracle/<DBSID>/origlogA Original set A of redo logs 120 MB
/oracle/<DBSID>/origlogB Original set B of redo logs 120 MB
/oracle/<DBSID>/mirrlogA Mirrored set A of redo logs 120 MB
/oracle/<DBSID>/mirrlogB Mirrored set B of redo logs 120 MB
/oracle/<DBSID>/oraarch New standard backup file system for Oracle offline redo logs. Use a separate disk for the file system /oracle/<DBSID>/oraarch.
The file system /oracle/<SAPSID>/ saparch still persists but now only contains brbackup log files. /oracle/<SAPSID>/ saparch gets automatically created by SAPinst.
For the installation, the archive directory /oracle/<DBSID>/ oraarch requires at least 350 MB of free disk space. For the operation of your SAP system, it should provide enough space for archives between two backups. In a production system, between 300 MB and 1 GB data is archived daily.
/oracle/<DBSID>/sapreorg Work directory for database administration
1500 MB
/oracle/<DBSID>/sapdata1 SAP data
/oracle/<DBSID>/sapdata2 SAP data
/oracle/<DBSID>/sapdata3 SAP data
/oracle/<DBSID>/sapdata4 SAP data
For space requirements of the SAP data file systems, see SAP Note 750984.
58 August 2004

3 Installation Preparations
3.6 Preparing the System for SAPinst
3.6 Preparing the System for SAPinst Use You use this procedure to prepare your installation host for SAPinst.
The installation tool SAPinst uses the Java-based graphical user interface SAPinst GUI.
If required, you can perform a remote installation using a standalone SAPinst GUI on a separate Windows or UNIX host. This enables you to perform the installation on a remote host while monitoring it with the SAPinst GUI from a local host. If you want to perform a remote installation, see Remote Installation with SAPinst [page 102]. In this case, prepare both the local and the remote host for SAPinst.
To prepare the system for SAPinst and SAPinst GUI you need to do the following:
• Check your Java Runtime Environment (JRE) on the host where SAPinst GUI runs, because the JRE cannot be integrated into the SAPinst GUI executable for all platforms due to licensing issues.
• Set the DISPLAY environment variable if you are installing on UNIX.
August 2004 59

3 Installation Preparations
3.6 Preparing the System for SAPinst
Procedure ...
1. Check that a released Java Runtime Environment (JRE) exists on the host where the SAPinst GUI is to run :
Platform Required JRE for the SAPinst GUI
Windows 64 bit (ia64), Linux (ia64), Linux for zSeries (s390x),
z/OS (OS390 resp. z/OS)
The required JRE version is the same as for SAP R/3 Enterprise. For the current required JRE version see SAP Service Marketplace at service.sap.com/platforms → Product Availability Matrix → SAP NetWeaver → SAP NetWeaver 04 → JSE Platforms
• JRE is not part of the SAP shipment. If necessary, you need to
download and install it.
• To check the version of an already installed JRE, enter: java –version
• If you have more than one Java Virtual Machine (JVM) installed on your system (for example, you have two JREs with different versions installed), make sure that the SAPINST_JRE_HOME environment variable (on UNIX: for user root) is set to the valid <JAVA_HOME> directory.
UNIX only: You must include the path to a valid <JAVA_HOME>/bin directory in the path for user root or set the SAPINST_JRE_HOME environment variable for the user root to the valid <JAVA_HOME> directory as follows:
Shell Used Command
Bourne shell (sh)
SAPINST_JRE_HOME=<path_to_JAVA_HOME>
export SAPINST_JRE_HOME
C shell (csh) setenv SAPINST_JRE_HOME <path_to_ JAVA_HOME>
Korn shell (ksh) export SAPINST_JRE_HOME=<path_to_ JAVA_HOME>
Windows 32 bit (x86),
HP-UX (PA-Risc),
HP-UX (ia64),
Solaris (sun4u)
No special JRE is required for the SAPinst GUI, because the JRE is integrated in the SAPinst GUI executable.
As the JRE is temporary extracted on your host, you need at least about 40 – 80 MB of free disk space for that purpose. After the installation, SAPinst removes this JRE from your host automatically.
60 August 2004

3 Installation Preparations
3.6 Preparing the System for SAPinst
Other platforms
The required JRE is 1.3.0 or higher.
• JRE is not part of the SAP shipment. If necessary you need to
download and install it.
• To check the version of an already installed JRE, enter: java –version
• If you have more than one Java Virtual Machine (JVM) installed on your system (for example, you have two JREs with different versions installed), make sure that the SAPINST_JRE_HOME environment variable (on UNIX: for user root) is set to the valid <JAVA_HOME> directory.
UNIX only: You must include the path to a valid <JAVA_HOME>/bin directory in the path for user root or set the SAPINST_JRE_HOME environment variable for the user root to the valid <JAVA_HOME> directory as follows:
Shell Used Command
Bourne shell (sh)
SAPINST_JRE_HOME=<path_to_JAVA_HOME>
export SAPINST_JRE_HOME
C shell (csh) setenv SAPINST_JRE_HOME <path_to_ JAVA_HOME>
Korn shell (ksh) export SAPINST_JRE_HOME=<path_to_ JAVA_HOME>
2. UNIX only: Make sure that your DISPLAY environment variable is set to <host_name>:0.0, where <host_name> is the host on which the SAPinst GUI is to be displayed.
Shell Used Command
Bourne shell (sh)
DISPLAY=<host_name>:0.0
export DISPLAY
C shell (csh) setenv DISPLAY <host_name>:0.0
Korn shell (ksh)
export DISPLAY=<host_name>:0.0
August 2004 61

3 Installation Preparations
3.7 Preparing the Installation CDs / DVDs
3.7 Preparing the Installation CDs / DVDs Use You use this procedure to prepare the installation CDs / DVDs.
Procedure 1. Using Media Information for SAP R/3 Enterprise 4.7 Ext. 2.0 SR 1, identify the required
CDs / DVDs for your installation and keep them separate from the rest of the installation package. This avoids mistakes between CDs / DVDs with similar names, so that you use the correct CDs / DVDs for your installation.
The CD / DVD names in the table below are abbreviated.
You can find the full names in Media Information for SAP R/3 Enterprise 4.7 Ext. 2.00 SR 1 on SAP Service Marketplace at:
service.sap.com/instguides SAP Components SAP R/3 Enterprise SAP R/3 Enterprise Core 4.70 / Ext. Set 2.00 (SR1)
The following table summarizes the required CDs:
SAP Instance Installation
Required CDs
SAP Installation Master CD
SAP Kernel CD
Central Instance
SAP Web AS Java CDs (includes CD IGS folder IGS_SOFT for the installation of IGS)
SAP Installation Master CD
SAP Kernel CD
Export CDs
Oracle database instance for a non-MCOD installation
Database DVD
62 August 2004

3 Installation Preparations
3.7 Preparing the Installation CDs / DVDs
SAP Instance Installation
Required CDs / DVDs
SAP Installation Master CD
SAP Kernel CD
Database instance for an MCOD installation
Export CDs
SAP Installation Master CD
SAP Kernel CD
Dialog Instance Installation
SAP Web AS Java CDs (includes CD IGS folder IGS_SOFT for the installation of IGS)
Gateway Instance SAP Presentation CDs
Additional Components SAP Presentation CDs
For the installation of a Unicode SAP system, the Unicode SAP Kernel CD is required. For the installation of a non-Unicode SAP system, the non-Unicode SAP Kernel CD is required.
We recommend that you make all required CDs / DVDs available in parallel.
The Export CDs and the Database DVD (if relevant) must be available in parallel.
2. Use one of the following methods to make CDs / DVDs available in parallel:
Before the installation:
Have sufficient DVD drives
Copy CDs / DVDs manually to local hard disks
During the installation:
Use the SAPinst CD Browser dialog [page 63], that is, you can check the entered location and then copy the entire CD / DVD to the path you entered in column Copy Package to.
August 2004 63

3 Installation Preparations
3.7 Preparing the Installation CDs / DVDs
3.7.1 Using the CD Browser Dialog Use During the installation procedure SAPinst first checks and finally verifies the availability and location of the required installation CDs / DVDs. SAPinst does this by displaying a CD Browser dialog, which prompts you for the file LABEL.ASC, which contains information about the software package to be installed.
To find the correct location of the file LABEL.ASC, look in the file README.TXT located in the root directory of the relevant CD / DVD.
Procedure SAPinst displays the CD Browser dialog in the following situations:
• SAPinst wants to check the availability of the software package in advance.
In this case, you see Check Location displayed in the CD Browser window.
Choose one of the following actions:
Situation Action Result
You are not yet sure where to set up the software package.
Do not enter any Package Location and do not select Check Location.
SAPinst skips the check and you can continue the installation procedure. However, SAPinst asks later for the missing LABEL.ASC (see final bullet point below).
You know where the software package will be but have not yet set it up.
Enter the path in Package Location but do not select Check Location.
SAPinst skips checking the label location, but your entered package locations are used later for the installation. SAPinst only asks again for a missing LABEL.ASC if the package location is incorrect (see final bullet point below).
You have already set up the software package at a specific location.
Enter the path in Package Location and select Check Location.
SAPinst checks the label location and displays an error message if the location is incorrect.
If all locations are correct, SAPinst does not ask again for the LABEL.ASC files.
• SAPinst cannot find the correct LABEL.ASC but needs the location of the software to process the installation now.
You can recognize this situation because Check Location in the CD Browser window is empty. You must now enter the path to the correct LABEL.ASC. Otherwise, the installation cannot continue.
64 August 2004

3 Installation Preparations
3.8 Preparing the Active Directory
When SAPinst prompts for a folder <FOLDER_NAME> on a CD / DVD, make sure that you enter the path to the corresponding directory on this CD / DVD.
In addition, you can copy the installation package by entering a location in the column Copy Package to.
3.8 Preparing the Active Directory Use If you decided to use LDAP directory services, you need to prepare the Active Directory. The SAP system can then use the Active Directory to store and access data.
To prepare the directory, you use the R3SETUP tool to automatically:
• Extend the Active Directory schema to include the SAP-specific data types
• Create the domain accounts required to enable the SAP system to access and modify the Active Directory. These are the group SAP_LDAP and the user sapldap.
• Create the root container where information related to SAP is stored
• Control access to the container for SAP data by giving members of the SAP_LDAP group permission to read and write to the directory
For more information on how to set up a Netscape / iPlanet directory server, see the documentation R/3 System Information in Directory Services on SAP Service Marketplace at
service.sap.com/msplatforms → Microsoft → Windows Server.
Prerequisites • A Windows domain controller with an Active Directory must be installed on the network.
• You must have an SAP Kernel CD of an SAP system installation that is based on SAP Web Application 6.10, SAP Basis 4.6D, or lower and contains the previous installation tool R3SETUP.
If you do not have an SAP Kernel CD with R3SETUP, you can download one from SAP Service Marketplace at
service.sap.com/installations → SAP Installations and Upgrades Entry by Application Group SAP NetWeaver Components SAP NetWeaver Components ( < SAP NW 04 ) SAP Web AS → SAP Web AS 6.10 → NT/I386 → <your_database>
Procedure
Installing the R3SETUP Tool
August 2004 65

3 Installation Preparations
3.8 Preparing the Active Directory
You use this procedure to install the R3SETUP tool on the domain controller where the Active Directory is located. ...
1. Log on to the domain controller as domain administrator.
2. Check that the TEMP environment variable has been set:
a. Right-click My Computer on the Windows desktop
b. Choose Properties → Advanced → Environment Variables.
TEMP is normally set to:
%userprofile%\Local Settings\Temp
For more information, see SAP Note 387745.
3. Insert the SAP Kernel CD.
4. Start the program R3SETUP.BAT from the directory
<CD_DRIVE>:\NT\COMMON
The R3SETUP window opens.
5. Enter the following when R3SETUP prompts you:
The name of your SAP system <SAPSID>
The directory on your hard disk that the R3SETUP files are to be copied to. The default directory is <DRIVE>:\USERS\<SAPSID>ADM\INSTALL
When you have made all the required entries, the R3SETUP tool is automatically installed.
6. Choose Yes when a dialog box appears prompting you to log off or reboot.
The R3SETUP tool now automatically logs off or reboots.
Configuring the Active Directory ...
1. Log on as the same user that installed the R3SETUP tool.
2. Choose Start → Programs → SAP system Setup for <SAPSID> → Configure Active Directory for SAP.
3. When you are prompted:
Confirm the name of the domain where the SAP_LDAP group is to be created. This is the domain that you are logged on to.
Enter the password of the sapldap user.
When you have made these entries, the R3SETUP tool automatically configures the Active Directory.
66 August 2004

4 Installation Process
4.1 Prerequisites before Starting SAPinst
4 Installation Process
Make sure that you read the Installation Checklists [page 17] before you start the installation.
4.1 Prerequisites before Starting SAPinst For Database Instance only As user root, set the library path environment variable on your installation host depending on the used shell:
<ORACLE_HOME> is the home directory for the oracle instance <DBSID> which you set up during the step Setting up File Systems and Raw Devices [page 53] /oracle/<DBSID>/920_32 if your operating system is of 32 bit, or /oracle/<DBSID>/920_64 if your operating system is of 64 bit.
• If you are using the Bourne shell (sh):
Operating System
Command
AIX LIBPATH=<sapmnt>/<SAPSID>/exe
export LIBPATH
HP Tru64 UNIX LD_LIBRARY_PATH=<sapmnt>/<SAPSID>/exe: \ /<ORACLE_HOME>/lib:/oracle/client/ \ 92x_64/lib
export LD_LIBRARY_PATH
Linux LD_LIBRARY_PATH=<sapmnt>/<SAPSID>/exe: \
<ORACLE_HOME>/lib
export LD_LIBRARY_PATH
HP-UX SHLIB_PATH=<sapmnt>/<SAPSID>/exe
export SHLIB_PATH
All other UNIX operating systems
LD_LIBRARY_PATH=<sapmnt>/<SAPSID>/exe
export LD_LIBRARY_PATH
• If you are using the C shell (csh):
Operating System
Command
AIX setenv LIBPATH <sapmnt>/<SAPSID>/exe
HP Tru64 UNIX setenv LIBPATH <sapmnt>/<SAPSID>/exe: \ /<ORACLE_HOME>/lib:/oracle/client/ \ 92x_64/lib
August 2004 67

4 Installation Process
4.1 Prerequisites before Starting SAPinst
Linux setenv LD_LIBRARY_PATH \ <sapmnt>/<SAPSID>/exe:<ORACLE_HOME>/lib
HP-UX setenv SHLIB_PATH <sapmnt>/<SAPSID>/exe
All other UNIX operating systems
setenv LD_LIBRARY_PATH \ <sapmnt>/<SAPSID>/exe
• If you are using the Korn shell (ksh):
Operating System
Command
AIX export LIBPATH=<sapmnt>/<SAPSID>/exe
HP Tru64 UNIX export LIBPATH <sapmnt>/<SAPSID>/exe: \ /<ORACLE_HOME>/lib:/oracle/client/ \ 92x_64/lib
Linux export LD_LIBRARY_PATH=<sapmnt>/ \ <SAPSID>/exe:<ORACLE_HOME>/lib
HP-UX export SHLIB_PATH=<sapmnt>/<SAPSID>/exe
All other UNIX operating systems
export LD_LIBRARY_PATH=<sapmnt>/<SAPSID>/exe
If you restart SAPinst at a later time, make sure the variable is still set.
For Distributed Instances only ...
If you install an instance on another host than the central instance (for example, a database or a dialog instance), mount directories from the central instance.
• If you want to install the executables locally instead of sharing them, do not
mount the exe directory via NFS. Instead, create <sapmnt>/<SAPSID>/exe as a local directory (not a link) with at least 340 MB free space.
• If you are installing a heterogeneous SAP system (that is, the instances are installed on different UNIX operating-system platforms), do not mount the exe directory. See documentation SAP Software on UNIX: OS Dependencies, section Heterogeneous SAP System Installations.
... ...
1. Log on to the central instance host as user root and export the following directories with root access (see documentation SAP Software on UNIX: OS Dependencies, section <Your OS>: Mounting Directories via NFS) to the dialog instance host: <sapmnt>/<SAPSID>/exe <sapmnt>/<SAPSID>/profile <sapmnt>/<SAPSID>/global
2. Log on to the distributed instance host as user root.
68 August 2004

4 Installation Process
4.1 Prerequisites before Starting SAPinst
3. Create the mount points: <sapmnt>/<SAPSID>/exe <sapmnt>/<SAPSID>/profile <sapmnt>/<SAPSID>/global
Mount these directories from the central instance host.
4. Make sure that the user root of the distributed instance host has write access to the directories exe, profile and global:
touch <sapmnt>/<SAPSID>/<directory>/nfs_test rm <sapmnt>/<SAPSID>/<directory>/nfs_test
August 2004 69

4 Installation Process
4.2 Running SAPinst
4.2 Running SAPinst Use This procedure tells you how to run SAPinst to install an SAP instance.
It describes an installation where SAPinst GUI and SAPinst server are running on the same host. If you want to perform a remote installation, where SAPinst GUI is running on another host, see Remote Installation with SAPinst [page 102].
SAPinst normally creates the installation directory sapinst_instdir directly below the temporary directory ($TEMP, $TMP, or /tmp). Therefore, make sure that your operating system does not delete the temporary directory and its subdirectories when the system is rebooted.
Each SAP instance requires a separate installation directory.
The SAPinst Self-Extractor extracts the SAPinst executables to the temporary directory ($TEMP, $TMP, $TMPDIR or /tmp). These executables are deleted again after SAPinst has stopped running. Directories with the name sapinst_exe.xxxxxx.xxxx sometimes remain in the temporary directory. You can safely delete them. You can terminate SAPinst and the SAPinst Self-Extractor by pressing Ctrl+C. In the temporary directory, you also find the Self Extractor log file dev_selfex.out, which might be useful if an error occurs.
Prerequisites • If you are installing a second or subsequent SAP system into an existing database,
make sure that the database is up and running before starting the installation. For more information, see Installation of Multiple Components in One Database [page 41].
• You need at least 50 MB of free space in the installation directory for each ABAP installation service. In addition, you need 60-200MB free space for the SAPinst executables. If you are not able to provide 200 MB free space in the temporary directory, you can set one of the environment variables TEMP, TMP or TMPDIR to another directory with 200 MB free space for the SAPinst executables.
We recommend that you keep all installation directories until you are fully satisfied that the system is completely and correctly installed.
If SAPinst cannot find a temporary directory, the installation terminates with the error FCO-00058.
70 August 2004

4 Installation Process
4.2 Running SAPinst
SAPinst GUI Handling
The following push buttons are available on the different SAPinst GUI dialogs (input screens, installation progress screen, message boxes):
Push Button
Meaning
Back Displays the previous dialog for editing.
Next Displays the next dialog for editing.
Cancel Cancels the installation with the following options:
− Stop Stops the installation without further changing the installation files. You can continue the installation later from this point.
− Reset Resets all installation input files. All files in the installation directory are removed from the system. No backup is available. You must restart the installation from the beginning.
Log Off Cancels the connection to the SAPinst GUI only. The SAPinst server keeps on running.
Typical case:
For some reason you need to log off during the installation from the host where you control the installation with SAPinst GUI. The installation continues while you are logged off. You can later connect with SAPinst GUI from another host to the same installation. For this you need the SAP Installation Master CD.
For more information on running SAPinst GUI in standalone mode for a remote installation, see Starting SAPinst GUI on the Local Host [page 103].
View Log Displays the content of the sapinst.log file during the installation.
Retry Performs the installation step again (if an error has occurred).
Stop Stops the installation without further changing the installation files. You can continue the installation later from this point.
Reset Resets all installation input files. All files in the installation directory are removed from the system. No backup is available.
You must restart the installation from the beginning.
Continue Continues with the option you have chosen before.
If a message box comes up and you choose Cancel, SAPinst then offers you the options Continue, Stop, Reset. Do not choose Continue, but choose Stop or Reset. If you choose Continue an error occurs.
August 2004 71

4 Installation Process
4.2 Running SAPinst
Procedure ...
1. Log on to your host as user root.
2. If you want to install:
A central instance, a database instance, or a dialog instance, mount the SAP Installation Master CD.
A gateway instance or additional components, mount the respective SAP Presentation CD. In this case, replace “SAP Installation Master CD” with ”SAP Presentation CD” in this section.
Mount CDs locally. We do not recommend that you use Network File System (NFS), as reading from NFS-mounted CDs might fail.
For more information on mounting CDs / DVDs, see the documentation SAP Software on UNIX: OS Dependencies, section “<Your OS>: Mounting a CD / DVD.”
3. Start SAPinst from the SAP Installation Master CD in one of the following ways:
• Using the default installation directory
Enter the following commands: cd <SAP_Installation_Master_CD>/SAPINST/UNIX/<OS>
./sapinst
SAPinst creates a directory called sapinst_instdir, which is the current working directory for your installation, below the temporary directory of your operating system.
72 August 2004

4 Installation Process
4.2 Running SAPinst
• Using an alternative installation directory
If you want SAPinst to use a directory other than the default, do the following: ...
i. Create an installation directory of your choice for SAPinst with sufficient free space (at least 300 MB for each installation service) and permissions 777.
ii. Change to this installation directory.
iii. Enter the following command to start SAPinst from the SAP Installation Master CD:
<SAP_Installation_Master_CD>/SAPINST/UNIX/<OS>/sapinst
SAPinst uses your installation directory as the current working directory for the installation. It does not create an installation directory called sapinst_instdir.
SAPinst uses the port 21212 during the installation for communication with the SAPinst GUI. If this port is already used by another service you must add the parameter SAPINST_DIALOG_PORT=<free_port_number> to the relevant sapinst command above. For example:
./sapinst SAPINST_DIALOG_PORT=<free_port_number>
SAPinst GUI normally starts automatically by displaying the Welcome screen.
However, if there is only one component to install, SAPinst directly displays the first input dialog without the Welcome screen.
4. In the Welcome screen, select the corresponding installation service as shown in the table below and then choose Next:
Installation Procedure Installation Service in SAPinst
Installing a central instance SAP R3E 4.7x200 SR1 ABAP System Install a Central Instance
Installing a database instance SAP R3E 4.7x200 SR1 ABAP System Install a Database Instance
Installing a dialog instance SAP R3E 4.7x200 SR1 ABAP System Install a Dialog Instance
Installing additional components SAP System Additional Components
Installing a gateway instance Install SAP Gateway
SAPinst creates a subdirectory for the chosen installation service below the current working directory. If you started SAPinst using the default installation directory, the directory structure is:
<sapinst_instdir>/<installation_service>
5. Follow the instructions in the SAPinst dialogs using the parameters you specified during installation planning (for more information, see Planning Guide for SAP Web Application Server on UNIX Oracle Installation Overview: <Your Installation Option>
Parameter Table: <Your Installation Option>).
After you have entered all required input parameters, SAPinst starts the installation and displays the progress of the installation.
August 2004 73

4 Installation Process
4.2 Running SAPinst
When the installation has successfully completed, the screen Finished installation is displayed.
74 August 2004

4 Installation Process
4.3 Starting the Script rootpre.sh (AIX only)
Troubleshooting • If an error occurs during the input phase, SAPinst:
Stops the installation
Displays a dialog informing you about the error
• You can now directly view the log file by choosing View Logs
• You must abort the installation with O.K. and try to solve the problem.
• If an error occurs during the processing phase, SAPinst:
Stops the installation
Displays a dialog informing you about the error
You can now:
Directly view the log file by choosing View Logs
Try to solve the problem
Retry the installation by choosing Retry.
Abort the installation by choosing O.K.
For more information, see Interrupted Installation with SAPinst [Page 106].
4.3 Starting the Script rootpre.sh (AIX only) Use
This section is not valid if you install a system into an existing database (MCOD).
The script rootpre.sh must be executed in order to install and activate AIX specific kernel extensions for asynchronous I/O.
Prerequisites This section only applies if your operating system is AIX.
Procedure ...
1. Log on as user root.
2. Enter (<bit> is either 32 or 64): cd /oracle/stage/920_<bit>/Disk1
3. Using a cshell, set the language environment variable: setenv LANG En_US
August 2004 75

4 Installation Process
4.3 Starting the Script rootpre.sh (AIX only)
4. Run the pre-installation script sh ./rootpre.sh
Check if the Asynchronous I/O is installed and activated on the database and the application server. Enter lsdev -C -l aio0 which should put out aio0 Available Asynchronous I/O
Otherwise install and activate the Asynchronous I/O using smit (Devices → Asynchronous I/O) and reboot your machine.
76 August 2004

4 Installation Process
4.4 Installing the Oracle 9.2.0 Database Software
4.4 Installing the Oracle 9.2.0 Database Software Use
This section is not valid if you install a system into an existing database (MCOD).
The Oracle database software is installed with the Oracle Universal Installer (OUI).
Although the installation procedure for several Oracle database versions may be contained in this documentation, not all of these Oracle database versions are released for every operating system.
Prerequisites A graphical user interface (GUI) is required for the database installation with Oracle Universal Installer.
AIX only: For AIX 5L release 5.1 ML01+ you need the following operating system fixes: IY22854, IY26778, IY28766, IY28949, IY29965, IY30150.
If you are using a later maintenance level of AIX version 5, make sure you have installed the required operating system fixes.
To check whether a fix has been installed, use the following command: instfix –ik <fixname>
Procedure ...
1. Make sure 400 MB of hard disk space is available in the directory /tmp.
2. The user ora<dbsid> must have a write authorization for the directory /oracle. To check if this authorization exists, proceed as follows:
...
a. Log on to your system with the user ora<dbsid>.
August 2004 77

4 Installation Process
4.4 Installing the Oracle 9.2.0 Database Software
b. Enter the following commands: touch /oracle/write_test rm /oracle/write_test
If the user ora<dbsid> does not have write authorization, log on to your system with the user root and enter the following commands:
chown ora<dbsid> /oracle
chgrp dba /oracle
chmod 775 /oracle
3. Enter the following commands as user ora<dbsid>: umask
If umask does not return the value 022, set umask: umask 022
4. Set the DISPLAY environment variable to <host_name>:0.0, where <host_name> is the host on which the Oracle Universal Installer will be displayed.
Shell Used Command
Bourne shell (sh) DISPLAY=<host_name>:0.0
export DISPLAY
C shell (csh) setenv DISPLAY <host_name>:0.0
Korn shell (ksh) export DISPLAY=<host_name>:0.0
5. Start the Oracle Universal Installer as user ora<dbsid>:
cd /oracle/stage/920_32/Disk1/SAP or cd /oracle/stage/920_64/Disk1/SAP
./RUNINSTALLER
6. When you start the Oracle Universal Installer, a series of windows appears:
Prompt or Condition Action
File Locations Destination... Check that the variable $ORACLE_HOME is correctly set (that is, it points to the new ORACLE_HOME). Make sure that the relevant directory is empty. Continue by choosing Next.
When you run the OUI for the first time on this host, a dialog box appears.
Execute the file /tmp/orainstRoot.sh as user root, and confirm the dialog box.
Available Product Components Confirm the default selections by choosing Next.
Java Development Kit (JDK) Enter the location of the JDK.
When the Install step has been completed, a dialog box appears.
Execute the file $ORACLE_HOME/root.sh with the user root, and confirm the dialog box by choosing OK. Then continue by choosing Next.
78 August 2004

4 Installation Process
4.4 Installing the Oracle 9.2.0 Database Software
If the installer asks you if you want to migrate existing databases or create a database, choose No.
The Installer finishes, reporting that the Oracle installation was successful.
Due to an error in the Oracle installer you cannot choose EXIT at this point.
7. Instead of choosing EXIT, close the installer window using its window menu or by other operating system means.
8. Confirm the dialog box that appears.
You can now access the Oracle 9.2 online documentation, which was installed during the last step. You can find the entry point to the Oracle online documentation at $ORACLE_BASE/doc/index.htm.
9. Install the current Oracle 9i patchset:
a. See SAP Note 539921 for the number of the current patchset and SAP Note 355776 for extra information on installing the current patchset.
You need only install the latest Oracle patchset.
b. Log on at the operating system level as the ora<dbsid> user.
c. Follow the instructions in SAP Note 539921 to download the current patchset.
d. Install this patchset using the Oracle Universal Installer. You do not have to run any SQL scripts at this time.
...
10. Install required interim patches using the Oracle tool OPatch. You might need interim patches in addition to the current patchset.
a. Check SAP Note 540021 to find the required patches.
b. Log on at the operating system level as the ora<dbsid> user.
c. Install the patch, following the instructions in SAP Note 306408.
Due to an Oracle error in the Oracle Universal Installer 2.2.0.12.0, the Oracle inventory may be corrupted when installing patches using the Oracle Patch Utility OPatch. To prevent this error, proceed as described in SAP Note 601965.
11. Check that ora<dbsid> can connect to the database:
sqlplus /nolog SQLPLUS> connect / as sysdba SQLPLUS> exit
If the connect succeeds without error messages, the database software installation was successful.
August 2004 79

4 Installation Process
4.5 Checking Settings for OS Users (AIX only)
4.5 Checking Settings for OS Users (AIX only) Check and, if required, modify the settings for the OS user root and users <sapsid>adm and ora<dbsid> that were created by SAPinst. For more information, see the documentation SAP Software on UNIX: OS Dependencies, section AIX: Creating UNIX Groups and Users.
4.6 Creating a User for LDAP Directory Access Use If you use LDAP directory services [page 64] on UNIX, you have to set up a user with a password on the machine where the SAP system is running. This permits the SAP system to access and modify the LDAP directory.
This section is not valid for ReliantUNIX.
Prerequisites During the SAP instance installation you chose to configure the SAP system to integrate LDAP services.
Procedure ...
1. Log on as user <sapsid>adm.
2. Enter: ldappasswd pf=<path_and_name_of_instance_profile>
3. Enter the required data.
The following is an example of an entry to create an LDAP Dírectory User:
CN=sapldap,CN=Users,DC=nt5,DC=sap-ag,DC=de
80 August 2004

4 Installation Process
4.7 Activating sapcpe
4.7 Activating sapcpe Use This section only applies when you install a dialog instance that uses the same operating system as the central instance.
Procedure ...
1. Log on to the dialog instance host as user <sapsid>adm.
2. Enter: mv /usr/sap/<SAPSID>/SYS/exe/run /usr/sap/<SAPSID>/SYS/exe/ctrun mkdir /usr/sap/<SAPSID>/SYS/exe/run
Provide at least 30 MB of additional disk space for the directory /usr/sap/<SAPSID>/SYS/exe/run.
3. Only perform the following steps once before the first startup of the dialog instance: ...
a. Log on to the dialog instance host as user <sapsid>adm.
b. Execute one of the following commands to set DIR_LIBRARY variable:
i. When using a csh:
setenv DIR_LIBRARY /usr/sap/<SAPSID>/SYS/exe/ctrun
ii. When using a sh:
DIR_LIBRARY=/usr/sap/<SAPSID>/SYS/exe/ctrun export DIR_LIBRARY
c. Execute the following command: cp /usr/sap/<SAPSID>/SYS/exe/ctrun/startsap \ /usr/sap/<SAPSID>/SYS/exe/run/startsap
d. Start the dialog instance with the command startsap.
If there are multiple SAP instances on the dialog instance host, start the dialog instance with: startsap <instanceID>
e. Log off from the dialog instance.
f. Log on again for the old environment to become active.
August 2004 81

5 Post-Installation Activities
5.1 Editing Shell Scripts (HP Tru64 UNIX only)
5 Post-Installation Activities
Make sure that you read the Installation Checklists [page 17] before you perform post-installation activities.
5.1 Editing Shell Scripts (HP Tru64 UNIX only) On HP Tru64 UNIX only, perform the following steps after the installation: ...
1. Login as user <sapsid>adm.
2. Edit the file dbenv_<host_name>.csh located in the home directory of user <sapsid>adm as follows:
The used Oracle client software version is contained in the name of the file <Kernel CD>/K*/UNIX/<OS>/OCL<Client_Version>.SAR.
...
if ( ! $?LD_LIBRARY_PATH ) then
setenv LD_LIBRARY_PATH /usr/sap/<sapsid>/SYS/exe/run: \ /oracle/client/<Client_Version>_64/lib:$ORACLE_HOME/lib
else
foreach d ( /usr/sap/<sapsid>/SYS/exe/run \ /oracle/client/<Client_Version>_64/lib $ORACLE_HOME/lib )
set i=0
...
3. Edit the file dbenv_<host_name>.sh located in the home directory of user <sapsid>adm as follows:
...
if [ -z "$LD_LIBRARY_PATH" ]; then
LD_LIBRARY_PATH=/usr/sap/<sapsid>/SYS/exe/run: \ /oracle/client/<Client_Version>_64/lib: \ $ORACLE_HOME/lib
else
for d in /usr/sap/<sapsid>/SYS/exe/run /oracle/client/<Client_Version>_64/lib $ORACLE_HOME/lib; do
i=0
...
82 August 2004

5 Post-Installation Activities
5.2 Starting and Stopping the SAP System
5.2 Starting and Stopping the SAP System Use You need to check that you can start and stop the SAP system after the installation using the scripts startsap and stopsap in the exe directory.
Prerequisites • You have signed on to the SAP system hosts as user <sapsid>adm.
• For more information on how to start or stop database-specific tools, see the database-specific information in this documentation and the documentation from the database manufacturer.
• If you want to use startsap or stopsap (for example, in a script) and require the fully qualified name of these SAP scripts, create a link to startsap or stopsap in the home directory of the corresponding user.
If there are multiple SAP instances on one host – for example, a central instance and a dialog instance – you must add an extra parameter to the scripts:
startsap <instanceID>
stopsap <instanceID>
For example, enter:
startsap DVEBMGS00
SAP Web AS Java for SAP R/3 Enterprise only
The instance name (instance ID) of the central instance is JC<Instance_Number>, the instance name of a J2EE dialog instance is J<Instance_Number>.
Procedure
Starting the SAP System ...
1. To start the central instance and database instance:
If you have a central system – that is, central instance, central services instance and database instance on the same host – enter the following on the central system host: startsap
This checks if the database is already running. If not, it starts the database before starting the central services instance and the central instance.
August 2004 83

5 Post-Installation Activities
5.2 Starting and Stopping the SAP System
You can start the database and SAP system separately by entering the following commands: startsap DB
startsap R3 <instanceID of central services instance>
startsap R3 <instanceID of central instance>
Make sure that you always start the database first because otherwise the central services instance and the central instance cannot be started.
There is also the parameter J2EE that is a synonym for the parameter R3. For SAP systems based on SAP R/3 Enterprise ABAP+Java, you can enter either the command startsap R3 or startsap J2EE to start the SAP instance comprising both ABAP and J2EE.
If you have a distributed system – that is, central instance, central services instance and database instance on different hosts – do the following:
i. On the database host, enter: startdb
ii. If you want to start an SAP system with the J2EE Engine, enter the following command on the central services instance host: startsap R3
iii. On the central instance host, enter: startsap R3
2. Enter the following to start dialog instances, if there are any: startsap
Stopping the SAP System
When you use stopsap in an MCOD [page 41] system with two central instances, only one central instance and the database are shut down. Therefore, you must first stop the other SAP system with stopsap R3 or make sure that it has already been stopped.
...
1. Enter the following to stop dialog instances: stopsap
2. To stop the central instance, the central services instance and the database instance:
If you have a central system – that is, central instance, central services instance and database instance on the same host – enter the following on the central system host: stopsap
This stops the central instance, the central services instance and then the database.
84 August 2004

5 Post-Installation Activities
5.2 Starting and Stopping the SAP System
You can stop the SAP system and the database separately by entering the command stopsap R3 <instanceID of central instance>, then stopsap R3 <instanceID of central services instance> and then stopsap <instanceID> .
Make sure that you always stop the central instance first and the central services instance second because otherwise the database cannot be stopped.
There is also the parameter J2EE that is a synonym for the parameter R3. For SAP systems based on an SAP R/3 Enterprise ABAP+Java, you can enter either the command stopsap R3 or stopsap J2EE to stop the SAP instance comprising both ABAP and J2EE.
If you have a distributed system – that is, central instance, central services instance and database instance on different hosts – do the following:
...
i. On the central instance host, enter: stopsap R3
ii. If you want to stop an SAP system with the J2EE Engine, enter the following command on the central services instance host: stopsap R3
iii. On the database host, enter: stopdb
Make sure that no SAP instance is running before you enter stopdb on a standalone database server. No automatic check is made.
August 2004 85

5 Post-Installation Activities
5.3 Logging On to the SAP System
5.3 Logging On to the SAP System Use You need to check that you can log on to the SAP system using the standard users.
Prerequisites You have already started the SAP system and installed a front end.
There are two standard users in the SAP system after the installation:
User Initial Password Client
SAP* 06071992 000, 066
DDIC 19920706 000
During the installation, SAPinst prompts you to change the passwords for these standard users in client 000.
If for any reason the SAP* and DDIC users still have initial passwords, you must change their passwords. Otherwise, there is a serious security risk because it is possible for anyone to log on to your SAP system using the initial passwords.
Procedure ...
1. Start SAP Logon on the central instance host:
SAP GUI for Windows:
On the machine, where you have installed the front end, choose:
Start → Programs → SAP Front End<Release> → SAPlogon
SAP GUI for Java:
Enter the following command from the GUI installation directory: guilogon
The SAP Logon dialog box appears.
2. Create a logon entry for the newly installed system:
Field Your Entry
Description of system
Give a meaningful description, for example, the host name of the central instance or the SAP system ID.
Application Server Specify the name of the central instance host
System number Specify the number you entered for the central instance during the installation.
When you choose OK, the SAP Logon dialog box reappears and now includes an entry for the new system.
3. Double-click the new system entry.
The logon screen for the SAP system appears.
4. Log on as user SAP*.
86 August 2004
5 Post-Installation Activities
5.4 Checking SAP System Services
5.4 Checking SAP System Services Use You need to check that the SAP system services are correctly installed.
Make sure that you perform this procedure after you log on to the SAP system for the first time after installation.
Prerequisites You have logged onto the SAP system [page 85].
Procedure ...
1. Call transaction SM50.
The services available for this instance are displayed:
Dialog
Update
Enqueue
Batch
Spool.
If the display is empty, check whether the message server is running. The process name is ms.sap<SAPSID>_DVEBMGS<nr>. If the process is not running, look at the following file for more information:
/usr/sap/<SAPSID>/DVEBMGS<nr>/work/dev_ms
2. Call transaction SM21 to check the system log.
3. Call transaction SM28 to perform the SAP initial consistency check.
August 2004 87

5 Post-Installation Activities
5.5 Installing the SAP Online Documentation
5.5 Installing the SAP Online Documentation Use SAP currently provides an HTML-based solution for the online documentation, the SAP Library. The Application Help, Glossary, Implementation Guide (IMG), and Release Notes are delivered in HTML format. You can display the documentation with a Java-compatible Web browser on all front-end platforms supported by SAP.
Procedure Install the SAP online documentation (SAP Library) in your SAP system as described in the README.TXT file contained in the root directory of the online documentation CDs, delivered as part of the installation package.
To access the SAP Library from your SAP system, choose Help SAP Library
5.6 Installing the SAP License Use When you install your SAP system, a temporary license is automatically installed. This temporary license allows you to use the system for four weeks from the date of installation. Before the temporary license expires, you must apply for a permanent license key from SAP. SAP recommends that you do so as soon as possible after you install your system.
Procedure The procedure to install the SAP license depends on the installation you have performed:
• If you installed an SAP system based on SAP R/3 Enterprise ABAP or ABAP+Java, see:
Solution Life Cycle Management SAP Licenses SAP License Key SAP License in the SAP Library [page 41]
SAP Note 94998
When you install the SAP system license, a license for the J2EE Engine gets installed automatically.
You can install several licenses, one for each host running a message server.
For example, on Windows, this applies if you have an installation with Microsoft Cluster Server (MSCS). The SAP system then searches for the current license.
• If you installed an SAP Web AS Java for SAP R/3 Enterprise, see Solution Life Cycle Management SAP Licenses SAP License Key SAP License Licensing of the SAP J2EE Engine in the SAP Library [page 41].
88 August 2004

5 Post-Installation Activities
5.7 Configuring SAProuter and SAPNet – R/3 Frontend
5.7 Configuring SAProuter and SAPNet – R/3 Frontend Use SAProuter increases network security and simplifies network configuration. SAProuter allows you to make indirect network connections. The SAProuter software is included in the standard SAP system. No additional installation is required. The network administrator normally configures SAProuter.
You require SAProuter if you are using any of the following:
• SAPNet – R/3 Frontend
SAPNet – R/3 Frontend is the SAP-based service system and provides the technical link between SAP customers and SAP. SAPNet – R/3 Frontend was formerly known as the Online Service System (OSS).
For more information on setting up and using SAPNet – R/3 Frontend, see the following:
SAP Service Marketplace at service.sap.com/remoteconnection
SAP Library [page 41]
• EarlyWatch
For more information on Early Watch, see SAP Service Marketplace at service.sap.com/earlywatch.
Procedure For a complete list of SAProuter parameters, enter the following at the command line: saprouter
For more information, choose Application Platform (SAP Web Application Server) → ABAP Technology → Client/Server Technology → SAProuter in the SAP Library [page 41].
For information on installing SAProuter as a Microsoft Windows service, see SAP Note 41054.
August 2004 89

5 Post-Installation Activities
5.8 Completing and Checking the Oracle Installation
5.8 Completing and Checking the Oracle Installation Use
An Oracle SAP database has to be run in archive log mode. Only this mode guarantees recovery after system failure. The database archive logs are written to the directory /oracle/<DBSID>/oraarch. If the file system containing the archive directory is full, all database transactions are stopped (archiver stuck). Use the tool brarchive to save the archives on tape. For more information, see the documentation SAP Database Administration: Oracle that is part of the Online Documentation.
The following tasks need to be executed to ensure the availability of important database tools and to complete the Oracle database installation.
Procedure
Checking Database Utilities brbackup and brarchive
Execute the following steps in order to check whether the database utilities brbackup and brarchive are installed correctly: ...
1. Log on as UNIX user ora<dbsid>.
2. Verify that the database is running.
3. Load a scratch/new tape in the tape station.
4. Initialize all tapes defined in the volume_backup and volume_archive init<DBSID>.sap profile parameters, if enough scratch tapes are available (default 60): brbackup -i force brarchive -i force
If only one scratch tape is available, enter: brbackup -i force -n 1 brarchive -i force -n 1
5. Start an online backup of a single database file: brbackup –d tape –t online –m 1 -c
6. One of the following messages appears:
• BRBACKUP terminated successfully
• BRBACKUP terminated successfully with warnings
7. Start a dummy backup (query mode) of offline redo log files: brarchive –d tape –v scratch –q -c
8. One of the following messages appears:
• BRARCHIVE terminated successfully
• No offline redo log files found for processing
90 August 2004

5 Post-Installation Activities
5.9 Configuring the Transport Management System
BRARCHIVE terminated successfully with warnings
If brarchive or brbackup did not terminate successfully, refer to the documentation SAP Database Administration: Oracle (supplied on the Online Documentation CD) to analyze error messages and to obtain information on how to solve the problems.
Installing the SAP Backup Library or the Legato Storage Manager
This is an optional post-installation step for Oracle 9.2.x only.
If you want to extend the backup functionality to include, for example, incremental backup, you must use one of the following backup libraries:
• SAP backup library
• Legato Storage Manager
• Backup tool of a third-party vendor that implements the backup interface of the Oracle Recovery Manager
The use of a backup library is optional. You can install a backup library any time after the Oracle installation.
For more information on how to install and use the SAP backup library and the Legato Storage Manager, see SAP Note 142635.
When installing third-party backup software, follow the vendor’s instructions.
5.9 Configuring the Transport Management System Use You configure the domain controller in the Transport Management System (TMS) by calling transaction STMS.
Procedure 1. In your SAP system, call transaction STMS.
2. Enter the required information to configure the domain controller.
If you are not sure how to configure the domain controller, choose Save and configure the controller later or choose Information to display the TMS online documentation.
August 2004 91

5 Post-Installation Activities
5.10 Performing Basic Operations
5.10 Performing Basic Operations Use You need to perform some basic operations that are described in the SAP Library.
Prerequisites Open the SAP Library [page 41].
Procedure Choose the relevant section to perform the following operations:
! Operation Section in SAP Help Library
Set up operation modes – transaction RZ04
Solution Life Cycle Management → System Management → Configuration → Operation Modes
Set up logon groups –transaction SMLG
Solution Life Cycle Management → System Management → Configuration → Dynamic Logon Load Distribution → The SAP Logon
Set up administrators Solution Life Cycle Management → System Management → Background Processing → Authorizations for Background Processing
Schedule background jobs
Solution Life Cycle Management → System Management → Background Processing
Install a printer Solution Life Cycle Management → System Management → SAP Printing Guide
Configure the system log
Solution Life Cycle Management → System Management → Tools for Monitoring the System → System log → Configuring the System Log
5.11 Configured Number of Work Processes Definition SAPinst installs SAP systems with a minimum number of work processes calculated using the following formula:
#dialog_WP = RAM / 256 (min 2, max 18)
#update_WP = RAM / 768 (min 1, max 6)
#update2_WP = RAM / 1024 (min 1, max 3)
#batch_WP = RAM / 1024 (min 2, max 3)
#enqueue_WP = 1
#spool_WP = 1
92 August 2004

5 Post-Installation Activities
5.12 Installing Additional Languages
Use This is only an initial configuration to get you started after the installation. It is not detailed enough for a production system because the optimal number of each type of work process depends on the system resources and on the number of users working in each SAP system application.
For a detailed configuration contact SAP Technical Consulting.
5.12 Installing Additional Languages Use To install an additional language, you need to perform the following steps:
• Classify the language
• Schedule the language transport
• Schedule the language supplementation
You can also install additional languages later, but if you install any Support Packages in the meantime, you have to do one of the following:
• Install the Support Packages again
• Use the report RSTLAN_IMPORT_OCS to extract the language-relevant information from each Support Package
Procedure For more information on how to transport an additional language, see Language Transport, which you can find in either of the following:
• SAP Service Marketplace at service.sap.com/instguidesNW04 Installation.
• SAP Library [page 41] by choosing Solution Life Cycle Management → Software Change Management → Change and Transport System → Language Transport.
August 2004 93

5 Post-Installation Activities
5.13 Activating the integrated Internet Transaction Server
5.13 Activating the integrated Internet Transaction Server Use The integrated Internet Transaction Server (ITS) was installed automatically with the SAP kernel.
To be able to use the integrated ITS you have to configure and activate the Internet Communication Manager (ICM) and make sure that the webgui service is activated in the Internet Communication Framework (ICF).
For more information, see the SAP Library [page 41] and choose Application Platform (SAP Web Application Server) ABAP Technology UI Technology Web UI Technology ITS/SAP@Web Studio SAP ITS in the SAP Web Application Server
There you can also find the necessary information if you do not want to use the integrated ITS.
5.14 Importing Support Packages Use You use this procedure to import Support Packages for your SAP system.
Procedure ...
1. See SAP Note 737696 for more information about Support Packages for SAP R/3 Enterprise 4.7 Ext. 2.00 SR 1.
2. For up-to-date information on currently recommended combinations of Support Packages and patches, see service.sap.com/sp-stacks.
3. To import a Support Package, download it from SAP Service Marketplace at: service.sap.com/patches
4. Apply Support Packages to your SAP system with the help of the Support Package Manager (formerly called SAP Patch Manager, transaction SPAM).
For more information on the availability of Support Packages, see the SAP Service Marketplace at: service.sap.com/ocs-schedules
The SAP Note Assistant lets you load, implement, and organize individual SAP Notes efficiently. It also recognizes dependencies between SAP Notes, Support Packages, and modifications.
For more information, see the SAP Service Marketplace at: service.sap.com/noteassistant
94 August 2004

5 Post-Installation Activities
5.15 Performing Operating System Adjustments
5.15 Performing Operating System Adjustments Use The following adjustment is recommended if your operating system is AIX on IBM/RS6000 or HP-UX on HP/HPPA.
Procedure You can improve performance by reducing the number of shared memories. To do this, group shared memories together as shared memory pools.
For more information, see SAP Note 37537.
5.16 Performing File and Directory Adjustments 1. If you have copied installation CDs / DVDs to your hard disk for an unattached
installation, you can delete these files when the installation has successfully completed.
2. For security reasons, set the permissions of the transport directory /usr/sap/trans to 771:
...
a. Log on as user root on the host that exports the transport directory.
b. Enter: chmod 771 /usr/sap/trans
5.17 Enabling Remote Monitoring To enable remote monitoring of the DB server from the SAP System, include the host name of each application server in the .rhosts file of user <sapsid>adm on the database host. If you use network domains, use nslookup on your database host to determine the ‘long name’ of a host.
Database server host is host1, central instance host is host2. The network domain is subdomain1.my_company.com. Then the file ~<sapsid>adm/.rhosts on host host1 must contain at least the line: host2.subdomain1.my_company.com
Check the connectivity from the central instance host to the database server. Try to open a remote shell without being asked for a password.
August 2004 95

5 Post-Installation Activities
5.18 Editing sapmsg.ini for LDAP
5.18 Editing sapmsg.ini for LDAP Use Instead of using a fixed list of systems and message servers, you can configure the SAP Logon in the sapmsg.ini configuration file to find SAP systems and their message servers from the directory. If you configure SAP Logon to use the LDAP directory, it queries the directory each time Server or Group selection is chosen to get up-to-date information on available SAP systems.
Prerequisites You decided to integrate LDAP directory services for SAP Logon (for more information, see Planning Guide for SAP Web Application Server on UNIX Oracle Integration of LDAP Directory Services).
96 August 2004

5 Post-Installation Activities
5.19 Scheduling Asynchronous Indexing and Deindexing
Procedure To use the LDAP operation mode, the sapmsg.ini file must contain the following Address section: [Address] Mode=LDAPdirectory LDAPserver= LDAPnode= LDAPoptions=
Distinguish the following cases:
• If you use Active Directory, you must set LDAPoptions=“DirType=NT5ADS”. For more information, see the SAP system profile parameter ldap/options.
• If the client is not located in the same domain forest as the Active Directory, or the operating system does not have a directory service client (Windows NT4.0 and Windows 9X without installed dsclient), you must specify the directory servers (for example LDAPserver=pcintel6 p24709). For more information, see the SAP system profile parameter ldap/servers.
• For other directory services you can use LDAPnode to specify the distinguished name of the SAP root node. For more information, see the SAP system profile parameter ldap/saproot.
5.19 Scheduling Asynchronous Indexing and Deindexing Use
This step is only needed if you use the Knowledge Provider (KPRO) component. For more information on KPRO see SAP Library [page 41] and choose Application Platform (SAP Web Application Server) Business Services Knowledge Provider (BC-SRV-KPR).
Asynchronous indexing and deindexing is triggered using the report RSTIRIDX. You should schedule this report as a daily background process.
The report RSTIRIDX starts the indexing and deindexing of scheduled documents, and logs indexing errors in the productive system. The chosen recipient can view the contents of the report using the transaction SO01. If an error occurs, check in IMS Monitoring (see Checking for Problems in IMS Monitoring [page 98]).
Prerequisites To use a report, you need Batch Administrator authorization for the authorization object Batch Processing.
August 2004 97

5 Post-Installation Activities
5.19 Scheduling Asynchronous Indexing and Deindexing
Procedure ...
1. In the SAP system, call transaction SM36 or choose System → Services → Jobs → Define Jobs from the menu.
The Define Background Job screen appears.
2. In the field Job name, enter INDEXING.
3. In the field Job class, choose B.
4. In the field Target Server, enter the name of the host on which the background process is to be performed.
5. Choose Spool list Recipient.
The Recipient Determination dialog box appears .
6. In the field Recipient, enter the name of the desired recipient. Then select the required General Attributes, and choose Copy.
7. From the application toolbar on the Define Background Job screen, choose Start condition.
The Start Time dialog box appears.
8. Choose Date/Time.
9. Enter the required start date and time.
10. Select the option Periodic Job anf choose Period Values
The Period Values dialog box appears.
11. Choose Daily.
12. Choose Save.
13. On the Start Time dialog box, choose Save again.
14. From the application toolbar, choose Step.
The Create Step dialog box appears.
15. Choose ABAP program.
16. In the ABAP Program group box, enter the name RSTIRIDX in the Name field.
17. Choose Print specifications.
The Background Print Parameters dialog box appears.
18. Enter the name of the output device and choose Properties.
The Spool Request Attributes dialog box appears
19. On the Overview tab, select General Properties and double-click Time of Printing.
20. In the group box Other Properties “Time of Printing”, choose the option Print out immediately from the listbox.
21. Confirm your entries with O.K.
98 August 2004

5 Post-Installation Activities
5.19 Scheduling Asynchronous Indexing and Deindexing
5.19.1 Checking for Problems in IMS Monitoring
This step is only needed if you use the Knowledge Provider (KPRO) component. For more information on KPRO see SAP Library [page 41] and choose Application Platform (SAP Web Application Server) Business Services Knowledge Provider (BC-SRV-KPR).
Procedure 1. In the SAP system, choose transaction SKPR07.
2. In the Extras area, choose Scheduled Documents. ...
The system displays a list of documents to be indexed or deindexed. The following information is available:
Client
Name of index category (32-place GUID)
Document class
Document language
Processing type (I = indexing, D = deindexing)
The number of scheduled documents for this index category
3. To see details on the scheduled documents, select the required list entry and choose View.
4. To see the number of attempts to index or deindex individual documents, select the required documents and choose View.
If an error has occurred whilst a document was being indexed or deindexed, it is scheduled for the process again. If the number of retries is large, there is probably an error that is preventing the indexing or deindexing of the document in general. Select such documents in the list of scheduled documents, and delete them.
Documents that could not be indexed or deindexed at the first attempt (including those documents that you have deleted from the list of scheduled documents manually) are treated by the system as problem cases.
5. To see a list of problem cases, call transaction SKRPR07 and choose Problems.
You can filter this list by document class and by the number of attempts to index or deindex a document.
You can delete the listed documents, or you can mark them to be indexed or deindexed again.
August 2004 99

5 Post-Installation Activities
5.20 Performing the Client Copy
5.20 Performing the Client Copy Use You use this procedure to perform the client copy, which consists of the following steps:
• Maintain the client with transaction SCC4
• Copy the client with local transaction SCCL
• Copy the log files with transaction SCC3
Procedure For more detailed information on how to perform the client copy, see the separate documentation in the SAP Library [page 41]:
Solution Life Cycle Management → Software Change Management → Change and Transport System → Client Copy and Transport
5.21 Performing a Full Installation Backup Use You must perform a full offline backup at the end of the installation. This procedure also describes how to use the backed-up data for a restore.
You need to back up the following directories and files:
• All database-specific directories
• All SAP-specific directories:
/usr/sap/<SAPSID>
/usr/sap/trans
<sapmnt>/<SAPSID>
Home directory of the user <sapsid>adm
• The root file system
This saves the structure of the system and all configuration files, such as file system size, logical volume manager configuration, and database configuration data.
This list is only valid for a standard installation.
The directory /usr/sap/trans is only required for SAP systems that have the ABAP engine installed.
100 August 2004

5 Post-Installation Activities
5.21 Performing a Full Installation Backup
Prerequisites • You have completed client maintenance, such as the client copy [page 99].
• You have logged on as user <sapsid>adm and stopped the SAP system and database [page 82].
• This procedure works on all hardware platforms. For more information on operating system-specific backup procedures, see your operating system documentation.
Procedure
Backing Up the Installation ...
1. Log on as user root.
2. Manually create a compressed tar archive containing all installed files: ...
a. Create the archive: tar -cf <ARCHIVNAME> <filesystem / filename>
tar -uf <ARCHIVNAME> <filesystem / filename> ....
b. Compress the archive: compress <ARCHIVNAME>
c. Store the archive on tape: tar -cf <tape_device> <ARCHIVNAME>.Z
Restoring Your Backup
Check for modifications in the existing parameter files before you overwrite them when restoring the backup.
...
1. Log on as user root.
2. Restore the data that you previously backed up: ...
a. Restore the data from tape: tar -xf <tape_device> <ARCHIVNAME>.Z
b. Uncompress the data: uncompress <ARCHIVNAME>.Z
c. Restore the data to the file system: tar -xf <ARCHIVNAME>
August 2004 101

5 Post-Installation Activities
5.22 Changing Passwords of Created Users
5.22 Changing Passwords of Created Users Use You need to change the passwords of the users that SAPinst creates during the installation. The table below lists these users. You also need to remove the contents of the installation directory and store them securely because otherwise they represent a security risk.
Make sure that you perform this procedure before the newly installed SAP system goes into production.
Procedure ...
Change the passwords of these users according to the SAP Security Guide.
For more information, see SAP Service Marketplace at service.sap.com/securityguide.
• SAP system users might exist in more SAP system clients than listed below
(for example, if a user was copied as part of the client copy [page 99]).
• We strongly recommend that you change the initial passwords even if SAPinst prompted for a new password during the installation procedure.
User Type User Comment SAP* User exists at least in SAP
system client 000
DDIC User exists at least in SAP system clients 000 and 066
EARLYWATCH User exists at least in SAP system client 066
SAP system user
SAPCPIC User exists at least in SAP system client 000
<sapsid>adm SAP system administrator Operating system user
ora<dbsid> Oracle database administrator (that is, the owner of the database files)
SAP<SCHEMA_ID> Oracle database owner (that is, the owner of the database tables)
SYSTEM –
SYS –
OUTLN –
Oracle database user
DBSNMP –
102 August 2004

6 Additional Information
6.1 Remote Installation with SAPinst
6 Additional Information 6.1 Remote Installation with SAPinst Purpose You can run the SAPinst GUI in standalone mode to perform a remote installation.
This enables you to install an SAP system on another host (the remote host) while monitoring the installation with the SAPinst GUI on your local Windows or UNIX computer (the local host).
Prerequisites • Make sure that you have performed the preparation activities for your local host
(SAPinst GUI host) and your remote host.
For more information, see Installation Preparations in this documentation.
• Both computers are in the same network and can ping each other.
To test this:
Log on to your remote host and enter the command ping <local host>.
Log on to the local host and enter the command ping <remote host>.
Process Flow 1. You start SAPinst on the remote host [page 102].
2. You start SAPinst GUI on the local host [page 103].
3. You perform the installation using the SAPinst GUI.
...
6.1.1 Starting SAPinst on the Remote Host Use You use this procedure to run SAPinst on the remote host when you to perform a remote installation [page 102]. The remote host is the host where you want to install the SAP system.
Prerequisites You have prepared your system for SAPinst [page 58].
Concerning the Handling of the SAP Installation Master CD see section Running SAPinst [page 69].
Procedure
Your Remote Host Runs on a Windows Platform ...
1. Log on to your remote host as a user who is a member of the local administration group.
2. Insert the installation CD in your DVD drive.
August 2004 103

6 Additional Information
6.1 Remote Installation with SAPinst
3. Enter the following commands from the Windows command prompt: cd <DVD drive>:\IM<x>\SAPinst\NT\<OS>
sapinst.exe SAPINST_START_GUI=false
SAPinst now starts and waits for the connection to the SAPinst GUI. That is, you see the following at the command prompt:
guiengine: no GUI connected; waiting for a connection on host <host_name>, port <port_number> to continue with the installation
4. Start the SAPinst GUI on your local host, as described in Starting SAPinst GUI on the Local Host [page 103].
Your Remote Host Runs on a UNIX Platform ...
1. Log on to your remote host as user root.
2. Mount the installation CD.
Mount the CD locally. We do not recommend using Network File System (NFS).
3. Enter the following commands: cd <SAP_Installation_CD>/IM<x>/SAPINST/UNIX/<OS>
sapinst SAPINST_START_GUI=false
SAPinst now starts and waits for the connection to the SAPinst GUI. That is, you see the following at the command prompt:
guiengine: no GUI connected; waiting for a connection on host <host_name>, port <port_number> to continue with the installation
4. Start the SAPinst GUI on your local host, as described in Starting SAPinst GUI on the Local Host [page 103].
6.1.2 Starting SAPinst GUI on the Local Host Use You use this procedure to run SAPinst GUI on the local host when you want to perform a remote installation [page 102]. The local host is the host where you want to control the installation with the SAPinst GUI.
Prerequisites You have prepared your system for SAPinst [page 58].
Concerning the Handling of the SAP Installation Master CD see section Running SAPinst [page 69].
104 August 2004

6 Additional Information
6.1 Remote Installation with SAPinst
Procedure
Your Local Host Runs on a Windows Platform ...
1. Log on to your remote host as a user who is a member of the local administration group.
2. Insert the installation CD into your CD drive.
3. Enter the following commands from the Windows command prompt: cd <CD drive>:\IM<x>\SAPinst\NT\<OS>
startinstgui.bat
If you enter this command without any parameters, the SAPinst GUI starts and connects automatically to the host that is waiting for a connection. The SAP Installation GUI Connection dialog appears.
Alternatively, you can also enter the host name and the port number of the remote host using the options –host <host_name> and –port <port_number> respectively. If the connection is successful, then the SAP Installation GUI Connection dialog does not appear.
4. If the SAP Installation GUI Connection dialog appears, you enter the host name of the Installation Host and the same Port as SAPinst uses on the remote host and choose OK.
SAPinst GUI now connects to the SAPinst server and the first dialog of the installation appears.
5. Perform the installation from your local host.
Your Local Host Runs on a UNIX Platform ...
1. Log on to your local UNIX host as user root.
2. Mount your installation CD.
Mount the CD locally. We do not recommend using Network File System (NFS).
3. Enter the following command: cd <SAP_Installation_CD>/IM<x>/SAPINST/UNIX/<OS>
./startInstGui.sh
If you enter this command without any parameters, the SAPinst GUI now gets started and connects automatically to the host that is waiting for a connection. The SAP Installation GUI Connection dialog appears.
Alternatively you can also enter the host name and the port number of the remote host using the options –host <host_name> and –port <port_number> respectively. If the connection is successful, then the SAP Installation GUI Connection dialog does not appear.
4. If the SAP Installation GUI Connection dialog appears, you enter the host name of the Installation Host and the same Port as SAPinst uses on the remote host and choose OK.
August 2004 105
6 Additional Information
6.1 Remote Installation with SAPinst
SAPinst GUI now connects to the SAPinst server and the first dialog of the installation appears.
5. Perform the installation from your local host.
106 August 2004

6 Additional Information
6.2 Interrupted Installation with SAPinst
6.2 Interrupted Installation with SAPinst Use SAPinst does not abort the installation in error situations. Therefore, you can continue an interrupted installation when you have:
• Not canceled the installation
That is, the error dialog box is still displayed and SAPinst is waiting for your input. You proceed by choosing Retry in the error dialog box.
SAPinst now retries the installation step.
• Already canceled the installation
That is, the installation was aborted. There are the following situations:
If you have canceled with…
Meaning
Stop Since SAPinst records the installation progress in the keydb.xml file, you can continue the installation from the failed step without repeating previous steps.
During this procedure, you can Reset the installation, too, if required.
Reset You must restart from the beginning, that is, with the default keydb.xml file as delivered.
In some cases, you must uninstall already installed components, before repeating the installation from the beginning. For example, this applies to an SAP system installation. For more information, see the description on how to de-install a component in the corresponding installation guide.
If you do not want to continue the installation, you can terminate SAPinst completely by pressing Ctrl+C (see section Running SAPinst [page 69]).
Prerequisites You have solved the problem that caused the error situation.
Concerning the Handling of the SAP Installation Master CD see section Running SAPinst [page 69].
Procedure
August 2004 107

6 Additional Information
6.2 Interrupted Installation with SAPinst
Windows
1. Log on to your remote host as a user who is a member of the local administration group.
2. Insert the installation CD in your DVD drive.
3. Enter the following commands from the Windows command prompt: cd <CD drive>:\IM<x>\SAPinst\NT\<OS>
sapinst.exe
4. From the tree structure in the Welcome screen, select the installation task that you want to continue and choose Next.
.
If there is only one component to install, SAPinst directly displays the dialog What do you want to do? without presenting the Welcome screen.
The What do you want to do? screen appears.
5. In the What do you want to do? screen, decide between the following alternatives and choose OK.
Alternative Behavior
Run a new Installation
The installation will not be continued.
Instead, SAPinst deletes the mentioned installation directory for the chosen installation service and starts the installation from the beginning.
The log files from the old installation are put into a backup directory with the following naming convention: <log_day_month_year_hours_minutes_seconds> (for example, log_01_Oct_2003_13_47_56).
Continue old installation
The installation of the mentioned installation service will be continued from the point of failure.
UNIX
1. Log on to your local UNIX host as user root.
2. Mount your installation CD.
Mount the CD locally. We do not recommend using Network File System (NFS).
3. Enter the following commands: cd <SAP_Installation_CD>/IM<x>/SAPINST/UNIX/<OS>
./sapinst
4. From the tree structure in the Welcome screen, select the installation task that you want to continue and choose Next.
108 August 2004

6 Additional Information
6.2 Interrupted Installation with SAPinst
.
If there is only one component to install, SAPinst directly displays the dialog What do you want to do? without presenting the Welcome screen.
The What do you want to do? screen appears.
5. In the What do you want to do? screen, decide between the following alternatives and choose OK.
Alternative Behavior
Run a new Installation
The installation will not be continued.
Instead, SAPinst deletes the mentioned installation directory for the chosen installation service and starts the installation from the beginning.
The log files from the old installation are put into a backup directory with the following naming convention: <log_day_month_year_hours_minutes_seconds> (for example, log_01_Oct_2003_13_47_56).
Continue old installation
The installation of the mentioned installation service will be continued from the point of failure.
August 2004 109

6 Additional Information
6.3 Deletion of an SAP System Installation (ABAP)
6.3 Deletion of an SAP System Installation (ABAP) Purpose This section describes how to delete a dialog instance or how to completely delete an SAP system.
This description assumes that the installation of your SAP system has been performed using SAP standard tools according to the installation documentation.
Process Flow
If you delete network-wide users, groups or service entries in an environment with Network Information System (NIS), other SAP installations might also be affected. Make sure that the users, groups, and service entries to be deleted are no longer required.
Deleting a Dialog Instance
You delete the dialog instance [page 110].
Deleting a J2EE Add-In Installation
If you have an SAP system based on SAP R/3 Enterprise ABAP+Java and you only want to delete the J2EE Add-In installation (that is, the SAP system (ABAP) is not deleted), see the documentation Installation Guide – SAP Web Application Server Java on UNIX: Oracle, section Deletion of an SAP System Installation (J2EE).
Deleting a Complete SAP System ...
1. You delete all dialog instances [page 110], if there are any.
2. If you want to delete an SAP system with the J2EE Engine, you delete the central services instances. For more information, see the documentation Installation Guide – SAP Web Application Server Java on UNIX: Oracle, section Deleting a Central Services Instance.
3. You delete the central instance [page 112].
4. You delete the database instance [page 114].
110 August 2004

6 Additional Information
6.3 Deletion of an SAP System Installation (ABAP)
6.3.1 Deleting a (J2EE) Dialog Instance Use You use this procedure to delete a dialog or J2EE dialog instance. You need to delete (J2EE) dialog instances when you delete an SAP system installation [page 109].
Prerequisites There are no files or directories located on the (J2EE) dialog instance host that are exported as Network File System (NFS) mounts.
If you are deleting a single SAP instance without deleting the entire SAP system, make sure that you do not delete files or directories used by other SAP instances by means of NFS mounts.
Procedure ...
1. Stop the SAP instance to be deleted: ...
a. Log on as user <sapsid>adm.
b. Execute this command: stopsap
If there are multiple SAP instances on the dialog instance host, you must stop them with the following command (where <Dxx> or <Jxx> is the name of the dialog or J2EE dialog instance):
• SAP systems based on SAP R/3 Enterprise ABAP+Java or SAP R/3 Enterprise ABAP: stopsap <Dxx>
• SAP Web AS Java for SAP R/3 Enterprise: stopsap <Jxx>
2. If the instance to be deleted is the only SAP instance running on this host, stop the saposcol process with the following command:
saposcol -k
3. To delete all (J2EE) dialog instances with the same instance ID <ID> belonging to the SAP system, remove their profiles as follows:
SAP systems based on SAP R/3 Enterprise ABAP+Java or SAP R/3 Enterprise ABAP: rm /usr/sap/<SAPSID>/SYS/profile/<SAPSID>_D<ID>_<host_name>
rm /usr/sap/<SAPSID>/SYS/profile/START_D<ID>_<host_name>
SAP Web AS Java for SAP R/3 Enterprise: rm /usr/sap/<SAPSID>/SYS/profile/<SAPSID>_J<ID>_<host_name>
rm /usr/sap/<SAPSID>/SYS/profile/START_J<ID>_<host_name>
August 2004 111

6 Additional Information
6.3 Deletion of an SAP System Installation (ABAP)
For example, enter the following commands:
rm /usr/sap/C11/SYS/profile/START_D00_h0001
rm /usr/sap/C11/SYS/profile/C11_D00_h0001
4. Log on as UNIX user root and delete the local instance directory:
SAP systems based on SAP R/3 Enterprise ABAP+Java or SAP R/3 Enterprise ABAP: rm -rf /usr/sap/<SAPSID>/D<ID>
SAP Web AS Java for SAP R/3 Enterprise: rm -rf /usr/sap/<SAPSID>/J<ID>
Perform the remaining steps only if there are no other instances belonging to this <SAPSID> running on this host. Otherwise, you have completed the deletion of dialog instances.
5. If the file system for the executables <sapmnt>/<SAPSID>/exe is located on the (J2EE) dialog instance host, delete it: rm -rf <sapmnt>/<SAPSID>/exe
6. Remove the softlinks: rm /usr/sap/<SAPSID>/SYS/exe/dbg
rm /usr/sap/<SAPSID>/SYS/profile
rm /usr/sap/<SAPSID>/SYS/global
7. Delete user <sapsid>adm , its home directory, and all subdirectories of the home directory:
To delete users, use the administration tools of your operating system if possible.
...
a. Delete the UNIX user <sapsid>adm as described in your operating system documentation.
b. If the home directory of the user was not deleted automatically in the previous step, delete this directory: rm -rf <sapsid_adm_home>
For example, enter the following command:
rm -rf /home/c11adm
8. Delete the user <sapsid>adm from the groups sapsys, oper and dba, if this was not done automatically in the previous step. If one of these groups is now empty, delete the complete group as described in your operating system documentation.
9. Check whether you need to delete entries from the file /etc/services: ...
a. Search for entries starting with sap.
112 August 2004

6 Additional Information
6.3 Deletion of an SAP System Installation (ABAP)
b. Check whether these entries are still required by other instances with the same or a different <SAPSID> on any server.
c. If not, start by generating a backup copy of the services file. You can do this as follows: cp /etc/services /etc/services.sap
d. Delete superfluous entries from /etc/services.
If you use Network Information System (NIS) for the services file, see your operating system documentation for more information on how to delete entries from network-wide service entries.
10. If there are no other SAP instances running on this host, delete the following files if they exist:
/etc/sapconf
/usr/sap/trans/.sapconf
The directory /usr/sap/trans is only required for SAP systems that have the ABAP engine installed.
6.3.2 Deleting a Central Instance Use You use this procedure to delete a central instance. You need to delete a central instance when you delete an SAP system installation [page 109].
Prerequisites • You have deleted all (J2EE) dialog instances [page 110] in the SAP system.
• If you delete an SAP system with the J2EE Engine, you have deleted the central services.
• The file systems /usr/sap/<SAPSID> and <sapmnt>/<SAPSID> are physically located on the central instance host.
Procedure ...
1. Stop the central instance by entering the following as user <sapsid>adm:
stopsap
If there are multiple SAP instances on one host (for example, a central instance and a dialog instance), the stopsap script requires an additional parameter:
stopsap <instanceID>
2. If the instance to be deleted is the only SAP instance running on this host, stop the saposcol process with the following command:
saposcol -k
August 2004 113

6 Additional Information
6.3 Deletion of an SAP System Installation (ABAP)
3. Delete the following directories: rm -rf /usr/sap/<SAPSID>
rm -rf /<sapmnt>/<SAPSID>
rm -rf <INSTDIR>
4. Delete the following file: rm /usr/sap/trans/bin/tpparam_inst<SAPSID>
The directory /usr/sap/trans is only required for SAP systems that have the ABAP engine installed.
5. Log on as user root.
6. Delete user <sapsid>adm, its home directory, and all sub-directories of this directory: ...
a. Delete <sapsid>adm as described in your operating system documentation.
b. If the user's home directory was not deleted automatically as part of the previous step, delete it: rm -rf <sapsid_adm_home>
7. Check whether you need to delete entries from the file /etc/services: ...
a. Search for entries starting with sap.
b. Check whether these entries are still required by other instances with the same or a different <SAPSID> on any server.
c. If not, generate a backup copy of the services file:
cp /etc/services /etc/services.sap
d. Delete superfluous entries from /etc/services.
If you use Network Information System (NIS) for the services file, see your operating system documentation for information on how to delete entries from network-wide service entries.
8. If not done automatically in the previous step, delete the user <sapsid>adm from the groups sapsys, oper, and dba. If one of these groups is now empty, delete the complete group, as described in your operating system documentation.
9. If there are no other SAP instances running on this host and the /etc/sapconf file exists, delete this file.
10. If there are no other SAP systems running network-wide, delete the directory /usr/sap/trans with all its sub-directories.
Otherwise, adapt the SAP system configuration description.
The directory /usr/sap/trans is only required for SAP systems that have the ABAP engine installed.
114 August 2004

6 Additional Information
6.3 Deletion of an SAP System Installation (ABAP)
6.3.3 Deleting an Oracle Database Installation Use
If you have multiple components installed in one database (MCOD), delete the database only if you want to delete all contained components as well. Otherwise, delete components on a selective basis (see SAP Note 399910).
This section describes how to delete an Oracle database that you have installed.
Prerequisites • Before deleting the database, stop all SAP instances belonging to this database or to
this J2EE database schema.
• We recommend you to delete the SAP instances before deleting the database instance.
Procedure ...
1. Log on as user ora<dbsid>.
2. Start sqlplus and shutdown the database. Enter:
sqlplus /nolog SQLPLUS>connect / as sysdba SQLPLUS>shutdown immediate SQLPLUS>exit
3. Kill the orasrv process if it is running:
ps -ef | grep orasrv (note the process ID <PID>) kill -9 <PID>
4. Stop the listener process: lsnrctl stop
5. Use the uninstall functionality of the Oracle Universal Installer (OUI):
a. Start the Oracle Universal Installer:
cd /oracle/stage/920_32/Disk1 or cd /oracle/stage/920_64/Disk1
./runInstaller
b. Choose Installed Products or Deinstall Products.
c. Select the database schema you want to uninstall (<DBSID>_920_32 or <DBSID>_920_64).
d. Mark the Oracle 9i database within the selected schema.
e. Choose Remove.
f. Confirm your selection with Yes.
g. Choose EXIT.
6. Log on as user root.
August 2004 115

6 Additional Information
6.3 Deletion of an SAP System Installation (ABAP)
7. Delete user ora<dbsid>along with its home directory and all subdirectories of this directory:
...
a. Delete the UNIX user ora<dbsid> using the steps appropriate for your operating system.
b. If the home directory of the user was not deleted automatically in the previous step, delete this directory: rm -rf <sapsid_adm_home>
For example, enter:
rm -rf /home/orac11
8. Delete user ora<dbsid> from group dba, if this was not done automatically in the previous step. If the group dba is now empty, delete the complete group using the steps appropriate for your operating system.
9. Remove the directory /oracle/<DBSID> and sub-directories rm -rf /oracle/<DBSID>
10. If there are no other database instances with the same Oracle release installed on this host, remove the staging area directory:
32-bit Oracle 9.2.0: rm -rf /oracle/stage/920_32
64-bit Oracle 9.2.0: rm -rf /oracle/stage/920_64
11. If there are no other Oracle instances on this host, remove the Oracle client software directory with one of the following commands:
Oracle Software Version Command
32-bit Oracle 9.2.x rm -r /oracle/client/92x_32
64-bit Oracle 9.2.x rm -r /oracle/client/92x_64
116 August 2004