repairing the audio amplifier - amazon web services · importance of trouble shooting does become...
TRANSCRIPT
Repairing the audio amplifierThis one came to me from a co-worker. It had a "rattle" inside and did not power up. The
importance of trouble shooting does become obvious with this repair.
Written By: oldturkey03
Repairing the audio amplifier
© iFixit — CC BY-NC-SA www.iFixit.com Page 1 of 10
INTRODUCTION
Here is an inexpensive Guitar Amplifier that came to me for a "rattling on the inside" and " no power"issue. I figured I can take a look at it and see what needs to be done. Straight forward disassemblymade it easy and no service manual is needed. Trouble shooting consist of visual as well as somecomponent testing.
TOOLS:Soldering Workstation (1)
Phillips #2 Screwdriver (1)
PARTS:5mm 0.25A fast blo fuse (1)
TDA2030A 18 W hi-fi amplier / 35 Waudio driver (1)
Repairing the audio amplifier
© iFixit — CC BY-NC-SA www.iFixit.com Page 2 of 10
Step 1 — Repairing the audio amplifier
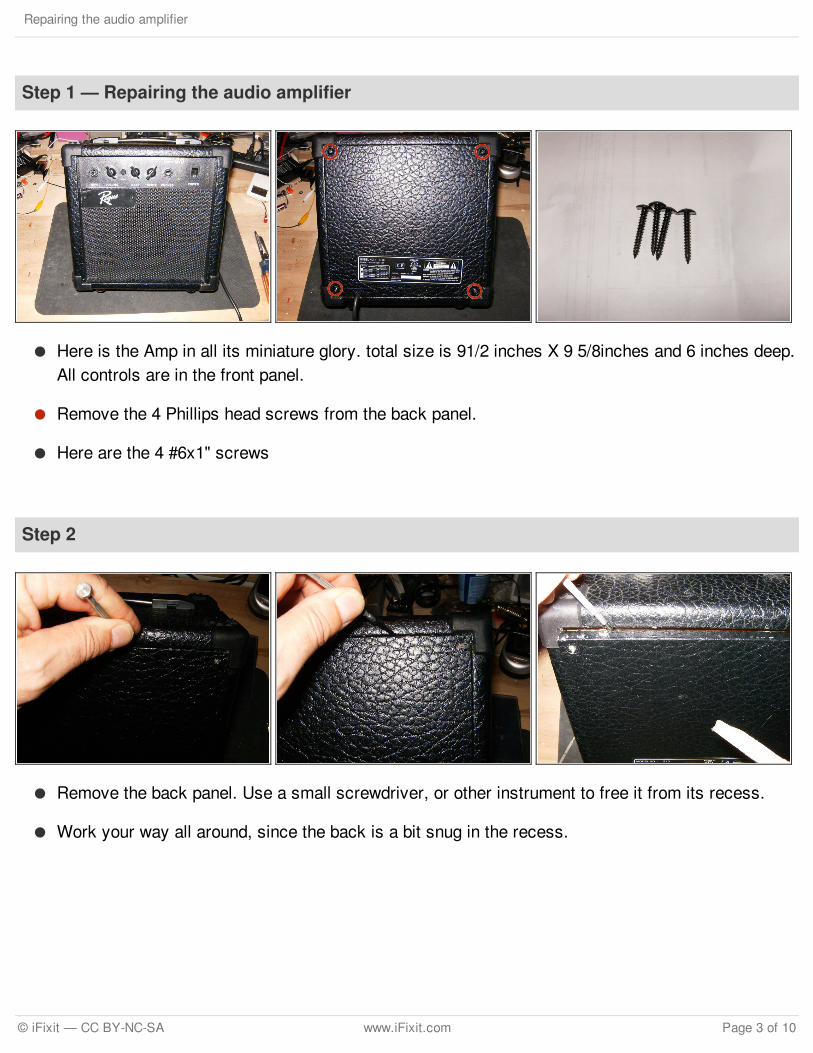
Here is the Amp in all its miniature glory. total size is 91/2 inches X 9 5/8inches and 6 inches deep.All controls are in the front panel.
Remove the 4 Phillips head screws from the back panel.
Here are the 4 #6x1" screws
Step 2
Remove the back panel. Use a small screwdriver, or other instrument to free it from its recess.
Work your way all around, since the back is a bit snug in the recess.
Repairing the audio amplifier
© iFixit — CC BY-NC-SA www.iFixit.com Page 3 of 10

Step 3
Once the panel is freed from the recess, fold it down and remove from amp.
Something does not look quite right :-)
the transformer should be mounted to the PCB, not laying inside the box.
Step 4
Trying to find a mount for it.
Closer view of the control panel PCB.
Mount for the transformer
Unoccupied connector
Fuse
Before anything else, check the fuse for continuity. this one has failed.
Repairing the audio amplifier
© iFixit — CC BY-NC-SA www.iFixit.com Page 4 of 10
Step 5
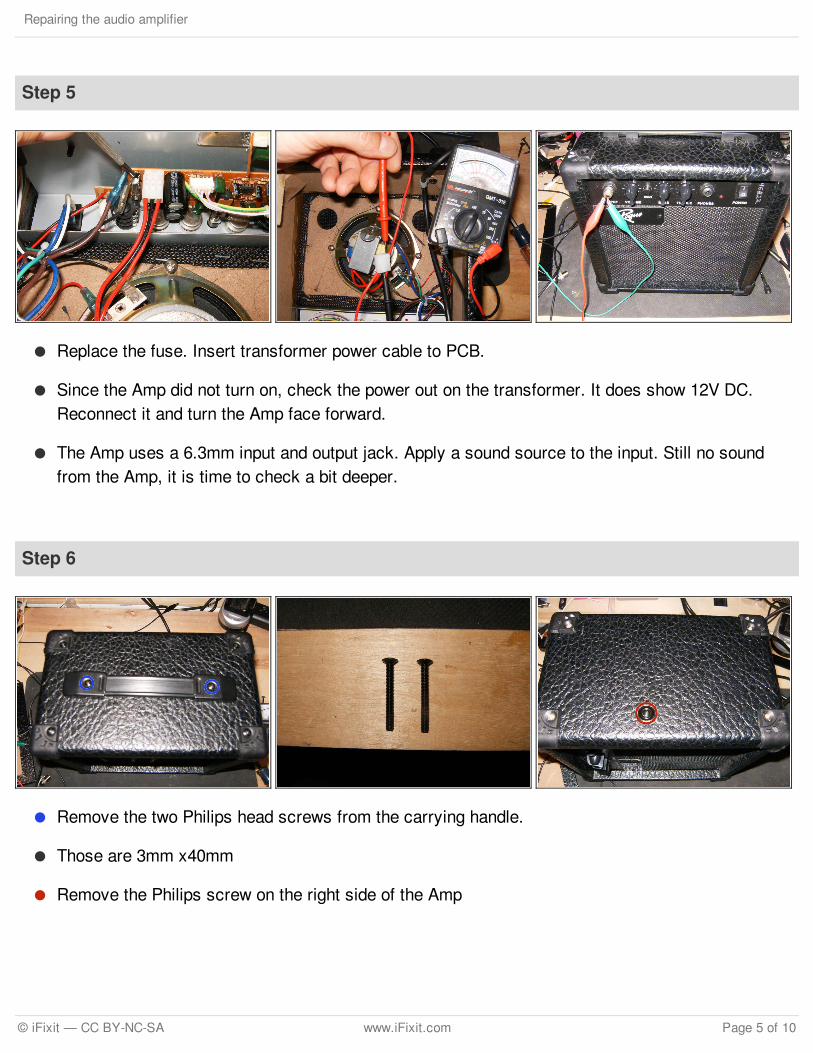
Replace the fuse. Insert transformer power cable to PCB.
Since the Amp did not turn on, check the power out on the transformer. It does show 12V DC.Reconnect it and turn the Amp face forward.
The Amp uses a 6.3mm input and output jack. Apply a sound source to the input. Still no soundfrom the Amp, it is time to check a bit deeper.
Step 6
Remove the two Philips head screws from the carrying handle.
Those are 3mm x40mm
Remove the Philips screw on the right side of the Amp
Repairing the audio amplifier
© iFixit — CC BY-NC-SA www.iFixit.com Page 5 of 10
Step 7
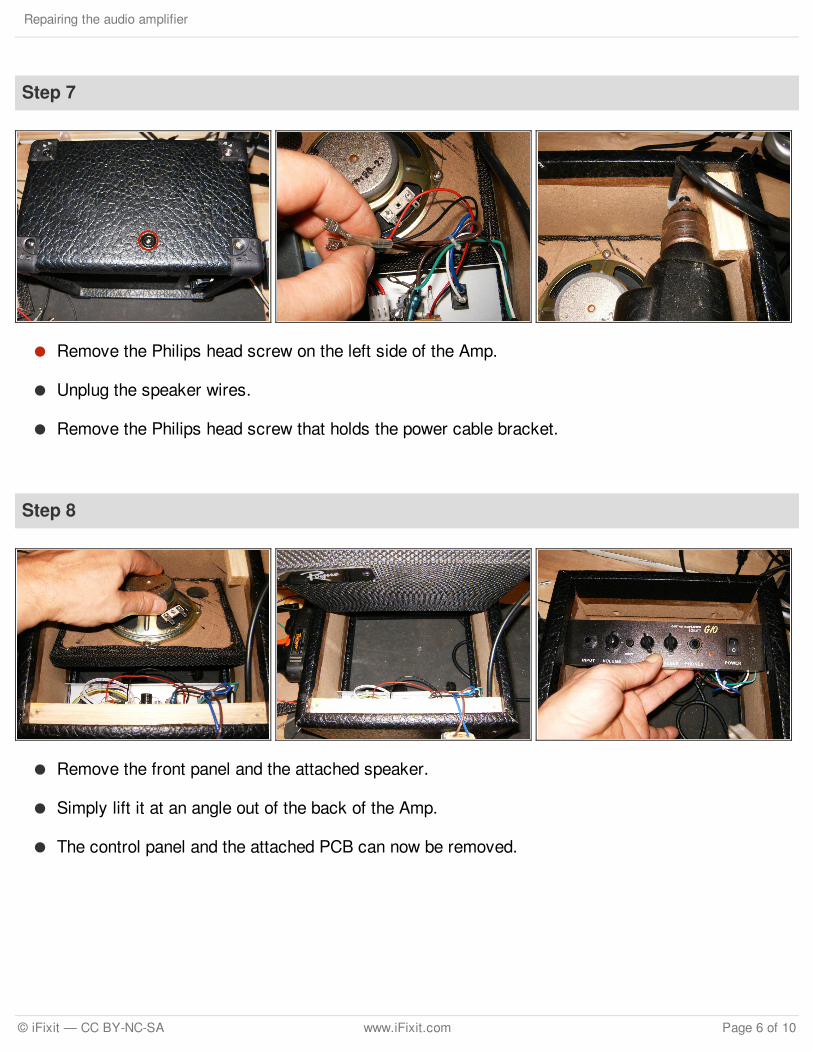
Remove the Philips head screw on the left side of the Amp.
Unplug the speaker wires.
Remove the Philips head screw that holds the power cable bracket.
Step 8
Remove the front panel and the attached speaker.
Simply lift it at an angle out of the back of the Amp.
The control panel and the attached PCB can now be removed.
Repairing the audio amplifier
© iFixit — CC BY-NC-SA www.iFixit.com Page 6 of 10

Step 9
Another odd looking piece is the location of the power Amp IC.
The smudge marks of the thermal past revealed that the board was loose and the the IC did notmake contact with the heatsink
The thread in the heatsink was partially stripped. Use a small jewelers screwdriver to wedge underthe screw,while using a #2 Philips screwdriver to remove it.
Step 10
Remove the connector from the PCB.
Remove the IC PCB from the panel. The IC definitely shows some damage, most likely fromoverheating.
Here is a close up of the damaged IC. It is a TDA2030A 18 W hi-fi amplier / 35 W audio driver
Repairing the audio amplifier
© iFixit — CC BY-NC-SA www.iFixit.com Page 7 of 10
Step 11
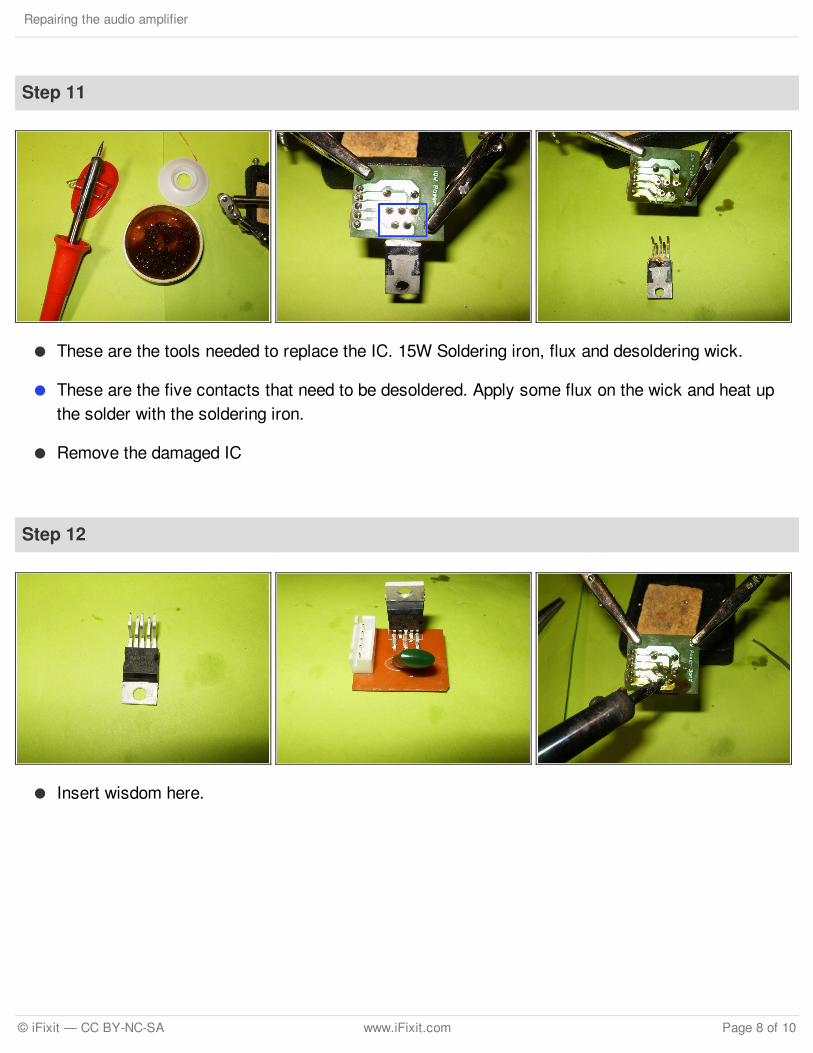
These are the tools needed to replace the IC. 15W Soldering iron, flux and desoldering wick.
These are the five contacts that need to be desoldered. Apply some flux on the wick and heat upthe solder with the soldering iron.
Remove the damaged IC
Step 12
Insert wisdom here.
Repairing the audio amplifier
© iFixit — CC BY-NC-SA www.iFixit.com Page 8 of 10
Step 13
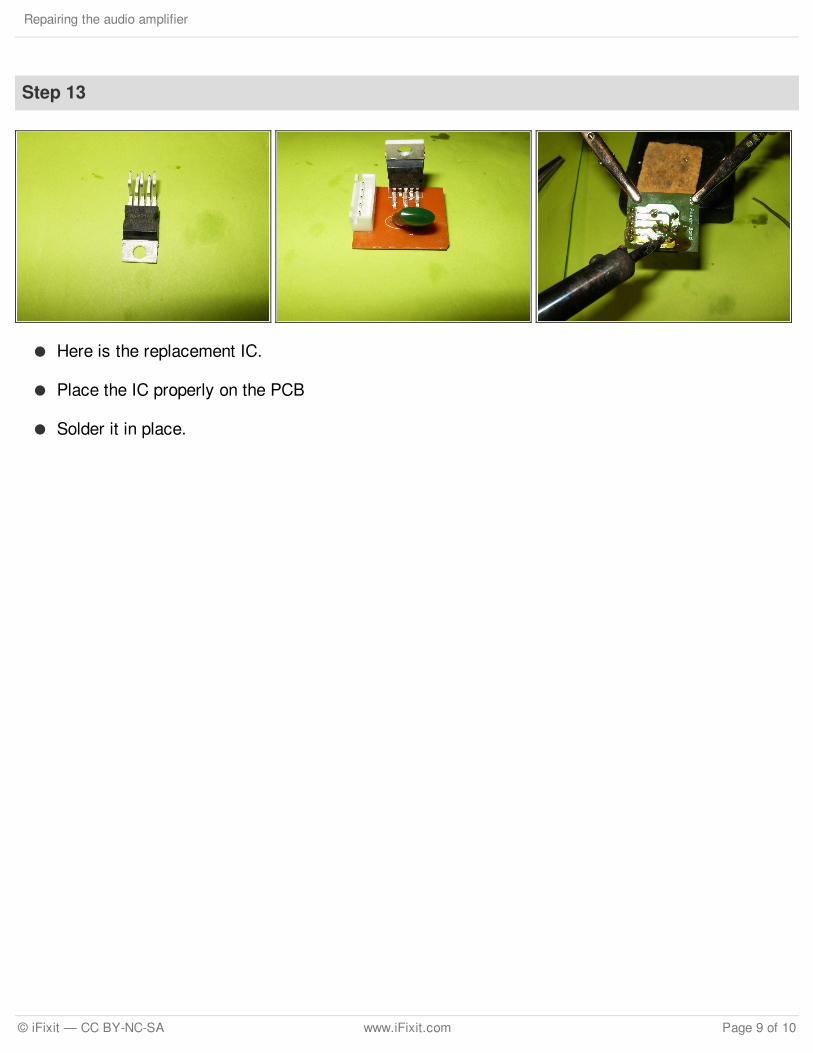
Here is the replacement IC.
Place the IC properly on the PCB
Solder it in place.
Repairing the audio amplifier
© iFixit — CC BY-NC-SA www.iFixit.com Page 9 of 10
To reassemble your device, follow these instructions in reverse order.
This document was last generated on 2017-06-20 02:12:34 AM.
Step 14
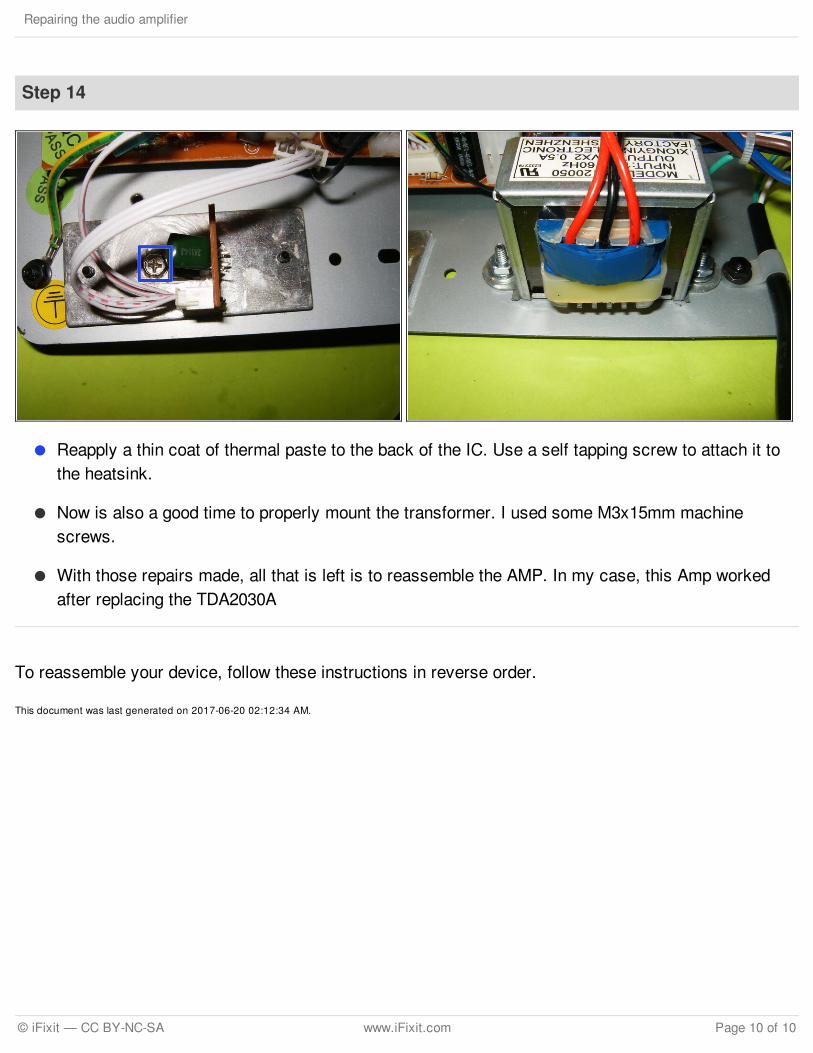
Reapply a thin coat of thermal paste to the back of the IC. Use a self tapping screw to attach it tothe heatsink.
Now is also a good time to properly mount the transformer. I used some M3x15mm machinescrews.
With those repairs made, all that is left is to reassemble the AMP. In my case, this Amp workedafter replacing the TDA2030A
Repairing the audio amplifier
© iFixit — CC BY-NC-SA www.iFixit.com Page 10 of 10