recovery/ recycling/ recharging unit - robinair.com · situations robinair is aware of. robinair...
TRANSCRIPT
Operating ManualManual de Operación
Manuel d’utilisation
Model 17800B/17801BRecovery/Recycling/Recharging Unit for Multiple Refrigerants ....................................1Modelo 17800B/17801BUnidad de recuperación/reciclado/recarga para múltiples refrigerantes ............................49Modèl 17800B/17801BPoste de récupération/recyclage/ Recharge pour frigorigènes multiples ......... 99
Recovery/Recycling/Recharging
Unit
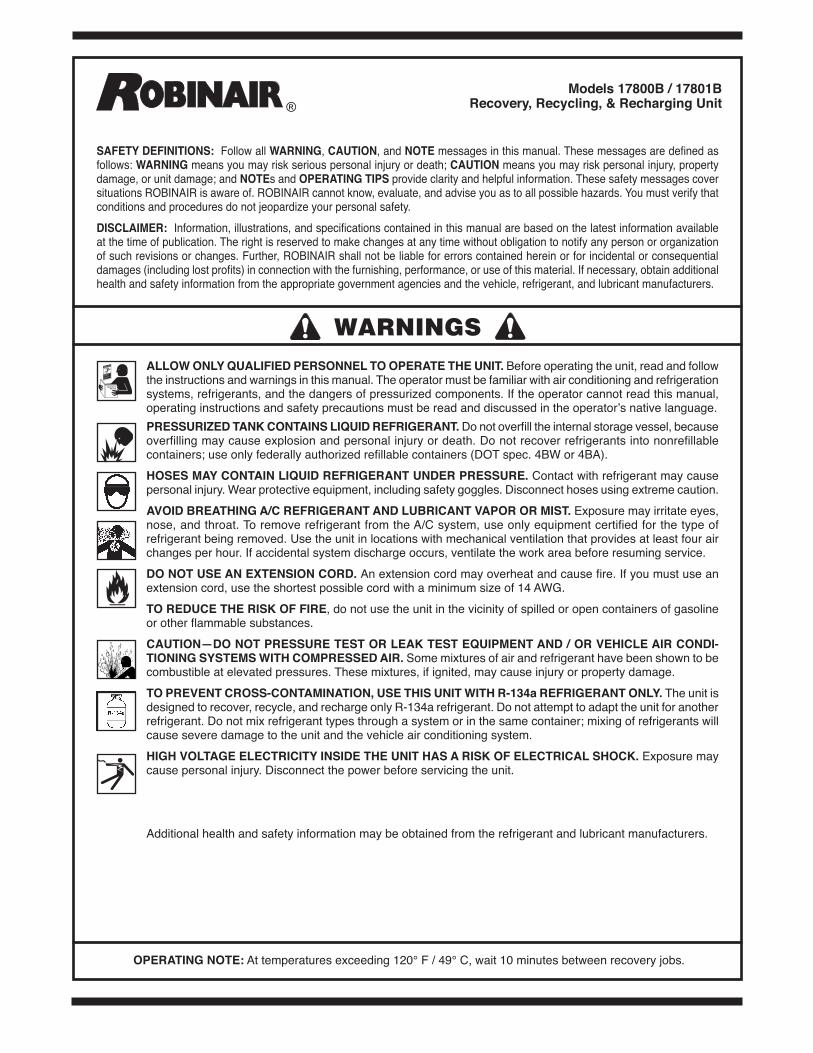
SAFETY DEFINITIONS: Follow all WARNING, CAUTION, and NOTE messages in this manual. These messages are defined as follows: WARNING means you may risk serious personal injury or death; CAUTION means you may risk personal injury, property damage, or unit damage; and NOTEs and OPERATING TIPS provide clarity and helpful information. These safety messages cover situations ROBINAIR is aware of. ROBINAIR cannot know, evaluate, and advise you as to all possible hazards. You must verify that conditions and procedures do not jeopardize your personal safety.DISCLAIMER: Information, illustrations, and specifications contained in this manual are based on the latest information available at the time of publication. The right is reserved to make changes at any time without obligation to notify any person or organization of such revisions or changes. Further, ROBINAIR shall not be liable for errors contained herein or for incidental or consequential damages (including lost profits) in connection with the furnishing, performance, or use of this material. If necessary, obtain additional health and safety information from the appropriate government agencies and the vehicle, refrigerant, and lubricant manufacturers.
ALLOW ONLY QUALIFIED PERSONNEL TO OPERATE THE UNIT. Before operating the unit, read and follow the instructions and warnings in this manual. The operator must be familiar with air conditioning and refrigeration systems, refrigerants, and the dangers of pressurized components. If the operator cannot read this manual, operating instructions and safety precautions must be read and discussed in the operator’s native language.PRESSURIZED TANK CONTAINS LIQUID REFRIGERANT. Do not overfill the internal storage vessel, because overfilling may cause explosion and personal injury or death. Do not recover refrigerants into nonrefillable containers; use only federally authorized refillable containers (DOT spec. 4BW or 4BA).HOSES MAY CONTAIN LIQUID REFRIGERANT UNDER PRESSURE. Contact with refrigerant may cause personal injury. Wear protective equipment, including safety goggles. Disconnect hoses using extreme caution.AVOID BREATHING A/C REFRIGERANT AND LUBRICANT VAPOR OR MIST. Exposure may irritate eyes, nose, and throat. To remove refrigerant from the A/C system, use only equipment certified for the type of refrigerant being removed. Use the unit in locations with mechanical ventilation that provides at least four air changes per hour. If accidental system discharge occurs, ventilate the work area before resuming service. DO NOT USE AN EXTENSION CORD. An extension cord may overheat and cause fire. If you must use an extension cord, use the shortest possible cord with a minimum size of 14 AWG.TO REDUCE THE RISK OF FIRE, do not use the unit in the vicinity of spilled or open containers of gasoline or other flammable substances.CAUTION—DO NOT PRESSURE TEST OR LEAK TEST EQUIPMENT AND / OR VEHICLE AIR CONDI-TIONING SYSTEMS WITH COMPRESSED AIR. Some mixtures of air and refrigerant have been shown to be combustible at elevated pressures. These mixtures, if ignited, may cause injury or property damage.TO PREVENT CROSS-CONTAMINATION, USE THIS UNIT WITH R-134a REFRIGERANT ONLY. The unit is designed to recover, recycle, and recharge only R-134a refrigerant. Do not attempt to adapt the unit for another refrigerant. Do not mix refrigerant types through a system or in the same container; mixing of refrigerants will cause severe damage to the unit and the vehicle air conditioning system. HIGH VOLTAGE ELECTRICITY INSIDE THE UNIT HAS A RISK OF ELECTRICAL SHOCK. Exposure may cause personal injury. Disconnect the power before servicing the unit.
Additional health and safety information may be obtained from the refrigerant and lubricant manufacturers.
WARNINGS
Models 17800B / 17801BRecovery, Recycling, & Recharging Unit
OPERATING NOTE: At temperatures exceeding 120° F / 49° C, wait 10 minutes between recovery jobs.
®

Model 17800B / 17801B Recovery/Recycling/Recharging Unit 1
EN
GL
ISH
This manual contains important safety procedures concerning the operation, use, and maintenance of this product. Failure to follow the instructions contained in this manual may result in serious injury. If you are unable to understand any of the contents of this manual, bring it to the attention of your supervisor. Do not operate this equipment unless you have read and understood the contents of this manual.
TABLE OF CONTENTS
Introduction....................................................................................... 2. Glossary.of.Terms......................................................................... 2. General.Operating.Guidelines....................................................... 3Set.Up.Instructions............................................................................ 4Operating.Instructions..................................................................... 10. Recovery.Procedures.................................................................. 10. Changing.Refrigerant.Types....................................................... 12. A/C-R.System.Evacuation.......................................................... 14. Recycling.Procedures.................................................................. 15. Charging.Procedures................................................................... 16. Correcting.An.Incomplete.Transfer............................................ 17. Adding.Refrigerant.to.the.Tank................................................... 18Operating.Overview........................................................................ 20Maintenance.Procedures................................................................. 23. Changing.the.Vacuum.Pump.Oil................................................. 23. Changing.the.Filter-Drier............................................................ 24. Confirming.the.Scale.Checklist.................................................. 26. Correct.Weight.Verification......................................................... 26. Calibrating.the.Scale................................................................... 27. Calibrating.the.UL.Circuit.......................................................... 28. Checking.for.Leaks..................................................................... 30. Changing.the.Temperature.Scale................................................ 30Operation.Guidelines...................................................................... 31. Using.the.Control.Panel.............................................................. 31. Keypad.Functions....................................................................... 32. Using.the.Digital.Display............................................................ 32. Using.the.Diagnostic.Mode........................................................ 35. Using.Display.Codes.................................................................. 37Replacement.Parts........................................................................... 39Flow.Diagram................................................................................. 40Wiring.Diagram.............................................................................. 41Troubleshooting.............................................................................. 43Limited.Warranty............................................................................ 47
See the Index on page 48 for a listing of all procedures and diagrams.
Introduction
© Bosch Automotive Service Solutions LLC2
EN
GL
ISH
The.17800B/17801B.is.a.complete.A/C-R.service.center..It.recovers,.recycles,.and.recharges.a.wide.range.of.refrigerants.—.from.existing.refrigerants.to.new.substitutes.and.blends..With.its.multi-refrigerant.capabilities,.it.is.ideal.for.trucks,.buses,.and.refrigerated.trailers,.as.well.as.in-plant.maintenance.and.other.accessible.installations.
The.built-in.manifold.means.the.entire.service.procedure.can.be.done.with.just.one.hook-up..A.microprocessor.controls.the.unit’s.functions;.evacuation.time.and.the.amount.of.refrigerant.to.be.recharged.can.be.programmed.at.the.beginning.of.the.job..Prompts.lead.you.through.programming.and.alert.you.when.the.filter.and.vacuum.pump.oil.need.to.be.changed.
This.unit.is.UL-listed.and.meets.the.SAE.specifications.for.recycled.refrigerant..It.is.also.designed.to.be.compatible.with.existing.service.equipment.and.standard.service.procedures.
This.unit.is.simple.to.operate.and.has.many.user-friendly.features:
. •. a.built-in.6.cfm.vacuum.pump.for.quick,.yet.thorough,.evacuation.
. •. a.plastic.enclosure.for.safe.and.easy.maneuvering.around.vehicles.without.the.worry.of.scratches.
. •. an.electronic.scale.that.weighs.recovered.refrigerant.and.recharges.by.weight.for.greatest.accuracy.
. •. a.pressure/temperature.chart.mounted.directly.above.the..gauges.—.with.just.a.quick.glance.you.can.tell.the.temperatures..in.the.system.
. •. large.diameter.wheels.that.make.it.easy.to.move.the.unit.
NOTE: To validate your warranty, complete the warranty card attached to your unit, and return it within ten days from date of purchase.
Introduction
GLOSSARY OF TERMSA/C-R. Air.conditioning.or.refrigerationA/C-R System. The.air.conditioning.or.refrigeration.system.servicedUnit. The.refrigerant.recovery,.recycling,.recharging.unitTank. The.refillable.refrigerant.tank
Model 17800B / 17801B Recovery/Recycling/Recharging Unit 3
EN
GL
ISH
GENERAL OPERATING GUIDELINES
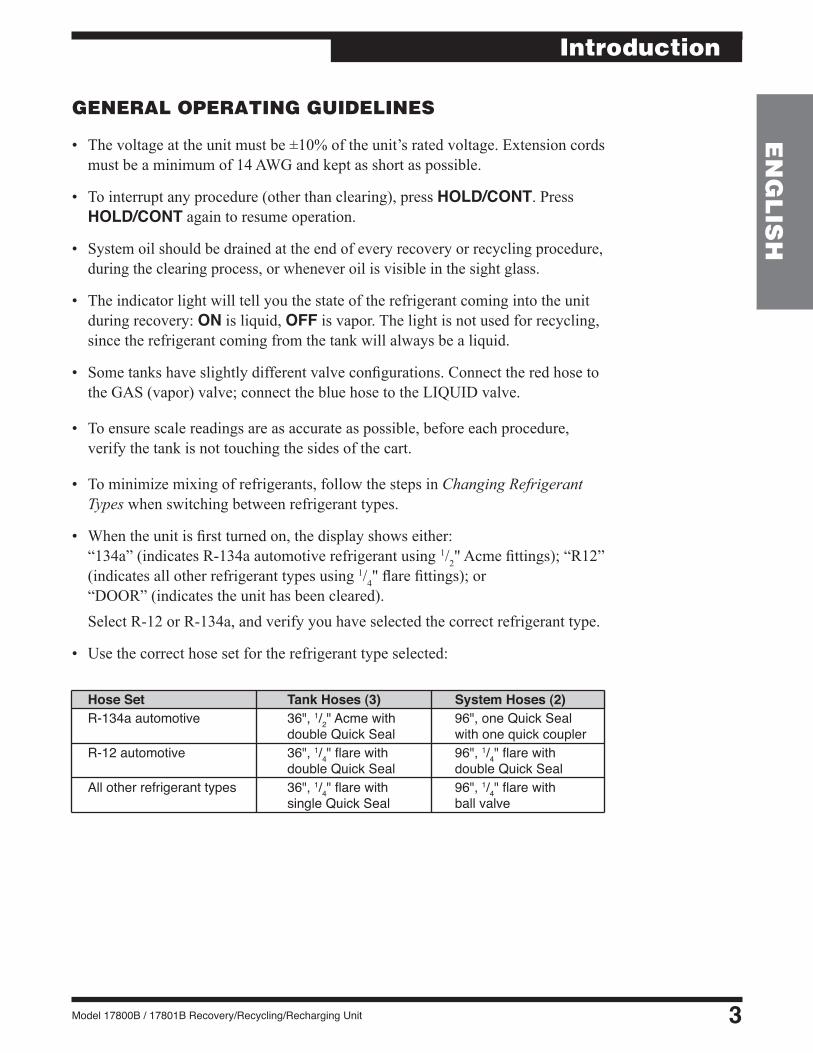
•. The.voltage.at.the.unit.must.be.±10%.of.the.unit’s.rated.voltage..Extension.cords.must.be.a.minimum.of.14.AWG.and.kept.as.short.as.possible.
•. To.interrupt.any.procedure.(other.than.clearing),.press.HOLD/CONT..Press.HOLD/CONT.again.to.resume.operation.
•. System.oil.should.be.drained.at.the.end.of.every.recovery.or.recycling.procedure,.during.the.clearing.process,.or.whenever.oil.is.visible.in.the.sight.glass.
•. The.indicator.light.will.tell.you.the.state.of.the.refrigerant.coming.into.the.unit.during.recovery:.ON is.liquid,.OFF is.vapor..The.light.is.not.used.for.recycling,.since.the.refrigerant.coming.from.the.tank.will.always.be.a.liquid.
•. Some.tanks.have.slightly.different.valve.configurations..Connect.the.red.hose.to.the.GAS.(vapor).valve;.connect.the.blue.hose.to.the.LIQUID.valve.
•. To.ensure.scale.readings.are.as.accurate.as.possible,.before.each.procedure,.verify.the.tank.is.not.touching.the.sides.of.the.cart.
•. To.minimize.mixing.of.refrigerants,.follow.the.steps.in.Changing Refrigerant Types.when.switching.between.refrigerant.types.
•. When.the.unit.is.first.turned.on,.the.display.shows.either:.. “134a”.(indicates.R-134a.automotive.refrigerant.using.1/2".Acme.fittings);.“R12”.(indicates.all.other.refrigerant.types.using.1/4".flare.fittings);.or
. “DOOR”.(indicates.the.unit.has.been.cleared)..
. Select.R-12.or.R-134a,.and.verify.you.have.selected.the.correct.refrigerant.type.
•. Use.the.correct.hose.set.for.the.refrigerant.type.selected:
Hose Set Tank Hoses (3) System Hoses (2) R-134a automotive 36", 1/2" Acme with 96", one Quick Seal
double Quick Seal with one quick coupler R-12 automotive 36", 1/4" flare with 96", 1/4" flare with
double Quick Seal double Quick Seal All other refrigerant types 36", 1/4" flare with 96", 1/4" flare with
single Quick Seal ball valve
Introduction
© Bosch Automotive Service Solutions LLC4
EN
GL
ISH
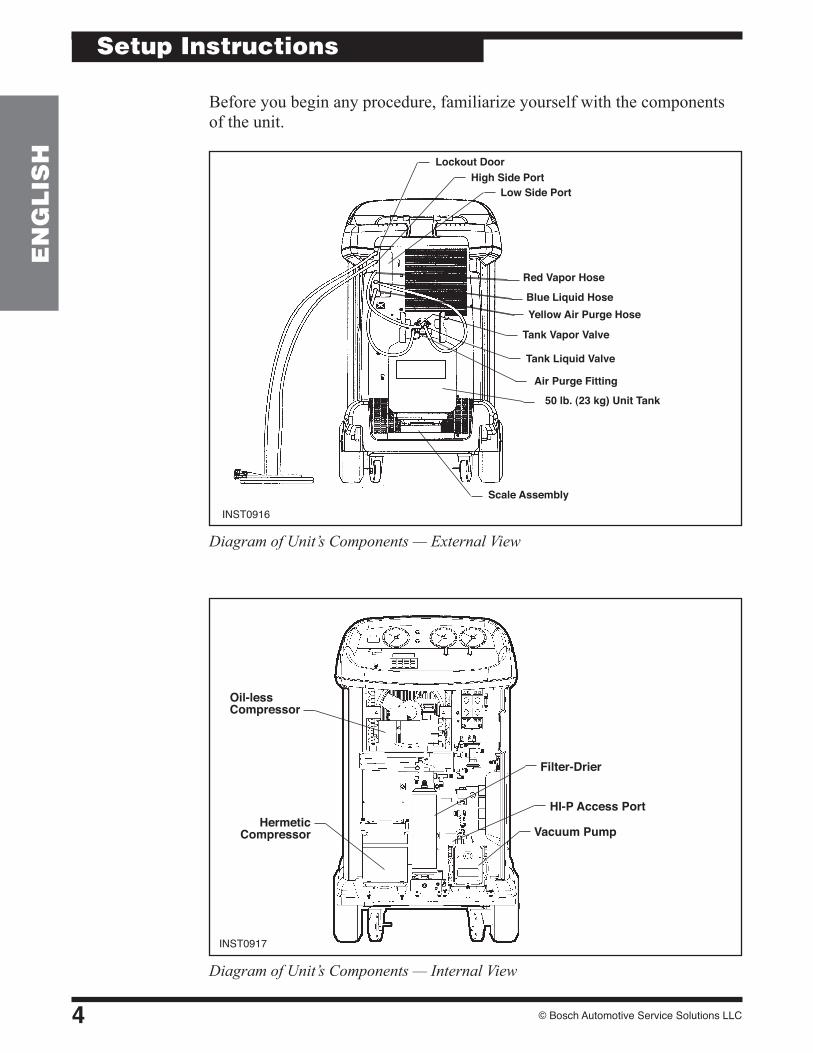
Diagram of Unit’s Components — Internal View
Before.you.begin.any.procedure,.familiarize.yourself.with.the.components.of.the.unit.
Diagram of Unit’s Components — External View
INST0916
High Side PortLow Side Port
Lockout Door
Blue Liquid Hose
Red Vapor Hose
Yellow Air Purge Hose
Tank Liquid Valve
Tank Vapor Valve
Air Purge Fitting
50 lb. (23 kg) Unit Tank
Scale Assembly
INST0917
Hermetic Compressor
Filter-Drier
Oil-lessCompressor
Setup Instructions
Vacuum Pump
HI-P Access Port

Model 17800B / 17801B Recovery/Recycling/Recharging Unit 5
EN
GL
ISH
Diagram of Control Panel and Keypad
Diagram of Unit’s Components — Side View
INST0918
Pressure / Temperature Chart
Door Screw
Door Screw
System Oil Drain Valve
Low Side Gauge
High Side Gauge
High Side Valve
Liquid/Vapor Indicator
Display
Main Power Switch
Air Purge Valve
Keypad
Low Side Valve
Tank Pressure Gauge
Setup Instructions
INST0919
Unit Circuit Breaker(17800B only)
System Oil Indicator
Oil-less Compressor Protector
TankTemperature
Gauge
© Bosch Automotive Service Solutions LLC6
EN
GL
ISH
Before.starting.the.set.up.procedures,.open.the.system.oil.drain.valve.and.allow.the.unit.to.depressurize.
. 1.. Plug.the.unit.into.a.correct.voltage.outlet.
WARNING: Avoid the use of an extension cord because the extension cord may overheat. However, if you must use an extension cord, use a No. 14 AWG minimum and keep the cord length to 25 feet (7.6 meters) or less.
. 2.. Verify.the.oil.drain.valve.on.the.side.of.the.unit.is.in.the.CLOSED position.
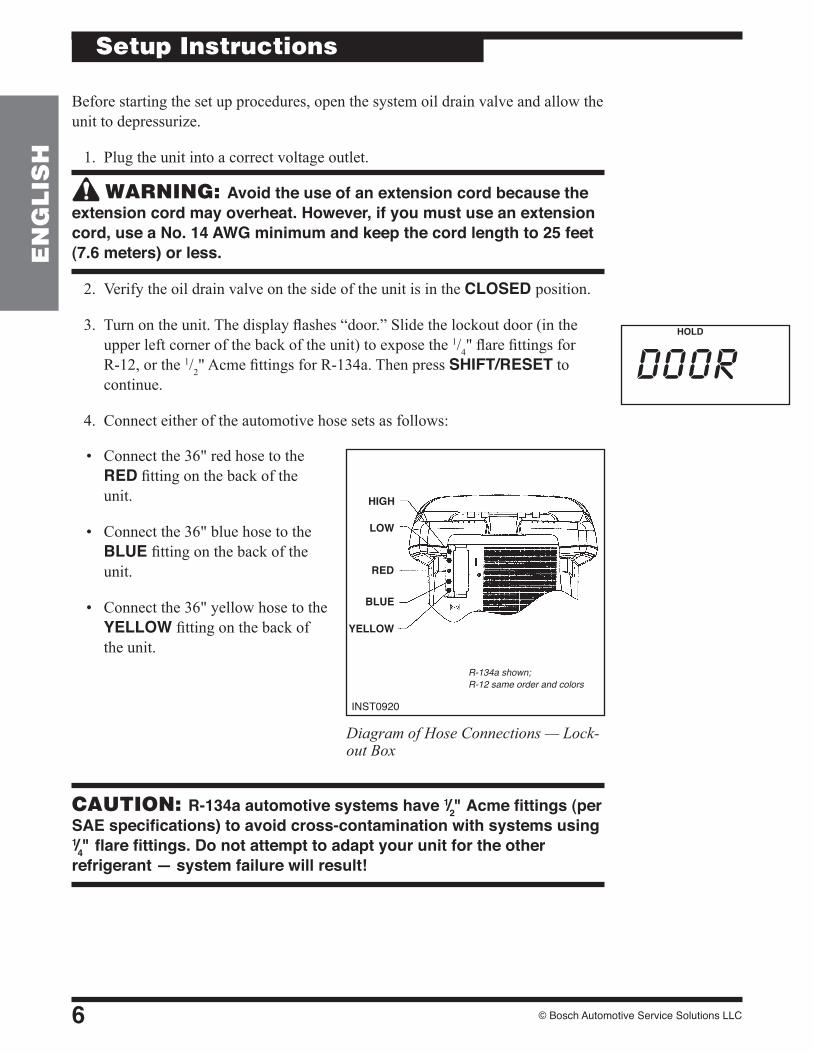
. 3.. Turn.on.the.unit..The.display.flashes.“door.”.Slide.the.lockout.door.(in.the.upper.left.corner.of.the.back.of.the.unit).to.expose.the.1/4".flare.fittings.forR-12,.or.the.1/2".Acme.fittings.for.R-134a..Then.press.SHIFT/RESET.to.continue.
. 4.. Connect.either.of.the.automotive.hose.sets.as.follows:
Diagram of Hose Connections — Lock-out Box
INST0920
RED
BLUE
YELLOW
Setup Instructions
R-134a shown; R-12 same order and colors
doorHOLD
HIGH
LOW
. •. Connect.the.36".red.hose.to.the.RED.fitting.on.the.back.of.the.unit.
. •. Connect.the.36".blue.hose.to.the.BLUE fitting.on.the.back.of.the.unit.
. •. Connect.the.36".yellow.hose.to.the.YELLOW fitting.on.the.back.of.the.unit.
.
.
CAUTION: R-134a automotive systems have 1/2" Acme fittings (per SAE specifications) to avoid cross-contamination with systems using 1/4" flare fittings. Do not attempt to adapt your unit for the other refrigerant — system failure will result!
Model 17800B / 17801B Recovery/Recycling/Recharging Unit 7
EN
GL
ISH
Setup Instructions
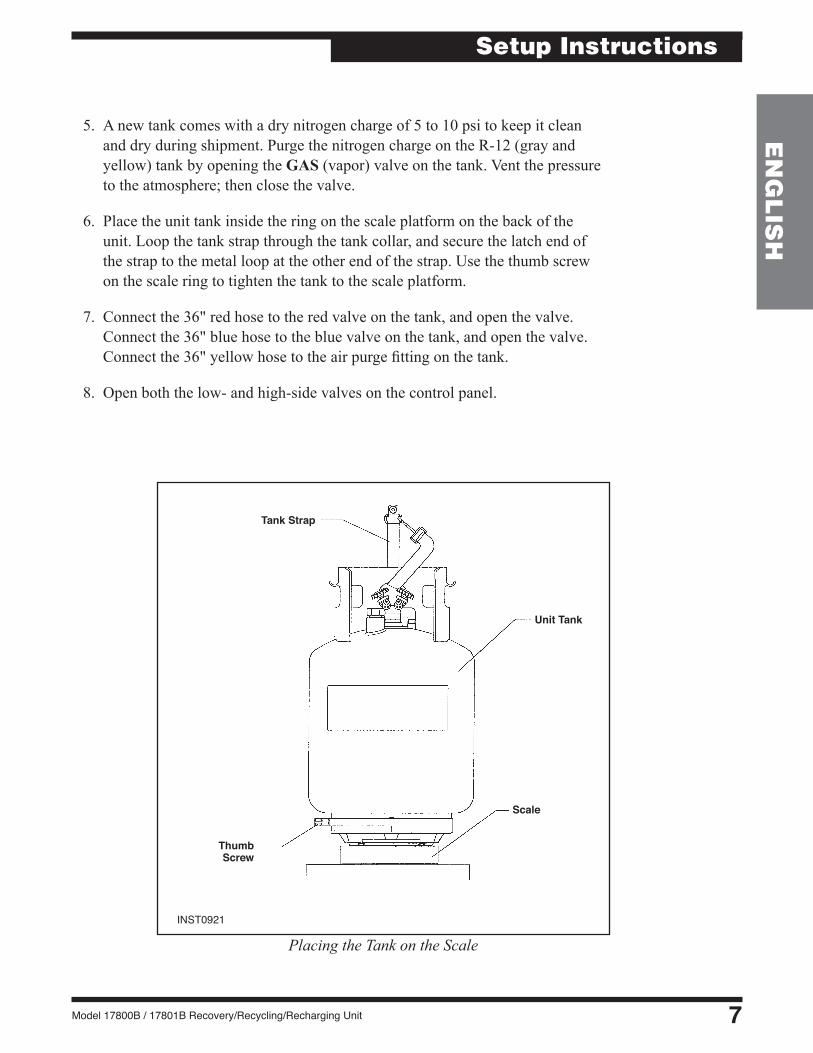
. 5.. A.new.tank.comes.with.a.dry.nitrogen.charge.of.5.to.10.psi.to.keep.it.clean.and.dry.during.shipment..Purge.the.nitrogen.charge.on.the.R-12.(gray.and.yellow).tank.by.opening.the.GAS (vapor).valve.on.the.tank..Vent.the.pressure.to.the.atmosphere;.then.close.the.valve.
. 6.. Place.the.unit.tank.inside.the.ring.on.the.scale.platform.on.the.back.of.the.unit..Loop.the.tank.strap.through.the.tank.collar,.and.secure.the.latch.end.of.the.strap.to.the.metal.loop.at.the.other.end.of.the.strap..Use.the.thumb.screw.on.the.scale.ring.to.tighten.the.tank.to.the.scale.platform...
. 7.. Connect.the.36".red.hose.to.the.red.valve.on.the.tank,.and.open.the.valve..Connect.the.36".blue.hose.to.the.blue.valve.on.the.tank,.and.open.the.valve...Connect.the.36".yellow.hose.to.the.air.purge.fitting.on.the.tank.
. 8.. Open.both.the.low-.and.high-side.valves.on.the.control.panel.
INST0921
Placing the Tank on the Scale
Thumb Screw
Scale
Unit Tank
Tank Strap

© Bosch Automotive Service Solutions LLC8
EN
GL
ISH
The.VacuMaster®.vacuum.pump.is.shipped.without.oil.in.the.reservoir..Before.starting.the.unit,.fill.the.pump.with.oil..Two.16-ounce.(472.milliliters).bottles.of.oil.are.included.with.your.unit.
. 9.. Remove.the.door.access.screws.from.the.right.side.of.the.unit...Open.the.door.
.10.. Remove.the.black.plastic.plug.from.the.pump’s.oil.fill.port..Attach.the.flexible.spout.and.cap.to.the.bottle.of.oil.included.with.your.unit..This.makes.it.easier.to.fill.the.pump.
.11.. Add.one-half.of.a.bottle.of.vacuum.pump.oil.to.the.vacuum.pump.
.12.. Press.SHIFT/RESET.and.ENTER at.the.same.time;.then.press.“1.”..The.vacuum.pump.will.start.and.run.continuously..While.the.pump.is.running,.pour.oil.into.the.pump’s.oil.fill.port.until.the.level.of.oil.is.even.with.the.line.of.the.pump.reservoir.sight.glass..Replace.the.black.plug.on.the.oil.fill.port.
.13.. Let.the.pump.run.for.about.five.(5).minutes.to.remove.any.air.from.the.unit.
.14.. To.turn.off.the.pump,.press.HOLD/CONT..Then.press.SHIFT/RESET.to.exit.the.diagnostics.mode.
.15.. Connect.the.blue.96".hose.to.the.low.side.port,.and.the.red.96".hose.to.the.high.side.port.on.the.back.of.the.unit.
Before.using.a.new.tank,.you.must.purge.its.nitrogen.charge.and.pull.it.into.a.vacuum.
CAUTION: The pump must be running when adding oil. Do not overfill the pump. The ap proximate oil charge is 13 oz. (384 milliliters).
Setup Instructions
Diagram of Vacuum Pump Components
Oil Filler Tube
Inlet
Pump Exhaust
Oil Fill Port
Sight Glass
Oil Drain Fitting
Model 17800B / 17801B Recovery/Recycling/Recharging Unit 9
EN
GL
ISH
Setup Instructions
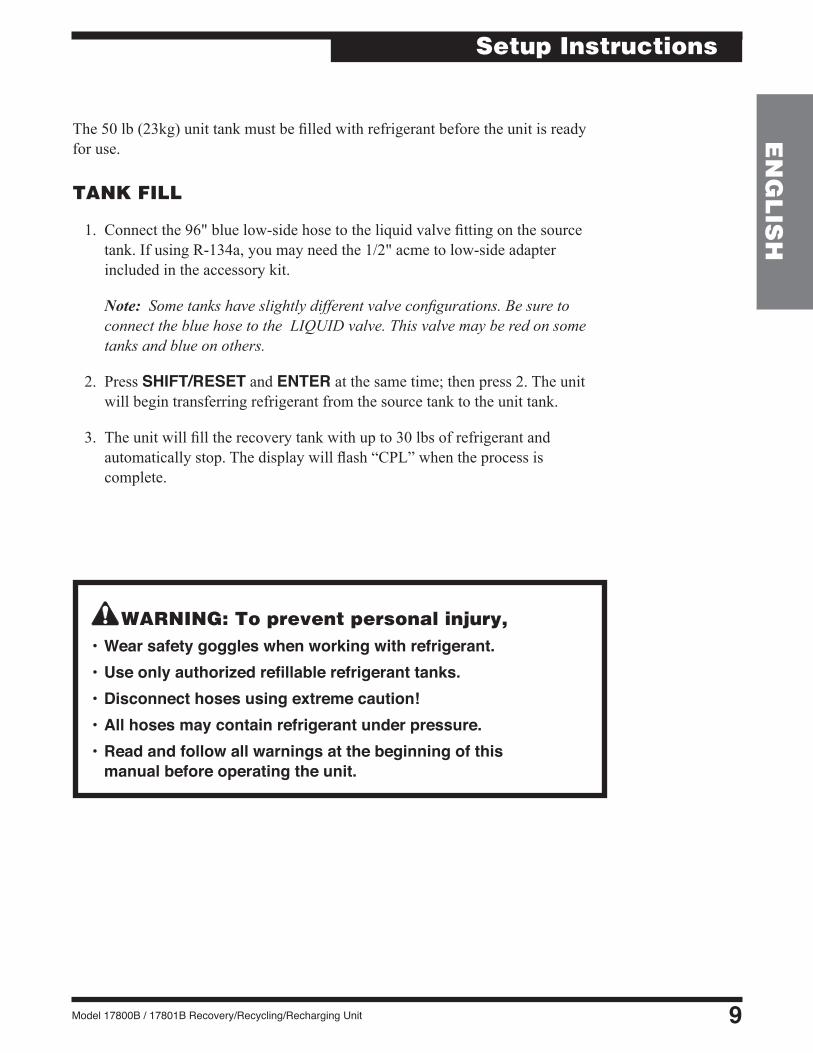
The.50.lb.(23kg).unit.tank.must.be.filled.with.refrigerant.before.the.unit.is.ready.for.use.
TANK FILL
. 1.. Connect.the.96".blue.low-side.hose.to.the.liquid.valve.fitting.on.the.source.tank..If.using.R-134a,.you.may.need.the.1/2".acme.to.low-side.adapter.included.in.the.accessory.kit.
. Note: Some tanks have slightly different valve configurations. Be sure to connect the blue hose to the LIQUID valve. This valve may be red on some tanks and blue on others.
. 2.. Press.SHIFT/RESET and.ENTER.at.the.same.time;.then.press.2..The.unit.will.begin.transferring.refrigerant.from.the.source.tank.to.the.unit.tank.
. 3.. The.unit.will.fill.the.recovery.tank.with.up.to.30.lbs.of.refrigerant.and.automatically.stop..The.display.will.flash.“CPL”.when.the.process.is.complete.
WARNING: To prevent personal injury,• Wear safety goggles when working with refrigerant.• Use only authorized refillable refrigerant tanks.• Disconnect hoses using extreme caution!• All hoses may contain refrigerant under pressure.• Read and follow all warnings at the beginning of this
manual before operating the unit.

© Bosch Automotive Service Solutions LLC10
EN
GL
ISH
Operating Instructions
Diagram of Control Panel
RECOVERY PROCEDURES
WARNING:
Wear safety goggles when working with refrigerant. Use only authorized refillable refrigerant tanks. Disconnect hoses using extreme caution!
All hoses may contain refrigerant under pressure. Read and follow all warnings at the beginning of this manual before operating the unit.
Before.beginning.recovery,.verify.the.unit.is.set.up.as.described.in.the.Setup Instructions..Also.verify.there.is.vacuum.pump.oil.in.the.vacuum.pump.
. 1.. Connect.the.high-.and.low-side.hoses.to.the.A/C-R.system,.as.you.would.normally.connect.your.manifold.gauge.set.
. 2.. Verify.both.the.high-.and.low-side.valves.on.the.control.panel.are.open..Also.verify.both.valves.on.the.tank.are.open.
. 3.. Plug.the.unit.into.a.correct.voltage.outlet,.and.turn.on.the.MAIN POWER.switch..The.display.shows.either.“134a”.(which.indicates.R-134a.automotive.refrigerant.that.uses.1/2".Acme..fittings).or.“R12”.(which.indicates.all.other.refrigerant.types.that.use.1/4".flare.fittings)..The.display.may.flash.“door,”.which.indicates.the.unit.is.cleared.and.can.be.set.up.for.any.refrigerant.type.
. 4.. Press.RECOVER.
Low Side GaugeHigh Side Gauge
High Side Valve
Liquid/Vapor Indicator
Display
Main Power Switch
Air Purge Valve
Keypad Low Side Valve
Tank Pressure Gauge
INST0919
Unit Circuit Breaker(17800B only)
System Oil Indicator
Oil-less Compressor Protector
Tank Temperature
Gauge
Model 17800B / 17801B Recovery/Recycling/Recharging Unit 11
EN
GL
ISH
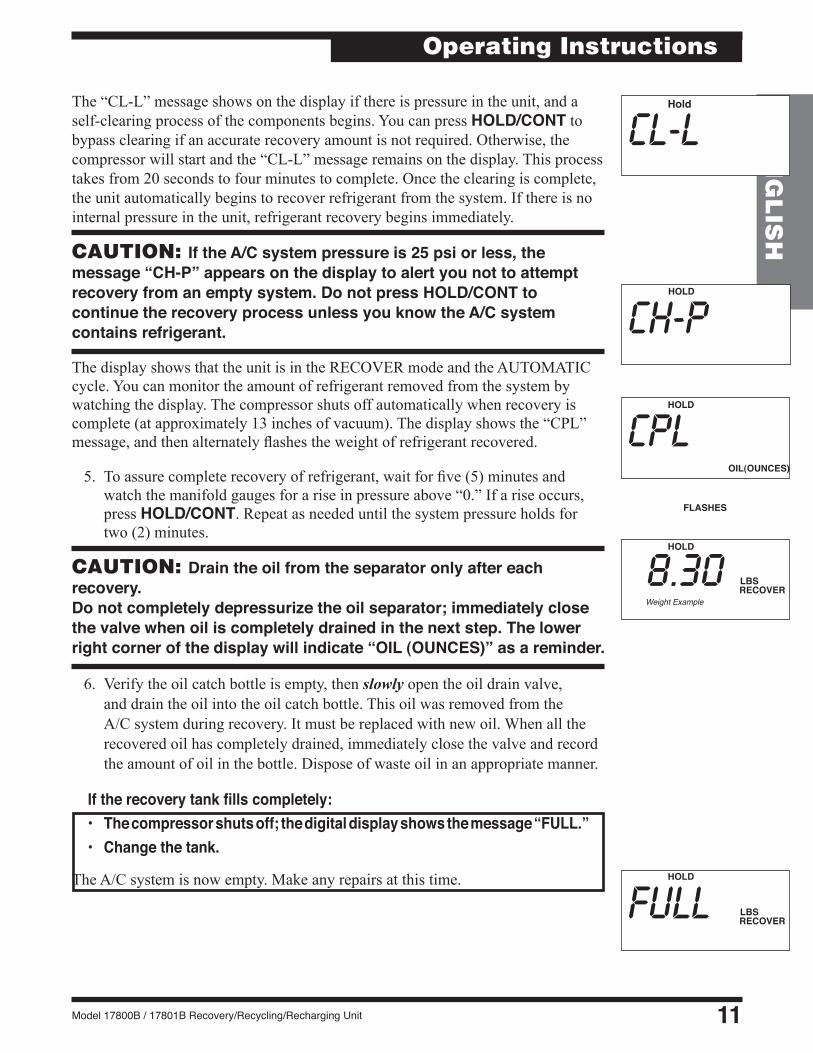
The.“CL-L”.message.shows.on.the.display.if.there.is.pressure.in.the.unit,.and.a.self-clearing.process.of.the.components.begins..You.can.press.HOLD/CONT.to.bypass.clearing.if.an.accurate.recovery.amount.is.not.required..Otherwise,.the.compressor.will.start.and.the.“CL-L”.message.remains.on.the.display..This.process.takes.from.20.seconds.to.four.minutes.to.complete..Once.the.clearing.is.complete,.the.unit.automatically.begins.to.recover.refrigerant.from.the.system..If.there.is.no.internal.pressure.in.the.unit,.refrigerant.recovery.begins.immediately.
CAUTION: If the A/C system pressure is 25 psi or less, the message “CH-P” appears on the display to alert you not to attempt recovery from an empty system. Do not press HOLD/CONT to continue the recovery process unless you know the A/C system contains refrigerant.
The.display.shows.that.the.unit.is.in.the.RECOVER.mode.and.the.AUTOMATIC.cycle..You.can.monitor.the.amount.of.refrigerant.removed.from.the.system.by.watching.the.display..The.compressor.shuts.off.automatically.when.recovery.is.complete.(at.approximately.13.inches.of.vacuum)..The.display.shows.the.“CPL”.message,.and.then.alternately.flashes.the.weight.of.refrigerant.recovered.
. 5.. To.assure.complete.recovery.of.refrigerant,.wait.for.five.(5).minutes.and.watch.the.manifold.gauges.for.a.rise.in.pressure.above.“0.”.If.a.rise.occurs,.press.HOLD/CONT..Repeat.as.needed.until.the.system.pressure.holds.for.two.(2).minutes.
CAUTION: Drain the oil from the separator only after each recovery. Do not completely depressurize the oil separator; immediately close the valve when oil is completely drained in the next step. The lower right corner of the display will indicate “OIL (OUNCES)” as a reminder.
. 6.. Verify.the.oil.catch.bottle.is.empty,.then.slowly open.the.oil.drain.valve,.and.drain.the.oil.into.the.oil.catch.bottle..This.oil.was.removed.from.the.A/C.system.during.recovery..It.must.be.replaced.with.new.oil..When.all.the.recovered.oil.has.completely.drained,.immediately.close.the.valve.and.record.the.amount.of.oil.in.the.bottle..Dispose.of.waste.oil.in.an.appropriate.manner.
If the recovery tank fills completely:• The compressor shuts off; the digital display shows the message “FULL.”• Change the tank.
The.A/C.system.is.now.empty..Make.any.repairs.at.this.time.
Weight Example
Operating Instructions
HOLD
OIL(OUNCES)
HOLD
LBSRECOVER
Hold
HOLD
LBSRECOVER
CL-L
HOLD
CH-P
CPL
8.30
FULL
FLASHES
© Bosch Automotive Service Solutions LLC12
EN
GL
ISH
Operating Instructions
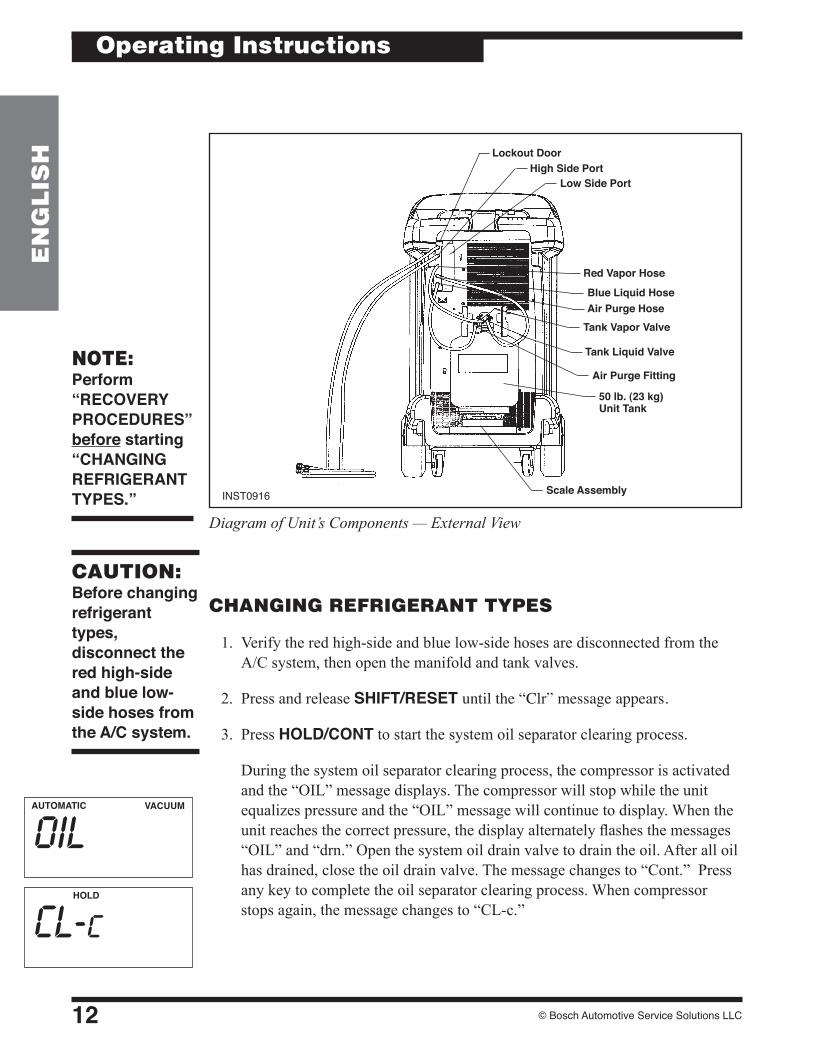
CAUTION: Before changing refrigerant types, disconnect the red high-side and blue low-side hoses from the A/C system.
CHANGING REFRIGERANT TYPES
. 1.. Verify.the.red.high-side.and.blue.low-side.hoses.are.disconnected.from.the.A/C.system,.then.open.the.manifold.and.tank.valves.
. 2.. Press.and.release.SHIFT/RESET until the “Clr” message appears.
. 3.. Press.HOLD/CONT.to.start.the.system.oil.separator.clearing.process.
. . During.the.system.oil.separator.clearing.process,.the.compressor.is.activated.and.the.“OIL”.message.displays..The.compressor.will.stop.while.the.unit.equalizes.pressure.and.the.“OIL”.message.will.continue.to.display..When.the.unit.reaches.the.correct.pressure,.the.display.alternately.flashes.the.messages.“OIL”.and.“drn.”.Open.the.system.oil.drain.valve.to.drain.the.oil..After.all.oil.has.drained,.close.the.oil.drain.valve..The.message.changes.to.“Cont.”..Press.any.key.to.complete.the.oil.separator.clearing.process..When.compressor.stops.again,.the.message.changes.to.“CL-c.”
NOTE: Perform “RECOVERY PROCEDURES” before starting “CHANGING REFRIGERANT TYPES.”
Diagram of Unit’s Components — External View
INST0916
AUTOMATIC VACUUM
OILHOLD
CL-c
High Side PortLow Side Port
Lockout Door
Blue Liquid Hose
Red Vapor Hose
Tank Liquid Valve
Tank Vapor Valve
Air Purge Fitting
50 lb. (23 kg) Unit Tank
Scale Assembly
Air Purge Hose
Model 17800B / 17801B Recovery/Recycling/Recharging Unit 13
EN
GL
ISH
. 4.. If.you.need.to.change.hoses.for.the.next.refrigerant.type,.go.to.Step.5..If.you.do.not.need.to.change.hoses,.press.SHIFT/RESET.and.go.to.Step.6.
. 5.. To.start.the.self-clearing.process,.press.VACUUM.while.the.“CL-c”.message.is.displayed..The.“Clr”.message.then.displays.and.the.vacuum.pump.runs.for.5.minutes.before.shutting.off.automatically..The.“door”.message.will.then.display..
. 6.. Close.the.tank.valves.and.disconnect.the.red,.blue,.and.yellow.hoses.from.the.tank..Then.remove.the.tank.from.the.unit.
. 7.. If.you.are.using.the.same.hoses.for.the.next.refrigerant.type,.go.to.Step.11..If.you.need.to.change.the.hoses,.go.to.Step.8.
. 8.. Disconnect.all.five.(5).hoses.from.the.lockout.box.fittings..If.you.need.to.change.the.door.position.on.the.lockout.box,.go.to.Step.9..If.you.do.not.need.to.change.the.door.position,.go.to.Step.10.
. 9.. Slide.the.door.on.the.lockout.box.to.expose.the.fittings.needed.for.the.next.refrigerant.type..
.10.. Connect.the.correct.hoses.for.the.next.refrigerant.to.the.fittings.in.the.lockout.box.
.Be.sure.to.use.the.correct.hose.set.for.the.refrigerant.type.selected:
Hose Set Tank Hoses (3) System Hoses (2) R-134a automotive 36", 1/2" Acme with 96", one Quick Seal double Quick Seal with one quick couplerR-12 automotive 36", 1/4" flare with 96", 1/4" flare with double Quick Seal double Quick SealAll other refrigerant types 36", 1/4" flare with 96", 1/4" flare with single Quick Seal ball valve
.11.. Place.a.tank.(already.set.up.for.the.next.refrigerant).on.the.unit..Connect.the.red,.blue,.and.yellow.hoses.to.the.appropriate.tank.fittings.
The.unit.is.now.ready.to.process.the.next.refrigerant.type.
Operating Instructions
doorHOLD
© Bosch Automotive Service Solutions LLC14
EN
GL
ISH
Operating Instructions
A/C-R SYSTEM EVACUATION
WARNING:Wear safety goggles when working with refrigerant. Use only authorized refillable refrigerant tanks. Disconnect hoses using extreme caution!All hoses may contain refrigerant under pressure. Read and follow all warnings at the beginning of this manual before operating the unit.
. 1.. Verify.the.high-.and.low-side.hoses.are.connected.to.the.A/C-R..system,.and.that.the.high-.and.low-side.valves.are.open.
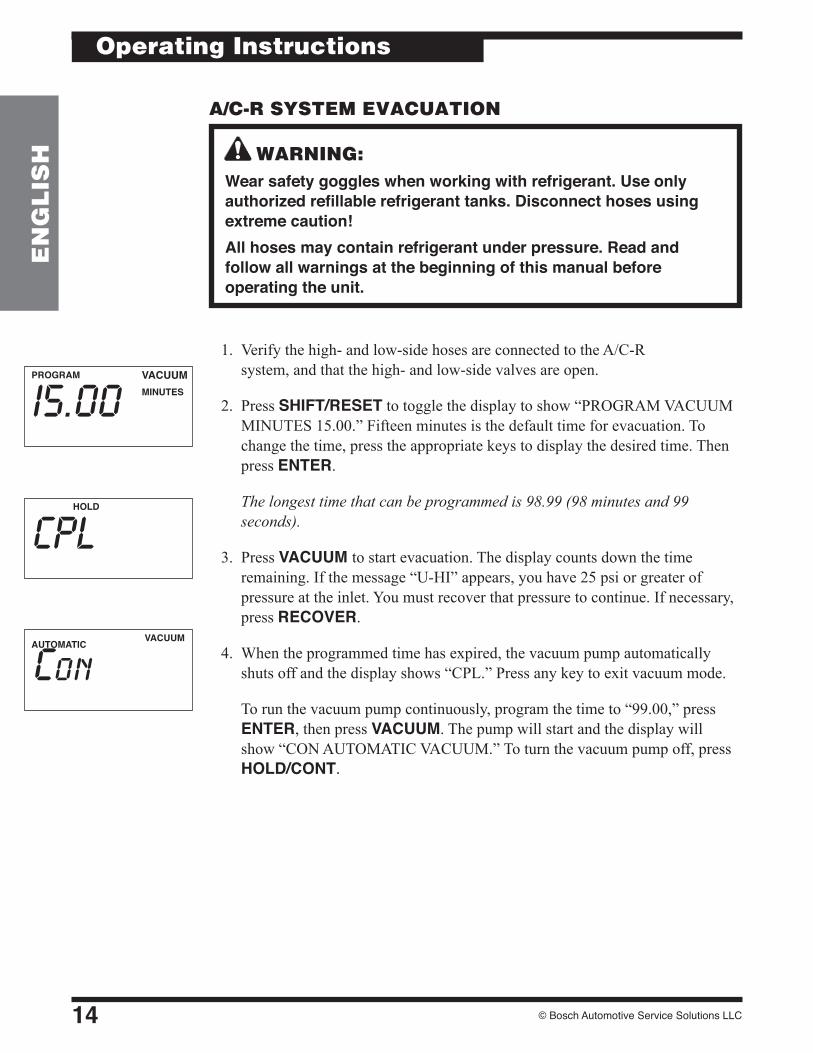
. 2.. Press.SHIFT/RESET.to.toggle.the.display.to.show.“PROGRAM.VACUUM.MINUTES.15.00.”.Fifteen.minutes.is.the.default.time.for.evacuation..To.change.the.time,.press.the.appropriate.keys.to.display.the.desired.time..Then.press.ENTER.
The longest time that can be programmed is 98.99 (98 minutes and 99 seconds).
. 3.. Press.VACUUM to.start.evacuation..The.display.counts.down.the.time.remaining..If.the.message.“U-HI”.appears,.you.have.25.psi.or.greater.of.pressure.at.the.inlet..You.must.recover.that.pressure.to.continue..If.necessary,.press.RECOVER.
. 4.. When.the.programmed.time.has.expired,.the.vacuum.pump.automatically.shuts.off.and.the.display.shows.“CPL.”.Press.any.key.to.exit.vacuum.mode.
. . To.run.the.vacuum.pump.continuously,.program.the.time.to.“99.00,”.press.ENTER,.then.press.VACUUM..The.pump.will.start.and.the.display.will.show.“CON.AUTOMATIC.VACUUM.”.To.turn.the.vacuum.pump.off,.press.HOLD/CONT.
VACUUMPROGRAM
MINUTES
HOLD
CPL
AUTOMATIC VACUUM
Con
I5.00

Model 17800B / 17801B Recovery/Recycling/Recharging Unit 15
EN
GL
ISH
RECYCLING PROCEDURES
WARNING:Wear safety goggles when working with refrigerant. Use only authorized refillable refrigerant tanks. Disconnect hoses using extreme caution!All hoses may contain refrigerant under pressure. Read and follow all warnings at the beginning of this manual before operating the unit.
. 1.. Verify.both.valves.on.the.tank.are.open..
. 2.. Press.and.hold.SHIFT/RESET,.then.press.“1”.to.start.the.recycling.process.
. . If.the.recovery.tank.is.full,.the.display.will.show.the.message.“FULL.”.Press.HOLD/CONT.to.resume.operation.
. 3.. After.about.five.(5).minutes.of.recycling,.the.tank.temperature.should.equalize..You.can.then.purge.non-condensables.
. 4.. To.purge.non-condensables,.check.the.tank.temperature.gauge.to.find.the.temperature.of.the.refrigerant..Use.that.temperature.to.find.the.correct.pressure.for.that.refrigerant.on.the.pressure/temperature.chart.on.the.top.of.the.unit..Compare.the.pressure.from.the.chart.to.the.pressure.shown.on.the.tank.pressure.gauge..If.the.gauge.pressure.exceeds.the.target.pressure.by.more.than.10.psi,.open.the.air.purge.valve.on.the.control.panel.for.about.30.seconds.to.release.non-condensables.from.the.tank..Then.close.the.air.purge.valve.and.allow.the.tank.to.stabilize.for.about.30.seconds..Check.the.tank.pressure.gauge.again..Repeat.this.step.as.necessary.during.the.recycling.procedure.
. . Note:.The.tank.temperature.display.can.show.Fahrenheit.or.Celsius.degrees..Refer.to.Changing the Temperature Scale.in.this.manual.
. 5.. To.stop.recycling,.close.the.tank’s.LIQUID.valve..The.unit.will.pull.into.a.vacuum.and.shut.off.automatically..Press.any.key.to.exit.recycle.mode.
CAUTION: You can stop recycling instantly by pressing HOLD/CONT, then SHIFT/RESET, but this can leave liquid refrigerant in the low side of the unit. Closing the tank’s LIQUID valve is the recommended method.
Operating Instructions
HOLDAUTOMATIC RECYCLE
FULL
© Bosch Automotive Service Solutions LLC16
EN
GL
ISH
Operating Instructions
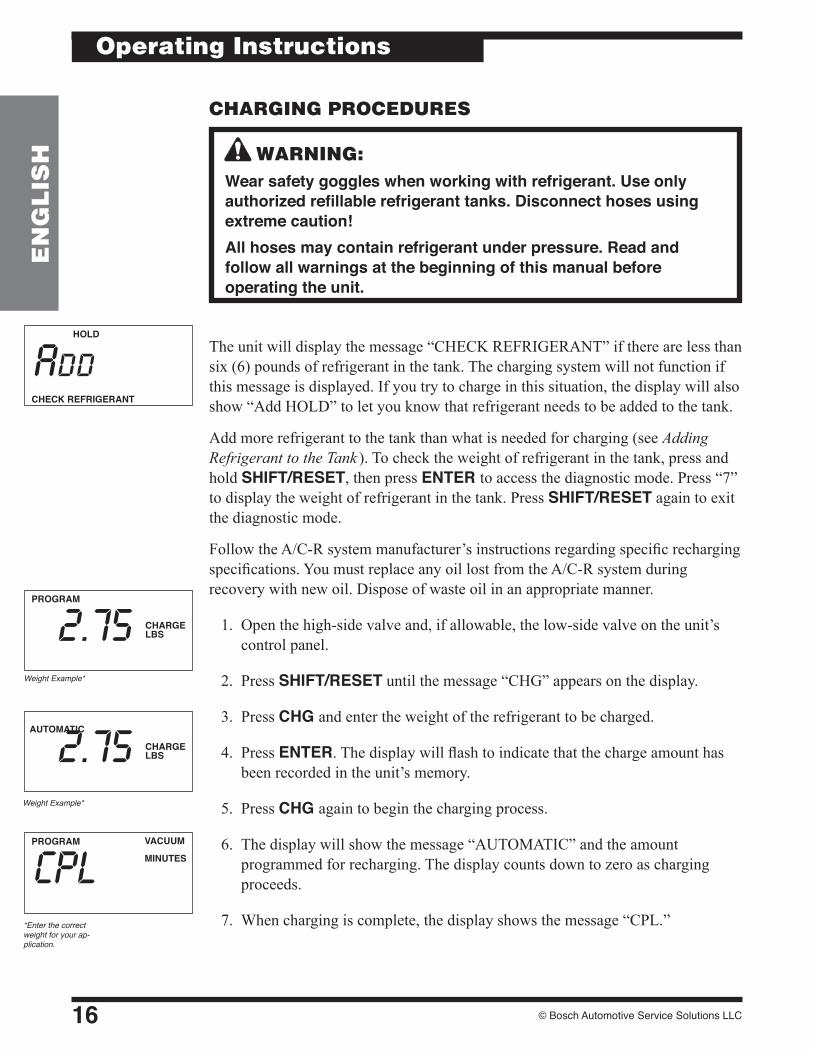
CHARGING PROCEDURES
WARNING:Wear safety goggles when working with refrigerant. Use only authorized refillable refrigerant tanks. Disconnect hoses using extreme caution!All hoses may contain refrigerant under pressure. Read and follow all warnings at the beginning of this manual before operating the unit.
The.unit.will.display.the.message.“CHECK.REFRIGERANT”.if.there.are.less.than.six.(6).pounds.of.refrigerant.in.the.tank..The.charging.system.will.not.function.if.this.message.is.displayed..If.you.try.to.charge.in.this.situation,.the.display.will.also.show.“Add.HOLD”.to.let.you.know.that.refrigerant.needs.to.be.added.to.the.tank..
Add.more.refrigerant.to.the.tank.than.what.is.needed.for.charging.(see.Adding Refrigerant to the Tank )..To.check.the.weight.of.refrigerant.in.the.tank,.press.and.hold.SHIFT/RESET,.then.press.ENTER to.access.the.diagnostic.mode..Press.“7”.to.display.the.weight.of.refrigerant.in.the.tank..Press.SHIFT/RESET.again.to.exit.the.diagnostic.mode.
Follow.the.A/C-R.system.manufacturer’s.instructions.regarding.specific.recharging.specifications..You.must.replace.any.oil.lost.from.the.A/C-R.system.during.recovery.with.new.oil..Dispose.of.waste.oil.in.an.appropriate.manner.
. 1.. Open.the.high-side.valve.and,.if.allowable,.the.low-side.valve.on.the.unit’s.control.panel.
. 2.. Press.SHIFT/RESET.until.the.message.“CHG”.appears.on.the.display.
. 3.. Press.CHG and.enter.the.weight.of.the.refrigerant.to.be.charged.
. 4.. Press.ENTER..The.display.will.flash.to.indicate.that.the.charge.amount.has.been.recorded.in.the.unit’s.memory.
. 5.. Press.CHG again.to.begin.the.charging.process.
. 6.. The.display.will.show.the.message.“AUTOMATIC”.and.the.amount.programmed.for.recharging..The.display.counts.down.to.zero.as.charging.proceeds.
. 7.. When.charging.is.complete,.the.display.shows.the.message.“CPL.”
HOLD
CHECK REFRIGERANT
Add
LBSCHARGE
PROGRAM
2.75
LBSCHARGE2.75AUTOMATIC
VACUUMPROGRAM
MINUTESCPL
Weight Example*
Weight Example*
*Enter the correct weight for your ap-plication.

Model 17800B / 17801B Recovery/Recycling/Recharging Unit 17
EN
GL
ISH
If.the.unit.beeps.continuously,.the.transfer.of.refrigerant.has.stopped.before.the.charging.procedure.was.completed.(see.Correcting An Incomplete Transfer).
. 8.. Close.the.high-.and.low-side.valves.on.the.control.panel,.and.start.the.A/C-R.system..Compare.the.gauge.readings.to.the.manufacturer’s.specifications.
. 9.. Turn.off.the.A/C-R.system,.and.disconnect.the.high-side.hose.from.it.
.10.. Start.the.A/C-R.system,.and.open.both.the.high-.and.low-side.valves..This.pulls.the.portion.of.the.programmed.charge.that.is.trapped.in.the.hoses.into.the.low.side.of.the.A/C-R.system.
.11.. At.the.lowest.recommended.operating.pressure,.close.the.low-side.valve.and.turn.off.the.A/C-R.system..Disconnect.the.low-side.hose.from.the.system.
.12.. Close.the.high-side.valve,.and.turn.off.the.MAIN POWER.switch.
CORRECTING AN INCOMPLETE TRANSFER
If.the.scale.value.does.not.change.for.30.seconds,.the.unit.beeps.continuously.to.indicate.that.the.transfer.of.refrigerant.was.not.completed..There.are.two.reasons.for.an.incomplete.transfer.of.refrigerant:
•. The.pressure.in.the.A/C-R.system.is.equal.to.the.pressure.in.the.tank..The.unit.produces.an.audible.signal.and.shows.the.weight.remaining.to.complete.the.transfer.
. 1.. Close.the.high-side.valve.on.the.control.panel.
. 2.. Disconnect.the.high-side.hose.from.the.A/C-R.system.
. 3.. Continue.with.Step.9.in.Charging Procedures.
•. The.display.shows.the.message.“CHECK.REFRIGERANT”.because.there.is.not.enough.refrigerant.in.the.tank.
. 1.. Press.HOLD/CONT.to.interrupt.the.transfer.
. 2.. Verify.both.valves.on.the.tank.are.closed,.then.disconnect.and.remove.the.tank.from.the.unit..Replace.it.with.a.tank.containing.additional.refrigerant.
. 3.. Press.HOLD/CONT.again.to.resume.the.transfer.
Operating Instructions
© Bosch Automotive Service Solutions LLC18
EN
GL
ISH
Operating Instructions
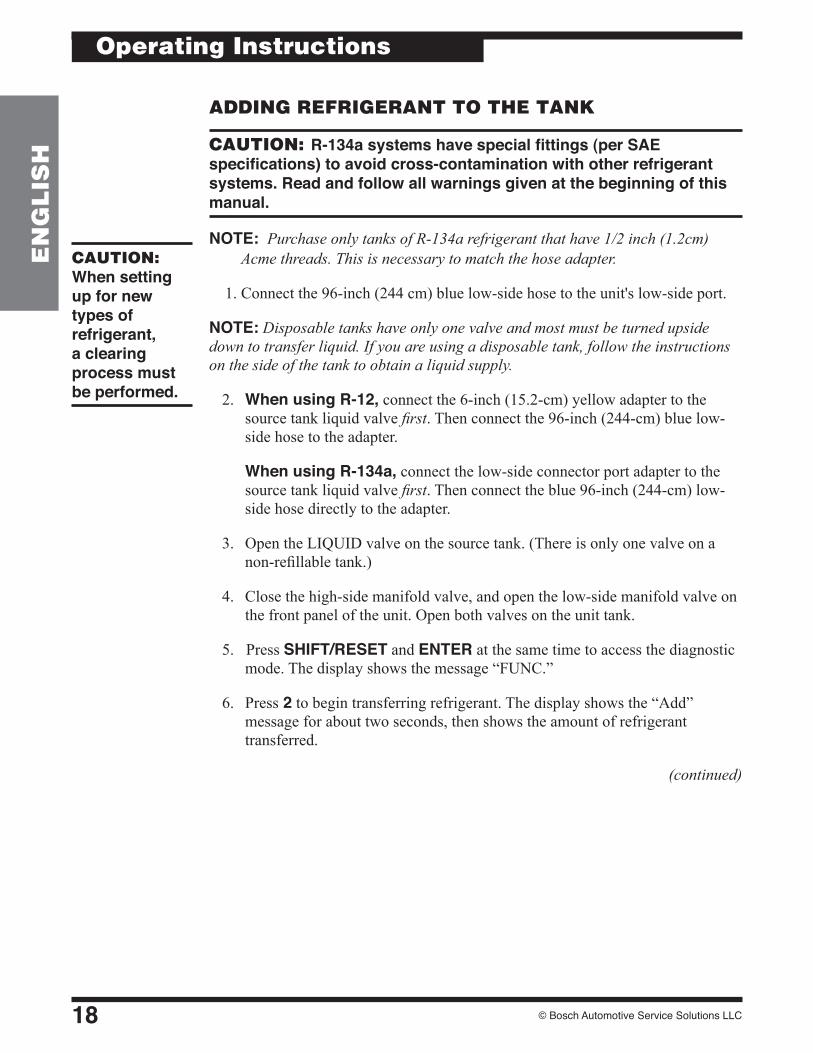
CAUTION: When setting up for new types of refrigerant, a clearing process must be performed.
ADDING REFRIGERANT TO THE TANK
CAUTION: R-134a systems have special fittings (per SAE specifications) to avoid cross-contamination with other refrigerant systems. Read and follow all warnings given at the beginning of this manual.
NOTE: .Purchase only tanks of R-134a refrigerant that have 1/2 inch (1.2cm) Acme threads. This is necessary to match the hose adapter.
.....1..Connect.the.96-inch.(244.cm).blue.low-side.hose.to.the.unit's.low-side.port.
NOTE:.Disposable tanks have only one valve and most must be turned upside down to transfer liquid. If you are using a disposable tank, follow the instructions on the side of the tank to obtain a liquid supply.
. 2.. When using R-12,.connect.the.6-inch.(15.2-cm).yellow.adapter.to.the.source.tank.liquid.valve.first..Then.connect.the.96-inch.(244-cm).blue.low-side.hose.to.the.adapter.
When using R-134a,.connect.the.low-side.connector.port.adapter.to.the.source.tank.liquid.valve.first..Then.connect.the.blue.96-inch.(244-cm).low-side.hose.directly.to.the.adapter.
. 3.. Open.the.LIQUID.valve.on.the.source.tank..(There.is.only.one.valve.on.a.non-refillable.tank.)
. 4.. Close.the.high-side.manifold.valve,.and.open.the.low-side.manifold.valve.on.the.front.panel.of.the.unit..Open.both.valves.on.the.unit.tank.
. 5....Press.SHIFT/RESET.and.ENTER.at.the.same.time.to.access.the.diagnostic.mode..The.display.shows.the.message.“FUNC.”
6.. Press 2.to.begin.transferring.refrigerant..The.display.shows.the.“Add”.message.for.about.two.seconds,.then.shows.the.amount.of.refrigerant.transferred.
(continued)
Model 17800B / 17801B Recovery/Recycling/Recharging Unit 19
EN
GL
ISH
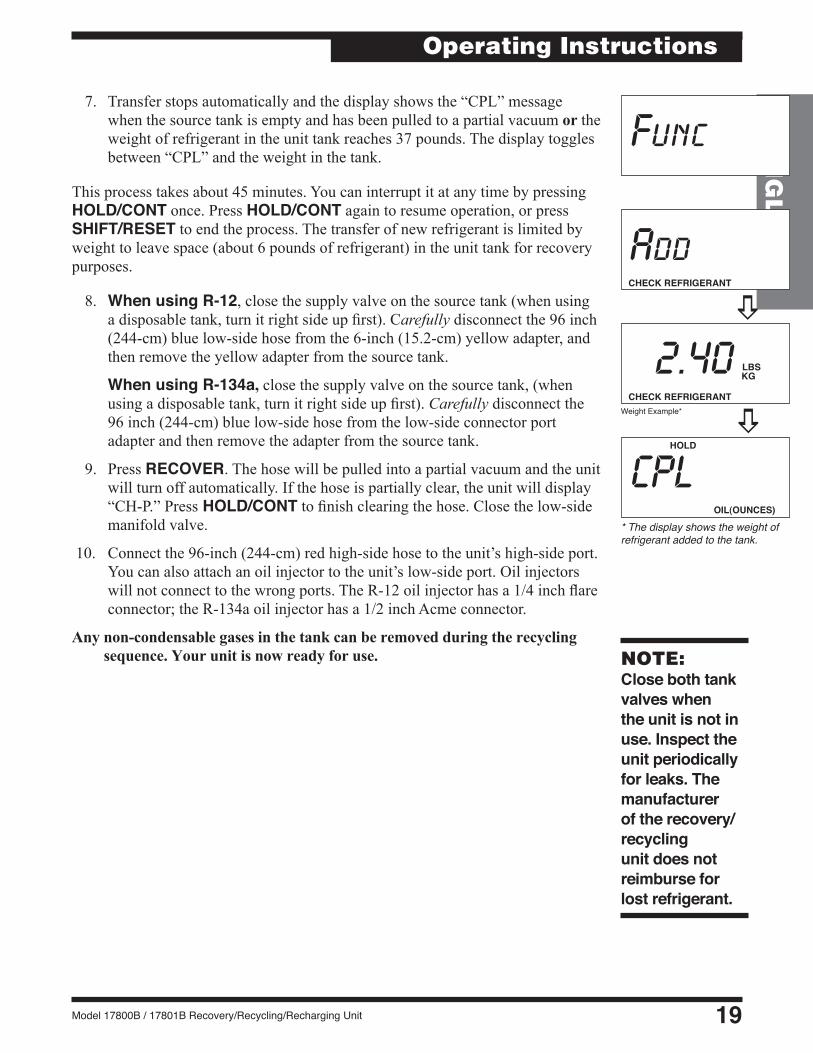
. 7.. Transfer.stops.automatically.and.the.display.shows.the.“CPL”.message.when.the.source.tank.is.empty.and.has.been.pulled.to.a.partial.vacuum.or the.weight.of.refrigerant.in.the.unit.tank.reaches.37.pounds..The.display.toggles.between.“CPL”.and.the.weight.in.the.tank.
.This.process.takes.about.45.minutes..You.can.interrupt.it.at.any.time.by.pressing.HOLD/CONT.once..Press.HOLD/CONT.again.to.resume.operation,.or.press.SHIFT/RESET.to.end.the.process..The.transfer.of.new.refrigerant.is.limited.by.weight.to.leave.space.(about.6.pounds.of.refrigerant).in.the.unit.tank.for.recovery.purposes..
. 8.. When using R-12,.close.the.supply.valve.on.the.source.tank.(when.using.a.disposable.tank,.turn.it.right.side.up.first)..Carefully disconnect.the.96.inch.(244-cm).blue.low-side.hose.from.the.6-inch.(15.2-cm).yellow.adapter,.and.then.remove.the.yellow.adapter.from.the.source.tank.
When using R-134a, close.the.supply.valve.on.the.source.tank,.(when.using.a.disposable.tank,.turn.it.right.side.up.first)..Carefully disconnect.the.96.inch.(244-cm).blue.low-side.hose.from.the.low-side.connector.port.adapter.and.then.remove.the.adapter.from.the.source.tank..
. 9.. Press.RECOVER..The.hose.will.be.pulled.into.a.partial.vacuum.and.the.unit.will.turn.off.automatically..If.the.hose.is.partially.clear,.the.unit.will.display.“CH-P.”.Press HOLD/CONT.to.finish.clearing.the.hose..Close.the.low-side.manifold.valve.
.10....Connect.the.96-inch.(244-cm).red.high-side.hose.to.the.unit’s.high-side.port..You.can.also.attach.an.oil.injector.to.the.unit’s.low-side.port..Oil.injectors.will.not.connect.to.the.wrong.ports..The.R-12.oil.injector.has.a.1/4.inch.flare.connector;.the.R-134a.oil.injector.has.a.1/2.inch.Acme.connector.
Any non-condensable gases in the tank can be removed during the recycling sequence. Your unit is now ready for use.
Operating Instructions
NOTE:Close both tank valves when the unit is not in use. Inspect the unit periodically for leaks. The manufacturer of the recovery/recycling unit does not reimburse for lost refrigerant.
* The display shows the weight ofrefrigerant added to the tank.
LBSKG
CHECK REFRIGERANT
2.40HOLD
OIL(OUNCES)
CPLWeight Example*
Func
CHECK REFRIGERANT
Add
aa
© Bosch Automotive Service Solutions LLC20
EN
GL
ISH
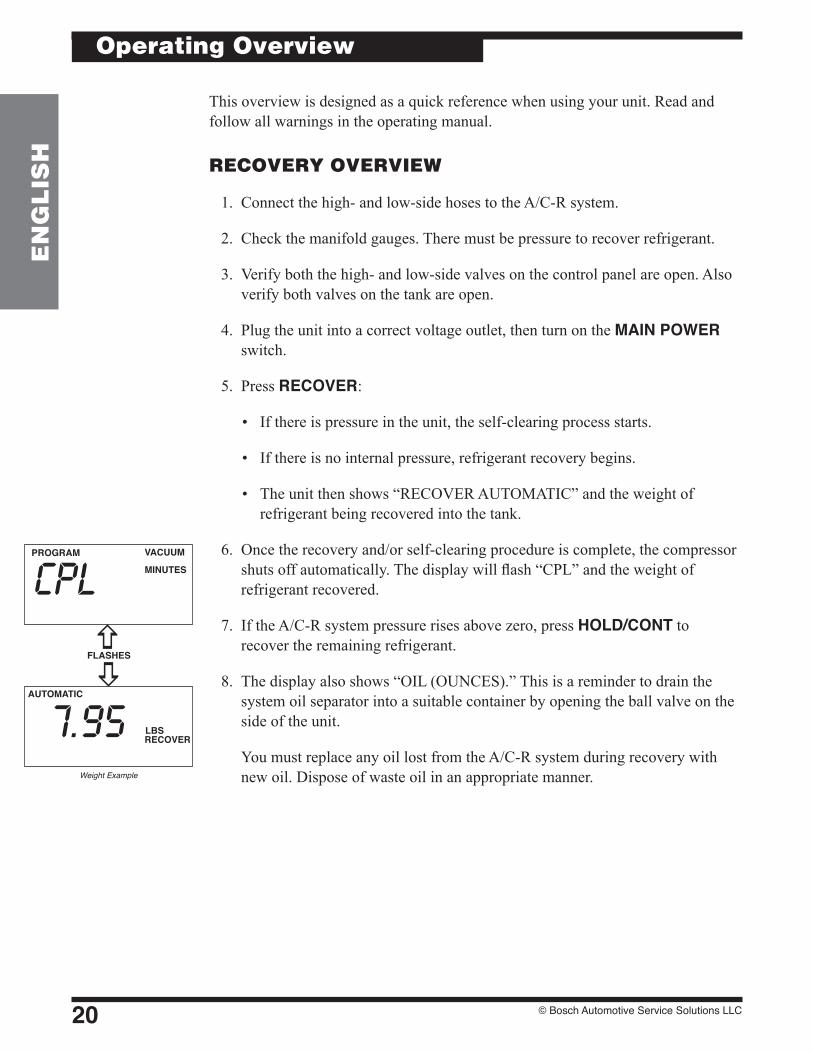
This overview is designed as a quick reference when using your unit. Read and follow all warnings in the operating manual.
RECOVERY OVERVIEW
1. Connect the high- and low-side hoses to the A/C-R system.
2. Check the manifold gauges. There must be pressure to recover refrigerant.
3. Verify both the high- and low-side valves on the control panel are open. Also verify both valves on the tank are open.
4. Plug the unit into a correct voltage outlet, then turn on the MAIN POWER switch.
5. Press RECOVER:
• If there is pressure in the unit, the self-clearing process starts.
• If there is no internal pressure, refrigerant recovery begins.
• The unit then shows “RECOVER AUTOMATIC” and the weight of refrigerant being recovered into the tank.
6. Once the recovery and/or self-clearing procedure is complete, the compressor shuts off automatically. The display will flash “CPL” and the weight of refrigerant recovered.
7. If the A/C-R system pressure rises above zero, press HOLD/CONT to recover the remaining refrigerant.
8. The display also shows “OIL (OUNCES).” This is a reminder to drain the system oil separator into a suitable container by opening the ball valve on the side of the unit.
You must replace any oil lost from the A/C-R system during recovery with new oil. Dispose of waste oil in an appropriate manner.
Operating Overview
Weight Example
VACUUMPROGRAM
MINUTESCPL
AUTOMATIC
LBSRECOVER7.95
FLASHESa a
Model 17800B/17801B Recovery/Recycling/Recharging Unit 21
EN
GL
ISH
EVACUATION OVERVIEW
1. Verify the high- and low-side hoses are connected to the A/C-R system, and that the high- and low-side valves are open.
2. Press SHIFT/RESET to toggle the display to show “PROGRAM VACUUM MINUTES 15.00.” Fifteen minutes is the default time for evacuation. To change the time, press the appropriate keys to display the desired time. Then press ENTER.
Note: The longest time that can be programmed is 98.99 (98 minutes and 99 seconds).
3. Press VACUUM to start evacuation. The display counts down the time remaining. If the message “U-HI” appears, there is 25 psi or greater of pressure at the inlet. You must recover that pressure to continue. If necessary, press RECOVER.
4. When the programmed time has expired the vacuum pump automatically shuts off and the display shows “CPL.”
To run the vacuum pump continuously, program the time to “99.00,” press ENTER, then press VACUUM. The pump will start and the display will show “CON AUTOMATIC VACUUM.” To turn the vacuum pump off, press HOLD/CONT.
RECYCLING OVERVIEW
1. Verify both valves on the tank are open. Press and hold SHIFT/RESET and then press “1” to start the recycling process.
2. When the tank temperature equalizes (after about five minutes of recycling time), purge non-condensables from the tank. To purge, use the temperature gauge to determine the temperature of the refrigerant. Then use the pressure/temperature chart on the top of the unit to determine the correct pressure for that refrigerant. If the gauge pressure exceeds the target pressure by more than 10 psi, open the air purge valve for about 30 seconds and release non-condensables from the tank.
3. Close the air purge valve and let the tank stabilize (about 30 seconds). Check the air purge gauge again. Repeat Steps 2 and 3 as necessary during the recycling process.
4. Close the tank's LIQUID valve to stop the recycling process. The unit will pull into a vacuum and shut off automatically.
CAUTION: You can stop recycling instantly by pressing HOLD/CONT, then SHIFT/RESET, but this can leave liquid refrigerant in the low side of the unit. Closing the tank’s LIQUID valve is the recommended method.
Operating Overview
VACUUMPROGRAM
MINUTESI5.00
VACUUMPROGRAM
MINUTESCPLAUTOMATIC
VACUUM
Con
© Bosch Automotive Service Solutions LLC22
EN
GL
ISH
CHARGING OVERVIEW
Follow the manufacturer’s recommendation for charging. You must replace any oil lost from the A/C-R system during recovery with new oil. Dispose of waste oil in an appropriate manner.
1. Open the high-side valve and, if allowable, the low-side valve.
2. Press CHG and enter the weight of the refrigerant to be charged.
3. Press ENTER, then press CHG again. The display counts down to zero, then shows the “CPL” message when complete.
4. Close the high- and low-side valves and start the A/C-R system. Compare the gauge readings to the manufacturer’s specifications.
5. Turn off the A/C-R system and disconnect the high-side hose from it.
6. Start the A/C-R system and open both manifold valves to pull refrigerant from the hoses.
7. At the lowest recommended operating pressure, close the low-side valve and turn off the A/C-R system. Disconnect the low-side hose.
8. Close both manifold valves and turn off the MAIN POWER switch.
Operating Overview
Weight Example*
*Enter the correct weight for your application.
LBSCHARGE
PROGRAM
2.75
AUTOMATIC
LBSCHARGECL-L
VACUUMPROGRAM
MINUTESCPL
Weight Example*
Model 17800B/17801B Recovery/Recycling/Recharging Unit 23
EN
GL
ISH
CHANGING THE VACUUM PUMP OIL
When the vacuum pump has run for a total of 10 hours, the “OIL” message will flash on the display to signal that an oil change is needed. To change the vacuum pump oil, follow these steps:
1. Turn on the MAIN POWER switch. The display shows the selected refrigerant type.
2. Press SHIFT/RESET and the message “PROGRAM VACUUM MINUTES 15:00” displays.
3. Press VACUUM. The display shows the “OIL” message.
4. Remove the door access screws from the right side of the unit. Open the door.
5. Remove the black plastic plug on the oil fill port.
6. Remove the oil drain cap from the vacuum pump, then drain the contaminated oil into a suitable container. (Dispose of it according to local, state, and federal regulations). Replace the oil drain cap.
7. Attach the flexible spout and cap to the oil bottle, and pour approximately six (6) ounces of vacuum pump oil into the oil fill port.
8. Verify the manifold valves are closed, then press SHIFT/RESET and ENTER at the same time to reset the ten-hour timer.
9. Press VACUUM. While the pump is running, slowly add new vacuum pump oil until the oil level is even with the line on the reservoir’s sight glass.
10. Replace the black plastic plug on the oil fill port.
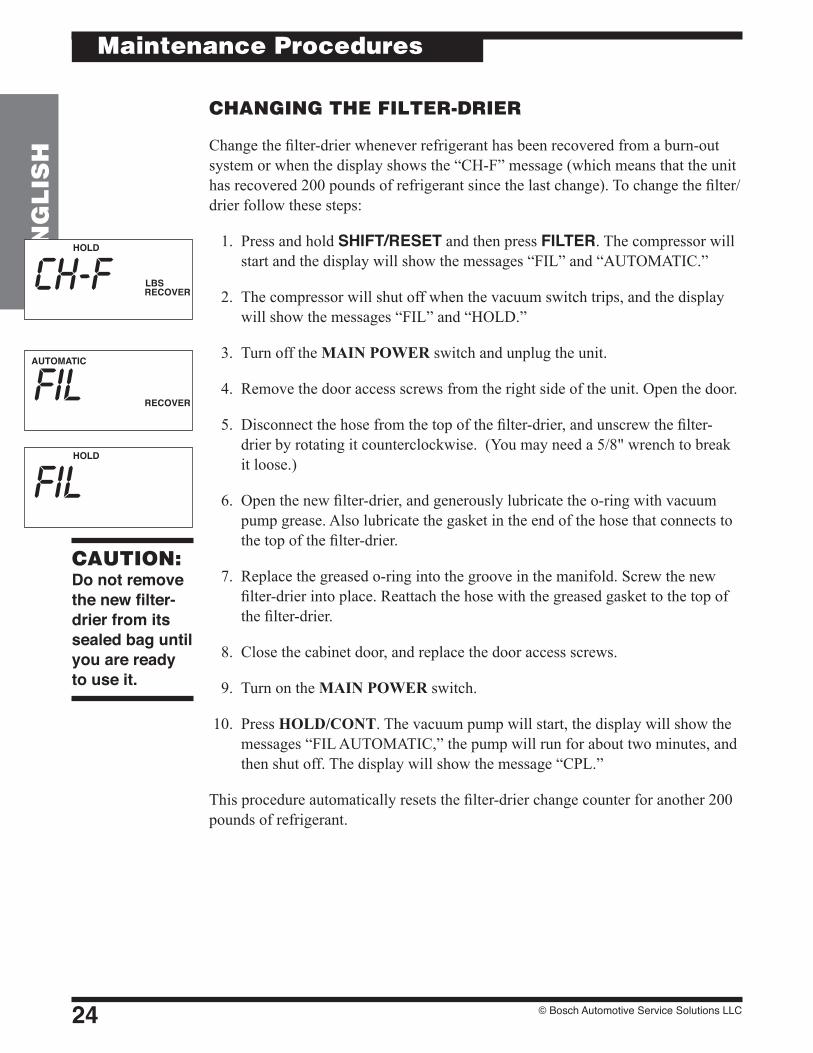
DiagramofVacuumPumpComponents
Oil Filler Tube
Inlet
Sight Glass
Oil Fill Port
Pump Exhaust
Oil Drain Fitting
Maintenance Procedures
VACUUMPROGRAM
MINUTESI5.00HOLD VACUUM
OIL
© Bosch Automotive Service Solutions LLC24
EN
GL
ISH
CHANGING THE FILTER-DRIER
Change the filter-drier whenever refrigerant has been recovered from a burn-out system or when the display shows the “CH-F” message (which means that the unit has recovered 200 pounds of refrigerant since the last change). To change the filter/drier follow these steps:
1. Press and hold SHIFT/RESET and then press FILTER. The compressor will start and the display will show the messages “FIL” and “AUTOMATIC.”
2. The compressor will shut off when the vacuum switch trips, and the display will show the messages “FIL” and “HOLD.”
3. Turn off the MAIN POWER switch and unplug the unit.
4. Remove the door access screws from the right side of the unit. Open the door.
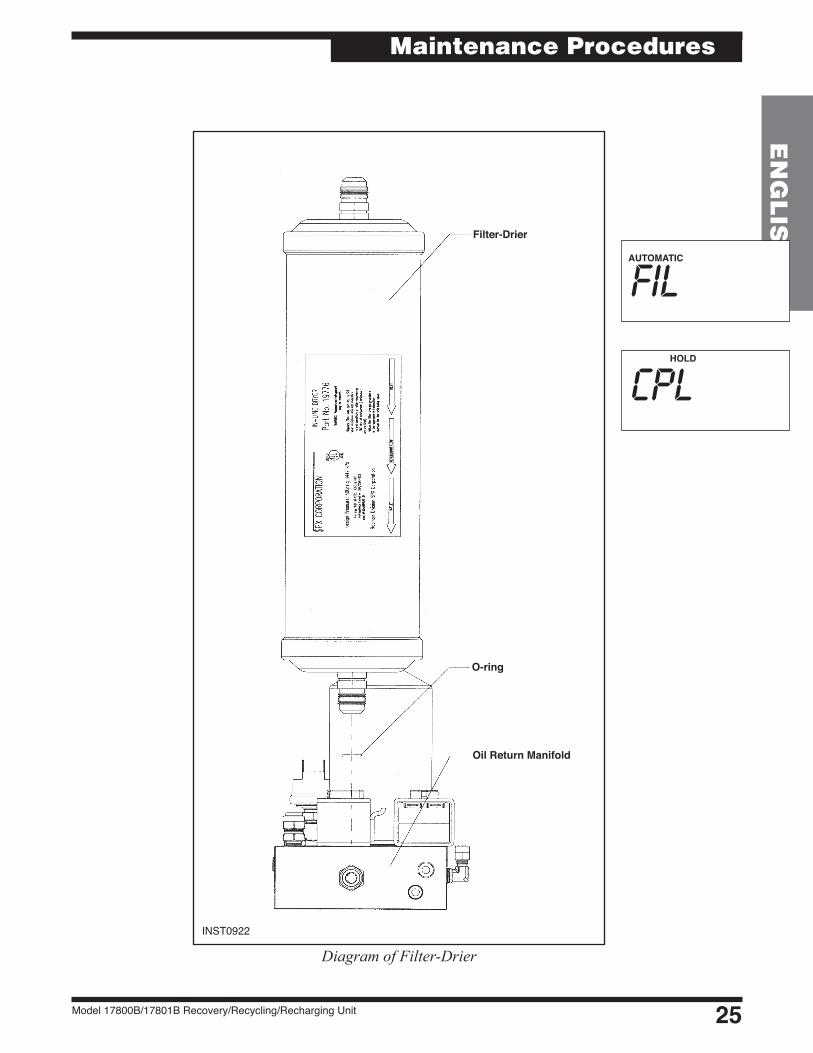
5. Disconnect the hose from the top of the filter-drier, and unscrew the filter-drier by rotating it counterclockwise. (You may need a 5/8" wrench to break it loose.)
6. Open the new filter-drier, and generously lubricate the o-ring with vacuum pump grease. Also lubricate the gasket in the end of the hose that connects to the top of the filter-drier.
7. Replace the greased o-ring into the groove in the manifold. Screw the new filter-drier into place. Reattach the hose with the greased gasket to the top of the filter-drier.
8. Close the cabinet door, and replace the door access screws.
9. Turn on the MAIN POWER switch.
10. Press HOLD/CONT. The vacuum pump will start, the display will show the messages “FIL AUTOMATIC,” the pump will run for about two minutes, and then shut off. The display will show the message “CPL.”
This procedure automatically resets the filter-drier change counter for another 200 pounds of refrigerant.
CAUTION:Do not remove the new filter-drier from its sealed bag until you are ready to use it.
Maintenance Procedures
HOLD
LBSRECOVERCH-F
AUTOMATIC
RECOVERFILHOLD
FIL
Model 17800B/17801B Recovery/Recycling/Recharging Unit 25
EN
GL
ISH
DiagramofFilter-Drier
Maintenance Procedures
Filter-Drier
O-ring
Oil Return Manifold
INST0922
AUTOMATIC
FILHOLD
CPL

© Bosch Automotive Service Solutions LLC26
EN
GL
ISH
CONFIRMING THE SCALE CHECKLIST
Blank Display or No WarningsCheck the wire connections from the scale assembly to the circuit board for configuration and continuity.
Verify the circuit board is receiving the correct voltage (refer to the decal on the back of the unit), and the two amp or 1/2 amp fuse is not blown. Use correctly grounded, active, electrical outlets only. Replace the circuit board or fuses as needed.
Total Amounts Not AccurateVerify that nothing is touching, blocking, or interfering in any way with the scale assembly, tank, or hoses. Confirm that the total weight on the scale assembly is not exceeding 80 lb/37 kg. If it is, reduce the amount of refrigerant in the tank.
Full (Full Tank Setting)The compressor will shut off at the weight previously set. To check the weight of the tank, scale, and refrigerant being recovered, follow the appropriate sections found under UsingtheDiagnosticMode.
CORRECT WEIGHT VERIFICATION
1. Turn on the MAIN POWER switch.
2. Press SHIFT/RESET until “PROGRAM” displays.
NOTE: Iftheunitisjustbeingturnedon,thescreenwilldefaulttodisplaytheselectedrefrigeranttype.PressSHIFT/RESETuntil“PROGRAM”displays.
3. When the “PROGRAM” message displays, press and hold SHIFT/RESET, then press ENTER. The “FUNC” message will display when the manual diagnostic mode has been accessed correctly.
4. Remove all weight from the scale platform.
5. Press 6 to turn the scale into a direct-reading weight scale.
NOTE: Anyweightonthescalewhen 6ispressedwillnotbeshownonthedisplay.Theunitautomaticallyzerostheweightonthescalewhen6ispressed.Ifyouremovetheweight,thedisplaywillshowthechangeintotalweight,butwillnotshowanegativesign.
6. Place a known weight of between 30-60 lbs./13-28 kg on the scale. The display will show the known weight “± .04lb./.02 kg.”
Maintenance Procedures
NOTE:Check the scale accuracy every three months.
Func
Model 17800B/17801B Recovery/Recycling/Recharging Unit 27
EN
GL
ISH
7. If the scale does not read the weight accurately, recalibrate the scale and UL circuit using the following instructions. If the scale does not respond to testing, verify the scale cable is plugged into the main circuit board.
8. Press SHIFT/RESET to exit this mode
CALIBRATING THE SCALE
NOTE: ThescaleassemblyandULcircuitMUSTbecalibratedwheninstallingareplacementscaleassemblyorcircuitboard.Toensurecontinuedchargingaccuracy,periodicallyconfirmthechecklistbelow.
1. Remove all weight from the scale platform.
2. Turn on the MAIN POWER switch.
NOTE: Iftheunitisjustbeingturnedon,thescreenwilldefaulttodisplaytheselectedrefrigeranttype.
3. Press SHIFT/RESET and ENTER until “PROGRAM” displays.
4. When the “PROGRAM” message displays, press SHIFT/ RESET at the same time. The “FUNC” message displays.
5. Press 9. The display is blank. 6. Press RECOVER and ENTER at the same time.
7. The DATE message flashes, then “0.00” displays. Enter the current month and year. For example, if the unit is being calibrated on November 8th, 1998, enter 1,1,9,8 and then press ENTER.
8. The “CAL” message will flash, then the “ZERO” message displays.
9. Verify nothing is on or touching the scale platform, then press ENTER.
10. The “CAL” message will flash, then the “A1” message displays.
11. Place a certified weight (between 20 and 70 lbs.) in the center of the scale platform. Enter the weight from the display. For example, to record 20 lbs. on the scale, press “2,0,0,0” on the keypad, then press ENTER. The display returns to the vacuum mode.
Maintenance Procedures
© Bosch Automotive Service Solutions LLC28
EN
GL
ISH
12. To check scale accuracy, follow the CorrectWeightVerificationprocedure.
WARNING
Unplug the unit before beginning service work. Incorrect use or connections can cause electrical shock. Only qualified personnel should perform service work.
If scale assembly and UL circuit are not calibrated, scale can overfill the tank, causing possible explosion and/or vehicle overcharge.
UL CIRCUIT CALIBRATIONNOTE: Alwayscalibratethescalefirst.Thenremovethe(4)screwsthatholddownthekeypadonthecontrolpanelbeforeattemptingtocalibratetheULcircuit.
1. Remove all weight from the scale platform.
2. Turn on the MAIN POWER.
NOTE: Iftheunitisjustbeingturnedon,thescreenwilldefaulttodisplaytheselectedrefrigeranttype.
3. Press SHIFT/RESET until “PROGRAM” displays.
4. When the “PROGRAM” message displays, press SHIFT/RESET and ENTER at the same time. The “FUNC” message displays.
5. Press 6.
NOTE: Anyweightonthescalewhen 6ispressedwillnotbeshownonthedisplay.Theunitautomaticallyzerostheweightonthescalewhen6ispressed.Ifyoure-movetheweight,thedisplaywillshowthechangeintotalweight,butwillnotshowanegativesign.
6. Place a known weight of EXACTLY 75 lbs. on the scale platform. The dis-play will show “75 lb. ± .04 lbs/.02kg.”
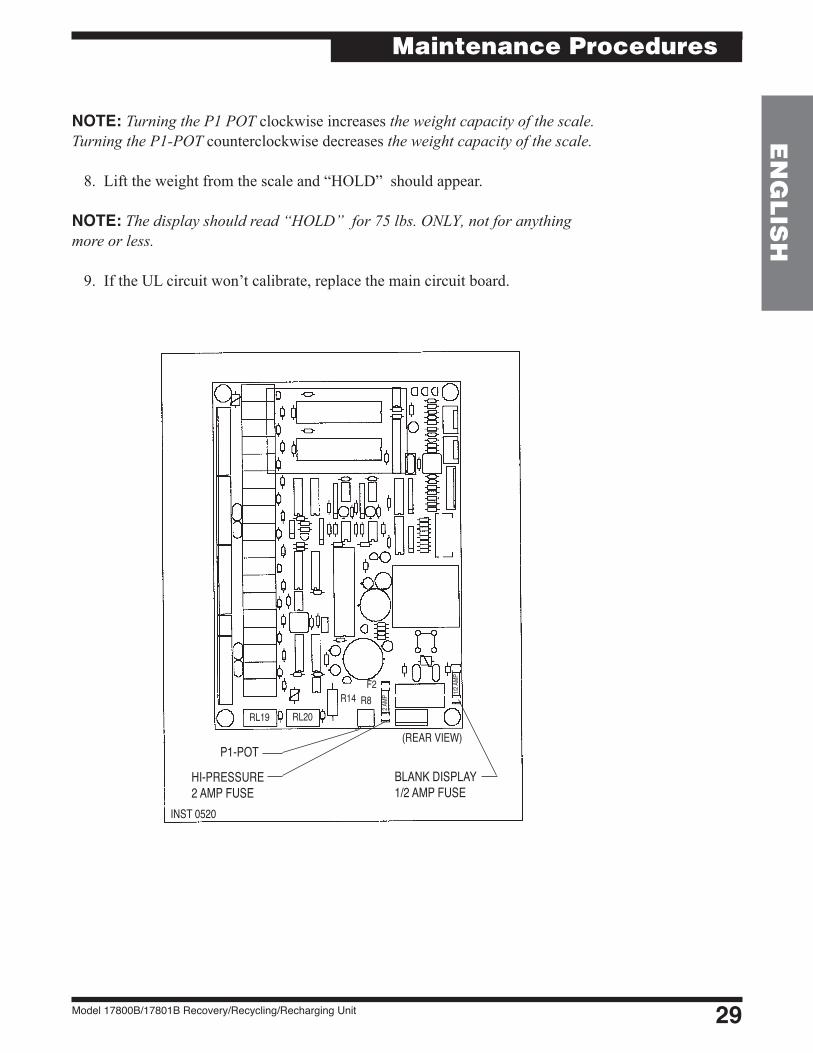
7. Adjust the potentiometer (P1 POT) set screw just until the “HOLD” message displays. (The potentiometer adjusting screw is located on the circuit board.)
Maintenance Procedures
NOTE:You must have a known weight of 75 lb. ± .01 (34.02 kg ±.005).
Model 17800B/17801B Recovery/Recycling/Recharging Unit 29
EN
GL
ISH
NOTE: TurningtheP1POTclockwise increasestheweightcapacityofthescale.TurningtheP1-POTcounterclockwise decreasestheweightcapacityofthescale.
8. Lift the weight from the scale and “HOLD” should appear.
NOTE: Thedisplayshouldread“HOLD”for75lbs.ONLY,notforanythingmoreorless.
9. If the UL circuit won’t calibrate, replace the main circuit board.
Maintenance Procedures
P1-POT
HI-PRESSURE2 AMP FUSE
BLANK DISPLAY1/2 AMP FUSE
(REAR VIEW)
INST 0520
2 AMP
RL19 RL20R14 R8
F2
1/2 AM
P
© Bosch Automotive Service Solutions LLC30
EN
GL
ISH
CHECKING FOR LEAKS
Every three months, or as often as required by local or state laws, check the unit for leaks. As with any mechanical equipment, general use, moving the unit, and vibration can cause fittings to loosen.
1. Turn off the MAIN POWER switch, and disconnect the power cord from the outlet.
2. Remove the door access screws from the right side of the unit. Open the door.
3. Use a leak detector to probe all fitting connections for refrigerant leaks. Tighten fittings if a leak is indicated.
4. Close the door and replace the door access screws.
NOTE:Inspect the unit periodically for leaks. The manufacturer does not reimburse for lost refrigerant.
Maintenance Procedures
CHANGING THE TEMPERATURE SCALE— FAHRENHEIT OR CELSIUS
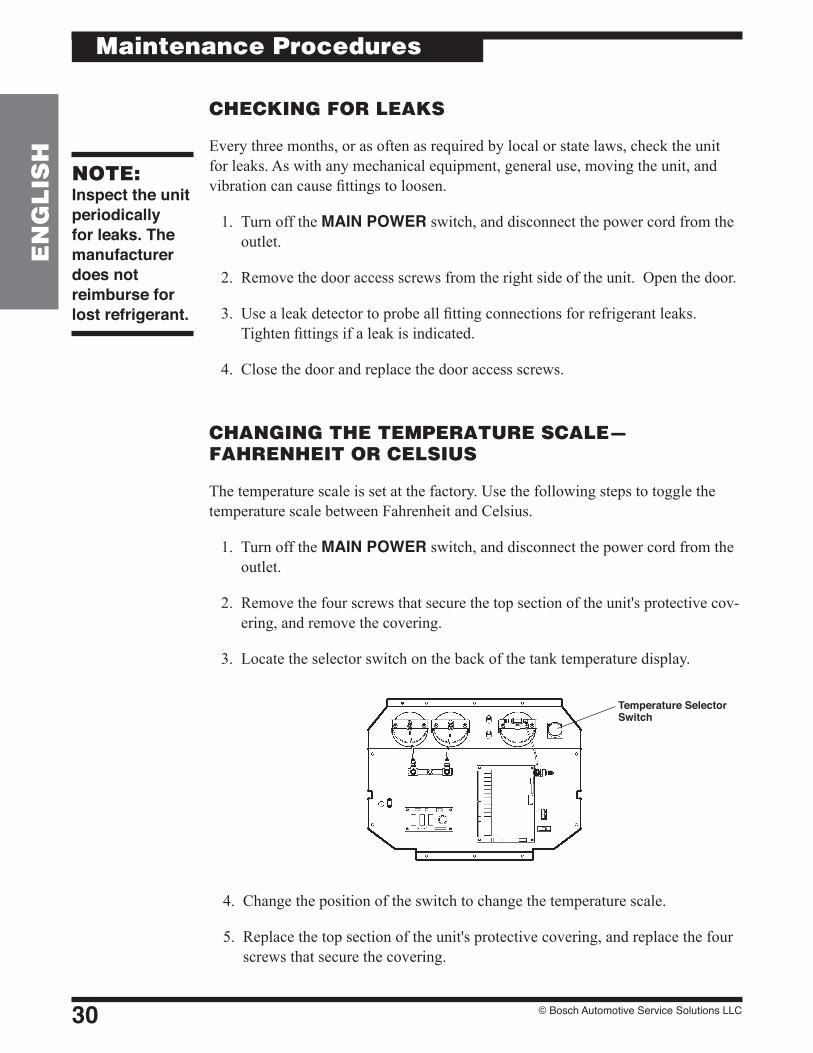
The temperature scale is set at the factory. Use the following steps to toggle the temperature scale between Fahrenheit and Celsius.
1. Turn off the MAIN POWER switch, and disconnect the power cord from the outlet.
2. Remove the four screws that secure the top section of the unit's protective cov-ering, and remove the covering.
3. Locate the selector switch on the back of the tank temperature display.
4. Change the position of the switch to change the temperature scale.
5. Replace the top section of the unit's protective covering, and replace the four screws that secure the covering.
Temperature Selector Switch
Model 17800B/17801B Recovery/Recycling/Recharging Unit 31
EN
GL
ISH
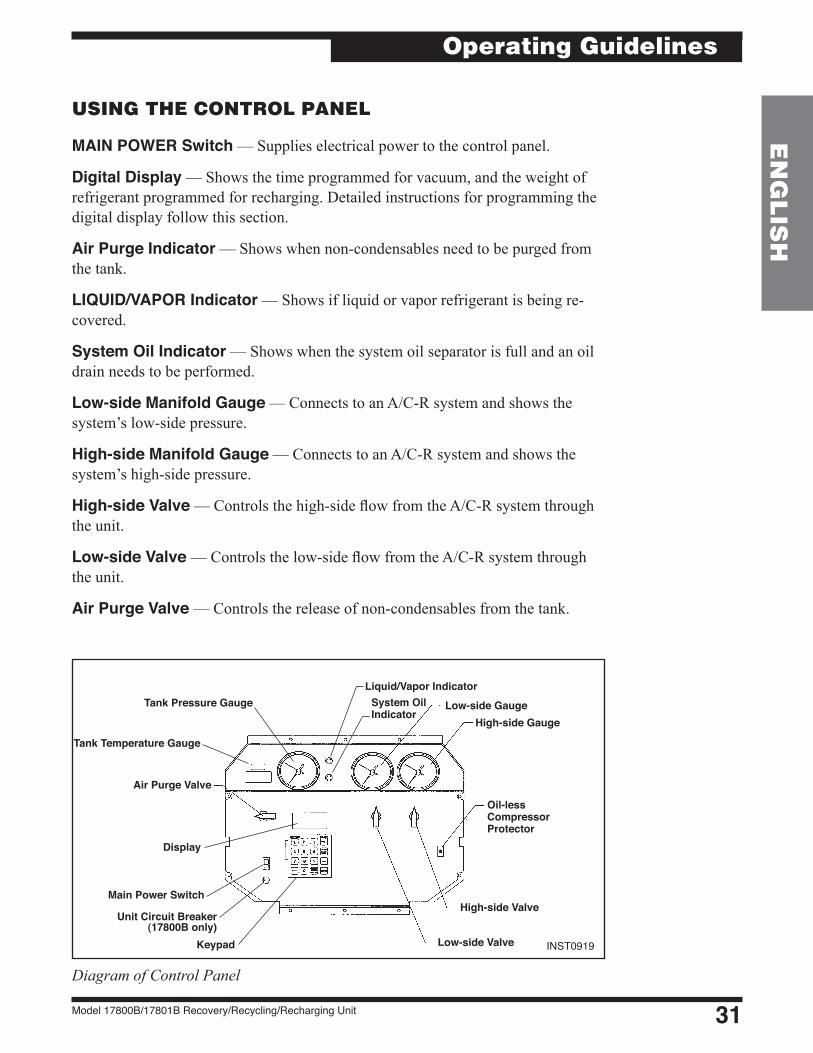
USING THE CONTROL PANEL
MAIN POWER Switch — Supplies electrical power to the control panel.
Digital Display — Shows the time programmed for vacuum, and the weight of refrigerant programmed for recharging. Detailed instructions for programming the digital display follow this section.
Air Purge Indicator — Shows when non-condensables need to be purged from the tank.
LIQUID/VAPOR Indicator — Shows if liquid or vapor refrigerant is being re-covered.
System Oil Indicator — Shows when the system oil separator is full and an oil drain needs to be performed.
Low-side Manifold Gauge — Connects to an A/C-R system and shows the system’s low-side pressure.
High-side Manifold Gauge — Connects to an A/C-R system and shows the system’s high-side pressure.
High-side Valve — Controls the high-side flow from the A/C-R system through the unit.
Low-side Valve — Controls the low-side flow from the A/C-R system through the unit.
Air Purge Valve — Controls the release of non-condensables from the tank.
Operating Guidelines
DiagramofControlPanel
Low-side GaugeHigh-side Gauge
High-side Valve
Liquid/Vapor Indicator
Display
Main Power Switch
Air Purge Valve
Keypad Low-side Valve
Tank Pressure Gauge
INST0919
Unit Circuit Breaker(17800B only)
System Oil Indicator
Oil-less Compressor Protector
Tank Temperature Gauge
© Bosch Automotive Service Solutions LLC32
EN
GL
ISH
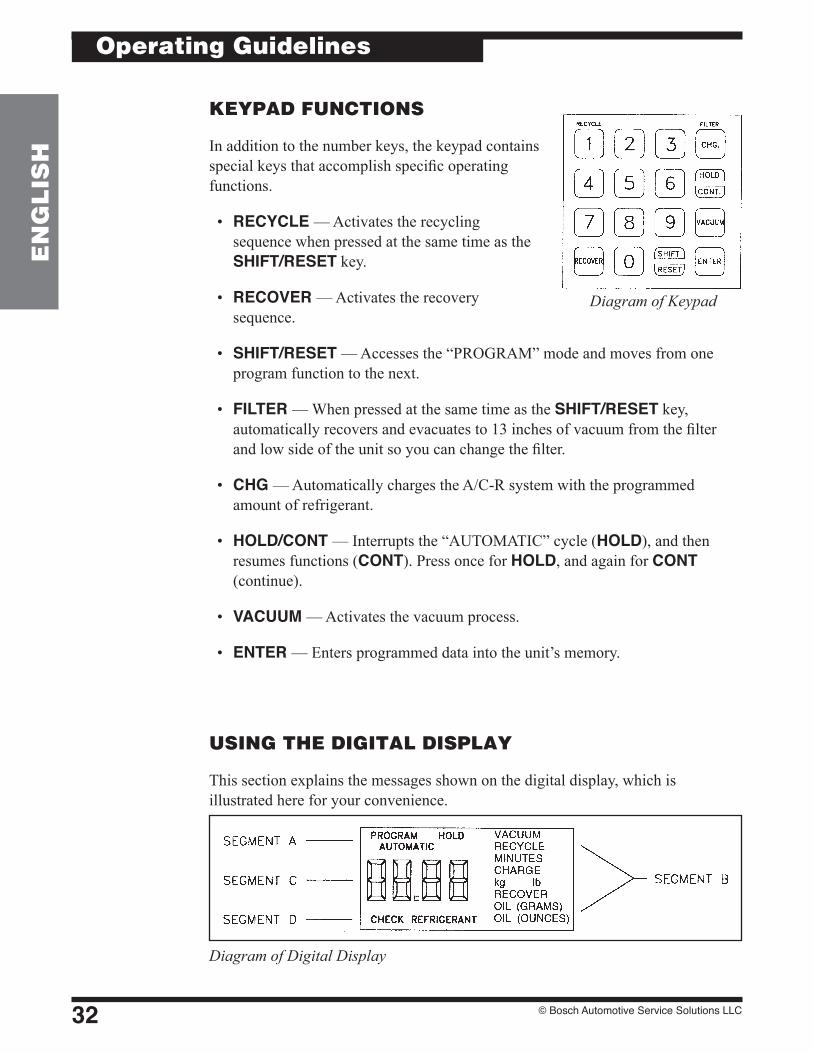
KEYPAD FUNCTIONS
In addition to the number keys, the keypad contains special keys that accomplish specific operating functions.
• RECYCLE — Activates the recycling sequence when pressed at the same time as the SHIFT/RESET key.
• RECOVER — Activates the recovery sequence.
• SHIFT/RESET — Accesses the “PROGRAM” mode and moves from one program function to the next.
• FILTER — When pressed at the same time as the SHIFT/RESET key, automatically recovers and evacuates to 13 inches of vacuum from the filter and low side of the unit so you can change the filter.
• CHG — Automatically charges the A/C-R system with the programmed amount of refrigerant.
• HOLD/CONT — Interrupts the “AUTOMATIC” cycle (HOLD), and then resumes functions (CONT). Press once for HOLD, and again for CONT (continue).
• VACUUM — Activates the vacuum process.
• ENTER — Enters programmed data into the unit’s memory.
DiagramofDigitalDisplay
USING THE DIGITAL DISPLAY
This section explains the messages shown on the digital display, which is illustrated here for your convenience.
DiagramofKeypad
Operating Guidelines
Model 17800B/17801B Recovery/Recycling/Recharging Unit 33
EN
GL
ISH
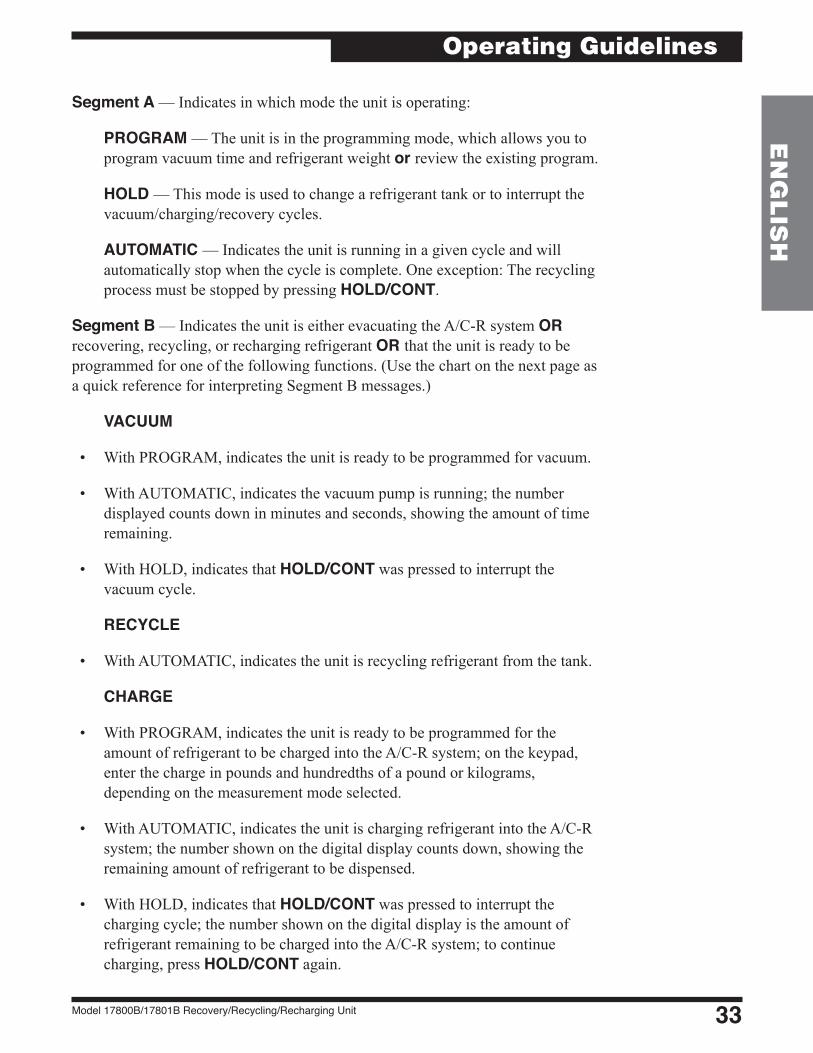
Segment A — Indicates in which mode the unit is operating:
PROGRAM — The unit is in the programming mode, which allows you to program vacuum time and refrigerant weight or review the existing program.
HOLD — This mode is used to change a refrigerant tank or to interrupt the vacuum/charging/recovery cycles.
AUTOMATIC — Indicates the unit is running in a given cycle and will automatically stop when the cycle is complete. One exception: The recycling process must be stopped by pressing HOLD/CONT.
Segment B — Indicates the unit is either evacuating the A/C-R system OR recovering, recycling, or recharging refrigerant OR that the unit is ready to be programmed for one of the following functions. (Use the chart on the next page as a quick reference for interpreting Segment B messages.)
VACUUM
• With PROGRAM, indicates the unit is ready to be programmed for vacuum.
• With AUTOMATIC, indicates the vacuum pump is running; the number displayed counts down in minutes and seconds, showing the amount of time remaining.
• With HOLD, indicates that HOLD/CONT was pressed to interrupt the vacuum cycle.
RECYCLE
• With AUTOMATIC, indicates the unit is recycling refrigerant from the tank.
CHARGE
• With PROGRAM, indicates the unit is ready to be programmed for the amount of refrigerant to be charged into the A/C-R system; on the keypad, enter the charge in pounds and hundredths of a pound or kilograms, depending on the measurement mode selected.
• With AUTOMATIC, indicates the unit is charging refrigerant into the A/C-R system; the number shown on the digital display counts down, showing the remaining amount of refrigerant to be dispensed.
• With HOLD, indicates that HOLD/CONT was pressed to interrupt the charging cycle; the number shown on the digital display is the amount of refrigerant remaining to be charged into the A/C-R system; to continue charging, press HOLD/CONT again.
Operating Guidelines

© Bosch Automotive Service Solutions LLC34
EN
GL
ISH
RECOVER
• With AUTOMATIC, indicates the unit is recovering refrigerant from the A/C-R system and shows the amount of refrigerant recovered in pounds or kilograms, depending on the measurement mode selected.
OIL (OUNCES) or OIL (GRAMS)
• Lights up as a reminder to drain the oil separator after each job.
Segment C — Shows a number or a coded error message on the digital display that indicates the unit’s operating status or any specific problems. See Troubleshooting for a list of error codes and messages.
Segment D — Indicates that refrigerant is low — approximately six pounds (or 2.7 kilograms) of refrigerant is left in the tank. Either replace the tank or add refrigerant to the tank.
VACUUM + PROGRAM = Program unit for vacuumVACUUM + AUTOMATIC = Vacuum pump is runningVACUUM + HOLD = Interrupted vacuum cycleRECYCLE + AUTOMATIC = Unit is recycling refrigerantCHARGE + PROGRAM = Program unit for chargeCHARGE + AUTOMATIC = Unit is charging A/C-R systemCHARGE + HOLD = Interrupted charging cycleRECOVER + AUTOMATIC = Unit is recovering refrigerant
QuickReferenceChartforSegmentB
Operating Guidelines

Model 17800B/17801B Recovery/Recycling/Recharging Unit 35
EN
GL
ISH
USING THE DIAGNOSTIC MODE
The diagnostic mode allows you to run individual components or retrieve stored information. To access the diagnostic mode, press and hold SHIFT/RESET and then press ENTER. The display will show the message “FUNC.” To exit the diagnostic mode, press SHIFT/RESET again.
Some diagnostic functions exit the diagnostic mode when completed, so to continue with more diagnostic functions you must re-enter the diagnostic mode.
Once in the diagnostic mode you can do the following:
Initial Vacuum Mode:
1. Press 1 to enter initial vacuum mode. The display will show the message “VACUUM.” The use of this mode is described in the initial setup instructions in this manual.
2. Press HOLD/CONT to stop the pump.
Set Display for Pounds or Kilograms:
1. Press “0” to display the unit of measure currently set (the unit assumes you want to change the setting).
2. Press ENTER to toggle between “lb” and “kg”.
3. When the desired setting displays, press SHIFT/RESET to save the selection.
Display Total Weight of Recovered Refrigerant:
1. Press “3” to display the total amount of refrigerant recovered by the unit since the last filter-drier change.
2. This counter resets with every filter-drier change.
NOTE:To access the diagnostic mode, press and hold SHIFT/RESET and press ENTER. The display will show the message “FUNC.” To exit the diagnostic mode, press SHIFT/RESET again.
Operating Guidelines
Func
© Bosch Automotive Service Solutions LLC36
EN
GL
ISH
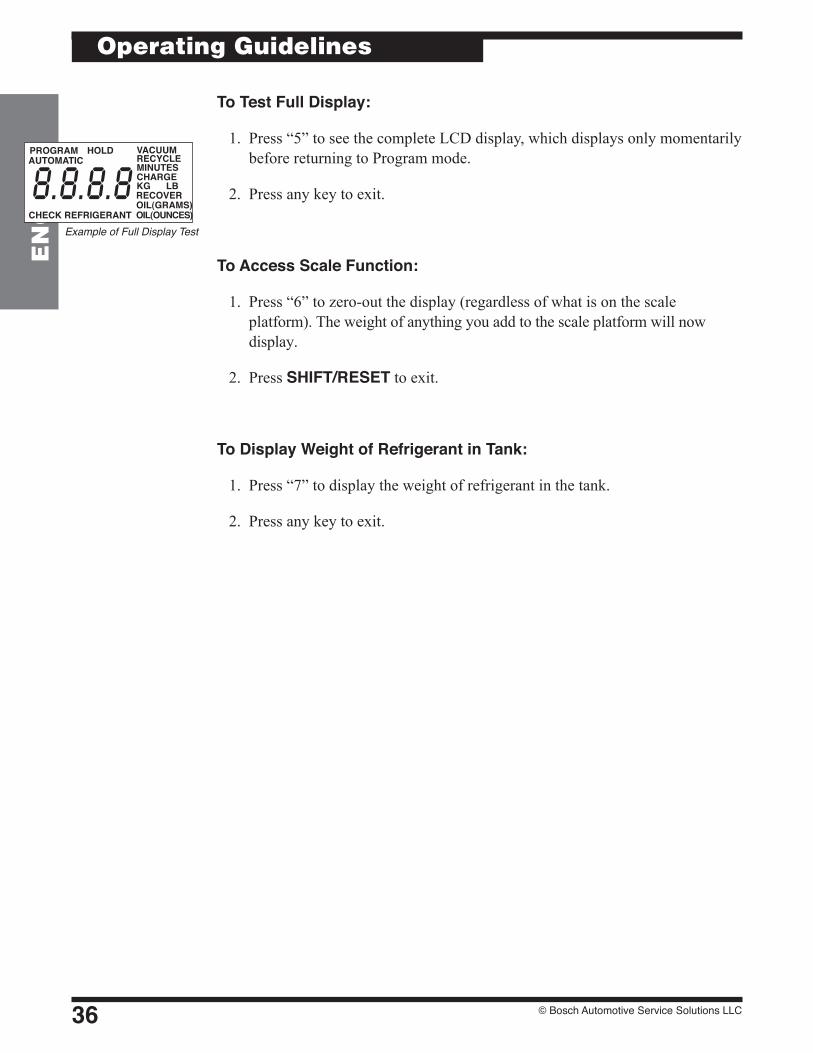
To Test Full Display:
1. Press “5” to see the complete LCD display, which displays only momentarily before returning to Program mode.
2. Press any key to exit.
To Access Scale Function:
1. Press “6” to zero-out the display (regardless of what is on the scale platform). The weight of anything you add to the scale platform will now display.
2. Press SHIFT/RESET to exit.
To Display Weight of Refrigerant in Tank:
1. Press “7” to display the weight of refrigerant in the tank.
2. Press any key to exit.
Example of Full Display Test
Operating Guidelines
HOLDAUTOMATIC RECYCLE
KG LBRECOVER
OIL(OUNCES)
VACUUM
CHARGE
PROGRAM
CHECK REFRIGERANT
MINUTES8.8.8.8OIL(GRAMS)

Model 17800B/17801B Recovery/Recycling/Recharging Unit 37
EN
GL
ISH
USING DISPLAY CODES
134A . . . . . . . . . .R-134a; indicates R-134a automotive refrigerant requiring 1/2" Acme fittings.
Add . . . . . . . . . . .Add refrigerant to the tank before starting charging procedures.
CAL . . . . . . . . . . .The scale is out of calibration; see CalibratingtheScale.
Check . . . . . . . .Tank has six (6) pounds or less of refrigerant; Refrigerant charging will not activate.
CH-F . . . . . . . . . .Change filter/drier; 200 pounds of refrigerant has been recovered since the last change.
CH-P . . . . . . . . . .A/C-R system pressure is low; prevents pulling air into the unit from a leaky system.
CL-c. . . . . . . . . . .Clearing complete; indicates the first stage of the clearing process is complete.
CL-L . . . . . . . . . .The low-side clearing routine is in progress; this occurs when you press RECOVER and can last up to four minutes.
Clr . . . . . . . . . . . .Self-clearing; if this message is displayed, the unit is in the self-clearing process.
CON. . . . . . . . . . .The vacuum pump will run continuously; press SHIFT/RESET to stop.
CPL . . . . . . . . . . .Complete; the current procedure is finished.
Door . . . . . . . . . .(Flashes) The unit has been cleared, and you can now select a door position. Slide the refrigerant lockout panel (located on the back of the unit, top left corner) to expose the fittings for the selected refrigerant type.
OIL/drn . . . . . . . .(Flashes alternately) Drain; open the oil drain valve to relieve the pressure in the unit.
FIL . . . . . . . . . . . .Compressor oil and filter/drier change procedures are being performed.
FULL . . . . . . . . . .The tank is full; recovery stops automatically.
HI-P . . . . . . . . . . .High pressure; unit pressure is greater than 435 psi.
Operating Guidelines
© Bosch Automotive Service Solutions LLC38
EN
GL
ISH
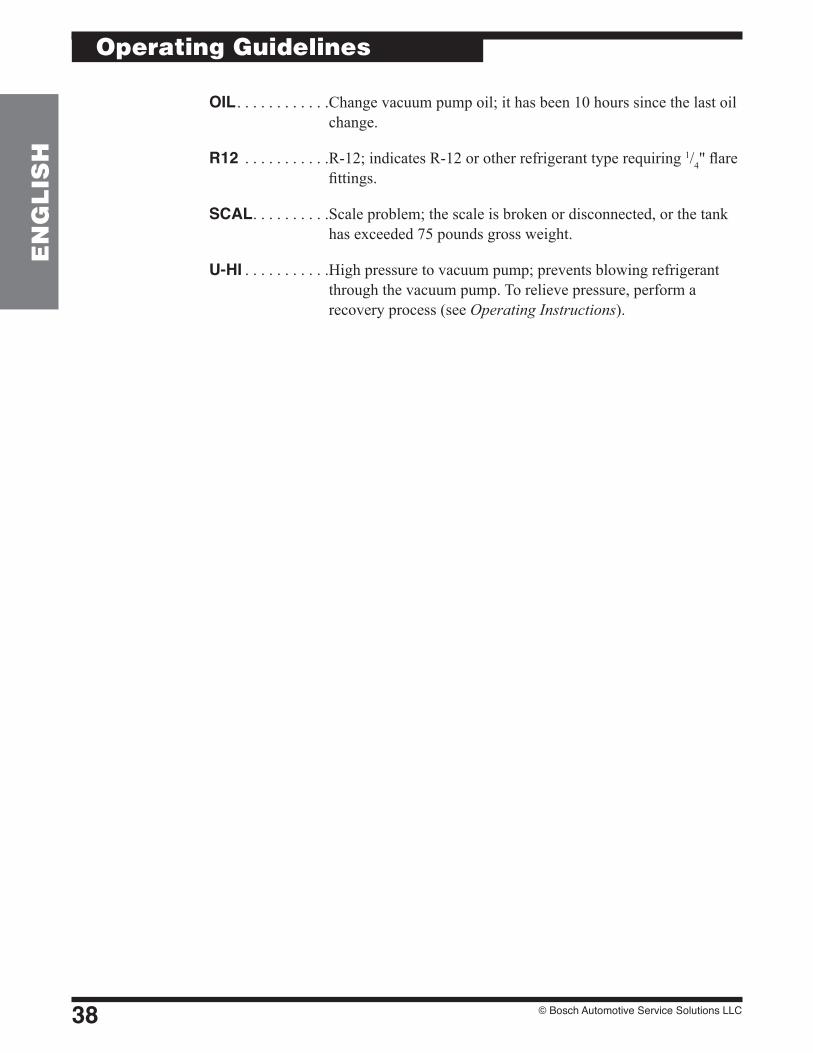
OIL . . . . . . . . . . . .Change vacuum pump oil; it has been 10 hours since the last oil change.
R12 . . . . . . . . . . .R-12; indicates R-12 or other refrigerant type requiring 1/4" flare fittings.
SCAL. . . . . . . . . .Scale problem; the scale is broken or disconnected, or the tank has exceeded 75 pounds gross weight.
U-HI . . . . . . . . . . .High pressure to vacuum pump; prevents blowing refrigerant through the vacuum pump. To relieve pressure, perform a recovery process (see OperatingInstructions).
Operating Guidelines
Model 17800B/17801B Recovery/Recycling/Recharging Unit 39
EN
GL
ISH
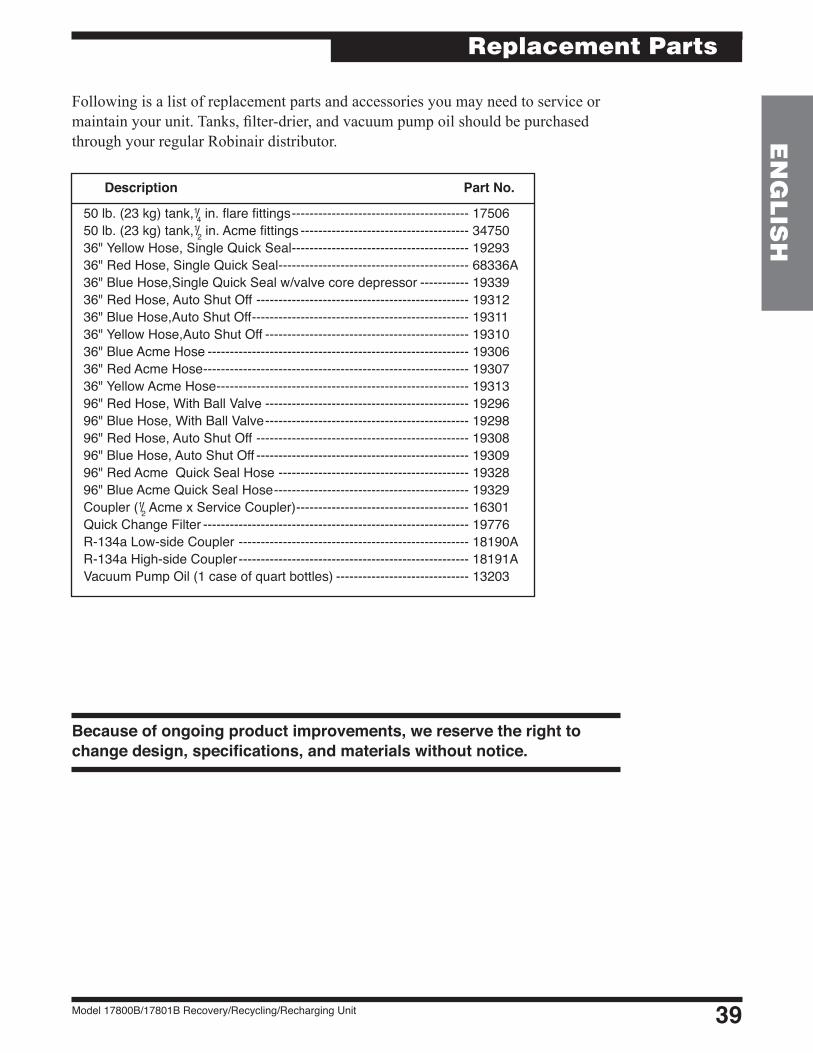
Following is a list of replacement parts and accessories you may need to service or maintain your unit. Tanks, filter-drier, and vacuum pump oil should be purchased through your regular Robinair distributor.
Description Part No.
50 lb. (23 kg) tank,1/4 in. flare fittings ---------------------------------------- 1750650 lb. (23 kg) tank,1/2 in. Acme fittings -------------------------------------- 3475036" Yellow Hose, Single Quick Seal ---------------------------------------- 1929336" Red Hose, Single Quick Seal ------------------------------------------- 68336A36" Blue Hose,Single Quick Seal w/valve core depressor ----------- 1933936" Red Hose, Auto Shut Off ------------------------------------------------ 1931236" Blue Hose,Auto Shut Off ------------------------------------------------- 1931136" Yellow Hose,Auto Shut Off ---------------------------------------------- 1931036" Blue Acme Hose ----------------------------------------------------------- 1930636" Red Acme Hose ------------------------------------------------------------ 1930736" Yellow Acme Hose --------------------------------------------------------- 1931396" Red Hose, With Ball Valve ---------------------------------------------- 1929696" Blue Hose, With Ball Valve ---------------------------------------------- 1929896" Red Hose, Auto Shut Off ------------------------------------------------ 1930896" Blue Hose, Auto Shut Off ------------------------------------------------ 1930996" Red Acme Quick Seal Hose ------------------------------------------- 1932896" Blue Acme Quick Seal Hose -------------------------------------------- 19329Coupler (1/2 Acme x Service Coupler) --------------------------------------- 16301Quick Change Filter ------------------------------------------------------------ 19776R-134a Low-side Coupler ---------------------------------------------------- 18190AR-134a High-side Coupler ---------------------------------------------------- 18191AVacuum Pump Oil (1 case of quart bottles) ------------------------------ 13203
Replacement Parts
Because of ongoing product improvements, we reserve the right to change design, specifications, and materials without notice.
© Bosch Automotive Service Solutions LLC40
EN
GL
ISH
INST0923
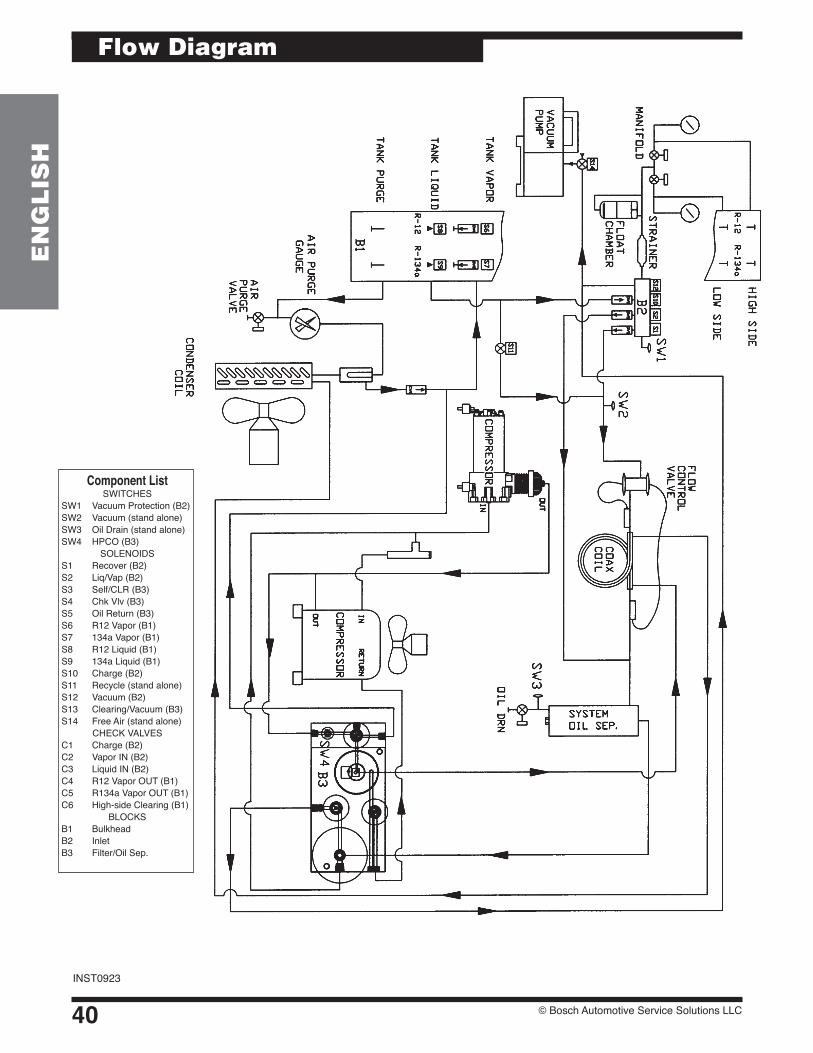
Flow Diagram
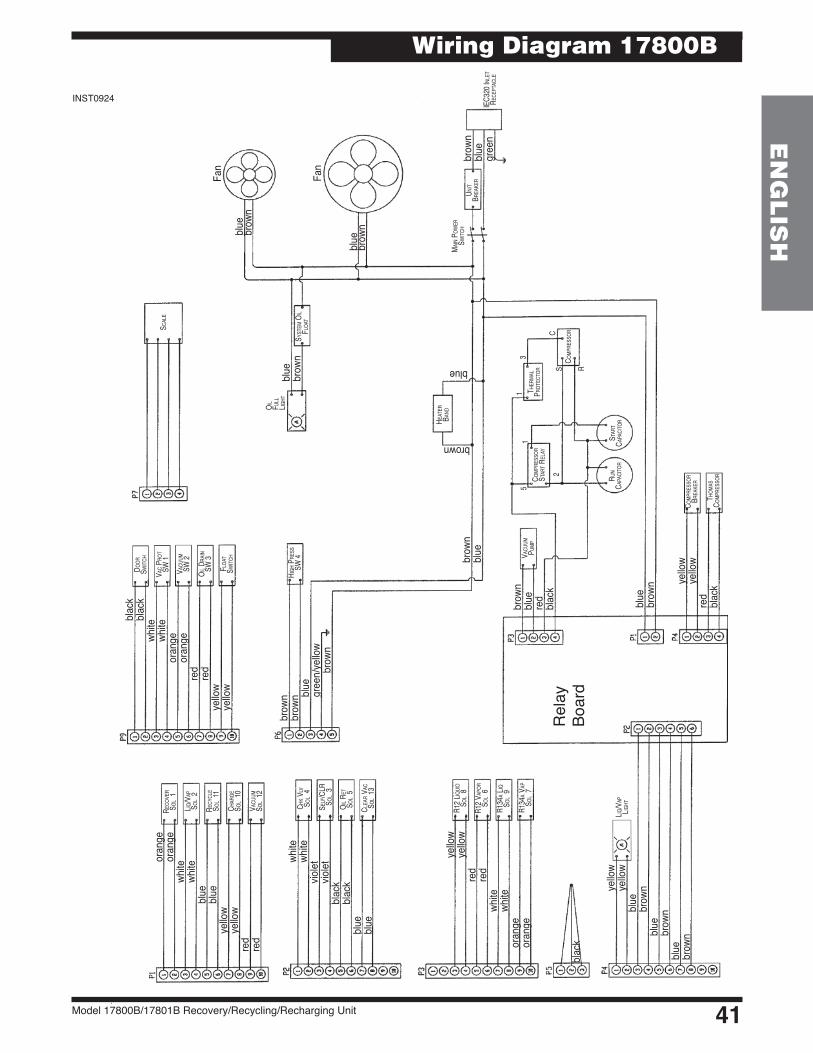
Component ListSWITCHES
SW1 Vacuum Protection (B2)SW2 Vacuum (stand alone)SW3 Oil Drain (stand alone)SW4 HPCO (B3)
SOLENOIDSS1 Recover (B2)S2 Liq/Vap (B2)S3 Self/CLR (B3)S4 Chk Vlv (B3)S5 Oil Return (B3)S6 R12 Vapor (B1)S7 134a Vapor (B1)S8 R12 Liquid (B1)S9 134a Liquid (B1)S10 Charge (B2)S11 Recycle (stand alone)S12 Vacuum (B2)S13 Clearing/Vacuum (B3)S14 Free Air (stand alone)
CHECK VALVESC1 Charge (B2)C2 Vapor IN (B2)C3 Liquid IN (B2)C4 R12 Vapor OUT (B1)C5 R134a Vapor OUT (B1)C6 High-side Clearing (B1)
BLOCKSB1 BulkheadB2 InletB3 Filter/Oil Sep.
Model 17800B/17801B Recovery/Recycling/Recharging Unit 41
EN
GL
ISH
Wiring Diagram 17800B
Liq/V
apLig
ht
black
black
wh
ite
white
oran
ge
or
ange
re
d
red
yello
wye
llow
brow
nbr
own
blu
e
gree
n/ye
llow
brow
n
Rel
ay
Boar
d
Reco
VeR
SoL
1
Liq/V
apSo
L 2
Recy
cLe
SoL
11
chaR
geSo
L 10
Vacu
umSo
L 12
chk V
LVSo
L 4
SeLf
/cLR
SoL
3oi
L Ret
SoL
5
cLea
R Vac
SoL
13
R12 L
iqui
dSo
L 8
R12 V
apoR
SoL
6
R134
a Liq
SoL
9
R134
a Vap
SoL
7
dooR
Sw
itch
Vac p
Rot
Sw 1
Vacu
um
Sw 2
oiL d
Rain
Sw 3
fLoa
t Sw
itch
high
pRe
SSSw
4 brow
nblu
e
brow
nblu
ere
dbla
ck
Vacu
um
pump
blue
brow
n
ye
llow
ye
llow
red
black
SySt
em o
iL fL
oat
blue
brow
n
oiL
fuLL
Lig
ht
ScaL
e
heat
eR
Band
brown
blue
blue
brow
n
comp
ReSS
oR
StaR
t ReL
ay
51
2
theR
maL
pRot
ecto
R
comp
ReSS
oR
StaR
t ca
paci
toR
13
S R
c
Run
capa
cito
R
thom
aS
comp
ReSS
oR
comp
ReSS
oRBR
eake
R
main
pow
eR
Switc
hblue
brow
n
Fan
Fan
unit
BRea
keR
brow
nblu
egr
een
iec3
20 in
Let
Rece
ptac
Le
oran
ge
or
ange
wh
ite
white
blue
blue
ye
llow
ye
llow
red
red
white
white
vio
let
violet
black
black
blu
e
blue
ye
llow
ye
llow
red
red
wh
ite
white
oran
geor
ange
black
yello
w
ye
llow
blu
e
brow
n
blu
e
br
own
blu
e
brow
n
INST0924

© Bosch Automotive Service Solutions LLC42
ENG
LISH
Wiring Diagram 17801B
orange
orange
white
white
blue
blue
yellow
yellow
redred
RecoveRS
ol 1
liq/vap
Sol 2
Recycle
Sol 11
chaRge
Sol 10
vacuum
Sol 12
white
white
violet
violet
black
black
blue
blue
chk v
lvS
ol 4
Self/clRS
ol 3
oil R
etS
ol 5
cleaR v
acS
ol 13
yellow
yellow
red
red
white
white
orangeorange
R12 liquidS
ol 8
R12 vapoR
Sol 6
R134a liqS
ol 9
R134a vap
Sol 7
black
yellow
yellow
blue
brown
blue
brown
blue
brown
liq/vap
light
black
black
white
white
orange
orange
red
red
yellowyellow
dooR
Sw
itch
vac p
Rot Sw
1
vacuum Sw
2o
il dRain
Sw 3
float S
witch
brownbrown
blue
green/yellow
brown
high p
ReSSSw
4S
yStem oil
float
bluebrown
oil
full light
heateR
Band
brownblue
brown
blue
brownblueredblack
vacuum p
ump
bluebrown
yellow
yellow
redblack
thomaS c
ompReSSoR compReSSoR
StaRt R
elay
theRmal p
RotectoR
compReSSoR
StaRt
capacitoR
lS
m
13
SR
c
green/yellowS
cale
bluebrown
bluebrown
main
pow
eR S
witch
fan
fan
unit
BReakeR
line filteR
iec320 inlet
Receptacle
brownbluegreen
Model 17800B/17801B Recovery/Recycling/Recharging Unit 43
ENG
LISH
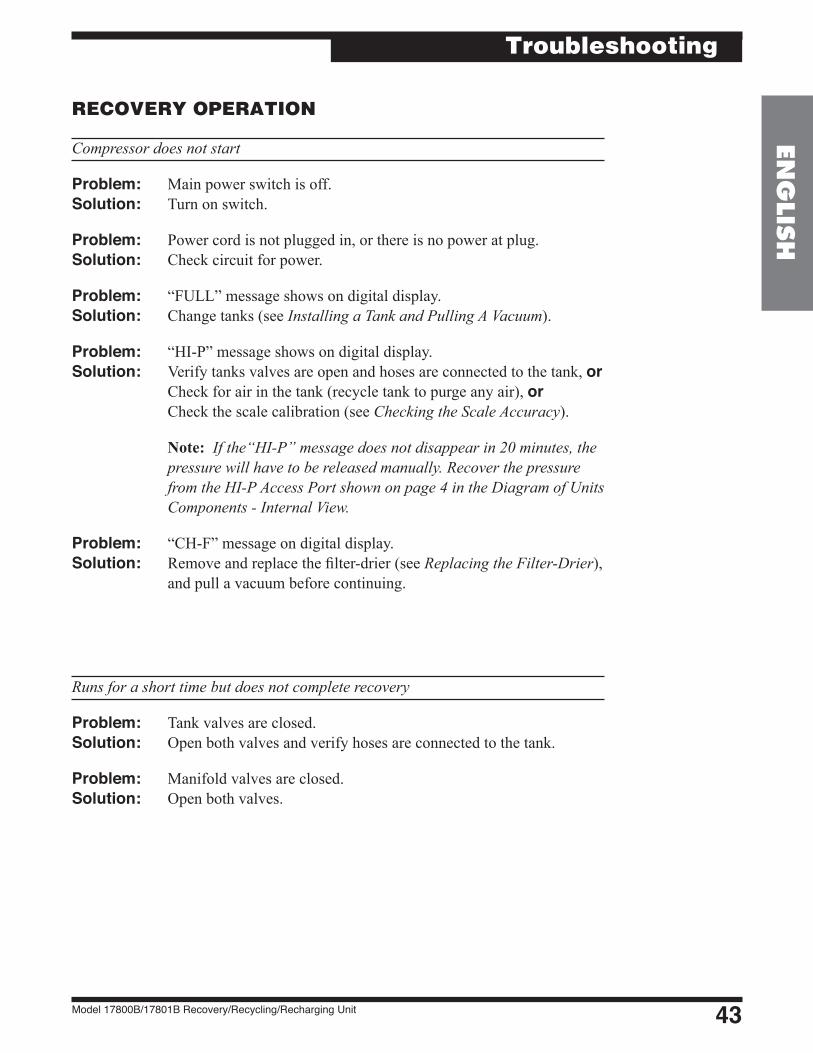
RECOVERY OPERATION
Compressor does not start
Problem: Main power switch is off.Solution: Turn on switch.
Problem: Power cord is not plugged in, or there is no power at plug.Solution: Check circuit for power.
Problem: “FULL” message shows on digital display.Solution: Change tanks (see Installing a Tank and Pulling A Vacuum).
Problem: “HI-P” message shows on digital display.Solution: Verify tanks valves are open and hoses are connected to the tank, or Check for air in the tank (recycle tank to purge any air), or Check the scale calibration (see Checking the Scale Accuracy).
Note: If the“HI-P” message does not disappear in 20 minutes, the pressure will have to be released manually. Recover the pressure from the HI-P Access Port shown on page 4 in the Diagram of Units Components - Internal View.
Problem: “CH-F” message on digital display.Solution: Remove and replace the filter-drier (see Replacing the Filter-Drier),
and pull a vacuum before continuing.
Runs for a short time but does not complete recovery
Problem: Tank valves are closed.Solution: Open both valves and verify hoses are connected to the tank.
Problem: Manifold valves are closed.Solution: Open both valves.
Troubleshooting
© Bosch Automotive Service Solutions LLC44
ENG
LISH
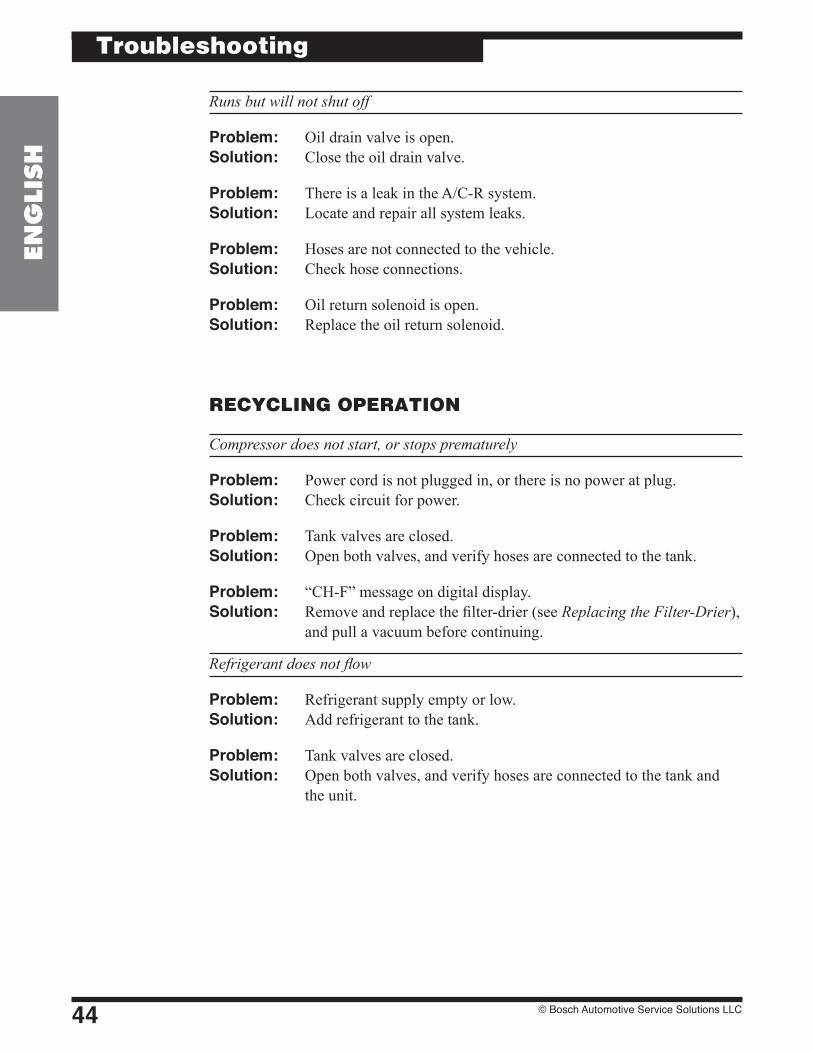
Runs but will not shut off
Problem: Oil drain valve is open.Solution: Close the oil drain valve.
Problem: There is a leak in the A/C-R system.Solution: Locate and repair all system leaks.
Problem: Hoses are not connected to the vehicle.Solution: Check hose connections.
Problem: Oil return solenoid is open.Solution: Replace the oil return solenoid.
RECYCLING OPERATION
Compressor does not start, or stops prematurely
Problem: Power cord is not plugged in, or there is no power at plug.Solution: Check circuit for power.
Problem: Tank valves are closed.Solution: Open both valves, and verify hoses are connected to the tank.
Problem: “CH-F” message on digital display.Solution: Remove and replace the filter-drier (see Replacing the Filter-Drier),
and pull a vacuum before continuing.
Refrigerant does not flow
Problem: Refrigerant supply empty or low.Solution: Add refrigerant to the tank.
Problem: Tank valves are closed.Solution: Open both valves, and verify hoses are connected to the tank and
the unit.
Troubleshooting
Model 17800B/17801B Recovery/Recycling/Recharging Unit 45
ENG
LISH
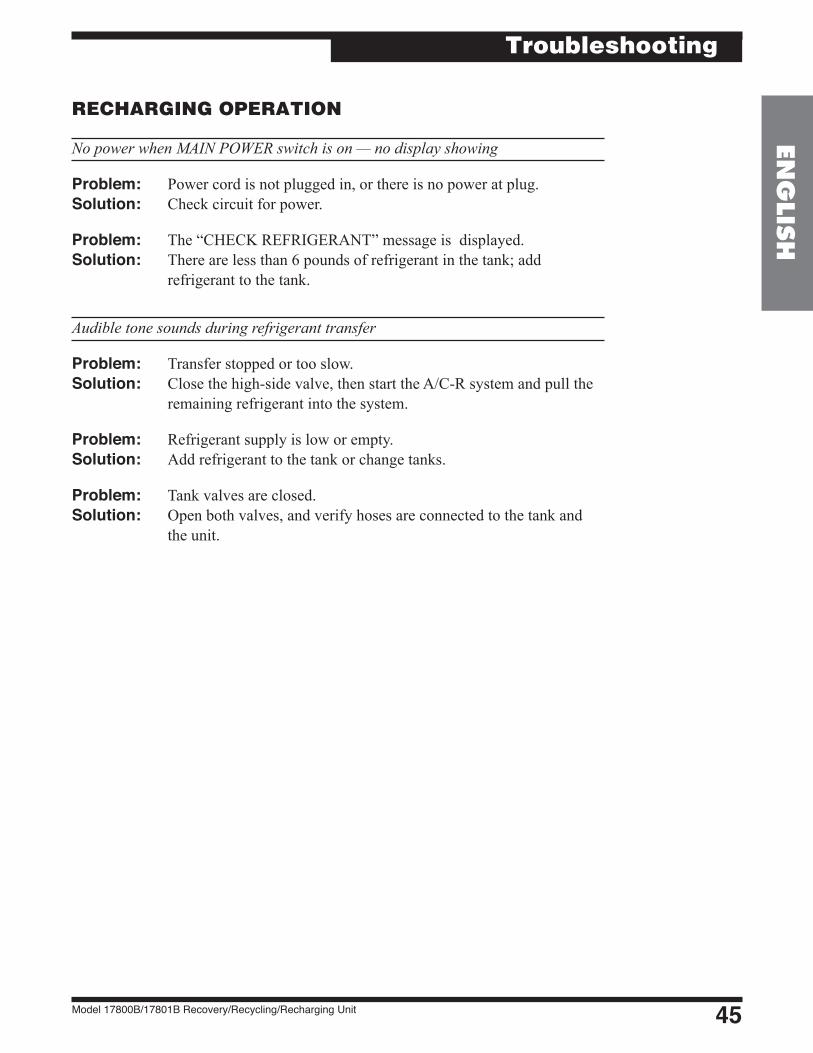
RECHARGING OPERATION
No power when MAIN POWER switch is on — no display showing
Problem: Power cord is not plugged in, or there is no power at plug.Solution: Check circuit for power.
Problem: The “CHECK REFRIGERANT” message is displayed.Solution: There are less than 6 pounds of refrigerant in the tank; add
refrigerant to the tank.
Audible tone sounds during refrigerant transfer
Problem: Transfer stopped or too slow.Solution: Close the high-side valve, then start the A/C-R system and pull the
remaining refrigerant into the system.
Problem: Refrigerant supply is low or empty.Solution: Add refrigerant to the tank or change tanks.
Problem: Tank valves are closed.Solution: Open both valves, and verify hoses are connected to the tank and
the unit.
Troubleshooting
© Bosch Automotive Service Solutions LLC46
ENG
LISH
EVACUATION OPERATION
Vacuum pump will not start
Problem: Power cord is not plugged in, or there is no power at plug.Solution: Check circuit for power.
Problem: The pressure in the A/C-R system is too high.Solution: Recover the remaining A/C-R system charge.
Problem: “U-HI” message on digital display.Solution: Recover all refrigerant before pulling a vacuum.
Problem: Vacuum time not entered.Solution: Program the required time for vacuum.
Vacuum pump runs, but low-side gauge does not register an appropriate vacuum
Problem: Low-side valve is closed.Solution: Open the low-side valve.
Problem: Pump oil is contaminated.Solution: Flush and change the vacuum pump oil.
Problem: Hose connection is loose, or manifold is leaking.Solution: Check connections.
CLEARING OPERATION
“CLR” displays on screen
Problem: Pressing HOLD/CONT does not clear the display.Solution: Slide the lockout panel on the back of the unit to expose the fittings
for the correct refrigerant type. Connect the appropriate hoses, and perform a clearing procedure (see Step 12 in Setup Instructions).
Troubleshooting
Model 17800B/17801B Recovery/Recycling/Recharging Unit 47
ENG
LISH
RobinairLimitedWarrantyStatementRev. November 1, 2005
This product is warranted to be free from defects in workmanship, materials, and components for a period of one year from date of purchase. All parts and labor required to repair defective products covered under the warranty will be at no charge. The following restrictions apply:
1. The limited warranty applies to the original purchaser only.
2. The warranty applies to the product in normal usage situations only, as described in the Operating Manual. The product must be serviced and maintained as specified.
3. If the product fails, it will be repaired or replaced at the option of the manufacturer.
4. Transportation charges for warranty service will be reimbursed by the factory upon verification of the warranty claim and submission of a freight bill for normal ground service. Approval from the manufacturer must be obtained prior to shipping to an authorized service center.
5. Warranty service claims are subject to authorized inspection for product defect(s).
6. The manufacturer shall not be responsible for any additional costs associated with a product failure including, but not limited to, loss of work time, loss of refrigerant, cross-contamination of refrigerant, and unauthorized shipping and/or labor charges.
7. All warranty service claims must be made within the specified warranty period. Proof-of-purchase date must be supplied to the manufacturer.
8. Use of recovery/recycling equipment with unauthorized refrigerants or sealants will void warranty.• Authorized refrigerants are listed on the equipment or are available through the Technical Service
Department.• The manufacturer prohibits the use of the recovery/recycling equipment on air conditioning (A/C)
systems containing leak sealants, either of a seal-swelling or aerobic nature.
This Limited Warranty does NOT apply if:
• The product, or product part, is broken by accident.
• The product is misused, tampered with, or modified.
• The product is used for recovering or recycling any substance other than the specified refrigerant type. This includes, but is not limited to, materials and chemicals used to seal leaks in A/C systems.
Limited Warranty
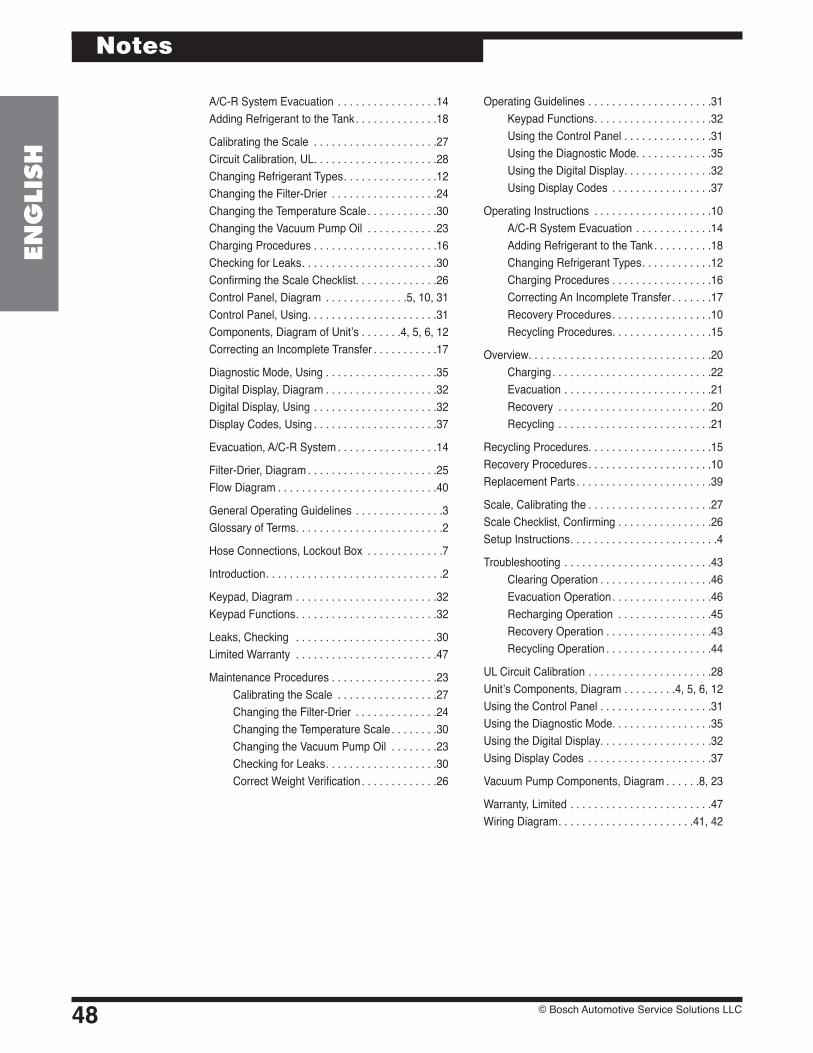
© Bosch Automotive Service Solutions LLC48
ENG
LISH
Notes
A/C-R System Evacuation . . . . . . . . . . . . . . . . .14Adding Refrigerant to the Tank . . . . . . . . . . . . . .18
Calibrating the Scale . . . . . . . . . . . . . . . . . . . . .27Circuit Calibration, UL . . . . . . . . . . . . . . . . . . . . .28Changing Refrigerant Types . . . . . . . . . . . . . . . .12Changing the Filter-Drier . . . . . . . . . . . . . . . . . .24Changing the Temperature Scale . . . . . . . . . . . .30Changing the Vacuum Pump Oil . . . . . . . . . . . .23Charging Procedures . . . . . . . . . . . . . . . . . . . . .16Checking for Leaks . . . . . . . . . . . . . . . . . . . . . . .30Confirming the Scale Checklist . . . . . . . . . . . . . .26Control Panel, Diagram . . . . . . . . . . . . . .5, 10, 31Control Panel, Using . . . . . . . . . . . . . . . . . . . . . .31Components, Diagram of Unit’s . . . . . . .4, 5, 6, 12Correcting an Incomplete Transfer . . . . . . . . . . .17
Diagnostic Mode, Using . . . . . . . . . . . . . . . . . . .35Digital Display, Diagram . . . . . . . . . . . . . . . . . . .32Digital Display, Using . . . . . . . . . . . . . . . . . . . . .32Display Codes, Using . . . . . . . . . . . . . . . . . . . . .37
Evacuation, A/C-R System . . . . . . . . . . . . . . . . .14
Filter-Drier, Diagram . . . . . . . . . . . . . . . . . . . . . .25Flow Diagram . . . . . . . . . . . . . . . . . . . . . . . . . . .40
General Operating Guidelines . . . . . . . . . . . . . . .3Glossary of Terms . . . . . . . . . . . . . . . . . . . . . . . . .2
Hose Connections, Lockout Box . . . . . . . . . . . . .7
Introduction . . . . . . . . . . . . . . . . . . . . . . . . . . . . . .2
Keypad, Diagram . . . . . . . . . . . . . . . . . . . . . . . .32Keypad Functions . . . . . . . . . . . . . . . . . . . . . . . .32
Leaks, Checking . . . . . . . . . . . . . . . . . . . . . . . .30Limited Warranty . . . . . . . . . . . . . . . . . . . . . . . .47
Maintenance Procedures . . . . . . . . . . . . . . . . . .23 Calibrating the Scale . . . . . . . . . . . . . . . . .27 Changing the Filter-Drier . . . . . . . . . . . . . .24 Changing the Temperature Scale . . . . . . . .30 Changing the Vacuum Pump Oil . . . . . . . .23 Checking for Leaks . . . . . . . . . . . . . . . . . . .30 Correct Weight Verification . . . . . . . . . . . . .26
Operating Guidelines . . . . . . . . . . . . . . . . . . . . .31 Keypad Functions . . . . . . . . . . . . . . . . . . . .32 Using the Control Panel . . . . . . . . . . . . . . .31 Using the Diagnostic Mode . . . . . . . . . . . . .35 Using the Digital Display . . . . . . . . . . . . . . .32 Using Display Codes . . . . . . . . . . . . . . . . .37
Operating Instructions . . . . . . . . . . . . . . . . . . . .10 A/C-R System Evacuation . . . . . . . . . . . . .14 Adding Refrigerant to the Tank . . . . . . . . . .18 Changing Refrigerant Types . . . . . . . . . . . .12 Charging Procedures . . . . . . . . . . . . . . . . .16 Correcting An Incomplete Transfer . . . . . . .17 Recovery Procedures . . . . . . . . . . . . . . . . .10 Recycling Procedures . . . . . . . . . . . . . . . . .15
Overview . . . . . . . . . . . . . . . . . . . . . . . . . . . . . . .20 Charging . . . . . . . . . . . . . . . . . . . . . . . . . . .22 Evacuation . . . . . . . . . . . . . . . . . . . . . . . . .21 Recovery . . . . . . . . . . . . . . . . . . . . . . . . . .20 Recycling . . . . . . . . . . . . . . . . . . . . . . . . . .21
Recycling Procedures . . . . . . . . . . . . . . . . . . . . .15Recovery Procedures . . . . . . . . . . . . . . . . . . . . .10Replacement Parts . . . . . . . . . . . . . . . . . . . . . . .39
Scale, Calibrating the . . . . . . . . . . . . . . . . . . . . .27Scale Checklist, Confirming . . . . . . . . . . . . . . . .26Setup Instructions . . . . . . . . . . . . . . . . . . . . . . . . .4
Troubleshooting . . . . . . . . . . . . . . . . . . . . . . . . .43 Clearing Operation . . . . . . . . . . . . . . . . . . .46 Evacuation Operation . . . . . . . . . . . . . . . . .46 Recharging Operation . . . . . . . . . . . . . . . .45 Recovery Operation . . . . . . . . . . . . . . . . . .43 Recycling Operation . . . . . . . . . . . . . . . . . .44
UL Circuit Calibration . . . . . . . . . . . . . . . . . . . . .28Unit’s Components, Diagram . . . . . . . . .4, 5, 6, 12Using the Control Panel . . . . . . . . . . . . . . . . . . .31Using the Diagnostic Mode . . . . . . . . . . . . . . . . .35Using the Digital Display . . . . . . . . . . . . . . . . . . .32Using Display Codes . . . . . . . . . . . . . . . . . . . . .37
Vacuum Pump Components, Diagram . . . . . .8, 23
Warranty, Limited . . . . . . . . . . . . . . . . . . . . . . . .47Wiring Diagram . . . . . . . . . . . . . . . . . . . . . . .41, 42


124048 (Rev. E September 9, 2013) © Bosch Automotive Service Solutions LLC
ConversionTable
Tabla de conversión
Table deConversion
OZ. LBS. onzas libras
0.5 0.03 1.0 0.06 1.5 0.09 2.0 0.13 2.5 0.16 3.0 0.19 3.5 0.22 4.0 0.25 4.5 0.28 5.0 0.31 5.5 0.34 6.0 0.38 6.5 0.41 7.0 0.44 7.5 0.47 8.0 0.50 8.5 0.53 9.0 0.56 9.5 0.59 10.0 0.63 10.5 0.66 11.0 0.69 11.5 0.72 12.0 0.75 12.5 0.78 13.0 0.81 13.5 0.84 14.0 0.88 14.5 0.91 15.0 0.94 15.5 0.97 16.0 1 lb.
Visit our web site at www.robinair.com or call our toll-free Technical Support Line at 800-822-5561
in the continental U.S. or Canada. In all other locations, contact your local distributor. To help us serve you better, please be pre-pared to provide the model number, serial number, and date of purchase of your unit.To validate your warranty, complete the warranty card attached to the unit, and return it within ten days from date of purchase. NATIONWIDE NETWORK OF AUTHORIZED SERVICE CENTERSIf your unit needs repair or replacement parts, contact the service center in your area. For help in locating a service center, call the toll-free technical support line or visit www.robinair.com.
Visite nuestro sitio web en www.robinair.com o llame sin costo ala línea de Asistencia técnica al 800-822-5561
en EE.UU. continental o Canadá.En todas las demás ubicaciones, comuníquese con su distribuidor local. Para ayudarnos a servirle mejor, tenga a mano el número de modelo, número de serie y fecha de compra de su unidad. Para validar la ga-rantía, complete la tarjeta de garantía anexa a su unidad y devuélvala dentro de los diez días siguientes a la fecha de compra.RED NACIONAL DE CENTROS DE SERVICIO AUTORIZADOSSi su unidad necesita reparaciones o partes de reemplazo, comuníquese con el centro de servicio de su área. Para obtener ayuda para ubicar un centro de servicio, llame sin costo a la línea de asistencia técnica o visite www.robinair.com.
Visitez notre site Web à www.robinair.com ou appelez sans fraisle soutien technique au 800-822-5561
sur le territoire continental des États-Unis ou au Canada.Pour tout autre endroit, communiquez avec votre distributeur local. Afin de nous aider à mieux vous servir, soyez prêt à nous donner le numéro de modèle, le numéro de série et la date de l’achat de votre unité. Afin de valider votre garantie, remplissez la carte de garantie jointe à votre système et retournez-la dans les dix jours de la date d’achat.RÉSEAU NATIONAL DES CENTRES DE SERVICE AUTORISÉSSi votre unité a besoin d’être réparée ou à besoin de pièces de remplacement, communiquez avec le centre de service de votre région. Pour vous aider à localiser un centre de service, appelez sans frais la ligne de soutien technique ou visitez le www.robinair.com.
The Robinair 17800B/17801B unit is designed to meet all applicable agency certifications, including Underwriter's Laboratories, Inc., SAE Standards, and CUL. Certain state and local jurisdictions dictate that using this equipment to sell refrigerant by weight may not be permitted. We recommend charging for any A/C service by the job performed. This weight scale provides a means of metering the amount of refrigerant needed for optimum A/C system performance as recommended by OEM manufacturersLa unidad Robinair 17800B/17801B está diseñada para cumplir con todas las certificaciones de agencia apli-cables, incluyendo Underwriter’s Laboratories, Inc., Estándares SAE y CUL. Ciertas jurisdicciones estatales y locales prescriben que el uso de este equipo para vender refrigerante por peso es posible que no sea permitido. Recomendamos que se cobre el trabajo realizado por dar servicio al aire acondicionado. Esta escala de peso proporciona un medio para medir la cantidad de refrigerante que se necesita para el rendimiento óptimo del sistema de aire acondicionado, tal como lo recomiendan los fabricantes OEM.Le modèle 17800B/17801B a été conçu pour répondre aux certifications applicables de la Underwriter’s Labora-tories, Inc., aux normes SAE et CUL. Certains endroits dictent l’utilisation de cet équipement et il peut arriver que la vente de fluide frigorigène en fonction du poids puisse être interdite. Nous vous recommandons de facturer les services de climatisation en fonction du travail effectué. Ce poids de tarification permet de calculer la quantité de fluide frigorigène nécessaire pour un rendement optimum de la climatisation, tel qu’il est recommandé par les fabricants de l’équipement d’origine.
Due to ongoing product improvements, we reserve the right to change design, specifications, and materials without notice.Debido a las constantes mejoras del producto, nos reservamos el derecho de cambiar diseño, especificaciones y materiales sin aviso.
En raison des améliorations constantes apportées à nos produits, nous nous réservons le droit de changer de concept, de spécifications et de matériaux sans préavis.
655 Eisenhower DriveOwatonna, MN 55060 USATech Services: 1-800-822-5561 Fax: 1-866-259-1241Customer Service: 1-800-533-6127 Fax: 1-800-322-2890Web site: www.robinair.com
®