r12 financial statement generator session #...
TRANSCRIPT

R12 Financial Statement Generator
Session # S300002
September 24, 2008 Prepared by Holly French and Liz Konley
DBA Knowledge, Inc.
Table of Contents
INTRODUCTION ........................................................................................................................................ III
PREREQUISITE SETUPS ........................................................................................................................ III
BASICS .......................................................................................................................................................... 4 LOGON & RESPONSIBILITY .............................................................................................................. 4
GENERAL LEDGER .................................................................................................................................... 6 DEFINE ROW SET ........................................................................................................................... 6 DEFINE COLUMN SET ................................................................................................................... 19 DEFINE CONTENT SET .................................................................................................................. 33 DEFINE A REPORT ........................................................................................................................ 39
REPORT PUBLISHING USING REPORT MANAGER......................................................................... 51
PROCEDURE FOR PUBLISHING FINANCIAL REPORTS ................................................................. 51
PROCEDURE FOR DRILLING DOWN ON FINANCIAL REPORTS .................................................. 67

INTRODUCTION This paper was designed to minimize the impact of errors for companies that are upgrading or implementing Oracle R12 financials.
PREREQUISITE SETUPS To be able to follow the scenarios listed below the users must have access to a R12 instance in TEST or PROD. The basic functionality of General Ledger must have been implemented with segment values uploaded. This will enable the users to print useful financial statements.

Session # S300002 www.dbaknow.com Page 4 of 83
Basics
Logon & Responsibility
Procedure
Step Action 1. Enter your USERNAME. 2. Enter your PASSWORD. 3. Click on the LOGIN button.

Session # S300002 www.dbaknow.com Page 5 of 83
Step Action 4. In the Navigator screen, select the Responsibility to use.
A Responsibility provides security to the system and only allows you access to specific tasks.
5. After clicking on the appropriate Responsibility, select the action to be performed from the right hand side of the Navigator screen. This will then open the appropriate screen where the task can be performed.
6. End of Procedure.

Session # S300002 www.dbaknow.com Page 6 of 83
General Ledger
Define Row Set
Procedure
Step Action 1. Under the General Ledger Super User Responsibility navigate to
REPORTS>DEFINE>ROW SET.

Session # S300002 www.dbaknow.com Page 7 of 83
Step Action 2. Enter the NAME of the row set (DESCRIPTION is optional).
Step Action 3. Click the DEFINE ROWS button.

Session # S300002 www.dbaknow.com Page 8 of 83
Step Action 4. To enter a DESCRIPTION row that has no amounts associated with it:
Type in the LINE number (always use increments in case you need to insert rows in between at a later date). Put the description to be printed out in the LINE ITEM box. Ensure DISPLAY ROW is checked and include a ROW NAME. Hit the DOWN ARROW to go to the next line in your row set.
Session # S300002 www.dbaknow.com Page 9 of 83
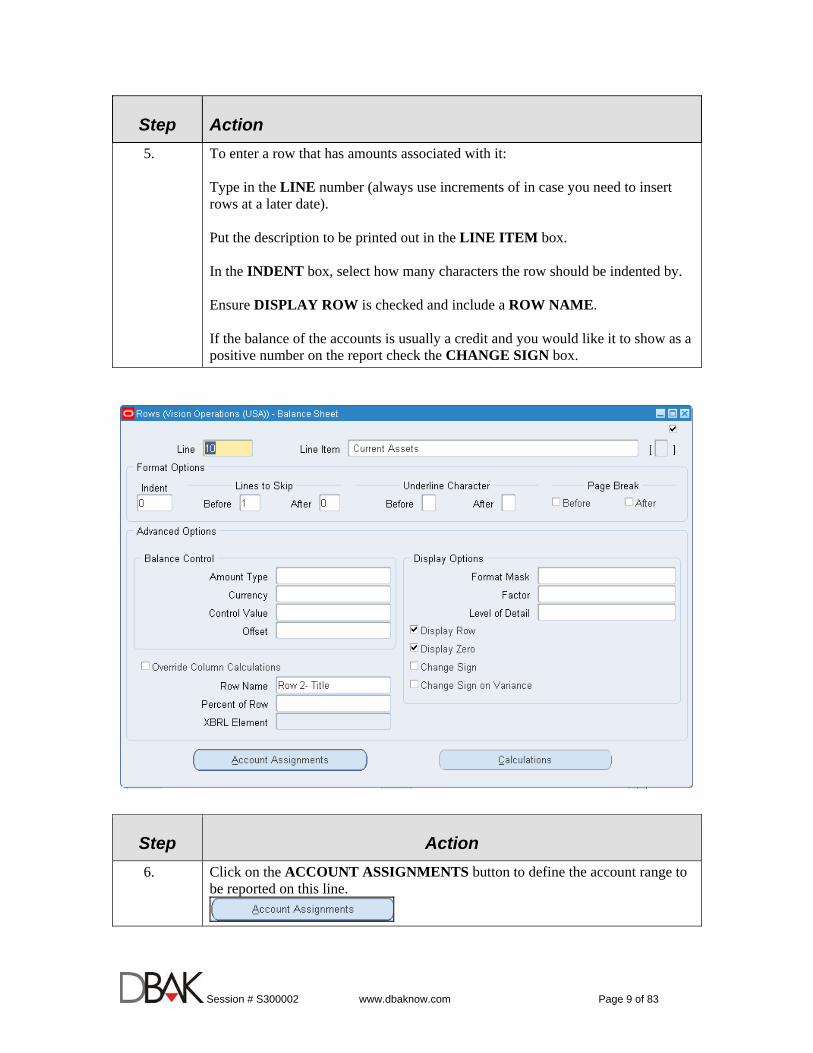
Step Action 5. To enter a row that has amounts associated with it:
Type in the LINE number (always use increments of in case you need to insert rows at a later date). Put the description to be printed out in the LINE ITEM box. In the INDENT box, select how many characters the row should be indented by. Ensure DISPLAY ROW is checked and include a ROW NAME. If the balance of the accounts is usually a credit and you would like it to show as a positive number on the report check the CHANGE SIGN box.
Step Action 6. Click on the ACCOUNT ASSIGNMENTS button to define the account range to
be reported on this line.
Session # S300002 www.dbaknow.com Page 10 of 83
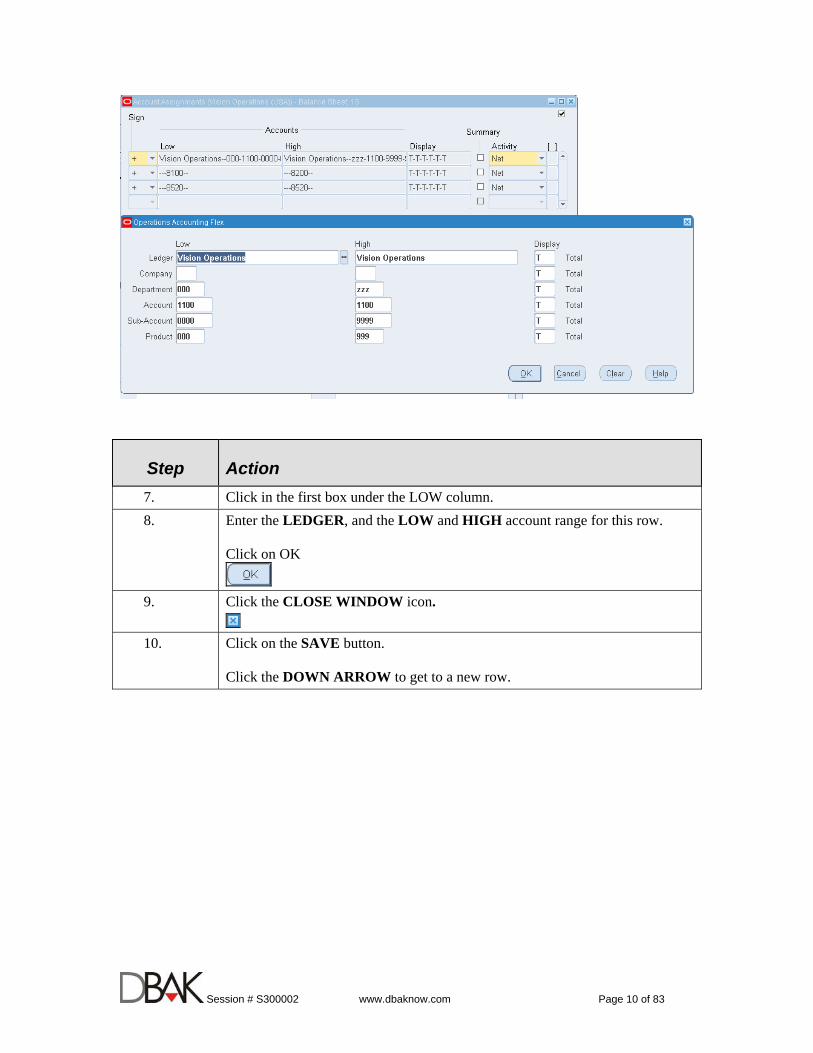
Step Action 7. Click in the first box under the LOW column. 8. Enter the LEDGER, and the LOW and HIGH account range for this row.
Click on OK
9. Click the CLOSE WINDOW icon.
10.
Click on the SAVE button. Click the DOWN ARROW to get to a new row.

Session # S300002 www.dbaknow.com Page 11 of 83
Step Action 11. In the new row enter a LINE number, the row description to be printed out in
LINE ITEM, and how many characters you would like this row indented by. 12. Enter a description for the ROW NAME.
In subsequent rows you may use a calculation that selects this row and adds/subtracts with another row so the description is important.

Session # S300002 www.dbaknow.com Page 12 of 83
Step Action 13. To assign an account range to this row, click on the ACCOUNT
ASSIGNMENTS button.
14. Click in the ACCOUNT RANGE: LOW field.
15. Enter your account range information and click on OK. 16. Click on the CLOSE WINDOW icon.
17. Click the SAVE button.

Session # S300002 www.dbaknow.com Page 13 of 83
Step Action 18. To enter a row that is a calculation of other rows, complete the LINE, LINE
ITEM, INDENT, ROW NAME, etc. fields and click on CALCULATIONS.
Step Action

Session # S300002 www.dbaknow.com Page 14 of 83
Step Action 19. Enter the SEQ number and the type of OPERATOR.
20. Click on the LOW Sequence field List of Values icon.
Step Action 21. Click on the sequence line where you want you your calculation to begin. 22. Click on OK.

Session # S300002 www.dbaknow.com Page 15 of 83
Step Action 23. Click on the HIGH Sequence field List of Values icon.

Session # S300002 www.dbaknow.com Page 16 of 83
Step Action 24. Select the row that your calculation should end on and click OK.
25. Once you have entered all calculations, click on the CLOSE SCREEN icon.

Session # S300002 www.dbaknow.com Page 17 of 83
Step Action 26. Click on SAVE.

Session # S300002 www.dbaknow.com Page 18 of 83
Step Action 27. Continue entering rows for the entire Financial Statement.
Be sure to Save after each row.
28. End of Procedure.

Session # S300002 www.dbaknow.com Page 19 of 83
Define Column Set
Procedure
Step Action 1. Under the General Ledger Super User responsibility, navigate to
REPORTS>DEFINE>COLUMN SET.

Session # S300002 www.dbaknow.com Page 20 of 83
Step Action 2. Enter a descriptive NAME for the column set.
Keep in mind that column sets can be used with any row set so make them flexible and name them as generically as possible.
Step Action 3. Click on the DEFINE COLUMNS button.

Session # S300002 www.dbaknow.com Page 21 of 83
Step Action 4. Enter the desired POSITION value. This is the number of characters to the right
that you want the column to be displayed at. The first column of the report will always be the descripton that was entered into each row of the row set so be sure to have enough characters in this field to account for row descriptions.

Session # S300002 www.dbaknow.com Page 22 of 83
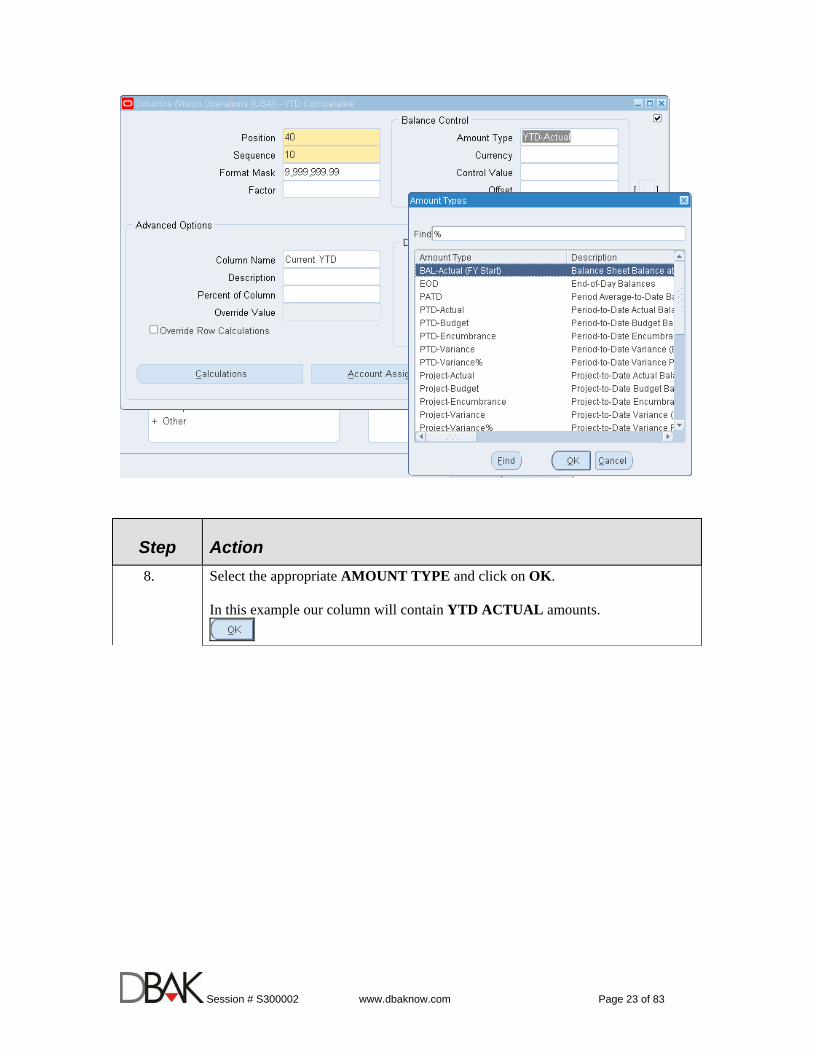
Step Action 5. Enter the SEQUENCE. Incrementing will allow for flexibility in the future to add
additional columns.
6. Enter the desired number format in the FORMAT MASK field. 7. Click on the AMOUNT TYPE List of Values icon.
Session # S300002 www.dbaknow.com Page 23 of 83
Step Action 8. Select the appropriate AMOUNT TYPE and click on OK.
In this example our column will contain YTD ACTUAL amounts.

Session # S300002 www.dbaknow.com Page 24 of 83
Step Action 9. Select the appropriate CURRENCY.
Step Action

Session # S300002 www.dbaknow.com Page 25 of 83
Step Action 10. Enter the COLUMN NAME. This can be used later in calculations. 11. Click on the SAVE button.
12. Press the DOWN ARROW to go to the next column. 13. Enter the desired position by adding the number of characters to the first column's
position that will allow for the printing of the first column amounts. In this example, our first column of amounts started at position 45 and we are allowing for it to be 20 characters wide by starting our second column at position 65.
Step Action 14. Enter the next SEQUENCE number remembering to increment for flexibility.

Session # S300002 www.dbaknow.com Page 26 of 83
Step Action 15. Select your AMOUNT TYPE. 16. OFFSET is used to tell how many periods to offset by in comparison to the
period the report is being ran for. In this example we want to bring in the prior year's YTD balance so we would need to offset by -13 because there are 13 periods in the fiscal year.
17. Type -13 in the OFFSET field.

Session # S300002 www.dbaknow.com Page 27 of 83
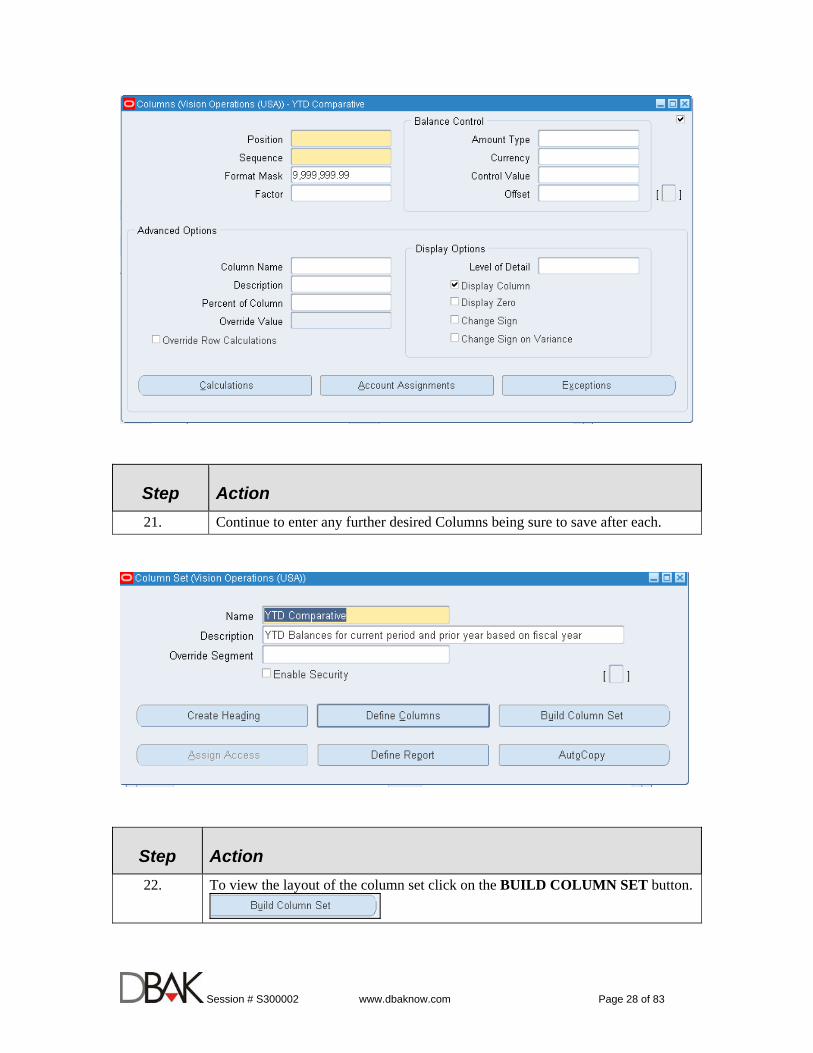
Step Action 18. Give the column a descriptive COLUMN NAME. 19. Click the SAVE button.
20. Click the CLOSE WINDOW icon.
Session # S300002 www.dbaknow.com Page 28 of 83
Step Action 21. Continue to enter any further desired Columns being sure to save after each.
Step Action 22. To view the layout of the column set click on the BUILD COLUMN SET button.

Session # S300002 www.dbaknow.com Page 29 of 83
Step Action 23. You can change the desired column width by typing the number of desired
characters directly in the WIDTH box for each column.

Session # S300002 www.dbaknow.com Page 30 of 83
Step Action 24. To enter cusomized column headings click in the HEADING boxes. You can
have up to 3 rows for the heading. The following code will dynamically put the period name in the column heading: &POIx where x is the period offset. So in this example &POI0 will put the current period name and &POI-13 will put the period name from 13 months ago.

Session # S300002 www.dbaknow.com Page 31 of 83
Step Action 25. To change the LEFT MARGIN (how much space is allowed for the row
description) type the desired number of characters in the LEFT MARGIN box.

Session # S300002 www.dbaknow.com Page 32 of 83
Step Action 26. After making the desired changes to the column layout, click OK or APPLY to
save your changes. BE AWARE that changes you make here affect the column definition screens and vice versa.
27. End of Procedure.

Session # S300002 www.dbaknow.com Page 33 of 83
Define Content Set
Procedure
Step Action 1. Under the General Ledger Super User responsibility navigate to
REPORTS>DEFINE>CONTENT SET.

Session # S300002 www.dbaknow.com Page 34 of 83
Step Action 2. Enter desired CONTENT SET name and DESCRIPTION.
Step Action
Session # S300002 www.dbaknow.com Page 35 of 83
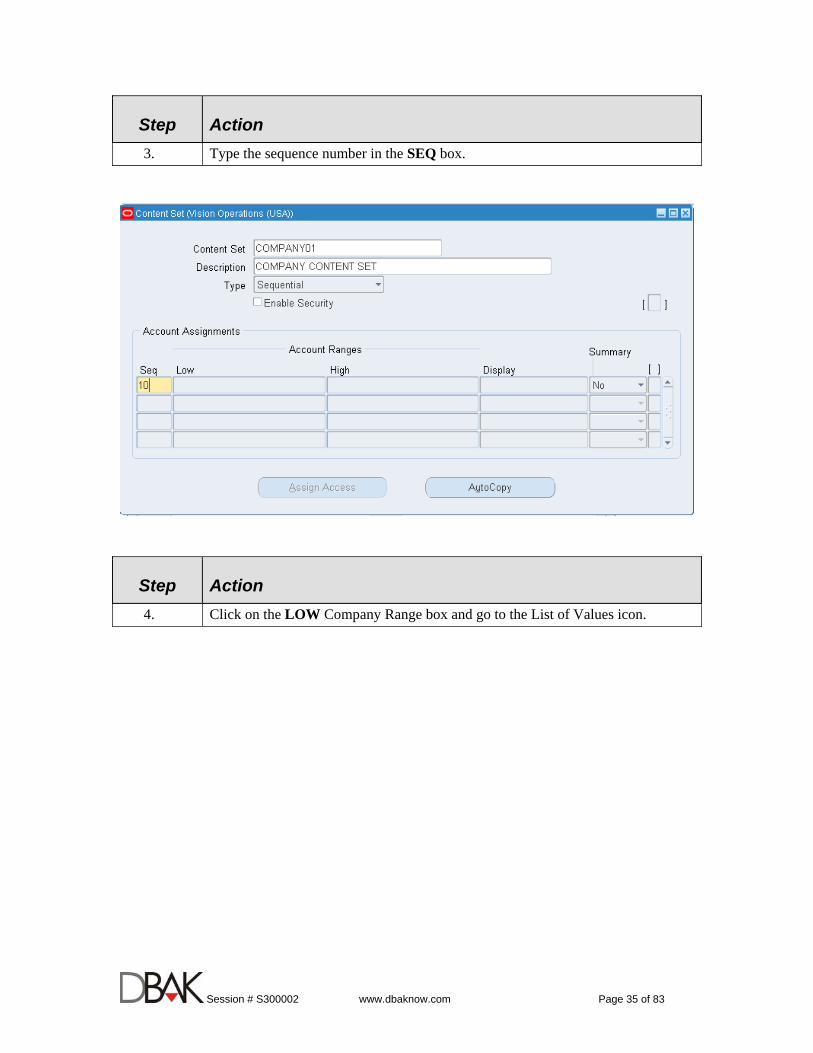
Step Action 3. Type the sequence number in the SEQ box.
Step Action 4. Click on the LOW Company Range box and go to the List of Values icon.

Session # S300002 www.dbaknow.com Page 36 of 83
Step Action 5. Click on the segment value you wish to limit the data by. 6. Select the appropriate value.
7. If you want the segment value to be displayed in the report select PE for Page
Expand under DISPLAY. Click on OK when done selecting the options.

Session # S300002 www.dbaknow.com Page 37 of 83
Step Action 8. Click on SAVE.

Session # S300002 www.dbaknow.com Page 38 of 83
Step Action 9. Click on the Close Window icon.
10. End of Procedure.

Session # S300002 www.dbaknow.com Page 39 of 83
Define a Report
Procedure
Step Action 1. Using the General Ledger Super User responsibility, navigate to
REPORTS>DEFINE>REPORT.

Session # S300002 www.dbaknow.com Page 40 of 83
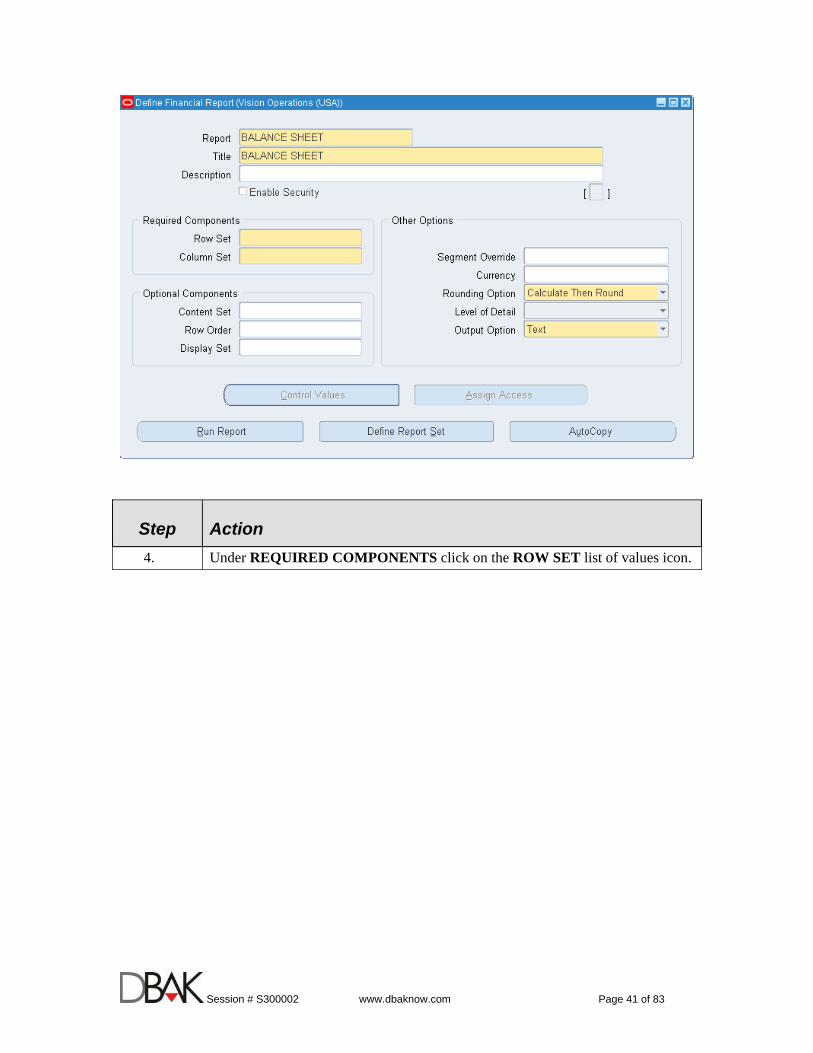
Step Action 2. Enter a descriptive name in the REPORT field. 3. Enter the title that you want to appear at the top of the report in the TITLE field.
Session # S300002 www.dbaknow.com Page 41 of 83
Step Action 4. Under REQUIRED COMPONENTS click on the ROW SET list of values icon.
Session # S300002 www.dbaknow.com Page 42 of 83
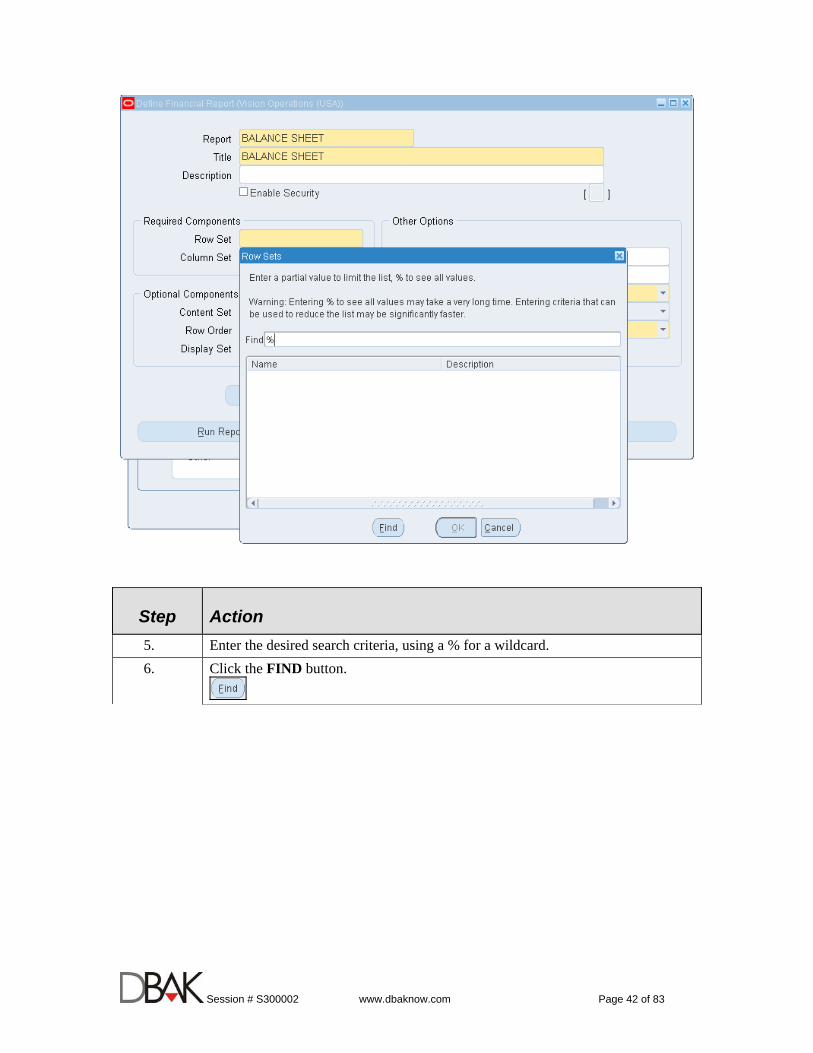
Step Action 5. Enter the desired search criteria, using a % for a wildcard. 6. Click the FIND button.

Session # S300002 www.dbaknow.com Page 43 of 83
Step Action 7. Select the desired ROW SET and click on OK.

Session # S300002 www.dbaknow.com Page 44 of 83
Step Action 8. Under REQUIRED COMPONENTS, click on the COLUMN SET List of
Values icon.

Session # S300002 www.dbaknow.com Page 45 of 83
Step Action 9. Select the desired COLUMN SET and click on OK.

Session # S300002 www.dbaknow.com Page 46 of 83
Step Action 10. CONTENT SET is used to limit the data/amounts that are reported.
For instance, if you want a Company specific Balance Sheet you could set up a content set for that specific Company and then select it here.

Session # S300002 www.dbaknow.com Page 47 of 83
Step Action 11. Click on the OUTPUT OPTION List of Values icon to see a list of outputs.

Session # S300002 www.dbaknow.com Page 48 of 83
Step Action 12. Select the desired output option from the list.

Session # S300002 www.dbaknow.com Page 49 of 83
Step Action 13. Click on SAVE.

Session # S300002 www.dbaknow.com Page 50 of 83
Step Action 14. Click on the CLOSE WINDOW icon.
15. End of Procedure.

Session # S300002 www.dbaknow.com Page 51 of 83
REPORT PUBLISHING USING REPORT MANAGER Starting with Release 12, the Application Desktop Integrator (ADI) is no longer available. In its place is a robust self service tool called Report Manager. This tool can be used to publish Financial Statement reports and drilldown on those reports. It also includes a Report Repository to store reports and archive them. This allows for easy access to already published reports and the contents of the repository can be distributed to the Oracle E-Business Suite home page. Finally, Report Manager contains a Security Workbench that allows for the tightening down of security on Financial Statements. Report Manager was available for 11i, but a few enchancements in Release 12 have made it more efficient and flexible. Some of these enhancements include:
Report Manager now comes preinstalled so there is no patching to be completed. Request Sets now run as one concurrent request instead of a request per report in the set.
This makes managing request more efficient and no longer causes a backlog for other requests.
You can now select a Ledger at run time creating a very flexible reporting tool that can be reused across your Enterprise.
It is a Self Service Application that can be published in XML. There is now an Expansion Value that allows for ad hoc filtering of the FSG reports.
PROCEDURE FOR PUBLISHING FINANCIAL REPORTS

Session # S300002 www.dbaknow.com Page 52 of 83
Step Action 1. To run Financial Statement Reports, select the Report Manager Responsibility
and click on Financial Report Submission.
Step Action 2. Click the Search for Report Name button.

Session # S300002 www.dbaknow.com Page 53 of 83
Step Action 3. Find the report you want to run and click on the Quick Select Button next to the
report name.
Session # S300002 www.dbaknow.com Page 54 of 83
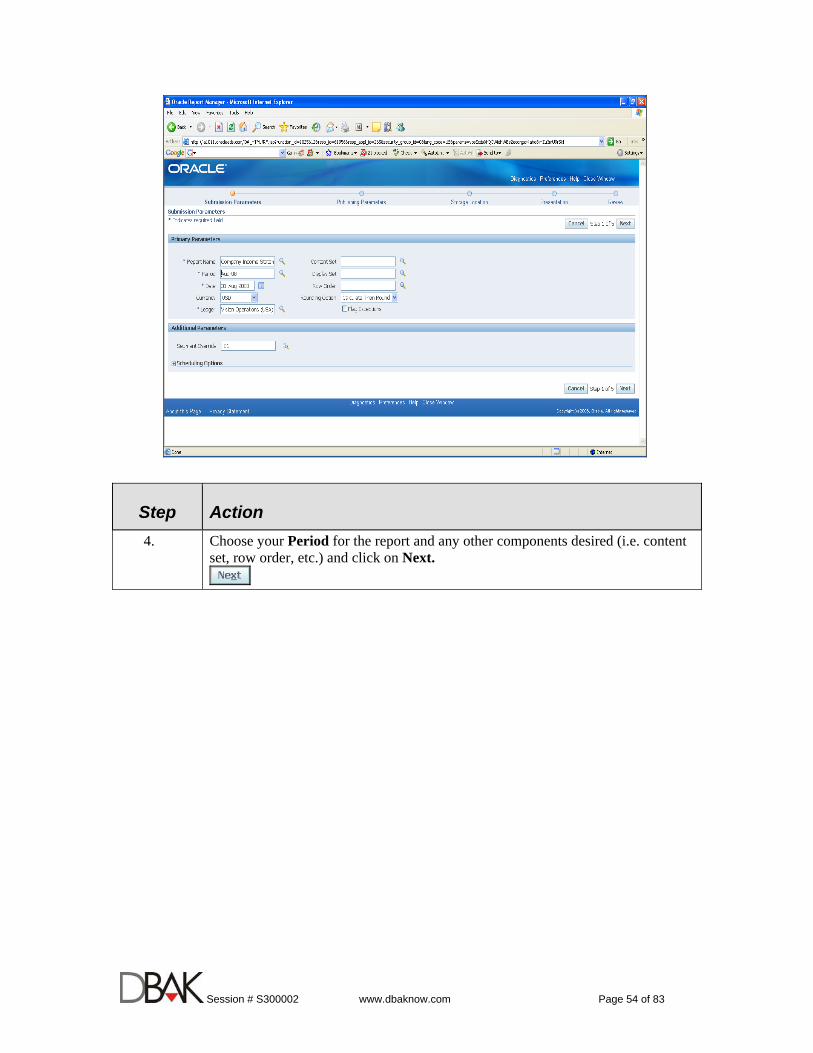
Step Action 4. Choose your Period for the report and any other components desired (i.e. content
set, row order, etc.) and click on Next.

Session # S300002 www.dbaknow.com Page 55 of 83
Step Action 5. Click the Search icon to lookup a Template.

Session # S300002 www.dbaknow.com Page 56 of 83
Step Action 6. Click the Next button.

Session # S300002 www.dbaknow.com Page 57 of 83
Step Action 7. All reports must now go to a Repository directory. Click on the Expand button
to see a list of directories.

Session # S300002 www.dbaknow.com Page 58 of 83
Step Action 8. Click the Select bubble for the applicable report Repository directory.

Session # S300002 www.dbaknow.com Page 59 of 83
Step Action 9. Click the Next button.

Session # S300002 www.dbaknow.com Page 60 of 83
Step Action 10. Click the Next button.

Session # S300002 www.dbaknow.com Page 61 of 83
Step Action 11. Click the Submit button.

Session # S300002 www.dbaknow.com Page 62 of 83
Step Action 12. Click the Monitor Requests button.

Session # S300002 www.dbaknow.com Page 63 of 83
Step Action 13. Click the Refresh button until the Status of the requests is Completed.
You'll note two different requests are generated. The one denoted as Publish and Presentation Program is the actual report in presentation format. The one denoted as Financial Statement Generator is the report in XML.

Session # S300002 www.dbaknow.com Page 64 of 83
Step Action 14. Once a request has completed the Output button will be available. Click on the
button to view the results. Here we will see the XML output.

Session # S300002 www.dbaknow.com Page 65 of 83
Step Action 15. Here is the XML output. Click the Back button to return to Monitor Requests.

Session # S300002 www.dbaknow.com Page 66 of 83
Step Action 16. Clicking this Output button will display the presentation format of the report.

Session # S300002 www.dbaknow.com Page 67 of 83
Step Action 17. Click the Output Type to change the format of the output.
PROCEDURE FOR DRILLING DOWN ON FINANCIAL REPORTS

Session # S300002 www.dbaknow.com Page 68 of 83
Step Action 1. Run a Financial Report from the Report Manager responsibility using a template
that is set for Drilldown. Once the report is complete, click on the Output button for the Publish and Presentation Program.
2. Click the View Report Now link.
Session # S300002 www.dbaknow.com Page 69 of 83
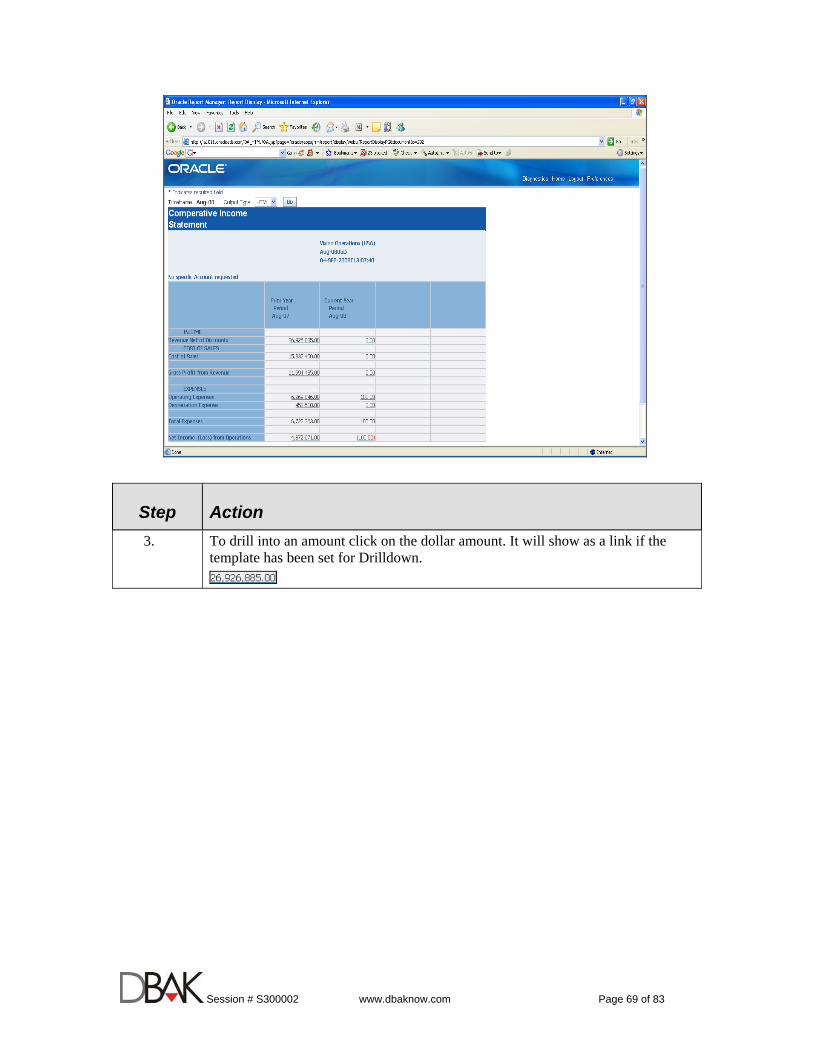
Step Action 3. To drill into an amount click on the dollar amount. It will show as a link if the
template has been set for Drilldown.
Session # S300002 www.dbaknow.com Page 70 of 83
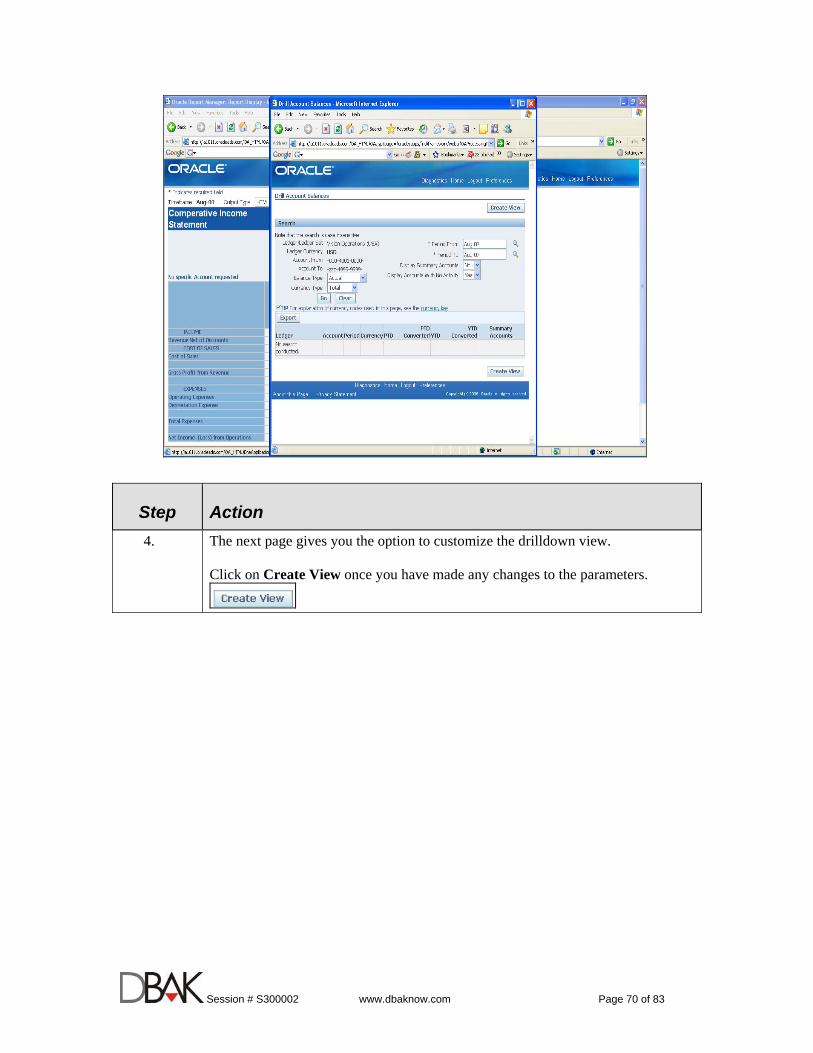
Step Action 4. The next page gives you the option to customize the drilldown view.
Click on Create View once you have made any changes to the parameters.

Session # S300002 www.dbaknow.com Page 71 of 83
Step Action 5. Again you will have the option to make further changes to the drilldown view. For
instance, you can change what columns are displayed in the drilldown. Put in a View Name (required). After making any changes, click the Apply and View Results button.

Session # S300002 www.dbaknow.com Page 72 of 83
Step Action 6. The next screen is a summary of all accounts that make up the line on the
Financial Statement. To further drill click on the PTD Amount you want to see detail for - it will be displayed as a link.

Session # S300002 www.dbaknow.com Page 73 of 83
Step Action 7. This page displays the journal source of the amount. Click on the Amount or
Create View to drill further.

Session # S300002 www.dbaknow.com Page 74 of 83
Step Action 8. Select an amount by clicking on the Select bubble next to the amount. Click on
the View Transaction button. This will take you back into the Application and to the actual transaction for the amount selected.

Session # S300002 www.dbaknow.com Page 75 of 83
Step Action 9. Select the appropriate responsibility to view the transaction. In this instance we
are drilling on a Receivable transaction so we will select a Receivables responsibility.

Session # S300002 www.dbaknow.com Page 76 of 83
Step Action 10. The actual transaction will be displayed.

Session # S300002 www.dbaknow.com Page 77 of 83
PROCEDURES FOR CREATING/EDITING REPORT TEMPLATES
Step Action 1. Click the Financial Report Template Editor link.
2. Select a current report to use for creating or modifying a Template for.
3. Click the Select icon next to the report name you want to use to create/edit your
template with.
4. Click the Excel Template Editor list item.
5. Select the Create New button to add a new Template. Select the Modify Existing button to edit a current template. You will then need to select the Template Name you wish to modify.
6.
Click the Lookup icon to select the Template to edit.
7.
Click the Select button next to the Template Name.

Session # S300002 www.dbaknow.com Page 78 of 83
Step Action 8. Click the Create button.
9.
Click Yes if an ActiveX message is received.
10. After making any formatting changes in Excel, click on the Oracle menu option.
NOTE: All formatting options that are available in Excel are available for report Templates.
Step Action 11. Select Upload to upload the edited/new Template to Report Manager.

Session # S300002 www.dbaknow.com Page 79 of 83
Step Action 12. Complete the Template Name and Description (leave the same if you are editing
an existing Template, change if you'd like to save to a new Template). 13.
Be sure to check the Enable Drill box if you want to be able to drill down on the report.

Session # S300002 www.dbaknow.com Page 80 of 83
Step Action 14. Click on the Upload button.

Session # S300002 www.dbaknow.com Page 81 of 83
REPOSITORY MANAGEMENT PROCEDURES
Step Action 1. Select a Report Manager Responsibility and click on Repository Management. 2. Use the Expand Button to view the contents of the Repository.

Session # S300002 www.dbaknow.com Page 82 of 83
Step Action 3. Continue to use the Expand Buttons to view contents of the Repository.

Session # S300002 www.dbaknow.com Page 83 of 83
Step Action 4. To Delete or Archive Reports, check the Select box next to the report and select
the Delete or Archive buttons. To view the report click on the View icon next to the report. You can also create a menu item for any report contained in the Repository by clicking on the Create Menu Item icon next to the report. To change the Publishing parameters of a report click on the Update icon. You can change the template and the date parameters and when you click on view the report will display with the new parameters in place. Using the Move icon you can move reports or folders contained in the Repository.
To Add a folder to the Repository click the + icon next to the folder you want to add it under.