quick start guide - zosi tech
TRANSCRIPT

Quick Start Guide
For more information of the camera, please go to ZOSI official website: www.zositech.com
Zosi Smart iOS/Android

1
1 What’s in the Box
1 x Camera 1 x Power Adapter 1 x Quick Start Guide
1 x Waterproof Lid
1 x Warning Sticker
1 x Mounting Screw Bag 1 x Mounting Hole Template

2
2 Specs
Antenna
LED SpotlightsIR-LEDsMicrophone
RESET Button
RJ45 PortPower Port
Speaker
Micro SD Card Slot

3
3 Installation Diagram

4
4 Register an AccountThe following is instruction for the Android user, the interface of the ios version will be slightly different.● Scan the QR code on the device and download the free ZOSI Smart App on phone.● Tap ‘Register’ to register an account.● Enter your email address and click "Get Code" to receive a verification code. Enter the verification code and password, and then tap Register to finish.Note: If you have not received the verification code, please check if the verification code is considered spam or try to send another email.
5
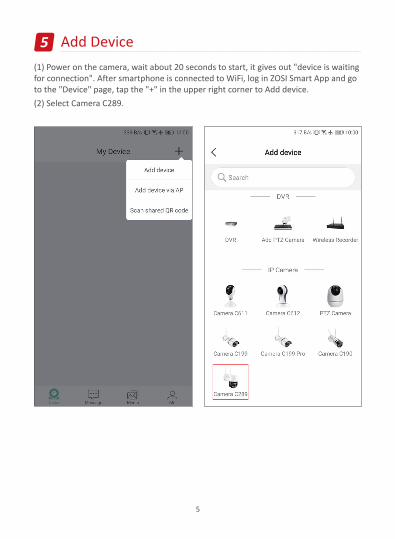
5 Add Device(1) Power on the camera, wait about 20 seconds to start, it gives out "device is waiting for connection". After smartphone is connected to WiFi, log in ZOSI Smart App and go to the "Device" page, tap the "+" in the upper right corner to Add device.(2) Select Camera C289.
6
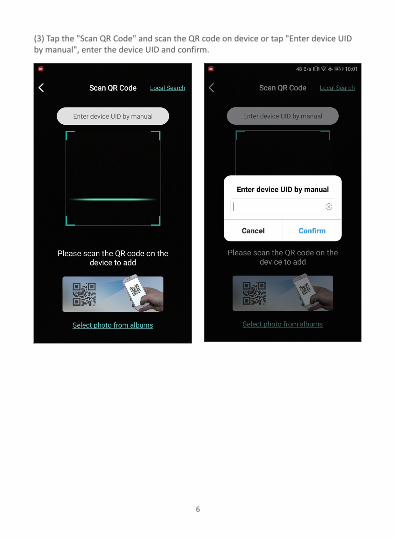
(3) Tap the "Scan QR Code" and scan the QR code on device or tap "Enter device UID by manual", enter the device UID and confirm.

7
(4) On the Device Information page, enter the device name and click "Add an unconnected device", confirm.
8
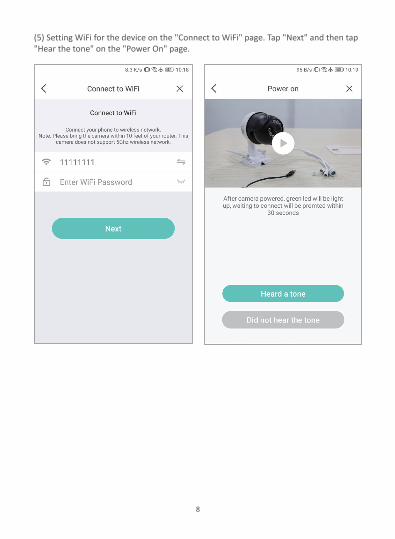
(5) Setting WiFi for the device on the "Connect to WiFi" page. Tap "Next" and then tap "Hear the tone" on the "Power On" page.
9
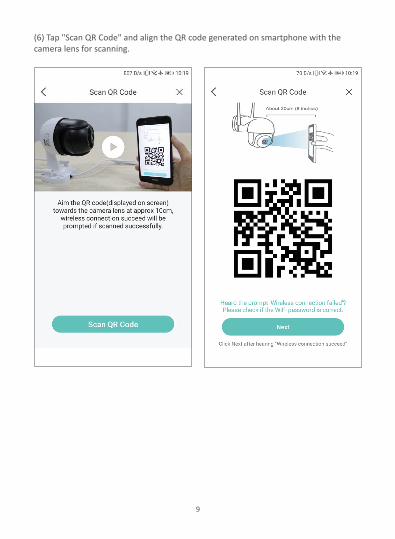
(6) Tap "Scan QR Code" and align the QR code generated on smartphone with the camera lens for scanning.

10
(7) Camera make a click sound, and you will hear "Wireless configuration successful" "WiFi is connecting, please wait" and after hearing "Wireless connection succeeds", tap "Next" and "Confirm" in the pop-up box. Tap "Done" on the "Device Added successfully" page.
NOTE: If the device is not added successfully, please reset the device by pressing the device reset button for 5 seconds, and then add device again according to the above steps.
11
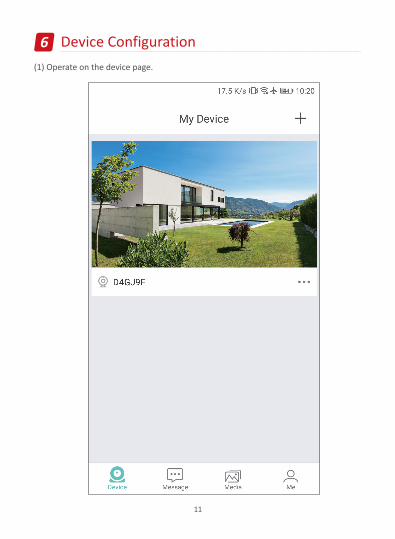
6 Device Configuration(1) Operate on the device page.

12
(2) Manually turn on the alarm function, the device will set off a beep sound warning, and the strobe light will continuously emit brilliant flashing light to deter the intruder. At the same time, a one-minute manual alarm countdown will pop up.
13
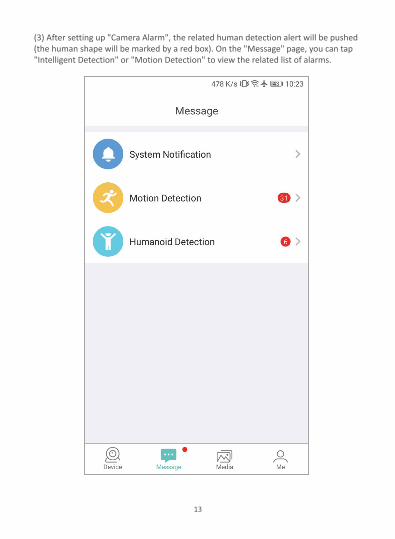
(3) After setting up "Camera Alarm", the related human detection alert will be pushed (the human shape will be marked by a red box). On the "Message" page, you can tap "Intelligent Detection" or "Motion Detection" to view the related list of alarms.
14
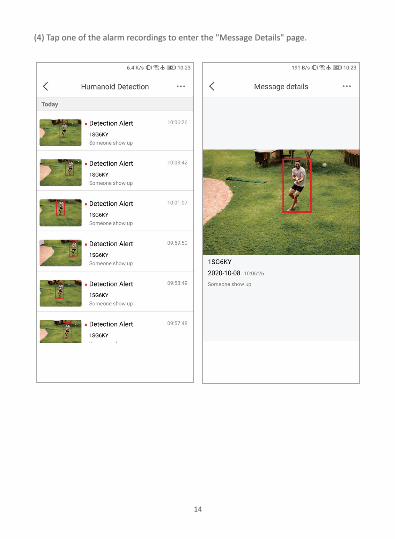
(4) Tap one of the alarm recordings to enter the "Message Details" page.
15
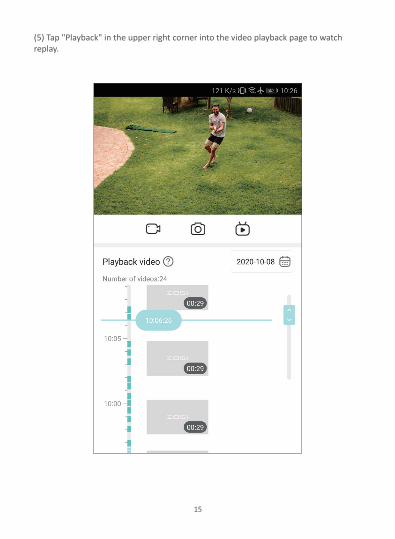
(5) Tap "Playback" in the upper right corner into the video playback page to watch replay.
16
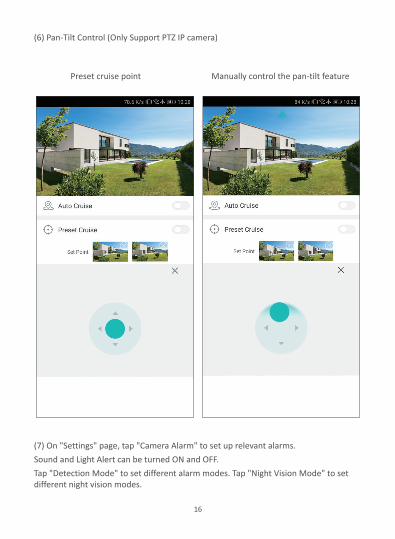
(6) Pan-Tilt Control (Only Support PTZ IP camera)
Preset cruise point Manually control the pan-tilt feature
(7) On "Settings" page, tap "Camera Alarm" to set up relevant alarms.Sound and Light Alert can be turned ON and OFF.Tap "Detection Mode" to set different alarm modes. Tap "Night Vision Mode" to set different night vision modes.

17
NOTE: For better human detection effects, please refer to the following installation requirements:The height of the installed camera is 2.2-2.5 meters from the ground, and the effective detection distance is 1-20 meters from the device.The installation angle is mainly head-up view and overhead view, which to ensure average illumination in the monitoring area.
18
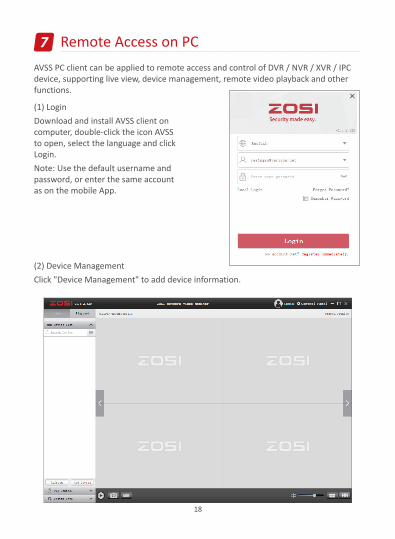
7 Remote Access on PCAVSS PC client can be applied to remote access and control of DVR / NVR / XVR / IPC device, supporting live view, device management, remote video playback and other functions.
(1) LoginDownload and install AVSS client on computer, double-click the icon AVSS to open, select the language and click Login.Note: Use the default username and password, or enter the same account as on the mobile App.
(2) Device ManagementClick "Device Management" to add device information.
19
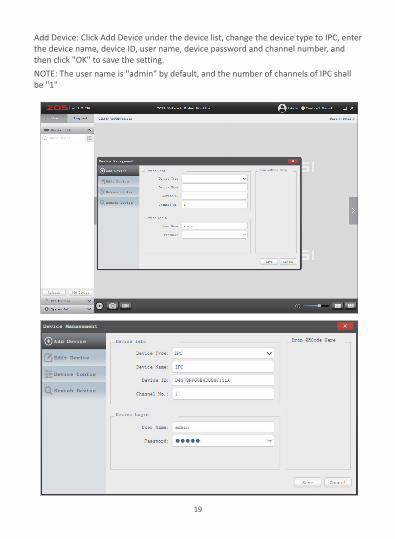
Add Device: Click Add Device under the device list, change the device type to IPC, enter the device name, device ID, user name, device password and channel number, and then click "OK" to save the setting.NOTE: The user name is "admin" by default, and the number of channels of IPC shall be "1"

20
(3) Live ViewClick "Live" to display the device list, right-click the device name, select Play All/ Stop All, Play/ Stop live view and other operations on the device. NOTE: The user name is "admin" by default, and the number of channels of IPC shall be "1".

21
(4) Remote Playback Click "Playback", select the device, channel and date, click "Search Now" to find the video you want to replay. Select the point in time on the timeline, and click the "Play" button to start playing recorded video from certain timing.
22
1.Q: Why can't I add a device by local search? A: Please make sure the device and mobile phone are in the same LAN. If you can't make both of them in the same LAN, please manually enter the device UID to add a device.
2.Q: Why is the device disconnected? A: Please check ▪ Whether the device is connected to the network.▪ Whether the router is working normally. ▪ Whether the function of 'Obtain IP address automatically' is chosen or not.
3.Q: Why can't I find the video recording files? A: Please check▪ Whether the SD card is damaged.▪ Whether the date of the searched file is valid. ▪ Whether the time of the device system is correct.
8 FAQs