psychopymanual
TRANSCRIPT
PsychoPy - Psychology software forPython
Release 1.65.01
Jonathan Peirce
July 07, 2011

CONTENTS
1 Overview 31.1 Features . . . . . . . . . . . . . . . . . . . . . . . . . . . . . . . . . . . . . . . . . . . . . . . . . . 31.2 Hardware Integration . . . . . . . . . . . . . . . . . . . . . . . . . . . . . . . . . . . . . . . . . . . 41.3 System requirements . . . . . . . . . . . . . . . . . . . . . . . . . . . . . . . . . . . . . . . . . . . 41.4 How to cite PsychoPy . . . . . . . . . . . . . . . . . . . . . . . . . . . . . . . . . . . . . . . . . . 41.5 Help PsychoPy . . . . . . . . . . . . . . . . . . . . . . . . . . . . . . . . . . . . . . . . . . . . . . 4
2 Contributing to the project 52.1 Why make it free? . . . . . . . . . . . . . . . . . . . . . . . . . . . . . . . . . . . . . . . . . . . . 52.2 How do I contribute changes? . . . . . . . . . . . . . . . . . . . . . . . . . . . . . . . . . . . . . . 52.3 Contribute to the Forum (mailing list) . . . . . . . . . . . . . . . . . . . . . . . . . . . . . . . . . . 5
3 Credits 73.1 Developers . . . . . . . . . . . . . . . . . . . . . . . . . . . . . . . . . . . . . . . . . . . . . . . . 73.2 Included packages . . . . . . . . . . . . . . . . . . . . . . . . . . . . . . . . . . . . . . . . . . . . 73.3 Funding . . . . . . . . . . . . . . . . . . . . . . . . . . . . . . . . . . . . . . . . . . . . . . . . . . 7
4 Installation 94.1 Recommended hardware . . . . . . . . . . . . . . . . . . . . . . . . . . . . . . . . . . . . . . . . . 94.2 Windows: . . . . . . . . . . . . . . . . . . . . . . . . . . . . . . . . . . . . . . . . . . . . . . . . . 94.3 Mac OS X: . . . . . . . . . . . . . . . . . . . . . . . . . . . . . . . . . . . . . . . . . . . . . . . . 94.4 Linux: . . . . . . . . . . . . . . . . . . . . . . . . . . . . . . . . . . . . . . . . . . . . . . . . . . 104.5 Dependencies . . . . . . . . . . . . . . . . . . . . . . . . . . . . . . . . . . . . . . . . . . . . . . . 104.6 Suggested packages . . . . . . . . . . . . . . . . . . . . . . . . . . . . . . . . . . . . . . . . . . . 11
5 Getting Started 13
6 General issues 156.1 Monitor Center . . . . . . . . . . . . . . . . . . . . . . . . . . . . . . . . . . . . . . . . . . . . . . 156.2 Units for the window and stimuli . . . . . . . . . . . . . . . . . . . . . . . . . . . . . . . . . . . . 166.3 Color spaces . . . . . . . . . . . . . . . . . . . . . . . . . . . . . . . . . . . . . . . . . . . . . . . 176.4 Preferences . . . . . . . . . . . . . . . . . . . . . . . . . . . . . . . . . . . . . . . . . . . . . . . . 196.5 Data outputs . . . . . . . . . . . . . . . . . . . . . . . . . . . . . . . . . . . . . . . . . . . . . . . 216.6 Timing Issues and synchronisation . . . . . . . . . . . . . . . . . . . . . . . . . . . . . . . . . . . . 22
7 Builder 277.1 Builder concepts . . . . . . . . . . . . . . . . . . . . . . . . . . . . . . . . . . . . . . . . . . . . . 277.2 Routines . . . . . . . . . . . . . . . . . . . . . . . . . . . . . . . . . . . . . . . . . . . . . . . . . 297.3 Flow . . . . . . . . . . . . . . . . . . . . . . . . . . . . . . . . . . . . . . . . . . . . . . . . . . . 297.4 Components . . . . . . . . . . . . . . . . . . . . . . . . . . . . . . . . . . . . . . . . . . . . . . . 31
i
7.5 Experiment settings . . . . . . . . . . . . . . . . . . . . . . . . . . . . . . . . . . . . . . . . . . . 387.6 Generating outputs (datafiles) . . . . . . . . . . . . . . . . . . . . . . . . . . . . . . . . . . . . . . 397.7 Common mistakes (aka gotcha’s) . . . . . . . . . . . . . . . . . . . . . . . . . . . . . . . . . . . . 407.8 Future developments . . . . . . . . . . . . . . . . . . . . . . . . . . . . . . . . . . . . . . . . . . . 40
8 Coder 418.1 Basic Concepts . . . . . . . . . . . . . . . . . . . . . . . . . . . . . . . . . . . . . . . . . . . . . . 418.2 Tutorials . . . . . . . . . . . . . . . . . . . . . . . . . . . . . . . . . . . . . . . . . . . . . . . . . 45
9 Troubleshooting 539.1 The application doesn’t start . . . . . . . . . . . . . . . . . . . . . . . . . . . . . . . . . . . . . . . 539.2 I run a Builder experiment and nothing happens . . . . . . . . . . . . . . . . . . . . . . . . . . . . . 539.3 Manually turn off the viewing of output . . . . . . . . . . . . . . . . . . . . . . . . . . . . . . . . . 549.4 Use the source (Luke?) . . . . . . . . . . . . . . . . . . . . . . . . . . . . . . . . . . . . . . . . . . 549.5 Cleaning preferences and app data . . . . . . . . . . . . . . . . . . . . . . . . . . . . . . . . . . . . 54
10 Recipes (“How-to”s) 5710.1 Builder - providing feedback . . . . . . . . . . . . . . . . . . . . . . . . . . . . . . . . . . . . . . . 5710.2 Generating formatted strings . . . . . . . . . . . . . . . . . . . . . . . . . . . . . . . . . . . . . . . 5810.3 Coder - interleave staircases . . . . . . . . . . . . . . . . . . . . . . . . . . . . . . . . . . . . . . . 58
11 Frequently Asked Questions (FAQs) 6111.1 Why is the bits++ demo not working? . . . . . . . . . . . . . . . . . . . . . . . . . . . . . . . . . . 6111.2 Can PsychoPy run my experiment with sub-millisecond timing? . . . . . . . . . . . . . . . . . . . . 61
12 Resources (e.g. for teaching) 6312.1 Upcoming events . . . . . . . . . . . . . . . . . . . . . . . . . . . . . . . . . . . . . . . . . . . . . 6312.2 Previous events . . . . . . . . . . . . . . . . . . . . . . . . . . . . . . . . . . . . . . . . . . . . . . 63
13 Reference Manual (API) 6513.1 psychopy.core - basic functions (clocks etc.) . . . . . . . . . . . . . . . . . . . . . . . . . . . . 6513.2 psychopy.visual - many visual stimuli . . . . . . . . . . . . . . . . . . . . . . . . . . . . . . 6513.3 psychopy.data - functions for storing/saving/analysing data . . . . . . . . . . . . . . . . . . . . 9313.4 psychopy.event - for getting keypress and mouse clicks . . . . . . . . . . . . . . . . . . . . . . 10513.5 psychopy.filters - helper functions for creating filters . . . . . . . . . . . . . . . . . . . . . . 10713.6 psychopy.gui - create dialogue boxes . . . . . . . . . . . . . . . . . . . . . . . . . . . . . . . . 10913.7 psychopy.hardware - hardware interfaces . . . . . . . . . . . . . . . . . . . . . . . . . . . . . 11113.8 psychopy.info - functions for getting information about the system . . . . . . . . . . . . . . . . 12013.9 psychopy.log - control what gets logged . . . . . . . . . . . . . . . . . . . . . . . . . . . . . . 12113.10 psychopy.misc - miscellaneous routines for converting units etc . . . . . . . . . . . . . . . . . . 12413.11 psychopy.monitors - for those that don’t like Monitor Center . . . . . . . . . . . . . . . . . . 12513.12 psychopy.parallel - functions for interacting with the parallel port . . . . . . . . . . . . . . . 13113.13 psychopy.serial - functions for interacting with the serial port . . . . . . . . . . . . . . . . . . 13113.14 psychopy.sound - play various forms of sound . . . . . . . . . . . . . . . . . . . . . . . . . . . 13213.15 Indices and tables . . . . . . . . . . . . . . . . . . . . . . . . . . . . . . . . . . . . . . . . . . . . 133
14 For Developers 13514.1 Using the repository . . . . . . . . . . . . . . . . . . . . . . . . . . . . . . . . . . . . . . . . . . . 13514.2 Adding a new Builder Component . . . . . . . . . . . . . . . . . . . . . . . . . . . . . . . . . . . . 137
15 PsychoPy Experiment file format (.psyexp) 14115.1 Parameters . . . . . . . . . . . . . . . . . . . . . . . . . . . . . . . . . . . . . . . . . . . . . . . . 14115.2 Settings . . . . . . . . . . . . . . . . . . . . . . . . . . . . . . . . . . . . . . . . . . . . . . . . . . 14115.3 Routines . . . . . . . . . . . . . . . . . . . . . . . . . . . . . . . . . . . . . . . . . . . . . . . . . 14215.4 Components . . . . . . . . . . . . . . . . . . . . . . . . . . . . . . . . . . . . . . . . . . . . . . . 142
ii
15.5 Flow . . . . . . . . . . . . . . . . . . . . . . . . . . . . . . . . . . . . . . . . . . . . . . . . . . . 14215.6 Names . . . . . . . . . . . . . . . . . . . . . . . . . . . . . . . . . . . . . . . . . . . . . . . . . . 142
16 Glossary 145
17 Indices 147
Python Module Index 149
Index 151
iii

iv

PsychoPy - Psychology software for Python, Release 1.65.01
Contents:
CONTENTS 1

PsychoPy - Psychology software for Python, Release 1.65.01
2 CONTENTS
CHAPTER
ONE
OVERVIEW
PsychoPy is an open-source package for running experiments in Python (a real and free alternative to Matlab). Psy-choPy combines the graphical strengths of OpenGL with the easy Python syntax to give scientists a free and simplestimulus presentation and control package. It is used by many labs worldwide for psychophysics, cognitive neuro-science and experimental psychology.
Because it’s open source, you can download it and modify the package if you don’t like it. And if you make changesthat others might use then please consider giving them back to the community via the mailing list. PsychoPy has beenwritten and provided to you absolutely for free. For it to get better it needs as much input from everyone as possible.
1.1 Features
There are many advantages to using PsychoPy, but here are some of the key ones
• Simple install process
• Huge variety of stimuli (see screenshots) generated in real-time:
– linear gratings, bitmaps constantly updating
– radial gratings
– random dots
– movies (DivX, mov, mpg...)
– text (unicode in any truetype font)
– shapes
– sounds (tones, numpy arrays, wav, ogg...)
• Platform independent - run the same script on Win, OS X or Linux
• Flexible stimulus units (degrees, cm, or pixels)
• Coder interface for those that like to program
• Builder interface for those that don’t
• Input from keyboard, mouse or button boxes
• Multi-monitor support
• Automated monitor calibration (requires PR650 or Minolta LS110)
3
PsychoPy - Psychology software for Python, Release 1.65.01
1.2 Hardware Integration
PsychoPy supports communication via serial ports, parallel ports and compiled drivers (dlls and dylibs), so it can talk to any hardware that your computer can! Interfaces are prebuilt for;
• Spectrascan PR650
• Minolta LS110
• Cambridge Research Systems Bits++
• Cedrus response boxes (RB7xx series)
1.3 System requirements
Although PsychoPy runs on a wide variety of hardware, and on Windows, OS X or Linux, it really does benefit froma decent graphics card. Get an ATI or nVidia card that supports OpenGL 2.0. Avoid built-in Intel graphics chips (e.g.GMA 950)
1.4 How to cite PsychoPy
A couple of papers have been written about PsychoPy already. Please cite them if you use the software.
1. Peirce, JW (2007) PsychoPy - Psychophysics software in Python. J Neurosci Methods, 162(1-2):8-13
2. Peirce JW (2009) Generating stimuli for neuroscience using PsychoPy. Front. Neuroinform. 2:10.doi:10.3389/neuro.11.010.2008
1.5 Help PsychoPy
PsychoPy is an open-source, community-driven project. It is written and provided free out of goodwill by people thatmake no money from it and have other jobs to do. The way that open-source projects work is that users contributeback some of their time. If you can improve PsychoPy, either by;
• fixing incorrect or unclear documentation - just email some improved text
• fixing a minor bug in the code
• writing a little feature that can be added
• if nothing else, then at least tell the primary developers that a bug exists - they likely don’t know!
For more information on how to view and edit the documentation and code see the section on Contributing to theproject
4 Chapter 1. Overview

CHAPTER
TWO
CONTRIBUTING TO THE PROJECT
PsychoPy is an open-source project. It was originally written by Jon Peirce to run vision science experiments in hislab. He felt that others might find it useful and made it available by releasing it for free on the web.
2.1 Why make it free?
It has taken, literally, thousands of hours of programming to get PsychoPy where it is today and it is provided absolutelyfor free. Without somone working on it full time (which would entail charging you for the result) the only way for thesoftware to keep getting better is if people contribute back to the project.
Please, please, please make the effort to give a little back to this project. If you found the documentation hard tounderstand then think about how you would have preferred it to be written and contribute it.
2.2 How do I contribute changes?
For simple changes, and for users that aren’t so confident with things like version control systems then just send yourchanges to the mailing list as described here.
If you want to make more substantial changes then discuss them on the developers mailing list.
The ideal model, for For Developers that know about git and may make more frequent contributions, is to create yourown clone of the project on github, make changes to that and then send a pull request to have them merged back intothe main repository.
2.3 Contribute to the Forum (mailing list)
The easiest way to help the project is to write to the forum (mailing list) with suggestions and solutions.
For documentation suggestions please try to provide actual replacement text. You, as a user, are probably better placedto write this than the actual developers (they know too much to write good docs)!
If you’re having problems, e.g. you think you may have found a bug:
• take a look at the Troubleshooting first
• submit a message with as much information as possible about your system and the problem
• please try to be precise. Rather than say “It didn’t work” try to say what what specific form of “notworking” you found (did the stimulus not appear? or it appeared but poorly rendered? or the wholeapplication crashed?!)
5
PsychoPy - Psychology software for Python, Release 1.65.01
• if there is an error message, try to provide it completely
If you had problems and worked out how to fix things, even if it turned out the problem was your own lack of under-standing, please still contribute the information. Others are likely to have similar problems. Maybe the documentationcould be clearer, or your email to the forum will be found by others googling for the same problem.
To make your message more useful you should, please try to:
• provide info about your system and PsychoPy version(e.g. the output of the sysInfo demo in coder). A lotof problems are specific to a particular graphics card or platform
• provide a minimal example of the breaking code (if you’re writing scripts)
6 Chapter 2. Contributing to the project
CHAPTER
THREE
CREDITS
3.1 Developers
PsychoPy is predominantly written and maintained by ‘Jon Peirce‘_ but has received code from a number of contrib-utors:
• Jeremy Gray (various aspects of code and ideas)
• Yaroslav Halchenko (building the Debian package and a lot more)
• Dave Britton
• Ariel Rokem
• Gary Strangman
• C Luhmann
3.2 Included packages
The PsychoPy library always includes a copy of:
• pyparallel by Chris Liechti. Used by psychopy.parallel
• quest.py by Andrew Straw. Used by QuestHandler
The Standalone versions also include the Suggested packages
3.3 Funding
PsychoPy project has attracted small grants from the HEA Psychology Network and Cambridge Research Systems .Thanks to those organisations for their support.
Jon is paid by The University of Nottingham, and has been funded by the BBSRC
7

PsychoPy - Psychology software for Python, Release 1.65.01
8 Chapter 3. Credits
CHAPTER
FOUR
INSTALLATION
Like many python modules PsychoPy is built and dependent on a number of other libraries (OpenGL, numpy...).Details on how to install those are below.
4.1 Recommended hardware
The bare minimum requirements for PsychoPy are a graphics card that supports OpenGL (most graphics cards do,but on windows you should install new drivers from the graphics card the windows-supplied drivers are buggy andsometimes don’t support OpenGL at all).
Ideally OpenGL 2.0 should be supported - certain functions run much faster with where it is available and some stimuli(e.g. ElementArrayStim) even requires it. At the time this was last updated dabs.co.uk were selling the GeForce9500GT for £45, which would be an excellent card for most experiments.
If you’re thinking of buying a laptop for running experiments, avoid the built-in intel graphics chips (e.g. GMA 950).The drivers are crumby and performance is poor. Get something with nVidia or ATI chips instead.
4.2 Windows:
If you’re new to python then you probably want to install the standalone package. This includes a copy of python andall the dependent libraries (if you do have python already installed, that won’t be touched by this installation). Onceinstalled, you’ll now find a link to the PsychoPy application in >Start>Progams>PsychoPy2. Click that and then onthe demos menu to get going.
You should make sure you have reasonably current drivers for your graphics card (download the latest from thevendor, rather than using the pre-installed windows drivers).
The standalone installer adds the PsychoPy folder to your path, so you can run the included version of python fromthe command line etc. If you have your own version of python installed as well then you need to check which one isrun by default, and change your path according to your personal preferences.
4.3 Mac OS X:
There are different ways to install PsychoPy on a mac that will suit different users
• Intel Mac users (with OS X v10.5) can simply download the standalone application bundle (the dmg file) anddrag it to their Applications folder. The app bundle contains its own independent python and all the dependenciesand will not interact with anything else on your system (except its own preferences).
9
PsychoPy - Psychology software for Python, Release 1.65.01
• Users of macports can install PsychoPy and all its dependencies simply with: sudo port installpy25-psychopy
(thanks James Kyles for that).
• For PPC macs (or for intel mac users that want their own custom python for running PsychoPy) you need toinstall the dependencies and PsychoPy manually. The easiest way is to use the Enthought Python Distribution.It’s free (for academic use) and the only things it misses are avbin (if you want to play movies) and pygame (forsound reproduction). You could alternatively manually install the ‘framework build’ of python and downloadall the dependencies below. One advantage to this is that you can then upgrade versions with:
sudo /usr/local/bin/easy_install-2.5 -N -Z -U psychopy
4.4 Linux:
For Debian users, PsychoPy is in the Debian packages index so you can simply do:
sudo apt-get install psychopy
For Debian-based distributions (e.g. Ubuntu):
1. Add the following sources in Synaptic, in the Configuration>Repository dialog box, under “Other software”:
deb http://neuro.debian.net/debian karmic main contrib non-freedeb-src http://neuro.debian.net/debian karmic main contrib non-free
2. Then follow the ‘Package authentification’ procedure described in http://neuro.debian.net/
3. Then install the psychopy package under Synaptic or through sudo apt-get install psychopy which will installall dependencies.
For non-Debian systems you need to install the dependencies below manually and then PsychoPy (with easy_install?).
Thanks to Yaroslav Halchenko for his work on the Debian package.
4.5 Dependencies
If you want to install each library individually rather than use the simple distributions of packages above then you candownload the following. Make sure you get the correct version for your OS and your version of Python.
• Python (2.4.x or 2.5.x, NOT version 3)
• setuptools
• numpy (version 0.9.6 or greater)
• scipy (version 0.4.8 or greater)
• pyglet (version 1.1 or greater)
• pygame (for playing sounds. Must be version 1.8 or greater)
• pywin32 (only needed for Windows)
• wxPython (version 2.8 or greater)
• Python Imaging Library (easier to install with setuptools/easy_install)
• matplotlib (for plotting stuff)
10 Chapter 4. Installation
PsychoPy - Psychology software for Python, Release 1.65.01
• winioport (to use the parallel port, win32 only)
• ctypes (this is already included in python 2.5)
• lxml (needed for printing saving builder experiment files)
4.6 Suggested packages
In addition to the required packages above, there are numerous other additional packages that are useful to PsychoPyusers, e.g. for controlling hardware and performing specific tasks. These are packaged with the Standalone versionsof PsychoPy but users with their own custom Python environment need to install these manually to use them. Most ofthese can be installed with easy_install
General packages:
• psignifit for bootsrtapping and other resampling tests
• pyserial for interfacing with the serial port
• parallel python (aka pp) for parallel processing
Specific hardware interfaces:
• pynetstation to communicate with EGI netstation. See notes on using egi (pynetstation)
• ioLabs toolbox
• labjack tolbox
For developers:
• nose and coverage for running unit tests (if this means nothing to you don’t worry)
• sphinx for documentation
Please send feedback to the mailing list.
4.6. Suggested packages 11

PsychoPy - Psychology software for Python, Release 1.65.01
12 Chapter 4. Installation

CHAPTER
FIVE
GETTING STARTED
PsychoPy has three main components; the application Coder view, the Builder view and an underlying API program-ming library. These can be used in various ways depending on the user’s preference and experience:
1. Builder view. For those that prefer not to program, and for those new to Python, you can generate a wide rangeof experiments easily from the Builder. This has an intuitive, graphical user interface (GUI). You can alwaysexport your experiment to a script for fine-tuning, and this might be an ideal way for experienced programmersto learn the syntax of python
2. Coder view For those comfortable with programming, but maybe inexperienced with Python, the Coder view isideal. This is a relative basic editor but does support syntax highlighting and code folding etc... It also has ademo menu where you can checkout a wide variety of PsychoPy scripts to get you started.
3. The API Experienced python programmers can simply import the libraries and use like any other package (theCoder tutorials and demos should help get you going and the API reference will give you the details).
The Builder and Coder views are both components of the PsychoPy app. If you’ve installed the standalone version ofPsychoPy on MS Windows then their should be an obvious link to PsychoPy in your >Start>Programs. If you installedthe standalone version on OS X then the app is where you dragged it (!). On these two platforms you can open theBuilder and Coder views from the View menu and the default view can be set from the preferences.
If the PsychoPy app is created with flags –coder (or -c), or –builder (or -b) e.g. on Linux, then the preferences will beoverridden and that view will be created as the app opens.
13

PsychoPy - Psychology software for Python, Release 1.65.01
14 Chapter 5. Getting Started
CHAPTER
SIX
GENERAL ISSUES
6.1 Monitor Center
PsychoPy provides a simple and intuitive way for you to calibrate your monitor and provide other information aboutit and then import that information into your experiment.
Information is inserted in the Monitor Center (Tools menu), which allows you to store information about multiplemonitors and keep track of multiple calibrations for the same monitor.
For experiments written in the Builder view, you can then import this information by simply specifying the name ofthe monitor that you wish to use in the Experiment settings dialog. For experiments created as scripts you can retrievethe information when creating the Window by simply naming the monitor that you created in Monitor Center. e.g.:
from psychopy import visualwin = visual.Window([1024,768], mon=’SonyG500’)
Of course, the name of the monitor in the script needs to match perfectly the name given in the Monitor Center.
6.1.1 Real world units
One of the particular features of PsychoPy is that you can specify the size and location of stimuli in units that areindependent of your particular setup, such as degrees of visual angle (see Units for the window and stimuli). In orderfor this to be possible you need to inform PsychoPy of some characteristics of your monitor. Your choice of unitsdetermines the information you need to provide:
Units Requires‘norm’ (normalised to widht/height) n/a‘pix’ (pixels) Screen width in pixels‘cm’ (centimeters on the screen) Screen width in pixels and screen width in cm‘deg’ (degrees of visual angle) Screen width (pixels), screen width (cm) and distance (cm)
6.1.2 Calibrating your monitor
PsychoPy can also store and use information about the gamma correction required for your monitor. If you havea Spectrascan PR650 (other devices will hopefully be added) you can perform an automated calibration in whichPsychoPy will measure the necessary gamma value to be applied to your monitor. Alternatively this can be addedmanually into the grid to the right of the Monitor Center. To run a calibration, connect the PR650 via the serial portand, immediately after turning it on press the Find PR650 button in the Monitor Center.
Note that, if you don’t have a photometer to hand then there is a method for determining the necessary gamma valuepsychophysically included in PsychoPy (see gammaMotionNull and gammaMotionAnalysis in the demos menu).
15
PsychoPy - Psychology software for Python, Release 1.65.01
The two additional tables in the Calibration box of the Monitor Center provide conversion from DKL and LMS colourspaces to RGB.
6.2 Units for the window and stimuli
One of the key advantages of PsychoPy over many other experiment-building software packages is that stimuli can bedescribed in a wide variety of real-world, device-independent units. In most other systems you provide the stimuli ata fixed size and location in pixels, or percentage of the screen, and then have to calculate how many cm or degrees ofvisual angle that was.
In PsychoPy, after providing information about your monitor, via the Monitor Center, you can simply specify yourstimulus in the unit of your choice and allow PsychoPy to calculate the appropriate pixel size for you.
Your choice of unit depends on the circumstances. For conducting demos, the two normalised units (‘norm’ and‘height’) are often handy because the stimulus scales naturally with the window size. For running an experiment it’susually best to use something like ‘cm’ or ‘deg’ so that the stimulus is a fixed size irrespective of the monitor/window.
For all units, the centre of the screen is represented by coordinates (0,0), negative values mean down/left, positivevalues mean up/right.
6.2.1 Height units
With ‘height’ units everything is specified relative to the height of the window (note the window, not the screen).As a result, the dimensions of a screen with standard 4:3 aspect ratio will range (-0.6667,-0.5) in the bottom left to(+0.6667,+0.5) in the top right. For a standard widescreen (16:10 aspect ratio) the bottom left of the screen is (-0.8,-0.5) and top-right is (+0.8,+0.5). This type of unit can be useful in that it scales with window size, unlike Degrees ofvisual angle or Centimeters on screen, but stimuli remain square, unlike Normalised units units. Obviously it has thedisadvantage that the location of the right and left edges of the screen have to be determined from a knowledge of thescreen dimensions. (These can be determined at any point by the Window.size attribute.)
Spatial frequency: cycles per stimulus (so will scale with the size of the stimulus).
Requires : No monitor information
6.2.2 Normalised units
In normalised (‘norm’) units the window ranges in both x and y from -1 to +1. That is, the top right of the windowhas coordinates (1,1), the bottom left is (-1,-1). Note that, in this scheme, setting the height of the stimulus to be 1.0,will make it half the height of the window, not the full height (because the window has a total height of 1:-1 = 2!).Also note that specifying the width and height to be equal will not result in a square stimulus if your window is notsquare - the image will have the same aspect ratio as your window. e.g. on a 1024x768 window the size=(1,0.75) willbe square.
Spatial frequency: cycles per stimulus (so will scale with the size of the stimulus).
Requires : No monitor information
6.2.3 Centimeters on screen
Set the size and location of the stimulus in centimeters on the screen.
Spatial frequency: cycles per cm
Requires : information about the screen width in cm and size in pixels
16 Chapter 6. General issues

PsychoPy - Psychology software for Python, Release 1.65.01
Assumes : pixels are square. Can be verified by drawing a stimulus with matching width and height and verifying thatit is in fact square. For a CRT this can be controlled by setting the size of the viewable screen (settings on the monitoritself).
6.2.4 Degrees of visual angle
Use degrees of visual angle to set the size and location of the stimulus. This is, of course, dependent on the distancethat the participant sits from the screen as well as the screen itself, so make sure that this is controlled, and rememberto change the setting in Monitor Center if viewing the distance changes.
Spatial frequency: cycles per degree
Requires : information about the screen width in cm and pixels and the viewing distance in cm
Assumes : that all parts of the screen are a constant distance from the eye (ie that the screen is curved!). This (clearlyincorrect assumption) is common to most studies that report the size of their stimulus in degrees of visual angle. Theresulting error is small at moderate eccentricities (a 0.2% error in size calculation at 3 deg eccentricity) but grows asstimuli are placed further from the centre of the screen (a 2% error at 10 deg). For studies of peripheral vision thisshould be corrected for. PsychoPy also makes no correction for the thickness of the screen glass, which refracts theimage slightly.
6.3 Color spaces
The color of stimuli can be specified when creating a stimulus and when using setColor() in a variety of ways. Thereare three basic color spaces that PsychoPy can use, RGB, DKL and LMS but colors can also be specified by a name(e.g. ‘DarkSalmon’) or by a hexadecimal string (e.g. ‘#00FF00’).
examples:
stim = visual.PatchStim(win, color=[1,-1,-1], colorSpace=’rgb’) #will be redstim.setColor(’Firebrick’)#one of the web/X11 color namesstim.setColor(’#FFFAF0’)#an off-whitestim.setColor([0,90,1], colorSpace=’dkl’)#modulate along S-cone axis in isoluminant planestim.setColor([1,0,0], colorSpace=’lms’)#modulate only on the L conestim.setColor([1,1,1], colorSpace=’rgb’)#all guns to maxstim.setColor([1,0,0])#this is ambiguous - you need to specify a color space
6.3.1 Colors by name
Any of the web/X11 color names can be used to specify a color. These are then converted into RGB space by PsychoPy.
These are not case sensitive, but should not include any spaces.
6.3.2 Colors by hex value
This is really just another way of specifying the r,g,b values of a color, where each gun’s value is given by twohexadecimal characters. For some examples see this chart. To use these in PsychoPy they should be formatted as astring, beginning with # and with no spaces. (NB on a British Mac keyboard the # key is hidden - you need to pressAlt-3)
6.3. Color spaces 17
PsychoPy - Psychology software for Python, Release 1.65.01
6.3.3 RGB color space
This is the simplest color space, in which colors are represented by a triplet of values that specify the red green andblue intensities. These three values each range between -1 and 1.
Examples:
• [1,1,1] is white
• [0,0,0] is grey
• [-1,-1,-1] is black
• [1.0,-1,-1] is red
• [1.0,0.6,0.6] is pink
The reason that these colors are expressed ranging between 1 and -1 (rather than 0:1 or 0:255) is that many experiments,particularly in visual science where PsychoPy has its roots, express colors as deviations from a grey screen. Underthat scheme a value of -1 is the maximum decrement from grey and +1 is the maximum increment above grey.
6.3.4 DKL color space
To use DKL color space the monitor should be calibrated with an appropriate spectrophotometer, such as a PR650.
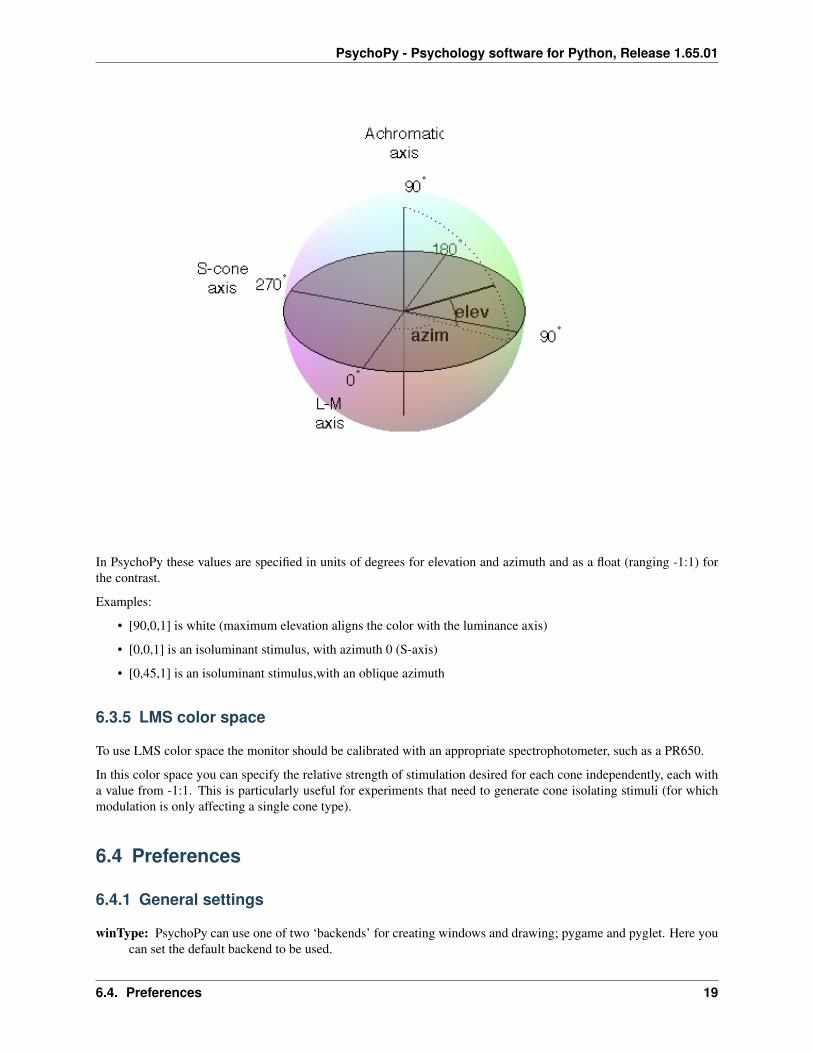
In the Derrington, Krauskopf and Lennie 1 color space (based on the Macleod and Boynton 2 chromaticity diagram)colors are represented in a 3-dimensional space using circular coordinates that specify the elevation from the isolumi-nant plane, the azimuth (the hue) and the contrast (as a fraction of the maximal modulations along the cardinal axes ofthe space).
1 Derrington, A.M., Krauskopf, J., & Lennie, P. (1984). Chromatic Mechanisms in Lateral Geniculate Nucleus of Macaque. Journal of Physiol-ogy, 357, 241-265.
2 MacLeod, D. I. A. & Boynton, R. M. (1979). Chromaticity diagram showing cone excitation by stimuli of equal luminance. Journal of theOptical Society of America, 69(8), 1183-1186.
18 Chapter 6. General issues
PsychoPy - Psychology software for Python, Release 1.65.01
In PsychoPy these values are specified in units of degrees for elevation and azimuth and as a float (ranging -1:1) forthe contrast.
Examples:
• [90,0,1] is white (maximum elevation aligns the color with the luminance axis)
• [0,0,1] is an isoluminant stimulus, with azimuth 0 (S-axis)
• [0,45,1] is an isoluminant stimulus,with an oblique azimuth
6.3.5 LMS color space
To use LMS color space the monitor should be calibrated with an appropriate spectrophotometer, such as a PR650.
In this color space you can specify the relative strength of stimulation desired for each cone independently, each witha value from -1:1. This is particularly useful for experiments that need to generate cone isolating stimuli (for whichmodulation is only affecting a single cone type).
6.4 Preferences
6.4.1 General settings
winType: PsychoPy can use one of two ‘backends’ for creating windows and drawing; pygame and pyglet. Here youcan set the default backend to be used.
6.4. Preferences 19

PsychoPy - Psychology software for Python, Release 1.65.01
units: Default units for windows and visual stimuli (‘deg’, ‘norm’, ‘cm’, ‘pix’). See Units for the window and stimuli.Can be overidden by individual experiments.
fullscr: Should windows be created full screen by default? Can be overidden by individual experiments.
allowGUI: When the window is created, should the frame of the window and the mouse pointer be visible. If set toFalse then both will be hidden.
6.4.2 Application settings
These settings are common to all components of the application (Coder and Builder etc)
largeIcons: Do you want large icons (on some versions of wx on OS X this has no effect)
defaultView: Determines which view(s) open when the PsychoPy app starts up. Default is ‘last’, which fetches thesame views as were open when PsychoPy last closed.
runScripts: Don’t ask. ;-) Just leave this option as ‘process’ for now!
allowModuleImports (only used by win32): Allow modules to be imported at startup for analysis by source assis-tant. This will cause startup to be slightly slower but will speedup the first analysis of a script.
6.4.3 Coder settings
outputFont: a list of font names to be used in the output panel. The first found on the system will be used
fontSize (in pts): an integer between 6 and 24 that specifies the size of fonts
codeFontSize = integer(6,24, default=12)
outputFontSize = integer(6,24, default=12)
showSourceAsst: Do you want to show the source assistant panel (to the right of the Coder view)? On windows thisprovides help about the current function if it can be found. On OS X the source assistant is of limitted use andis disabled by default.
analysisLevel: If using the source assistant, how much depth should PsychoPy try to analyse the current script? Lowervalues may reduce the amount of analysis performed and make the Coder view more responsive (particularlyfor files that import many modules and sub-modules).
analyseAuto: If using the source assistant, should PsychoPy try to analyse the current script on every save/load of thefile? The code can be analysed manually from the tools menu
showOutput: Show the output panel in the Coder view. If shown all python output from the session will be outputto this panel. Otherwise it will be directed to the original location (typically the terminal window that calledPsychoPy application to open).
reloadPrevFiles: Should PsychoPy fetch the files that you previously had open when it launches?
6.4.4 Builder settings
reloadPrevExp (default=False): for the user to add custom components (comma-separated list)
componentsFolders: a list of folder pathnames that can hold additional custom components for the Builder view
hiddenComponents: a list of components to hide (eg, because you never use them)
20 Chapter 6. General issues
PsychoPy - Psychology software for Python, Release 1.65.01
6.4.5 Connection settings
proxy: The proxy server used to connect to the internet if needed. Must be of the form http://111.222.333.444:5555
autoProxy: PsychoPy should try to deduce the proxy automatically (if this is True and autoProxy is successful thenthe above field should contain a valid proxy address).
allowUsageStats: Allow PsychoPy to ping a website at when the application starts up. Please leave this set to True.The info sent is simply a string that gives the date, PsychoPy version and platform info. There is no cost toyou: no data is sent that could identify you and PsychoPy will not be delayed in starting as a result. The aimis simple: if we can show that lots of people are using PsychoPy there is a greater chance of it being improvedfaster in the future.
checkForUpdates: PsychoPy can (hopefully) automatically fetch and install updates. This will only work for minorupdates and is still in a very experimental state (as of v1.51.00).
6.4.6 Key bindings
There are many shortcut keys that you can use in PsychoPy. For instance did you realise that you can indent or outdenta block of code with Ctrl-[ and Ctrl-] ?
6.5 Data outputs
There are a number of different forms of output that PsychoPy can generate, depending on the study and your preferredanalysis software. Multiple file types can be output from a single experiment (e.g. Excel data file for a quick browse,Log file to check for error mesages and PsychoPy data file (.psydat) for detailed analysis)
6.5.1 Log file
Log files are actually rather difficult to use for data analysis but provide a chronological record of everything thathappened during your study. The level of content in them depends on you. See Logging data for further information.
6.5.2 PsychoPy data file (.psydat)
This is actually a TrialHandler or StairHandler object that has been saved to disk with the python cPicklemodule.
These files are ideal for batch analysis with a python script and plotting via matplotlib. They contain more informationthan the Excel or csv data files, and can even be used to (re)create those files.
Of particular interest might be the attributes of the Handler:
extraInfo the extraInfo dictionary provided to the Handler during its creation
trialList the list of dictionaries provided to the Handler during its creation
data a dictionary of 2D numpy arrays. Each entry in the dictionary represents a type of data (e.g.if you added ‘rt’ data during your experiment using ~psychopy.data.TrialHandler.addData then‘rt’ will be a key). For each of those entries the 2D array represents the condition number andrepeat number (remember that these start at 0 in python, unlike matlab(TM) which starts at 1)
For example, to open a psydat file and examine some of its contents with:
6.5. Data outputs 21
PsychoPy - Psychology software for Python, Release 1.65.01
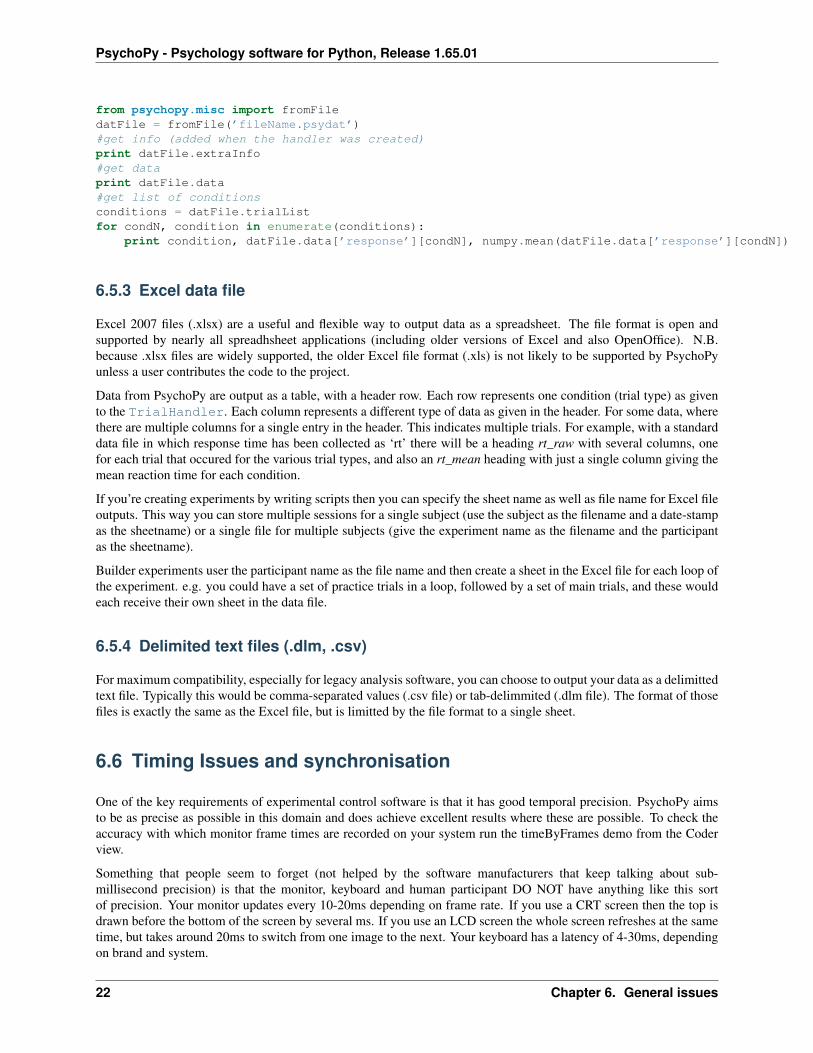
from psychopy.misc import fromFiledatFile = fromFile(’fileName.psydat’)#get info (added when the handler was created)print datFile.extraInfo#get dataprint datFile.data#get list of conditionsconditions = datFile.trialListfor condN, condition in enumerate(conditions):
print condition, datFile.data[’response’][condN], numpy.mean(datFile.data[’response’][condN])
6.5.3 Excel data file
Excel 2007 files (.xlsx) are a useful and flexible way to output data as a spreadsheet. The file format is open andsupported by nearly all spreadhsheet applications (including older versions of Excel and also OpenOffice). N.B.because .xlsx files are widely supported, the older Excel file format (.xls) is not likely to be supported by PsychoPyunless a user contributes the code to the project.
Data from PsychoPy are output as a table, with a header row. Each row represents one condition (trial type) as givento the TrialHandler. Each column represents a different type of data as given in the header. For some data, wherethere are multiple columns for a single entry in the header. This indicates multiple trials. For example, with a standarddata file in which response time has been collected as ‘rt’ there will be a heading rt_raw with several columns, onefor each trial that occured for the various trial types, and also an rt_mean heading with just a single column giving themean reaction time for each condition.
If you’re creating experiments by writing scripts then you can specify the sheet name as well as file name for Excel fileoutputs. This way you can store multiple sessions for a single subject (use the subject as the filename and a date-stampas the sheetname) or a single file for multiple subjects (give the experiment name as the filename and the participantas the sheetname).
Builder experiments user the participant name as the file name and then create a sheet in the Excel file for each loop ofthe experiment. e.g. you could have a set of practice trials in a loop, followed by a set of main trials, and these wouldeach receive their own sheet in the data file.
6.5.4 Delimited text files (.dlm, .csv)
For maximum compatibility, especially for legacy analysis software, you can choose to output your data as a delimittedtext file. Typically this would be comma-separated values (.csv file) or tab-delimmited (.dlm file). The format of thosefiles is exactly the same as the Excel file, but is limitted by the file format to a single sheet.
6.6 Timing Issues and synchronisation
One of the key requirements of experimental control software is that it has good temporal precision. PsychoPy aimsto be as precise as possible in this domain and does achieve excellent results where these are possible. To check theaccuracy with which monitor frame times are recorded on your system run the timeByFrames demo from the Coderview.
Something that people seem to forget (not helped by the software manufacturers that keep talking about sub-millisecond precision) is that the monitor, keyboard and human participant DO NOT have anything like this sortof precision. Your monitor updates every 10-20ms depending on frame rate. If you use a CRT screen then the top isdrawn before the bottom of the screen by several ms. If you use an LCD screen the whole screen refreshes at the sametime, but takes around 20ms to switch from one image to the next. Your keyboard has a latency of 4-30ms, dependingon brand and system.
22 Chapter 6. General issues
PsychoPy - Psychology software for Python, Release 1.65.01
So, yes, PsychoPy’s temporal precision can be very good, but the overall accuracy is likely to be severely limited byyour experimental hardware. Below are some further details on timing issues.
Warning: The information about timing in PsychoPy assumes that your graphics card is capable of synchronisingwith the monitor frame rate. For integrated Intel graphics chips (e.g. GMA 945) under Windows, this is not trueand the use of those chips is not recommended for serious experimental use as a result. Desktop systems can havea moderate graphics card added for around £30 which will be vastly superior in performance.
Contents:
6.6.1 Detecting dropped frames
Occasionally you will drop frames if you:
• try to do too much drawing
• do it in an innefficient manner (write poor code)
• have a poor computer/graphics card
Things to avoid:
• recreating textures for stimuli
• building new stimuli from scratch (create them once at the top of your script and then change them usingstim.setOri(ori)(), stim.setPos([x,y]...)
Turn on frame time recording
The key sometimes is knowing if you are dropping frames. PsychoPy can help with that by keeping track of framedurations. By default, frame time tracking is turned off because many people don’t need it, but it can be turned on anytime after Window creation setRecordFrameIntervals(), e.g.:
from psychopy import visual win = visual.Window([800,600]) win.setRecordFrameIntervals(True)
Since there are often dropped frames just after the system is initialised, it makes sense to start off with a fixation period,or a ready message and don’t start recording frame times until that has ended. Obviously if you aren’t refreshing thewindow at some point (e.g. waiting for a key press with an unchanging screen) then you should turn off the recordingof frame times or it will give spurious results.
Warn me if I drop a frame
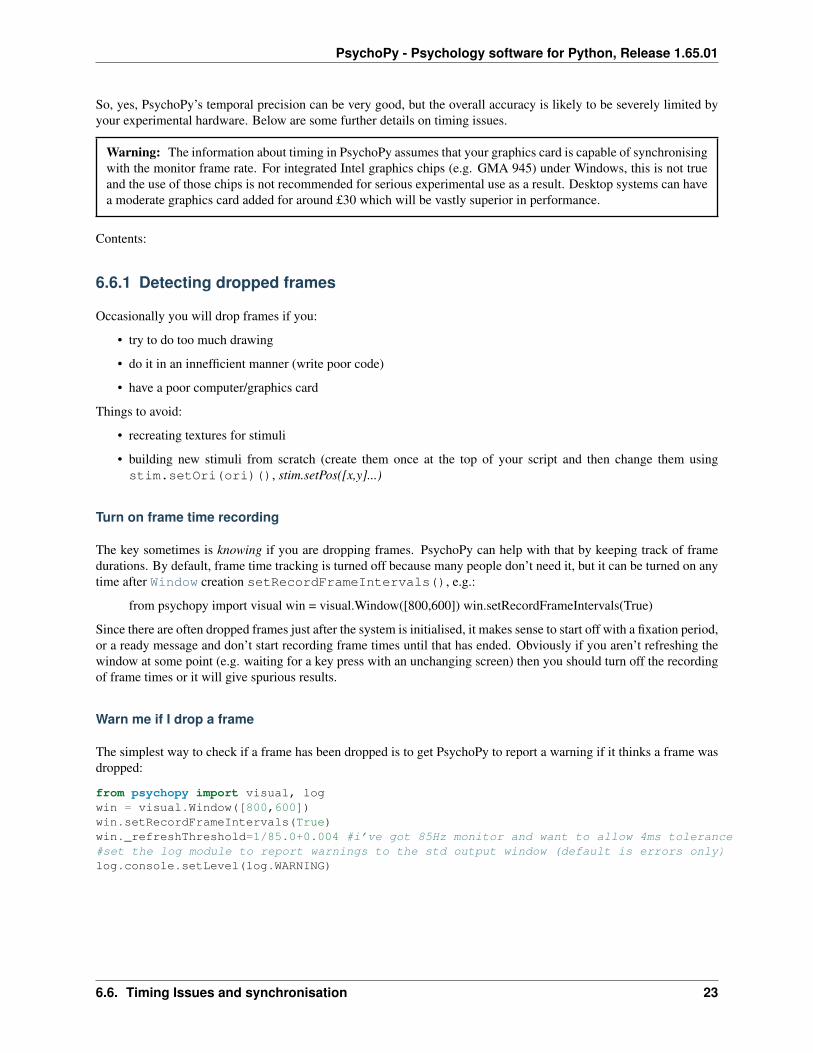
The simplest way to check if a frame has been dropped is to get PsychoPy to report a warning if it thinks a frame wasdropped:
from psychopy import visual, logwin = visual.Window([800,600])win.setRecordFrameIntervals(True)win._refreshThreshold=1/85.0+0.004 #i’ve got 85Hz monitor and want to allow 4ms tolerance#set the log module to report warnings to the std output window (default is errors only)log.console.setLevel(log.WARNING)
6.6. Timing Issues and synchronisation 23
PsychoPy - Psychology software for Python, Release 1.65.01
Show me all the frame times that I recorded
While recording frame times, these are simply appended, every frame to win.frameIntervals (a list). You can simplyplot these at the end of your script using pylab:
import pylabpylab.plot(win.frameIntervals)pylab.show()
Or you could save them to disk. A convenience function is provided for this:
win.saveFrameIntervals(fileName=None, clear=True)
The above will save the currently stored frame intervals (using the default filename, ‘lastFrameIntervals.log’) and thenclears the data. The saved file is a simple text file.
At any time you can also retrieve the time of the /last/ frame flip using win.lastFrameT (the time is synchronised withlog.defaultClock so it will match any logging commands that your script uses).
_blockingOnVBI:
‘Blocking’ on the VBI
As of version 1.62 PsychoPy ‘blocks’ on the vertical blank interval meaning that, once Window.flip() has been called,no code will be executed until that flip actually takes place. The timestamp for the above frame interval measure-ments is taken immediately after the flip occurs. Run the timeByFrames demo in Coder to see the precision of thesemeasurements on your system. They should be within 1ms of your mean frame interval.
Note that Intel integrated graphics chips (e.g. GMA 945) under win32 do not sync to the screen at all and so blockingon those machines is not possible.
6.6.2 Reducing dropped frames
There are many things that can affect the speed at which drawing is achieved on your computer. These include, but areprobably not limited to; your graphics card, CPU, operating system, running programs, stimuli, and your code itself.Of these, the CPU and the OS appear to make rather little difference. To determine whether you are actually droppingframes see Detecting dropped frames.
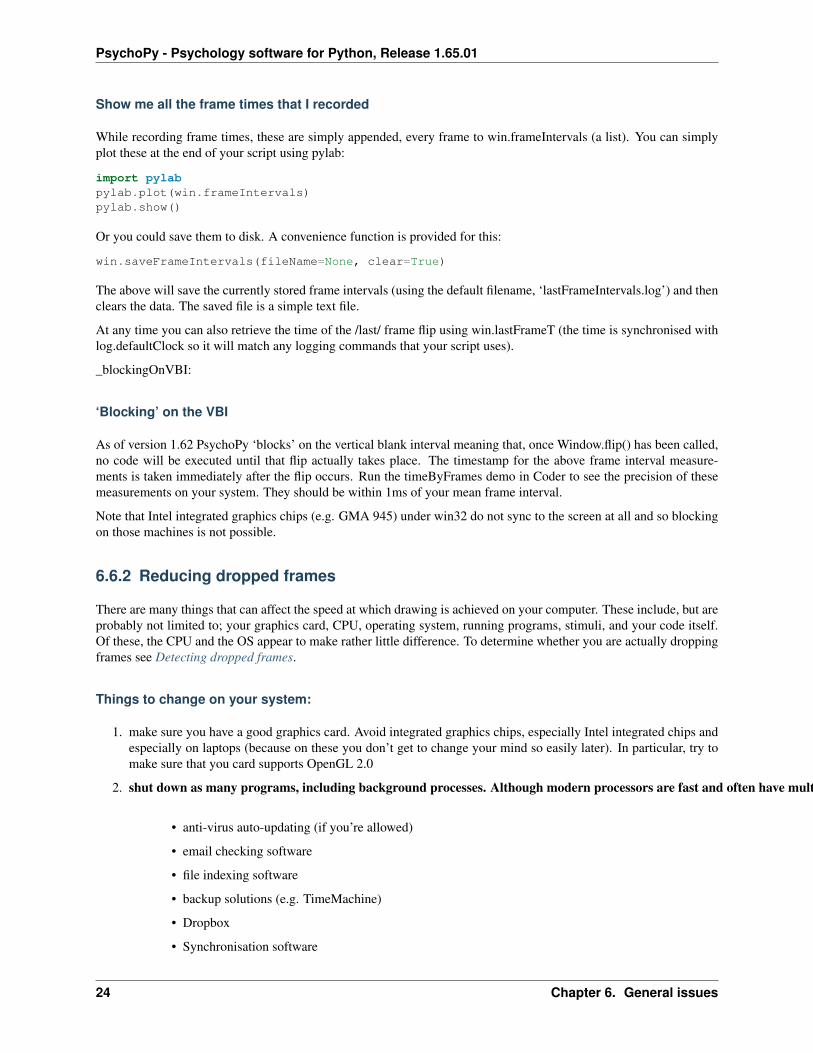
Things to change on your system:
1. make sure you have a good graphics card. Avoid integrated graphics chips, especially Intel integrated chips andespecially on laptops (because on these you don’t get to change your mind so easily later). In particular, try tomake sure that you card supports OpenGL 2.0
2. shut down as many programs, including background processes. Although modern processors are fast and often have multiple cores, substantial disk/memory accessing can cause frame drops
• anti-virus auto-updating (if you’re allowed)
• email checking software
• file indexing software
• backup solutions (e.g. TimeMachine)
• Dropbox
• Synchronisation software
24 Chapter 6. General issues
PsychoPy - Psychology software for Python, Release 1.65.01
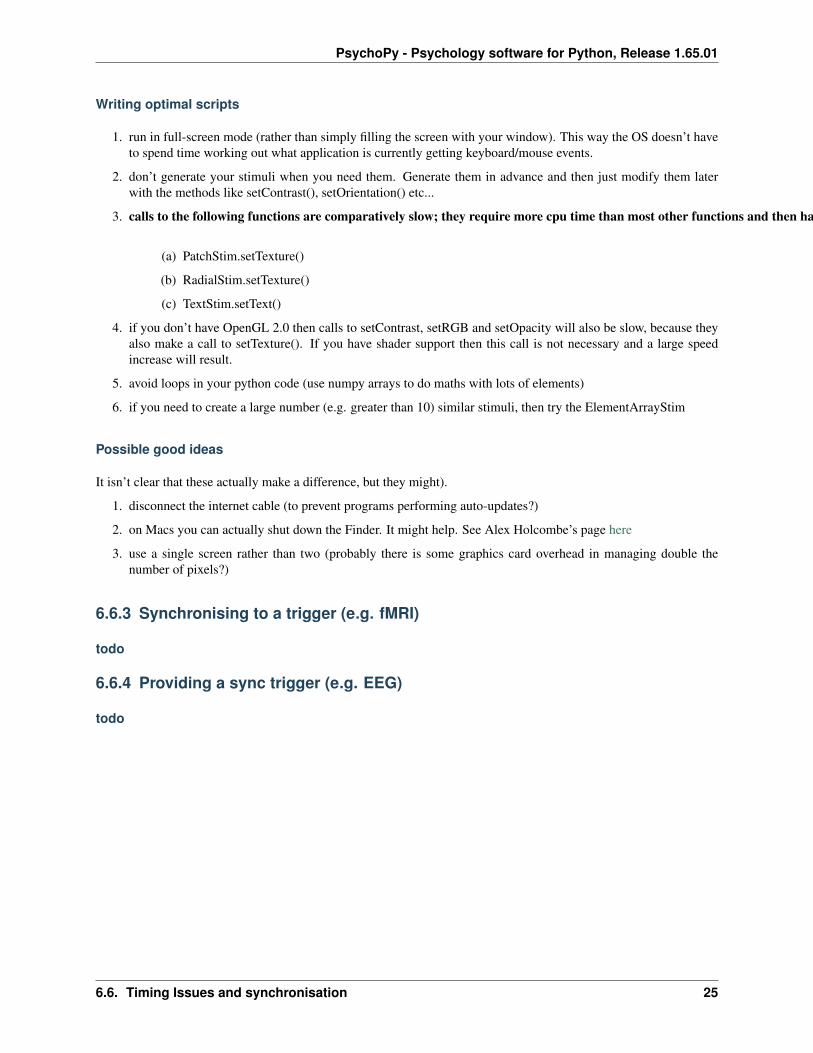
Writing optimal scripts
1. run in full-screen mode (rather than simply filling the screen with your window). This way the OS doesn’t haveto spend time working out what application is currently getting keyboard/mouse events.
2. don’t generate your stimuli when you need them. Generate them in advance and then just modify them laterwith the methods like setContrast(), setOrientation() etc...
3. calls to the following functions are comparatively slow; they require more cpu time than most other functions and then have to send a large amount of data to the graphics card. Try to use these methods in inter-trial intervals. This is especially true when you need to load an image from disk too as the texture.
(a) PatchStim.setTexture()
(b) RadialStim.setTexture()
(c) TextStim.setText()
4. if you don’t have OpenGL 2.0 then calls to setContrast, setRGB and setOpacity will also be slow, because theyalso make a call to setTexture(). If you have shader support then this call is not necessary and a large speedincrease will result.
5. avoid loops in your python code (use numpy arrays to do maths with lots of elements)
6. if you need to create a large number (e.g. greater than 10) similar stimuli, then try the ElementArrayStim
Possible good ideas
It isn’t clear that these actually make a difference, but they might).
1. disconnect the internet cable (to prevent programs performing auto-updates?)
2. on Macs you can actually shut down the Finder. It might help. See Alex Holcombe’s page here
3. use a single screen rather than two (probably there is some graphics card overhead in managing double thenumber of pixels?)
6.6.3 Synchronising to a trigger (e.g. fMRI)
todo
6.6.4 Providing a sync trigger (e.g. EEG)
todo
6.6. Timing Issues and synchronisation 25

PsychoPy - Psychology software for Python, Release 1.65.01
26 Chapter 6. General issues
CHAPTER
SEVEN
BUILDER
Building experiments in a GUI
Warning: As at version v1.61.00, the builder view is very much beta-testing software. Check carefully that thestimuli and response collection are as expected.
NB. PsychoPy users may be interested in the the NinStim package
Contents:
7.1 Builder concepts
7.1.1 Routines and Flow
The Builder view of the PsychoPy application is designed to allow the rapid development of a wide range of experi-ments for experimental psychology and cognitive neuroscience experiments.
The Builder view comprises two main panels for viewing the experiment’s Routines (upper left) and another forviewing the Flow (lower part of the window).
An experiment can have any number of Routines, describing the timing of stimuli, instructions and responses. Theseare portrayed in a simple track-based view, similar to that of video-editing software, which allows stimuli to come ongo off repeatedly and to overlap with each other.
The way in which these Routines are combined and/or repeated is controlled by the Flow panel. All experimentshave exactly one Flow. This takes the form of a standard flowchart allowing a sequence of routines to occur one afteranother, and for loops to be inserted around one or more of the Routines. The loop also controls variables that changebetween repetitions, such as stimulus attributes.
7.1.2 Example 1 - a reaction time experiment
For a simple reaction time experiment there might be 3 Routines, one that presents instructions and waits for a keypress,one that controls the trial timing, and one that thanks the participant at the end. These could then be combined in theFlow so that the instructions come first, followed by trial, followed by the thanks Routine, and a loop could be insertedso that the Routine repeated 4 times for each of 6 stimulus intensities.
27
PsychoPy - Psychology software for Python, Release 1.65.01
7.1.3 Example 2 - an fMRI block design
Many fMRI experiments present a sequence of stimuli in a block. For this there are multiple ways to create theexperiment: * We could create a single Routine that contained a number of stimuli and presented them sequentially,followed by a long blank period to give the inter-epoch interval, and surround this single Routine by a loop to controlthe blocks. * Alternatively we could create a pair of Routines to allow presentation of a) a single stimulus (for 1 sec)and b) a blank screen, for the prolonged period. With these Routines we could insert pair of loops, one to repeat thestimulus Routine with different images, followed by the blank Routine, and another to surround this whole set andcontrol the blocks.
7.1.4 Demos
There are a couple of demos included with the package, that you can find in their own special menu. When you loadthese the first thing to do is make sure the experiment settings specify the same resolution as your monitor, otherwisethe screen can appear off-centred and strangely scaled.
Stroop demo
This runs a digital demonstration of the Stroop effect 1. The experiment presents a series of coloured words writtenin coloured ‘inks’. Subjects have to report the colour of the letters for each word, but find it harder to do so when theletters are spelling out a different (incongruous) colour. Reaction times for the congruent trials (where letter colourmatches the written word) are faster than for the incongruent trials.
From this demo you should note:
• How to setup a trial list in a .csv file
• How to record key presses and reaction times (using the resp Component in trial Routine)
• How to change a stimulus parameter on each repetition of the loop. The text and rgb values of the wordComponent are based on thisTrial, which represents a single iteration of the trials loop. They have beenset to change every repeat (don’t forget that step!)
• How to present instructions: just have a long-lasting TextStim and then force end of the Routine when akey is pressed (but don’t bother storing the key press).
Grating demo
As at version 1.50.04 (I plan to update it to demo a mini psychophysics experiment), this is a very simple demo showing how to drift a Gabor stimulus in realtime. It shows a few things of note that differ to the Stroop demo:
• The stimulus orientation is governed by expInfo[’ori’], which is a python dictionary created in the Ex-periement Settings dialog
• The phase of the stimulus is set to change every frame and its value is determined by the value of tri-alClock.getTime()*2. Every Routine has a clock associated with it that gets reset at the beginning of theiteration through the Routine. There is also a globalClock that can be used in the same way. The phaseof a Patch Component ranges 0-1 (and wraps to that range if beyond it). The result in this case is that thegrating drifts at a rate of 2Hz.
1 Stroop, J.R. (1935). “Studies of interference in serial verbal reactions”. Journal of Experimental Psychology 18: 643-662.
28 Chapter 7. Builder
PsychoPy - Psychology software for Python, Release 1.65.01
7.2 Routines
An experiment consists of one or more Routines. A Routine might specify the timing of events within a trial or thepresentation of instructions or feedback. Multiple Routines can then be combined in the Flow, which controls theorder in which these occur and the way in which they repeat. To create a new Routine use the Experiment menu.
Within a Routine there are a number of components. These components determine the occurrence of a stimulus, or therecording of a response. Any number of components can be added to a Routine. Each has its own line in the Routineview that shows when the component starts and finishes in time, and these can overlap.
For now the time axis of the Routines panel is fixed, representing seconds (one line is one second). This will hopefullychange in the future so that units can also be number of frames (more precise) and can be scaled up or down to allowvery long or very short Routines to be viewed easily. That’s on the wishlist...
7.3 Flow
In the Flow panel a number of Routines can be combined to form an experiment. For instance, your study may have aRoutine that presented initial instructions and waited for a key to be pressed, followed by a Routine that presented onetrial which should be repeated 5 times with various different parameters set. All of this is achieved in the Flow panel.
7.3.1 Adding Routines
The Routines that the Flow will use should be generated first (although their contents can be added or altered at anytime). To insert a Routine into the Flow click the appropriate button in the left of the Flow panel or use the Experimentmenu. A dialog box will appear asking which of your Routines you wish to add and where to add it. To select thelocation choose the number (being shown in small black disks on the timeline) that corresponds to the location foryour Routine. Note that the numbers do not represent physical units of time (e.g. seconds), merely an ordering.
7.3.2 Loops
Loops control the repetition of Routines and the choice of stimulus parameters for each. PsychoPy can generate thenext trial based on the method of constants or using an adaptive staircase. To insert a loop use the button on the leftof the Flow panel, or the item in the Experiment menu of the Builder. The start and end of a loop is set in the sameway as the location of a Routine (see above) using numbers to indicate the entry points on the time line. Loops canencompass one or more Routines and other loops (i.e. they can be nested).
As with components in Routines, the loop must be given a name, which must be unique and made up of only alpha-numeric characters (underscores are allowed). I would normally use a plural name, since the loop represents multiplerepeats of something. For example, trials, blocks or epochs would be good names for your loops.
Method of Constants
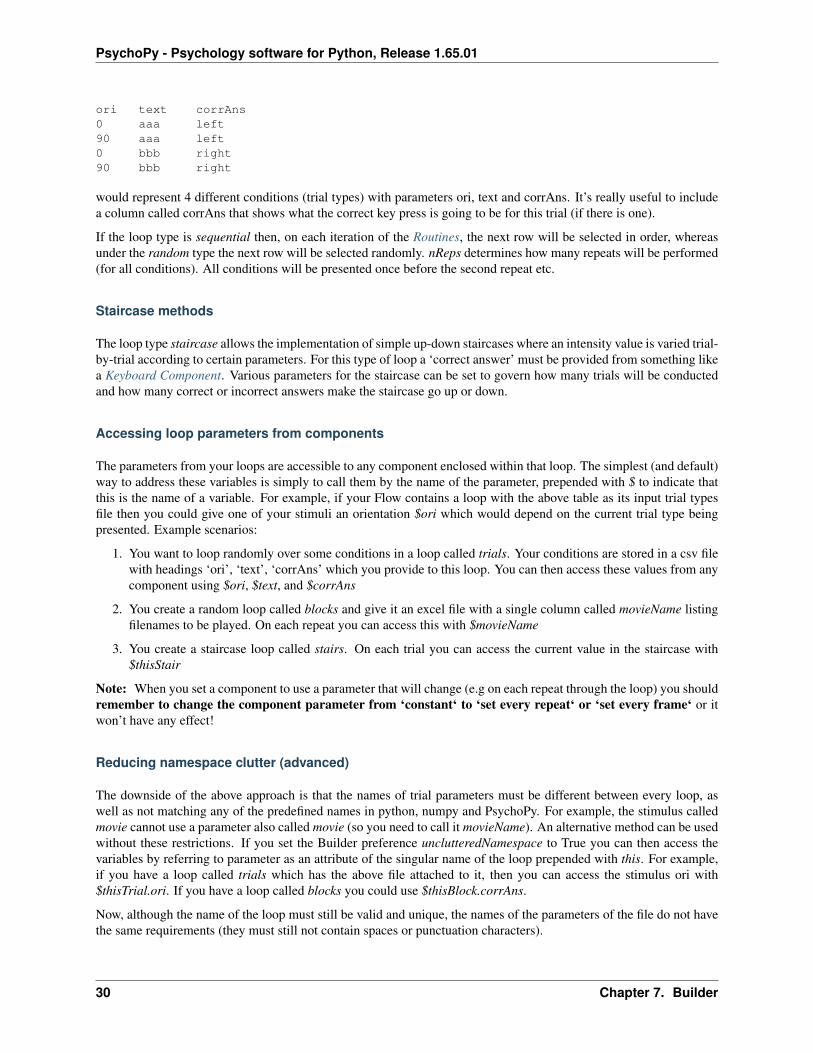
Selecting a loop type of random or sequential will result in a method of constants experiment, whereby the types oftrials that can occur are predetermined. In this case, a file must be provided that describes the parameters for therepeats. This should be an Excel 2007 (xlsx) file or a comma-separated-value (csv) file in which columns refer toparameters that are needed to describe stimuli etc and rows one for each type of trial. These can easily be generatedfrom a spreadsheet package like excel. The top row should give headers; text labels describing the contents of thatcolumn (which must also not include spaces or other characters other than letters, numbers or underscores). Forexample, a file containing the following table:
7.2. Routines 29
PsychoPy - Psychology software for Python, Release 1.65.01
ori text corrAns0 aaa left90 aaa left0 bbb right90 bbb right
would represent 4 different conditions (trial types) with parameters ori, text and corrAns. It’s really useful to includea column called corrAns that shows what the correct key press is going to be for this trial (if there is one).
If the loop type is sequential then, on each iteration of the Routines, the next row will be selected in order, whereasunder the random type the next row will be selected randomly. nReps determines how many repeats will be performed(for all conditions). All conditions will be presented once before the second repeat etc.
Staircase methods
The loop type staircase allows the implementation of simple up-down staircases where an intensity value is varied trial-by-trial according to certain parameters. For this type of loop a ‘correct answer’ must be provided from something likea Keyboard Component. Various parameters for the staircase can be set to govern how many trials will be conductedand how many correct or incorrect answers make the staircase go up or down.
Accessing loop parameters from components
The parameters from your loops are accessible to any component enclosed within that loop. The simplest (and default)way to address these variables is simply to call them by the name of the parameter, prepended with $ to indicate thatthis is the name of a variable. For example, if your Flow contains a loop with the above table as its input trial typesfile then you could give one of your stimuli an orientation $ori which would depend on the current trial type beingpresented. Example scenarios:
1. You want to loop randomly over some conditions in a loop called trials. Your conditions are stored in a csv filewith headings ‘ori’, ‘text’, ‘corrAns’ which you provide to this loop. You can then access these values from anycomponent using $ori, $text, and $corrAns
2. You create a random loop called blocks and give it an excel file with a single column called movieName listingfilenames to be played. On each repeat you can access this with $movieName
3. You create a staircase loop called stairs. On each trial you can access the current value in the staircase with$thisStair
Note: When you set a component to use a parameter that will change (e.g on each repeat through the loop) you shouldremember to change the component parameter from ‘constant‘ to ‘set every repeat‘ or ‘set every frame‘ or itwon’t have any effect!
Reducing namespace clutter (advanced)
The downside of the above approach is that the names of trial parameters must be different between every loop, aswell as not matching any of the predefined names in python, numpy and PsychoPy. For example, the stimulus calledmovie cannot use a parameter also called movie (so you need to call it movieName). An alternative method can be usedwithout these restrictions. If you set the Builder preference unclutteredNamespace to True you can then access thevariables by referring to parameter as an attribute of the singular name of the loop prepended with this. For example,if you have a loop called trials which has the above file attached to it, then you can access the stimulus ori with$thisTrial.ori. If you have a loop called blocks you could use $thisBlock.corrAns.
Now, although the name of the loop must still be valid and unique, the names of the parameters of the file do not havethe same requirements (they must still not contain spaces or punctuation characters).
30 Chapter 7. Builder
PsychoPy - Psychology software for Python, Release 1.65.01
7.4 Components
Routines in the Builder contain any number of components, which typically define the parameters of a stimulus or aninput/output device.
The following components are available, as at version 1.50, but further components will be added in the future includ-ing a Mouse, Parallel/Serial ports, other visual stimuli (e.g. GeometricStim) and a Custom component that will allowarbitrary code to be executed.
7.4.1 Aperture Component
This component can be used to filter the visual display, as if the subject is looking at it through an opening. Currentlyonly circular apertures are supported. Moreover, only one aperture is enabled at a time. You can’t “double up”: asecond aperture takes precedence.
name [string] Everything in a PsychoPy experiment needs a unique name. The name should contain only letters,numbers and underscores (no puncuation marks or spaces).
pos [[X,Y]] The position of the centre of the aperture, in the units specified by the stimulus or window.
size [int] The size controls how big the aperture will be, in pixels, default = 120
units: pix What units to use (currently only pix).
See Also:
API reference for Aperture
7.4.2 Code Component
The Code Component can be used to insert short pieces of python code into your experiments. This might be create avariable that you want for another Component, to manipulate images before displaying them, to interact with hardwarefor which there isn’t yet a pre-packaged component in PsychoPy (e.g. writing code to interact with the serial/parallelports). See codeUses below.
Be aware that the code for each of the components in your Routine are executed in the order they appear on the Routinedisplay (from top to bottom). If you want your Code Component to alter a variable to be used by another componentimmediately, then it needs to be above that component in the view. You may want the code not to take effect until nextframe however, in which case put it at the bottom of the Routine. You can move Components up and down the Routineby right-clicking on their icons.
Within your code you can use other variables and modules from the script. For example, all routines have a stopwatch-style Clock associated with them, which gets reset at the beginning of that repeat of the routine. So if you have a Routine called trial, there will be a Clock called trialClock and so you can get the time (in sec) from the beginning of the trial by using::currentT = trialClock.getTime()
To see what other variables you might want to use, and also what terms you need to avoid in your chunks of code,compile your script before inserting the code object and take a look at the contents of that script.
Parameters
The parameters of the Code Component simply specify the code that will get executed at 5 different points within theexperiment. You can use as many or as few of these as you need for any Code Component:
Begin Experiment: Things that need to be done just once, like importing a supporting module, initialis-ing a variable for later use.
Begin Routine: Certain things might need to be done just once at the start of a Routine e.g. at thebeginning of each trial you might decide which side a stimulus will appear
7.4. Components 31
PsychoPy - Psychology software for Python, Release 1.65.01
Each Frame: Things that need to updated constantly, throughout the experiment. Note that these will beexectued exactly once per video frame (on the order of every 10ms)
End Routine: At the end of the Routine (eg. the trial) you may need to do additional things, like checkingif the participant got the right answer
End Experiment: Use this for things like saving data to disk, presenting a graph(?), resetting hardwareto its original state etc.
Example code uses
Set a random location for your target stimulus
There are many ways to do this, but you could add the following to the Begin Routine section of a Code Component atthe top of your Routine. Then set your stimulus position to be $targetPos and set the correct answer field of a KeyboardComponent to be $corrAns (set both of these to update on every repeat of the Routine).:
if random()>0.5:targetPos=[-2.0, 0.0]#on the leftcorrAns=’left’
else:targetPos=[+2.0, 0.0]#on the rightcorrAns=’right’
Create a patch of noise
To do. (but see the related Coder demo)
Send a feedback message at the end of the experiment
Create a Code Component with this in the Begin Experiment field:
expClock = core.Clock()
and with this in the End Experiment field:
print "Thanks for participating - that took %.2f minutes in total" %(expClock.getTime()/60.0)
7.4.3 Keyboard Component
The Keyboard component can be used to collect responses from a participant.
By not storing the key press and setting force end of trial to be true it can be used simply to end a Routine
Parameters
Name Everything in a PsychoPy experiment needs a unique name. The name should contain only letters, numbersand underscores (no puncuation marks or spaces).
StartTime [float or integer] The time (relative to the beginning of this Routine) that the keyboard should first bechecked.
Duration [float or integer] The duration for which the keyboard is checked.
32 Chapter 7. Builder
PsychoPy - Psychology software for Python, Release 1.65.01
Allowed keys A list of allowed keys can be inserted e.g. [”m”,”z”,”1”,”2”]. If this box is left blank then any keys willbe read. Only allowed keys count as having been pressed; any other key will not be stored and will not force theend of the Routine. Note that key names (even for number keys) should be given in inverted commas, as withtext parameters. Cursor keys can be accessed with “up”, “down”, etc.
Store Which key press, if any, should be stored; the first to be pressed, the last to be pressed or all that have beenpressed. If the key press is to force the end of the trial then this setting is unlikely to be necessary, unless twokeys happen to be pressed in the same video frame.
Store correct Check this box if you wish to store whether or not this key press was correct. If so then fill in the nextbox that defines what would consitute a correct answer. This is given as Python code that should return True (1)or False (0). Often this correct answer will be defined in the settings of the Loops.
Force end trial If this box is checked then the Routine will end as soon as one of the allowed keys is pressed.
Store response time If checked then the response time will also be stored. This time will be taken from the start ofkeyboard checking.
See Also:
API reference for event
7.4.4 Mouse Component
The Mouse component can be used to collect responses from a participant. The coordinates of the mouse location aregiven in the same coordinates as the Window, with (0,0) in the centre.
Scenarios
This can be used in various ways. Here are some scenarios (email the list if you have other uses for your mouse):
Use the mouse to record the location of a button press
Use the mouse to control stimulus parameters Imgine you want to use your mouse to make your ‘patch’_ bigger orsmaller and save the final size. Call your mouse ‘mouse’, set it to save its state at the end of the trial and set thebutton press to end the Routine. Then for the size setting of your Patch stimulus insert $mouse.getPos()[0] touse the x position of the mouse to control the size or $mouse.getPos()[1].
Tracking the entire path of the mouse during a period
Parameters
Name Everything in a PsychoPy experiment needs a unique name. The name should contain only letters, numbersand underscores (no puncuation marks or spaces).
Start Time [float or integer] The time (relative to the beginning of this Routine) that the mouse should first bechecked.
Duration [float or integer] The duration for which the keyboard is checked.
Save Mouse State How often do you need to save the state of the mouse? Every time the subject presses a mousebutton, at the end of the trial, or every single frame? Note that the text output for cases where you store themouse data repeatedly per trial (e.g. every press or every frame) is likely to be very hard to interpret, so you maythen need to analyse your data using the psydat file (with python code) instead. Hopefully in future releases theoutput of the text file will be improved.
Force End Trial If this box is checked then the Routine will end as soon as one of the mouse buttons is pressed.
7.4. Components 33

PsychoPy - Psychology software for Python, Release 1.65.01
Time Relative To Whenever the mouse state is saved (e.g. on button press or at end of trial) a time is saved too. Doyou want this time to be relative to start of the Routine, or the start of the whoe experiment?
See Also:
API reference for mouse
.._movie:
7.4.5 Movie Component
The Movie component allows movie files to be played from a variety of formats (e.g. mpeg).
The movie can be positioned, rotated, flipped and stretched to any size on the screen (using the Units for the windowand stimuli given).
Parameters
name [a string] Everything in a PsychoPy experiment needs a unique name. The name should contain only letters,numbers and underscores (no puncuation marks or spaces).
startTime [float or integer] The time (relative to the beginning of this Routine) that the stimulus should first appear.
duration [float or integer] The duration for which the stimulus is presented.
movie [a string] The filename of the movie, including the path. The path can be absolute or relative to the location ofthe experiment (.psyexp) file.
pos [[X,Y]] The position of the centre of the stimulus, in the units specified by the stimulus or window
ori [degrees] Movies can be rotated in real-time too! This specifies the orientation of the movie in degrees.
size [[sizex, sizey] or a single value (applied to both x and y)] The size of the stimulus in the given units of thestimulus/window.
units [deg, cm, pix, norm, or inherit from window] See Units for the window and stimuli
See Also:
API reference for MovieStim
7.4.6 Patch (image) Component
The Patch stimulus allows images to be presented in a variety of forms on the screen. It allows the combination of animage, which can be a bitmap image from a variety of standard file formats, or a synthetic repeating texture such as asinusoidal grating. A transparency mask can also be control the shape of the image, and this can also be derived fromeither a second image, or mathematical form such as a Gaussian.
Patches can have their position, orientation, size and other settings manipulated on a frame-by-frame basis. They arelimited, however, in that the dimensions of the image used as a texture should be square and powers of two (32, 64,128, 256 etc.). This does not mean the image size on the screen needs to be square - that can be stretched to any sizeyou choose - just that the input image must be square.
Parameters
name [a string] Everything in a PsychoPy experiment needs a unique name. The name should contain only letters,numbers and underscores (no puncuation marks or spaces).
34 Chapter 7. Builder
PsychoPy - Psychology software for Python, Release 1.65.01
startTime [float or integer] The time (relative to the beginning of this Routine) that the stimulus should first appear.
duration [float or integer] The duration for which the stimulus is presented.
colour [triplet of values between -1 and 1] See Color spaces
colour space [rgb, dkl or lms] See Color spaces
image [a filename, a standard name (‘sin’, ‘sqr’) or a numpy array of dimensions NxNx1 or NxNx3] This specifiesthe image that will be used as the texture for the visual patch. The image can be repeated on the patch (in eitherx or y or both) by setting the spatial frequency to be high (or can be stretched so that only a subset of the imageappears by setting the spatial frequency to be low). Filenames can be relative or absolute paths and can refer tomost image formats (e.g. , tif, jpg, bmp, png...).
interpolate [True or False] If the interpolate box is checked (True) then linear interpolation will be applied when theimage is rescaled to the appropriate size for the screen. Otherwise a nearest-neighbour rule will be used.
mask [a filename, a standard name (‘gauss’, ‘circle’) or a numpy array of dimensions NxNx1] The mask definesthe shape and, potentially, intermediate transparency values for the patch. For values of -1 the patch will betransparent, for values of 1 it will be opaque and for 0 it will be semi-transparent.
ori [degrees] The orientation of the entire patch (texture and mask) in degrees.
phase [single float or pair of values [X,Y]] The position of the texture within the mask, in both X and Y. If a singlevalue is given it will be applied to both dimensions. The phase has units of cycles (rather than degrees orradians), wrapping at 1. As a result, setting the phase to 0,1,2... is equivalent, causing the texture to be centeredon the mask. A phase of 0.25 will cause the image to shift by half a cycle (equivalent to pi radians). Theadvantage of this
pos [[X,Y]] The position of the centre of the stimulus, in the units specified by the stimulus or window
SF [[SFx, SFy] or a single value (applied to x and y)] The spatial frequency of the texture on the patch. The units aredependent on the specified units for the stimulus/window; if the units are deg then the SF units will be c/deg, ifunits are norm then the SF units will be cycles per stimulus.
size [[sizex, sizey] or a single value (applied to x and y)] The size of the stimulus in the given units of the stimu-lus/window. If the mask is a Guassian then the size refers to width at 3 standard devations on either side of themean (i.e. sd=size/6)
Texture Resolution [an integer (power of two)] Defines the size of the resolution of the texture for standard texturessuch as sin, sqr etc. For most cases a value of 256 pixels will suffice, but if stimuli are going to be very smallthen a lower resolution will use less memory.
Units [deg, cm, pix, norm, or inherit from window] See Units for the window and stimuli
See Also:
API reference for PatchStim
7.4.7 RatingScale Component
A rating scale is used to collect a numeric rating or a choice from among a few alternatives, via the mouse, thekeyboard, or both. Both the response and time taken to make it are returned.
A given routine might involve an image (patch component), along with a rating scale to collect the response. A routinefrom a personality questionaire could have text plus a rating scale.
Three common usage styles are enabled on the first settings page: ‘visual analog scale’: the subject uses themouse to position a marker on an unmarked line
‘category choices’: choose among verbal labels (categories, e.g., “True, False” or “Yes, No, Not sure”)
‘scale description’: used for numeric choices, e.g., 1 to 7 rating
7.4. Components 35
PsychoPy - Psychology software for Python, Release 1.65.01
Complete control over the display options is available as an advanced setting, ‘customize_everything’.
7.4.8 Properties
name [string] Everything in a PsychoPy experiment needs a unique name. The name should contain only letters,numbers and underscores (no puncuation marks or spaces).
visualAnalogScale [checkbox] If this is checked, a line with no tick marks will be presented using the ‘glow’ marker,and will return a rating from 0.00 to 1.00 (quasi-continuous). This is intended to bias people away from thinkingin terms of numbers, and focus more on the visual bar when making their rating. This supercedes either choicesor scaleDescription.
choices [string] Instead of a numeric scale, you can present the subject with words or phrases to choose from. Enterall the words as a string. (Probably more than 6 or so will not look so great on the screen.) Spaces are assumed toseparate the words. If there are any commas, the string will be interpreted as a list of words or phrases (possiblyincluding spaces) that are separated by commas.
scaleDescription : Brief instructions, reminding the subject how to interpret the numerical scale, default = “1 = notat all ... extremely = 7”
low [str] The lowest number (bottom end of the scale), default = 1. If its not an integer, it will be converted tolowAnchorText (see Advanced).
high [str] The highest number (top end of the scale), default = 7. If its not an integer, it will be converted to highAn-chorText (see Advanced).
7.4.9 Advanced settings
startTime [float or integer] How many seconds to wait before displaying the rating scale, relative to the start of thecurrent routine.
forceEndTrial [checkbox] If checked, when the subject makes a rating the routine will be ended.
size [float] The size controls how big the scale will appear on the screen. (Same as “displaySizeFactor”.) Larger than1 will be larger than the default, smaller than 1 will be smaller than the default.
pos [[X,Y]] The position of the centre of the stimulus, in the units specified by the stimulus or window. default iscentered left-right, and somewhat lower than the vertical center (-0.4).
duration [float or integer] The maximum duration in seconds for which the stimulus is presented. Typically, thesubject’s response should end the trial, not a duration. A blank or negative value means wait for a very longtime.
storeRatingTime: save the response time
storeRating: save the rating that was selected
lowAnchorText [str] Custom text to display at the low end of the scale, e.g., “0%”; overrides ‘low’ setting
highAnchorText [str] Custom text to display at the low end of the scale, e.g., “100%”; overrides ‘high’ setting
customize_everything [str] If this is not blank, it will be used when initializing the rating scale just as it wouldbe in a code component (see RatingScale). This allows access to all the customizable aspects of a ratingscale, and supercedes all of the other RatingScale settings in the dialog panel. (This does not affect: startTime,forceEndTrial, duration, storeRatingTime, storeRating.)
See Also:
API reference for RatingScale
36 Chapter 7. Builder

PsychoPy - Psychology software for Python, Release 1.65.01
7.4.10 Sound Component
Parameters
name [a string] Everything in a PsychoPy experiment needs a unique name. The name should contain only letters,numbers and underscores (no puncuation marks or spaces).
startTime [float or integer] The time (relative to the beginning of this Routine) that the stimulus will begin playing.
duration [float or integer] The duration for which the stimulus is presented. This is only needed for sounds, such astones, that do not have predefined durations. For sounds coming from a file, for instance, this parameter will beignored.
sound : This sound can be described in a variety of ways:
• a number can specify the frequency in Hz (e.g. 440)
• a letter gives a note name (e.g. “C”) and sharp or flat can also be added (e.g. “Csh” “Bf”)
• a filename, which can be a relative or absolute path. As at version 1.51.00 only .ogg and .wav files aresupported, but this is expected to be greatly increased.
See Also:
API reference for Sound
7.4.11 Text Component
This component can be used to present text to the participant, either instructions or as stimuli.
name [a string] Everything in a PsychoPy experiment needs a unique name. The name should contain only letters,numbers and underscores (no puncuation marks or spaces).
startTime [float or integer] The time (relative to the beginning of this Routine) that the stimulus should first appear.
duration [float or integer] The duration for which the stimulus is presented.
colour [triplet of values between -1 and 1] See Color spaces
colour space [rgb, dkl or lms] See Color spaces
ori [degrees] The orientation of the stimulus in degrees.
pos [[X,Y]] The position of the centre of the stimulus, in the units specified by the stimulus or window
height [a single value] The height of the characters in the given units of the stimulus/window. Note that nearly allactual letters will occupy a smaller space than this, depending on font, character, presence of accents etc. Thewidth of the letters is determined by the aspect ratio of the font.
Units [deg, cm, pix, norm, or inherit from window] See Units for the window and stimuli
See Also:
API reference for TextStim
7.4.12 Entering parameters
Most of the entry boxes for Component parameters simply receive text or numeric values or lists (sequences of valuessurrounded by square brackets) as input. In addition, the user can insert variables and code into most of these, whichwill be interpreted either at the beginning of the experiment or at regular intervals within it.
7.4. Components 37
PsychoPy - Psychology software for Python, Release 1.65.01
To indicate to PsychoPy that the value represents a variable or python code, rather than literal text, it should be precededby a $. For example, inserting intensity into the text field of the Text Component will cause that word literally to bepresented, whereas $intensity will cause python to search for the variable called intensity in the script.
Variables associated with Loops can also be entered in this way (see Accessing loop parameters from components forfurther details). But it can also be used to evaluate arbitrary python code.
For example:
• $random(2) will generate a pair of random numbers
• $”yn”[randint()] will randomly choose the first or second character (y or n)
• $globalClock.getTime() will insert the current time in secs of the globalClock object
• $[sin(angle), cos(angle)] will insert the sin and cos of an angle (e.g. into the x,y coords of a stimulus)
7.4.13 How often to evaluate the variable/code
If you do want the parameters of a stimulus to be evaluated by code in this way you need also to decide how often itshould be updated. By default, the parameters of Components are set to be constant; the parameter will be set at thebeginning of the experiment and will remain that way for the duration. Alternatively, they can be set to change eitheron every repeat in which case the parameter will be set at the beginning of the Routine on each repeat of it. Lastlymany parameters can even be set on every frame, allowing them to change constantly on every refresh of the screen.
7.5 Experiment settings
The settings menu allows the user to set various aspects of the experiment, such as the size of the window to be used,additional information about the subject and determine what outputs (data files) should be generated.
7.5.1 Settings
Screen: If multiple screens are available (and if the graphics card is not an intel integrated graphics chip) then theuser can choose which screen they use (e.g. 1 or 2).
Full-screen window: If this box is checked then the experiment window will fill the screen (overriding the windowsize setting and using the size that the screen is currently set to in the operating system settings).
Window size: The size of the window in pixels, if this is not to be a full-screen window.
Experiment Info This is a python dictionary object that stores information about the current experiment. This willbe saved with any data files so can be used for storing information about the current run of the study. Theinformation stored here can also be used within the experiment. For example, if the Experiment Info was‘participant’:’jwp’, ‘ori’:10 then Builder Components could access info[’ori’] to retrieve the orientation sethere. Obviously this is a useful way to run essentially the same experiment, but with different conditions set atrun time.
Show info dlg If this box is checked then a dialog will appear at the beginning of the experiment allowing the Exper-iment Info to be changed.
Monitor The name of the monitor calibration. Must match one of the monitor names from Monitor Center.
Save log file A log file provides a record of what occurred during the experiment in chronological order, includinginformation about any errors or warnings that may have occurred.
Units The default units of the window (see Units for the window and stimuli). These can be overridden by individualComponents.
38 Chapter 7. Builder
PsychoPy - Psychology software for Python, Release 1.65.01
Logging level How much detail do you want to be output to the log file, if it is being saved. The lowest level is error,which only outputs error messages; warning outputs warnings and errors; info outputs all info, warnings anderrors; debug outputs all info that can be logged. This system enables the user to get a great deal of informationwhile generating their experiments, but then reducing this easily to just the critical information needed whenactually running the study.
7.6 Generating outputs (datafiles)
There are (or will be - as at version 1.51.00 the log file is generally empty) 3 main forms of output file from PsychoPy:
• text data files (one for each loop)
• binary data files (as text files but with greater detail)
• log files (one per experiment)
7.6.1 Text data files (.dlm)
One tab-delimitted text file is typically output for each loop within the experiment. These are useful forproviding a human-readable summary of the responses tabulated by trial type. In such files, each rowcontains information for a single trial type. The columns then contain different variables; either predeter-mined (the variables that define the trials, as set in the csv file for a method of constants experiment) orrecorded during the experiment (responses and response times from the keyboard). For variables such asresponses where there may have been multiple trials, there is a column giving the mean response, as wellas a set of columns providing each of the raw responses. For instance, if responses were being recorded bya Keyboard Component called resp, and there were 5 repeats of the 6 different trial types using a methodof constants, then the resulting .dlm file would contain 6 data rows (one for each trial type) and wouldinclude columns labelled resp_mean (the mean response), resp_raw (5 columns providing the individualresponses from trials 1-5).
7.6.2 Binary data files (.psydat)
These files are very similar to the above files, in that they are saved from the loops in the same way, butare a special python-specific format (pickle files). They can be used by python scripts as an easier way toload data for plotting and analysis. They can be loaded using e.g.:
from psychopy import miscthisRun = misc.fromFile(’myDat.psydat’)data = thisRun.data
These files are designed to be used by experienced users with previous experience of python and, probably, matplotlib.The contents of the file can be explored with dir(), as any other python object. All should be self-explanatory. Ideally,we should provide a demo script here for fetching and plotting some data feel (free to contribute).
7.6.3 Log files (.log)
Log files allow data output in a strictly chronological fashion (1 line per event). This has the disadvantagethat information isn’t associated with particular trial types etc., so you would have to reconstruct the waythat the experiment ran yourself. But it has the key advantage that a great deal more information canpotentially be output including errors or warnings etc. As at version 1.51.00 the log files were not really
7.6. Generating outputs (datafiles) 39
PsychoPy - Psychology software for Python, Release 1.65.01
being used and were not fully developed. But they will be! (If you notice that this note is still here inseveral versions time then let Jon know to update the info!!!)
7.7 Common mistakes (aka gotcha’s)
7.7.1 todo
7.8 Future developments
As at version 1.61 the builder view still has a few rough edges, but is hopefully fairly usable. Here are some of theways I hope it will improve:
• More components. Several of the stimuli and events that PsychoPy can handle don’t currently show up ascomponents in the builder view, but they can be added easily (take a look inside the components directory to seehow easy it is to create a component).
• Dialogue entry validation. Dialogue boxes currently allow you to type almost anything into their windows. Theonly current checking is that a name is given to the component and that this is unique. More checking is neededto reduce errors.
• Similar to the above, I hope to add suggested entries to go into dialogs, as a form of help. e.g. on right-clickingan entry box, say for stimulus orientation, a context menu should appear with ideas including numeric values,known local variables (e.g. “thisTrial.rgb”, based on the existing loops in the Flow) and global variable ideas(e.g. “frameN*360”)
• Better code output. I hope that the builder output code will illustrate best practice for precise timing and stimuluspresentation (it will probably always take more lines than a man-made script, but it should be at least as precise).At the moment that isn’t the case. e.g. The builder should strongly recommend an interval between trials whereonly static stimuli are drawn (e.g. fixation) and update components for this trial in that interval.
40 Chapter 7. Builder
CHAPTER
EIGHT
CODER
You can learn to use the scripting interface to PsychoPy in several ways, and you should probably follow a combinationof them. These do not teach you about Python concepts, and you are recommended also to learn about that. Inparticular, dictionaries, lists and numpy arrays are used a great deal in most PsychoPy experiments:
• Basic Concepts: some of the logic of PsychoPy scripting
• Tutorials: walk you through the development of some semi-complete experiments
• demos: in the demos menu of Coder view. Many and varied
• use the Builder to compile a script and see how it works
• check the Reference Manual (API) for further details
• ultimately go into PsychoPy and start examining the source code. It’s just regular python!
Note: Before you start, tell PsychoPy about your monitor(s) using the Monitor Center. That way you get to use units(like degrees of visual angle) that will transfer easily to other computers.
8.1 Basic Concepts
8.1.1 Presenting Stimuli
Stimulus objects
Python is an ‘object-oriented’ programming language, meaning that Most stimuli in PsychoPy are represented bypython objects, with various associated methods and information.
Typically you should create your stimulus once, at the beginning of the script, and then change it as you need to laterusing set____() commands. For instance, create your text and then change its color any time you like:
from psychopy import visual, corewin=visual.Window([400,400])message = visual.TextStim(win, text=’hello’)message.setAutoDraw(True)#automatically draw every framewin.flip()core.wait(2.0)message.setText(’world’)#change properties of existing stimwin.flip()core.wait(2.0)
41
PsychoPy - Psychology software for Python, Release 1.65.01
Timing
There are various ways to measure and control timing in PsychoPy:
• using frame refresh periods (most accurate, least obvious)
• checking the time on Clock objects
• using core.wait() commands (most obvious, least flexible/accurate)
Using core.wait(), as in the above example, is clear and intuitive in your script. But it can’t be used while somethingis changing. For more flexible timing, you could use a Clock() object from the core module:
from psychopy import visual, core
#setup stimuluswin=visual.Window([400,400])gabor = visual.PatchStim(win, tex=’sin’, mask=’gauss’,sf=5, name=’gabor’)gabor.setAutoDraw(True)#automatically draw every framegabor.autoLog=False#or we’ll get many messages about phase change
clock = core.Clock()#let’s draw a stimulus for 2s, drifting for middle 0.5swhile clock.getTime()<2.0:#clock times are in seconds
if 0.5<=clock.getTime()<1.0:gabor.setPhase(0.1, ’+’)#increment by 10th of cycle
win.flip()#flip the screen every second
Clocks are accurate to around 1ms (better on some platforms), but using them to time stimuli is not very accuratebecause it fails to account for the fact that one frame on your monitor has a fixed frame rate. In the above, the stimulusdoes not actually get drawn for exactly 0.5s (500ms). If the screen is refreshing at 60Hz (16.7ms per frame) and thegetTime() call reports that the time has reached 1.999s, then the stimulus will draw again for a frame, in accordancewith the if statement and will ultimately be displayed for 2.167s. Alternatively, if the time has reached 2.001s, therewill not be an extra frame drawn. So using this method you get timing accurate to the nearest frame period butwith little consistent precision. An error of 16.7ms might be acceptable to long-duration stimuli, but not to a briefpresentation. It also might also give the false impression that a stimulus can be presented for any given period. At60Hz refresh you can not present your stimulus for, say, 120ms; the frame period would limit you to a period of116.7ms (7 frames) or 133.3ms (8 frames).
As a result, the most precise way to control stimulus timing is to present them for a specified number of frames. Theframe rate is extremely precise, much better than ms-precision. Calls to Window.flip() will be synchronised to theframe refresh; the script will not continue until the flip has occured. As a result, on most cards, as long as frames arenot being ‘dropped’ (see Detecting dropped frames) you can present stimuli for a fixed, reproducible period.
Note: Some graphics cards, such as Intel GMA graphics chips under win32, don’t support frame sync. Avoidintegrated graphics for experiment computers wherever possible.
Using the concept of fixed frame periods and flip() calls that sync to those periods we can time stimulus presentationextremely precisely with the following:
from psychopy import visual, core
#setup stimuluswin=visual.Window([400,400])gabor = visual.PatchStim(win, tex=’sin’, mask=’gauss’,sf=5,
name=’gabor’, autoLog=False)fixation = visual.PatchStim(win, tex=None, mask=’gauss’,sf=0, size=0.02,
name=’fixation’, autoLog=False)
clock = core.Clock()
42 Chapter 8. Coder
PsychoPy - Psychology software for Python, Release 1.65.01
#let’s draw a stimulus for 2s, drifting for middle 0.5sfor frameN in range(200):#for exactly 200 frames
if 10<=frameN<150:#present fixation for a subset of framesfixation.draw()
if 50<=frameN<100:#present stim for a different subsetgabor.setPhase(0.1, ’+’)#increment by 10th of cyclegabor.draw()
win.flip()#flip the screen every second
Using autoDraw
Stimuli are typically drawn manually on every frame in which they are needed, using the draw() function. You canalso set any stimulus to start drawing every frame using setAutoDraw(True) or setAutoDraw(False). If you use thesecommands on stimuli that also have autoLog==True, then these functions will also generate a log message on theframe when the first drawing occurs and on the first frame when it is confirmed to have ended.
8.1.2 Logging data
TrialHandler and StairHandler can both generate data outputs in which responses are stored, in relation to the stimulusconditions. In addition to those data outputs, PsychoPy can created detailed chronological log files of events duringthe experiment.
Log levels and targets
Log messages have various levels of severity: ERROR, WARNING, DATA, EXP, INFO and DEBUG
Multiple targets can also be created to receive log messages. Each target has a particular critical level and receives alllogged messages greater than that. For example, you could set the console (visual output) to receive only warningsand errors, have a central log file that you use to store warning messages across studies (with file mode append), andanother to create a detailed log of data and events within a single study with level=INFO:
from psychopy import loglog.console.setLevel(log.WARNING)#overwrite (mode=’w’) a detailed log of the last run in this dirlastLog=log.LogFile("lastRun.log", level=log.INFO, mode=’w’)#also append warnings to a central log filecentralLog=log.LogFile("c:/psychopyExps.log", level=log.WARNING, mode=’a’)
Updating the logs
For performance purposes log files are not actually written when the log commands are ‘sent’. They are stored in astack and processed automatically when the script ends. You might also choose to force a flush of the logged messagesmanually during the experiment (e.g. during an inter-trial interval):
from psychopy import log
...
log.flush()#write messages out to all targets
This should only be necessary if you want to see the logged information as the experiment progresses.
8.1. Basic Concepts 43
PsychoPy - Psychology software for Python, Release 1.65.01
AutoLogging
New in version 1.63.00
Certain events will log themselves automatically by default. For instance, visual stimuli send log messages everytime one of their parameters is changed, and when autoDraw is toggled they send a message that the stimulus hasstarted/stopped. All such log messages are timestamped with the frame flip on which they take effect. To avoidthis logging, for stimuli such as fixation points that might not be critical to your analyses, or for stimuli that changeconstantly and will flood the logging system with messages, the autoLogging can be turned on/off at initialisation ofthe stimulus and can be altered afterwards with .setAutoLog(True/False)
Manual methods
In addition to a variety of automatic logging messages, you can create your own, of various levels. These can betimestamped immediately:
from psychopy import loglog.log(level=log.WARN, msg=’something important’)log.log(level=log.EXP, msg=’something about the conditions’)log.log(level=log.DATA, msg=’something about a response’)log.log(level=log.INFO, msg=’something less important’)
There are additional convenience functions for the above: log.warn(‘a warning’) etc.
For stimulus changes you probably want the log message to be timestamped based on the frame flip (when the stimulusis next presented) rather than the time that the log message is sent:
from psychopy import log, visualwin = visual.Window([400,400])win.flip()log.log(level=log.EXP, msg=’sent immediately’)log.logNextFlip(level=log.EXP, msg=’sent on actual flip’)win.flip()
Using a custom clock for logs
New in version 1.63.00
By default times for log files are reported as seconds after the very beginning of the script (often it takes a few secondsto initialise and import all modules too). You can set the logging system to use any given core.Clock object(actually, anything with a getTime() method):
from psychopy import core, logglobalClock=core.Clock()log.setDefaultClock(globalClock)
8.1.3 Handling Trials and Conditions
TrialHandler
StairHandler
44 Chapter 8. Coder
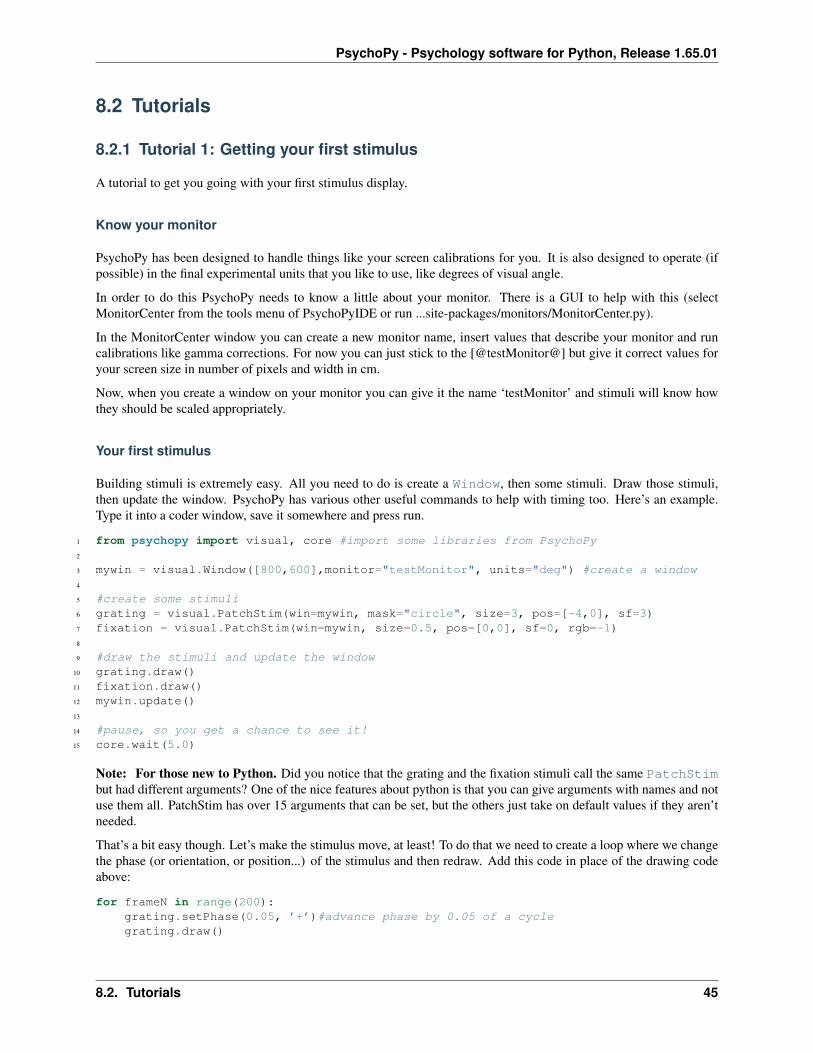
PsychoPy - Psychology software for Python, Release 1.65.01
8.2 Tutorials
8.2.1 Tutorial 1: Getting your first stimulus
A tutorial to get you going with your first stimulus display.
Know your monitor
PsychoPy has been designed to handle things like your screen calibrations for you. It is also designed to operate (ifpossible) in the final experimental units that you like to use, like degrees of visual angle.
In order to do this PsychoPy needs to know a little about your monitor. There is a GUI to help with this (selectMonitorCenter from the tools menu of PsychoPyIDE or run ...site-packages/monitors/MonitorCenter.py).
In the MonitorCenter window you can create a new monitor name, insert values that describe your monitor and runcalibrations like gamma corrections. For now you can just stick to the [@testMonitor@] but give it correct values foryour screen size in number of pixels and width in cm.
Now, when you create a window on your monitor you can give it the name ‘testMonitor’ and stimuli will know howthey should be scaled appropriately.
Your first stimulus
Building stimuli is extremely easy. All you need to do is create a Window, then some stimuli. Draw those stimuli,then update the window. PsychoPy has various other useful commands to help with timing too. Here’s an example.Type it into a coder window, save it somewhere and press run.
1 from psychopy import visual, core #import some libraries from PsychoPy2
3 mywin = visual.Window([800,600],monitor="testMonitor", units="deg") #create a window4
5 #create some stimuli6 grating = visual.PatchStim(win=mywin, mask="circle", size=3, pos=[-4,0], sf=3)7 fixation = visual.PatchStim(win=mywin, size=0.5, pos=[0,0], sf=0, rgb=-1)8
9 #draw the stimuli and update the window10 grating.draw()11 fixation.draw()12 mywin.update()13
14 #pause, so you get a chance to see it!15 core.wait(5.0)
Note: For those new to Python. Did you notice that the grating and the fixation stimuli call the same PatchStimbut had different arguments? One of the nice features about python is that you can give arguments with names and notuse them all. PatchStim has over 15 arguments that can be set, but the others just take on default values if they aren’tneeded.
That’s a bit easy though. Let’s make the stimulus move, at least! To do that we need to create a loop where we changethe phase (or orientation, or position...) of the stimulus and then redraw. Add this code in place of the drawing codeabove:
for frameN in range(200):grating.setPhase(0.05, ’+’)#advance phase by 0.05 of a cyclegrating.draw()
8.2. Tutorials 45
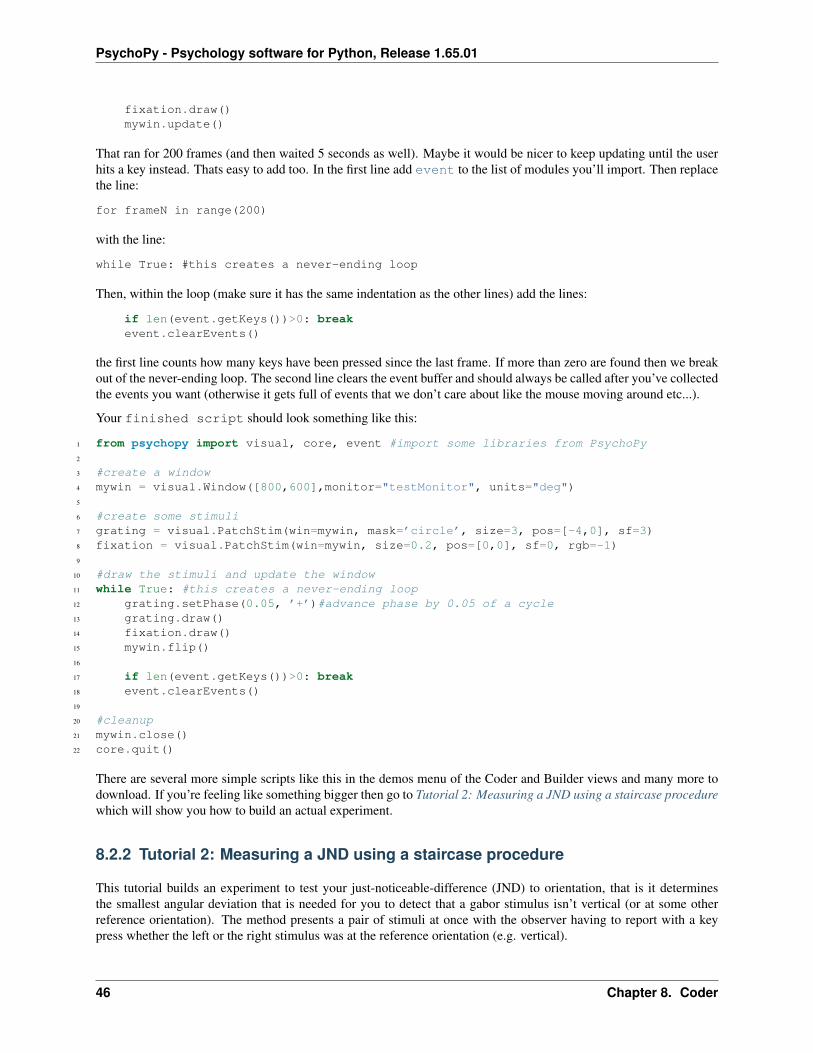
PsychoPy - Psychology software for Python, Release 1.65.01
fixation.draw()mywin.update()
That ran for 200 frames (and then waited 5 seconds as well). Maybe it would be nicer to keep updating until the userhits a key instead. Thats easy to add too. In the first line add event to the list of modules you’ll import. Then replacethe line:
for frameN in range(200)
with the line:
while True: #this creates a never-ending loop
Then, within the loop (make sure it has the same indentation as the other lines) add the lines:
if len(event.getKeys())>0: breakevent.clearEvents()
the first line counts how many keys have been pressed since the last frame. If more than zero are found then we breakout of the never-ending loop. The second line clears the event buffer and should always be called after you’ve collectedthe events you want (otherwise it gets full of events that we don’t care about like the mouse moving around etc...).
Your finished script should look something like this:
1 from psychopy import visual, core, event #import some libraries from PsychoPy2
3 #create a window4 mywin = visual.Window([800,600],monitor="testMonitor", units="deg")5
6 #create some stimuli7 grating = visual.PatchStim(win=mywin, mask=’circle’, size=3, pos=[-4,0], sf=3)8 fixation = visual.PatchStim(win=mywin, size=0.2, pos=[0,0], sf=0, rgb=-1)9
10 #draw the stimuli and update the window11 while True: #this creates a never-ending loop12 grating.setPhase(0.05, ’+’)#advance phase by 0.05 of a cycle13 grating.draw()14 fixation.draw()15 mywin.flip()16
17 if len(event.getKeys())>0: break18 event.clearEvents()19
20 #cleanup21 mywin.close()22 core.quit()
There are several more simple scripts like this in the demos menu of the Coder and Builder views and many more todownload. If you’re feeling like something bigger then go to Tutorial 2: Measuring a JND using a staircase procedurewhich will show you how to build an actual experiment.
8.2.2 Tutorial 2: Measuring a JND using a staircase procedure
This tutorial builds an experiment to test your just-noticeable-difference (JND) to orientation, that is it determinesthe smallest angular deviation that is needed for you to detect that a gabor stimulus isn’t vertical (or at some otherreference orientation). The method presents a pair of stimuli at once with the observer having to report with a keypress whether the left or the right stimulus was at the reference orientation (e.g. vertical).
46 Chapter 8. Coder
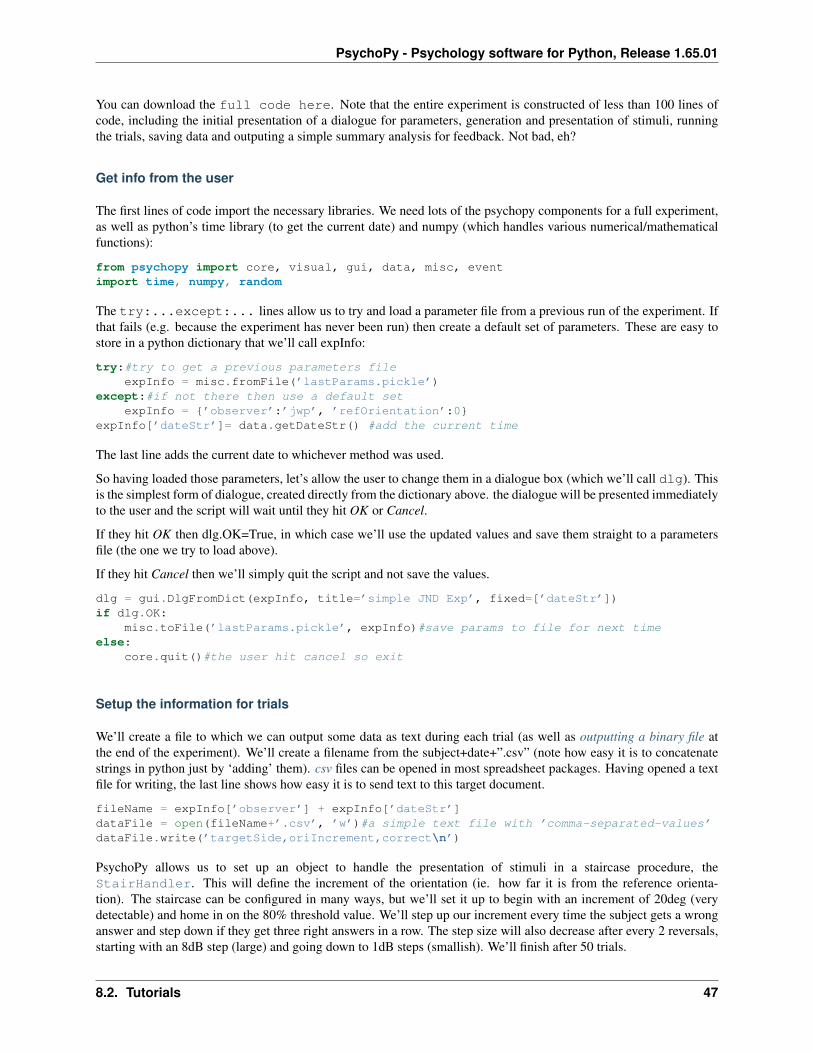
PsychoPy - Psychology software for Python, Release 1.65.01
You can download the full code here. Note that the entire experiment is constructed of less than 100 lines ofcode, including the initial presentation of a dialogue for parameters, generation and presentation of stimuli, runningthe trials, saving data and outputing a simple summary analysis for feedback. Not bad, eh?
Get info from the user
The first lines of code import the necessary libraries. We need lots of the psychopy components for a full experiment,as well as python’s time library (to get the current date) and numpy (which handles various numerical/mathematicalfunctions):
from psychopy import core, visual, gui, data, misc, eventimport time, numpy, random
The try:...except:... lines allow us to try and load a parameter file from a previous run of the experiment. Ifthat fails (e.g. because the experiment has never been run) then create a default set of parameters. These are easy tostore in a python dictionary that we’ll call expInfo:
try:#try to get a previous parameters fileexpInfo = misc.fromFile(’lastParams.pickle’)
except:#if not there then use a default setexpInfo = ’observer’:’jwp’, ’refOrientation’:0
expInfo[’dateStr’]= data.getDateStr() #add the current time
The last line adds the current date to whichever method was used.
So having loaded those parameters, let’s allow the user to change them in a dialogue box (which we’ll call dlg). Thisis the simplest form of dialogue, created directly from the dictionary above. the dialogue will be presented immediatelyto the user and the script will wait until they hit OK or Cancel.
If they hit OK then dlg.OK=True, in which case we’ll use the updated values and save them straight to a parametersfile (the one we try to load above).
If they hit Cancel then we’ll simply quit the script and not save the values.
dlg = gui.DlgFromDict(expInfo, title=’simple JND Exp’, fixed=[’dateStr’])if dlg.OK:
misc.toFile(’lastParams.pickle’, expInfo)#save params to file for next timeelse:
core.quit()#the user hit cancel so exit
Setup the information for trials
We’ll create a file to which we can output some data as text during each trial (as well as outputting a binary file atthe end of the experiment). We’ll create a filename from the subject+date+”.csv” (note how easy it is to concatenatestrings in python just by ‘adding’ them). csv files can be opened in most spreadsheet packages. Having opened a textfile for writing, the last line shows how easy it is to send text to this target document.
fileName = expInfo[’observer’] + expInfo[’dateStr’]dataFile = open(fileName+’.csv’, ’w’)#a simple text file with ’comma-separated-values’dataFile.write(’targetSide,oriIncrement,correct\n’)
PsychoPy allows us to set up an object to handle the presentation of stimuli in a staircase procedure, theStairHandler. This will define the increment of the orientation (ie. how far it is from the reference orienta-tion). The staircase can be configured in many ways, but we’ll set it up to begin with an increment of 20deg (verydetectable) and home in on the 80% threshold value. We’ll step up our increment every time the subject gets a wronganswer and step down if they get three right answers in a row. The step size will also decrease after every 2 reversals,starting with an 8dB step (large) and going down to 1dB steps (smallish). We’ll finish after 50 trials.
8.2. Tutorials 47
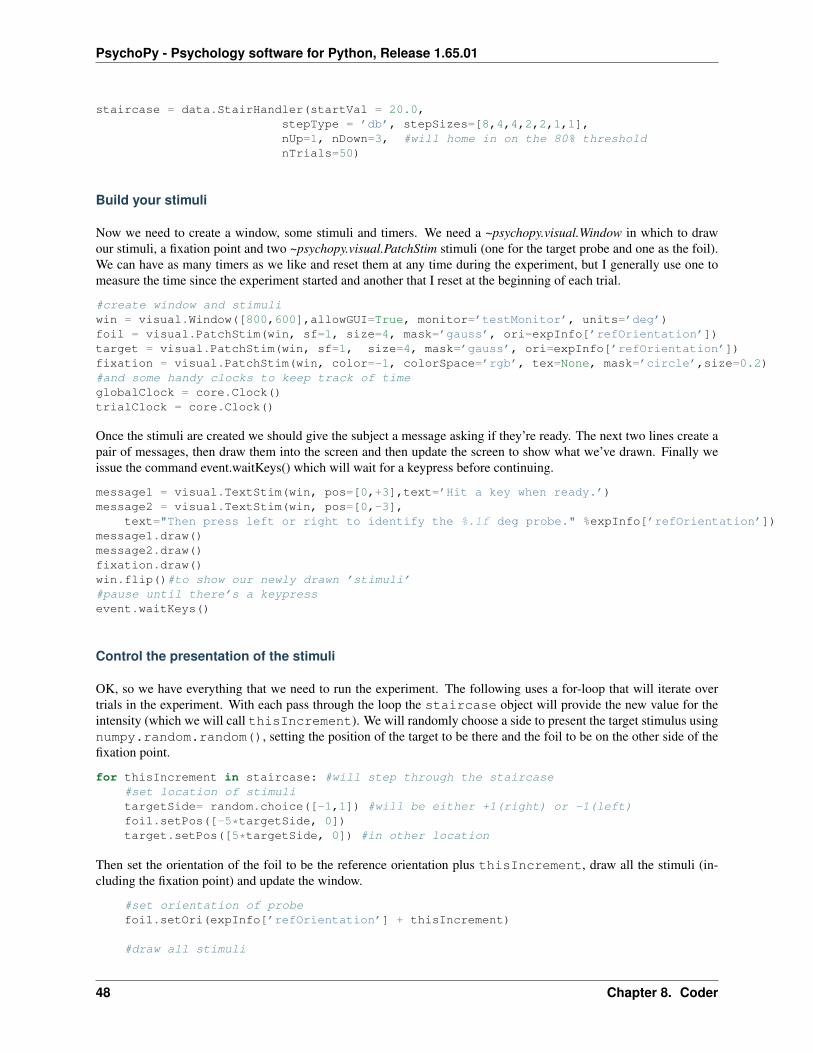
PsychoPy - Psychology software for Python, Release 1.65.01
staircase = data.StairHandler(startVal = 20.0,stepType = ’db’, stepSizes=[8,4,4,2,2,1,1],nUp=1, nDown=3, #will home in on the 80% thresholdnTrials=50)
Build your stimuli
Now we need to create a window, some stimuli and timers. We need a ~psychopy.visual.Window in which to drawour stimuli, a fixation point and two ~psychopy.visual.PatchStim stimuli (one for the target probe and one as the foil).We can have as many timers as we like and reset them at any time during the experiment, but I generally use one tomeasure the time since the experiment started and another that I reset at the beginning of each trial.
#create window and stimuliwin = visual.Window([800,600],allowGUI=True, monitor=’testMonitor’, units=’deg’)foil = visual.PatchStim(win, sf=1, size=4, mask=’gauss’, ori=expInfo[’refOrientation’])target = visual.PatchStim(win, sf=1, size=4, mask=’gauss’, ori=expInfo[’refOrientation’])fixation = visual.PatchStim(win, color=-1, colorSpace=’rgb’, tex=None, mask=’circle’,size=0.2)#and some handy clocks to keep track of timeglobalClock = core.Clock()trialClock = core.Clock()
Once the stimuli are created we should give the subject a message asking if they’re ready. The next two lines create apair of messages, then draw them into the screen and then update the screen to show what we’ve drawn. Finally weissue the command event.waitKeys() which will wait for a keypress before continuing.
message1 = visual.TextStim(win, pos=[0,+3],text=’Hit a key when ready.’)message2 = visual.TextStim(win, pos=[0,-3],
text="Then press left or right to identify the %.1f deg probe." %expInfo[’refOrientation’])message1.draw()message2.draw()fixation.draw()win.flip()#to show our newly drawn ’stimuli’#pause until there’s a keypressevent.waitKeys()
Control the presentation of the stimuli
OK, so we have everything that we need to run the experiment. The following uses a for-loop that will iterate overtrials in the experiment. With each pass through the loop the staircase object will provide the new value for theintensity (which we will call thisIncrement). We will randomly choose a side to present the target stimulus usingnumpy.random.random(), setting the position of the target to be there and the foil to be on the other side of thefixation point.
for thisIncrement in staircase: #will step through the staircase#set location of stimulitargetSide= random.choice([-1,1]) #will be either +1(right) or -1(left)foil.setPos([-5*targetSide, 0])target.setPos([5*targetSide, 0]) #in other location
Then set the orientation of the foil to be the reference orientation plus thisIncrement, draw all the stimuli (in-cluding the fixation point) and update the window.
#set orientation of probefoil.setOri(expInfo[’refOrientation’] + thisIncrement)
#draw all stimuli
48 Chapter 8. Coder

PsychoPy - Psychology software for Python, Release 1.65.01
foil.draw()target.draw()fixation.draw()win.flip()
Wait for presentation time of 500ms and then blank the screen (by updating the screen after drawing just the fixationpoint).
core.wait(0.5) #wait 500ms; but use a loop of x frames for more accurate timing in fullscreen# eg, to get 30 frames: for f in xrange(30): win.flip()
#blank screenfixation.draw()win.flip()
Get input from the subject
Still within the for-loop (note the level of indentation is the same) we need to get the response from the subject. Themethod works by starting off assuming that there hasn’t yet been a response and then waiting for a key press. Foreach key pressed we check if the answer was correct or incorrect and assign the response appropriately, which endsthe trial. We always have to clear the event buffer if we’re checking for key presses like this
thisResp=Nonewhile thisResp==None:
allKeys=event.waitKeys()for thisKey in allKeys:
if thisKey==’left’:if targetSide==-1: thisResp = 1#correctelse: thisResp = -1 #incorrect
elif thisKey==’right’:if targetSide== 1: thisResp = 1#correctelse: thisResp = -1 #incorrect
elif thisKey in [’q’, ’escape’]:core.quit() #abort experiment
event.clearEvents() #must clear other (eg mouse) events - they clog the buffer
Now we must tell the staircase the result of this trial with its addData() method. Then it can work out whether thenext trial is an increment or decrement. Also, on each trial (so still within the for-loop) we may as well save the dataas a line of text in that .csv file we created earlier.
staircase.addData(thisResp)dataFile.write(’%i,%.3f,%i\n’ %(targetSide, thisIncrement, thisResp))
Output your data and clean up
OK! We’re basically done! We’ve reached the end of the for-loop (which occured because the staircase terminated)which means the trials are over. The next step is to close the text data file and also save the staircase as a binary file(by ‘pickling’ the file in Python speak) which maintains a lot more info than we were saving in the text file.
#staircase has endeddataFile.close()
While we’re here, it’s quite nice to give some immediate feedback to the user. Let’s tell them the the intensity valuesat the all the reversals and give them the mean of the last 6. This is an easy way to get an estimate of the threshold,but we might be able to do a better job by trying to reconstruct the psychometric function. To give that a try see thestaircase analysis script of Tutorial 3.
8.2. Tutorials 49
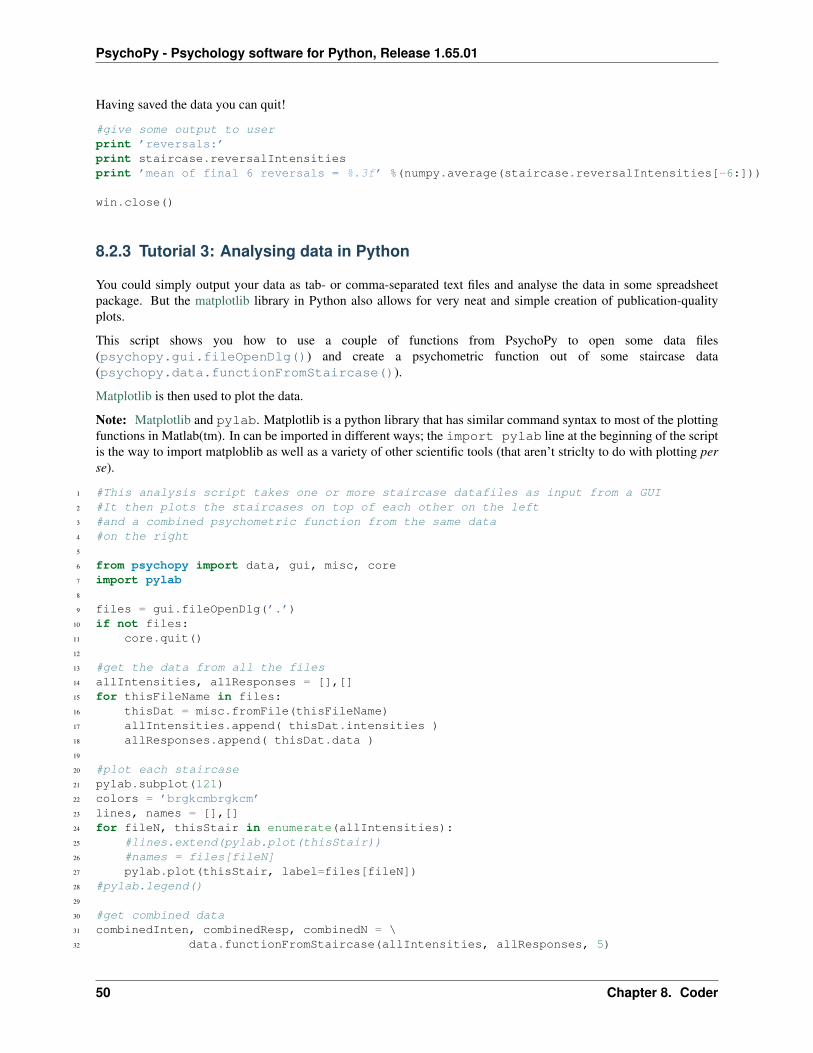
PsychoPy - Psychology software for Python, Release 1.65.01
Having saved the data you can quit!
#give some output to userprint ’reversals:’print staircase.reversalIntensitiesprint ’mean of final 6 reversals = %.3f’ %(numpy.average(staircase.reversalIntensities[-6:]))
win.close()
8.2.3 Tutorial 3: Analysing data in Python
You could simply output your data as tab- or comma-separated text files and analyse the data in some spreadsheetpackage. But the matplotlib library in Python also allows for very neat and simple creation of publication-qualityplots.
This script shows you how to use a couple of functions from PsychoPy to open some data files(psychopy.gui.fileOpenDlg()) and create a psychometric function out of some staircase data(psychopy.data.functionFromStaircase()).
Matplotlib is then used to plot the data.
Note: Matplotlib and pylab. Matplotlib is a python library that has similar command syntax to most of the plottingfunctions in Matlab(tm). In can be imported in different ways; the import pylab line at the beginning of the scriptis the way to import matploblib as well as a variety of other scientific tools (that aren’t striclty to do with plotting perse).
1 #This analysis script takes one or more staircase datafiles as input from a GUI2 #It then plots the staircases on top of each other on the left3 #and a combined psychometric function from the same data4 #on the right5
6 from psychopy import data, gui, misc, core7 import pylab8
9 files = gui.fileOpenDlg(’.’)10 if not files:11 core.quit()12
13 #get the data from all the files14 allIntensities, allResponses = [],[]15 for thisFileName in files:16 thisDat = misc.fromFile(thisFileName)17 allIntensities.append( thisDat.intensities )18 allResponses.append( thisDat.data )19
20 #plot each staircase21 pylab.subplot(121)22 colors = ’brgkcmbrgkcm’23 lines, names = [],[]24 for fileN, thisStair in enumerate(allIntensities):25 #lines.extend(pylab.plot(thisStair))26 #names = files[fileN]27 pylab.plot(thisStair, label=files[fileN])28 #pylab.legend()29
30 #get combined data31 combinedInten, combinedResp, combinedN = \32 data.functionFromStaircase(allIntensities, allResponses, 5)
50 Chapter 8. Coder

PsychoPy - Psychology software for Python, Release 1.65.01
33 #fit curve34 fit = data.FitFunction(’weibullTAFC’,combinedInten, combinedResp, guess=[0.2, 0.5])35 smoothInt = pylab.arange(min(combinedInten), max(combinedInten), 0.001)36 smoothResp = fit.eval(smoothInt)37 thresh = fit.inverse(0.8)38 print thresh39
40 #plot curve41 pylab.subplot(122)42 pylab.plot(smoothInt, smoothResp, ’-’)43 pylab.plot([thresh, thresh],[0,0.8],’--’); pylab.plot([0, thresh],[0.8,0.8],’--’)44 pylab.title(’threshold = %0.3f’ %(thresh))45 #plot points46 pylab.plot(combinedInten, combinedResp, ’o’)47 pylab.ylim([0,1])48
49 pylab.show()
8.2. Tutorials 51

PsychoPy - Psychology software for Python, Release 1.65.01
52 Chapter 8. Coder
CHAPTER
NINE
TROUBLESHOOTING
Regretably, PsychoPy is not bug-free. Running on all possible hardware and all platforms is a big ask. That said, ahuge number of bugs have been resolved by the fact that there are literally 1000s of people using the software thathave contributed either bug reports and/or fixes.
Below are some of the more common problems and their workarounds, as well as advice on how to get further help.
9.1 The application doesn’t start
You may find that you try to launch the PsychoPy application, the splash screen appears and then goes away andnothing more happens. What this means is that an error has occured during startup itself. We need to get to an errormessage in order to work out why. The way to get that message depends on the platform (see below).
Often, the cause of these catastrophic and mysterious crashes is that the user preferences or appData files have beencorrupted. See Cleaning preferences and app data to fix those problems.
Windows users (starting from the Command Prompt):
1. open a DOS Command Prompt (terminal):
(a) go to the Windows Start menu
(b) select Run... and type in cmd <Return>
2. paste the following into that window (Ctrl-V doesn’t work but you can right-click and select Paste). Re-place VERSION with your version number (e.g. 1.61.03):
"C:\Program Files\PsychoPy2\python.exe" "C:\Program Files\PsychoPy2\Lib\site-packages\PsychoPy-VERSION-py2.6.egg\psychopy\app\psychopyApp.py"
3. when you hit <return> you will hopefully get a moderately useful error message that you can Contributeto the Forum (mailing list)
Mac users:
1. open the Console app (open spotlight and type console)
2. if there are a huge number of messages there you might find it easiest to clear them (the brush icon) andthen start PsychoPy again to generate a new set of messages
9.2 I run a Builder experiment and nothing happens
An error message may have appeared in a dialog box that is hidden (look to see if you have other open windowssomewhere).
53
PsychoPy - Psychology software for Python, Release 1.65.01
An error message may have been generated that was sent to output of the Coder view:
1. go to the Coder view (from the Builder>View menu if not visible)
2. if there is no Output panel at the bottom of the window, go to the View menu and select Output
3. try running your experiment again and see if an error message appears in this Output view
If you still don’t get an error message but the application still doesn’t start then manually turn off the viewing ofthe Output (as below) and try the above again.
9.3 Manually turn off the viewing of output
Very occasionally an error will occur that crashes the application after the application has opened the Coder Outputwindow. In this case the error message is still not sent to the console or command prompt.
To turn off the Output view so that error messages are sent to the command prompt/terminal on startup, open yourappData.cfg file (see Cleaning preferences and app data), find the entry:
[coder]showOutput = True
and set it to showOutput = False (note the capital ‘F’).
9.4 Use the source (Luke?)
PsychoPy comes with all the source code included. You may not think you’re much of a programmer, but have a go atreading the code. You might find you understand more of it than you think!
To have a look at the source code do one of the following:
• when you get an error message in the Coder click on the hyperlinked error lines to see the relevant code
• on Windows
– go to Program FilesPsychoPy2Libsite-packagesPsychopy
– have a look at some of the files there
• on Mac
– right click the PscyhoPy app and select Show Package Contents
– navigate to Contents/Resources/lib/python2.6/psychopy
9.5 Cleaning preferences and app data
Every time you shut down PsychoPy (by normal means) your current preferences and the state of the application (thelocation and state of the windows) are saved to disk. If PsychoPy is crashing during startup you may need to edit thosefiles or delete them completely.
On OS X and linux the files are:
~/.psychopy2/appData.cfg~/.psychopy2/userPrefs.cfg
On windows they are:
54 Chapter 9. Troubleshooting
PsychoPy - Psychology software for Python, Release 1.65.01
$DOCS AND SETTINGS\USER\Application Data\psychopy2\appData.cfg$DOCS AND SETTINGS\USER\Application Data\psychopy2\userPrefs.cfg
The files are simple text, which you should be able to edit in any text editor. Particular changes that you might need tomake:
If the problem is that you have a corrupt experiment file or script that is trying and failing to load on startup, youcould simply delete the appData.cfg file. Please also _contribForum a copy of the file that isn’t working so that theunderlying cause of the problem can be investigated (google first to see if it’s a known issue).
9.5. Cleaning preferences and app data 55

PsychoPy - Psychology software for Python, Release 1.65.01
56 Chapter 9. Troubleshooting
CHAPTER
TEN
RECIPES (“HOW-TO”S)
Below are various tips/tricks/recipes/how-tos for PsychoPy. They involve something that is a little more involved thanyou would find in FAQs, but too specific for the manual as such (should they be there?).
10.1 Builder - providing feedback
If you’re using the Builder then the way to provide feedback is with a Code Component to generate an appropriatemessage (and then a Text Component to present that message). PsychoPy will be keeping track of various aspects ofthe stimuli and responses for you throughout the experiment and the key is knowing where to find those.
The following examples assume you have a Loop called trials, containing a Routine with a Keyboard Componentcalled key_resp. Obviously these need to be adapted in the code below to fit your experiment.
Note: The following generate strings use python ‘formatted strings’. These are very powerful and flexible but a littlestrange when you aren’t used to them (they contain odd characters like %.2f). See Generating formatted strings formore info.
10.1.1 Feedback after a trial
This is actually demonstrated in the demo, ExtendedStroop (in the Builder>demos menu, unpack the demos and thenlook in the menu again. tada!)
If you have a Keyboard Component called key_resp then, after every trial you will have te folowing variables:
key_resp.keys #a python list of keys pressedkey_resp.rt #the time to the first key presskey_resp.corr #None, 0 or 1, if you are using ’store correct’
To create your msg, insert the following into the ‘start experiment‘ section of the Code Component:
msg=’doh!’#if this comes up we forgot to update the msg!
and then insert the following into the Begin Routine section (this will get run every repeat of the routine):
if len(key_resp.keys)<1:msg="Failed to respond"
elif resp.corr:#stored on last run routinemsg="Correct! RT=%.3f" %(resp.rt)
else:msg="Oops! That was wrong"
57
PsychoPy - Psychology software for Python, Release 1.65.01
10.1.2 Feedback after a block
In this case the feedback routine would need to come after the loop (the block of trials) and the message needs to usethe stored data from the loop rather than the key_resp directly. Accessing the data from a loop is not well documentedbut totally possible.
In this case, to get all the keys pressed in a numpy array:
trials.data[’key_resp.keys’] #numpy array with size=[ntrials,ntypes]
If you used the ‘Store Correct’ feature of the Keyboard Component (and told psychopy what the correct answer was)you will also have a variable:
#numpy array storing whether each response was correct (1) or not (0)trials.data[’resp.corr’]
So, to create your msg, insert the following into the ‘start experiment‘ section of the Code Component:
msg=’doh!’#if this comes up we forgot to update the msg!
and then insert the following into the Begin Routine section (this will get run every repeat of the routine):
nCorr = trials.data[’key_resp.corr’].sum() #.std(), .mean() also availablemeanRt = trials.data[’key_resp.rt’].mean()msg = "You got %i trials correct (rt=%.2f)" %(nCorr,meanRt)
10.1.3 Draw your message to the screen
Using one of the above methods to generate you msg in a Code Component, you then need to present it to the participantby adding a Text Component to your feedback Routine and setting its text to %msg.
Warning: The Text Component needs to be below the Code Component in the Routine (because it needs to beupdated second) and it needs to set every repeat.
10.2 Generating formatted strings
For now, see the python documentation on this at
http://docs.python.org/library/stdtypes.html#string-formatting-operations
10.3 Coder - interleave staircases
Often psychophysicists using staircase procedures want to interleave multiple staircases, either with different startpoints, or for different conditions.
The follow script shows you how that can be done by nesting a pair of loops, one to loop through the number of trialsand another to loop across the staircases. The staircases can be shuffled between trials, so that do not simply cycle.
Note: Note the need to create a copy of the info. If you simply do thisInfo=info then all your staircases will end uppointing to the same object, and when you change the info in the final one, you will be changing it for all.
58 Chapter 10. Recipes (“How-to”s)
PsychoPy - Psychology software for Python, Release 1.65.01
from psychopy import visual, core, data, eventfrom numpy.random import shuffleimport copy, time #from the std python libs
#create some info to store with the datainfo=info[’startPoints’]=[1.5,3,6]info[’nTrials’]=10info[’observer’]=’jwp’
win=visual.Window([400,400])#---------------------#create the stimuli#---------------------
#create staircasesstairs=[]for thisStart in info[’startPoints’]:
#we need a COPY of the info for each staircase#(or the changes here will be made to all the other staircases)thisInfo = copy.copy(info)#now add any specific info for this staircasethisInfo[’thisStart’]=thisStart #we might want to keep track of thisthisStair = data.StairHandler(startVal=thisStart,
extraInfo=thisInfo,nTrials=50, nUp=1, nDown=3,minVal = 0.5, maxVal=8,stepSizes=[4,4,2,2,1,1])
stairs.append(thisStair)
for trialN in range(info[’nTrials’]):shuffle(stairs) #this shuffles ’in place’ (ie stairs itself is changed, nothing returned)#then loop through our randomised order of staircases for this repeatfor thisStair in stairs:
thisIntensity = thisStair.next()print ’start=%.2f, current=%.4f’ %(thisStair.extraInfo[’thisStart’], thisIntensity)
#---------------------#run your trial and get an input#---------------------keys = event.waitKeys() #(we can simulate by pushing left for ’correct’)if ’left’ in keys: wasCorrect=Trueelse: wasCorrect = False
thisStair.addData(wasCorrect) #so that the staircase adjusts itself
#this trial (of all staircases) has finished#all trials finished
#save data (separate pickle and txt files for each staircase)dateStr = time.strftime("%b_%d_%H%M", time.localtime())#add the current timefor thisStair in stairs:
#create a filename based on the subject and start valuefilename = "%s start%.2f %s" %(thisStair.extraInfo[’observer’], thisStair.extraInfo[’thisStart’], dateStr)thisStair.saveAsPickle(filename)thisStair.saveAsText(filename)
10.3. Coder - interleave staircases 59
PsychoPy - Psychology software for Python, Release 1.65.01
60 Chapter 10. Recipes (“How-to”s)
CHAPTER
ELEVEN
FREQUENTLY ASKED QUESTIONS(FAQS)
11.1 Why is the bits++ demo not working?
So far PsychoPy supports bits++ only in the bits++ mode (rather than mono++ or color++). In this mode, a code (theT-lock code) is written to the lookup table on the bits++ device by drawing a line at the top of the window. The mostlikely reason that the demo isn’t working for you is that this line is not being detected by the device, and so the lookuptable is not being modified. Most of these problems are actually nothing to do with PsychoPy /per se/, but to do withyour graphics card and the CRS bits++ box itself.
There are a number of reasons why the T-lock code is not being recognised:
• the bits++ device is in the wrong mode. Open the utility that CRS supply and make sure you’re in the rightmode. Try resetting the bits++ (turn it off and on).
• the T-lock code is not fully on the screen. If you create a window that’s too big for the screen or badly positionedthen the code will be broken/not visible to the device.
• the T-lock code is on an ‘odd’ pixel.
• the graphics card is doing some additional filtering (win32). Make sure you turn off any filtering in the advanceddisplay properties for your graphics card
• the gamma table of the graphics card is not set to be linear (but this should normally be handled by PsychoPy,so don’t worry so much about it).
• you’ve got a Mac that’s performing temporal dithering (new macs, around 2009). Apple have come up with anew, very annoying idea, where they continously vary the pixel values coming out of the graphics card everyframe to create additional intermediate colours. This will break the T-lock code on 1/2-2/3rds of frames.
11.2 Can PsychoPy run my experiment with sub-millisecond timing?
This question is common enough and complex enough to have a section of the manual all of its own. See Timing Issuesand synchronisation
61

PsychoPy - Psychology software for Python, Release 1.65.01
62 Chapter 11. Frequently Asked Questions (FAQs)

CHAPTER
TWELVE
RESOURCES (E.G. FOR TEACHING)
There are a number of further resources to help learn/teach about PsychoPy.
12.1 Upcoming events
12.1.1 EPS satellite workshop,
Where: School of Psychology, University of Nottingham
When: 8 July 2011, 2-5pm
Cost: Free
As a satellite event to the EPS meeting (July 6-8th 2011) the creator of Psychopy will give a workshop, introducingthe software to new users. The workshop will incorporate a brief lecture about the software. There will then be timefor attendees to generate their own experiment using PsychoPy, with expert help on-hand.
The workshop is an ideal opportunity for you to find out whether PsychoPy will meet your needs for teaching andresearch and to get started with your own studies using this unique package. If you’re interested in coming to theworkshop, why not bring along stimuli from a typical study of yours and try to build it on-site in the afternoon?!
12.1.2 Yale, 21-23 July (inclusive)
The first ever dedicated PsychoPy workshop/conference is coming to Yale, 21-23 July!! Seehttps://scanlab.psych.yale.edu/public/psychopy for the preliminary ideas. Let Jeremy/Jon know ASAP if youmight be able to join us there!
12.2 Previous events
BPS Maths Stats and Computing Section workshop (Dec 2010):
63
PsychoPy - Psychology software for Python, Release 1.65.01
64 Chapter 12. Resources (e.g. for teaching)
CHAPTER
THIRTEEN
REFERENCE MANUAL (API)
Contents:
13.1 psychopy.core - basic functions (clocks etc.)
Basic functions, including timing, rush (imported), quit
class psychopy.core.ClockA convenient class to keep track of time in your experiments. You can have as many independent clocks as youlike (e.g. one to time responses, one to keep track of stimuli...) The clock is based on python.time.time() whichis a sub-millisec timer on most machines. i.e. the times reported will be more accurate than you need!
getTime()Returns the current time on this clock in secs (sub-ms precision)
reset(newT=0.0)Reset the time on the clock. With no args time will be set to zero. If a float is received this will be the newtime on the clock
psychopy.core.quit()Close everything and exit nicely (ending the experiment)
psychopy.core.shellCall(shellCmd, stderr=False)Call a single system command with arguments, return its stdout. Returns (stdout,stderr) if requested (bystderr==True). Does not handle multiple commands connected by pipes (“|”).
psychopy.core.wait(secs, hogCPUperiod=0.20000000000000001)Wait for a given time period.
If secs=10 and hogCPU=0.2 then for 9.8s python’s time.sleep function will be used, which is not especiallyprecise, but allows the cpu to perform housekeeping. In the final hogCPUperiod the more precise method ofconstantly polling the clock is used for greater precision.
If you want to obtain key-presses during the wait, be sure to use pyglet and to hogCPU for the entire time, andthen call event.getKeys() after calling core.wait()
13.2 psychopy.visual - many visual stimuli
To control the screen and visual stimuli for experiments
65
PsychoPy - Psychology software for Python, Release 1.65.01
13.2.1 Window
class psychopy.visual.Window(size=(800, 600), pos=None, color=(0, 0, 0), colorSpace=’rgb’,rgb=None, dkl=None, lms=None, fullscr=None, allowGUI=None,monitor=, bitsMode=None, winType=None, units=None,gamma=None, blendMode=’avg’, screen=0, viewScale=None, view-Pos=None, viewOri=0.0, waitBlanking=True, allowStencil=False)
Used to set up a context in which to draw objects, using either PyGame (python’s SDL binding) or pyglet.
The pyglet backend allows multiple windows to be created, allows the user to specify which screen to use (ifmore than one is available, duh!) and allows movies to be rendered.
Pygame has fewer bells and whistles, but does seem a little faster in text rendering. Pygame is used for all soundproduction and for monitoring the joystick.
Parameters
size [(800,600)] Size of the window in pixels (X,Y)
pos [None or (x,y)] Location of the window on the screen
rgb [[0,0,0]] Color of background as [r,g,b] list or single value. Each gun can take valuesbetweeen -1 and 1
fullscr [None, True or False] Better timing can be achieved in full-screen mode
allowGUI [None, True or False (if None prefs are used) ] If set to False, window will be drawnwith no frame and no buttons to close etc...
winType [None, ‘pyglet’, ‘pygame’] If None then PsychoPy will revert to user/site preferences
monitor [None, string or a ~psychopy.monitors.Monitor object] The monitor to be used duringthe experiment
units [None, ‘height’ (of the window), ‘norm’ (normalised),’deg’,’cm’,’pix’] Defines the defaultunits of stimuli drawn in the window (can be overridden by each stimulus) See Units for thewindow and stimuli for explanation of options.
screen [0, 1 (or higher if you have many screens)] Specifies the physical screen that stimuli willappear on (pyglet winType only)
viewScale [None or [x,y]] Can be used to apply a custom scaling to the current units of theWindow.
viewPos [None, or [x,y]] If not None, redefines the origin for the window
viewOri [0 or any numeric value] A single value determining the orientation of the view in degs
waitBlanking [None, True or False. ] After a call to flip() should we wait for the blank beforethe script continues
gamma [] Monitor gamma for linearisation (will use Bits++ if possible). Overrides monitorsettings
bitsMode [None, ‘fast’, (‘slow’ mode is deprecated). ] Defines how (and if) the Bits++ boxwill be used. ‘fast’ updates every frame by drawing a hidden line on the top of the screen.
allowStencil [True or False] When set to True, this allows operations that use the OpenGLstencil buffer (notably, allowing the class:~psychopy.visual.Aperture to be used).
note Preferences. Some parameters (e.g. units) can now be given default values in theuser/site preferences and these will be used if None is given here. If you do specify avalue here it will take precedence over preferences.
66 Chapter 13. Reference Manual (API)
PsychoPy - Psychology software for Python, Release 1.65.01
clearBuffer()Clear the back buffer (to which you are currently drawing) without flipping the window. Useful if youwant to generate movie sequences from the back buffer without actually taking the time to flip the window.
close()Close the window (and reset the Bits++ if necess).
flip(clearBuffer=True)Flip the front and back buffers after drawing everything for your frame. (This replaces the win.update()method, better reflecting what is happening underneath).
win.flip(clearBuffer=True)#results in a clear screen after flipping win.flip(clearBuffer=False)#the screenis not cleared (so represent the previous screen)
fps()Report the frames per second since the last call to this function (or since the window was created if this isfirst call)
getMovieFrame(buffer=’front’)Capture the current Window as an image. This can be done at any time (usually after a .update() command).
Frames are stored in memory until a .saveMovieFrames(filename) command is issued. You can issuegetMovieFrame() as often as you like and then save them all in one go when finished.
logOnFlip(msg, level, obj=None)Send a log message that should be time-stamped at the next .flip() command.
Parameters
• msg: the message to be logged
• level: the level of importance for the message
• obj (optional): the python object that might be associated with this message ifdesired
saveFrameIntervals(fileName=None, clear=True)Save recorded screen frame intervals to disk, as comma-separated values.
Parameters
fileName [None or the filename (including path if necessary) in which to store the data.] If None then‘lastFrameIntervals.log’ will be used.
saveMovieFrames(fileName, mpgCodec=’mpeg1video’, fps=30, clearFrames=True)Writes any captured frames to disk. Will write any format that is understood by PIL (tif, jpg, bmp, png...)
Parameters
filename: name of file, including path (required) The extension at the end of the file de-termines the type of file(s) created. If an image type is given the multiple static frames arecreated. If it is .gif then an animated GIF image is created (although you will get higherquality GIF by saving PNG files and then combining them in dedicated image manipula-tion software (e.g. GIMP). On windows and linux .mpeg files can be created if pymedia isinstalled. On OS X .mov files can be created if the pyobjc-frameworks-QTKit is installed.
mpgCodec: the code to be used by pymedia if the filename ends in .mpg
fps: the frame rate to be used throughout the movie only for quicktime (.mov) movies
clearFrames: set this to False if you want the frames to be kept for additional calls tosaveMovieFrames
13.2. psychopy.visual - many visual stimuli 67
PsychoPy - Psychology software for Python, Release 1.65.01
Examples:
myWin.saveMovieFrames(’frame.tif’)#writes a series of static frames as frame001.tif, frame002.tif etc...myWin.saveMovieFrames(’stimuli.mov’, fps=25)#on OS X onlymyWin.saveMovieFrames(’stimuli.gif’)#not great quality animated gifmyWin.saveMovieFrames(’stimuli.mpg’)#not on OS X
setColor(color, colorSpace=None, operation=’‘)Set the color of the window.
NB This command sets the color that the blank screen will have on the next clear operation. As a result iteffectively takes TWO flip() operations to become visible (the first uses the color to create the new screenthe second presents that screen to the viewer).
See Color spaces for further information about the ways to specify colors and their various implications.
Parameters
color [] Can be specified in one of many ways. If a string is given then it is in-terpreted as the name of the color. Any of the standard html/X11 color names<http://www.w3schools.com/html/html_colornames.asp> can be used. e.g.:
myStim.setColor(’white’)myStim.setColor(’RoyalBlue’)#(the case is actually ignored)
A hex value can be provided, also formatted as with web colors. This can be provided as a string thatbegins with # (not using python’s usual 0x000000 format):
myStim.setColor(’#DDA0DD’)#DDA0DD is hexadecimal for plum
You can also provide a triplet of values, which refer to the coordinates in one of the Color spaces. Ifno color space is specified then the color space most recently used for this stimulus is used again.
myStim.setColor([1.0,-1.0,-1.0], ‘rgb’)#a red color in rgb space myS-tim.setColor([0.0,45.0,1.0], ‘dkl’) #DKL space with elev=0, azimuth=45 myS-tim.setColor([0,0,255], ‘rgb255’) #a blue stimulus using rgb255 space
Lastly, a single number can be provided, x, which is equivalent to providing [x,x,x].
myStim.setColor(255, ‘rgb255’) #all guns o max
colorSpace : string or None
defining which of the Color spaces to use. For strings and hex values this is not needed. If Nonethe default colorSpace for the stimulus is used (defined during initialisation).
operation : one of ‘+’,’-‘,’*’,’/’, or ‘’ for no operation (simply replace value)
for colors specified as a triplet of values (or single intensity value) the new value will performthis operation on the previous color
thisStim.setColor([1,1,1],’rgb255’,’+’)#increment all guns by 1 valuethisStim.setColor(-1, ‘rgb’, ‘*’) #multiply the color by -1 (which in this space in-verts the contrast) thisStim.setColor([10,0,0], ‘dkl’, ‘+’)#raise the elevation from theisoluminant plane by 10 deg
setGamma(gamma)Set the monitor gamma, using Bits++ if possible
68 Chapter 13. Reference Manual (API)
PsychoPy - Psychology software for Python, Release 1.65.01
setMouseVisible(visibility)Sets the visibility of the mouse cursor.
If Window was initilised with noGUI=True then the mouse is initially set to invisible, otherwise it willinitially be visible.
Usage: setMouseVisible(False) setMouseVisible(True)
setRGB(newRGB)Deprecated: As of v1.61.00 please use setColor() instead
setRecordFrameIntervals(value=True)To provide accurate measures of frame intervals, to determine whether frames are being dropped. Set thisto False while the screen is not being updated e.g. during event.waitkeys() and set to True during criticalparts of the script
see also: Window.saveFrameIntervals()
setScale(units, font=’dummyFont’, prevScale=(1.0, 1.0))This method is called from within the draw routine and sets the scale of the OpenGL context to mapbetween units. Could potentially be called by the user in order to draw OpenGl objects manually in eachframe.
The units can be ‘height’ (multiples of window height), ‘norm’(normalised), ‘pix’(pixels), ‘cm’ or‘stroke_font’. The font parameter is only used if units=’stroke_font’
13.2.2 PatchStim (images that can be rotated and blended)
class psychopy.visual.PatchStim(win, tex=’sin’, mask=’none’, units=’‘, pos=(0.0, 0.0), size=None,sf=None, ori=0.0, phase=(0.0, 0.0), texRes=128, rgb=None,dkl=None, lms=None, color=(1.0, 1.0, 1.0), colorSpace=’rgb’,contrast=1.0, opacity=1.0, depth=0, rgbPedestal=(0.0, 0.0, 0.0),interpolate=False, name=’‘, autoLog=True)
Stimulus object for drawing arbitrary bitmaps, textures and shapes. One of the main stimuli for PsychoPy.
Formally PatchStim is just a texture behind an optional transparency mask (an ‘alpha mask’). Both the textureand mask can be arbitrary bitmaps and their combination allows an enormous variety of stimuli to be drawn inrealtime.
Examples:
myGrat = PatchStim(tex=’sin’,mask=’circle’) #gives a circular patch of gratingmyGabor = PatchStim(tex=’sin’,mask=’gauss’) #gives a ’Gabor’ patchgratingmyImage = PatchStim(tex=’face.jpg’,mask=None) #simply draws the image face.jpg
An PatchStim can be rotated scaled and shifted in position, its texture can be drifted in X and/or Y and it canhave a spatial frequency in X and/or Y (for an image file that simply draws multiple copies in the patch).
Also since transparency can be controlled two PatchStims can combine e.g. to form a plaid.
Using Patchstim with images from disk (jpg, tif, png...)
Ideally images to be rendered should be square with ‘power-of-2’ dimensions e.g. 16x16, 128x128. Any imagethat is not will be upscaled (with linear interp) to the nearest such texture by PsychoPy. The size of the stimulusshould be specified in the normal way using the appropriate units (deg, pix, cm...). Be sure to get the aspectratio the same as the image (if you don’t want it stretched!).
Why can’t I have a normal image, drawn pixel-by-pixel? PatchStims are rendered using OpenGL textures.This is more powerful than using simple screen blitting - it allows the rotation, masking, transparency to work.
13.2. psychopy.visual - many visual stimuli 69
PsychoPy - Psychology software for Python, Release 1.65.01
Parameters
win [] a Window object (required)
tex [] The texture forming the image
• ‘sin’,’sqr’, ‘saw’, ‘tri’, None
• or the name of an image file (most formats supported)
• or a numpy array (1xN or NxN) ranging -1:1
mask : The alpha mask (forming the shape of the image)
• None, ‘circle’, ‘gauss’
• or the name of an image file (most formats supported)
• or a numpy array (1xN or NxN) ranging -1:1
units [None, ‘norm’, ‘cm’, ‘deg’ or ‘pix’ ] If None then the current units of the Window willbe used. See Units for the window and stimuli for explanation of other options.
pos : a tuple (0.0,0.0) or a list [0.0,0.0] for the x and y of the centre of the stimulus. The originis the screen centre, the units are determined by units (see above). Stimuli can be positionbeyond the window!
size : a tuple (0.5,0.5) or a list [0.5,0.5] for the x and y OR a single value (which will be appliedto x and y). Units are specified by ‘units’ (see above). Sizes can be negative and can extendbeyond the window.
Note: If the mask is Gaussian (‘gauss’), then the ‘size’ parameter refers to the stimulus at3 standard deviations on each side of the centre (ie. sd=size/6)
sf: a tuple (1.0,1.0) or a list [1.0,1.0] for the x and y OR a single value (which will be appliedto x and y). Where units == ‘deg’ or ‘cm’ units are in cycles per deg/cm. If units == ‘norm’then sf units are in cycles per stimulus (so scale with stimulus size). If texture is an imageloaded from a file then sf defaults to 1/stim size to give one cycle of the image.
ori: orientation of stimulus in degrees
phase: a tuple (0.0,0.0) or a list [0.0,0.0] for the x and y OR a single value (which will beapplied to x and y). Phase of the stimulus in each direction. NB phase has modulus 1 (ratherthan 360 or 2*pi) This is a little unconventional but has the nice effect that setting phase=t*ndrifts a stimulus at n Hz
texRes: resolution of the texture (if not loading from an image file)
color:
Could be a:
• web name for a color (e.g. ‘FireBrick’);
• hex value (e.g. ‘#FF0047’);
• tuple (1.0,1.0,1.0); list [1.0,1.0, 1.0]; or numpy array.
If the last three are used then the color space should also be given See Color spaces
colorSpace: the color space controlling the interpretation of the color See Color spaces
contrast: How far the stimulus deviates from the middle grey. Contrast can vary -1:1 (this is amultiplier for the values given in the color description of the stimulus).
opacity: 1.0 is opaque, 0.0 is transparent
70 Chapter 13. Reference Manual (API)
PsychoPy - Psychology software for Python, Release 1.65.01
depth: The depth argument is deprecated and may be removed in future versions. Depth iscontrolled simply by drawing order.
name [string] The name of the object to be using during logged messages about this stim
clearTextures()Clear the textures associated with the given stimulus. As of v1.61.00 this is called automatically duringgarbage collection of your stimulus, so doesn’t need calling explicitly by the user.
draw(win=None)Draw the stimulus in its relevant window. You must call this method after every MyWin.flip() if you wantthe stimulus to appear on that frame and then update the screen again.
setAutoDraw(val)Add or remove a stimulus from the list of stimuli that will be automatically drawn on each flip
Parameters
• val: True/False True to add the stimulus to the draw list, False to remove it
setAutoLog(val=True)Turn on (or off) autoLogging for this stimulus.
Parameters
• val: True (default) or False
setColor(color, colorSpace=None, operation=’‘)Set the color of the stimulus. See Color spaces for further information about the various ways to specifycolors and their various implications.
Parameters
color [] Can be specified in one of many ways. If a string is given then it is in-terpreted as the name of the color. Any of the standard html/X11 color names<http://www.w3schools.com/html/html_colornames.asp> can be used. e.g.:
myStim.setColor(’white’)myStim.setColor(’RoyalBlue’)#(the case is actually ignored)
A hex value can be provided, also formatted as with web colors. This can be provided as a string thatbegins with # (not using python’s usual 0x000000 format):
myStim.setColor(’#DDA0DD’)#DDA0DD is hexadecimal for plum
You can also provide a triplet of values, which refer to the coordinates in one of the Color spaces. Ifno color space is specified then the color space most recently used for this stimulus is used again.
myStim.setColor([1.0,-1.0,-1.0], ‘rgb’)#a red color in rgb space myS-tim.setColor([0.0,45.0,1.0], ‘dkl’) #DKL space with elev=0, azimuth=45 myS-tim.setColor([0,0,255], ‘rgb255’) #a blue stimulus using rgb255 space
Lastly, a single number can be provided, x, which is equivalent to providing [x,x,x].
myStim.setColor(255, ‘rgb255’) #all guns o max
colorSpace : string or None
defining which of the Color spaces to use. For strings and hex values this is not needed. If Nonethe default colorSpace for the stimulus is used (defined during initialisation).
operation : one of ‘+’,’-‘,’*’,’/’, or ‘’ for no operation (simply replace value)
13.2. psychopy.visual - many visual stimuli 71
PsychoPy - Psychology software for Python, Release 1.65.01
for colors specified as a triplet of values (or single intensity value) the new value will performthis operation on the previous color
thisStim.setColor([1,1,1],’rgb255’,’+’)#increment all guns by 1 valuethisStim.setColor(-1, ‘rgb’, ‘*’) #multiply the color by -1 (which in this space in-verts the contrast) thisStim.setColor([10,0,0], ‘dkl’, ‘+’)#raise the elevation from theisoluminant plane by 10 deg
setContr(newContr, operation=’‘)Set the contrast of the stimulus
setContrast(value, operation=’‘)
setDKL(newDKL, operation=’‘)DEPRECATED since v1.60.05: Please use setColor
setDepth(newDepth, operation=’‘)
setLMS(newLMS, operation=’‘)DEPRECATED since v1.60.05: Please use setColor
setMask(value)
setOpacity(newOpacity, operation=’‘)
setOri(newOri, operation=’‘)Set the stimulus orientation in degrees
setPhase(value, operation=’‘)
setPos(newPos, operation=’‘, units=None)Set the stimulus position in the specified (or inheritted) units
setRGB(newRGB, operation=’‘)DEPRECATED since v1.60.05: Please use setColor
setSF(value, operation=’‘)
setSize(newSize, operation=’‘, units=None)Set the stimulus size [X,Y] in the specified (or inheritted) units
setTex(value)
setUseShaders(val=True)Set this stimulus to use shaders if possible.
13.2.3 SimpleImageStim - for drawing simple images
class psychopy.visual.SimpleImageStim(win, image=’‘, units=’‘, pos=(0.0, 0.0), contrast=1.0,opacity=1.0, flipHoriz=False, flipVert=False, name=’‘,autoLog=True)
A simple stimulus for loading images from a file and presenting at exactly the resolution and color in the file(subject to gamma correction if set).
Unlike the PatchStim, this type of stimulus cannot be rescaled, rotated or masked (although flipping horizontallyor vertically is possible). Drawing will also tend to be marginally slower, because the image isn’t preloaded tothe graphics card. The advantage, however is that the stimulus will always be in its original aspect ratio, withno interplotation or other transformation.
SimpleImageStim does not support a depth parameter (the OpenGL method that draws the pixels does notsupport it). Simple images will obscure any other stimulus type.
72 Chapter 13. Reference Manual (API)
PsychoPy - Psychology software for Python, Release 1.65.01
Parameters
win : a Window object (required)
image : The filename, including relative or absolute path. The image can be any format that thePython Imagin Library can import (which is almost all).
units [None, ‘height’, ‘norm’, ‘cm’, ‘deg’ or ‘pix’ ] If None then the current units of theWindowwill be used. See Units for the window and stimuli for explanation of other options.
pos [] a tuple (0.0,0.0) or a list [0.0,0.0] for the x and y of the centre of the stimulus. The originis the screen centre, the units are determined by units (see above). Stimuli can be positionbeyond the window!
contrast : How far the stimulus deviates from the middle grey. Contrast can vary -1:1 (this is amultiplier for the values given in the color description of the stimulus)
opacity : 1.0 is opaque, 0.0 is transparent
name [string] The name of the object to be using during logged messages about this stim
draw(win=None)Draw the stimulus in its relevant window. You must call this method after every MyWin.flip() if you wantthe stimulus to appear on that frame and then update the screen again.
setDepth(newDepth, operation=’‘)
setFlipHoriz(newVal=True)If set to True then the image will be flipped horiztonally (left-to-right). Note that this is relative to theoriginal image, not relative to the current state.
setFlipVert(newVal=True)If set to True then the image will be flipped vertically (top-to-bottom). Note that this is relative to theoriginal image, not relative to the current state.
setImage(filename=None)Set the image to be drawn.
Parameters
• filename: The filename, including relative or absolute path if necessary. Can actuallyalso be an image loaded by PIL.
setPos(newPos, operation=’‘, units=None)
setUseShaders(val=True)Set this stimulus to use shaders if possible.
13.2.4 TextStim
class psychopy.visual.TextStim(win, text=’Hello World’, font=’‘, pos=(0.0, 0.0), depth=0,rgb=None, color=(1.0, 1.0, 1.0), colorSpace=’rgb’, opacity=1.0,units=’‘, ori=0.0, height=None, antialias=True, bold=False,italic=False, alignHoriz=’center’, alignVert=’center’, fontFiles=[], wrapWidth=None, name=’‘, autoLog=True)
Class of text stimuli to be displayed in a Window
Parameters
win: A Window object. Required - the stimulus must know where to draw itself
13.2. psychopy.visual - many visual stimuli 73
PsychoPy - Psychology software for Python, Release 1.65.01
text: The text to be rendered
pos: Position on the screen
color:
Could be a:
• web name for a color (e.g. ‘FireBrick’);
• hex value (e.g. ‘#FF0047’);
• tuple (1.0,1.0,1.0); list [1.0,1.0, 1.0]; or numpy array.
If the last three are used then the color space should also be given See Color spaces
colorSpace: the color space controlling the interpretation of the color See Color spaces
opacity: How transparent the object will be (0 for transparent, 1 for opaque)
units [None, ‘height’, ‘norm’, ‘cm’, ‘deg’ or ‘pix’ ] If None then the current units of theWindowwill be used. See Units for the window and stimuli for explanation of other options.
ori: Orientation of the text
height: Height of the characters (including the ascent of the letter and the descent)
antialias: boolean to allow (or not) antialiasing the text
bold: Make the text bold (better to use a bold font name)
italic: Make the text italic (better to use an actual italic font)
alignHoriz: The horizontal alignment (‘left’, ‘right’ or ‘center’)
alignVert: The vertical alignment (‘top’, ‘bottom’ or ‘center’)
fontFiles: A list of additional files if the font is not in the standard system location (include thefull path)
wrapWidth: The width the text should run before wrapping
name [string] The name of the object to be using during logged messages about this stim
depth: The depth argument is deprecated and may be removed in future versions. Depth iscontrolled simply by drawing order.
draw(win=None)Draw the stimulus in its relevant window. You must call this method after every MyWin.flip() if you wantthe stimulus to appear on that frame and then update the screen again.
If win is specified then override the normal window of this stimulus.
setAutoDraw(val)Add or remove a stimulus from the list of stimuli that will be automatically drawn on each flip
Parameters
• val: True/False True to add the stimulus to the draw list, False to remove it
setAutoLog(val=True)Turn on (or off) autoLogging for this stimulus.
Parameters
• val: True (default) or False
74 Chapter 13. Reference Manual (API)
PsychoPy - Psychology software for Python, Release 1.65.01
setColor(color, colorSpace=None, operation=’‘)Set the color of the stimulus. See Color spaces for further information about the various ways to specifycolors and their various implications.
Parameters
color : Can be specified in one of many ways. If a string is given then it is in-terpreted as the name of the color. Any of the standard html/X11 color names<http://www.w3schools.com/html/html_colornames.asp> can be used. e.g.:
myStim.setColor(’white’)myStim.setColor(’RoyalBlue’)#(the case is actually ignored)
A hex value can be provided, also formatted as with web colors. This can be provided as a string thatbegins with # (not using python’s usual 0x000000 format):
myStim.setColor(’#DDA0DD’)#DDA0DD is hexadecimal for plum
You can also provide a triplet of values, which refer to the coordinates in one of the Color spaces. Ifno color space is specified then the color space most recently used for this stimulus is used again.
myStim.setColor([1.0,-1.0,-1.0], ‘rgb’)#a red color in rgb space myS-tim.setColor([0.0,45.0,1.0], ‘dkl’) #DKL space with elev=0, azimuth=45 myS-tim.setColor([0,0,255], ‘rgb255’) #a blue stimulus using rgb255 space
Lastly, a single number can be provided, x, which is equivalent to providing [x,x,x].
myStim.setColor(255, ‘rgb255’) #all guns o max
colorSpace : string or None
defining which of the Color spaces to use. For strings and hex values this is not needed. If Nonethe default colorSpace for the stimulus is used (defined during initialisation).
operation : one of ‘+’,’-‘,’*’,’/’, or ‘’ for no operation (simply replace value)
for colors specified as a triplet of values (or single intensity value) the new value will performthis operation on the previous color
thisStim.setColor([1,1,1],’rgb255’,’+’)#increment all guns by 1 valuethisStim.setColor(-1, ‘rgb’, ‘*’) #multiply the color by -1 (which in this space in-verts the contrast) thisStim.setColor([10,0,0], ‘dkl’, ‘+’)#raise the elevation from theisoluminant plane by 10 deg
setContr(newContr, operation=’‘)Set the contrast of the stimulus
setDKL(newDKL, operation=’‘)DEPRECATED since v1.60.05: Please use setColor
setDepth(newDepth, operation=’‘)
setFont(font)Set the font to be used for text rendering. font should be a string specifying the name of the font (in systemresources)
setHeight(height)Set the height of the letters (including the entire box that surrounds the letters in the font). The width ofthe letters is then defined by the font.
13.2. psychopy.visual - many visual stimuli 75

PsychoPy - Psychology software for Python, Release 1.65.01
setLMS(newLMS, operation=’‘)DEPRECATED since v1.60.05: Please use setColor
setOpacity(newOpacity, operation=’‘)
setOri(newOri, operation=’‘)Set the stimulus orientation in degrees
setPos(newPos, operation=’‘, units=None)Set the stimulus position in the specified (or inheritted) units
setRGB(value, operation=’‘)
setSize(newSize, operation=’‘, units=None)Set the stimulus size [X,Y] in the specified (or inheritted) units
setText(value=None)Set the text to be rendered using the current font
setUseShaders(val=True)Set this stimulus to use shaders if possible.
13.2.5 MovieStim
class psychopy.visual.MovieStim(win, filename=’‘, units=’pix’, size=None, pos=(0.0, 0.0), ori=0.0,flipVert=False, flipHoriz=False, opacity=1.0, name=’‘, au-toLog=True)
A stimulus class for playing movies (mpeg, avi, etc...) in PsychoPy.
examples:
mov = visual.MovieStim(myWin, ’testMovie.mp4’, fliVert=False)print mov.durationprint mov.format.width, mov.format.height #give the original size of the movie in pixels
mov.draw() #draw the current frame (automagically determined)
See MovieStim.py for demo.
Parameters
win : a Window object (required)
filename : a string giving the relative or absolute path to the movie. Can be any movie thatAVbin can read (e.g. mpeg, DivX)
units [None, ‘height’, ‘norm’, ‘cm’, ‘deg’ or ‘pix’ ] If None then the current units of theWindowwill be used. See Units for the window and stimuli for explanation of other options.
pos : position of the centre of the movie, given in the units specified
flipVert [True or False] If True then the movie will be top-bottom flipped
flipHoriz [True or False] If True then the movie will be right-left flipped
ori : Orientation of the stimulus in degrees
size : Size of the stimulus in units given. If not specified then the movie will take its originaldimensions.
opacity : the movie can be made transparent by reducing this
76 Chapter 13. Reference Manual (API)

PsychoPy - Psychology software for Python, Release 1.65.01
name [string] The name of the object to be using during logged messages about this stim
draw(win=None)Draw the current frame to a particular visual.Window (or to the default win for this object if not specified).The current position in the movie will be determined automatically.
This method should be called on every frame that the movie is meant to appear
loadMovie(filename)Load a movie from file
Parameters
filename: string The name of the file, including path if necessary
Brings up a warning if avbin is not found on the computer. After the file is loaded MovieStim.duration isupdated with the movie duration (in seconds).
pause()Pause the current point in the movie (sound will stop, current frame will not advance)
play()Continue a paused movie from current position
seek(timestamp)Seek to a particular timestamp in the movie. NB this does not seem very robust as at version 1.62 and maycause crashes!
setAutoDraw(val)Add or remove a stimulus from the list of stimuli that will be automatically drawn on each flip
Parameters
• val: True/False True to add the stimulus to the draw list, False to remove it
setAutoLog(val=True)Turn on (or off) autoLogging for this stimulus.
Parameters
• val: True (default) or False
setColor(color, colorSpace=None, operation=’‘)Set the color of the stimulus. See Color spaces for further information about the various ways to specifycolors and their various implications.
Parameters
color [] Can be specified in one of many ways. If a string is given then it is in-terpreted as the name of the color. Any of the standard html/X11 color names<http://www.w3schools.com/html/html_colornames.asp> can be used. e.g.:
myStim.setColor(’white’)myStim.setColor(’RoyalBlue’)#(the case is actually ignored)
A hex value can be provided, also formatted as with web colors. This can be provided as a string thatbegins with # (not using python’s usual 0x000000 format):
myStim.setColor(’#DDA0DD’)#DDA0DD is hexadecimal for plum
You can also provide a triplet of values, which refer to the coordinates in one of the Color spaces. Ifno color space is specified then the color space most recently used for this stimulus is used again.
13.2. psychopy.visual - many visual stimuli 77

PsychoPy - Psychology software for Python, Release 1.65.01
myStim.setColor([1.0,-1.0,-1.0], ‘rgb’)#a red color in rgb space myS-tim.setColor([0.0,45.0,1.0], ‘dkl’) #DKL space with elev=0, azimuth=45 myS-tim.setColor([0,0,255], ‘rgb255’) #a blue stimulus using rgb255 space
Lastly, a single number can be provided, x, which is equivalent to providing [x,x,x].
myStim.setColor(255, ‘rgb255’) #all guns o max
colorSpace : string or None
defining which of the Color spaces to use. For strings and hex values this is not needed. If Nonethe default colorSpace for the stimulus is used (defined during initialisation).
operation : one of ‘+’,’-‘,’*’,’/’, or ‘’ for no operation (simply replace value)
for colors specified as a triplet of values (or single intensity value) the new value will performthis operation on the previous color
thisStim.setColor([1,1,1],’rgb255’,’+’)#increment all guns by 1 valuethisStim.setColor(-1, ‘rgb’, ‘*’) #multiply the color by -1 (which in this space in-verts the contrast) thisStim.setColor([10,0,0], ‘dkl’, ‘+’)#raise the elevation from theisoluminant plane by 10 deg
setContr(newContr, operation=’‘)Set the contrast of the stimulus
setDKL(newDKL, operation=’‘)DEPRECATED since v1.60.05: Please use setColor
setDepth(newDepth, operation=’‘)
setLMS(newLMS, operation=’‘)DEPRECATED since v1.60.05: Please use setColor
setMovie(filename)See ~MovieStim.loadMovie (the functions are identical). This form is provided for syntactic consistencywith other visual stimuli.
setOpacity(newOpacity, operation=’‘)Sets the opacity of the movie to newOpacity
Over-rides _BaseVisualStim.setOpacity
setOri(newOri, operation=’‘)Set the stimulus orientation in degrees
setPos(newPos, operation=’‘, units=None)Set the stimulus position in the specified (or inheritted) units
setRGB(newRGB, operation=’‘)DEPRECATED since v1.60.05: Please use setColor
setSize(newSize, operation=’‘, units=None)Set the stimulus size [X,Y] in the specified (or inheritted) units
setUseShaders(val=True)Set this stimulus to use shaders if possible.
78 Chapter 13. Reference Manual (API)
PsychoPy - Psychology software for Python, Release 1.65.01
13.2.6 ShapeStim
class psychopy.visual.ShapeStim(win, units=’‘, lineWidth=1.0, lineColor=(1.0, 1.0, 1.0), line-ColorSpace=’rgb’, fillColor=None, fillColorSpace=’rgb’,vertices=((-0.5, 0), (0, 0.5), (0.5, 0)), closeShape=True, pos=(0,0), ori=0.0, opacity=1.0, depth=0, interpolate=True, lin-eRGB=None, fillRGB=None, name=’‘, autoLog=True)
Create geometric (vector) shapes by defining vertex locations.
Shapes can be outlines or filled, by setting lineRGB and fillRGB to rgb triplets, or None. They can also berotated (stim.setOri(__)) and translated (stim.setPos(__)) like any other stimulus.
NB for now the fill of objects is performed using glBegin(GL_POLYGON) and that is limited to convex shapes.With concavities you get unpredictable results (e.g. add a fill color to the arrow stim below). To create concav-ities, you can combine multiple shapes, or stick to just outlines. (If anyone wants to rewrite ShapeStim to useglu tesselators that would be great!)
Parameters
win : A Window object (required)
units [None, ‘norm’, ‘cm’, ‘deg’ or ‘pix’ ] If None then the current units of the Window willbe used. See Units for the window and stimuli for explanation of other options.
lineColor :
Could be a:
• web name for a color (e.g. ‘FireBrick’);
• hex value (e.g. ‘#FF0047’);
• tuple (1.0,1.0,1.0); list [1.0,1.0, 1.0]; or numpy array.
If the last three are used then the color space should also be given See Color spaces
lineColorSpace: The color space controlling the interpretation of the lineColor. See Colorspaces
fillColor :
Could be a:
• web name for a color (e.g. ‘FireBrick’);
• hex value (e.g. ‘#FF0047’);
• tuple (1.0,1.0,1.0); list [1.0,1.0, 1.0]; or numpy array.
If the last three are used then the color space should also be given See Color spaces
lineWidth [int (or float?) ] specifying the line width in pixels
vertices [a list of lists or a numpy array (Nx2) ] specifying xy positions of each vertex
closeShape [True or False] Do you want the last vertex to be automatically connected to thefirst?
pos [tuple, list or 2x1 array] the position of the anchor for the stimulus (relative to which thevertices are drawn)
ori [float or int] the shape can be rotated around the anchor
opacity [float] 1.0 is opaque, 0.0 is transparent
13.2. psychopy.visual - many visual stimuli 79

PsychoPy - Psychology software for Python, Release 1.65.01
depth: The depth argument is deprecated and may be removed in future versions. Depth iscontrolled simply by drawing order.
interpolate [True or False] If True the edge of the line will be antialiased.
name [string] The name of the object to be using during logged messages about this stim
draw(win=None)Draw the stimulus in its relevant window. You must call this method after every MyWin.flip() if you wantthe stimulus to appear on that frame and then update the screen again.
setAutoDraw(val)Add or remove a stimulus from the list of stimuli that will be automatically drawn on each flip
Parameters
• val: True/False True to add the stimulus to the draw list, False to remove it
setAutoLog(val=True)Turn on (or off) autoLogging for this stimulus.
Parameters
• val: True (default) or False
setColor(color, colorSpace=None, operation=’‘)For ShapeStim use setLineColor() or setFillColor()
setContr(newContr, operation=’‘)Set the contrast of the stimulus
setDKL(newDKL, operation=’‘)DEPRECATED since v1.60.05: Please use setColor
setDepth(newDepth, operation=’‘)
setFillColor(color, colorSpace=None, operation=’‘)Sets the color of the shape fill. See PatchStim.setColor() for further details of how to use thisfunction.
Note that shapes where some vertices point inwards will usually not ‘fill’ correctly.
setFillRGB(value, operation=’‘)DEPRECATED since v1.60.05: Please use setFillColor()
setLMS(newLMS, operation=’‘)DEPRECATED since v1.60.05: Please use setColor
setLineColor(color, colorSpace=None, operation=’‘)Sets the color of the shape edge. See PatchStim.setColor() for further details of how to use thisfunction.
setLineRGB(value, operation=’‘)DEPRECATED since v1.60.05: Please use setLineColor()
setOpacity(newOpacity, operation=’‘)
setOri(newOri, operation=’‘)Set the stimulus orientation in degrees
setPos(newPos, operation=’‘, units=None)Set the stimulus position in the specified (or inheritted) units
setRGB(newRGB, operation=’‘)DEPRECATED since v1.60.05: Please use setColor
80 Chapter 13. Reference Manual (API)
PsychoPy - Psychology software for Python, Release 1.65.01
setSize(newSize, operation=’‘, units=None)Set the stimulus size [X,Y] in the specified (or inheritted) units
setUseShaders(val=True)Set this stimulus to use shaders if possible.
setVertices(value=None, operation=’‘)Set the xy values of the vertices (relative to the centre of the field). Values should be:
•an array/list of Nx2 coordinates.
13.2.7 RadialStim
class psychopy.visual.RadialStim(win, tex=’sqrXsqr’, mask=’none’, units=’‘, pos=(0.0, 0.0),size=(1.0, 1.0), radialCycles=3, angularCycles=4, radial-Phase=0, angularPhase=0, ori=0.0, texRes=64, angular-Res=100, visibleWedge=(0, 360), rgb=None, color=(1.0, 1.0,1.0), colorSpace=’rgb’, dkl=None, lms=None, contrast=1.0,opacity=1.0, depth=0, rgbPedestal=(0.0, 0.0, 0.0), interpo-late=False, name=’‘, autoLog=True)
Stimulus object for drawing radial stimuli, like an annulus, a rotating wedge, a checkerboard etc...
Ideal for fMRI retinotopy stimuli!
Many of the capabilities are built on top of the PatchStim.
This stimulus is still relatively new and I’m finding occasional gliches. it also takes longer to draw than a typicalPatchStim, so not recommended for tasks where high frame rates are needed.
Parameters
win : a Window object (required)
tex : The texture forming the image
• ‘sqrXsqr’, ‘sinXsin’, ‘sin’,’sqr’,None
• or the name of an image file (most formats supported)
• or a numpy array (1xN, NxNx1, NxNx3) ranging -1:1
mask : Unlike the mask in the PatchStim, this is a 1-D mask dictating the behaviour from thecentre of the stimulus to the surround.
units [None, ‘norm’, ‘cm’, ‘deg’ or ‘pix’ ] If None then the current units of the Window willbe used. See Units for the window and stimuli for explanation of other options.
pos : a tuple (0.0,0.0) or a list [0.0,0.0] for the x and y of the centre of the stimulus. Stimuli canbe position beyond the window!
size : a tuple (0.5,0.5) or a list [0.5,0.5] for the x and y OR a single value (which will be appliedto x and y). Sizes can be negative and stimuli can extend beyond the window.
ori [] orientation of stimulus in degrees.
texRes [(default= 128 )] resolution of the texture (if not loading from an image file)
angularRes [(default= 100 )] 100, the number of triangles used to make the sti
radialPhase : the phase of the texture from the centre to the perimeter of the stimulus
angularPhase [] the phase of the texture around the stimulus
13.2. psychopy.visual - many visual stimuli 81

PsychoPy - Psychology software for Python, Release 1.65.01
color:
Could be a:
• web name for a color (e.g. ‘FireBrick’);
• hex value (e.g. ‘#FF0047’);
• tuple (1.0,1.0,1.0); list [1.0,1.0, 1.0]; or numpy array.
If the last three are used then the color space should also be given See Color spaces
colorSpace: the color space controlling the interpretation of the color See Color spaces
contrast [(default= 1.0 )] How far the stimulus deviates from the middle grey. Contrast canvary -1:1 (this is a multiplier for the values given in the color description of the stimulus)
opacity : 1.0 is opaque, 0.0 is transparent
depth: The depth argument is deprecated and may be removed in future versions. Depth iscontrolled simply by drawing order.
name [string] The name of the object to be using during logged messages about this stim
clearTextures()Clear the textures associated with the given stimulus. As of v1.61.00 this is called automatically duringgarbage collection of your stimulus, so doesn’t need calling explicitly by the user.
draw(win=None)Draw the stimulus in its relevant window. You must call this method after every MyWin.flip() if you wantthe stimulus to appear on that frame and then update the screen again.
If win is specified then override the normal window of this stimulus.
setAngularCycles(value, operation=’‘)set the number of cycles going around the stimulus
setAngularPhase(value, operation=’‘)set the angular phase of the texture
setAutoDraw(val)Add or remove a stimulus from the list of stimuli that will be automatically drawn on each flip
Parameters
• val: True/False True to add the stimulus to the draw list, False to remove it
setAutoLog(val=True)Turn on (or off) autoLogging for this stimulus.
Parameters
• val: True (default) or False
setColor(color, colorSpace=None, operation=’‘)Set the color of the stimulus. See Color spaces for further information about the various ways to specifycolors and their various implications.
Parameters
color [] Can be specified in one of many ways. If a string is given then it is in-terpreted as the name of the color. Any of the standard html/X11 color names<http://www.w3schools.com/html/html_colornames.asp> can be used. e.g.:
82 Chapter 13. Reference Manual (API)
PsychoPy - Psychology software for Python, Release 1.65.01
myStim.setColor(’white’)myStim.setColor(’RoyalBlue’)#(the case is actually ignored)
A hex value can be provided, also formatted as with web colors. This can be provided as a string thatbegins with # (not using python’s usual 0x000000 format):
myStim.setColor(’#DDA0DD’)#DDA0DD is hexadecimal for plum
You can also provide a triplet of values, which refer to the coordinates in one of the Color spaces. Ifno color space is specified then the color space most recently used for this stimulus is used again.
myStim.setColor([1.0,-1.0,-1.0], ‘rgb’)#a red color in rgb space myS-tim.setColor([0.0,45.0,1.0], ‘dkl’) #DKL space with elev=0, azimuth=45 myS-tim.setColor([0,0,255], ‘rgb255’) #a blue stimulus using rgb255 space
Lastly, a single number can be provided, x, which is equivalent to providing [x,x,x].
myStim.setColor(255, ‘rgb255’) #all guns o max
colorSpace : string or None
defining which of the Color spaces to use. For strings and hex values this is not needed. If Nonethe default colorSpace for the stimulus is used (defined during initialisation).
operation : one of ‘+’,’-‘,’*’,’/’, or ‘’ for no operation (simply replace value)
for colors specified as a triplet of values (or single intensity value) the new value will performthis operation on the previous color
thisStim.setColor([1,1,1],’rgb255’,’+’)#increment all guns by 1 valuethisStim.setColor(-1, ‘rgb’, ‘*’) #multiply the color by -1 (which in this space in-verts the contrast) thisStim.setColor([10,0,0], ‘dkl’, ‘+’)#raise the elevation from theisoluminant plane by 10 deg
setContr(newContr, operation=’‘)Set the contrast of the stimulus
setContrast(value, operation=’‘)
setDKL(newDKL, operation=’‘)DEPRECATED since v1.60.05: Please use setColor
setDepth(newDepth, operation=’‘)
setLMS(newLMS, operation=’‘)DEPRECATED since v1.60.05: Please use setColor
setMask(value)
setOpacity(newOpacity, operation=’‘)
setOri(newOri, operation=’‘)Set the stimulus orientation in degrees
setPhase(value, operation=’‘)
setPos(newPos, operation=’‘, units=None)Set the stimulus position in the specified (or inheritted) units
setRGB(newRGB, operation=’‘)DEPRECATED since v1.60.05: Please use setColor
13.2. psychopy.visual - many visual stimuli 83
PsychoPy - Psychology software for Python, Release 1.65.01
setRadialCycles(value, operation=’‘)set the number of texture cycles from centre to periphery
setRadialPhase(value, operation=’‘)set the radial phase of the texture
setSF(value, operation=’‘)
setSize(value, operation=’‘)
setTex(value)
setUseShaders(val=True)Set this stimulus to use shaders if possible.
13.2.8 ElementArrayStim
class psychopy.visual.ElementArrayStim(win, units=None, fieldPos=(0.0, 0.0), fieldSize=(1.0,1.0), fieldShape=’circle’, nElements=100, sizes=2.0,xys=None, rgbs=(1.0, 1.0, 1.0), opacities=1.0,depths=0, fieldDepth=0, oris=0, sfs=1.0, contrs=1,phases=0, elementTex=’sin’, elementMask=’gauss’,texRes=48, name=’‘, autoLog=True)
This stimulus class defines a field of elements whose behaviour can be independently controlled. Suitablefor creating ‘global form’ stimuli or more detailed random dot stimuli. This stimulus can draw thousands ofelements without dropping a frame, but in order to achieve this performance, uses several OpenGL extensionsonly available on modern graphics cards (supporting OpenGL2.0). See the ElementArray demo.
Parameters
win : a Window object (required)
units [None, ‘height’, ‘norm’, ‘cm’, ‘deg’ or ‘pix’ ] If None then the current units of theWindowwill be used. See Units for the window and stimuli for explanation of other options.
fieldPos [] The centre of the array of elements
fieldSize [] The size of the array of elements (this will be overridden by setting explicit xypositions for the elements)
fieldShape [] The shape of the array (‘circle’ or ‘sqr’)
nElements [] number of elements in the array
sizes [] an array of sizes Nx1, Nx2 or a single value
xys [] the xy positions of the elements, relative to the field centre (fieldPos)
rgbs [] specifying the color(s) of the elements. Should be Nx1 (different greys), Nx3 (differentcolors) or 1x3 (for a single color)
opacities [] the opacity of each element (Nx1 or a single value)
depths [] the depths of the elements (Nx1), relative the overall depth of the field (fieldDepth)
fieldDepth [] the depth of the field (will be added to the depths of the elements)
oris [] the orientations of the elements (Nx1 or a single value)
sfs [] the spatial frequencies of the elements (Nx1, Nx2 or a single value)
contrs [] the contrasts of the elements, ranging -1 to +1 (Nx1 or a single value)
84 Chapter 13. Reference Manual (API)
PsychoPy - Psychology software for Python, Release 1.65.01
phases [] the spatial phase of the texture on the stimulus (Nx1 or a single value)
elementTex [] the texture, to be used by all elements (e.g. ‘sin’, ‘sqr’,.. , ‘myTexture.tif’,numpy.ones([48,48]))
elementMask [] the mask, to be used by all elements (e.g. ‘circle’, ‘gauss’,... , ‘myTexture.tif’,numpy.ones([48,48]))
texRes [] the number of pixels in the textures (overridden if an array or image is provided)
name [string] The name of the objec to be using during logged messages about this stim
clearTextures()Clear the textures associated with the given stimulus. As of v1.61.00 this is called automatically duringgarbage collection of your stimulus, so doesn’t need calling explicitly by the user.
draw(win=None)Draw the stimulus in its relevant window. You must call this method after every MyWin.update() if youwant the stimulus to appear on that frame and then update the screen again.
setContrs(value, operation=’‘)Set the contrast for each element. Should either be:
•a single value
•an Nx1 array/list
setFieldPos(value, operation=’‘)Set the centre of the array (X,Y)
setFieldSize(value, operation=’‘)Set the size of the array on the screen (will override current XY positions of the elements)
setMask(value)Change the mask (all elements have the same mask). Avoid doing this during time-critical points in yourscript. Uploading new textures to the graphics card can be time-consuming.
setOpacities(value, operation=’‘)Set the opacity for each element. Should either be a single value or an Nx1 array/list
setOris(value, operation=’‘)Set the orientation for each element. Should either be a single value or an Nx1 array/list
setPhases(value, operation=’‘)Set the phase for each element. Should either be:
•a single value
•an Nx1 array/list
•an Nx2 array/list (for separate X and Y phase)
setPos(newPos=None, operation=’‘, units=None)Obselete - users should use setFieldPos or instead of setPos
setRgbs(value, operation=’‘)Set the rgb for each element. Should either be:
•a single value
•an Nx1 array/list
•an Nx3 array/list
setSfs(value, operation=’‘)Set the spatial frequency for each element. Should either be:
13.2. psychopy.visual - many visual stimuli 85
PsychoPy - Psychology software for Python, Release 1.65.01
•a single value
•an Nx1 array/list
•an Nx2 array/list (spatial frequency of the element in X and Y).
If the units for the stimulus are ‘pix’ or ‘norm’ then the units of sf are cycles per stimulus width. For unitsof ‘deg’ or ‘cm’ the units are c/cm or c/deg respectively.
setSizes(value, operation=’‘)Set the size for each element. Should either be:
•a single value
•an Nx1 array/list
•an Nx2 array/list
setTex(value)Change the texture (all elements have the same base texture). Avoid this during time-critical points in yourscript. Uploading new textures to the graphics card can be time-consuming.
setXYs(value=None, operation=’‘)Set the xy values of the element centres (relative to the centre of the field). Values should be:
•None
•an array/list of Nx2 coordinates.
If value is None then the xy positions will be generated automatically, based on the fieldSize and fieldPos.In this case opacity will also be overridden by this function (it is used to make elements outside the fieldinvisible.
updataElementColors()Create a new array of self._RGBAs
updataTextureCoords()Create a new array of self._maskCoords
updateElementVertices()
13.2.9 DotStim
class psychopy.visual.DotStim(win, units=’‘, nDots=1, coherence=0.5, fieldPos=(0.0, 0.0), field-Size=(1.0, 1.0), fieldShape=’sqr’, dotSize=2.0, dotLife=3, dir=0.0,speed=0.5, rgb=None, color=(1.0, 1.0, 1.0), colorSpace=’rgb’,opacity=1.0, depth=0, element=None, signalDots=’different’, noise-Dots=’position’, name=’‘, autoLog=True)
This stimulus class defines a field of dots with an update rule that determines how they change on every call tothe .draw() method.
This standard class can be used to generate a wide variety of dot motion types. For a review of possible typesand their pros and cons see Scase, Braddick & Raymond (1996). All six possible motions they describe can begenerated with appropriate choices of the signalDots (which determines whether signal dots are the ‘same’ or‘different’ from frame to frame), noiseDots (which determines the locations of the noise dots on each frame)and the dotLife (which determines for how many frames the dot will continue before being regenerated).
‘Movshon’-type noise uses a random position, rather than random direction, for the noise dots and the signaldots are distinct (noiseDots=’different’). This has the disadvantage that the noise dots not only have a randomdirection but also a random speed (so differ in two ways from the signal dots). The default option for DotStim is
86 Chapter 13. Reference Manual (API)
PsychoPy - Psychology software for Python, Release 1.65.01
that the dots follow a random walk, with the dot and noise elements being randomised each frame. This providesgreater certainty that individual dots cannot be used to determine the motion direction.
When dots go out of bounds or reach the end of their life they are given a new random position. As a result,to prevent inhomogeneities arising in the dots distribution across the field, a limitted lifetime dot is stronglyrecommended.
If further customisation is required, then the DotStim should be subclassed and its _update_dotsXY and _new-DotsXY methods overridden.
Parameters
win : a Window object (required)
units [None, ‘norm’, ‘cm’, ‘deg’ or ‘pix’ ] If None then the current units of the Window willbe used. See Units for the window and stimuli for explanation of other options.
nDots [int] number of dots to be generated
fieldPos [(x,y) or [x,y]] specifying the location of the centre of the stimulus.
fieldSize [a single value, specifying the diameter of the field] Sizes can be negative and canextend beyond the window.
fieldShape [‘sqr’ or ‘circle’ ] Defines the envelope used to present the dots
dotSize specified in pixels (overridden if element is specified)
dotLife [int] Number of frames each dot lives for (default=3, -1=infinite)
dir [float (degrees)] direction of the coherent dots
speed [float] speed of the dots (in units/frame)
signalDots [‘same’ or ‘different’] If ‘same’ then the chosen signal dots remain the same on eachframe. If ‘different’ they are randomly chosen each frame. This paramater corresponds toScase et al’s (1996) categories of RDK.
noiseDots [‘position’,’direction’ or ‘walk’] Determines the behaviour of the noise dots, takendirectly from Scase et al’s (1996) categories. For ‘position’, noise dots take a random po-sition every frame. For ‘direction’ noise dots follow a random, but constant direction. For‘walk’ noise dots vary their direction every frame, but keep a constant speed.
color:
Could be a:
• web name for a color (e.g. ‘FireBrick’);
• hex value (e.g. ‘#FF0047’);
• tuple (1.0,1.0,1.0); list [1.0,1.0, 1.0]; or numpy array.
If the last three are used then the color space should also be given See Color spaces
colorSpace: the color space controlling the interpretation of the color See Color spaces
opacity [float] 1.0 is opaque, 0.0 is transparent
depth: The depth argument is deprecated and may be removed in future versions. Depth iscontrolled simply by drawing order.
element [None or a visual stimulus object] This can be any object that has a .draw() methodand a .setPos([x,y]) method (e.g. a PatchStim, TextStim...)!! See ElementArrayStimfor a faster implementation of this idea.
13.2. psychopy.visual - many visual stimuli 87
PsychoPy - Psychology software for Python, Release 1.65.01
name [string] The name of the object to be using during logged messages about this stim
draw(win=None)Draw the stimulus in its relevant window. You must call this method after every MyWin.flip() if you wantthe stimulus to appear on that frame and then update the screen again.
set(attrib, val, op=’‘)DotStim.set() is obselete and may not be supported in future versions of PsychoPy. Use the specific methodfor each parameter instead (e.g. setFieldPos(), setCoherence()...)
setAutoDraw(val)Add or remove a stimulus from the list of stimuli that will be automatically drawn on each flip
Parameters
• val: True/False True to add the stimulus to the draw list, False to remove it
setAutoLog(val=True)Turn on (or off) autoLogging for this stimulus.
Parameters
• val: True (default) or False
setColor(color, colorSpace=None, operation=’‘)Set the color of the stimulus. See Color spaces for further information about the various ways to specifycolors and their various implications.
Parameters
color [] Can be specified in one of many ways. If a string is given then it is in-terpreted as the name of the color. Any of the standard html/X11 color names<http://www.w3schools.com/html/html_colornames.asp> can be used. e.g.:
myStim.setColor(’white’)myStim.setColor(’RoyalBlue’)#(the case is actually ignored)
A hex value can be provided, also formatted as with web colors. This can be provided as a string thatbegins with # (not using python’s usual 0x000000 format):
myStim.setColor(’#DDA0DD’)#DDA0DD is hexadecimal for plum
You can also provide a triplet of values, which refer to the coordinates in one of the Color spaces. Ifno color space is specified then the color space most recently used for this stimulus is used again.
myStim.setColor([1.0,-1.0,-1.0], ‘rgb’)#a red color in rgb space myS-tim.setColor([0.0,45.0,1.0], ‘dkl’) #DKL space with elev=0, azimuth=45 myS-tim.setColor([0,0,255], ‘rgb255’) #a blue stimulus using rgb255 space
Lastly, a single number can be provided, x, which is equivalent to providing [x,x,x].
myStim.setColor(255, ‘rgb255’) #all guns o max
colorSpace : string or None
defining which of the Color spaces to use. For strings and hex values this is not needed. If Nonethe default colorSpace for the stimulus is used (defined during initialisation).
operation : one of ‘+’,’-‘,’*’,’/’, or ‘’ for no operation (simply replace value)
for colors specified as a triplet of values (or single intensity value) the new value will performthis operation on the previous color
88 Chapter 13. Reference Manual (API)
PsychoPy - Psychology software for Python, Release 1.65.01
thisStim.setColor([1,1,1],’rgb255’,’+’)#increment all guns by 1 valuethisStim.setColor(-1, ‘rgb’, ‘*’) #multiply the color by -1 (which in this space in-verts the contrast) thisStim.setColor([10,0,0], ‘dkl’, ‘+’)#raise the elevation from theisoluminant plane by 10 deg
setContr(newContr, operation=’‘)Set the contrast of the stimulus
setDKL(newDKL, operation=’‘)DEPRECATED since v1.60.05: Please use setColor
setDepth(newDepth, operation=’‘)
setDir(val, op=’‘)Change the direction of the signal dots (units in degrees)
setFieldCoherence(val, op=’‘)Change the coherence (%) of the DotStim. This will be rounded according to the number of dots in thestimulus.
setFieldPos(val, op=’‘)
setLMS(newLMS, operation=’‘)DEPRECATED since v1.60.05: Please use setColor
setOpacity(newOpacity, operation=’‘)
setOri(newOri, operation=’‘)Set the stimulus orientation in degrees
setPos(newPos=None, operation=’‘, units=None)Obselete - users should use setFieldPos or instead of setPos
setRGB(newRGB, operation=’‘)DEPRECATED since v1.60.05: Please use setColor
setSize(newSize, operation=’‘, units=None)Set the stimulus size [X,Y] in the specified (or inheritted) units
setSpeed(val, op=’‘)Change the speed of the dots (in stimulus units per second)
setUseShaders(val=True)Set this stimulus to use shaders if possible.
13.2. psychopy.visual - many visual stimuli 89
PsychoPy - Psychology software for Python, Release 1.65.01
13.2.10 RatingScale
class psychopy.visual.RatingScale(win, scale=None, choices=None, low=1, high=7, lowAnchor-Text=None, highAnchorText=None, precision=1, textSizeFac-tor=1.0, textColor=’LightGray’, textFont=’Helvetica Bold’,showValue=True, showScale=True, showAnchors=True,showAccept=True, acceptKeys=’return’, acceptPre-Text=’key, click’, acceptText=’accept?’, leftKeys=’left’,rightKeys=’right’, lineColor=’White’, markerStyle=’triangle’,markerColor=None, markerStart=False, markerExpansion=1,customMarker=None, escapeKeys=None, allowSkip=True,skipKeys=’tab’, mouseOnly=False, singleClick=False, display-SizeFactor=1.0, stretchHoriz=1.0, pos=None, minTime=1.0,name=’‘, autoLog=True)
A class for getting numeric subjective ratings, e.g., on a 1-to-7 scale.
Returns a re-usable rating-scale object having a .draw() method, with a customizable visual appearance. Triesto provide useful default values.
The .draw() method displays the rating scale only (not the item to be rated), handles the subject’s response, andupdates the display. When the subject responds, .noResponse goes False (i.e., there is a response). You canthen call .getRating() to obtain the rating, .getRT() to get the decision time, or .reset() to restore the scale (forre-use). The experimenter has to handle the item to be rated, i.e., draw() it in the same window each frame. ARatingScale instance has no idea what else is on the screen. The subject can use the arrow keys (left, right) tomove the marker in small increments (e.g., 1/100th of a tick-mark if precision = 100).
Auto-rescaling happens if the low-anchor is 0 and high-anchor is a multiple of 10, just to reduce visual clutter.
Example 1.:
*Default 7-point scale*::
myItem = <create your text, image, movie, ...>myRatingScale = visual.RatingScale(myWin)while myRatingScale.noResponse:
myItem.draw()myRatingScale.draw()myWin.flip()
rating = myRatingScale.getRating()decisionTime = myRatingScale.getRT()
Example 2.:
*Mouse-free*. Considerable customization is possible. For fMRI, if your in-scanner response box sends keys 1-4, you coulduse custom left, right, and accept keys, and no mouse::
myRatingScale = visual.RatingScale(myWin, markerStart=4, leftKeys=’1’, rightKeys = ’2’, acceptKeys=’4’)
** Example 3. **:
*Non-numeric* choices (categorical, unordered)::
myRatingScale = visual.RatingScale(myWin, choices=[’agree’, ’disagree’])myRatingScale = visual.RatingScale(myWin, choices=[’cherry’, ’apple’, True, 3.14, ’pie’])
str(item) will be displayed, but the value returned by getResponse() will be of type you gave it::
myRatingScale = visual.RatingScale(myWin, choices=[True, False])
90 Chapter 13. Reference Manual (API)

PsychoPy - Psychology software for Python, Release 1.65.01
So if you give boolean values and the subject chooses False, getResponse() will return False (bool) and not ’False’ (str).
See coder Demos / stimuli / ratingScale.py for examples.
Author 2010 Jeremy Gray 2011 various updates; ‘tab’ is new default key to mean ‘skip this item’(‘escape’ means ‘break out of the experiment’ in builder)
Parameters
win : A Window object (required)
scale : string, explanation of the numbers to display to the subject; default = None will result ina default scale: <low>=not at all, <high>=extremely
choices : a list of items which the subject can choose among; (takes precedence over low, high,lowAnchorText, highAnchorText, showScale)
low : lowest numeric rating / low anchor (integer, default = 1)
high : highest numeric rating / high anchor (integer, default = 7; at least low+1)
lowAnchorText : text to dsiplay for the low end of the scale (default = numeric low value)
highAnchorText : text to display for the high end of the scale (default = numeric high value)
precision : portions of a tick to accept as input [1,10,100], default = 1 tick (no fractional parts)
Note: left/right keys will move the marker by one portion of a tick.
textSizeFactor : control the size of text elements of the scale. for larger than default text (ex-pand) set > 1; for smaller, set < 1
textColor : color to use for anchor and scale text (assumed to be RGB), default = ‘LightGray’
textFont : name of the font to use, default = ‘Helvetica Bold’
showValue : show the subject their currently selected number, default = True
showScale : show the scale text, default = True
showAnchors : show the two end points of the scale (low, high), default = True
showAccept : show the button to click to accept the current value by using the mouse, default= True
Note: If showAccept is False and acceptKeys is empty, acceptKeys is reset to [’return’] togive the subject a way to respond.
acceptKeys : list of keys that mean “accept the current response”, default = [’return’]
acceptPreText : text to display before any value has been selected
acceptText : text to display in the ‘accept’ button after a value has been selected
leftKeys : list of keys that mean “move leftwards”, default = [’left’]
rightKeys : list of keys that mean “move rightwards”, default = [’right’]
lineColor : color to use for the scale line, default = ‘White’
markerStyle : ‘triangle’ (DarkBlue), ‘circle’ (DarkRed), or ‘glow’ (White)
markerColor : None = use defaults; or any legal RGB colorname, e.g., ‘#123456’, ‘DarkRed’
markerStart : False, or the value in [low..high] to be pre-selected upon initial display
markerExpansion : how much the glow marker expands when moving to the right; 0=none,negative shrinks; try 10 or -10
13.2. psychopy.visual - many visual stimuli 91

PsychoPy - Psychology software for Python, Release 1.65.01
escapeKeys : keys that will quit the experiment, calling core.quit(). default = [ ] (none)
allowSkip : if True, the subject can skip an item by pressing a key in skipKeys, default = True
skipKeys : list of keys the subject can use to skip a response, default = [’tab’]
Note: to require a response to every item, use allowSkip=False
mouseOnly : require the subject use the mouse only (no keyboard), default = False. can beused to avoid competing with other objects for keyboard input.
Note: mouseOnly=True and showAccept=False is a bad combination, so showAccept wins(mouseOnly is reset to False); similarly, mouseOnly and allowSkip can conflict, becauseskipping an item is done via key press (mouseOnly wins) mouseOnly=True is helpful ifthere will be something else on the screen expecting keyboard input
singleClick : enable a mouse click to both indicate and accept the rating, default = False. notethat the ‘accept’ box is visible, but clicking it has no effect, its just to display the value. alegal key press will also count as a singleClick.
pos [tuple (x, y)] where to position the rating scale (x, y) in terms of the window’s units (pix,norm); default (0.0, -0.4) in norm units
displaySizeFactor : how much to expand or contract the overall rating scale display (not justthe line length)
stretchHoriz: multiplicative factor for stretching (or compressing) the scale horizontally (3 ->use the whole window); like displaySizeFactor, but only in the horizontal direction
minTime : number of seconds that must elapse before a reponse can be accepted, default = 1.0s
Note: For a max response time (upper limit), record the response
only within a desired time window. Or present the ratingScale for as long as you like, andjust ignore ‘late’ responses.
name [string] The name of the object to be using during logged messages about this stim
draw()Update the visual display, check for response (key, mouse, skip).
sets self.noResponse as appropriate. draw() only draws the rating scale, not the item to be rated
getRT()Returns the seconds taken to make the rating (or to indicate skip). Returns None if no rating available.
getRating()Returns the numerical rating. None if the subject skipped this item; False if not available.
reset()restores the rating-scale to its post-creation state (as “untouched” by the subject).
does not restore the scale text description (such reset is needed between items when rating multiple items)
13.2.11 Aperture
class psychopy.visual.Aperture(win, size, pos=(0, 0), ori=0, nVert=120, shape=’circle’,units=None)
Used to create a shape (circular for now) to restrict a stimulus visibility area.
Note: This is a new stimulus (1.63.05) and is subject to change. Notably, right now it supports only a circularshape
92 Chapter 13. Reference Manual (API)

PsychoPy - Psychology software for Python, Release 1.65.01
When enabled any drawing commands will only operate on pixels within the Aperture. Once disabled, subse-quent draw operations affect the whole screen as usual.
See demos/stimuli/aperture.py for example usage
Author 2011, Yuri Spitsyn 2011, Jon Peirce added units options, Jeremy Gray added shape &orientation
disable()Disable the Aperture. Any subsequent drawing operations will not be affected by the aperture until re-enabled.
enable()Enable the aperture so that it is used in future drawing operations
NB. The Aperture is enabled by default, when created.
setPos(pos, needReset=True)Set the pos (centre) of the Aperture
setSize(size, needReset=True)Set the size (diameter) of the Aperture
13.3 psychopy.data - functions for storing/saving/analysing data
Routines for handling data structures and analysis
13.3.1 TrialHandler
class psychopy.data.TrialHandler(trialList, nReps, method=’random’, dataTypes=None, ex-traInfo=None, seed=None, originPath=None)
Class to handle smoothly the selection of the next trial and report current values etc. Calls to .next() will fetchthe next object given to this handler, according to the method specified and will raise a StopIteration error iftrials have finished
See demo_trialHandler.py
trialList: a simple list (or flat array) of trials.
addData(thisType, value, position=None)Add data for the current trial
next()Advances to next trial and returns it. Updates attributes; thisTrial, thisTrialN and thisIndex If the trialshave ended this method will raise a StopIteration error. This can be handled with code such as:
trials = TrialHandler(.......)for eachTrial in trials:#automatically stops when done
#do stuff
or:
trials = TrialHandler(.......)while True: #ie forever
try:thisTrial = trials.next()
except StopIteration:#we got a StopIteration errorbreak #break out of the forever loop
#do stuff here for the trial
13.3. psychopy.data - functions for storing/saving/analysing data 93

PsychoPy - Psychology software for Python, Release 1.65.01
nextTrial()DEPRECATION WARNING: TrialHandler.nextTrial() will be deprecated please use Trialhandler.next()instead. jwp: 19/6/06
printAsText(stimOut=[], dataOut=(‘all_mean’, ‘all_std’, ‘all_raw’), delim=’t’, ma-trixOnly=False)
Exactly like saveAsText except that the output goes to the screen instead of a file
saveAsExcel(fileName, sheetName=’rawData’, stimOut=[], dataOut=(‘n’, ‘all_mean’, ‘all_std’,‘all_raw’), matrixOnly=False, appendFile=True)
Save a summary data file in Excel OpenXML format workbook (xlsx) for processing in most spreadsheetpackages. This format is compatible with versions of Excel (2007 or greater) and and with OpenOffice(>=3.0).
It has the advantage over the simpler text files (see TrialHandler.saveAsText() ) that data can bestored in multiple named sheets within the file. So you could have a single file named after your experimentand then have one worksheet for each participant. Or you could have one file for each participant and thenmultiple sheets for repeated sessions etc.
The file extension .xlsx will be added if not given already.
Parameters
fileName: string the name of the file to create or append. Can include relative or absolutepath
sheetName: string the name of the worksheet within the file
stimOut: list of strings the attributes of the trial characteristics to be output. To use thisyou need to have provided a list of dictionaries specifying to trialList parameter of theTrialHandler and give here the names of strings specifying entries in that dictionary
dataOut: list of strings specifying the dataType and the analysis to be performed, in theform dataType_analysis. The data can be any of the types that you added using trialHan-dler.data.add() and the analysis can be either ‘raw’ or most things in the numpy library,including ‘mean’,’std’,’median’,’max’,’min’. e.g. rt_max will give a column of max reac-tion times across the trials assuming that rt values have been stored. The default valueswill output the raw, mean and std of all datatypes found
appendFile: True or False If False any existing file with this name will be overwritten. IfTrue then a new worksheet will be appended. If a worksheet already exists with that namea number will be added to make it unique.
saveAsPickle(fileName)Basically just saves a copy of self (with data) to a pickle file.
This can be reloaded if necess and further analyses carried out.
saveAsText(fileName, stimOut=[], dataOut=(‘n’, ‘all_mean’, ‘all_std’, ‘all_raw’), delim=’t’, ma-trixOnly=False, appendFile=True)
Write a text file with the data and various chosen stimulus attributes
Parameters
fileName: will have .dlm appended (so you can double-click it to open in excel) andcan include path info.
stimOut: the stimulus attributes to be output. To use this you need to use a list ofdictionaries and give here the names of dictionary keys that you want as strings
dataOut: a list of strings specifying the dataType and the analysis to be performed,inthe form dataType_analysis. The data can be any of the types that you added usingtrialHandler.data.add() and the analysis can be either ‘raw’ or most things in the
94 Chapter 13. Reference Manual (API)
PsychoPy - Psychology software for Python, Release 1.65.01
numpy library, including; ‘mean’,’std’,’median’,’max’,’min’... The default valueswill output the raw, mean and std of all datatypes found
delim: allows the user to use a delimiter other than tab (”,” is popular with file exten-sion ”.csv”)
matrixOnly: outputs the data with no header row or extraInfo attached
appendFile: will add this output to the end of the specified file if it already exists
13.3.2 StairHandler
class psychopy.data.StairHandler(startVal, nReversals=None, stepSizes=4, nTrials=0, nUp=1,nDown=3, extraInfo=None, method=‘2AFC’, stepType=’db’,minVal=None, maxVal=None, originPath=None)
Class to handle smoothly the selection of the next trial and report current values etc. Calls to nextTrial() willfetch the next object given to this handler, according to the method specified.
See demo_trialHandler.py
The staircase will terminate when nTrials AND nReversals have been exceeded. If stepSizes was an array andhas been exceeded before nTrials is exceeded then the staircase will continue to reverse
Parameters
startVal: The initial value for the staircase.
nReversals: The minimum number of reversals permitted. If stepSizes is a list then there mustalso be enough reversals to satisfy this list.
stepSizes: The size of steps as a single value or a list (or array). For a single value the step sizeis fixed. For an array or list the step size will progress to the next entry at each reversal.
nTrials: The minimum number of trials to be conducted. If the staircase has not reached therequired number of reversals then it will continue.
nUp: The number of ‘incorrect’ (or 0) responses before the staircase level increases.
nDown: The number of ‘correct’ (or 1) responses before the staircase level decreases.
extraInfo: A dictionary (typically) that will be stored along with collected data usingsaveAsPickle() or saveAsText() methods.
stepType: specifies whether each step will be a jump of the given size in ‘db’, ‘log’ or ‘lin’units (‘lin’ means this intensity will be added/subtracted)
method: Not used and may be deprecated in future releases.
stepType: ‘db’, ‘lin’, ‘log’ The type of steps that should be taken each time. ‘lin’ will simplyadd or subtract that amount each step, ‘db’ and ‘log’ will step by a certain number of decibelsor log units (note that this will prevent your value ever reaching zero or less)
minVal: None, or a number The smallest legal value for the staircase, which can be used toprevent it reaching impossible contrast values, for instance.
maxVal: None, or a number The largest legal value for the staircase, which can be used toprevent it reaching impossible contrast values, for instance.
addData(result)Add a 1 or 0 to signify a correct/detected or incorrect/missed trial
This is essential to advance the staircase to a new intensity level!
13.3. psychopy.data - functions for storing/saving/analysing data 95
PsychoPy - Psychology software for Python, Release 1.65.01
calculateNextIntensity()based on current intensity, counter of correct responses and current direction
next()Advances to next trial and returns it. Updates attributes; thisTrial, thisTrialN and thisIndex.
If the trials have ended, calling this method will raise a StopIteration error. This can be handled with codesuch as:
staircase = StairHandler(.......)for eachTrial in staircase:#automatically stops when done
#do stuff
or:
staircase = StairHandler(.......)while True: #ie forever
try:thisTrial = staircase.next()
except StopIteration:#we got a StopIteration errorbreak #break out of the forever loop
#do stuff here for the trial
nextTrial()DEPRECATION WARNING: StairHandler.nextTrial() will be deprecated please use StairHandler.next()instead. jwp: 19/6/06
printAsText(stimOut=[], dataOut=(‘rt_mean’, ‘rt_std’, ‘acc_raw’), delim=’t’, matrixOnly=False)Exactly like saveAsText except that the output goes to the screen instead of a file
saveAsExcel(fileName, sheetName=’data’, matrixOnly=False, appendFile=True)Save a summary data file in Excel OpenXML format workbook (xlsx) for processing in most spreadsheetpackages. This format is compatible with versions of Excel (2007 or greater) and and with OpenOffice(>=3.0).
It has the advantage over the simpler text files (see TrialHandler.saveAsText() ) that data can bestored in multiple named sheets within the file. So you could have a single file named after your experimentand then have one worksheet for each participant. Or you could have one file for each participant and thenmultiple sheets for repeated sessions etc.
The file extension .xlsx will be added if not given already.
The file will contain a set of values specifying the staircase level (‘intensity’) at each reversal, a list ofreversal indices (trial numbers), the raw staircase/intensity level on every trial and the corresponding re-sponses of the participant on every trial.
Parameters
fileName: string the name of the file to create or append. Can include relative or absolutepath
sheetName: string the name of the worksheet within the file
matrixOnly: True or False If set to True then only the data itself will be output (no addi-tional info)
appendFile: True or False If False any existing file with this name will be overwritten. IfTrue then a new worksheet will be appended. If a worksheet already exists with that namea number will be added to make it unique.
saveAsPickle(fileName)Basically just saves a copy of self (with data) to a pickle file.
96 Chapter 13. Reference Manual (API)
PsychoPy - Psychology software for Python, Release 1.65.01
This can be reloaded if necess and further analyses carried out.
saveAsText(fileName, delim=’t’, matrixOnly=False)Write a text file with the data
Parameters
fileName: a string The name of the file, including path if needed. The extension .dlm willbe added if not included.
delim: a string the delimitter to be used (e.g. ‘ ‘ for tab-delimitted, ‘,’ for csv files)
matrixOnly: True/False If True, prevents the output of the extraInfo provided at initialisa-tion.
13.3.3 MultiStairHandler
class psychopy.data.MultiStairHandler(stairType=’simple’, method=’random’, condi-tions=None, nTrials=50)
A Handler to allow easy interleaved staircase procedures (simple or QUEST).
Parameters for the staircases, as used by the relevant StairHandler or QuestHandler (e.g. the startVal,minVal, maxVal...) should be specified in the conditions list and may vary between each staircase. In particular,the conditions /must/ include the a startVal (because this is a required argument to the above handlers) a label totag the staircase and a startValSd (only for QUEST staircases). Any parameters not specified in the conditionsfile will revert to the default for that individual handler.
Params
stairType: ‘simple’ or ‘quest’ Use a ‘~psychopy.data.StairHandler‘_ or ‘~psy-chopy.data.QuestHandler‘_
method: ‘random’ or ‘sequential’ The stairs are shuffled in each repeat but not randomisedmore than that (so you can’t have 3 repeats of the same staircase in a row unless it’s the onlyone still running)
conditions: a list of dictionaries specifying conditions Can be used to control parametersfor the different staicases. Can be imported from an Excel file using psy-chopy.data.importTrialTypes MUST include keys providing, ‘startVal’, ‘label’ and ‘start-ValSd’ (QUEST only). The ‘label’ will be used in data file saving so should be unique. SeeExample Usage below.
nTrials=50 Minimum trials to run (but may take more if the staircase hasn’t also met its minimalreversals. See ~psychopy.data.StairHandler
Example usage:
conditions=[’label’:’low’, ’startVal’: 0.1, ’ori’:45,’label’:’high’,’startVal’: 0.8, ’ori’:45,’label’:’low’, ’startVal’: 0.1, ’ori’:90,’label’:’high’,’startVal’: 0.8, ’ori’:90,]
stairs = MultiStairHandler(conditions=conditions, trials=50)
for thisIntensity, thisCondition in stairs:thisOri = thisCondition[’ori’]
#do something with thisIntensity and thisOri
stairs.addData(correctIncorrect)#this is ESSENTIAL
13.3. psychopy.data - functions for storing/saving/analysing data 97
PsychoPy - Psychology software for Python, Release 1.65.01
#save data as multiple formatsstairs.saveDataAsExcel(fileName)#easy to browsestairs.saveAsPickle(fileName)#contains more info
addData(result)Add a 1 or 0 to signify a correct/detected or incorrect/missed trial
This is essential to advance the staircase to a new intensity level!
next()Advances to next trial and returns it.
This can be handled with code such as:
staircase = MultiStairHandler(.......)for eachTrial in staircase:#automatically stops when done
#do stuff here for the trial
or:
staircase = MultiStairHandler(.......)while True: #ie forever
try:thisTrial = staircase.next()
except StopIteration:#we got a StopIteration errorbreak #break out of the forever loop
#do stuff here for the trial
printAsText(delim=’t’, matrixOnly=False)Write the data to the standard output stream
Parameters
delim: a string the delimitter to be used (e.g. ‘ ‘ for tab-delimitted, ‘,’ for csv files)
matrixOnly: True/False If True, prevents the output of the extraInfo provided at initialisa-tion.
saveAsExcel(fileName, matrixOnly=False, appendFile=False)Save a summary data file in Excel OpenXML format workbook (xlsx) for processing in most spreadsheetpackages. This format is compatible with versions of Excel (2007 or greater) and and with OpenOffice(>=3.0).
It has the advantage over the simpler text files (see TrialHandler.saveAsText() ) that the datafrom each staircase will be save in the same file, with the sheet name coming from the ‘label’ given in thedictionary of conditions during initialisation of the Handler.
The file extension .xlsx will be added if not given already.
The file will contain a set of values specifying the staircase level (‘intensity’) at each reversal, a list ofreversal indices (trial numbers), the raw staircase/intensity level on every trial and the corresponding re-sponses of the participant on every trial.
Parameters
fileName: string the name of the file to create or append. Can include relative or absolutepath
matrixOnly: True or False If set to True then only the data itself will be output (no addi-tional info)
98 Chapter 13. Reference Manual (API)
PsychoPy - Psychology software for Python, Release 1.65.01
appendFile: True or False If False any existing file with this name will be overwritten. IfTrue then a new worksheet will be appended. If a worksheet already exists with that namea number will be added to make it unique.
saveAsPickle(fileName)Saves a copy of self (with data) to a pickle file.
This can be reloaded later and further analyses carried out.
saveAsText(fileName, delim=’t’, matrixOnly=False)Write out text files with the data.
For MultiStairHandler this will output one file for each staircase that was run, with _label added to thefileName that you specify above (label comes from the condition dictionary you specified when you createdthe Handler).
Parameters
fileName: a string The name of the file, including path if needed. The extension .dlm willbe added if not included.
delim: a string the delimitter to be used (e.g. ‘ ‘ for tab-delimitted, ‘,’ for csv files)
matrixOnly: True/False If True, prevents the output of the extraInfo provided at initialisa-tion.
13.3.4 QuestHandler
class psychopy.data.QuestHandler(startVal, startValSd, pThreshold=0.81999999999999995,nTrials=None, stopInterval=None, method=’quantile’, step-Type=’log’, beta=3.5, delta=0.01, gamma=0.5, grain=0.01,range=None, extraInfo=None, minVal=None, maxVal=None,staircase=None)
Class that implements the Quest algorithm using python code from XXX. f Like StairHandler, it handles theselection of the next trial and report current values etc. Calls to nextTrial() will fetch the next object given tothis handler, according to the method specified.
The staircase will terminate when nTrials or XXX has been exceeded.
Measure threshold using a Weibull psychometric function. Currently, it is not possible to use a different psy-chometric function.
Threshold ‘t’ is measured on an abstract ‘intensity’ scale, which usually corresponds to log10 contrast.
The Weibull psychometric function:
p2=delta*gamma+(1-delta)*(1-(1-gamma)*exp(-10**(beta*(x2+xThreshold))))
Example:
# setup display/window...# create stimulusstimulus = visual.RadialStim(win=win, tex=’sinXsin’, size=1, pos=[0,0], units=’deg’)...# create staircase object# trying to find out the point where subject’s response is 50/50# if wanted to do a 2AFC then the defaults for pThreshold and gamma are goodstaircase = data.QuestHandler(staircase._nextIntensity, 0.2, pThreshold=0.63, gamma=0.01,
nTrials=20, minVal=0, maxVal=1)...
13.3. psychopy.data - functions for storing/saving/analysing data 99
PsychoPy - Psychology software for Python, Release 1.65.01
while thisContrast in staircase:# setup stimulusstimulus.setContrast(thisContrast)stimulus.draw()win.flip()core.wait(0.5)# get response...# add responsestaircase.addData(thisResp)
...# can now access 1 of 3 suggested threshold levelsstaircase.mean()staircase.mode()staircase.quantile() #gets the median
Typical values for pThreshold are:
• 0.82 which is equivalent to a 3 up 1 down standard staircase
• 0.63 which is equivalent to a 1 up 1 down standard staircase (and might want gamma=0.01)
The variable(s) nTrials and/or stopSd must be specified.
beta, delta, and gamma are the parameters of the Weibull psychometric function.
Parameters
startVal: Prior threshold estimate or your initial guess threshold.
startValSd: Standard deviation of your starting guess threshold. Be generous with the sd asQUEST will have trouble finding the true threshold if it’s more than one sd from your initialguess.
pThreshold Your threshold criterion expressed as probability of response==1. An intensityoffset is introduced into the psychometric function so that the threshold (i.e., the midpointof the table) yields pThreshold..
nTrials: None or a number The maximum number of trials to be conducted.
stopInterval: None or a number The minimum 5-95% confidence interval required in thethreshold estimate before stopping. If both this and nTrials is specified, whichever happensfirst will determine when Quest will stop.
method: ‘quantile’, ‘mean’, ‘mode’ The method used to determine the next threshold to test.If you want to get a specific threshold level at the end of your staircasing, please use thequantile, mean, and mode methods directly.
stepType: ‘log’, ‘db’, ‘lin’ The type of steps that should be taken each time. ‘db’ and ‘log’ willtransform your intensity levels into decibels or log units and will move along the psycho-metric function with these values.
beta: 3.5 or a number Controls the steepness of the psychometric function.
delta: 0.01 or a number The fraction of trials on which the observer presses blindly.
gamma: 0.5 or a number The fraction of trials that will generate response 1 when intensity=-Inf.
grain: 0.01 or a number The quantization of the internal table.
100 Chapter 13. Reference Manual (API)
PsychoPy - Psychology software for Python, Release 1.65.01
range: None, or a number The intensity difference between the largest and smallest intensitythat the internal table can store. This interval will be centered on the initial guess tGuess.QUEST assumes that intensities outside of this range have zero prior probability (i.e., theyare impossible).
extraInfo: A dictionary (typically) that will be stored along with collected data usingsaveAsPickle() or saveAsText() methods.
minVal: None, or a number The smallest legal value for the staircase, which can be used toprevent it reaching impossible contrast values, for instance.
maxVal: None, or a number The largest legal value for the staircase, which can be used toprevent it reaching impossible contrast values, for instance.
staircase: None or StairHandler Can supply a staircase object with intensities and results.Might be useful to give the quest algorithm more information if you have it. You can alsocall the importData function directly.
addData(result, intensity=None)Add a 1 or 0 to signify a correct/detected or incorrect/missed trial Also update the intensity
calculateNextIntensity()based on current intensity and counter of correct responses
confInterval(getDifference=False)give the range of the 5-95% confidence interval
importData(intensities, results)import some data which wasn’t previously given to the quest algorithm
incTrials(nNewTrials)increase maximum number of trials Updates attribute: nTrials
mean()mean of Quest posterior pdf
mode()mode of Quest posterior pdf
next()Advances to next trial and returns it. Updates attributes; thisTrial, thisTrialN, thisIndex, finished, intensities
If the trials have ended, calling this method will raise a StopIteration error. This can be handled with codesuch as:
staircase = QuestHandler(.......)for eachTrial in staircase:#automatically stops when done
#do stuff
or:
staircase = QuestHandler(.......)while True: #ie forever
try:thisTrial = staircase.next()
except StopIteration:#we got a StopIteration errorbreak #break out of the forever loop
#do stuff here for the trial
nextTrial()DEPRECATION WARNING: StairHandler.nextTrial() will be deprecated please use StairHandler.next()instead. jwp: 19/6/06
13.3. psychopy.data - functions for storing/saving/analysing data 101

PsychoPy - Psychology software for Python, Release 1.65.01
printAsText(stimOut=[], dataOut=(‘rt_mean’, ‘rt_std’, ‘acc_raw’), delim=’t’, matrixOnly=False)Exactly like saveAsText except that the output goes to the screen instead of a file
quantile(p=None)quantile of Quest posterior pdf
saveAsExcel(fileName, sheetName=’data’, matrixOnly=False, appendFile=True)Save a summary data file in Excel OpenXML format workbook (xlsx) for processing in most spreadsheetpackages. This format is compatible with versions of Excel (2007 or greater) and and with OpenOffice(>=3.0).
It has the advantage over the simpler text files (see TrialHandler.saveAsText() ) that data can bestored in multiple named sheets within the file. So you could have a single file named after your experimentand then have one worksheet for each participant. Or you could have one file for each participant and thenmultiple sheets for repeated sessions etc.
The file extension .xlsx will be added if not given already.
The file will contain a set of values specifying the staircase level (‘intensity’) at each reversal, a list ofreversal indices (trial numbers), the raw staircase/intensity level on every trial and the corresponding re-sponses of the participant on every trial.
Parameters
fileName: string the name of the file to create or append. Can include relative or absolutepath
sheetName: string the name of the worksheet within the file
matrixOnly: True or False If set to True then only the data itself will be output (no addi-tional info)
appendFile: True or False If False any existing file with this name will be overwritten. IfTrue then a new worksheet will be appended. If a worksheet already exists with that namea number will be added to make it unique.
saveAsPickle(fileName)Basically just saves a copy of self (with data) to a pickle file.
This can be reloaded if necess and further analyses carried out.
saveAsText(fileName, delim=’t’, matrixOnly=False)Write a text file with the data
Parameters
fileName: a string The name of the file, including path if needed. The extension .dlm willbe added if not included.
delim: a string the delimitter to be used (e.g. ‘ ‘ for tab-delimitted, ‘,’ for csv files)
matrixOnly: True/False If True, prevents the output of the extraInfo provided at initialisa-tion.
sd()standard deviation of Quest posterior pdf
simulate(tActual)returns a simulated user response to the next intensity level presented by Quest, need to supply the actualthreshold level
102 Chapter 13. Reference Manual (API)
PsychoPy - Psychology software for Python, Release 1.65.01
13.3.5 FitWeibull
class psychopy.data.FitWeibull(xx, yy, sems=1.0, guess=None, display=1, expectedMin=0.5)Fit a Weibull function (either 2AFC or YN) of the form:
y = chance + (1.0-chance)*(1-exp( -(xx/alpha)**(beta) ))
and with inverse:
x = alpha * (-log((1.0-y)/(1-chance)))**(1.0/beta)
After fitting the function you can evaluate an array of x-values with fit.eval(x), retrieve the inverse ofthe function with fit.inverse(y) or retrieve the parameters from fit.params (a list with [alpha,beta])
eval(xx=None, params=None)
inverse(yy, params=None)
13.3.6 FitLogistic
class psychopy.data.FitLogistic(xx, yy, sems=1.0, guess=None, display=1, expectedMin=0.5)Fit a Logistic function (either 2AFC or YN) of the form:
y = chance + (1-chance)/(1+exp((PSE-xx)*JND))
and with inverse:
x = PSE - log((1-chance)/(yy-chance) - 1)/JND
After fitting the function you can evaluate an array of x-values with fit.eval(x), retrieve the inverse of thefunction with fit.inverse(y) or retrieve the parameters from fit.params (a list with [PSE, JND])
eval(xx=None, params=None)
inverse(yy, params=None)
13.3.7 FitNakaRushton
class psychopy.data.FitNakaRushton(xx, yy, sems=1.0, guess=None, display=1)Fit a Naka-Rushton function of the form:
yy = rMin + (rMax-rMin) * xx**n/(xx**n+c50**n)
After fitting the function you can evaluate an array of x-values with fit.eval(x), retrieve the inverse of thefunction with fit.inverse(y) or retrieve the parameters from fit.params (a list with [rMin, rMax,c50, n])
Note that this differs from most of the other functions in not using a value for the expected minimum. Rather, itfits this as one of the parameters of the model.
eval(xx=None, params=None)
inverse(yy, params=None)
13.3. psychopy.data - functions for storing/saving/analysing data 103

PsychoPy - Psychology software for Python, Release 1.65.01
13.3.8 FitCumNormal
class psychopy.data.FitCumNormal(xx, yy, sems=1.0, guess=None, display=1, expectedMin=0.5)Fit a Cumulative Normal function (aka error function or erf) of the form:
y = chance + (1-chance)*(special.erf(xx*xScale - xShift)/2.0+0.5)
and with inverse:
x = (erfinv((yy-chance)/(1-chance)*2.0-1)+xShift)/xScale
After fitting the function you can evaluate an array of x-values with fit.eval(x), retrieve the inverse of the functionwith fit.inverse(y) or retrieve the parameters from fit.params (a list with [xShift, xScale])
eval(xx=None, params=None)
inverse(yy, params=None)
13.3.9 importTrialList()
psychopy.data.importTrialList(fileName, returnFieldNames=False)Imports a list of TrialTypes from an Excel (.xlsx) or comma-separated-value file.
If fileName ends .csv then import as a comma-separated-value file will be used. All other filenames will betreated as Excel 2007 (xlsx) files. Sorry no support for older versions of Excel file are planned.
The file should contain one row per type of trial needed and one column for each parameter that defines the trialtype. The first row should give parameter names, which should;
•be unique
•begin with a letter (upper or lower case)
•contain no spaces or other punctuation (underscores are permitted)
13.3.10 functionFromStaircase()
psychopy.data.functionFromStaircase(intensities, responses, bins=10)Create a psychometric function by binning data from a staircase procedure
usage:
[intensity, meanCorrect, n] = functionFromStaircase(intensities, responses, bins)
where:
intensities are a list of intensities to be binned
responses are a list of 0,1 each corresponding to the equivalent intensity value
bins can be an integer (giving that number of bins) or ‘unique’ (where each bin is made from ALL datafor exactly one intensity value)
intensity is the center of an intensity bin
meanCorrect is mean % correct in that bin
n is number of responses contributing to that mean
104 Chapter 13. Reference Manual (API)
PsychoPy - Psychology software for Python, Release 1.65.01
13.3.11 bootStraps()
psychopy.data.bootStraps(dat, n=1)Create a list of n bootstrapped resamples of the data
SLOW IMPLEMENTATION (Python for-loop)
Usage: out = bootStraps(dat, n=1)
Where:
dat an NxM or 1xN array (each row is a different condition, each column is a different trial)
n number of bootstrapped resamples to create
out
• dim[0]=conditions
• dim[1]=trials
• dim[2]=resamples
13.4 psychopy.event - for getting keypress and mouse clicks
To handle input from keyboard, mouse and joystick (joysticks require pygame to be installed). See demo_mouse.pyand idemo_joystick.py for examples
class psychopy.event.Mouse(visible=True, newPos=None, win=None)Easy way to track what your mouse is doing. It needn’t be a class, but since Joystick works better as a class thismay as well be one too for consistency
Create your visual.Window before creating a Mouse.
Parameters
visible [True or False] makes the mouse invisbile if necessary
newPos [None or [x,y]] gives the mouse a particular starting position (pygame Window only)
win [None or Window] the window to which this mouse is attached (the first found if Noneprovided)
clickReset(buttons=[0, 1, 2])Reset a 3-item list of core.Clocks use in timing button clicks. The pyglet mouse-button-pressed handleruses their timeAtLastReset when a button is pressed so the user can reset them at stimulus onset or offsetto measure RT. The default is to reset all, but they can be reset individually as specified in buttons list
getPos()Returns the current postion of the mouse, in the same units as the Window (0,0) is at centre
getPressed(getTime=False)Returns a 3-item list indicating whether or not buttons 1,2,3 are currently pressed
If getTime=True (False by default( then getPressed will return all buttons that have been pressed since thelast call to mouse.clickReset as well as their time stamps:
buttons = mouse.getPressed()buttons, times = mouse.getPressed(getTime=True)
13.4. psychopy.event - for getting keypress and mouse clicks 105
PsychoPy - Psychology software for Python, Release 1.65.01
Typically you want to call mouse.clickReset() at stimulus onset, then after the button is pressed in reactionto it, the total time elapsed from the last reset to click is in mouseTimes. This is the actual RT, regardlessof when the call to getPressed() was made.
getRel()Returns the new position of the mouse relative to the last call to getRel or getPos, in the same units as theWindow.
getVisible()Gets the visibility of the mouse (1 or 0)
getWheelRel()Returns the travel of the mouse scroll wheel since last call. Returns a numpy.array(x,y) but for most wheelsy is the only value that will change (except mac mighty mice?)
mouseMoved(distance=None, reset=False)Determine whether/how far the mouse has moved
With no args returns true if mouse has moved at all since last getPos() call, or distance (x,y) can be set topos or neg distances from x and y to see if moved either x or y that far from lastPos , or distance can be anint/float to test if new coordinates are more than that far in a straight line from old coords.
Retrieve time of last movement from self.mouseClock.getTime().
Reset can be to ‘here’ or to screen coords (x,y) which allows measuring distance from there to mousewhen moved. if reset is (x,y) and distance is set, then prevPos is set to (x,y) and distance from (x,y) to hereis checked, mouse.lastPos is set as current (x,y) by getPos(), mouse.prevPos holds lastPos from last timemouseMoved was called
setPos(newPos=(0, 0))Sets the current postiion of the mouse (pygame only), in the same units as the Window (0,0) is at centre
Parameters
newPos [(x,y) or [x,y]] the new position on the screen
setVisible(visible)Sets the visibility of the mouse to 1 or 0
NB when the mouse is not visible its absolute position is held at (0,0) to prevent it from going off thescreen and getting lost! You can still use getRel() in that case.
psychopy.event.clearEvents(eventType=None)Clears all events currently in the event buffer. Optional argument, eventType, specifies only certain types to becleared
Parameters
eventType [None, ‘mouse’, ‘joystick’, ‘keyboard’ ] If this is not None then only events of thegiven type are cleared
psychopy.event.getKeys(keyList=None, timeStamped=False)Returns a list of keys that were pressed.
Parameters
keyList [None or []] Allows the user to specify a set of keys to check for. Only keypresses fromthis set of keys will be removed from the keyboard buffer. If the keyList is None all keyswill be checked and the key buffer will be cleared completely. NB, pygame doesn’t returntimestamps (they are always 0)
106 Chapter 13. Reference Manual (API)
PsychoPy - Psychology software for Python, Release 1.65.01
timeStamped [False or True or Clock] If True will return a list of tuples instead of a list ofkeynames. Each tuple has (keyname, time). If a core.Clock is given then the time will berelative to the Clock‘s last reset
Author
• 2003 written by Jon Peirce
• 2009 keyList functionality added by Gary Strangman
• 2009 timeStamped code provided by Dave Britton
psychopy.event.waitKeys(maxWait=None, keyList=None)Halts everything (including drawing) while awaiting input from keyboard. Then returns list of keys pressed.Implicitly clears keyboard, so any preceding keypresses will be lost.
Optional arguments specify maximum wait period and which keys to wait for.
Returns None if times out.
psychopy.event.xydist(p1=[0.0, 0.0], p2=[0.0, 0.0])Helper function returning the cartesian distance between p1 and p2
13.5 psychopy.filters - helper functions for creating filters
Various useful functions for creating filters and textures (e.g. for PatchStim)
psychopy.filters.butter2d_bp(size, cutin, cutoff, n)Bandpass Butterworth filter in two dimensions
Parameters
size [tuple] size of the filter
cutin [float] relative cutin frequency of the filter (0 - 1.0)
cutoff [float] relative cutoff frequency of the filter (0 - 1.0)
n [int, optional] order of the filter, the higher n is the sharper the transition is.
Returns
numpy.ndarray filter kernel in 2D centered
psychopy.filters.butter2d_hp(size, cutoff, n=3)Highpass Butterworth filter in two dimensions
Parameters
size [tuple] size of the filter
cutoff [float] relative cutoff frequency of the filter (0 - 1.0)
n [int, optional] order of the filter, the higher n is the sharper the transition is.
Returns
numpy.ndarray: filter kernel in 2D centered
psychopy.filters.butter2d_lp(size, cutoff, n=3)Create lowpass 2D Butterworth filter
Parameters
size [tuple] size of the filter
13.5. psychopy.filters - helper functions for creating filters 107
PsychoPy - Psychology software for Python, Release 1.65.01
cutoff [float] relative cutoff frequency of the filter (0 - 1.0)
n [int, optional] order of the filter, the higher n is the sharper the transition is.
Returns
numpy.ndarray filter kernel in 2D centered
psychopy.filters.butter2d_lp_elliptic(size, cutoff_x, cutoff_y, n=3, alpha=0, offset_x=0, off-set_y=0)
Butterworth lowpass filter of any elliptical shape.
Parameters
size [tuple] size of the filter
cutoff_x, cutoff_y [float, float] relative cutoff frequency of the filter (0 - 1.0) for x and y axes
alpha [float, optional] rotation angle (in radians)
offset_x, offset_y [float] offsets for the ellipsoid
n [int, optional] order of the filter, the higher n is the sharper the transition is.
Returns
numpy.ndarray: filter kernel in 2D centered
psychopy.filters.conv2d(smaller, larger)convolve a pair of 2d numpy matrices Uses fourier transform method, so faster if larger matrix has dimensionsof size 2**n
Actually right now the matrices must be the same size (will sort out padding issues another day!)
psychopy.filters.getRMScontrast(matrix)Returns the RMS contrast (the sample standard deviation) of a array
psychopy.filters.imfft(X)Perform 2D FFT on an image and center low frequencies
psychopy.filters.imifft(X)Inverse 2D FFT with decentering
psychopy.filters.makeGauss(x, mean=0.0, sd=1.0, gain=1.0, base=0.0)
Return the gaussian distribution for a given set of x-vals
Parameters
mean: float the centre of the distribution
sd: float the width of the distribution
gain: float the height of the distribution
base: float an offset added to the result
psychopy.filters.makeGrating(res, ori=0.0, cycles=1.0, phase=0.0, gratType=’sin’, contr=1.0)Make an array containing a luminance grating of the specified params
Parameters
res: integer the size of the resulting matrix on both dimensions (e.g 256)
ori: float or int (default=0.0) the orientation of the grating in degrees
cycles:float or int (default=1.0) the number of grating cycles within the array
108 Chapter 13. Reference Manual (API)
PsychoPy - Psychology software for Python, Release 1.65.01
phase: float or int (default=0.0) the phase of the grating in degrees (NB this differs to mostPsychoPy phase arguments which use units of fraction of a cycle)
gratType: ‘sin’, ‘sqr’, ‘ramp’ or ‘sinXsin’ (default=”sin”) the type of grating to be ‘drawn’
contr: float (default=1.0) contrast of the grating
Returns a square numpy array of size resXres
psychopy.filters.makeMask(matrixSize, shape=’circle’, radius=1.0, center=(0.0, 0.0), range=[-1,1])
Returns a matrix to be used as an alpha mask (circle,gauss,ramp)
Parameters
matrixSize: integer the size of the resulting matrix on both dimensions (e.g 256)
shape: ‘circle’,’gauss’,’ramp’ (linear gradient from center) shape of the mask
radius: float scale factor to be applied to the mask (circle with radius of [1,1] will extend justto the edge of the matrix). Radius can asymmetric, e.g. [1.0,2.0] will be wider than it is tall.
center: 2x1 tuple or list (default=[0.0,0.0]) the centre of the mask in the matrix ([1,1] is top-right corner, [-1,-1] is bottom-left)
psychopy.filters.makeRadialMatrix(matrixSize, center=(0.0, 0.0), radius=1.0)Generate a square matrix where each element val is its distance from the centre of the matrix
Parameters
matrixSize: integer the size of the resulting matrix on both dimensions (e.g 256)
radius: float scale factor to be applied to the mask (circle with radius of [1,1] will extend justto the edge of the matrix). Radius can asymmetric, e.g. [1.0,2.0] will be wider than it is tall.
center: 2x1 tuple or list (default=[0.0,0.0]) the centre of the mask in the matrix ([1,1] is top-right corner, [-1,-1] is bottom-left)
psychopy.filters.maskMatrix(matrix, shape=’circle’, radius=1.0, center=(0.0, 0.0))Make and apply a mask to an input matrix (e.g. a grating)
Parameters
matrix: a square numpy array array to which the mask should be applied
shape: ‘circle’,’gauss’,’ramp’ (linear gradient from center) shape of the mask
radius: float scale factor to be applied to the mask (circle with radius of [1,1] will extend justto the edge of the matrix). Radius can asymmetric, e.g. [1.0,2.0] will be wider than it is tall.
center: 2x1 tuple or list (default=[0.0,0.0]) the centre of the mask in the matrix ([1,1] is top-right corner, [-1,-1] is bottom-left)
13.6 psychopy.gui - create dialogue boxes
13.6.1 DlgFromDict
class psychopy.gui.DlgFromDict(dictionary, title=’‘, fixed=[], order=[], tip=)Creates a dialogue box that represents a dictionary of values. Any values changed by the user are change(in-place) by this dialogue box. e.g.:
13.6. psychopy.gui - create dialogue boxes 109
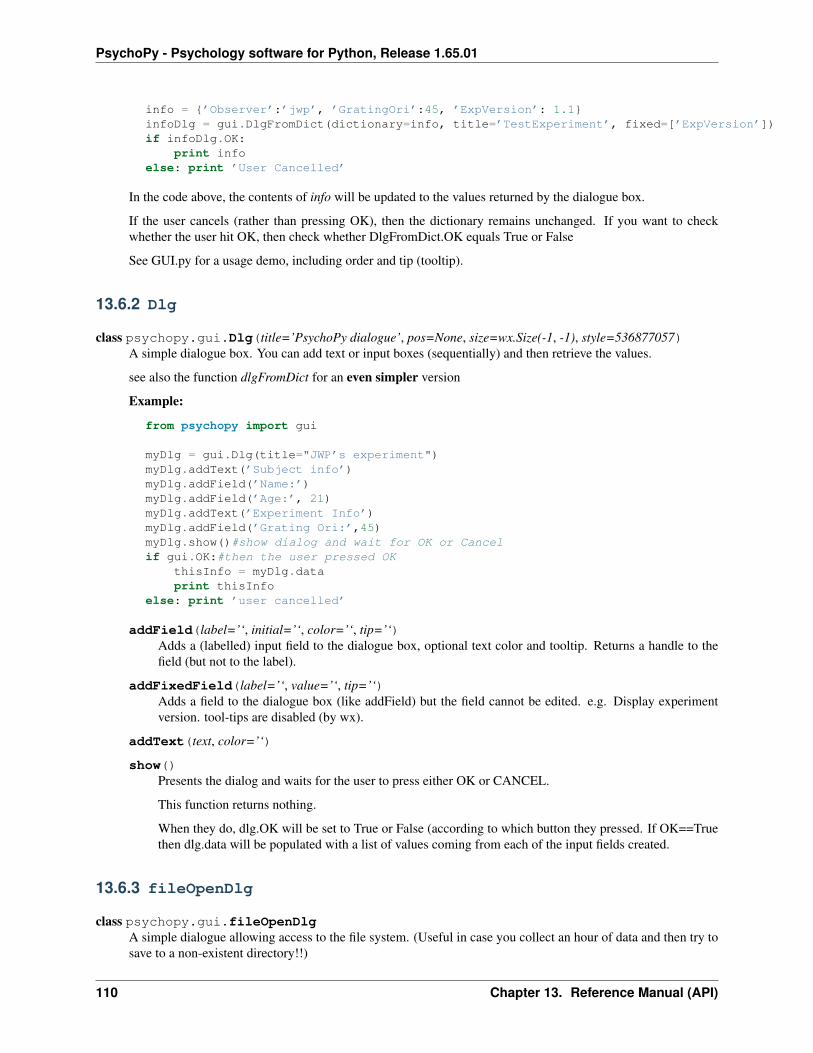
PsychoPy - Psychology software for Python, Release 1.65.01
info = ’Observer’:’jwp’, ’GratingOri’:45, ’ExpVersion’: 1.1infoDlg = gui.DlgFromDict(dictionary=info, title=’TestExperiment’, fixed=[’ExpVersion’])if infoDlg.OK:
print infoelse: print ’User Cancelled’
In the code above, the contents of info will be updated to the values returned by the dialogue box.
If the user cancels (rather than pressing OK), then the dictionary remains unchanged. If you want to checkwhether the user hit OK, then check whether DlgFromDict.OK equals True or False
See GUI.py for a usage demo, including order and tip (tooltip).
13.6.2 Dlg
class psychopy.gui.Dlg(title=’PsychoPy dialogue’, pos=None, size=wx.Size(-1, -1), style=536877057)A simple dialogue box. You can add text or input boxes (sequentially) and then retrieve the values.
see also the function dlgFromDict for an even simpler version
Example:
from psychopy import gui
myDlg = gui.Dlg(title="JWP’s experiment")myDlg.addText(’Subject info’)myDlg.addField(’Name:’)myDlg.addField(’Age:’, 21)myDlg.addText(’Experiment Info’)myDlg.addField(’Grating Ori:’,45)myDlg.show()#show dialog and wait for OK or Cancelif gui.OK:#then the user pressed OK
thisInfo = myDlg.dataprint thisInfo
else: print ’user cancelled’
addField(label=’‘, initial=’‘, color=’‘, tip=’‘)Adds a (labelled) input field to the dialogue box, optional text color and tooltip. Returns a handle to thefield (but not to the label).
addFixedField(label=’‘, value=’‘, tip=’‘)Adds a field to the dialogue box (like addField) but the field cannot be edited. e.g. Display experimentversion. tool-tips are disabled (by wx).
addText(text, color=’‘)
show()Presents the dialog and waits for the user to press either OK or CANCEL.
This function returns nothing.
When they do, dlg.OK will be set to True or False (according to which button they pressed. If OK==Truethen dlg.data will be populated with a list of values coming from each of the input fields created.
13.6.3 fileOpenDlg
class psychopy.gui.fileOpenDlgA simple dialogue allowing access to the file system. (Useful in case you collect an hour of data and then try tosave to a non-existent directory!!)
110 Chapter 13. Reference Manual (API)
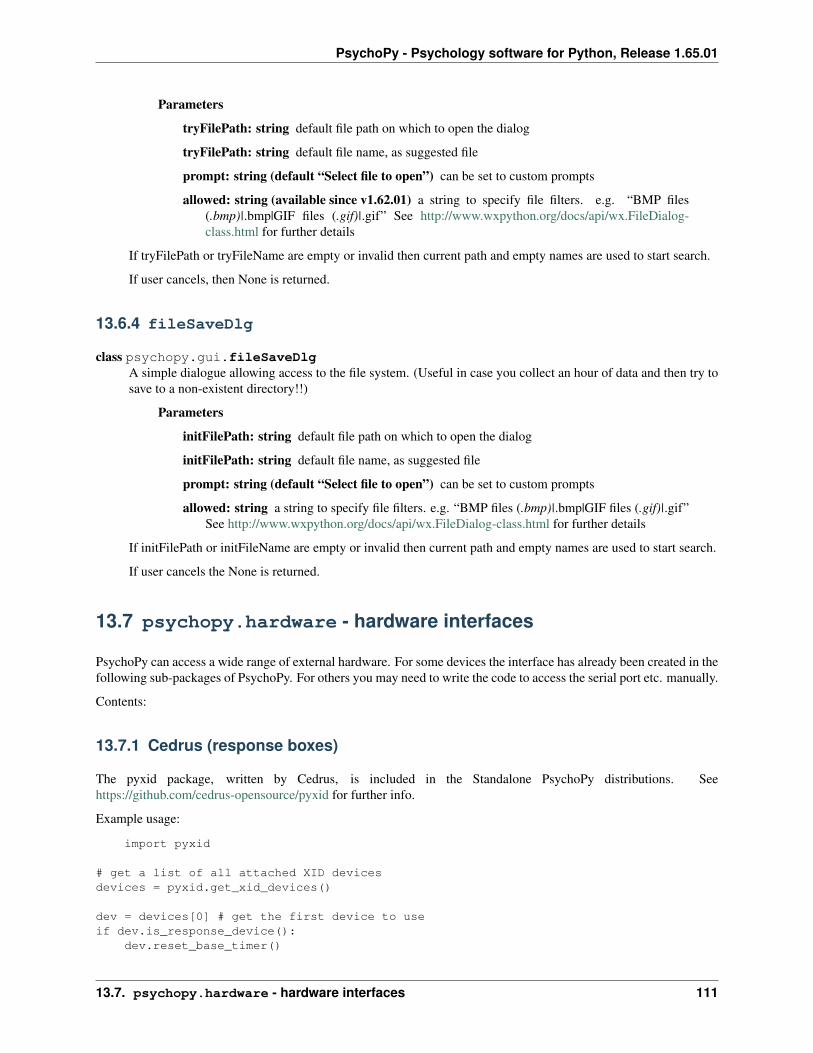
PsychoPy - Psychology software for Python, Release 1.65.01
Parameters
tryFilePath: string default file path on which to open the dialog
tryFilePath: string default file name, as suggested file
prompt: string (default “Select file to open”) can be set to custom prompts
allowed: string (available since v1.62.01) a string to specify file filters. e.g. “BMP files(.bmp)|.bmp|GIF files (.gif)|.gif” See http://www.wxpython.org/docs/api/wx.FileDialog-class.html for further details
If tryFilePath or tryFileName are empty or invalid then current path and empty names are used to start search.
If user cancels, then None is returned.
13.6.4 fileSaveDlg
class psychopy.gui.fileSaveDlgA simple dialogue allowing access to the file system. (Useful in case you collect an hour of data and then try tosave to a non-existent directory!!)
Parameters
initFilePath: string default file path on which to open the dialog
initFilePath: string default file name, as suggested file
prompt: string (default “Select file to open”) can be set to custom prompts
allowed: string a string to specify file filters. e.g. “BMP files (.bmp)|.bmp|GIF files (.gif)|.gif”See http://www.wxpython.org/docs/api/wx.FileDialog-class.html for further details
If initFilePath or initFileName are empty or invalid then current path and empty names are used to start search.
If user cancels the None is returned.
13.7 psychopy.hardware - hardware interfaces
PsychoPy can access a wide range of external hardware. For some devices the interface has already been created in thefollowing sub-packages of PsychoPy. For others you may need to write the code to access the serial port etc. manually.
Contents:
13.7.1 Cedrus (response boxes)
The pyxid package, written by Cedrus, is included in the Standalone PsychoPy distributions. Seehttps://github.com/cedrus-opensource/pyxid for further info.
Example usage:
import pyxid
# get a list of all attached XID devicesdevices = pyxid.get_xid_devices()
dev = devices[0] # get the first device to useif dev.is_response_device():
dev.reset_base_timer()
13.7. psychopy.hardware - hardware interfaces 111
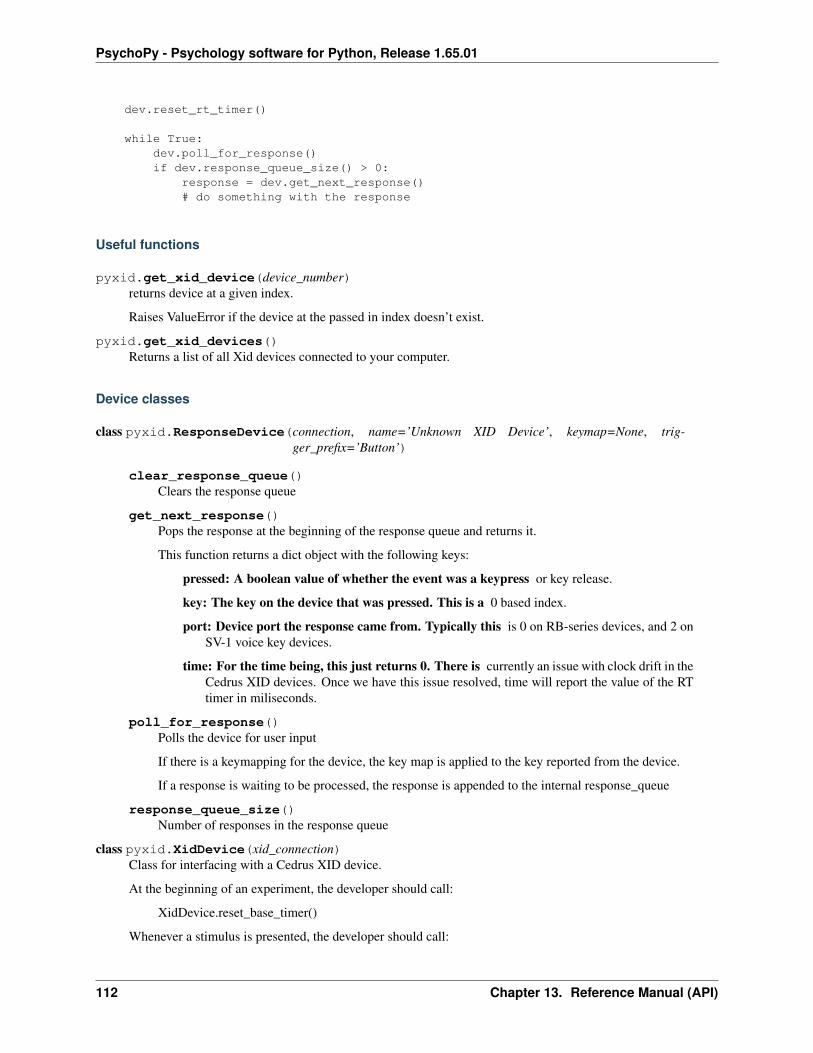
PsychoPy - Psychology software for Python, Release 1.65.01
dev.reset_rt_timer()
while True:dev.poll_for_response()if dev.response_queue_size() > 0:
response = dev.get_next_response()# do something with the response
Useful functions
pyxid.get_xid_device(device_number)returns device at a given index.
Raises ValueError if the device at the passed in index doesn’t exist.
pyxid.get_xid_devices()Returns a list of all Xid devices connected to your computer.
Device classes
class pyxid.ResponseDevice(connection, name=’Unknown XID Device’, keymap=None, trig-ger_prefix=’Button’)
clear_response_queue()Clears the response queue
get_next_response()Pops the response at the beginning of the response queue and returns it.
This function returns a dict object with the following keys:
pressed: A boolean value of whether the event was a keypress or key release.
key: The key on the device that was pressed. This is a 0 based index.
port: Device port the response came from. Typically this is 0 on RB-series devices, and 2 onSV-1 voice key devices.
time: For the time being, this just returns 0. There is currently an issue with clock drift in theCedrus XID devices. Once we have this issue resolved, time will report the value of the RTtimer in miliseconds.
poll_for_response()Polls the device for user input
If there is a keymapping for the device, the key map is applied to the key reported from the device.
If a response is waiting to be processed, the response is appended to the internal response_queue
response_queue_size()Number of responses in the response queue
class pyxid.XidDevice(xid_connection)Class for interfacing with a Cedrus XID device.
At the beginning of an experiment, the developer should call:
XidDevice.reset_base_timer()
Whenever a stimulus is presented, the developer should call:
112 Chapter 13. Reference Manual (API)
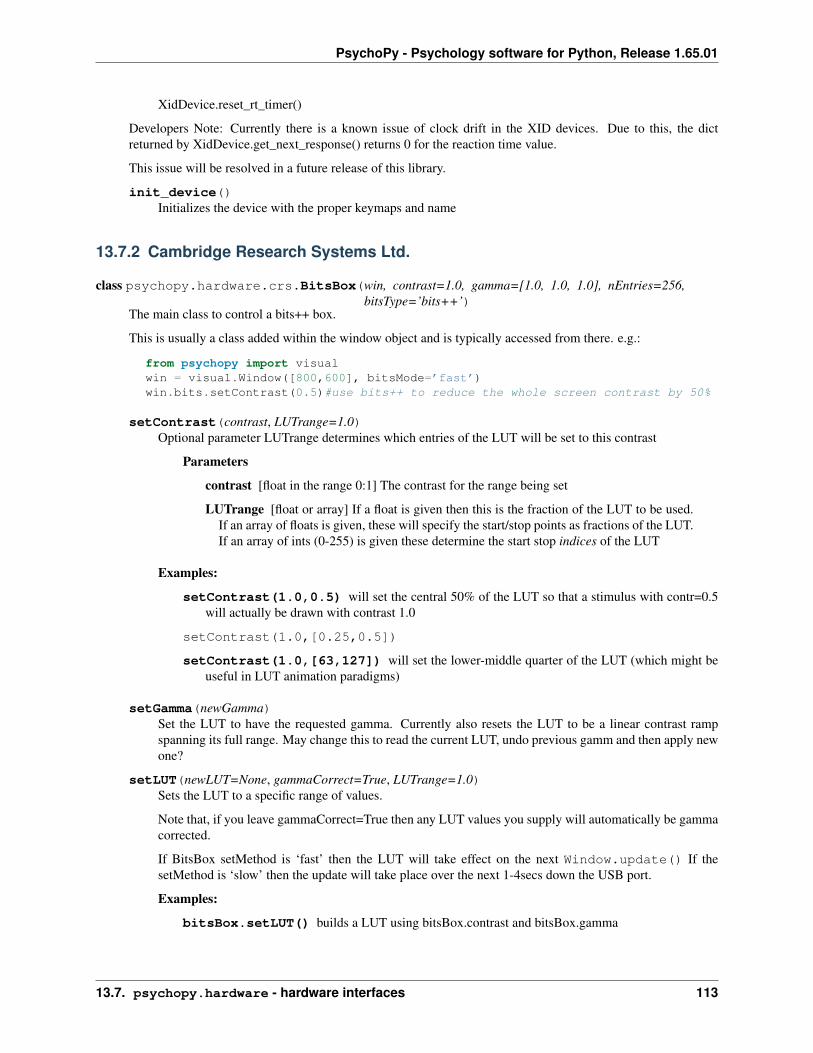
PsychoPy - Psychology software for Python, Release 1.65.01
XidDevice.reset_rt_timer()
Developers Note: Currently there is a known issue of clock drift in the XID devices. Due to this, the dictreturned by XidDevice.get_next_response() returns 0 for the reaction time value.
This issue will be resolved in a future release of this library.
init_device()Initializes the device with the proper keymaps and name
13.7.2 Cambridge Research Systems Ltd.
class psychopy.hardware.crs.BitsBox(win, contrast=1.0, gamma=[1.0, 1.0, 1.0], nEntries=256,bitsType=’bits++’)
The main class to control a bits++ box.
This is usually a class added within the window object and is typically accessed from there. e.g.:
from psychopy import visualwin = visual.Window([800,600], bitsMode=’fast’)win.bits.setContrast(0.5)#use bits++ to reduce the whole screen contrast by 50%
setContrast(contrast, LUTrange=1.0)Optional parameter LUTrange determines which entries of the LUT will be set to this contrast
Parameters
contrast [float in the range 0:1] The contrast for the range being set
LUTrange [float or array] If a float is given then this is the fraction of the LUT to be used.If an array of floats is given, these will specify the start/stop points as fractions of the LUT.If an array of ints (0-255) is given these determine the start stop indices of the LUT
Examples:
setContrast(1.0,0.5) will set the central 50% of the LUT so that a stimulus with contr=0.5will actually be drawn with contrast 1.0
setContrast(1.0,[0.25,0.5])
setContrast(1.0,[63,127]) will set the lower-middle quarter of the LUT (which might beuseful in LUT animation paradigms)
setGamma(newGamma)Set the LUT to have the requested gamma. Currently also resets the LUT to be a linear contrast rampspanning its full range. May change this to read the current LUT, undo previous gamm and then apply newone?
setLUT(newLUT=None, gammaCorrect=True, LUTrange=1.0)Sets the LUT to a specific range of values.
Note that, if you leave gammaCorrect=True then any LUT values you supply will automatically be gammacorrected.
If BitsBox setMethod is ‘fast’ then the LUT will take effect on the next Window.update() If thesetMethod is ‘slow’ then the update will take place over the next 1-4secs down the USB port.
Examples:
bitsBox.setLUT() builds a LUT using bitsBox.contrast and bitsBox.gamma
13.7. psychopy.hardware - hardware interfaces 113

PsychoPy - Psychology software for Python, Release 1.65.01
bitsBox.setLUT(newLUT=some256x1array) (NB array should be float 0.0:1.0) Builds aluminance LUT using newLUT for each gun (actually array can be 256x1 or 1x256)
bitsBox.setLUT(newLUT=some256x3array) (NB array should be float 0.0:1.0) Allowsyou to use a different LUT on each gun
(NB by using BitsBox.setContr() and BitsBox.setGamma() users may not need this function!?)
13.7.3 egi (pynetstation)
Interface to EGI Netstation
This is currently a simple import of pynetstation That needs to be installed (but is included in the Standalone distribu-tions of PsychoPy as of version 1.62.01).
installation:
Download the package from the link above and copy egi.py into your site-packages directory.
usage:
from psychopy.hardware import egi
For an example see the demos menu of the PsychoPy Coder For further documentation see the pynetstation website
13.7.4 fORP response box
fORP MR-compatible input devices (by CurrentDesigns) See http://www.curdes.com/WebHome.html
class psychopy.hardware.forp.ButtonBox(serialPort=1)Serial line interface to the fORP MRI response box
Set the box use setting 0 or 1 and connect the serial line to use this object class. (Alternatively connect the USBcable and use fORP to emulate a keyboard).
fORP sends characters at 800Hz, so you should check the buffer frequently. Also note that the trigger eventnumpy the fORP is typically extremely short (occurs for a single 800Hz epoch).
serialPort should be a number (where 1=COM1,...)
clearBuffer()Empty the input buffer of all characters
getEvents(returnRaw=False)Returns a list of unique events (one event per button pressed) AND stores a copy of the full list of eventssince last getEvents() (stored as ForpBox.rawEvts)
getUniqueEvents(fullEvts=None)Returns a Python set of the unique (unordered) events of either a list given or the current rawEvts buffer
13.7.5 ioLab
Interface to ioLab button box
This is currently a simple import of the ioLab python library. That needs to be installed (but is included in theStandalone distributions of PsychoPy as of version 1.62.01).
installation:
114 Chapter 13. Reference Manual (API)
PsychoPy - Psychology software for Python, Release 1.65.01
easy_install iolabs
usage:
from psychopy.hardware import ioLabs
for examples see the demos menu of the PsychoPy Coder or go to the URL above.
13.7.6 labjack (USB I/O devices)
The labjack package is included in the Standalone PsychoPy distributions. It differs slightly form the standard versiondistributed by labjack (www.labjack.com) in the import. From the cutoms distribution use:
from labjack import u3
NOT:
import u3
In all other respects the library is the same and instructions on how to use it can be found here:
http://labjack.com/support/labjackpython
Note: To use labjack devices you do need also to install the driver software described on the page above
13.7.7 Minolta
Minolta light-measuring devices See http://www.konicaminolta.com/instruments
class psychopy.hardware.minolta.LS100(port, maxAttempts=1)A class to define a Minolta LS100 (or LS110?) photometer
You need to connect a LS100 to the serial (RS232) port and when you turn it on press the F key on the device.This will put it into the correct mode to communicate with the serial port.
usage:
from psychopy.hardware import minoltaphot = minolta.LS100(port)if phot.OK:#then we successfully made a connection and can send/receive
print phot.getLum()
Parameters port: string
the serial port that should be checked
maxAttempts: int If the device doesn’t respond first time how many attempts should be made?If you’re certain that this is the correct port and the device is on and correctly configuredthen this could be set high. If not then set this low.
Troubleshooting Various messages are printed to the log regarding the function of this device, butto see them you need to set the printing of the log to the correct level:
13.7. psychopy.hardware - hardware interfaces 115

PsychoPy - Psychology software for Python, Release 1.65.01
from psychopy import loglog.console.setLevel(log.ERROR)#error messages onlylog.console.setLevel(log.INFO)#will give a little more infolog.console.setLevel(log.DEBUG)#will export a log of all communications
If you’re using a keyspan adapter (at least on OS X) be aware that it needs a driver installed.Otherwise no ports wil be found.
Error messages:
ERROR: Couldn’t connect to Minolta LS100/110 on ____: This likelymeans that the device is not connected to that port (although the port has been found andopened). Check that the device has the [ in the bottom right of the display; if not turn offand on again holding the F key.
ERROR: No reply from LS100: The port was found, the connection was made and aninitial command worked, but then the device stopped communating. If the first measurementtaken with the device after connecting does not yield a reasonble intensity the device cansulk (not a technical term!). The “[” on the display will disappear and you can no longercommunicate with the device. Turn it off and on again (with F depressed) and use a reason-ably bright screen for your first measurement. Subsequent measurements can be dark (orwe really would be in trouble!!).
checkOK(msg)Check that the message from the photometer is OK. If there’s an error print it.
Then return True (OK) or False.
clearMemory()Clear the memory of the device from previous measurements
getLum()Makes a measurement and returns the luminance value
measure()Measure the current luminance and set .lastLum to this value
sendMessage(message, timeout=5.0)Send a command to the photometer and wait an alloted timeout for a response.
setMaxAttempts(maxAttempts)Changes the number of attempts to send a message and read the output Typically this should be lowinitially, if you aren’t sure that the device is setup correctly but then, after the first successful reading, setit higher.
setMode(mode=‘04’)Set the mode for measurements. Returns True (success) or False
‘04’ means absolute measurements. ‘08’ = peak ‘09’ = cont
See user manual for other modes
13.7.8 PhotoResearch
Supported devices:
• PR650
• PR655/PR670
116 Chapter 13. Reference Manual (API)
PsychoPy - Psychology software for Python, Release 1.65.01
PhotoResearch spectrophotometers See http://www.photoresearch.com/
class psychopy.hardware.pr.PR650(port, verbose=None)An interface to the PR650 via the serial port.
(Added in version 1.63.02)
example usage:
from psychopy.hardware.pr import PR650myPR650 = PR650(port)myPR650.getLum()#make a measurementnm, power = myPR650.getLastSpectrum()#get a power spectrum for the last measurement
NB psychopy.hardware.findPhotometer() will locate and return any supported device for you soyou can also do:
from psychopy import hardwarephot = hardware.findPhotometer()print phot.getLum()
Troubleshooting Various messages are printed to the log regarding the function of this device, butto see them you need to set the printing of the log to the correct level:
from psychopy import loglog.console.setLevel(log.ERROR)#error messages onlylog.console.setLevel(log.INFO)#will give a little more infolog.console.setLevel(log.DEBUG)#will export a log of all communications
If you’re using a keyspan adapter (at least on OS X) be aware that it needs a driver installed.Otherwise no ports wil be found.
Also note that the attempt to connect to the PR650 must occur within the first few seconds afterturning it on.
getLastLum()This retrieves the luminance (in cd/m**2) from the last call to .measure()
getLastSpectrum(parse=True)This retrieves the spectrum from the last call to .measure()
If parse=True (default): The format is a num array with 100 rows [nm, power]
otherwise: The output will be the raw string from the PR650 and should then be passed to.parseSpectrumOutput(). It’s more efficient to parse R,G,B strings at once than each individu-ally.
getLum()Makes a measurement and returns the luminance value
getSpectrum(parse=True)Makes a measurement and returns the current power spectrum
If parse=True (default): The format is a num array with 100 rows [nm, power]
If parse=False (default): The output will be the raw string from the PR650 and should then be passedto .parseSpectrumOutput(). It’s slightly more efficient to parse R,G,B strings at once thaneach individually.
13.7. psychopy.hardware - hardware interfaces 117
PsychoPy - Psychology software for Python, Release 1.65.01
measure(timeOut=30.0)Make a measurement with the device. For a PR650 the device is instructed to make a measurement andthen subsequent commands are issued to retrieve info about that measurement
parseSpectrumOutput(rawStr)Parses the strings from the PR650 as received after sending the command ‘d5’. The input argument “raw-Str” can be the output from a single phosphor spectrum measurement or a list of 3 such measurements[rawR, rawG, rawB].
sendMessage(message, timeout=0.5, DEBUG=False)Send a command to the photometer and wait an alloted timeout for a response (Timeout should be long forlow light measurements)
class psychopy.hardware.pr.PR655(port)An interface to the PR655/PR670 via the serial port.
example usage:
from psychopy.hardware.pr import PR655myPR655 = PR655(port)myPR655.getLum()#make a measurementnm, power = myPR655.getLastSpectrum()#get a power spectrum for the last measurement
NB psychopy.hardware.findPhotometer() will locate and return any supported device for you soyou can also do:
from psychopy import hardwarephot = hardware.findPhotometer()print phot.getLum()
Troubleshooting If the device isn’t responding try turning it off and turning it on again, and/ordisconnecting/reconnecting the USB cable. It may be that the port has become controlled bysome other program.
endRemoteMode()Puts the colorimeter back into normal mode
getDeviceSN()Return the device serial number
getDeviceType()Return the device type (e.g. ‘PR-655’ or ‘PR-670’)
getLastColorTemp()Fetches (from the device) the color temperature (K) of the last measurement
Returns list: status, units, exponent, correlated color temp (Kelvins), CIE 1960 deviation
See also measure() automatically populates pr655.lastColorTemp with the color temp inKelvins
getLastSpectrum(parse=True)This retrieves the spectrum from the last call to measure()
If parse=True (default):
The format is a num array with 100 rows [nm, power]
otherwise:
118 Chapter 13. Reference Manual (API)
PsychoPy - Psychology software for Python, Release 1.65.01
The output will be the raw string from the PR650 and should then be passed toparseSpectrumOutput(). It’s more efficient to parse R,G,B strings at once than each indi-vidually.
getLastTristim()Fetches (from the device) the last CIE 1931 Tristimulus values
Returns list: status, units, Tristimulus Values
See also measure() automatically populates pr655.lastTristim with just the tristimulus coor-dinates
getLastUV()Fetches (from the device) the last CIE 1976 u,v coords
Returns list: status, units, Photometric brightness, u, v
See also measure() automatically populates pr655.lastUV with [u,v]
getLastXY()Fetches (from the device) the last CIE 1931 x,y coords
Returns list: status, units, Photometric brightness, x,y
See also measure() automatically populates pr655.lastXY with [x,y]
measure(timeOut=30.0)Make a measurement with the device.
This automatically populates:
•.lastLum
•‘‘.lastSpectrum‘
•.lastCIExy
•.lastCIEuv
parseSpectrumOutput(rawStr)Parses the strings from the PR650 as received after sending the command ‘D5’. The input argument“rawStr” can be the output from a single phosphor spectrum measurement or a list of 3 such measurements[rawR, rawG, rawB].
sendMessage(message, timeout=0.5, DEBUG=False)Send a command to the photometer and wait an alloted timeout for a response (Timeout should be long forlow light measurements)
startRemoteMode()Sets the Colorimeter into remote mode
13.7.9 pylink (SR research)
For now the SR Research pylink module is packaged with the Standalone flavours of PsychoPy and can be importedwith:
import pylink
You do need to install the Display Software (which they also call Eyelink Developers Kit) for your particular platform.This can be found by following the threads from:
https://www.sr-support.com/forums/forumdisplay.php?f=17
for pylink documentation see:
13.7. psychopy.hardware - hardware interfaces 119

PsychoPy - Psychology software for Python, Release 1.65.01
https://www.sr-support.com/forums/showthread.php?t=14 Performing research with eye-tracking equipment typicallyrequires a long-term investment in software tools to collect, process, and analyze data. Much of this involves real-timedata collection, saccadic analysis, calibration routines, and so on. The EyeLink® eye-tracking system is designed toimplement most of the required software base for data collection and conversion. It is most powerful when used withthe Ethernet link interface, which allows remote control of data collection and real-time data transfer. The PyLinktoolkit includes Pylink module, which implements all core EyeLink functions and classes for EyeLink connectionand the eyelink graphics, such as the display of camera image, calibration, validation, and drift correct. The EyeLinkgraphics is currently implemented using Simple Direct Media Layer (SDL: www.libsdl.org).
The Pylink library contains a set of classes and functions, which are used to program experiments on many differentplatforms, such as MS-DOS, Windows, Linux, and the Macintosh. Some programming standards, such as placementof messages in the EDF file by your experiment, and the use of special data types, have been implemented to allowportability of the development kit across platforms. The standard messages allow general analysis tools such asEDF2ASC converter or EyeLink Data Viewer to process your EDF files.
psychopy.hardware.findPhotometer(ports=None, device=None)Try to find a connected photometer/photospectrometer! PsychoPy will sweep a series of serial ports trying toopen them. If a port successfully opens then it will try to issue a command to the device. If it responds with oneof the expected values then it is assumed to be the appropriate device.
Parameters
ports [a list of ports to search] Each port can be a string (e.g. ‘COM1’, ‘’/dev/tty.Keyspan1.1’)or a number (for win32 comports only). If none are provided then PsychoPy will sweepCOM0-10 on win32 and search known likely port names on OS X and linux.
device [string giving expected device (e.g. ‘PR650’, ‘PR655’, ‘LS110’).] If this is not giventhen an attempt will be made to find a device of any type, but this often fails
Returns
• An object representing the first photometer found
• None if the ports didn’t yield a valid response
• -1 if there were not even any valid ports (suggesting a driver not being installed)
e.g.:
photom = findPhotometer(device=’PR655’) #sweeps ports 0 to 10 searching for a PR655print photom.getLum()if hasattr(photom, ’getSpectrum’):#can retrieve spectrum (e.g. a PR650)
print photom.getSpectrum()
13.8 psychopy.info - functions for getting information about thesystem
Fetching data about the system
class psychopy.info.RunTimeInfo(author=None, version=None, win=None, refreshTest=’grating’,userProcsDetailed=False, verbose=False, randomSeed=None)
Returns a snapshot of your configuration at run-time, for immediate or archival use.
Returns a dict-like object with info about PsychoPy, your experiment script, the system & OS, your window andmonitor settings (if any), python & packages, and openGL.
If you want to skip testing the refresh rate, use ‘refreshTest=None’
Example usage: see runtimeInfo.py in coder demos.
120 Chapter 13. Reference Manual (API)
PsychoPy - Psychology software for Python, Release 1.65.01
Author
• 2010 written by Jeremy Gray, with input from Jon Peirce and Alex Holcombe
Parameters
win [None, False, Window instance] what window to use for refresh rate testing (if any) andsettings. None -> temporary window using defaults; False -> no window created, used, norprofiled; a Window() instance you have already created
author [None, string] None = try to autodetect first __author__ in sys.argv[0]; string = user-supplied author info (of an experiment)
version [None, string] None = try to autodetect first __version__ in sys.argv[0]; string = user-supplied version info (of an experiment)
verbose : False, True; how much detail to assess
refreshTest [None, False, True, ‘grating’] True or ‘grating’ = assess refresh average, median,and SD of 60 win.flip()s, using visual.getMsPerFrame() ‘grating’ = show a visual during theassessment; True = assess without a visual
userProcsDetailed: False, True get details about concurrent user’s processses (command,process-ID)
randomSeed: None a way for the user to record, and optionally set, a random seed for makingreproducible random sequences ‘set:XYZ’ will both record the seed, ‘XYZ’, and set it: ran-dom.seed(‘XYZ’); numpy.random.seed() is NOT set None defaults to python default; ‘time’= use time.time() as the seed, as obtained during RunTimeInfo() randomSeed=’set:time’ willgive a new random seq every time the script is run, with the seed recorded.
Returns a flat dict (but with several groups based on key names):
psychopy [version, rush() availability] psychopyVersion, psychopyHaveExtRush, git branchand current commit hash if available
experiment [author, version, directory, name, current time-stamp, ] SHA1 digest, VCS info (ifany, svn or hg only), experimentAuthor, experimentVersion, ...
system [hostname, platform, user login, count of users, user process info (count, cmd + pid),flagged processes] systemHostname, systemPlatform, ...
window [(see output; many details about the refresh rate, window, and monitor; units arenoted)] windowWinType, windowWaitBlanking, ...windowRefreshTimeSD_ms, ... win-dowMonitor.<details>, ...
python [version of python, versions of key packages (wx, numpy, scipy, matplotlib, pyglet,pygame)] pythonVersion, pythonScipyVersion, ...
openGL [version, vendor, rendering engine, plus info on whether several extensions arepresent] openGLVersion, ..., openGLextGL_EXT_framebuffer_object, ...
13.9 psychopy.log - control what gets logged
Provides functions for logging error and other messages to one or more files and/or the console, using python’s ownlogging module. Some warning messages and error messages are generated by PsychoPy itself. The user can generatemore using the functions in this module.
There are various levels for logged messages with the following order of importance: ERROR, WARNING, DATA,EXP, INFO and DEBUG.
13.9. psychopy.log - control what gets logged 121
PsychoPy - Psychology software for Python, Release 1.65.01
When setting the level for a particular log target (e.g. LogFile) the user can set the minimum level that is requiredfor messages to enter the log. For example, setting a level of INFO will result in INFO, EXP, DATA, WARNING andERROR messages to be recorded but not DEBUG messages.
By default, PsychoPy will record messages of WARNING level and above to the console. The user can silence that bysetting it to receive only CRITICAL messages, (which PsychoPy doesn’t use) using the commands:
from psychopy import loglog.console.setLevel(log.CRITICAL)
class psychopy.log.LogFile(f=None, level=30, filemode=’a’, logger=None, encoding=’utf8’)A text stream to receive inputs from the logging system
Create a log file as a target for logged entries of a given level
Parameters
• f: this could be a string to a path, that will be created if it doesn’t exist. Alternatively thiscould be a file object, sys.stdout or any object that supports .write() and .flush() methods
• level: The minimum level of importance that a message must have to be logged by thistarget.
• mode: ‘a’, ‘w’ Append or overwrite existing log file
setLevel(level)Set a new minimal level for the log file/stream
write(txt)Write directy to the log file (without using logging functions). Useful to send messages that only this filereceives
psychopy.log.addLevel(level, levelName)Associate ‘levelName’ with ‘level’.
This is used when converting levels to text during message formatting.
psychopy.log.critical(msg, t=None, obj=None)log.critical(message) Send the message to any receiver of logging info (e.g. a LogFile) of level log.CRITICALor higher
psychopy.log.data(msg, t=None, obj=None)Log a message about data collection (e.g. a key press)
usage:: log.data(message)
Sends the message to any receiver of logging info (e.g. a LogFile) of level log.DATA or higher
psychopy.log.debug(msg, t=None, obj=None)Log a debugging message (not likely to be wanted once experiment is finalised)
usage:: log.debug(message)
Sends the message to any receiver of logging info (e.g. a LogFile) of level log.DEBUG or higher
psychopy.log.error(msg, t=None, obj=None)log.error(message)
Send the message to any receiver of logging info (e.g. a LogFile) of level log.ERROR or higher
psychopy.log.exp(msg, t=None, obj=None)Log a message about the experiment (e.g. a new trial, or end of a stimulus)
usage:: log.exp(message)
Sends the message to any receiver of logging info (e.g. a LogFile) of level log.EXP or higher
122 Chapter 13. Reference Manual (API)
PsychoPy - Psychology software for Python, Release 1.65.01
psychopy.log.fatal(msg, t=None, obj=None)log.critical(message) Send the message to any receiver of logging info (e.g. a LogFile) of level log.CRITICALor higher
psychopy.log.flush(logger=<psychopy.log._Logger instance at 0x1b65940>)Send current messages in the log to all targets
psychopy.log.getLevel(level)Return the textual representation of logging level ‘level’.
If the level is one of the predefined levels (CRITICAL, ERROR, WARNING, INFO, DEBUG) then you get thecorresponding string. If you have associated levels with names using addLevelName then the name you haveassociated with ‘level’ is returned.
If a numeric value corresponding to one of the defined levels is passed in, the corresponding string representationis returned.
Otherwise, the string “Level %s” % level is returned.
psychopy.log.info(msg, t=None, obj=None)Log some information - maybe useful, maybe not
usage:: log.info(message)
Sends the message to any receiver of logging info (e.g. a LogFile) of level log.INFO or higher
psychopy.log.log(msg, level, t=None, obj=None)Log a message
usage:: log(level, msg, t=t, obj=obj)
Log the msg, at a given level on the root logger
psychopy.log.setDefaultClock(clock)Set the default clock to be used to reference all logging times. Must be a psychopy.core.Clock object.Beware that if you reset the clock during the experiment then the resets will be reflected here. That might beuseful if you want your logs to be reset on each trial, but probably not.
psychopy.log.warn(msg, t=None, obj=None)log.warning(message)
Sends the message to any receiver of logging info (e.g. a LogFile) of level log.WARNING or higher
psychopy.log.warning(msg, t=None, obj=None)log.warning(message)
Sends the message to any receiver of logging info (e.g. a LogFile) of level log.WARNING or higher
13.9.1 flush()
psychopy.log.flush(logger=<psychopy.log._Logger instance at 0x1b65940>)Send current messages in the log to all targets
13.9.2 setDefaultClock()
psychopy.log.setDefaultClock(clock)Set the default clock to be used to reference all logging times. Must be a psychopy.core.Clock object.Beware that if you reset the clock during the experiment then the resets will be reflected here. That might beuseful if you want your logs to be reset on each trial, but probably not.
13.9. psychopy.log - control what gets logged 123
PsychoPy - Psychology software for Python, Release 1.65.01
13.10 psychopy.misc - miscellaneous routines for converting unitsetc
Tools, nothing to do with psychophysics or experiments - just handy things like conversion functions etc...
psychopy.misc.array2image(a)Takes an array and returns an image object (PIL)
psychopy.misc.cart2pol(x, y, units=’deg’)Convert from cartesian to polar coordinates
usage: theta, radius = pol2cart(x, y, units=’deg’)
units refers to the units (rad or deg) for theta that should be returned
psychopy.misc.cm2deg(cm, monitor)Convert size in cm to size in degrees for a given Monitor object
psychopy.misc.cm2pix(cm, monitor)Convert size in degrees to size in pixels for a given Monitor object
psychopy.misc.deg2cm(degrees, monitor)Convert size in degrees to size in pixels for a given Monitor object
psychopy.misc.deg2pix(degrees, monitor)Convert size in degrees to size in pixels for a given Monitor object
psychopy.misc.extendArr(inArray, newSize)Takes a numpy array and returns it padded with zeros to the necessary size
>>> misc.extendArr([1,2,3],5)array([1, 2, 3, 0, 0])
psychopy.misc.float_uint16(inarray)Converts arrays, lists, tuples and floats ranging -1:1 into an array of Uint16s ranging 0:2^16
psychopy.misc.float_uint8(inarray)Converts arrays, lists, tuples and floats ranging -1:1 into an array of Uint8s ranging 0:255
>>> float_uint8(-1)0>>> float_uint8(0)128
psychopy.misc.fromFile(filename)load data (of any sort) from a pickle file
simple wrapper of the cPickle module in core python
psychopy.misc.image2array(im)Takes an image object (PIL) and returns an array
fredrik lundh, october 1998
[email protected] http://www.pythonware.com
psychopy.misc.makeImageAuto(inarray)Combines float_uint8 and image2array operations ie. scales a numeric array from -1:1 to 0:255 and converts toPIL image format
psychopy.misc.mergeFolder(src, dst, pattern=None)Merge a folder into another.
124 Chapter 13. Reference Manual (API)

PsychoPy - Psychology software for Python, Release 1.65.01
Existing files in dst with the same name will be overwritten. Non-existent files/folders will be created.
psychopy.misc.pix2cm(pixels, monitor)Convert size in pixels to size in cm for a given Monitor object
psychopy.misc.pix2deg(pixels, monitor)Convert size in pixels to size in degrees for a given Monitor object
psychopy.misc.plotFrameIntervals(intervals)Plot a histogram of the frame intervals.
Arguments:
• intervals: Either a filename to a log file, saved by Window.saveFrameIntervals or simply a list(or array of frame intervals)
psychopy.misc.pol2cart(theta, radius, units=’deg’)Convert from polar to cartesian coordinates
usage: x,y = pol2cart(theta, radius, units=’deg’)
psychopy.misc.radians(degrees)Convert degrees to radians
>>> radians(180)3.1415926535897931>>> degrees(45)0.78539816339744828
psychopy.misc.ratioRange(start, nSteps=None, stop=None, stepRatio=None, stepdB=None, stepLo-gUnits=None)
Creates a array where each step is a constant ratio rather than a constant addition.
Specify start and any 2 of, nSteps, stop, stepRatio, stepdB, stepLogUnits
>>> ratioRange(1,nSteps=4,stop=8)array([ 1., 2., 4., 8.])>>> ratioRange(1,nSteps=4,stepRatio=2)array([ 1., 2., 4., 8.])>>> ratioRange(1,stop=8,stepRatio=2)array([ 1., 2., 4., 8.])
psychopy.misc.shuffleArray(inArray, shuffleAxis=-1, seed=None)Takes a (flat) num array, list or string and returns a shuffled version as a num array with the same shape. Optionalargument ShuffleAxis determines the axis to shuffle along (default=-1 meaning shuffle across entire matrix?)
THIS DOESN’T WORK WITH MATRICES YET - ONLY FLAT ARRAYS - APPEARS TO BE BUG INEITHER NUMPY.ARGSORT() OR NUMPY.TAKE()
psychopy.misc.toFile(filename, data)save data (of any sort) as a pickle file
simple wrapper of the cPickle module in core python
psychopy.misc.uint8_float(inarray)Converts arrays, lists, tuples and UINTs ranging 0:255 into an array of floats ranging -1:1
13.11 psychopy.monitors - for those that don’t like Monitor Center
Most users won’t need to use the code here. In general the Monitor Centre interface is sufficient and monitors setupthat way can be passed as strings to Window s. If there is some aspect of the normal calibration that you wish to
13.11. psychopy.monitors - for those that don’t like Monitor Center 125
PsychoPy - Psychology software for Python, Release 1.65.01
override. eg:
from psychopy import visual, monitorsmon = monitors.Monitor(’SonyG55’)#fetch the most recent calib for this monitormon.setDistance(114)#further away than normal?win = visual.Window(size=[1024,768], monitor=mon)
You might also want to fetch the Photometer class for conducting your own calibrations
13.11.1 Monitor
class psychopy.monitors.Monitor(name, width=None, distance=None, gamma=None, notes=None,useBits=None, verbose=True, currentCalib=)
Creates a monitor object for storing calibration details. This will be loaded automatically from disk if themonitor name is already defined (see methods).
Many settings from the stored monitor can easilly be overridden either by adding them as arguments during theinitial call.
arguments:
•width, distance, gamma are details about the calibration
•notes is a text field to store any useful info
•useBits True, False, None
•verbose True, False, None
•currentCalib is a dict object containing various fields for a calibration. Use with caution sincethe dict may not contain all the necessary fields that a monitor object expects to find.
eg:
myMon = Monitor(’sony500’, distance=114) Fetches the info on the sony500 and overrides itsusual distance to be 114cm for this experiment.
myMon = Monitor(’sony500’) followed by...
myMon[’distance’]=114 ...does the same!
For both methods, if you then save any modifications will be saved as well.
copyCalib(calibName=None)Stores the settings for the current calibration settings as new monitor.
delCalib(calibName)Remove a specific calibration from the current monitor. Won’t be finalised unless monitor is saved
gammaIsDefault()
getCalibDate()As a python date object (convert to string using calibTools.strFromDate
getDKL_RGB(RECOMPUTE=False)Returns the DKL->RGB conversion matrix. If one has been saved this will be returned. Otherwise, ifpower spectra are available for the monitor a matrix will be calculated.
getDistance()Returns distance from viewer to the screen in cm, or None if not known
getGamma()
126 Chapter 13. Reference Manual (API)
PsychoPy - Psychology software for Python, Release 1.65.01
getGammaGrid()Gets the min,max,gamma values for the each gun
getLMS_RGB(RECOMPUTE=False)Returns the LMS->RGB conversion matrix. If one has been saved this will be returned. Otherwise (ifpower spectra are available for the monitor) a matrix will be calculated.
getLevelsPost()Gets the measured luminance values from last calibration TEST
getLevelsPre()Gets the measured luminance values from last calibration
getLineariseMethod()Gets the min,max,gamma values for the each gun
getLumsPost()Gets the measured luminance values from last calibration TEST
getLumsPre()Gets the measured luminance values from last calibration
getMeanLum()
getNotes()Notes about the calibration
getPsychopyVersion()
getSizePix()Returns the size of the current calibration in pixels, or None if not defined
getSpectra()Gets the wavelength values from the last spectrometer measurement (if available)
usage:
• nm, power = monitor.getSpectra()
getUseBits()Was this calibration carried out witha a bits++ box
getWidth()Of the viewable screen in cm, or None if not known
lineariseLums(desiredLums, newInterpolators=False, overrideGamma=None)lums should be uncalibrated luminance values (e.g. a linear ramp) ranging 0:1
newCalib(calibName=None, width=None, distance=None, gamma=None, notes=None,useBits=False, verbose=True)
create a new (empty) calibration for this monitor and makes this the current calibration
saveMon()saves the current dict of calibs to disk
setCalibDate(date=None)Sets the calibration to a given date/time or to the current date/time if none given. (Also returns the date asset)
setCurrent(calibration=-1)Sets the current calibration for this monitor. Note that a single file can hold multiple calibrations eachstored under a different key (the date it was taken)
The argument is either a string (naming the calib) or an integer eg:
13.11. psychopy.monitors - for those that don’t like Monitor Center 127
PsychoPy - Psychology software for Python, Release 1.65.01
myMon.setCurrent’mainCalib’) fetches the calibration named mainCalib calibName= myMon.setCurrent(0) fetches the first calibration (alphabetically) for this monitorcalibName = myMon.setCurrent(-1) fetches the last alphabetical calib for this moni-tor (this is default) If default names are used for calibs (ie date/time stamp) then this will importthe most recent.
setDKL_RGB(dkl_rgb)sets the DKL->RGB conversion matrix for a chromatically calibrated monitor (matrix is a 3x3 num array).
setDistance(distance)To the screen (cm)
setGamma(gamma)Sets the gamma value(s) for the monitor. This only uses a single gamma value for the three guns, which isfairly approximate. Better to use setGammaGrid (which uses one gamma value for each gun)
setGammaGrid(gammaGrid)Sets the min,max,gamma values for the each gun
setLMS_RGB(lms_rgb)sets the LMS->RGB conversion matrix for a chromatically calibrated monitor (matrix is a 3x3 num array).
setLevelsPost(levels)Sets the last set of luminance values measured AFTER calibration
setLevelsPre(levels)Sets the last set of luminance values measured during calibration
setLineariseMethod(method)Sets the method for linearising 0 uses y=a+(bx)^gamma 1 uses y=(a+bx)^gamma 2 uses linear interpola-tion over the curve
setLumsPost(lums)Sets the last set of luminance values measured AFTER calibration
setLumsPre(lums)Sets the last set of luminance values measured during calibration
setMeanLum(meanLum)Records the mean luminance (for reference only)
setNotes(notes)For you to store notes about the calibration
setPsychopyVersion(version)
setSizePix(pixels)
setSpectra(nm, rgb)sets the phosphor spectra measured by the spectrometer
setUseBits(usebits)
setWidth(width)Of the viewable screen (cm)
128 Chapter 13. Reference Manual (API)
PsychoPy - Psychology software for Python, Release 1.65.01
13.11.2 GammaCalculator
class psychopy.monitors.GammaCalculator(inputs=[], lums=[], gamma=None, bitsIN=8, bit-sOUT=8, eq=1)
Class for managing gamma tables
Parameters:
•inputs (required)= values at which you measured screen luminance either in range 0.0:1.0, or range0:255. Should include the min and max of the monitor
Then give EITHER “lums” or “gamma”:
•lums = measured luminance at given input levels
•gamma = your own gamma value (single float)
•bitsIN = number of values in your lookup table
•bitsOUT = number of bits in the DACs
myTable.gammaModel myTable.gamma
fitGammaErrFun(params, x, y, minLum, maxLum)Provides an error function for fitting gamma function
(used by fitGammaFun)
fitGammaFun(x, y)Fits a gamma function to the monitor calibration data.
Parameters: -xVals are the monitor look-up-table vals (either 0-255 or 0.0-1.0) -yVals are the measuredluminances from a photometer/spectrometer
13.11.3 getAllMonitors()
psychopy.monitors.getAllMonitors()Find the names of all monitors for which calibration files exist
13.11.4 findPR650()
psychopy.monitors.findPR650(ports=None)DEPRECATED (as of v.1.60.01). Use psychopy.hardware.findPhotometer() instead, which findsa wider range of devices
13.11.5 getLumSeriesPR650()
psychopy.monitors.getLumSeriesPR650(lumLevels=8, winSize=(800, 600), monitor=None,gamma=1.0, allGuns=True, useBits=False, au-toMode=’auto’, stimSize=0.29999999999999999,photometer=’COM1’)
DEPRECATED (since v1.60.01): Use pscyhopy.monitors.getLumSeries() instead
13.11. psychopy.monitors - for those that don’t like Monitor Center 129
PsychoPy - Psychology software for Python, Release 1.65.01
13.11.6 getRGBspectra()
psychopy.monitors.getRGBspectra(stimSize=0.29999999999999999, winSize=(800, 600), pho-tometer=’COM1’)
usage: getRGBspectra(stimSize=0.3, winSize=(800,600), photometer=’COM1’)
Params
• ‘photometer’ could be a photometer object or a serial port name on which
a photometer might be found (not recommended)
13.11.7 gammaFun()
psychopy.monitors.gammaFun(xx, minLum, maxLum, gamma, eq=1, a=None, b=None, k=None)Returns gamma-transformed luminance values. y = gammaFun(x, minLum, maxLum, gamma)
a and b are calculated directly from minLum, maxLum, gamma
Parameters:
•xx are the input values (range 0-255 or 0.0-1.0)
•minLum = the minimum luminance of your monitor
•maxLum = the maximum luminance of your monitor (for this gun)
•gamma = the value of gamma (for this gun)
13.11.8 gammaInvFun()
psychopy.monitors.gammaInvFun(yy, minLum, maxLum, gamma, b=None, eq=1)Returns inverse gamma function for desired luminance values. x = gammaInvFun(y, minLum, maxLum,gamma)
a and b are calculated directly from minLum, maxLum, gamma Parameters:
•xx are the input values (range 0-255 or 0.0-1.0)
•minLum = the minimum luminance of your monitor
•maxLum = the maximum luminance of your monitor (for this gun)
•gamma = the value of gamma (for this gun)
•eq determines the gamma equation used; eq==1[default]: yy = a + (b*xx)**gamma eq==2: yy = (a +b*xx)**gamma
13.11.9 makeDKL2RGB()
psychopy.monitors.makeDKL2RGB(nm, powerRGB)creates a 3x3 DKL->RGB conversion matrix from the spectral input powers
13.11.10 makeLMS2RGB()
psychopy.monitors.makeLMS2RGB(nm, powerRGB)Creates a 3x3 LMS->RGB conversion matrix from the spectral input powers
130 Chapter 13. Reference Manual (API)
PsychoPy - Psychology software for Python, Release 1.65.01
13.12 psychopy.parallel - functions for interacting with the paral-lel port
This module provides read/write access to the parallel port on a PC.
This is a wrapper around Dincer Aydin’s winioport for reading and writing to the parallel port, but adds the followingadditional functions for convenience.
On windows winioport requires the PortIO driver to be installed.
An alternative (e.g. on Linux) might be to install pyParallel and call that directly.
psychopy.parallel.readPin(pinNumber)Determine whether a desired (input) pin is high(1) or low(0).
Only pins ‘status’ pins (10-14 and 15) are currently read here, although the data pins (2-9) probably could betoo.
psychopy.parallel.setData(data)Set the data to be presented on the parallel port (one ubyte). Alternatively you can set the value of each pin (datapins are pins 2-9 inclusive) using setPin()
examples:
parallel.setData(0) #sets all pins lowparallel.setData(255) #sets all pins highparallel.setData(2) #sets just pin 3 high (remember that pin2=bit0)parallel.setData(3) #sets just pins 2 and 3 high
you can also convert base 2 to int v easily in python:
parallel.setData( int("00000011",2) )#pins 2 and 3 highparallel.setData( int("00000101",2) )#pins 2 and 4 high
psychopy.parallel.setPin(pinNumber, state)Set a desired pin to be high(1) or low(0).
Only pins 2-9 (incl) are normally used for data output:
parallel.setPin(3, 1)#sets pin 3 highparallel.setPin(3, 0)#sets pin 3 low
psychopy.parallel.setPortAddress(address=888)Set the memory address of your parallel port, to be used in subsequent commands
common port addresses:
LPT1 = 0x0378 or 0x03BCLPT2 = 0x0278 or 0x0378LPT3 = 0x0278
13.13 psychopy.serial - functions for interacting with the serialport
PsychoPy is compatible with Chris Liechti’s pyserial package. You can use it like this:
13.12. psychopy.parallel - functions for interacting with the parallel port 131
PsychoPy - Psychology software for Python, Release 1.65.01
import serialser = serial.Serial(0, 19200, timeout=1) # open first serial port#ser = serial.Serial(’/dev/ttyS1’, 19200, timeout=1)#or something like this for mac/linux machinesser.write(’someCommand’)line = ser.readline() # read a ’\n’ terminated lineser.close()
Ports are fully configurable with all the options you would expect of RS232 communications. Seehttp://pyserial.sourceforge.net for further details and documentation.
pyserial is packaged in the Standalone (win and mac distributions), for manual installations you should install thisyourself.
13.14 psychopy.sound - play various forms of sound
13.14.1 Sound
class psychopy.sound.SoundPygame(value=’C’, secs=0.5, octave=4, sampleRate=44100, bits=16)Create a sound object, from one of many ways.
Parameters
value: can be a number, string or an array:
• If it’s a number between 37 and 32767 then a tone will be generated at that frequency inHz.
• It could be a string for a note (‘A’,’Bfl’,’B’,’C’,’Csh’...). Then you may want to specifywhich octave as well
• Or a string could represent a filename in the current location, or mediaLocation, or a fullpath combo
• Or by giving an Nx2 numpy array of floats (-1:1) you can specify the sound yourself as awaveform
secs: duration (only relevant if the value is a note name or a frequency value)
octave: is only relevant if the value is a note name. Middle octave of a piano is 4. Most com-puters won’t output sounds in the bottom octave (1) and the top octave (8) is generallypainful
sampleRate(=44100): only used for sounds using pyglet. Pygame uses one rate for all soundssample rate for all sounds (once initialised)
bits(=16): Only 8- and 16-bits supported so far. Only used for sounds using pyglet. Pygameuses the same sample rate for all sounds (once initialised)
fadeOut(mSecs)fades out the sound (when playing) over mSecs. Don’t know why you would do this in psychophysics butit’s easy and fun to include as a possibility :)
getDuration()Get’s the duration of the current sound in secs
getVolume()Returns the current volume of the sound (0.0:1.0)
132 Chapter 13. Reference Manual (API)
PsychoPy - Psychology software for Python, Release 1.65.01
play(fromStart=True)Starts playing the sound on an available channel. If no sound channels are available, it will not play andreturn None.
This runs off a separate thread i.e. your code won’t wait for the sound to finish before continuing. You needto use a psychopy.core.wait() command if you want things to pause. If you call play() whiles something isalready playing the sounds will be played over each other.
setVolume(newVol)Sets the current volume of the sound (0.0:1.0)
stop()Stops the sound immediately
For those that prefer Epydoc formatted API, that is also available here
13.15 Indices and tables
• genindex
• modindex
• search
13.15. Indices and tables 133
PsychoPy - Psychology software for Python, Release 1.65.01
134 Chapter 13. Reference Manual (API)
CHAPTER
FOURTEEN
FOR DEVELOPERS
There is a separate mailing list to discuss development ideas and issues.
For developers the best way to use PsychoPy is to install a version to your own copy of python (preferably 2.6 but 2.5is OK). Make sure you have all the Dependencies, including the extra recommendedPackages for developers.
Don’t install PsychoPy. Instead fetch a copy of the git repository and add this to the python path using a .pth file. Otherusers of the computer might have their own standalone versions installed without your repository version touchingthem.
14.1 Using the repository
Note: Much of the following is explained with more detail in the nitime documentation, and then in further detail innumerous online tutorials.
14.1.1 Workflow
The use of git and the following workflow allows people to contribute changes that can easily be incorporated backinto the project, while (hopefully) maintaining order and consistency in the code. All changes should be tracked andreversible.
• Create a fork of the central psychopy/psychopy repository
• Create a local clone of that fork
• For small changes
– make the changes directly in the master branch
– push back to your fork
– submit a pull request to the central repository
• For substantial changes (new features)
– create a branch
– when finished run unit tests
– when the unit tests pass merge changes back into the master branch
– submit a pull request to the central repository
–
135
PsychoPy - Psychology software for Python, Release 1.65.01
14.1.2 Create your own fork of the central repository
Go to github, create an account and make a fork of the psychopy repository You can change your fork in any way youchoose without it affecting the central project. You can also share your fork with others, including the central project.
14.1.3 Fetch a local copy
Install git on your computer. Create and upload an ssh key to your github account - this is necessary for you to pushchanges back to your fork of the project at github.
Then, in a folder of your choosing fetch your fork:
$ git clone [email protected]:USER/psychopy.git$ cd psychopy$ git remote add upstream git://github.com/psychopy/psychopy.git
The last line connects your copy (with read access) to the central server so you can easily fetch any updates to thecentral repository.
14.1.4 Fetching the latest version
Periodically it’s worth fetching any changes to the central psychopy repository (into your master branch, more on thatbelow):
$ git checkout master$ git pull upstream master # here ’master’ is the desired branch of psychopy to fetch
14.1.5 Fixing bugs and making minor improvements
You can make minor changes directly in the master branch of your fork. After making a change you need to commit aset of changes to your files with a message. This enables you to group together changes and you will subsequently beable to go back to any previous commit, so your changes are reversible.
I (Jon) usually do this by opening the graphical user interface that comes with git:
$ git gui
From the GUI you can select (or stage in git terminology) the files that you want to include in this particular commitand give it a message. Give a clear summary of the changes for the first line. You can add more details about thechanges on lower lines if needed.
If you have internet access then you could also push your changes back up to your fork (which is called your originby default), either by pressing the push button in the GUI or by closing that and typing:
$ git push
14.1.6 Share your improvement with others
Only a couple of people have direct write-access to the psychopy repository, but you can get your changes included inupstream by pushing your changes back to your github fork and then submitting a pull request.
136 Chapter 14. For Developers
PsychoPy - Psychology software for Python, Release 1.65.01
14.1.7 Add a new feature branch
For more substantial work, you should create a new branch in your repository. Often whle working on a new featureother aspects of the code will get broken and the master branch should always be in a working state. To create a newbranch:
$ git branch feature-somethingNew
You can now switch to your new feature branch with:
$ git checkout feature-somethingNew
And get back to your master branch with:
$ git checkout master
You can push your new branch back to your fork (origin) with:
$ git push origin feature-somethingNew
14.1.8 Completing work on a feature
When you’re done run the unit tests for your feature branch. If they pass you hopefully haven’t damaged other partsof PsychoPy (!?). If possible add a unit test for your new feature too, so that if other people make changes they don’tbreak your work!
You can merge your changes back into your master branch with:
$ git checkout master$ git merge feature-somethingNew
Once you’ve folded your new code back into your master and pushed it back to your github fork then it’s time to Shareyour improvement with others.
14.2 Adding a new Builder Component
Builder Components are auto-detected and displayed to the experimenter as icons (builder, right panel). This makes itstraightforward to add new ones.
All you need to do is create a list of parameters that the Component needs to know about (that will automaticallyappear in the Component’s dialog) and a few pieces of code specifying what code should be called at different pointsin the script (e.g. beginning of the Routine, every frame, end of the study etc...). Many of these will come simply fromsubclassing the _base or _visual Components.
To get started, Add a new feature branch for the development of this component. (If this doesn’t mean anything to youthen see Using the repository )
You’ll mainly be working in the directory .../psychopy/app/builder/components/. Take a look at several existing Com-ponents (such as ‘patch.py’), and key files including ‘_base.py’ and ‘_visual.py’.
There are three main steps, the first being by far the most involved.
14.2.1 Step 1. Make a new file: ‘newcomp.py’
Its pretty straightforward to model a new Component on one of the existing ones. Be prepared to specify what yourComponent needs to do at several different points in time: before the first trial, every frame, at the end of each routine,
14.2. Adding a new Builder Component 137
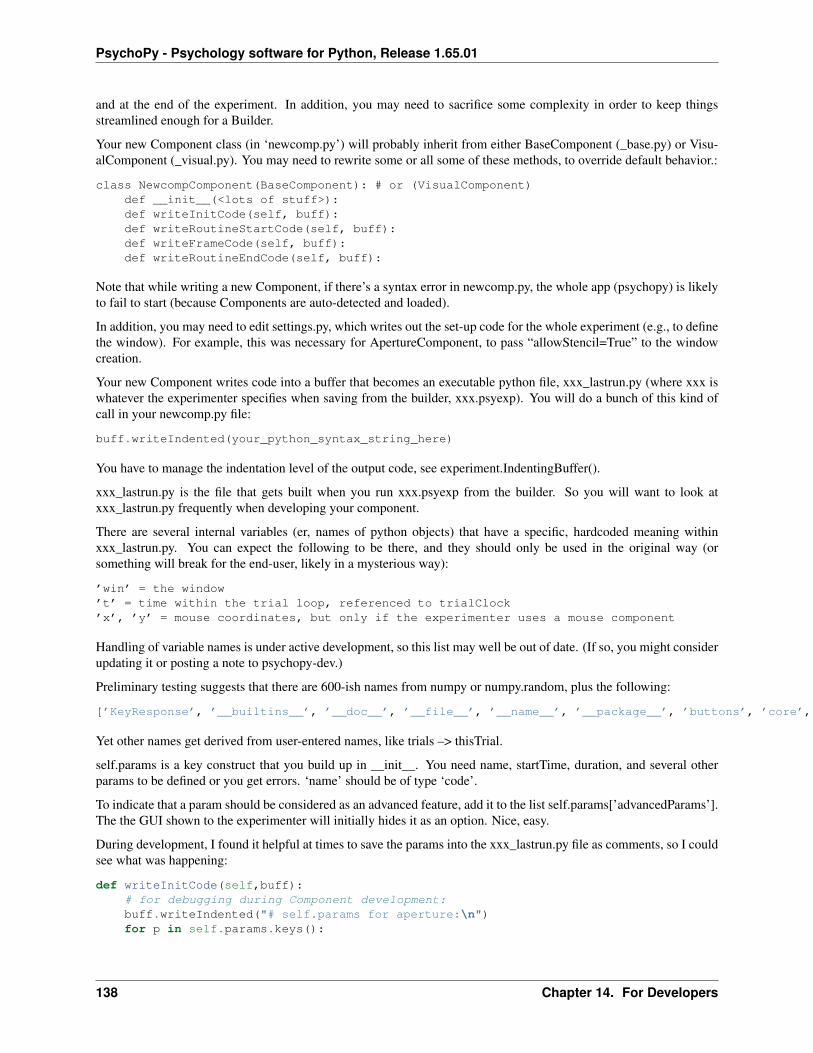
PsychoPy - Psychology software for Python, Release 1.65.01
and at the end of the experiment. In addition, you may need to sacrifice some complexity in order to keep thingsstreamlined enough for a Builder.
Your new Component class (in ‘newcomp.py’) will probably inherit from either BaseComponent (_base.py) or Visu-alComponent (_visual.py). You may need to rewrite some or all some of these methods, to override default behavior.:
class NewcompComponent(BaseComponent): # or (VisualComponent)def __init__(<lots of stuff>):def writeInitCode(self, buff):def writeRoutineStartCode(self, buff):def writeFrameCode(self, buff):def writeRoutineEndCode(self, buff):
Note that while writing a new Component, if there’s a syntax error in newcomp.py, the whole app (psychopy) is likelyto fail to start (because Components are auto-detected and loaded).
In addition, you may need to edit settings.py, which writes out the set-up code for the whole experiment (e.g., to definethe window). For example, this was necessary for ApertureComponent, to pass “allowStencil=True” to the windowcreation.
Your new Component writes code into a buffer that becomes an executable python file, xxx_lastrun.py (where xxx iswhatever the experimenter specifies when saving from the builder, xxx.psyexp). You will do a bunch of this kind ofcall in your newcomp.py file:
buff.writeIndented(your_python_syntax_string_here)
You have to manage the indentation level of the output code, see experiment.IndentingBuffer().
xxx_lastrun.py is the file that gets built when you run xxx.psyexp from the builder. So you will want to look atxxx_lastrun.py frequently when developing your component.
There are several internal variables (er, names of python objects) that have a specific, hardcoded meaning withinxxx_lastrun.py. You can expect the following to be there, and they should only be used in the original way (orsomething will break for the end-user, likely in a mysterious way):
’win’ = the window’t’ = time within the trial loop, referenced to trialClock’x’, ’y’ = mouse coordinates, but only if the experimenter uses a mouse component
Handling of variable names is under active development, so this list may well be out of date. (If so, you might considerupdating it or posting a note to psychopy-dev.)
Preliminary testing suggests that there are 600-ish names from numpy or numpy.random, plus the following:
[’KeyResponse’, ’__builtins__’, ’__doc__’, ’__file__’, ’__name__’, ’__package__’, ’buttons’, ’core’, ’data’, ’dlg’, ’event’, ’expInfo’, ’expName’, ’filename’, ’gui’, ’logFile’, ’os’, ’psychopy’, ’sound’, ’t’, ’visual’, ’win’, ’x’, ’y’]
Yet other names get derived from user-entered names, like trials –> thisTrial.
self.params is a key construct that you build up in __init__. You need name, startTime, duration, and several otherparams to be defined or you get errors. ‘name’ should be of type ‘code’.
To indicate that a param should be considered as an advanced feature, add it to the list self.params[’advancedParams’].The the GUI shown to the experimenter will initially hides it as an option. Nice, easy.
During development, I found it helpful at times to save the params into the xxx_lastrun.py file as comments, so I couldsee what was happening:
def writeInitCode(self,buff):# for debugging during Component development:buff.writeIndented("# self.params for aperture:\n")for p in self.params.keys():
138 Chapter 14. For Developers

PsychoPy - Psychology software for Python, Release 1.65.01
try: buff.writeIndented("# %s: %s <type %s>\n" % (p, self.params[p].val, self.params[p].valType))except: pass
A lot more detail can be infered from Jon’s code.
Making things loop-compatible looks interesting – see keyboard.py for an example, especially code for saving data atthe end.
Gotchas:
param[].val : If you have a boolean variable (e.g., my_flag) as one of your params, note that‘self.param[”my_flag”]’ is always True (the param exists –> True). So you almost always want‘self.param[”my_flag”].val’.
14.2.2 Step 2. Make an icon: ‘newcomp.png’:
Using your favorite image software, make an icon for your Component, ‘newcomp.png’. Dimensions = 48 x 48. Putit in the components directory.
In ‘newcomp.py’, have a line near the top:
iconFile = path.join(thisFolder, ’newcomp.png’)
14.2.3 Step 3. Write some documentation: ‘newcomp.rst’:
Just make a text file that ends in .rst (“restructured text”), and put it in psychopy/docs/source/builder/components/ . Itwill get auto-formatted and end up at http://www.psychopy.org/builder/components/newcomp.html
Happy Coding Folks!!
14.2. Adding a new Builder Component 139

PsychoPy - Psychology software for Python, Release 1.65.01
140 Chapter 14. For Developers
CHAPTER
FIFTEEN
PSYCHOPY EXPERIMENT FILEFORMAT (.PSYEXP)
The file format used to save experiments constructed in PsychoPy builder was created especially for the purpose, butis an open format, using a basic xml form, that may be of use to other similar software. Indeed the builder itself couldbe used to generate experiments on different backends (such as Vision Egg, PsychToolbox or PyEPL). The xml formatof the file makes it extremely platform independent, as well as moderately(?!) easy to read by a humans.
The simplest way to understand the file format is probably simply to create an experiment, save it and open the filein an xml-aware editor/viewer (e.g. change the file extension from .psyexp to .xml and then open it in firefox). Anexample (from the stroop demo) is shown below.
The file format maps fairly obviously onto the structure of experiments constructed with the Builder interface, asdescribed here. There are general Settings for the experiment, then there is a list of Routines and a Flow that describeshow these are combined.
As with any xml file the format contains object nodes which can have direct properties and also child nodes. Forinstance the outermost node of the .psyexp file is the experiment node, with properties that specifiy the version ofPsychoPy that was used to save the file most recently and the encoding of text within the file (ascii, unicode etc.), andwith child nodes Settings, Routines and Flow.
15.1 Parameters
Many of the nodes described within this xml description of the experiment contain Param entries, representing differentparameters of that Component. All parameter nodes have a name property and a val property. Most also have a valTypeproperty, which can take values ‘bool’, ‘code’, ‘str’ and an updates property that specifies whether this parameter ischanging during the experiment and, if so, whether it changes ‘every frame’ (of the monitor) or ‘every repeat’ (of theRoutine).
15.2 Settings
The Settings node contains a number of parameters that, in PsychoPy, would normally be set in the Experiment settingsdialog, such as the monitor to be used. This node contains a number of Parameters that map onto the entries in thatdialog.
141
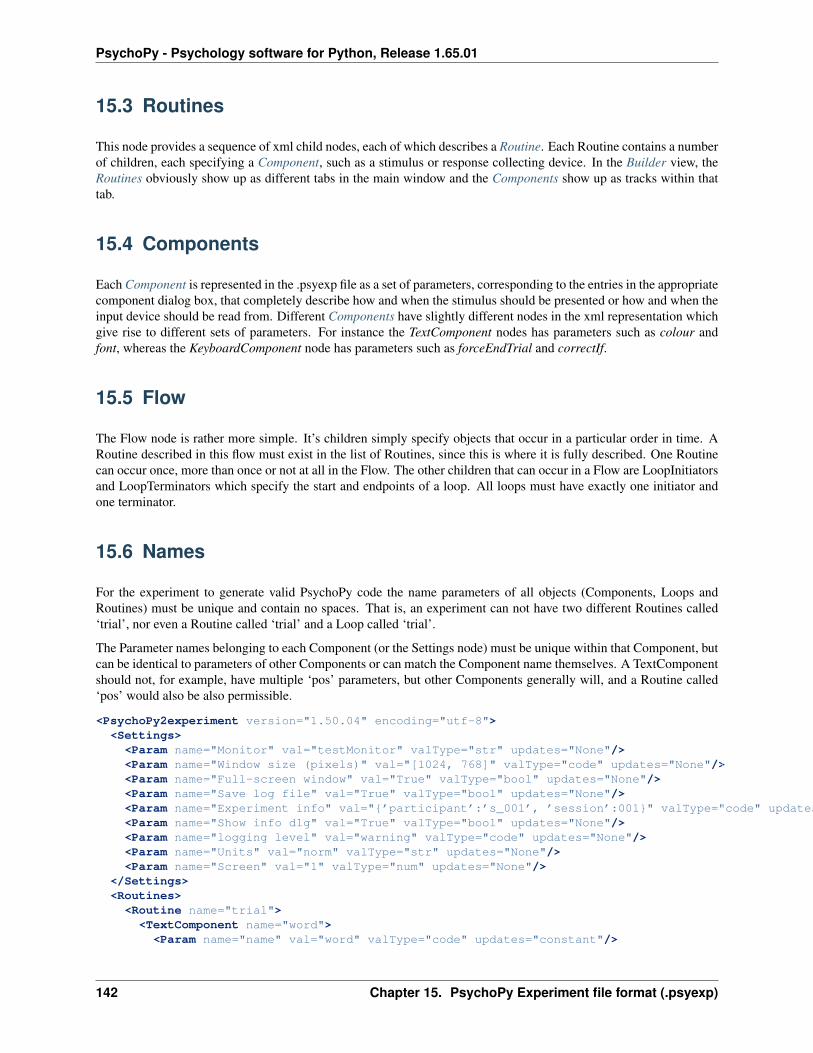
PsychoPy - Psychology software for Python, Release 1.65.01
15.3 Routines
This node provides a sequence of xml child nodes, each of which describes a Routine. Each Routine contains a numberof children, each specifying a Component, such as a stimulus or response collecting device. In the Builder view, theRoutines obviously show up as different tabs in the main window and the Components show up as tracks within thattab.
15.4 Components
Each Component is represented in the .psyexp file as a set of parameters, corresponding to the entries in the appropriatecomponent dialog box, that completely describe how and when the stimulus should be presented or how and when theinput device should be read from. Different Components have slightly different nodes in the xml representation whichgive rise to different sets of parameters. For instance the TextComponent nodes has parameters such as colour andfont, whereas the KeyboardComponent node has parameters such as forceEndTrial and correctIf.
15.5 Flow
The Flow node is rather more simple. It’s children simply specify objects that occur in a particular order in time. ARoutine described in this flow must exist in the list of Routines, since this is where it is fully described. One Routinecan occur once, more than once or not at all in the Flow. The other children that can occur in a Flow are LoopInitiatorsand LoopTerminators which specify the start and endpoints of a loop. All loops must have exactly one initiator andone terminator.
15.6 Names
For the experiment to generate valid PsychoPy code the name parameters of all objects (Components, Loops andRoutines) must be unique and contain no spaces. That is, an experiment can not have two different Routines called‘trial’, nor even a Routine called ‘trial’ and a Loop called ‘trial’.
The Parameter names belonging to each Component (or the Settings node) must be unique within that Component, butcan be identical to parameters of other Components or can match the Component name themselves. A TextComponentshould not, for example, have multiple ‘pos’ parameters, but other Components generally will, and a Routine called‘pos’ would also be also permissible.
<PsychoPy2experiment version="1.50.04" encoding="utf-8"><Settings><Param name="Monitor" val="testMonitor" valType="str" updates="None"/><Param name="Window size (pixels)" val="[1024, 768]" valType="code" updates="None"/><Param name="Full-screen window" val="True" valType="bool" updates="None"/><Param name="Save log file" val="True" valType="bool" updates="None"/><Param name="Experiment info" val="’participant’:’s_001’, ’session’:001" valType="code" updates="None"/><Param name="Show info dlg" val="True" valType="bool" updates="None"/><Param name="logging level" val="warning" valType="code" updates="None"/><Param name="Units" val="norm" valType="str" updates="None"/><Param name="Screen" val="1" valType="num" updates="None"/>
</Settings><Routines><Routine name="trial">
<TextComponent name="word"><Param name="name" val="word" valType="code" updates="constant"/>
142 Chapter 15. PsychoPy Experiment file format (.psyexp)
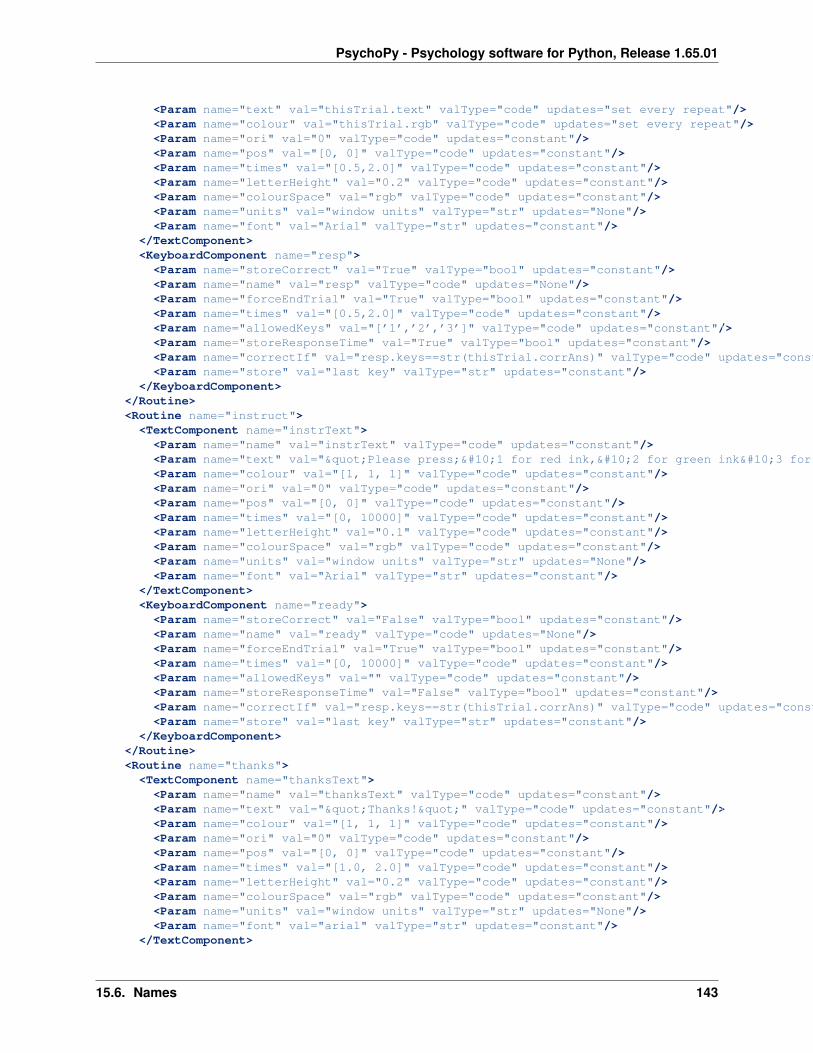
PsychoPy - Psychology software for Python, Release 1.65.01
<Param name="text" val="thisTrial.text" valType="code" updates="set every repeat"/><Param name="colour" val="thisTrial.rgb" valType="code" updates="set every repeat"/><Param name="ori" val="0" valType="code" updates="constant"/><Param name="pos" val="[0, 0]" valType="code" updates="constant"/><Param name="times" val="[0.5,2.0]" valType="code" updates="constant"/><Param name="letterHeight" val="0.2" valType="code" updates="constant"/><Param name="colourSpace" val="rgb" valType="code" updates="constant"/><Param name="units" val="window units" valType="str" updates="None"/><Param name="font" val="Arial" valType="str" updates="constant"/>
</TextComponent><KeyboardComponent name="resp">
<Param name="storeCorrect" val="True" valType="bool" updates="constant"/><Param name="name" val="resp" valType="code" updates="None"/><Param name="forceEndTrial" val="True" valType="bool" updates="constant"/><Param name="times" val="[0.5,2.0]" valType="code" updates="constant"/><Param name="allowedKeys" val="[’1’,’2’,’3’]" valType="code" updates="constant"/><Param name="storeResponseTime" val="True" valType="bool" updates="constant"/><Param name="correctIf" val="resp.keys==str(thisTrial.corrAns)" valType="code" updates="constant"/><Param name="store" val="last key" valType="str" updates="constant"/>
</KeyboardComponent></Routine><Routine name="instruct"><TextComponent name="instrText"><Param name="name" val="instrText" valType="code" updates="constant"/><Param name="text" val=""Please press; 1 for red ink, 2 for green ink 3 for blue ink (Esc will quit) Any key to continue"" valType="code" updates="constant"/><Param name="colour" val="[1, 1, 1]" valType="code" updates="constant"/><Param name="ori" val="0" valType="code" updates="constant"/><Param name="pos" val="[0, 0]" valType="code" updates="constant"/><Param name="times" val="[0, 10000]" valType="code" updates="constant"/><Param name="letterHeight" val="0.1" valType="code" updates="constant"/><Param name="colourSpace" val="rgb" valType="code" updates="constant"/><Param name="units" val="window units" valType="str" updates="None"/><Param name="font" val="Arial" valType="str" updates="constant"/>
</TextComponent><KeyboardComponent name="ready"><Param name="storeCorrect" val="False" valType="bool" updates="constant"/><Param name="name" val="ready" valType="code" updates="None"/><Param name="forceEndTrial" val="True" valType="bool" updates="constant"/><Param name="times" val="[0, 10000]" valType="code" updates="constant"/><Param name="allowedKeys" val="" valType="code" updates="constant"/><Param name="storeResponseTime" val="False" valType="bool" updates="constant"/><Param name="correctIf" val="resp.keys==str(thisTrial.corrAns)" valType="code" updates="constant"/><Param name="store" val="last key" valType="str" updates="constant"/>
</KeyboardComponent></Routine><Routine name="thanks"><TextComponent name="thanksText"><Param name="name" val="thanksText" valType="code" updates="constant"/><Param name="text" val=""Thanks!"" valType="code" updates="constant"/><Param name="colour" val="[1, 1, 1]" valType="code" updates="constant"/><Param name="ori" val="0" valType="code" updates="constant"/><Param name="pos" val="[0, 0]" valType="code" updates="constant"/><Param name="times" val="[1.0, 2.0]" valType="code" updates="constant"/><Param name="letterHeight" val="0.2" valType="code" updates="constant"/><Param name="colourSpace" val="rgb" valType="code" updates="constant"/><Param name="units" val="window units" valType="str" updates="None"/><Param name="font" val="arial" valType="str" updates="constant"/>
</TextComponent>
15.6. Names 143
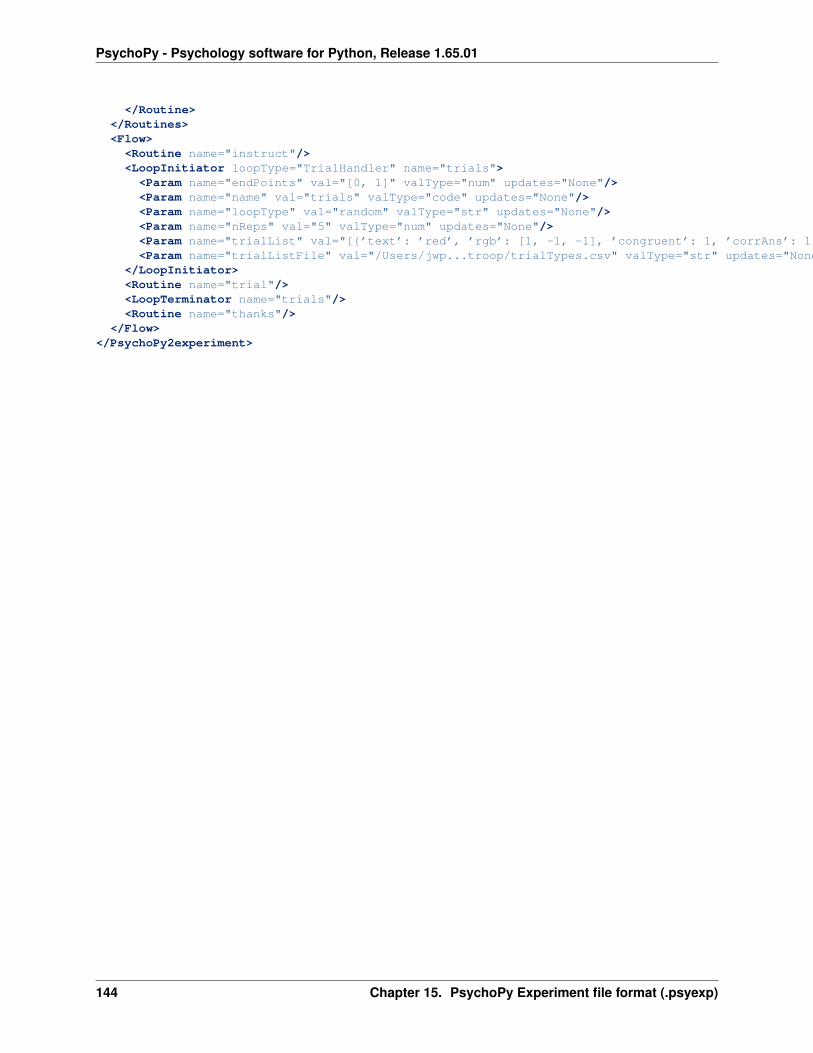
PsychoPy - Psychology software for Python, Release 1.65.01
</Routine></Routines><Flow><Routine name="instruct"/><LoopInitiator loopType="TrialHandler" name="trials"><Param name="endPoints" val="[0, 1]" valType="num" updates="None"/><Param name="name" val="trials" valType="code" updates="None"/><Param name="loopType" val="random" valType="str" updates="None"/><Param name="nReps" val="5" valType="num" updates="None"/><Param name="trialList" val="[’text’: ’red’, ’rgb’: [1, -1, -1], ’congruent’: 1, ’corrAns’: 1, ’text’: ’red’, ’rgb’: [-1, 1, -1], ’congruent’: 0, ’corrAns’: 1, ’text’: ’green’, ’rgb’: [-1, 1, -1], ’congruent’: 1, ’corrAns’: 2, ’text’: ’green’, ’rgb’: [-1, -1, 1], ’congruent’: 0, ’corrAns’: 2, ’text’: ’blue’, ’rgb’: [-1, -1, 1], ’congruent’: 1, ’corrAns’: 3, ’text’: ’blue’, ’rgb’: [1, -1, -1], ’congruent’: 0, ’corrAns’: 3]" valType="str" updates="None"/><Param name="trialListFile" val="/Users/jwp...troop/trialTypes.csv" valType="str" updates="None"/>
</LoopInitiator><Routine name="trial"/><LoopTerminator name="trials"/><Routine name="thanks"/>
</Flow></PsychoPy2experiment>
144 Chapter 15. PsychoPy Experiment file format (.psyexp)
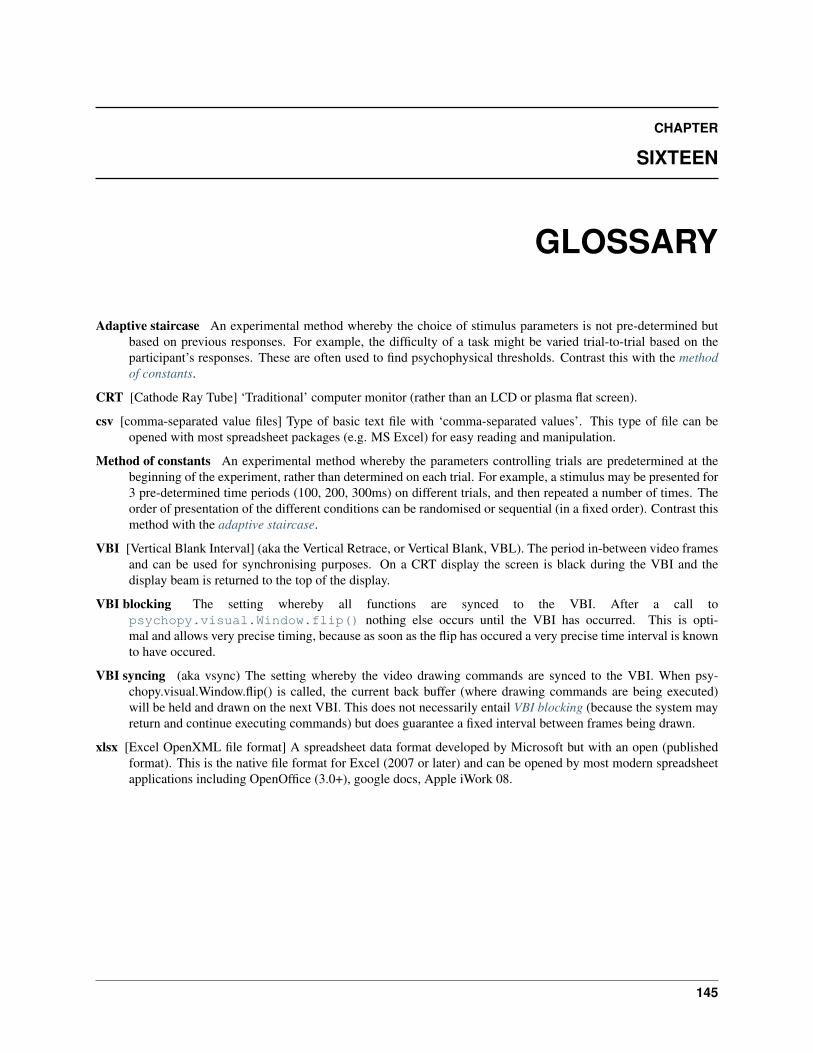
CHAPTER
SIXTEEN
GLOSSARY
Adaptive staircase An experimental method whereby the choice of stimulus parameters is not pre-determined butbased on previous responses. For example, the difficulty of a task might be varied trial-to-trial based on theparticipant’s responses. These are often used to find psychophysical thresholds. Contrast this with the methodof constants.
CRT [Cathode Ray Tube] ‘Traditional’ computer monitor (rather than an LCD or plasma flat screen).
csv [comma-separated value files] Type of basic text file with ‘comma-separated values’. This type of file can beopened with most spreadsheet packages (e.g. MS Excel) for easy reading and manipulation.
Method of constants An experimental method whereby the parameters controlling trials are predetermined at thebeginning of the experiment, rather than determined on each trial. For example, a stimulus may be presented for3 pre-determined time periods (100, 200, 300ms) on different trials, and then repeated a number of times. Theorder of presentation of the different conditions can be randomised or sequential (in a fixed order). Contrast thismethod with the adaptive staircase.
VBI [Vertical Blank Interval] (aka the Vertical Retrace, or Vertical Blank, VBL). The period in-between video framesand can be used for synchronising purposes. On a CRT display the screen is black during the VBI and thedisplay beam is returned to the top of the display.
VBI blocking The setting whereby all functions are synced to the VBI. After a call topsychopy.visual.Window.flip() nothing else occurs until the VBI has occurred. This is opti-mal and allows very precise timing, because as soon as the flip has occured a very precise time interval is knownto have occured.
VBI syncing (aka vsync) The setting whereby the video drawing commands are synced to the VBI. When psy-chopy.visual.Window.flip() is called, the current back buffer (where drawing commands are being executed)will be held and drawn on the next VBI. This does not necessarily entail VBI blocking (because the system mayreturn and continue executing commands) but does guarantee a fixed interval between frames being drawn.
xlsx [Excel OpenXML file format] A spreadsheet data format developed by Microsoft but with an open (publishedformat). This is the native file format for Excel (2007 or later) and can be opened by most modern spreadsheetapplications including OpenOffice (3.0+), google docs, Apple iWork 08.
145

PsychoPy - Psychology software for Python, Release 1.65.01
146 Chapter 16. Glossary
CHAPTER
SEVENTEEN
INDICES
• genindex
• modindex
• search
A pdf copy of the current documentation is available at:
http://www.psychopy.org/PsychoPyManual.pdf
147

PsychoPy - Psychology software for Python, Release 1.65.01
148 Chapter 17. Indices
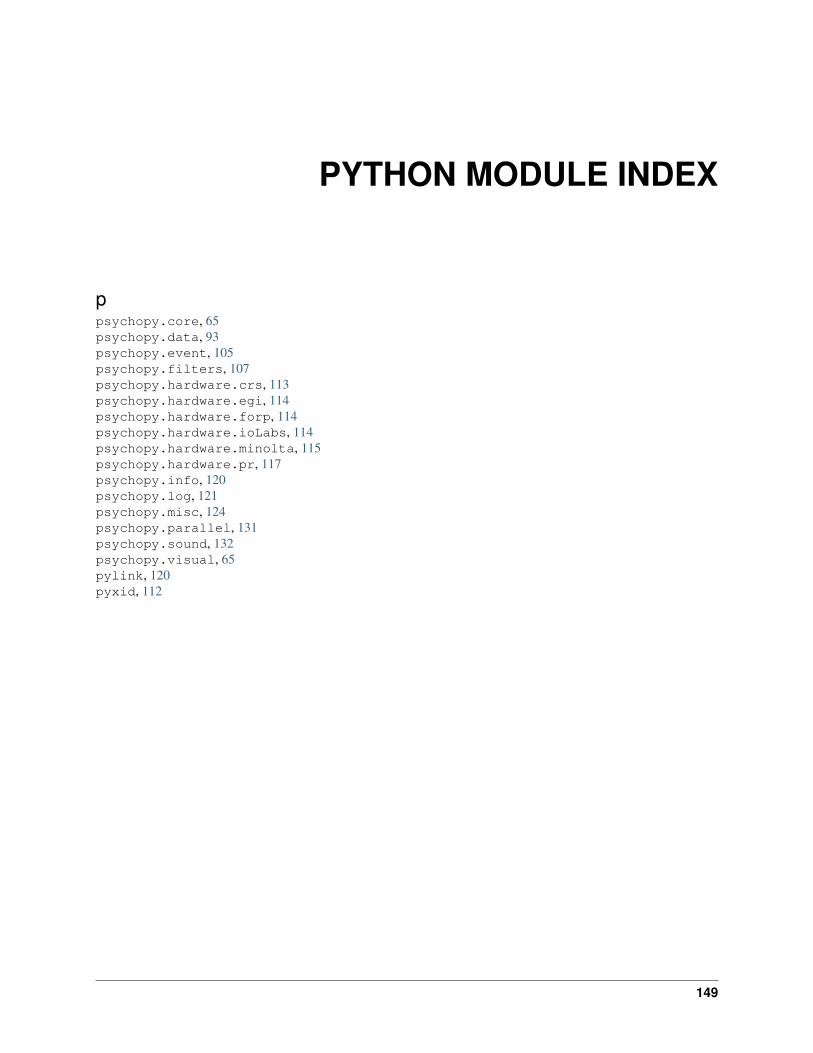
PYTHON MODULE INDEX
ppsychopy.core, 65psychopy.data, 93psychopy.event, 105psychopy.filters, 107psychopy.hardware.crs, 113psychopy.hardware.egi, 114psychopy.hardware.forp, 114psychopy.hardware.ioLabs, 114psychopy.hardware.minolta, 115psychopy.hardware.pr, 117psychopy.info, 120psychopy.log, 121psychopy.misc, 124psychopy.parallel, 131psychopy.sound, 132psychopy.visual, 65pylink, 120pyxid, 112
149

PsychoPy - Psychology software for Python, Release 1.65.01
150 Python Module Index
INDEX
AAdaptive staircase, 145addData() (psychopy.data.MultiStairHandler method), 98addData() (psychopy.data.QuestHandler method), 101addData() (psychopy.data.StairHandler method), 95addData() (psychopy.data.TrialHandler method), 93addField() (psychopy.gui.Dlg method), 110addFixedField() (psychopy.gui.Dlg method), 110addLevel() (in module psychopy.log), 122addText() (psychopy.gui.Dlg method), 110Aperture (class in psychopy.visual), 92array2image() (in module psychopy.misc), 124
BBitsBox (class in psychopy.hardware.crs), 113bootStraps() (in module psychopy.data), 105butter2d_bp() (in module psychopy.filters), 107butter2d_hp() (in module psychopy.filters), 107butter2d_lp() (in module psychopy.filters), 107butter2d_lp_elliptic() (in module psychopy.filters), 108ButtonBox (class in psychopy.hardware.forp), 114
CcalculateNextIntensity() (psychopy.data.QuestHandler
method), 101calculateNextIntensity() (psychopy.data.StairHandler
method), 95cart2pol() (in module psychopy.misc), 124checkOK() (psychopy.hardware.minolta.LS100 method),
116clear_response_queue() (pyxid.ResponseDevice method),
112clearBuffer() (psychopy.hardware.forp.ButtonBox
method), 114clearBuffer() (psychopy.visual.Window method), 66clearEvents() (in module psychopy.event), 106clearMemory() (psychopy.hardware.minolta.LS100
method), 116clearTextures() (psychopy.visual.ElementArrayStim
method), 85clearTextures() (psychopy.visual.PatchStim method), 71
clearTextures() (psychopy.visual.RadialStim method), 82clickReset() (psychopy.event.Mouse method), 105Clock (class in psychopy.core), 65close() (psychopy.visual.Window method), 67cm2deg() (in module psychopy.misc), 124cm2pix() (in module psychopy.misc), 124confInterval() (psychopy.data.QuestHandler method),
101conv2d() (in module psychopy.filters), 108copyCalib() (psychopy.monitors.Monitor method), 126critical() (in module psychopy.log), 122CRT, 145csv, 145
Ddata() (in module psychopy.log), 122debug() (in module psychopy.log), 122deg2cm() (in module psychopy.misc), 124deg2pix() (in module psychopy.misc), 124delCalib() (psychopy.monitors.Monitor method), 126disable() (psychopy.visual.Aperture method), 93Dlg (class in psychopy.gui), 110DlgFromDict (class in psychopy.gui), 109DotStim (class in psychopy.visual), 86draw() (psychopy.visual.DotStim method), 88draw() (psychopy.visual.ElementArrayStim method), 85draw() (psychopy.visual.MovieStim method), 77draw() (psychopy.visual.PatchStim method), 71draw() (psychopy.visual.RadialStim method), 82draw() (psychopy.visual.RatingScale method), 92draw() (psychopy.visual.ShapeStim method), 80draw() (psychopy.visual.SimpleImageStim method), 73draw() (psychopy.visual.TextStim method), 74
EElementArrayStim (class in psychopy.visual), 84enable() (psychopy.visual.Aperture method), 93endRemoteMode() (psychopy.hardware.pr.PR655
method), 118error() (in module psychopy.log), 122eval() (psychopy.data.FitCumNormal method), 104eval() (psychopy.data.FitLogistic method), 103
151
PsychoPy - Psychology software for Python, Release 1.65.01
eval() (psychopy.data.FitNakaRushton method), 103eval() (psychopy.data.FitWeibull method), 103exp() (in module psychopy.log), 122extendArr() (in module psychopy.misc), 124
FfadeOut() (psychopy.sound.SoundPygame method), 132fatal() (in module psychopy.log), 123fileOpenDlg (class in psychopy.gui), 110fileSaveDlg (class in psychopy.gui), 111findPhotometer() (in module psychopy.hardware), 120findPR650() (in module psychopy.monitors), 129FitCumNormal (class in psychopy.data), 104fitGammaErrFun() (psy-
chopy.monitors.GammaCalculator method),129
fitGammaFun() (psychopy.monitors.GammaCalculatormethod), 129
FitLogistic (class in psychopy.data), 103FitNakaRushton (class in psychopy.data), 103FitWeibull (class in psychopy.data), 103flip() (psychopy.visual.Window method), 67float_uint16() (in module psychopy.misc), 124float_uint8() (in module psychopy.misc), 124flush() (in module psychopy.log), 123fps() (psychopy.visual.Window method), 67fromFile() (in module psychopy.misc), 124functionFromStaircase() (in module psychopy.data), 104
GGammaCalculator (class in psychopy.monitors), 129gammaFun() (in module psychopy.monitors), 130gammaInvFun() (in module psychopy.monitors), 130gammaIsDefault() (psychopy.monitors.Monitor method),
126get_next_response() (pyxid.ResponseDevice method),
112get_xid_device() (in module pyxid), 112get_xid_devices() (in module pyxid), 112getAllMonitors() (in module psychopy.monitors), 129getCalibDate() (psychopy.monitors.Monitor method),
126getDeviceSN() (psychopy.hardware.pr.PR655 method),
118getDeviceType() (psychopy.hardware.pr.PR655 method),
118getDistance() (psychopy.monitors.Monitor method), 126getDKL_RGB() (psychopy.monitors.Monitor method),
126getDuration() (psychopy.sound.SoundPygame method),
132getEvents() (psychopy.hardware.forp.ButtonBox
method), 114getGamma() (psychopy.monitors.Monitor method), 126
getGammaGrid() (psychopy.monitors.Monitor method),126
getKeys() (in module psychopy.event), 106getLastColorTemp() (psychopy.hardware.pr.PR655
method), 118getLastLum() (psychopy.hardware.pr.PR650 method),
117getLastSpectrum() (psychopy.hardware.pr.PR650
method), 117getLastSpectrum() (psychopy.hardware.pr.PR655
method), 118getLastTristim() (psychopy.hardware.pr.PR655 method),
119getLastUV() (psychopy.hardware.pr.PR655 method), 119getLastXY() (psychopy.hardware.pr.PR655 method), 119getLevel() (in module psychopy.log), 123getLevelsPost() (psychopy.monitors.Monitor method),
127getLevelsPre() (psychopy.monitors.Monitor method), 127getLineariseMethod() (psychopy.monitors.Monitor
method), 127getLMS_RGB() (psychopy.monitors.Monitor method),
127getLum() (psychopy.hardware.minolta.LS100 method),
116getLum() (psychopy.hardware.pr.PR650 method), 117getLumSeriesPR650() (in module psychopy.monitors),
129getLumsPost() (psychopy.monitors.Monitor method), 127getLumsPre() (psychopy.monitors.Monitor method), 127getMeanLum() (psychopy.monitors.Monitor method),
127getMovieFrame() (psychopy.visual.Window method), 67getNotes() (psychopy.monitors.Monitor method), 127getPos() (psychopy.event.Mouse method), 105getPressed() (psychopy.event.Mouse method), 105getPsychopyVersion() (psychopy.monitors.Monitor
method), 127getRating() (psychopy.visual.RatingScale method), 92getRel() (psychopy.event.Mouse method), 106getRGBspectra() (in module psychopy.monitors), 130getRMScontrast() (in module psychopy.filters), 108getRT() (psychopy.visual.RatingScale method), 92getSizePix() (psychopy.monitors.Monitor method), 127getSpectra() (psychopy.monitors.Monitor method), 127getSpectrum() (psychopy.hardware.pr.PR650 method),
117getTime() (psychopy.core.Clock method), 65getUniqueEvents() (psychopy.hardware.forp.ButtonBox
method), 114getUseBits() (psychopy.monitors.Monitor method), 127getVisible() (psychopy.event.Mouse method), 106getVolume() (psychopy.sound.SoundPygame method),
132
152 Index
PsychoPy - Psychology software for Python, Release 1.65.01
getWheelRel() (psychopy.event.Mouse method), 106getWidth() (psychopy.monitors.Monitor method), 127
Iimage2array() (in module psychopy.misc), 124imfft() (in module psychopy.filters), 108imifft() (in module psychopy.filters), 108importData() (psychopy.data.QuestHandler method), 101importTrialList() (in module psychopy.data), 104incTrials() (psychopy.data.QuestHandler method), 101info() (in module psychopy.log), 123init_device() (pyxid.XidDevice method), 113inverse() (psychopy.data.FitCumNormal method), 104inverse() (psychopy.data.FitLogistic method), 103inverse() (psychopy.data.FitNakaRushton method), 103inverse() (psychopy.data.FitWeibull method), 103
LlineariseLums() (psychopy.monitors.Monitor method),
127loadMovie() (psychopy.visual.MovieStim method), 77log() (in module psychopy.log), 123LogFile (class in psychopy.log), 122logOnFlip() (psychopy.visual.Window method), 67LS100 (class in psychopy.hardware.minolta), 115
MmakeDKL2RGB() (in module psychopy.monitors), 130makeGauss() (in module psychopy.filters), 108makeGrating() (in module psychopy.filters), 108makeImageAuto() (in module psychopy.misc), 124makeLMS2RGB() (in module psychopy.monitors), 130makeMask() (in module psychopy.filters), 109makeRadialMatrix() (in module psychopy.filters), 109maskMatrix() (in module psychopy.filters), 109mean() (psychopy.data.QuestHandler method), 101measure() (psychopy.hardware.minolta.LS100 method),
116measure() (psychopy.hardware.pr.PR650 method), 117measure() (psychopy.hardware.pr.PR655 method), 119mergeFolder() (in module psychopy.misc), 124Method of constants, 145mode() (psychopy.data.QuestHandler method), 101Monitor (class in psychopy.monitors), 126Mouse (class in psychopy.event), 105mouseMoved() (psychopy.event.Mouse method), 106MovieStim (class in psychopy.visual), 76MultiStairHandler (class in psychopy.data), 97
NnewCalib() (psychopy.monitors.Monitor method), 127next() (psychopy.data.MultiStairHandler method), 98next() (psychopy.data.QuestHandler method), 101
next() (psychopy.data.StairHandler method), 96next() (psychopy.data.TrialHandler method), 93nextTrial() (psychopy.data.QuestHandler method), 101nextTrial() (psychopy.data.StairHandler method), 96nextTrial() (psychopy.data.TrialHandler method), 93
PparseSpectrumOutput() (psychopy.hardware.pr.PR650
method), 118parseSpectrumOutput() (psychopy.hardware.pr.PR655
method), 119PatchStim (class in psychopy.visual), 69pause() (psychopy.visual.MovieStim method), 77pix2cm() (in module psychopy.misc), 125pix2deg() (in module psychopy.misc), 125play() (psychopy.sound.SoundPygame method), 132play() (psychopy.visual.MovieStim method), 77plotFrameIntervals() (in module psychopy.misc), 125pol2cart() (in module psychopy.misc), 125poll_for_response() (pyxid.ResponseDevice method),
112PR650 (class in psychopy.hardware.pr), 117PR655 (class in psychopy.hardware.pr), 118printAsText() (psychopy.data.MultiStairHandler method),
98printAsText() (psychopy.data.QuestHandler method), 101printAsText() (psychopy.data.StairHandler method), 96printAsText() (psychopy.data.TrialHandler method), 94psychopy.core (module), 65psychopy.data (module), 93psychopy.event (module), 105psychopy.filters (module), 107psychopy.hardware.crs (module), 113psychopy.hardware.egi (module), 114psychopy.hardware.forp (module), 114psychopy.hardware.ioLabs (module), 114psychopy.hardware.minolta (module), 115psychopy.hardware.pr (module), 117psychopy.info (module), 120psychopy.log (module), 121psychopy.misc (module), 124psychopy.parallel (module), 131psychopy.sound (module), 132psychopy.visual (module), 65pylink (module), 120pyxid (module), 112
Qquantile() (psychopy.data.QuestHandler method), 102QuestHandler (class in psychopy.data), 99quit() (in module psychopy.core), 65
RRadialStim (class in psychopy.visual), 81
Index 153
PsychoPy - Psychology software for Python, Release 1.65.01
radians() (in module psychopy.misc), 125RatingScale (class in psychopy.visual), 90ratioRange() (in module psychopy.misc), 125readPin() (in module psychopy.parallel), 131reset() (psychopy.core.Clock method), 65reset() (psychopy.visual.RatingScale method), 92response_queue_size() (pyxid.ResponseDevice method),
112ResponseDevice (class in pyxid), 112RunTimeInfo (class in psychopy.info), 120
SsaveAsExcel() (psychopy.data.MultiStairHandler
method), 98saveAsExcel() (psychopy.data.QuestHandler method),
102saveAsExcel() (psychopy.data.StairHandler method), 96saveAsExcel() (psychopy.data.TrialHandler method), 94saveAsPickle() (psychopy.data.MultiStairHandler
method), 99saveAsPickle() (psychopy.data.QuestHandler method),
102saveAsPickle() (psychopy.data.StairHandler method), 96saveAsPickle() (psychopy.data.TrialHandler method), 94saveAsText() (psychopy.data.MultiStairHandler method),
99saveAsText() (psychopy.data.QuestHandler method), 102saveAsText() (psychopy.data.StairHandler method), 97saveAsText() (psychopy.data.TrialHandler method), 94saveFrameIntervals() (psychopy.visual.Window method),
67saveMon() (psychopy.monitors.Monitor method), 127saveMovieFrames() (psychopy.visual.Window method),
67sd() (psychopy.data.QuestHandler method), 102seek() (psychopy.visual.MovieStim method), 77sendMessage() (psychopy.hardware.minolta.LS100
method), 116sendMessage() (psychopy.hardware.pr.PR650 method),
118sendMessage() (psychopy.hardware.pr.PR655 method),
119set() (psychopy.visual.DotStim method), 88setAngularCycles() (psychopy.visual.RadialStim
method), 82setAngularPhase() (psychopy.visual.RadialStim method),
82setAutoDraw() (psychopy.visual.DotStim method), 88setAutoDraw() (psychopy.visual.MovieStim method), 77setAutoDraw() (psychopy.visual.PatchStim method), 71setAutoDraw() (psychopy.visual.RadialStim method), 82setAutoDraw() (psychopy.visual.ShapeStim method), 80setAutoDraw() (psychopy.visual.TextStim method), 74setAutoLog() (psychopy.visual.DotStim method), 88
setAutoLog() (psychopy.visual.MovieStim method), 77setAutoLog() (psychopy.visual.PatchStim method), 71setAutoLog() (psychopy.visual.RadialStim method), 82setAutoLog() (psychopy.visual.ShapeStim method), 80setAutoLog() (psychopy.visual.TextStim method), 74setCalibDate() (psychopy.monitors.Monitor method), 127setColor() (psychopy.visual.DotStim method), 88setColor() (psychopy.visual.MovieStim method), 77setColor() (psychopy.visual.PatchStim method), 71setColor() (psychopy.visual.RadialStim method), 82setColor() (psychopy.visual.ShapeStim method), 80setColor() (psychopy.visual.TextStim method), 74setColor() (psychopy.visual.Window method), 68setContr() (psychopy.visual.DotStim method), 89setContr() (psychopy.visual.MovieStim method), 78setContr() (psychopy.visual.PatchStim method), 72setContr() (psychopy.visual.RadialStim method), 83setContr() (psychopy.visual.ShapeStim method), 80setContr() (psychopy.visual.TextStim method), 75setContrast() (psychopy.hardware.crs.BitsBox method),
113setContrast() (psychopy.visual.PatchStim method), 72setContrast() (psychopy.visual.RadialStim method), 83setContrs() (psychopy.visual.ElementArrayStim method),
85setCurrent() (psychopy.monitors.Monitor method), 127setData() (in module psychopy.parallel), 131setDefaultClock() (in module psychopy.log), 123setDepth() (psychopy.visual.DotStim method), 89setDepth() (psychopy.visual.MovieStim method), 78setDepth() (psychopy.visual.PatchStim method), 72setDepth() (psychopy.visual.RadialStim method), 83setDepth() (psychopy.visual.ShapeStim method), 80setDepth() (psychopy.visual.SimpleImageStim method),
73setDepth() (psychopy.visual.TextStim method), 75setDir() (psychopy.visual.DotStim method), 89setDistance() (psychopy.monitors.Monitor method), 128setDKL() (psychopy.visual.DotStim method), 89setDKL() (psychopy.visual.MovieStim method), 78setDKL() (psychopy.visual.PatchStim method), 72setDKL() (psychopy.visual.RadialStim method), 83setDKL() (psychopy.visual.ShapeStim method), 80setDKL() (psychopy.visual.TextStim method), 75setDKL_RGB() (psychopy.monitors.Monitor method),
128setFieldCoherence() (psychopy.visual.DotStim method),
89setFieldPos() (psychopy.visual.DotStim method), 89setFieldPos() (psychopy.visual.ElementArrayStim
method), 85setFieldSize() (psychopy.visual.ElementArrayStim
method), 85setFillColor() (psychopy.visual.ShapeStim method), 80
154 Index
PsychoPy - Psychology software for Python, Release 1.65.01
setFillRGB() (psychopy.visual.ShapeStim method), 80setFlipHoriz() (psychopy.visual.SimpleImageStim
method), 73setFlipVert() (psychopy.visual.SimpleImageStim
method), 73setFont() (psychopy.visual.TextStim method), 75setGamma() (psychopy.hardware.crs.BitsBox method),
113setGamma() (psychopy.monitors.Monitor method), 128setGamma() (psychopy.visual.Window method), 68setGammaGrid() (psychopy.monitors.Monitor method),
128setHeight() (psychopy.visual.TextStim method), 75setImage() (psychopy.visual.SimpleImageStim method),
73setLevel() (psychopy.log.LogFile method), 122setLevelsPost() (psychopy.monitors.Monitor method),
128setLevelsPre() (psychopy.monitors.Monitor method), 128setLineariseMethod() (psychopy.monitors.Monitor
method), 128setLineColor() (psychopy.visual.ShapeStim method), 80setLineRGB() (psychopy.visual.ShapeStim method), 80setLMS() (psychopy.visual.DotStim method), 89setLMS() (psychopy.visual.MovieStim method), 78setLMS() (psychopy.visual.PatchStim method), 72setLMS() (psychopy.visual.RadialStim method), 83setLMS() (psychopy.visual.ShapeStim method), 80setLMS() (psychopy.visual.TextStim method), 75setLMS_RGB() (psychopy.monitors.Monitor method),
128setLumsPost() (psychopy.monitors.Monitor method), 128setLumsPre() (psychopy.monitors.Monitor method), 128setLUT() (psychopy.hardware.crs.BitsBox method), 113setMask() (psychopy.visual.ElementArrayStim method),
85setMask() (psychopy.visual.PatchStim method), 72setMask() (psychopy.visual.RadialStim method), 83setMaxAttempts() (psychopy.hardware.minolta.LS100
method), 116setMeanLum() (psychopy.monitors.Monitor method),
128setMode() (psychopy.hardware.minolta.LS100 method),
116setMouseVisible() (psychopy.visual.Window method), 68setMovie() (psychopy.visual.MovieStim method), 78setNotes() (psychopy.monitors.Monitor method), 128setOpacities() (psychopy.visual.ElementArrayStim
method), 85setOpacity() (psychopy.visual.DotStim method), 89setOpacity() (psychopy.visual.MovieStim method), 78setOpacity() (psychopy.visual.PatchStim method), 72setOpacity() (psychopy.visual.RadialStim method), 83setOpacity() (psychopy.visual.ShapeStim method), 80
setOpacity() (psychopy.visual.TextStim method), 76setOri() (psychopy.visual.DotStim method), 89setOri() (psychopy.visual.MovieStim method), 78setOri() (psychopy.visual.PatchStim method), 72setOri() (psychopy.visual.RadialStim method), 83setOri() (psychopy.visual.ShapeStim method), 80setOri() (psychopy.visual.TextStim method), 76setOris() (psychopy.visual.ElementArrayStim method),
85setPhase() (psychopy.visual.PatchStim method), 72setPhase() (psychopy.visual.RadialStim method), 83setPhases() (psychopy.visual.ElementArrayStim
method), 85setPin() (in module psychopy.parallel), 131setPortAddress() (in module psychopy.parallel), 131setPos() (psychopy.event.Mouse method), 106setPos() (psychopy.visual.Aperture method), 93setPos() (psychopy.visual.DotStim method), 89setPos() (psychopy.visual.ElementArrayStim method), 85setPos() (psychopy.visual.MovieStim method), 78setPos() (psychopy.visual.PatchStim method), 72setPos() (psychopy.visual.RadialStim method), 83setPos() (psychopy.visual.ShapeStim method), 80setPos() (psychopy.visual.SimpleImageStim method), 73setPos() (psychopy.visual.TextStim method), 76setPsychopyVersion() (psychopy.monitors.Monitor
method), 128setRadialCycles() (psychopy.visual.RadialStim method),
83setRadialPhase() (psychopy.visual.RadialStim method),
84setRecordFrameIntervals() (psychopy.visual.Window
method), 69setRGB() (psychopy.visual.DotStim method), 89setRGB() (psychopy.visual.MovieStim method), 78setRGB() (psychopy.visual.PatchStim method), 72setRGB() (psychopy.visual.RadialStim method), 83setRGB() (psychopy.visual.ShapeStim method), 80setRGB() (psychopy.visual.TextStim method), 76setRGB() (psychopy.visual.Window method), 69setRgbs() (psychopy.visual.ElementArrayStim method),
85setScale() (psychopy.visual.Window method), 69setSF() (psychopy.visual.PatchStim method), 72setSF() (psychopy.visual.RadialStim method), 84setSfs() (psychopy.visual.ElementArrayStim method), 85setSize() (psychopy.visual.Aperture method), 93setSize() (psychopy.visual.DotStim method), 89setSize() (psychopy.visual.MovieStim method), 78setSize() (psychopy.visual.PatchStim method), 72setSize() (psychopy.visual.RadialStim method), 84setSize() (psychopy.visual.ShapeStim method), 80setSize() (psychopy.visual.TextStim method), 76setSizePix() (psychopy.monitors.Monitor method), 128
Index 155
PsychoPy - Psychology software for Python, Release 1.65.01
setSizes() (psychopy.visual.ElementArrayStim method),86
setSpectra() (psychopy.monitors.Monitor method), 128setSpeed() (psychopy.visual.DotStim method), 89setTex() (psychopy.visual.ElementArrayStim method), 86setTex() (psychopy.visual.PatchStim method), 72setTex() (psychopy.visual.RadialStim method), 84setText() (psychopy.visual.TextStim method), 76setUseBits() (psychopy.monitors.Monitor method), 128setUseShaders() (psychopy.visual.DotStim method), 89setUseShaders() (psychopy.visual.MovieStim method),
78setUseShaders() (psychopy.visual.PatchStim method), 72setUseShaders() (psychopy.visual.RadialStim method),
84setUseShaders() (psychopy.visual.ShapeStim method), 81setUseShaders() (psychopy.visual.SimpleImageStim
method), 73setUseShaders() (psychopy.visual.TextStim method), 76setVertices() (psychopy.visual.ShapeStim method), 81setVisible() (psychopy.event.Mouse method), 106setVolume() (psychopy.sound.SoundPygame method),
133setWidth() (psychopy.monitors.Monitor method), 128setXYs() (psychopy.visual.ElementArrayStim method),
86ShapeStim (class in psychopy.visual), 79shellCall() (in module psychopy.core), 65show() (psychopy.gui.Dlg method), 110shuffleArray() (in module psychopy.misc), 125SimpleImageStim (class in psychopy.visual), 72simulate() (psychopy.data.QuestHandler method), 102SoundPygame (class in psychopy.sound), 132StairHandler (class in psychopy.data), 95startRemoteMode() (psychopy.hardware.pr.PR655
method), 119stop() (psychopy.sound.SoundPygame method), 133
TTextStim (class in psychopy.visual), 73toFile() (in module psychopy.misc), 125TrialHandler (class in psychopy.data), 93
Uuint8_float() (in module psychopy.misc), 125updataElementColors() (psy-
chopy.visual.ElementArrayStim method),86
updataTextureCoords() (psy-chopy.visual.ElementArrayStim method),86
updateElementVertices() (psy-chopy.visual.ElementArrayStim method),86
VVBI, 145VBI blocking, 145VBI syncing, 145
Wwait() (in module psychopy.core), 65waitKeys() (in module psychopy.event), 107warn() (in module psychopy.log), 123warning() (in module psychopy.log), 123Window (class in psychopy.visual), 66write() (psychopy.log.LogFile method), 122
XXidDevice (class in pyxid), 112xlsx, 145xydist() (in module psychopy.event), 107
156 Index