protect data using snapcenter service : cloud manager
TRANSCRIPT

Protect data using SnapCenter ServiceCloud ManagerNetAppMarch 10, 2022
This PDF was generated from https://docs.netapp.com/us-en/occm/overview-architecture-limitation-functionalities-snapcenter-service.html on March 10, 2022. Always check docs.netapp.com for the latest.

Table of Contents
Protect data using SnapCenter Service . . . . . . . . . . . . . . . . . . . . . . . . . . . . . . . . . . . . . . . . . . . . . . . . . . . . . . . . 1
Learn about SnapCenter Service. . . . . . . . . . . . . . . . . . . . . . . . . . . . . . . . . . . . . . . . . . . . . . . . . . . . . . . . . . . 1
Get started . . . . . . . . . . . . . . . . . . . . . . . . . . . . . . . . . . . . . . . . . . . . . . . . . . . . . . . . . . . . . . . . . . . . . . . . . . . . 3
Prerequisites to create Connector and enable SnapCenter Service . . . . . . . . . . . . . . . . . . . . . . . . . . . . . . . . 4
Create a Connector in Azure for SnapCenter Service . . . . . . . . . . . . . . . . . . . . . . . . . . . . . . . . . . . . . . . . . . . 7
Enable SnapCenter Service for Azure NetApp Files . . . . . . . . . . . . . . . . . . . . . . . . . . . . . . . . . . . . . . . . . . . . 8
Install the HDBSQL client. . . . . . . . . . . . . . . . . . . . . . . . . . . . . . . . . . . . . . . . . . . . . . . . . . . . . . . . . . . . . . . . 12
Protect SAP HANA systems. . . . . . . . . . . . . . . . . . . . . . . . . . . . . . . . . . . . . . . . . . . . . . . . . . . . . . . . . . . . . . 13
Manage operations . . . . . . . . . . . . . . . . . . . . . . . . . . . . . . . . . . . . . . . . . . . . . . . . . . . . . . . . . . . . . . . . . . . . 16
Troubleshoot issues . . . . . . . . . . . . . . . . . . . . . . . . . . . . . . . . . . . . . . . . . . . . . . . . . . . . . . . . . . . . . . . . . . . . 17

Protect data using SnapCenter Service
Learn about SnapCenter Service
SnapCenter Service provides data protection capabilities for applications running on
NetApp® Cloud Storage. SnapCenter Service enabled within NetApp Cloud Manager
offers efficient, application consistent, policy-based backup and restore of SAP HANA®
Systems residing on Azure NetApp Files.
Architecture
The architecture of SnapCenter Service include the following components.
• SnapCenter Service UI is integrated with Cloud Manager UI.
The SnapCenter Service UI is served from the Cloud Manager SAAS framework managed by NetApp that
offers multiple storage and data management capabilities.
• Cloud Manager Connector is a component from Cloud Manager that manages the life cycle of the
SnapCenter Service and several other services.
• SnapCenter Service is a set of data protection services hosted on Azure Kubernetes Service(AKS) that
orchestrates the data protection workflows.
The Cloud Manager Connector and SnapCenter Service are deployed in your Cloud network.
The following diagram shows the relationship between each component of SnapCenter Service:
For any user initiated request, the SnapCenter Service UI communicates with the Cloud Manager SaaS which
upon validating the request forwards the call to the Cloud Manager Connector. The Connector then
communicates to SnapCenter Service and SnapCenter Service invokes Azure NetApp Files management APIs
1

and HANA system commands to perform data protection operations.
SnapCenter Service can be deployed in the same VNet as that of the HANA system, or in a different one. If
SnapCenter Service and HANA systems are on different network, you should establish a network connectivity
between them.
Supported functionalities
SnapCenter Service supports the following functionalities.
• Adding SAP HANA systems
• Backing up SAP HANA systems
◦ Supports both snapshot-based and file-based backups
◦ Supports on-demand backup of SAP HANA systems
◦ Supports scheduled backup of SAP HANA systems using system-defined policies or custom policies
You can specify different scheduling frequencies such as hourly, daily, weekly, and monthly in the
policy.
◦ Supports backing up of both non-data volumes and global non-data volumes
• Retaining backups based on the policy
• Restoring SAP HANA systems from user specified backup
• Monitoring backups and other jobs
• Housekeeping of data and log backup catalogs on the HANA systems
• Displaying the protection summary, configuration details, and job status on the Dashboard
• Sending alerts through email
Limitations
SnapCenter Service 1.0 has the following limitations.
• Internationalization is not supported, you should use English browsers.
• Only a Cloud Manager user with “Account Admin” role can enable the SnapCenter Service.
• Limitations related to Azure Kubernetes Service (AKS) cluster node failure
◦ In the AKS cluster if one of the nodes goes offline, the inflight jobs might fail but subsequent jobs will be
executed.
◦ In the AKS cluster if one of the node goes down, you cannot add SAP HANA systems and but other
operations will run without any issue.
You should bring up the node to add HANA systems.
◦ Scheduler does not support high-availability configuration.
If the MySQL node which is used by the scheduler goes down, you should bring up the node for
scheduled operations to continue.
2

Get started
Get started with SnapCenter Service to protect your data in a few steps.
Access Cloud Manager
You should sign up to NetApp Cloud Central, log into Cloud Manager, and then set up a NetApp account.
Only an Account Admin can deploy the SnapCenter Service. However, both Account Admin and SnapCenter
Admin can perform different operations. Learn more
Ensure that the prerequisites are met
You should ensure that all the prerequisites to create a Connector and enable SnapCenter Service are met.
Create a Connector in Azure for SnapCenter Service
You should create a Connector in Azure for SnapCenter Service.
If you have a connector that meets all the prerequisites, you can use that.
Set up and discover Azure NetApp Files
Create an Azure NetApp Files working environment in Cloud Manager to create and manage NetApp
accounts, capacity pools, volumes, and snapshots. Learn more
Enable SnapCenter Service
You should enable SnapCenter Service using the Cloud Manager UI. When the SnapCenter Service is
enabled, Azure Kubernetes Service (AKS) cluster is created that will host the SnapCenter Service.
Install the HDBSQL client
You should install the HDBSQL client to perform data protection operations on SAP HANA databases. The
HDBSQL client is used to communicate with the SAP HANA systems.
Protect SAP HANA systems
You should manually add the SAP HANA systems.
You can then back up your SAP HANA system using system-defined or custom policies. In the event of data
loss, you can restore the SAP HANA system using the backup of that system.
3

Prerequisites to create Connector and enable SnapCenterService
Before you create a Connector in Azure and enable SnapCenter Service, you should
ensure certain things.
• Ensure that the subnet chosen for the Connector should not overlap with the following IP address ranges
reserved for Azure Kubernetes Service (AKS): 169.254.0.0/16, 172.30.0.0/16, 172.31.0.0/16, and
192.0.2.0/24.
• Ensure that there are no AKS running in the chosen subnet.
• Ensure that the chosen subnet can access the SAP HANA systems on the respective ports.
• If the VNet of the chosen subnet is different from the VNet of the SAP HANA systems, ensure that the
VNets can communicate with each other through VPN gateway, peering, or other means.
• If you want to enable SnapCenter Service behind firewall, you should perform the actions mentioned in
Network requirements.
You should upfront decide whether you want to enable SnapCenter Service behind firewall. After enabling
SnapCenter Service, you cannot configure it to run behind firewall. This is an AKS limitation.
Network requirements
Set up your network so that the Connector can manage resources and processes within your cloud
environment.
Firewall configuration
If you want to enable SnapCenter Service behind firewall, you should perform the following actions.
If you are using Azure firewall, you can perform these steps using a script. For information, see
Azure Firewall configuration.
Steps
1. Add the below network rules to the firewall.
Destination endpoint Proto
col
Por
t
Comments
Service tags -
AzureCloud.<Region>:1194
UDP 119
4
Not required if you are planning to have a private Connector and
private SnapCenter Service cluster.
Service tags -
AzureCloud.<Region>:900
0
TCP 900
0
Not required if you are planning to have a private Connector and
private SnapCenter Service cluster.
FQDN -
ntp.ubuntu.com:123
UDP 123 Required for time synchronization in Azure virtual machines.
Service tags -
AzureCloud.<Region>:443
TCP 443 Not required if you are planning to have a private Connector and
private SnapCenter Service cluster.
4

2. Add an application rule in the firewall with the following FQDN tag and port details:
◦ FQDN Tag - AzureKubernetesService
◦ HTTPS: 443
3. Add an Application rule with the below endpoints as target FQDNs with protocol and port as HTTPS: 443.
Endpoints Purpose
https://management.azure.com
https://login.microsoftonline.com
Enables Cloud Manager to deploy and manage Cloud
Volumes ONTAP in most Azure regions.
https://management.microsoftazure.de
https://login.microsoftonline.de
Enables Cloud Manager to deploy and manage Cloud
Volumes ONTAP in the Azure Germany regions.
https://management.usgovcloudapi.net
https://login.microsoftonline.com
Enables Cloud Manager to deploy and manage Cloud
Volumes ONTAP in the Azure US Gov regions.
https://api.services.cloud.netpp.com Allows API requests to NetApp Cloud Central.
https://cloud.support.netapp.com.s3.us-west-
1.amazonaws.com
Provides access to software images, manifests, and
templates.
https://cognito-idp.us-east-
1.amazonaws.com
https://cognito-identity.us-east-
1.amazonaws.com
https://sts.amazonaws.com
https://cloud-support-netapp-com-
accelerated.s3.amazonaws.com
Enables the Connector to access and download manifests,
templates, and Cloud Volumes ONTAP upgrade images.
https://cloudmanagerinfraprod.azurecr.io Access to software images of container components for an
infrastructure that’s running Docker and provides a solution
for service integrations with Cloud Manager.
https://kinesis.us-east-1.amazonaws.com Enables NetApp to stream data from audit records.
https://cloudmanager.cloud.netapp.com Communication with the Cloud Manager service, which
includes NetApp accounts.
https://netapp-cloud-account.auth0.com Communication with NetApp Cloud Central for centralized
user authentication.
https://support.netapp.com Communication with NetApp AutoSupport.
https://cloud-support-netapp-com.s3.us-
west-1.amazonaws.com
Communication with NetApp for system licensing and
support registration.
https://client.infra.support.netapp.com.s3.us-
west-1.amazonaws.com
https://cloud-support-netapp-com-
accelerated.s3.us-west-1.amazonaws.com
Enables NetApp to collect information needed to
troubleshoot support issues.
*.blob.core.windows.net Required for HA pairs when using a proxy.
https://auth0.com Required for Auth0 authentication.
https://registry-1.docker.io
https://auth.docker.io
https://production.cloudflare.docker.com
Retrieves the dependencies of SnapCenter Service
workflow engine.
5

Endpoints Purpose
https://exteranl-
log.cloudmanager.netapp.com
Allows communication to transfer the logs to the Cloud
Manager log repository.
4. Select the subnet where you are planning to install SnapCenter Service.
5. Create a route table with routes:
◦ to forward the traffic from the subnet to the firewall internal IP address
◦ to forward the traffic from firewall public IP address to the internet.
6. Attach the route table to the subnet.
For information on the networking requirements for Cloud Manager Connector, see Networking requirements
for the Connector.
Azure Firewall configuration
If you want to enable SnapCenter Service behind Azure firewall, you should perform the following actions.
What you will need
• You should have created the firewall (classic mode).
• You should have created the VNet and subnet for SnapCenter Service.
• If your firewall resource and VNet of the SnapCenter Service are in different tenants, you should log into
both the tenants in the Azure shell.
• If your Firewall VNet and SnapCenter VNet are different, you should establish peering between the VNets.
Steps
1. Download the scs_azure_firewall_config.sh script to your local system.
2. Log into Microsoft Azure portal.
3.
Click to open the cloud shell and select the Bash console.
a. Upload the script to Azure cloud shell.
b. Assign the permission to run the script.
chmod +x ./scs_azure_firewall_config.sh
c. Run the script.
./scs_azure_firewall_config.sh -fwsubid <Firewall_SubscriptionID> -fwname
<Firewall_name> -fwrg <Firewall_Resource_group> -scssubid
<SnapCenter_Service_SubscriptionID> -scsvnet <SnapCenter_Service_VNet_name>
-scssubnet <SnapCenter_Service_Subnet_name> -scsvnetrg
<SnapCenter_Service_VNet_Resource_Group> -scsrg
<SnapCenter_Service_Resource_group>
6
If you have not created the resource group, the script creates the resource group. While
creating the Connector, you can use the same resource group so that all the
SnapCenter Service related resources are in the same resource group.
Results
• Firewall rules are configured.
• A resource group is created for SnapCenter Service.
• A route table is created in the SnapCenter Service resource group.
• The route table rules are configured.
• The route table is attached to the subnet.
Connectivity to HANA Systems
SnapCenter Service cluster needs to communicate with HANA systems in the user’s network using HDBSQL
command. The communication channel between SnapCenter cluster and HANA systems need to be allowed
using various network architecture such as:
• Connector and SnapCenter Service cluster are deployed in the same VNet as that of HANA systems
• Connector and SnapCenter Service cluster are deployed in a different VNet as that of HANA systems and
the communication is established using VNet peering between the 2 VNets.
• Connector and SnapCenter Service cluster are deployed in a different VNet as that of HANA systems, and
the communication is established using VPN gateway between the 2 VNets.
Security Group configuration
If network security group (NSG) is configured in the HANA Systems, it should allow inbound communication
from the port of the SnapCenter Service to the port of HANA System as specified in User Store Key.
• Protocol: All TCP
• Subnet: SnapCenter AKS cluster subnet
• Purpose: To execute HDBSQL command
The HANA services running in the SnapCenter AKS cluster supports SSL communication with HANA systems
that have SSL enabled.
Create a Connector in Azure for SnapCenter Service
An Account Admin should deploy a Connector before you can use the Cloud Manager
features. The Connector enables Cloud Manager to manage resources and processes
within your public cloud environment.
By default, you can create a Connector in Azure from Azure Marketplace. While performing the steps to create
the connector from Azure Marketplace, you should remember the following:
• Wherever Cloud Manager for Cloud Volumes ONTAP is specified, the same can be leveraged for
SnapCenter Service.
• For the Cloud Manager Name specify your Connector VM name for better identification. This will be shown
7

as connector name in the Cloud Manager UI.
• If you have configured the Connector without public IP or configured a firewall, you should have a jump
host to connect to the Connector machine.
If you have user consent enabled in your Azure Active Directory or if your tenant admin can provide the
consent, you can create the Connector from Cloud Manager UI.
User consent is enabled
If the user consent is enabled in your Azure active directory, create the Connector from Cloud Manager.
User consent is disabled
1. Perform one of the following:
◦ If the admin consent workflow is configured in your active directory, you should request for admin
consent.
◦ If the admin consent workflow is not configured, you should:
a. Construct the URL for granting tenant-wide admin consent.
Specify the clientID as 989efff4-9a9e-46fa-9f17-de39e15714f9. This is the Cloud
Manager Azure application ID named in the Cloud Manager wizard.
b. Ask your tenant admin to run the URL in a browser and provide his consent.
The displayed errors can be ignored by your Admin.
2. Create the Connector from Cloud Manager.
The username and password or the key that was provided while creating the Connector would
be required to connect to the machine
Enable SnapCenter Service for Azure NetApp Files
You can enable the SnapCenter Service using the Cloud Manager UI. When the
SnapCenter Service is enabled, Azure Kubernetes Service (AKS) cluster is created that
will host the SnapCenter Service.
What you will need
• You should register the "Microsoft.ContainerService" resource provider in your Azure subscription. For
information, see how to register resource provider.
• You should ensure that all the prerequisites are met.
About this task
The AKS cluster will be created in the same resource group and the same subnet that was chosen while
creating the Connector. If your Connector is created without public IP address, then the AKS cluster will be
created in private mode.
A user assigned managed identity with necessary permissions is required to create and manage AKS cluster.
8
The user assigned managed identity will be created and should be assigned to the Connector VM.
Steps
1. Log into Cloud Manager.
2. Select the Connector that was created in the Cloud Manager.
Ensure that the Connector has the network connectivity to the SAP HANA systems to be protected.
3. Click All Services > SnapCenter > Enable.
4. Perform one of the following:
◦ If you have created the Connector from Cloud Manager UI and if you have permissions to create and
assign roles, the user assigned managed identity will be created automatically by SnapCenter Service
installation.
a. Select Use Azure login.
b. On the Get Ready page, click Continue.
c. Specify the Azure credentials.
You should ensure that the Azure login account has the sufficient permissions. For
information on the permissions and how to assign the permissions, see Permissions
required for Azure login account.
◦ If you have created the Connector from Azure marketplace or if you do not have permissions to create
and assign roles, follow the below steps to create the user assigned managed identity.
a. Select Use Azure CLI script.
b. Contact your admin if you do not have sufficient permissions on your Azure account.
For information on the permissions and how to assign the permissions, see Permissions required
for Azure login account.
c. Download the prerequisite_azure.sh script to your local system.
d. Log into Microsoft Azure portal.
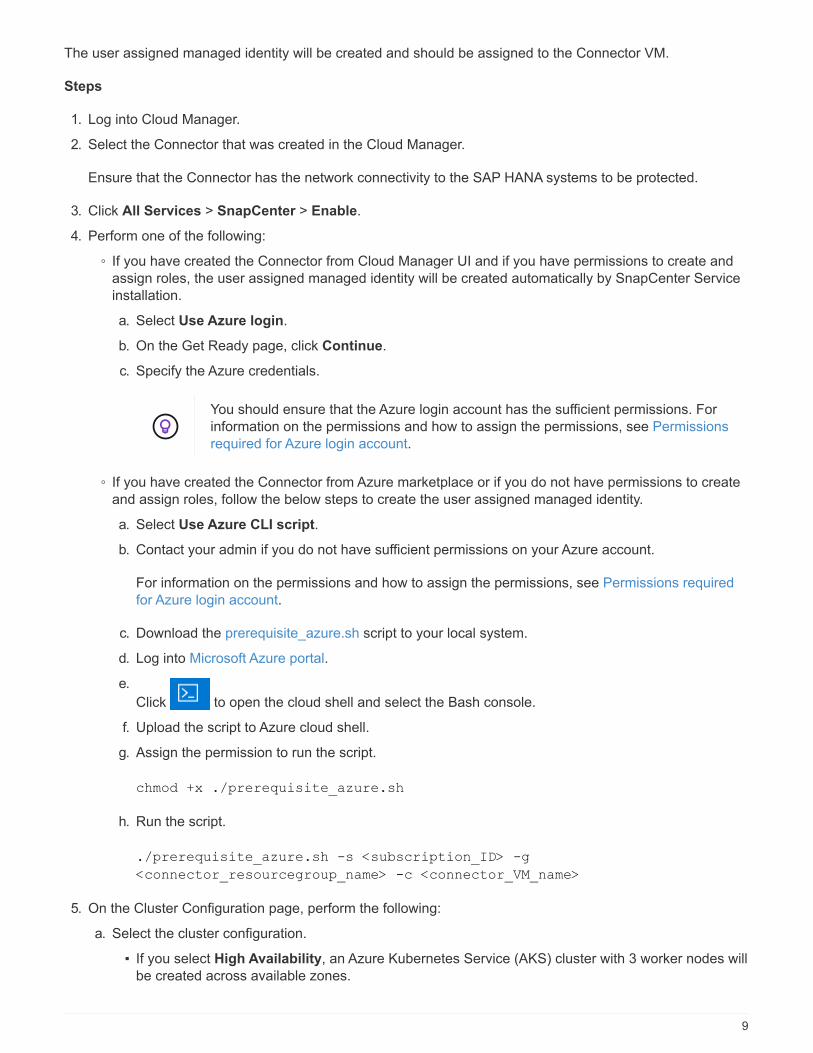
e.
Click to open the cloud shell and select the Bash console.
f. Upload the script to Azure cloud shell.
g. Assign the permission to run the script.
chmod +x ./prerequisite_azure.sh
h. Run the script.
./prerequisite_azure.sh -s <subscription_ID> -g
<connector_resourcegroup_name> -c <connector_VM_name>
5. On the Cluster Configuration page, perform the following:
a. Select the cluster configuration.
▪ If you select High Availability, an Azure Kubernetes Service (AKS) cluster with 3 worker nodes will
be created across available zones.
9
▪ If you select Single Node, an AKS cluster with single node will be created.
b. Specify the Kubernetes Pod address range.
Ensure that the Kubernetes Pod address range does not overlap with IP ranges of your virtual network,
peered virtual networks, and on-premises networks that are connected. Also, the range should not
overlap with the Service address range and Docker bridge address.
c. Specify the Kubernetes Service address.
Ensure that the Kubernetes service address range does not overlap with the IP ranges of your virtual
network, peered virtual networks, and on-premise networks that are connected. Also, the range should
not overlap with the Pod address range and Docker bridge address.
d. Specify the Docker bridge network.
Ensure that the Docker Bridge address does not overlap with the IP ranges of your virtual network,
peered virtual networks, and on-premise networks that are connected. Also, the range should not
overlap with the Pod address range and Service address range.
e. If the Connector is created without a public IP and if you are using custom DNS servers on your VNet,
select Support Custom DNS servers.
You should create a virtual network link in the private DNS zone for the VNets where
your custom DNS servers are hosted. The private DNS zone name and the resource
group name are displayed on the UI.
6. On the Review page, review the details and click Enable.
7. After enabling the SnapCenter Service successfully, click Finish.
Results
• After successfully enabling the SnapCenter Service, the AKS cluster will be created. You can view the AKS
cluster details by clicking .
If you have failed to enable the SnapCenter Service, you can fix the issue and click Retry.
• After creating the user assigned managed identity, it will be assigned to a custom role.
◦ The user assigned managed identity will be assigned to a custom role with the below permissions at
the scope of Connector resource group:
10

"Microsoft.Resources/subscriptions/resourceGroups/read",
"Microsoft.ContainerService/managedClusters/read",
"Microsoft.ContainerService/managedClusters/write",
"Microsoft.ContainerService/managedClusters/delete",
"Microsoft.ContainerService/managedClusters/listClusterUserCredential
/action",
"Microsoft.ManagedIdentity/userAssignedIdentities/assign/action",
"Microsoft.ManagedIdentity/userAssignedIdentities/read",
"Microsoft.Compute/virtualMachines/read",
"Microsoft.Network/networkInterfaces/read"
◦ The user assigned managed identity will be assigned to a custom role with the below permissions at
the scope of Connector’s VNet:
"Microsoft.Authorization/roleAssignments/read",
"Microsoft.Network/virtualNetworks/subnets/join/action",
"Microsoft.Network/virtualNetworks/subnets/read",
"Microsoft.Network/virtualNetworks/read",
"Microsoft.Network/virtualNetworks/join/action"
◦ If route table is configured on the subnet for routing to firewall, then the user assigned managed identity
will be assigned to a custom role with the below permissions at the scope of the route table.
"Microsoft.Network/routeTables/*",
"Microsoft.Network/networkInterfaces/effectiveRouteTable/action",
"Microsoft.Network/networkWatchers/nextHop/action"
◦ If the Connector is installed without public IP, then the user assigned managed identity will be assigned
to a custom role with the below permission at the scope of private DNS zone.
"Microsoft.Network/privateDnsZones/*"
Permissions required for Azure login account
Azure login account is used to create the user assigned managed identity, required roles, and assigning the
identity to the Connector VM.
The credentials of the login account is not stored anywhere in the SnapCenter Service and are
not used to call APIs. The credentials are used only in the UI.
Steps
1. Create a custom role using the SnapCenter_Deployment_Role1.json file.
11

You should replace the <Subscription_ID> in the SnapCenter_Deployment_Role1.json file with your Azure
subscription ID.
2. Assign the role to the login account at the scope of Connector’s resource group.
3. Create a custom role using the SnapCenter_Deployment_Role2.json file.
You should replace the <Subscription_ID> in the SnapCenter_Deployment_Role2.json file with your Azure
subscription ID.
4. Assign the role to the login account at the scope of Connector’s VNet or higher.
5. If you have configured firewall, create a custom role using the SnapCenter_Deployment_Role3.json file.
You should replace the <Subscription_ID> in the SnapCenter_Deployment_Role3.json file with your Azure
subscription ID.
6. Assign the role to the login account at the scope of route table which is attached to the SnapCenter subnet.
Install the HDBSQL client
After enabling the SnapCenter Service, install the HDBSQL client to perform data
protection operations on SAP HANA databases. The HDBSQL client is used to
communicate with the SAP HANA systems.
Steps
1. Download HDB Client software from your SAP account.
It is an archive file with (.SAR) extension. Example: IMDB_CLIENT20_008_20-80002082.SAR
The HDB Client software version should be 2.4.202.1590784230 or later.
2. Download the latest SAPCAR utility from your SAP account. Example: SAPCAR_1010-70006178.EXE
3. On the Cloud Manager UI, click Connector to obtain the connector name.
4. Log into Microsoft Azure portal.
5. Click Virtual machines.
6. Search for the Cloud Manager Connector and copy the public IP address assigned to the Connector.
If the Connector does not have public IP enabled, you should use a jump host.
7. Copy the SAPCAR utility and HDB Client archive (.SAR) file to the Connector machine.
To copy the file to the Connector path, you need the credentials, or the key provided while creating the
Connector.
◦ scp <SAPCAR_utility> <usersername>@<IP_ADDRESS>:/home/<username>
◦ scp <HDB_Client_archive> <username>@<IP_ADDRESS>:/home/<username>
The file are copied to /home/<username>.
8. Log into the Connector VM with the ssh credentials or key.
12

9. Run the following commands in the Connector VM to install the HDBSQL client in the AKS.
a. sudo cp /home/<username>/<SAPCAR_utility>
/var/lib/docker/volumes/cloudmanager_snapcenter_volume/_data/
b. sudo cp /home/<username>/< HDB_Client_archive>
/var/lib/docker/volumes/cloudmanager_snapcenter_volume/_data/
c. sudo docker exec -it cloudmanager_snapcenter /bin/bash
/opt/netapp/hdbclient/hdbclient.sh --archivefile <HDB_Client_archive>
--archiveutil <SAPCAR_utility>
Find more information
How to move files using SCP
Protect SAP HANA systems
Add SAP HANA systems
Manually add the SAP HANA systems. Auto discovery of SAP HANA system is not
supported.
While adding the SAP HANA systems, you should add the HDB user store keys. The HDB secure user store
key is used to store the connection information of SAP HANA systems securely on the client and HDBSQL
client uses the secure user store key to connect to SAP HANA systems.
You cannot add or modify SAP HANA systems if a node in the AKS cluster is down.
Steps
1. On the SnapCenter Service page, click SAP HANA Systems > Add.
2. On the System Details page, perform the following actions:
a. Select the system type.
b. Specify the SID of the SAP HANA system.
c. Specify the SAP HANA system name.
d. Click HDB Secure User Store Keys text box to add user store keys details.
Specify the key name, system details, username, and password.
e. Click Add.
You should add user store keys for each host if you are adding a multi-host SAP HANA
system.
3. Click Continue.
4. On the Storage Footprint page, perform the following:
a. Select the working environment and specify the NetApp account.
b. Select the required volumes.
13

c. Click Add Storage.
5. Click Continue.
6. Review all the details and click Add.
You can also edit or remove the SAP HANA systems that were added to the SnapCenter Service.
When you remove the SAP HANA system, all the associated backups and catalog entries will be deleted and
no longer be protected.
Add non-data volumes
After adding the multitenant database container or single container type SAP HANA system, you can add the
non-data volumes of the HANA system.
Steps
1. On the SnapCenter Service page, click SAP HANA Systems.
All the systems added to the SnapCenter Service are displayed.
2. Click corresponding to the multitenant database container or single container type system to which
you want to add the non-data volumes.
3. Click Add Non-Data Volumes.
4. Click Add New Storage.
Back up SAP HANA systems
You can either perform an on-demand backup or schedule backups of your SAP HANA
system using system-defined or custom policies. SnapCenter Service supports both
snapshot-based and file-based backups.
Create backup policies
Policies specify the backup type, backup frequency, schedules, retention type, retention count, and other
characteristics of data protection operations. You can create policies using the Cloud Manager UI.
By default, two system-defined policies, one each for snapshot-based and file-based backup operations are
available.
Steps
1. On the SnapCenter Service page, click Policies > Add.
2. On the Create Backup Policy page, perform the following actions:
a. Specify a policy name.
b. Select the type of backup you want to create using this policy.
c. Specify the backup name.
The suffix timestamp is added by default. You can select the other suffixes that should be included in
the backup name and define the order in which the suffixes should appear.
d. Specify the schedule frequency and the start and end time for the scheduled backups.
14

e. Specify the number of snapshot copies to be retained or specify the days for which the snapshot copies
should be retained.
3. Click Add.
You can view, edit, or delete policies by clicking corresponding to the policy.
Create on-demand backups
Create on-demand backups of SAP HANA systems either by associating a policy or by not associating any
policy.
Steps
1. On the SnapCenter Service page, click SAP HANA Systems.
All the systems added to the SnapCenter Service are displayed.
2. Click corresponding to the system that you want to protect.
3. Click On-Demand Backup.
4. On the On-Demand Backup page, perform one of the following actions:
◦ If you want to associate the backup to a policy, select the policy and click Create Backup.
◦ If you do not want to associate the backup to a policy, perform the following actions:
a. In the Policy field, select None.
b. Select the backup type.
If you are backing up a non-data volume, you can only select Snapshot Based as the backup type.
c. Specify the retention period.
d. Click Create Backup.
Create scheduled backups
Create scheduled backups by associating policies with the SAP HANA system.
Steps
1. On the SnapCenter Service page, click SAP HANA Systems.
All the systems added to the SnapCenter Service are displayed.
2. Click corresponding to the system that you want to protect.
3. Click Protect.
4. Select the policies that you want to use to protect the SAP HANA system.
5. Click Protect.
Find more information
SAP HANA backup and recovery on Azure NetApp Files with SnapCenter Service
15

Restore SAP HANA systems
In the event of data loss, restore the SAP HANA system from one of the backups of that
system.
Only storage restore is supported. You should put the HANA system in recovery mode using SAP HANA
Studio or SAP HANA Cockpit before restoring because recovery of HANA system is not supported.
Steps
1. On the SnapCenter Service page, click SAP HANA Systems.
The systems added to the SnapCenter Service are displayed.
2. Click corresponding to the system that you want to restore.
3. Click View Backups.
4. In the Backups section, click corresponding to the backup that you want to use to restore the system.
5. Click Restore.
6. Review the message and select Yes, Restore to confirm.
After restoring the database, if you do a point-in-time recovery of the SAP HANA system using
HANA Studio then the data backup catalog entries which were deleted by SnapCenter Service
as per the retention setting, might be restored.
If the deleted data backup catalog entries are restored because of the recovery operation,
SnapCenter Service will not be able to detect and delete them. This could result in SnapCenter
Service not cleaning the log catalog properly.
You can verify the backup entries in SnapCenter Service to find out which all data backup
catalog entries are newly restored and manually delete those entries.
Find more information
SAP HANA backup and recovery on Azure NetApp Files with SnapCenter Service
Manage operations
You can monitor the status of the jobs executed, receive email notifications, and view
dashboard.
Monitor jobs
Click Job Monitor on the SnapCenter Service page to view the status of the jobs. The Job Monitor page
displays an overall summary and lists all the jobs.
You can then click corresponding to a particular job to view the details.
16

Email notification
The email notifications are sent by default for a failed on-demand backup, scheduled backup, and restore
operations. Only a Cloud Manager user with “Account Admin” role will receive the email.
View dashboard
Click Overview on the SnapCenter Service page to view the protection summary, configuration details, and job
status.
Troubleshoot issues
17

Issue: Redis Pods get stuck in a CrashLoopBackOff state
Description
In a high availability configuration, the AKS cluster does not come back to working state if all the nodes of the
cluster are down. When you restart all the nodes, you might find all the Redis Pods to be in CrashLoopBackOff
state.
Solution
You should run the following commands to restore the system.
1. Log into the Connector.
2. Delete all the Redis Pods.
◦ docker exec -it cloudmanager_snapcenter — sh
◦ kubectl scale --replicas=0 sts sc-dependencies-redis-node -n snapcenter
3. Verify if all the Redis Pods are deleted.
kubectl get pods -n snapcenter
4. If the Redis Pods are not deleted, run the following commands:
◦ kubectl delete pod sc-dependencies-redis-node-0 -n snapcenter
◦ kubectl delete pod sc-dependencies-redis-node-1 -n snapcenter
◦ kubectl delete pod sc-dependencies-redis-node-2 -n snapcenter
5. After all the Redis Pods are deleted, run:
kubectl scale --replicas=3 sts sc-dependencies-redis-node -n snapcenter
6. Verify if all the deleted pods are up and running.
Kubectl get pods -n snapcenter
Issue: Jobs are failing after restarting the cluster nodes
Description
In a high availability configuration, the AKS cluster does not come back to working state if all the nodes of the
cluster are down. When you restart all the nodes, you might see jobs are failing with granular tasks either
greyed out or timed out.
Solution
You should run the following commands:
1. Log into the Connector.
2. Save the RabbitMQ statefulset (sts) deployment.
◦ docker exec -it cloudmanager_snapcenter — sh
◦ kubectl get sts rabbitmq -o yaml -n snapcenter > rabbitmq_sts.yaml
3. Identify the persistent volumes (PVs) attached to RabbitMQ pods.
kubectl get pv | grep rabbitmq
4. Delete the persistent volume claims (PVCs) attached to RabbitMQ pods.
kubectl get pvc -n snapcenter| grep rabbitmq | awk {'print $1'} | xargs
kubectl delete pvc -n snapcenter
18

5. Delete each of the PVs that you identified earlier in step 3.
kubectl delete pv 'pvname'
6. Create a RabbitMQ sts.
kubectl create -f rabbitmq_sts.yaml -n snapcenter
Issue: Backup operation fails during tenant database creation
Description
While creating a tenant database if an on-demand or a scheduled backup is initiated, the backup operation
fails.
Solution
Creating a tenant database is a maintenance operation on the SAP HANA system.
You should put the SAP HANA system in the maintenance mode using SnapCenter Service before creating the
tenant database. After putting the SAP HANA system in maintenance mode no operations can be initiated.
After creating the tenant database, you should bring back the SAP HANA system to production mode.
19

Copyright Information
Copyright © 2022 NetApp, Inc. All rights reserved. Printed in the U.S. No part of this document
covered by copyright may be reproduced in any form or by any means-graphic, electronic, or
mechanical, including photocopying, recording, taping, or storage in an electronic retrieval system-
without prior written permission of the copyright owner.
Software derived from copyrighted NetApp material is subject to the following license and disclaimer:
THIS SOFTWARE IS PROVIDED BY NETAPP “AS IS” AND WITHOUT ANY EXPRESS OR IMPLIED
WARRANTIES, INCLUDING, BUT NOT LIMITED TO, THE IMPLIED WARRANTIES OF
MERCHANTABILITY AND FITNESS FOR A PARTICULAR PURPOSE, WHICH ARE HEREBY
DISCLAIMED. IN NO EVENT SHALL NETAPP BE LIABLE FOR ANY DIRECT, INDIRECT,
INCIDENTAL, SPECIAL, EXEMPLARY, OR CONSEQUENTIAL DAMAGES (INCLUDING, BUT NOT
LIMITED TO, PROCUREMENT OF SUBSTITUTE GOODS OR SERVICES; LOSS OF USE, DATA, OR
PROFITS; OR BUSINESS INTERRUPTION) HOWEVER CAUSED AND ON ANY THEORY OF
LIABILITY, WHETHER IN CONTRACT, STRICT LIABILITY, OR TORT (INCLUDING NEGLIGENCE OR
OTHERWISE) ARISING IN ANY WAY OUT OF THE USE OF THIS SOFTWARE, EVEN IF ADVISED OF
THE POSSIBILITY OF SUCH DAMAGE.
NetApp reserves the right to change any products described herein at any time, and without notice.
NetApp assumes no responsibility or liability arising from the use of products described herein,
except as expressly agreed to in writing by NetApp. The use or purchase of this product does not
convey a license under any patent rights, trademark rights, or any other intellectual property
rights of NetApp.
The product described in this manual may be protected by one or more U.S. patents,
foreign patents, or pending applications.
RESTRICTED RIGHTS LEGEND: Use, duplication, or disclosure by the government is subject to
restrictions as set forth in subparagraph (c)(1)(ii) of the Rights in Technical Data and
Computer Software clause at DFARS 252.277-7103 (October 1988) and FAR 52-227-19 (June 1987).
Trademark Information
NETAPP, the NETAPP logo, and the marks listed at http://www.netapp.com/TM are trademarks of
NetApp, Inc. Other company and product names may be trademarks of their respective owners.
20