properties of matter - learningthings.com · properties of matter • welcome to god’s design for...
TRANSCRIPT
God’s Design for Chemistry
Properties of Matter
Debbie Lawrence and Richard Lawrence
God’s Design for Chemistry is a complete chemistry curriculum for elementary aged children. The books in this series are designed for use in the Christian homeschool, and provide easy to use lessons that will encourage children to see God’s hand in everything around them.
2nd Printing: March 2006
Copyright © 2004 by Debbie Lawrence and its licensors.All Rights Reserved
ISBN: 1-893345-79-3
Cover design: Brandie LucasLayout: Diane KingEditor: Gary Vaterlaus
No part of this book may be reproduced in any form or by any means without written permission from the author and publisher other than: (1) the specific pages within the book that are designed for single family/classroom use, and (2) as brief quotations quoted in a review.
All scripture quotations are taken from the New King James Version®. Copyright © 1982 by Thomas Nelson, Inc. Used by permission. All rights reserved.
The publisher and authors have made every reasonable effort to ensure that the activities recommended in this book are safe when performed as instructed but assume no responsibility for any damage caused or sustained while conducting the experiments and activities in this book. It is the parents’, guardians’, and/or teachers’ responsibility to supervise all recommended activities.
Published by Answers in Genesis, PO Box 510, Hebron, Kentucky 42080
Printed in the United States of America
You may contact the authors at: [email protected]; (970) 686-5744
www.AnswersInGenesis.org

ContentsWelcome to God’s Design for Chemistry ..............................................................................iWhy Teach Chemistry? .....................................................................................................iHow Do I Teach Science? ................................................................................................ iiHow Do I Teach Creation vs. Evolution? ........................................................................ iv
Introduction to Chemistry
Lesson 1 Introduction to Chemistry ............................................................................. 1Lesson 2 The Scientific Method .................................................................................. 3Lesson 3 Tools of Science ............................................................................................. 8Special Feature: Lord Kelvin. ........................................................................................ 12Lesson 4 The Metric System ....................................................................................... 14Introduction to Chemistry Quiz ................................................................................ 18
Measurement of Matter
Lesson 5 Mass versus Weight ...................................................................................... 19Lesson 6 Conservation of Mass .................................................................................. 22Lesson 7 Volume ...................................................................................................... 25 Lesson 8 Density ........................................................................................................ 28Lesson 9 Buoyancy ...................................................................................................... 31Special Feature: James Clerk Maxwell .......................................................................... 34Measurement of Matter Quiz ...................................................................................... 35
States of Matter
Lesson 10 Physical and Chemical Properties ................................................................ 36Lesson 11 States of Matter ............................................................................................ 39Lesson 12 Solids ............................................................................................................ 42Lesson 13 Liquids ........................................................................................................ 45Lesson 14 Gases ........................................................................................................... 48Lesson 15 Gas Laws ...................................................................................................... 51Special Feature: Robert Boyle ........................................................................................ 54States of Matter Quiz ................................................................................................... 55
Classification of Matter
Lesson 16 Elements ....................................................................................................... 56Special Feature: William Prout ..................................................................................... 59Lesson 17 Compounds .................................................................................................. 61Lesson 18 Water ........................................................................................................... 64Lesson 19 Mixtures ...................................................................................................... 68Lesson 20 Milk and Cream .......................................................................................... 71Classification of Matter Quiz ...................................................................................... 74

Solutions
Lesson 21 Solutions ...................................................................................................... 75Lesson 22 Suspensions ................................................................................................. 79Lesson 23 Solubility ..................................................................................................... 82Lesson 24 Soda Pop ..................................................................................................... 85Lesson 25 Concentration ............................................................................................. 89Lesson 26 Seawater ...................................................................................................... 92Special Feature: Desalination of Water ......................................................................... 94Lesson 27 Water Treatment .......................................................................................... 95Solutions Quiz ............................................................................................................. 98
Food Chemistry
Lesson 28 Food Chemistry .......................................................................................... 99Lesson 29 Chemical Analysis of Food ........................................................................ 102Lesson 30 Flavors ....................................................................................................... 105Special Feature: Chocolate and Vanilla ......................................................................... 108Lesson 31 Additives ................................................................................................... 110Lesson 32 Bread ......................................................................................................... 113Special Feature: Bread Through the Centuries ............................................................. 116Food Chemistry Quiz ................................................................................................ 118
Unit Project
Lesson 33 Identification of Unknown Substances - Unit Project ................................ 119Properties of Matter Unit Test ..................................................................................... 124
Conclusion
Lesson 34 Conclusion ................................................................................................ 126
Appendices
Appendix A – Answers to Quizzes and Test ................................................................. 128Appendix B – Resource Guide ..................................................................................... 130Appendix C – Master Supply List ................................................................................ 131Appendix D – List of Reproducible Pages .................................................................... 132
Index ........................................................................................................................... 133
Works Cited ................................................................................................................ 134
Properties of Matter • �
Welcome to God’s Design for Chemistry
God’s Design for Chemistry is a series that has been designed for use in teaching chemistry to children in grades 3-7. It is divided into two books: Properties of Matter and Properties
of Atoms and Molecules. Each book has approximately 35 lessons as well as a unit project that ties all of the lessons together.
In addition to the lessons, special features in each book include biographical information on interesting people as well as interesting facts pages to make the subject more fun and a little less dusty.
Please use the books in this series as a guide and feel free to add to each lesson. Although this is a complete curriculum, the information included here is just a beginning. A resource guide is included in Appendix B to help you find additional information and resources. Also, a supply list of items needed is included at the beginning of each lesson. A master list of all supplies needed for the entire book can be found in Appendix C.
If you wish to cover the material in this series in one year you should plan on covering approximately 2 lessons per week. The time required for each lesson varies depending on how much additional information you want to include, but you can plan on about 45 minutes per lesson. Older children can do quizzes, tests or additional activities on non-lesson days if you choose to do science every day.
If you wish to cover material in more depth, you may add additional information and take a longer period of time to cover all the material.
Why Teach Chemistry?Maybe you hate science or you just hate teaching it. Maybe you love science but don’t quite
know how to teach it to your children. Maybe science just doesn’t seem as important as some of those other subjects you need to teach. Maybe you need a little motivation. If any of these descriptions fits you, then please consider the following.
It is not uncommon to question the need to teach your kids hands-on science in elemen-tary school. We could argue that the knowledge gained in science will be needed later in life in order for your children to be more productive and well-rounded adults. We could argue
�� • Properties of Matter
that teaching your children science also teaches them logical and inductive thinking and reasoning skills, which are tools they will need to be more successful. We could argue that science is a necessity in this technological world in which we live. While all of these argu-ments are true, none of them are the main reason that we should teach our children science. The most important reason to teach science in elementary school is to give your children an understanding that God is our Creator, and the Bible can be trusted. Teaching science from a creation perspective is one of the best ways to reinforce your children’s faith in God and to help them counter the evolutionary propaganda they face every day.
God is the Master Creator of everything. His handiwork is all around us. Our Great Cre-ator put in place all of the laws of physics, biology and chemistry. These laws were put here for us to see His wisdom and power. In science, we see the hand of God at work more than in any other subject. Romans 1:20 says, “For since the creation of the world His invisible attributes are clearly seen, being understood by the things that are made, even His eternal power and Godhead, so that they [men] are without excuse” (NKJV). We need to help our children see God as Creator of the world around them so they will be able to recognize God and follow Him.
The study of chemistry helps us understand and appreciate the amazing way everything God created works together. The study of atoms and molecules and how different substances react with each other reveals an amazing design, even at the smallest level of life. Understand-ing the carbon, nitrogen and water cycles helps our children see that God has a plan to keep everything working together.
It’s fun to teach chemistry! It’s interesting too. The elements of chemistry are all around us. Children naturally like to combine things to see what will happen. You just need to direct their curiosity.
Finally, teaching chemistry is easy. You won’t have to try to find strange materials for experiments or do dangerous things to learn about chemistry. Chemistry is as close as your kitchen or your own body.
How Do I Teach Science?
In order to teach any subject you need to understand how people learn. People learn in dif-ferent ways. Most people, and children in particular, have a dominant or preferred learn-
ing style in which they absorb and retain information more easily.If your child’s dominant style is:
Auditory – he needs to not only hear the information but he needs to hear himself say it. This child needs oral presentation as well as oral drill and repetition.Visual – he needs things he can see. This child responds well to flashcards, pictures, charts, models, etc.Kinesthetic – he needs active participation. This child remembers best through games, hands-on activities, experiments and field trips.

Properties of Matter • ���
Also, some people are more relational while others are more analytical. Your relational child needs to know who the people are, why this is important and how it will affect him personally. Your analytical child, however, wants just the facts.
If you are trying to teach more than one child, you will probably have to deal with more than one learning style. Therefore, you need to present your lessons in several differ-ent ways so that each child can grasp and retain the information. You need to give them a reason to learn it.
To help you with this, we have divided each lesson into three sections. The first section introduces the topic. It is the “just the facts” part of the lesson for the analytical child. This section is marked by the icon. The second section is the observation and hands-on sec-tion denoted by the icon. This section helps your visual and kinesthetic learners. The final section is the summary and review section denoted by the icon, representing wrapping up the lesson. This oral review helps your auditory learners. Also included in this section is the applications part of the lesson to help your relational child appreciate what he has learned. We have included periodic biographies to help your child appreciate the great men and women who have gone before us in the field of science.
We suggest a threefold approach to each lesson:
Introduce the topic - We give a brief description of the facts. Frequently you will want to add more informa-
tion than the bare essentials given in this book. This section of each lesson is written as if we were talking to your child. In addition to reading this section aloud, you may wish to do one or more of the following:
- Read a related book with your child.- Write things on the board to help your visual child.- Give some history of the subject. We provide some historical sketches to help you, but
you may want to add more.- Ask questions to get your child thinking about the subject.
Make observations and do experiments- One or more hands-on projects are suggested for each lesson. This section of each lesson is written to the parent/teacher.- Have your child observe the topic for him/herself whenever possible.
Wrap it up- The “What did we learn?” section has review questions.- The “Taking it further” section encourages your child to

�v • Properties of Matter
o Draw conclusionso Make applications of what was learnedo Add extended information to what was covered in the lesson
- The “FUN FACT” section adds fun information.(Questions with answers are provided to help you wrap up the lesson.)By teaching all three parts of the lesson, you will be presenting the material in a way that
all learning styles can both relate to and remember. Also, this method relates directly to the scientific method and will help your child think
more scientifically. Don’t panic! The “scientific method” is just a way to logically examine a subject and learn from it. Briefly, the steps of the scientific method are:1. Learn about a topic.2. Ask a question.3. Make a hypothesis (a good guess).4. Design an experiment to test your hypothesis.5. Observe the experiment and collect data.6. Draw conclusions. (Does the data support your hypothesis?)
Note: It’s okay to have a “wrong hypothesis.” That’s how we learn. Be sure to try to under-stand why you got a different result than you expected.
Our lessons will help your child begin to approach problems in a logical, scientific way.
How Do I Teach Creation vs. Evolution?
We are constantly bombarded by evolutionary ideas about life, which prompt many ques-tions. Is a living being just a collection of chemicals? Did life begin as a random com-
bination of chemicals? Can life be recreated in a laboratory? What does the chemical evidence tell us about the earth? The Bible answers these questions and this book accepts the historical accuracy of the Bible as written. We believe this is the only way we can teach our children to trust that everything God says is true.
There are 5 common views of the origins of life and the age of the earth:1. Historical biblical account – Each day of creation in Genesis is a normal day of about 24
hours in length, in which God created everything that exists. The earth is only thousands of years old, as determined by the genealogies in the Bible.
2. Progressive creation - The idea that God created various creatures to replace other creatures that died out over millions of years. Each of the days in Genesis represents a long period of time (day-age theory) and the earth is billions of years old.
3. Gap theory – The idea that there was a long, long time between what happened in Genesis 1:1 and what happened in Genesis 1:2. During this time, the “fossil record” was supposed

Properties of Matter • v
to have formed, and millions of years of Earth history supposedly passed.4. Theistic evolution – The idea that God used the process of evolution over millions of years
(involving struggle and death) to bring about what we see today.5. Naturalistic evolution – The view that there is no God and evolution of all life forms hap-
pened by purely naturalistic processes over billions of years.
Any theory that tries to add the evolutionary timeframe with creation presupposes that death entered the world before Adam sinned, which contradicts what God has said in His Word. The view that the Earth (and its “fossil record”) is hundreds of millions of years old damages the Gospel message. God’s completed creation was “very good” at the end of the sixth day (Genesis 1:31). Death entered this perfect paradise after Adam disobeyed God’s command. It was the punishment for Adam’s sin (Genesis 2:16-17; 3:19; Romans 5:12-19).
The first animal death occurred when God killed at least one animal, shedding its blood, to make clothes for Adam and Eve (Genesis 3:21). If the Earth’s “fossil record” (filled with death, disease and thorns) formed over millions of years before Adam appeared (and before he sinned), then death no longer would be the penalty for sin. Death, the “last enemy” (1 Cor-inthians 15:26), and diseases (such as cancer) would instead be part of the original creation that God labeled “very good.” No, it is clear that the “fossil record” formed some time after Adam sinned—not many millions of years before. Most fossils were formed as a result of the worldwide Genesis Flood.
When viewed from a biblical perspective, the scientific evidence clearly supports a recent creation by God, and not naturalistic evolution and millions of years. The volume of evidence supporting the biblical creation account is substantial and cannot be adequately covered in this book. If you would like more information on this topic, please see the resource guide in Appendix B. To help get you started, just a few examples of evidence supporting a recent cre-ation are given below:
• Evolutionary Myth: Life evolved from non-life when chemicals randomly combined together to produce amino acids and then proteins that then produced living cells. The Truth: The chemical requirements for DNA and proteins to line up just right to create life could not have happened through purely natural processes. The process of converting DNA information into proteins requires at least 75 different protein molecules. But each and every one of these 75 proteins must be synthesized in the first place by the process in which they themselves are involved. How could the process begin without the presence of all the necessary proteins? Could all 75 proteins have arisen by chance in just the right place at just the right time?1 Dr. Gary Parker says this is like the chicken and the egg problem. The obvious conclusion is that both the DNA and proteins must have been functional from the beginning, otherwise life could not exist. The best explanation for the existence of these proteins and DNA is that God created them.2
• Evolutionary Myth: Stanley Miller created life in a test tube, thus demonstrating that the early earth had the conditions necessary for life to begin. The Truth: Although Miller was able to create amino acids from raw chemicals in his famous experiment, he did not create anything 1 John P. Marcus, in: Ashton, J., ed., In Six Days: Why 50 scientists choose to believe in creation, Master Books, 2000, 177.2 Gary Parker, Creation Facts of Life, Creation Life Publishers, 1994, 24-28.
v� • Properties of Matter
close to life or even the ingredients of life. There are four main problems with Miller’s experi-ment. First, he left out oxygen because he knew that oxygen corrodes and destroys amino acids very quickly. However, rocks found in every layer of the earth indicate that oxygen has always been a part of the earth’s atmosphere. Second, Miller included ammonia gas and methane gas. Ammonia gas would not have been present in any large quantities because it would have been dissolved in the oceans. And there is no indication in any of the rock layers that methane has ever been a part of the earth’s atmosphere. Third, Miller used a spark of electricity to cause the amino acids to form, simulating lightning. However, this spark more quickly destroyed the amino acids than built them up, so to keep the amino acids from being destroyed, Miller used specially designed equipment to siphon off the amino acids before they could be destroyed. This is not what would have happened in nature. And finally, although Miller did produce amino acids, they were not the kinds of amino acids that are needed for life as we know it. Most of the acids were ones that actually break down proteins, not build them up.3
• Evolutionary Myth: Living creatures are just a collection of chemicals. The Truth: It is true that cells are made of specific chemicals. However, a dead animal is made of the same chemi-cals as it was when it was living, but it cannot become alive again. What makes the chemicals into a living creature is the result of the organization of the substances, not just the substances themselves. Dr. Parker again uses an example. An airplane is made up of millions of non-flying parts; however, it can fly because of the design and organization of those parts. Similarly, plants and animals are alive because God created the chemicals in a specific way for them to be able to live.4 A collection of all the right parts is not life.
• Evolutionary Myth: Chemical evidence points to an earth that is billions of years old. The Truth: Much of the chemical evidence actually points to a young earth. For example, radio-active decay in the earth’s crust produces helium atoms that rise to the surface and enter the atmosphere. Assuming that the rate of helium production has always been constant (an evo-lutionary assumption), the maximum age for the atmosphere could only be 2 million years. This is much younger than the 4+ billion years claimed by evolutionists. And there are many ideas that could explain the presence of helium that would indicate a much younger age than 2 million years.5 Similarly, salt accumulates in the ocean over time. Evolutionists claim that life evolved in a salty ocean 3-4 billion years ago. If this were true and the salt has continued to accumulate over billions of years, the ocean would be too salty for anything to live in by now. Using the most conservative possible values (those that would give the oldest possible age for the oceans), scientists have calculated that the ocean must be less than 62 million years. That number is based on the assumption that nothing has affected the rate at which the salt is accumulating. However, the Genesis Flood would have drastically altered the amount of salt in the ocean, dissolving much sodium from land rocks. 6 Thus, the chemical evidence does not support an earth that is billions of years old.
3 Ken Ham, et al., War of the Worldviews, Master Books, 2006, 15-24. See also www.AnswersInGenesis.org/origin.4 Parker, op. cit., 29-30.5 See Dr. Don DeYoung, Thousands…not billions, Master Books, 2005. See also: www.AnswersInGenesis.org/helium.6 John D. Morris, Ph.D., The Young Earth, Creation Life Publishers 1994, 83-87. See also www.AnswersInGenesis.org/creation/v21/i1/seas.asp

Go
d’s D
esign
for
Ch
emistr
yP
ro
perties o
f Matter
Introduction to C
hemistry
Measurem
ent of M
atterStates of M
atterC
lassifications of M
atterSolutions
Food Chem
istryU
nit Activity &
Conclusion
��
Mass versus WeightWhat’s the difference?
Supply list: Ruler Thin rubber band String 2 pencils 3 paper cups Paper 25 pennies Tape Several paper clips Single hole punch
When studying matter, one of the first questions scientists ask is, “How much matter do we have?” The amount of matter in a sample
is called its mass. The mass of an object does not depend on its shape. If you start with a ball of Silly Putty and you flatten it into a disk you still have the same amount of Silly Putty. You have not changed its mass. You have not changed how much you have.
People often confuse weight with mass. Mass is how much of some-thing there is. Weight is a measure of how strongly one thing is attracted to another by gravity. On earth, weight is a measure of how much the earth pulls on an object, such as your body. Because the gravitational pull on earth is defined as 1, the weight of an object and its mass are the same on earth. But in space, where there is no gravity, a person becomes weightless but his/her mass remains the same.
Mass is measured by using a balance to compare an object’s mass with a known mass. You place the object to be measured on one side of the bal-ance and known masses on the other side of the balance until both sides are even. For example, to measure the mass of a pencil, you would place it on one side of a balance, and then add 1-gram mass pieces to the other side until both sides are balanced. This would show you the mass of the pencil.
Because weight is a measurement of gravitational pull, it is measured
Lesson
�Lesson
�

Go
d’s
Des
ign
fo
r C
hem
istr
yP
ro
per
ties
of
Mat
ter
Intr
oduc
tion
to
Che
mis
try
Mea
sure
men
t of
Mat
ter
Stat
es o
f Mat
ter
Cla
ssifi
catio
ns
of M
atte
rSo
lutio
nsFo
od C
hem
istry
Uni
t Act
ivity
&
Con
clus
ion
�0
using a spring scale. The object to be measured is attached to one end of a spring and the other end is held up. The amount that the spring stretches indicates the weight of the object. With many spring scales the object can be placed on top of a spring and the amount the spring compresses shows the object’s weight. This is how most bathroom scales work.
In SI units, mass is measured using grams for small objects such as an eraser or a cherry, and kilograms (1000 grams) for larger objects such as people or cars. The metric system unit for weight is the Newton—named after Sir Isaac Newton.
So even though we often use the terms weight and mass interchange-ably, there is a difference. Mass is how much material you have, and weight is how much gravity pulls down on that material.
Measuring Mass and Weight:To measure mass you need to build a balance. This can be done by fol-
lowing the steps below:1. If you have a ruler with a hole in it, you can put a pencil through the
hole. Otherwise, securely tape a pencil to the center of the ruler.2. Punch a hole near the top of a paper cup. Punch a second hole directly
across from the first hole. Tie the ends of a 50 cm piece of string to the cup through the holes. Tape the center of the string to the ruler approximately 2 cm from one end.
3. Repeat step 2 and tape the string of the second cup to the other end of the ruler.
4. While holding the pencil, see if the empty cups balance so that the ruler is level. If not, adjust one cup by moving it closer to or further from the center until the balance is level. Now you can use your balance to find the mass of small objects. Place a
small object in one cup. Now place pennies one at a time in the other cup until the ruler is level. A penny has the mass of approximately 3 grams so multiply the number of pennies by 3 to determine the approximate mass of the object. If the object has a mass that is less than that of a penny, you can use paper clips. Small paper clips are about ½ gram each. Save this balance to use in lessons 6 and 8.
To measure the weight of an object you need to build a spring scale. But since springs can be hard to find we will use a rubber band instead. 1. Prepare a cup like you did
for the balance by punch-ing holes in it and tying a string to it, but put the

Go
d’s D
esign
for
Ch
emistr
yP
ro
perties o
f Matter
Introduction to C
hemistry
Measurem
ent of M
atterStates of M
atterC
lassifications of M
atterSolutions
Food Chem
istryU
nit Activity &
Conclusion
��
string through a rubber band before tying the second end to the cup.
2. Place a pencil through the rubber band to hold up the top of your scale.
3. Set the pencil on a table near the edge so the scale hangs in front of the table.
4. Tape a piece of paper to the edge of the table so that it is behind the rubber band and cup.
5. Make a mark on the paper showing the bottom of the rubber band when there is nothing in the cup.
6. Place five pennies in the cup and mark the bottom of the rubber band on the paper.
7. Repeat this for 10 pennies, 15 pennies, 20 pennies and 25 pennies, marking where the bottom of the rubber band is at each measure-ment.
8. Remove the pennies. Now your spring scale is ready to use.Place a small object in the cup and see how much it stretches the rubber
band. You can compare this to the weight of the pennies. Because weight and mass are equal on earth, you can compare the results you get with the scale to those you get with the balance.
What did we learn?What is the difference between mass and weight? (Mass is the amount
of material there is in an object and weight is how much gravity pulls down on an object.)
How do you measure mass? (By using a balance to compare an object to a known mass)
How do you measure weight? (By using a spring scale that is marked for known weights)
Where is the only known place in the universe that weight and mass are equal? (On earth)
Taking it furtherWhat would your weight be in outer space? (Zero, or nearly zero
because there is very little gravity in space.)What would your mass be in outer space? (The same as it is on earth)Name a place in the universe where you might go to increase your
weight without changing your mass. (Any of the larger planets such as Jupiter or Saturn. Of course, you cannot really go there and you could not survive there if you could, but the gravity is much higher there than on earth so you would weigh much more there.)

Go
d’s
Des
ign
fo
r C
hem
istr
yP
ro
per
ties
of
Mat
ter
Intr
oduc
tion
to
Che
mis
try
Mea
sure
men
t of
Mat
ter
Stat
es o
f Mat
ter
Cla
ssifi
catio
ns
of M
atte
rSo
lutio
nsFo
od C
hem
istry
Uni
t Act
ivity
&
Con
clus
ion
��
Conservation of MassWhere does it go?
Supply list: 2 paper cups Balance from lesson 5 2 sugar cubes
In the previous lesson you learned that mass is how much of a substance is in a sample or object. You may think that mass changes when something
changes form because it looks different or it takes up a different amount of space, but this is not true. For example, lets say you have 10 grams of water in a cup. That water can change form, it can be frozen and become ice, or it can be boiled and become steam, but you will still have 10 grams of water. Similarly, if you have a 20 gram rock and you hit it with a hammer until it is broken into tiny pieces, you will still have 20 grams of rock. The pieces will be very small but if you put them all together the mass remains the same.
Sometimes matter doesn’t just change form; sometimes it combines with other matter to make a new substance. Hydrogen and oxygen mol-ecules combine to form water. But if you have 100 grams of hydrogen and oxygen before they combine, you will have 100 grams of water after. In general, the amount of mass does not change even in a chemical reaction. Occasionally, a chemical reaction does produce a slightly smaller amount of mass because some mass has been converted into energy.
The fact that matter does not go away is a law called the Law of Con-servation of Mass. Energy also does not go away and this fact is called the Law of Conservation of Energy. These two laws taken together are called the 1st Law of Thermodynamics. This law states, “Matter and energy cannot be created nor destroyed, they can only change form.” The Law of Conserva-tion of Mass is very important and is apparent all around us. The water cycle is God’s way of providing for our needs. Water evaporates from the oceans,
Lesson
�Lesson
�
Go
d’s D
esign
for
Ch
emistr
yP
ro
perties o
f Matter
Introduction to C
hemistry
Measurem
ent of M
atterStates of M
atterC
lassifications of M
atterSolutions
Food Chem
istryU
nit Activity &
Conclusion
��
lakes and rivers. It then forms into clouds and eventually falls as rain or other precipitation to provide water for crops and people. If water was used up in this process the world would eventually run out of water.
Another example of the conservation of mass occurs in plants. Plants absorb nutrients such as nitrogen from the ground. Then when they die, they decay and return those nutrients to the soil. An animal may eat the plant and absorb the nutrients into its body, but when the animal dies, it decays and returns the nutrients to the soil to be used by other plants. This reusing of nutrients is part of the conservation of mass. It is God’s way of recycling so that we do not run out of essential materials.
The Law of Conservation of Mass raises an important question. If matter cannot be created nor destroyed, then where did it come from in the first place? This is a question that cannot be answered by operational science. The Bible tells us in Genesis chapter 1 that God spoke the universe into existence. This is the only viable explanation for the matter that exists today. God created it and it continues to exist because man cannot destroy it. God set up a wonderful system to maintain life on earth through the reusing of all matter on the planet.
Changing Form Without Losing Mass:To help you understand that changing the form of something does not
change its mass, perform the following experiment.In a paper cup, dissolve a sugar cube in a small amount of water. Where
did the sugar go? (It is still there, in the water. It just looks different because it has been broken into very small pieces by the water molecules.)
Set the cup in a place where it will not be disturbed. Check the cup every day until all of the water is evaporated. What do you see in the bottom of the cup? (You should see sugar crystals.)
Set up the balance you made in lesson 5. Place the cup with the sugar crystals in the cup on one side of the balance and place a second identical cup with one sugar cube in it in the other cup of the balance. Do both cups balance? (They should.) This shows that the sugar cube did not go away when it was dissolved in the water. It just changed form into crystals instead of a cube, but it still has the same mass.
What did we learn?What does the Law of Conservation of Mass say? (Matter cannot be
created nor destroyed. It can change form, but it does not go away.)How is the mass of water changed when it turns to ice? (It does not
change.)
Taking it furtherIf you start with 10 grams of water and you boil it until there is no
water left in the pan, what happened to the water? (The 10 grams of water
Go
d’s
Des
ign
fo
r C
hem
istr
yP
ro
per
ties
of
Mat
ter
Intr
oduc
tion
to
Che
mis
try
Mea
sure
men
t of
Mat
ter
Stat
es o
f Mat
ter
Cla
ssifi
catio
ns
of M
atte
rSo
lutio
nsFo
od C
hem
istry
Uni
t Act
ivity
&
Con
clus
ion
��
turned into 10 grams of steam and entered the air, but it did not disappear or go away.)
Why is the Law of Conservation of Mass important to understanding the beginning of the world? (It shows that matter cannot create itself or be created by anything in nature. Therefore it had to be created by something outside of nature. We know from the Bible that all matter was created by God.)
Go
d’s D
esign
for
Ch
emistr
yP
ro
perties o
f Matter
Introduction to C
hemistry
Measurem
ent of M
atterStates of M
atterC
lassifications of M
atterSolutions
Food Chem
istryU
nit Activity &
Conclusion
��
VolumeHow much space does it take up?
Supply list: Meter stick Small box Metric ruler Small object (eraser, toy, etc.) Liquid measuring cup
When scientists study matter they make many measurements to help them understand more about the material they are studying. They
measure mass so they know how much matter they have. They also mea-sure volume.
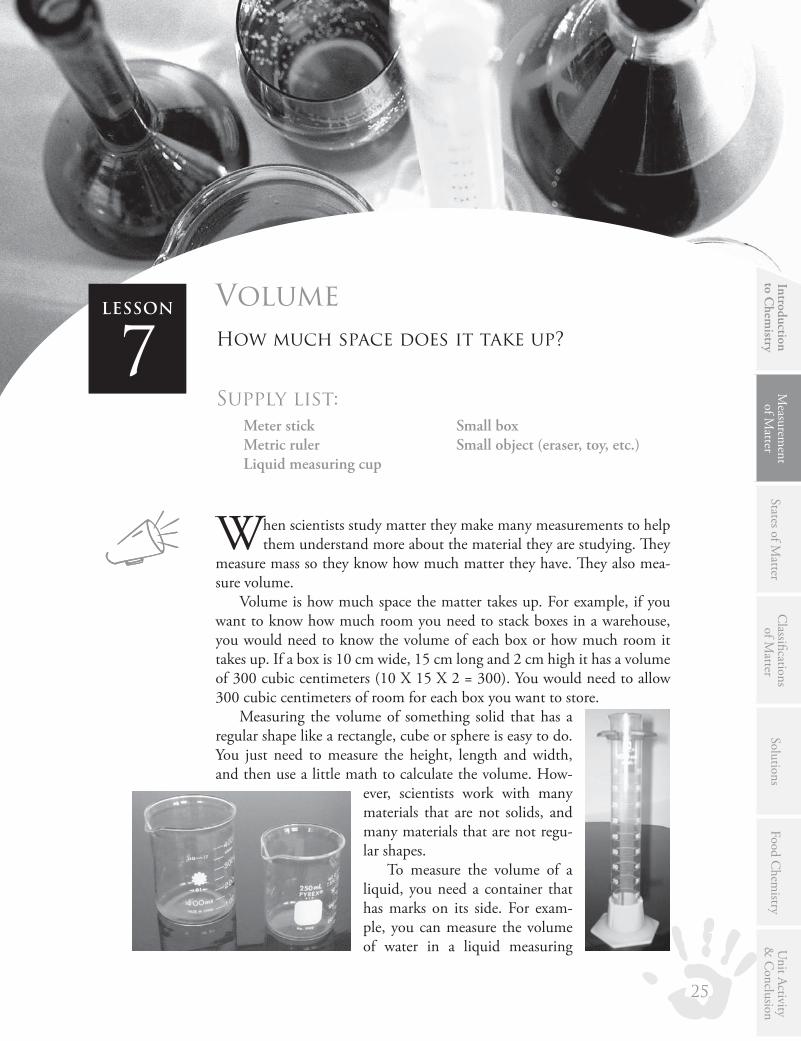
Volume is how much space the matter takes up. For example, if you want to know how much room you need to stack boxes in a warehouse, you would need to know the volume of each box or how much room it takes up. If a box is 10 cm wide, 15 cm long and 2 cm high it has a volume of 300 cubic centimeters (10 X 15 X 2 = 300). You would need to allow 300 cubic centimeters of room for each box you want to store.
Measuring the volume of something solid that has a regular shape like a rectangle, cube or sphere is easy to do. You just need to measure the height, length and width, and then use a little math to calculate the volume. How-
ever, scientists work with many materials that are not solids, and many materials that are not regu-lar shapes.
To measure the volume of a liquid, you need a container that has marks on its side. For exam-ple, you can measure the volume of water in a liquid measuring
Lesson
7Lesson
7
Go
d’s
Des
ign
fo
r C
hem
istr
yP
ro
per
ties
of
Mat
ter
Intr
oduc
tion
to
Che
mis
try
Mea
sure
men
t of
Mat
ter
Stat
es o
f Mat
ter
Cla
ssifi
catio
ns
of M
atte
rSo
lutio
nsFo
od C
hem
istry
Uni
t Act
ivity
&
Con
clus
ion
��
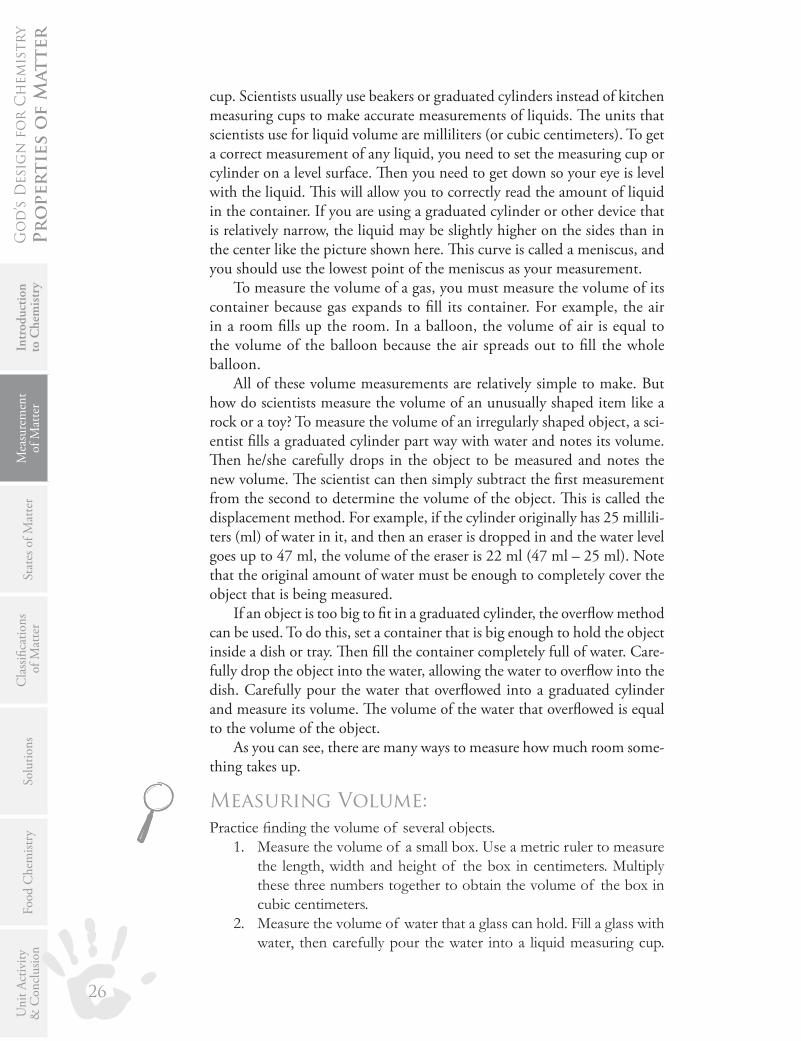
cup. Scientists usually use beakers or graduated cylinders instead of kitchen measuring cups to make accurate measurements of liquids. The units that scientists use for liquid volume are milliliters (or cubic centimeters). To get a correct measurement of any liquid, you need to set the measuring cup or cylinder on a level surface. Then you need to get down so your eye is level with the liquid. This will allow you to correctly read the amount of liquid in the container. If you are using a graduated cylinder or other device that is relatively narrow, the liquid may be slightly higher on the sides than in the center like the picture shown here. This curve is called a meniscus, and you should use the lowest point of the meniscus as your measurement.
To measure the volume of a gas, you must measure the volume of its container because gas expands to fill its container. For example, the air in a room fills up the room. In a balloon, the volume of air is equal to the volume of the balloon because the air spreads out to fill the whole balloon.
All of these volume measurements are relatively simple to make. But how do scientists measure the volume of an unusually shaped item like a rock or a toy? To measure the volume of an irregularly shaped object, a sci-entist fills a graduated cylinder part way with water and notes its volume. Then he/she carefully drops in the object to be measured and notes the new volume. The scientist can then simply subtract the first measurement from the second to determine the volume of the object. This is called the displacement method. For example, if the cylinder originally has 25 millili-ters (ml) of water in it, and then an eraser is dropped in and the water level goes up to 47 ml, the volume of the eraser is 22 ml (47 ml – 25 ml). Note that the original amount of water must be enough to completely cover the object that is being measured.
If an object is too big to fit in a graduated cylinder, the overflow method can be used. To do this, set a container that is big enough to hold the object inside a dish or tray. Then fill the container completely full of water. Care-fully drop the object into the water, allowing the water to overflow into the dish. Carefully pour the water that overflowed into a graduated cylinder and measure its volume. The volume of the water that overflowed is equal to the volume of the object.
As you can see, there are many ways to measure how much room some-thing takes up.
Measuring Volume:Practice finding the volume of several objects.
1. Measure the volume of a small box. Use a metric ruler to measure the length, width and height of the box in centimeters. Multiply these three numbers together to obtain the volume of the box in cubic centimeters.
2. Measure the volume of water that a glass can hold. Fill a glass with water, then carefully pour the water into a liquid measuring cup.

Go
d’s D
esign
for
Ch
emistr
yP
ro
perties o
f Matter
Introduction to C
hemistry
Measurem
ent of M
atterStates of M
atterC
lassifications of M
atterSolutions
Food Chem
istryU
nit Activity &
Conclusion
�7
Be sure to place the measuring cup on a level surface and bend down until your eye is even with the water level to determine the volume of the water. Your measuring cup may use ounces, cups or milliliters as its units.
3. Measure the volume of air in your school room. Use a meter stick to measure the length, width and height of your room. Multiply these numbers together to determine the volume of the room in cubic meters. This is not quite equal to the volume of air because you are in the room and you probably have furniture and other items in the room that are taking up space. But it tells you the volume of air that would be in the room if the room were empty.
4. Determine the volume of an irregularly shaped object. If you have an object that is small enough to fit in the measuring cup, use the displacement method to determine its volume. If you want to measure something that does not fit in the cup, use the overflow method described in the lesson.
What did we learn?What is volume? (The amount of room or space something occupies.)Does air have volume? (Yes, even though you can’t see it, it still takes
up space. It expands to fill up the available space. Think about a balloon. The air forces the balloon to expand; visibly showing how much room the air is taking up.)
Taking it furtherIf you have a cube that is 10 centimeters on each side, what would its
volume be? (10 cm X 10 cm X 10 cm = 1000 cubic centimeters.)Why is volume important to a scientist? (The volume of matter can be
related to many things that scientists are interested in. For example, the volume that a certain amount of fuel occupies determines how a vehicle will be designed.)
FUN FACTFor those of you who are math whizzes, here are some mathematical
formulas for helping you calculate the volume of certain shapes:
Volume of a cube = Side X Side X SideVolume of a rectangle = Length X Width X HeightVolume of a sphere = (4/3) π Radius X Radius X Radius Where π = approximately 3.14Volume of a cylinder = π Radius X Radius X HeightVolume of a cone = (1/3) π Radius X Radius X Height

Go
d’s
Des
ign
fo
r C
hem
istr
yP
ro
per
ties
of
Mat
ter
Intr
oduc
tion
to
Che
mis
try
Mea
sure
men
t of
Mat
ter
Stat
es o
f Mat
ter
Cla
ssifi
catio
ns
of M
atte
rSo
lutio
nsFo
od C
hem
istry
Uni
t Act
ivity
&
Con
clus
ion
��
DensityDoes it feel heavy?
Supply list: Ping-pong ball Golf ball Balance from lesson 5
Have you ever held a ping-pong ball in one hand and a golf ball in the other? Even though the balls have nearly the same volume—they
take up about the same amount of space—the golf ball is heavier than the ping-pong ball. This is because the golf ball has more mass in the same area. It is more dense.
Density is the relationship between mass and volume. Density is defined as the mass divided by the volume. Here is another example to help you understand density. Which has more mass, a kilogram of feathers or a kilogram of lead? You may have answered that a kilogram of lead has more mass because we usually think of lead as being heavy and feathers as being light. But a kilogram of lead is the same amount of mass as a kilogram of feathers. However, the pile of feathers would be much larger—it would have a greater volume—than the pile of lead. Lead is very dense. A cubic centimeter of lead is 11.3 grams. But feathers are much less dense. There is less than 1 gram of feathers in a cubic centimeter of feathers. Because density is defined as mass divided by volume its units are usually given as grams/milliliter or grams/cubic centimeter.
Understanding density is important to scientists for many reasons. One use of density is to help the scientist determine what a sample of material is made of. If someone were interested in opening a mine, they would take samples of ore found in the area to a scientist to determine what metals are present. One way the scientist determines what metals are present is to measure the sample’s density. Different metals have different densities.
Lesson
�Lesson
�

Go
d’s D
esign
for
Ch
emistr
yP
ro
perties o
f Matter
Introduction to C
hemistry
Measurem
ent of M
atterStates of M
atterC
lassifications of M
atterSolutions
Food Chem
istryU
nit Activity &
Conclusion
��
Gold is very dense so it feels heavier than a similar sized piece of copper, which has a much lower density. If the ore has a density close to 9 g/cc it is likely to contain copper, and if it has a density close to 19 g/cc it is likely to contain gold.
Another reason that scientists are interested in density is to determine how a material might be used. If something is very dense it is more ideal for some uses than others. If it has a low density it may be more useful in other areas. For example, fiberglass and styrofoam are materials that are not very dense because they have tiny air pockets trapped inside. This property makes them very good insulators. Fiberglass insulation is used to keep many houses warm in the winter and styrofoam cups keep you from burning your hands when you hold a cup of hot chocolate. Many objects that are more dense, such as metals, conduct heat and do not make good insulators.
Measuring Density:Determine the density of a ping-pong ball by doing the following:
1. Measure the mass of the ball using your balance and pennies or paper clips.
2. Measure the volume of the ball using the water displacement method from lesson 7. If the ball floats, carefully push the ball just under the surface of the water with your finger.
3. Divide the mass by the volume to determine the ball’s density.Repeat these three steps to determine the density of a golf ball. How did the mass of the golf ball compare to the mass of the ping-
pong ball? (It should be significantly more.)How did the volume of the golf ball compare to the volume of the
ping-pong ball? (It should be about the same.)Which ball has a higher density? (The golf ball)
What did we learn?What is the definition of density? (The mass of an object divided by its
volume.)If two substances with the same volume have different densities how
can you tell which one is the densest? (If they have the same volume, the one that is heavier will have the higher density.)
Taking it furtherIf you have two unknown substances that both appear to be silvery col-
ored, how can you tell if they are the same material? (Measure their densi-ties. Platinum has a density of 21.45 g/cc, lead is 11.3 g/cc and aluminum is 2.7 g/cc. This may give you a clue to the material’s identity.)
If two objects have the same density and the same size what will be true

Go
d’s
Des
ign
fo
r C
hem
istr
yP
ro
per
ties
of
Mat
ter
Intr
oduc
tion
to
Che
mis
try
Mea
sure
men
t of
Mat
ter
Stat
es o
f Mat
ter
Cla
ssifi
catio
ns
of M
atte
rSo
lutio
nsFo
od C
hem
istry
Uni
t Act
ivity
&
Con
clus
ion
�0
about their masses? (They will have the same mass.)If you suspect that someone is trying to pass off a gold plated bar of
lead as a solid gold bar, how can you test your theory? (Measure the density of the bar. Gold has a density of 19.3 g/cc while lead has a density of 11.3 g/cc. Even though lead may seem heavy, it is not as dense as gold.)
Why does the ping-pong ball have a lower density than the golf ball? (It is filled with air. Air is very light compared to most substances. The golf ball is filled with plastic, rubber or other solid materials.)
FUN FACTThe densest known substance on earth is osmium. Osmium has a den-
sity of 22.48 grams/cubic centimeter.
FUN FACTThe early miners in the California gold rush used the fact that gold is
very dense to help them pan for gold. Because gold is very heavy compared to other substances in the riverbed, it sank to the bottom of the mining pan, while other lighter substances were washed away by the water.

Go
d’s D
esign
for
Ch
emistr
yP
ro
perties o
f Matter
Introduction to C
hemistry
Measurem
ent of M
atterStates of M
atterC
lassifications of M
atterSolutions
Food Chem
istryU
nit Activity &
Conclusion
��
BuoyancyIt floats!
Supply list: Rubbing alcohol Vegetable oil Modeling clay 2 cups Popcorn (including some unpopped kernels)
Have you ever wondered how something as heavy as a battleship can float on the water when a small rock sinks when you toss it in a lake?
The ability of matter to float is called buoyancy and is directly related to its density. An object that is denser than its surroundings will sink while an object that is less dense will float. If the object floats it is said to be buoyant or to have buoyancy.
So why is a battleship more buoyant than a rock? The battleship is less dense than the rock. Even though the ship has much more mass than the rock, it is shaped so that is has a much greater volume. And most of the ship’s volume is filled with air, which is much lighter and less dense than water. Thus the ship’s overall density is less than the density of the water and so it floats. A rock, however, has a small mass and a small volume. Thus it has a higher density than the water, so it sinks. A few rocks have low densities and can float on the water.
You have probably used the principle of buoyancy when you were swimming. When you take a deep breath you are able to float because the air in your lungs decreases your overall density—increasing your buoyancy. Your body becomes less dense than the water so you are able to float.
Not all solids have the same density and not all liquids have the same density. For example, Mercury is a very dense liquid and would quickly sink to the bottom of a glass of water. You would never go swimming in a pool of mercury, but if you could, you would have no problem floating on the surface. However, if you went swimming in a pool of rubbing alcohol you
Lesson
�Lesson
�
Go
d’s
Des
ign
fo
r C
hem
istr
yP
ro
per
ties
of
Mat
ter
Intr
oduc
tion
to
Che
mis
try
Mea
sure
men
t of
Mat
ter
Stat
es o
f Mat
ter
Cla
ssifi
catio
ns
of M
atte
rSo
lutio
nsFo
od C
hem
istry
Uni
t Act
ivity
&
Con
clus
ion
��
would have a very difficult time keeping your head above the surface because alcohol is less dense than water and you would no longer be buoyant.
So you can see that buoyancy is relative. It is the difference in the density of one substance compared to another. One of the most important applica-tions of buoyancy is the fact that frozen water is less dense than liquid water so ice floats on liquid water. Water is the only known substance that becomes less dense when it becomes a solid. This was a special design by God. If ice did not float, but instead sank to the bottom of the lake, the lakes and ponds would all freeze solid in the wintertime and life would quickly die in them. So give thanks to God for making ice buoyant!
Testing Buoyancy:Perform the following tests to observe buoyancy.
Solid in a liquid:Take two equal size pieces of modeling clay. Roll one into a solid ball. Shape the second piece into a flat bottomed boat shape. Place both pieces of clay in a sink filled with water. Which shape floats? (If you formed the boat carefully, you should be able to get it to float, whereas the ball will probably sink.)
Solid in a solid:Pop some popcorn and put it in a bowl. Be sure to include several unpopped kernels. Mix the popcorn up with the kernels. Now gently shake the bowl for a few seconds. What did you observe happening? (You should see the fluffy pieces rise to the top and the unpopped kernels sink to the bottom. The kernels are denser than the popped pieces. The popped pieces take up more space, but have the same amount of matter as the kernels so they are less dense and thus rise to the top.)
Liquid in a liquid:Pour some water in one cup and some rubbing alcohol in a second cup. Pour a small amount of vegetable oil in each cup. What happened to the oil in each cup? (You should have observed that the oil floated on the top of the water but sank to the bottom of the alcohol.) Why did the oil float in one cup but sink in the other? (Oil is less dense than water but more dense than alcohol. The oil is buoyant in the water but not in the alcohol.)
What did we learn?What is buoyancy? (The ability to float.)If something is buoyant, what does that tell you about its density com-
pared to that of the substance in which it floats? (It means that the object’s density is less than the density of the substance that it is floating on.)
Are you buoyant in water? (Probably, especially if you are holding your breath.)

Go
d’s D
esign
for
Ch
emistr
yP
ro
perties o
f Matter
Introduction to C
hemistry
Measurem
ent of M
atterStates of M
atterC
lassifications of M
atterSolutions
Food Chem
istryU
nit Activity &
Conclusion
��
Taking it furtherWhat are some substances that are buoyant in water besides you? (Ivory
soap, a leaf, paper, oil, etc.)Based on what you observed, which is denser, water or alcohol? (Water
is denser. Oil will float on the water but sinks in the alcohol.)Why is a foam swimming tube or a foam life ring able to keep a person
afloat in the water? (Foam is a material that has air trapped in it so it is not very dense. Even with the person’s weight/mass added to it, the foam object’s density remains lower than the density of the water.)
Why is it important to life that ice is less dense than water? (Otherwise rivers and lakes would freeze from the bottom up, and no life could survive in them.)
FUN FACTNuclear powered submarines must be bigger than
diesel powered submarines in order to be buoyant. This is because nuclear reactors are much heavier than diesel engines. Therefore, the nuclear submarine must have
a greater volume filled with air to com-pensate for the additional mass of the reactor in order to be buoyant in the water.

34 • Properties of Matter
James Clerk Maxwell(����-��7�)
Math, science, nature and Christianity; what do these things all have in common? They were all important in the life of James Clerk Maxwell. Maxwell, described as one of the
outstanding mathematicians and scientists of the 19th century, was born in Edinburgh, Scot-land. He was an only child and was home educated by his mother until her death in 1838. After spending 2 years with a tutor, James attended Edinburgh Academy, where he graduated at the top of his class in english and math. He then attended the University of Edinburgh and continued his studies at Trinity College.
After he completed his training, Maxwell spent some time teaching at Marischal College, where met and married Katherine Mary Dewar, the daughter of the college principle. He later became the professor of physics and astronomy at Kings College in London, and in 1871, he became the Chair of Experimental Physics at Cambridge University.
Although Maxwell spent time teaching at each of these schools, his real interest was in experimenting and testing out new ideas. Maxwell was the first to explain the kinetic theory of gases, showing that the movement of gas particles creates heat and pressure. He also tested the viscosity, or density, of gases. He was the first to suggest that the rings around Saturn were not a solid or a gas, but a collection of millions of tiny particles that orbit the planet. This idea was proven to be true when the Voyager 1 space probe visited Saturn in 1980. It sent back pictures showing that the rings are composed of millions of pieces of ice, dust and rocks.
Maxwell is best known for his work in electromagnetism. He worked closely with Michael Faraday, and helped to mathematically describe the electromagnetic fields that generate elec-tricity. Today, these equations are called Maxwell’s Equations. Born out of his work with elec-tricity, Maxwell advanced the idea that light was a form of electromagnetic energy.
Despite all his scientific work, the people closest to Maxwell did not describe him as a great scientist. Instead, they described him has a humble, godly man. James was an elder in his church and he fervently believed that the reason to study nature was to draw people to God so they could ultimately have a saving relationship with the Creator. Maxwell died of cancer at the age of 48. He left behind a great scientific legacy, but more importantly, he left behind a legacy of humble obedience to God.

Properties of Matter • 35
Measurement of Matter Quiz
Lessons �-�
Matching – draw a line from the phrase to the word it describes1. The amount of a substance conservation of mass2. How strongly something is pulled on by gravity density3. Matter cannot be created or destroyed mass4. How much space matter occupies volume5. How much mass is in a particular volume spring scale6. The ability for one substance to float in another balance7. Used to measure mass buoyancy8. Used to measure weight weight9. A material that is denser than lead water10. Only material to become less dense when frozen goldShort answer.
11. Explain how the water you drink today could be the same water a dinosaur drank thou-
sands of years ago.______________________________________________________
____________________________________________________________________
12. Explain what happens to nitrogen in the soil and in plants that demonstrates conservation
of mass. _____________________________________________________________
____________________________________________________________________13. If an object floats in one liquid but sinks in another, what does that tell you about the den-
sities of the two liquids? _________________________________________________
14. How would you determine the volume of a toy car? ___________________________
_______________________________________________________________________
15. How are buoyancy and density related? _____________________________________

Properties of Matter • 131
Appendix CMaster Supply List
Supplies needed Lesson Supplies needed LessonBaking soda 1,17, 24, 28, 33 Funnel 19Vinegar 1, 22, 33 Liquid whipping cream 203 Empty soda bottles 2, 27 Vanilla extract 20, 24, 25Yeast 2, 32 Can/spray whip cream 20Molasses 2 Roll Lifesavers candy 21Thermometer 2, 3 Rolling pin 21Masking tape 2, 3, 5 Plastic zipper bags 21, 25, 27Balloons 2, 15, 34 Dry mustard 22Small box 3, 7 Paprika 22Digital Stop watch 3 Lemon juice 22, 24, 312 Tennis balls 3, 14 2 Cans soda pop 23Metric ruler, meter stick 3, 4, 5, 7 Food Coloring 24Paper clips 4, 5 Club soda 24Paper cups 5, 6 Corn Syrup 24String 5 Nutmeg 24Rubber band 5 Cinnamon 2425 Pennies 5 Salt 25, 26, 32Sugar cubes 6 Soda Straw 26Ping-pong ball 8 Goggles 27Golf ball 8 Sand 27Rubbing alcohol 9, 33 Charcoal briquettes 27Modeling clay 9 Cotton balls 27Vegetable oil 9,13, 22, 29, 33 Alum 27Popcorn 9 Hammer 27Hand mirror 11 Apple 29, 31Ice tray 11 Iodine 29, 33Wooden block 12 Brown paper bag 29Honey 12, 13 Bread 29Hand lotion 13 Peanut butter 29Dish soap 13 Potato or tortilla chips 29Empty 1 gallon milk carton 15 Instant pudding mix 30Jigsaw puzzle 16 Spray oil 322 small jars 17, 20 Powdered Sugar 33Copper wire 17 Corn Starch 336-volt battery 17 Candle 34Coffee filter 19 Orange juice 19, 24
It is assumed that other art supplies such as colored pencils, construction paper, markers, scis-sors, tape, etc. are available. Most other supplies should be readily available in most homes.