power point presentation for the high school floral certification testing of the symmetrical...
TRANSCRIPT

Power Point Presentation
for the
High School Floral Certification
Testing of the
Symmetrical Triangle Arrangement
and
Boutonniere
1Revised 2011
Texas State Florists’ Association
www.tsfa.org512-834-0362800-375-0361
High School Certification Testing Information
• Must enroll by deadline date – usually in middle January
Check TSFA website www.tsfa.org for updated information
• $100 Testing Fee,
if not receiving scholarship by application deadline• Must pass 100 question written exam: true/false, short
answer, multiple choice, fill in the blank• Need #2 pencil • Must pass judging criteria for symmetrical design and
boutonniere• Test Dates and Locations: to be announced each year
Check TSFA website www.tsfa.org2
Additional Testing Information
• Students will be provided with design bowl, 1/3 brick
wet floral foam, anchor tape, floral wire, floral tape,
and fresh product for hands on design • Students should bring knives, stem cutters/shears, and
wire cutters. There will be no tools provided• Written test and design portion will be timed
one hour for each section (written test and hands on)• Re-testing is available for students who do not pass
either test or do not pass one part (written or design) • Date, place, time: to be announced.
Check TSFA website: www.tsfa.org• $35.00 Re-testing fee
3
Symmetrical Triangle Arrangement
• 9 stems of carnations provided• 10 stems of leather provided• 7-10 florets of statice – approximately 3 stems provided• There will be no extra product provided
Students MUST be careful with product• Broken stems will not be replaced, may wire if needed
Will not count off for inferior product - judged on
stem placement only• Strict guidelines and procedures
4

5
A CompletedArrangement
• Completed arrangement with flowers, foliage and filler

6
Required Materials
For Arrangement
• 9 Carnations• 1/3 bunch Statice• 10 stems Leather Leaf
Fern• Container, Floral Foam and Anchor Tape• #21 or #22 wire• Necessary Tools: Wire Cutters, Clippers, and Knife…Band Aids (There will be no tools provided)
7
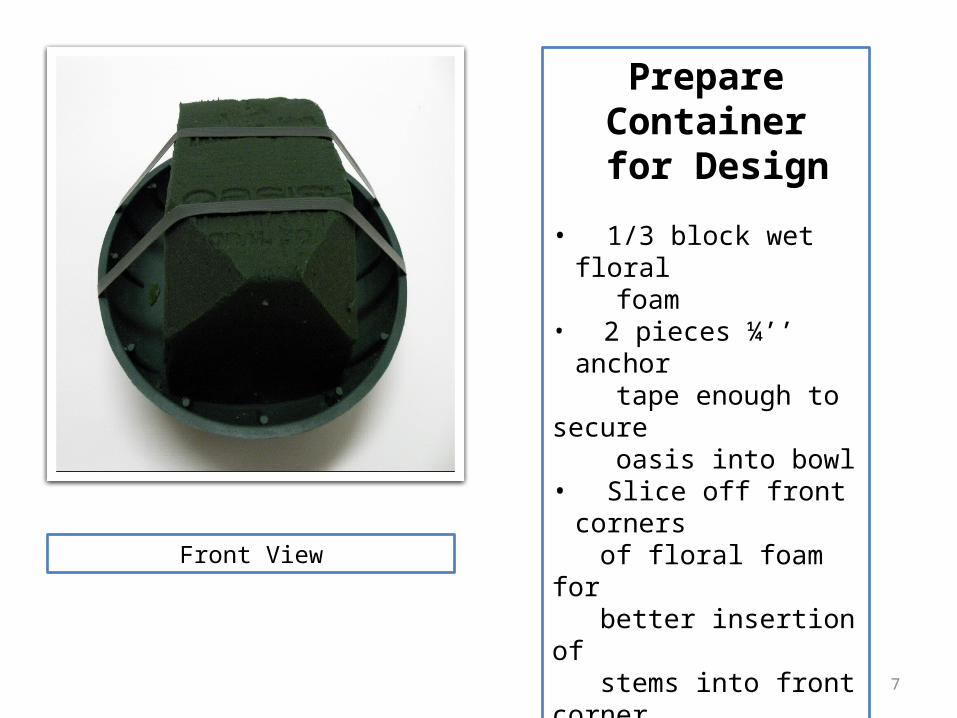
Prepare Container
for Design
• 1/3 block wet floral foam• 2 pieces ¼’’ anchor tape enough to secure oasis into bowl• Slice off front corners of floral foam for better insertion of stems into front corner area. (Suggestion only)
Front View
8
Insert Carnations
• Cut stems at an angle• Stems must be secure in floral foam below water line• Should be no re-insertions• Must develop symmetrical triangle• Carefully measure before cutting stems• Develop skeleton of design in steps 1-9• May fluff tight or non round carnations before inserting into floral foam• Filler flowers to be inserted between carnations, placing them high and low to create depth
9
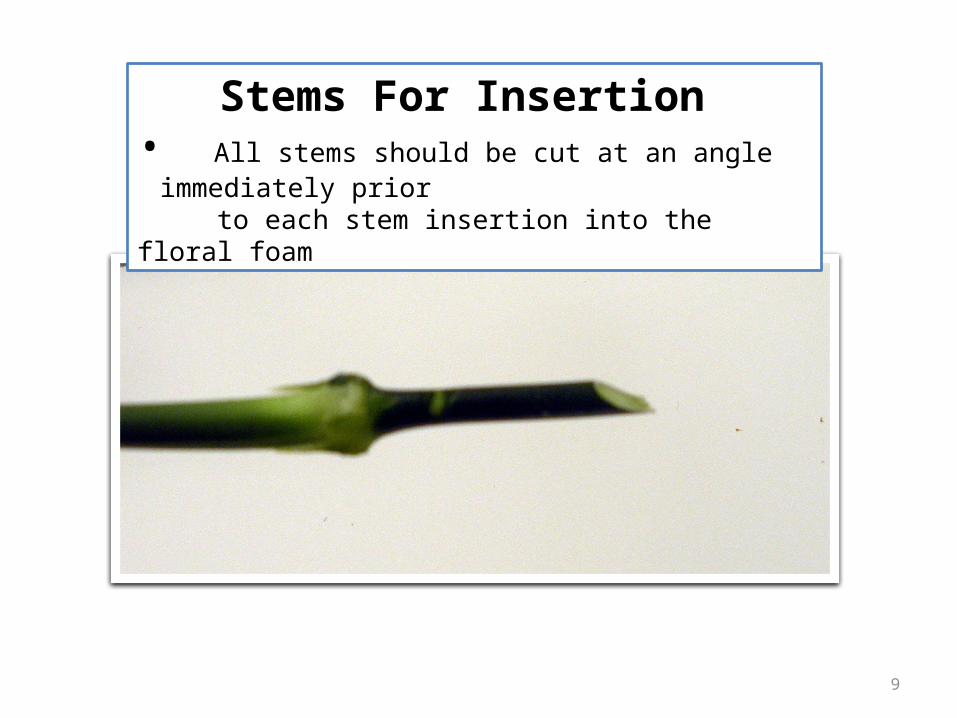
Stems For Insertion • All stems should be cut at an angle immediately prior
to each stem insertion into the floral foam
10
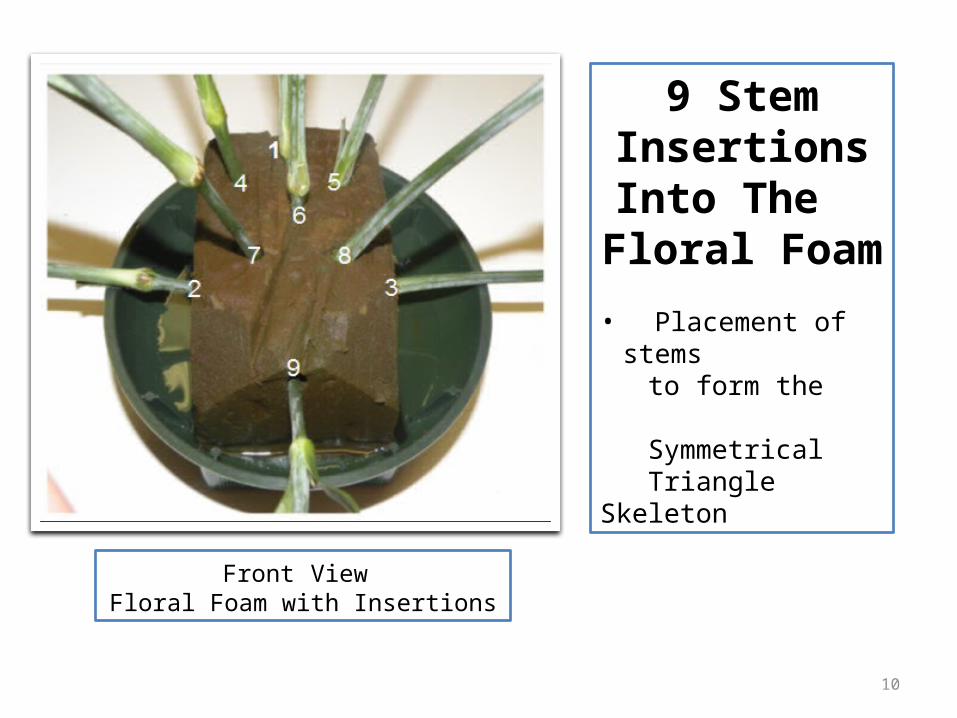
9 Stem InsertionsInto The
Floral Foam
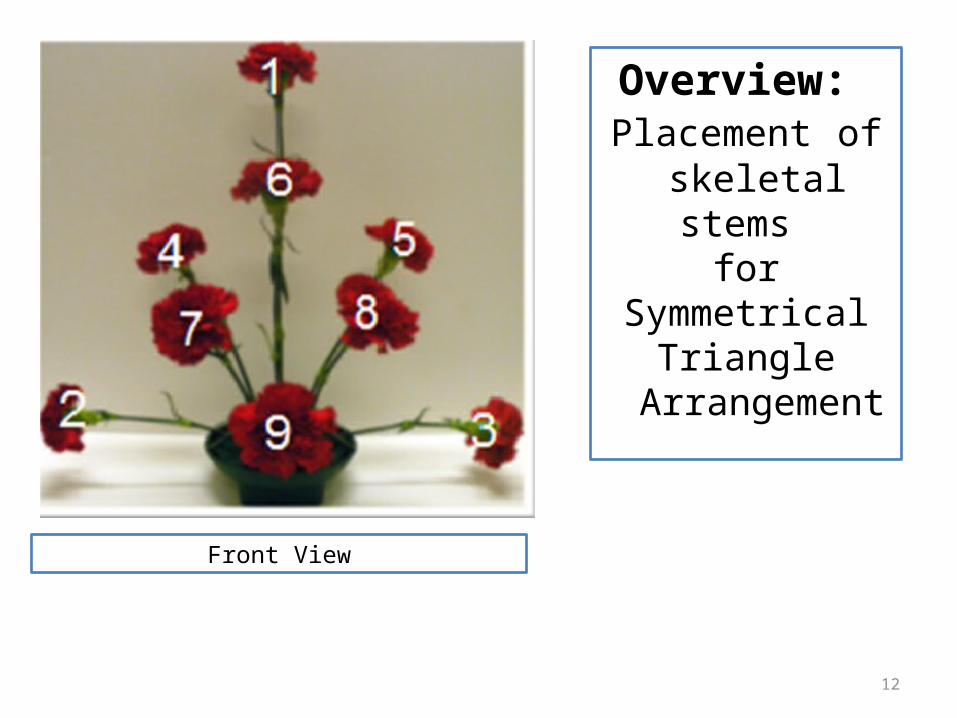
• Placement of stems to form the Symmetrical Triangle Skeleton
Front View Floral Foam with Insertions
11
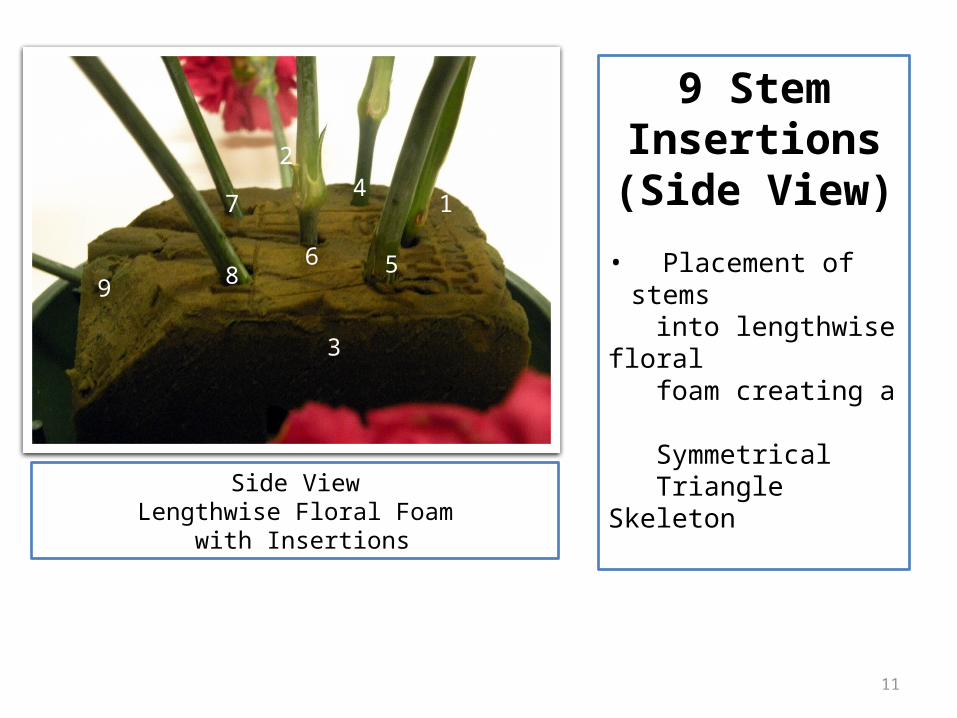
Side ViewLengthwise Floral Foam
with Insertions
14
5
2
3
67
8 9
9 StemInsertions(Side View)
• Placement of stems into lengthwise floral foam creating a Symmetrical Triangle Skeleton
12
Overview: Placement of
skeletal stems for Symmetrical
Triangle Arrangement
Front View
13 Side View
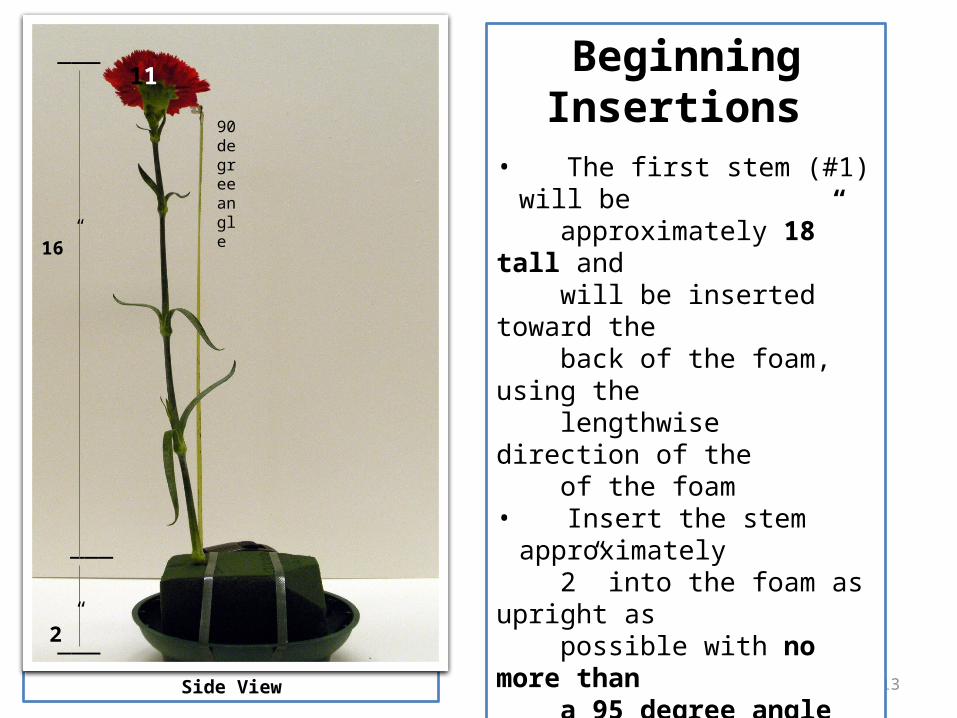
Beginning Insertions
• The first stem (#1) will be approximately 18” tall and will be inserted toward the back of the foam, using the lengthwise direction of the of the foam• Insert the stem
approximately 2” into the foam as upright as possible with no more than a 95 degree angle• Note: 90 degree angle to use as a guide (The stem should lay no further back than shown in example)
___
___
16”
90 degree angle
2”
___
11
14
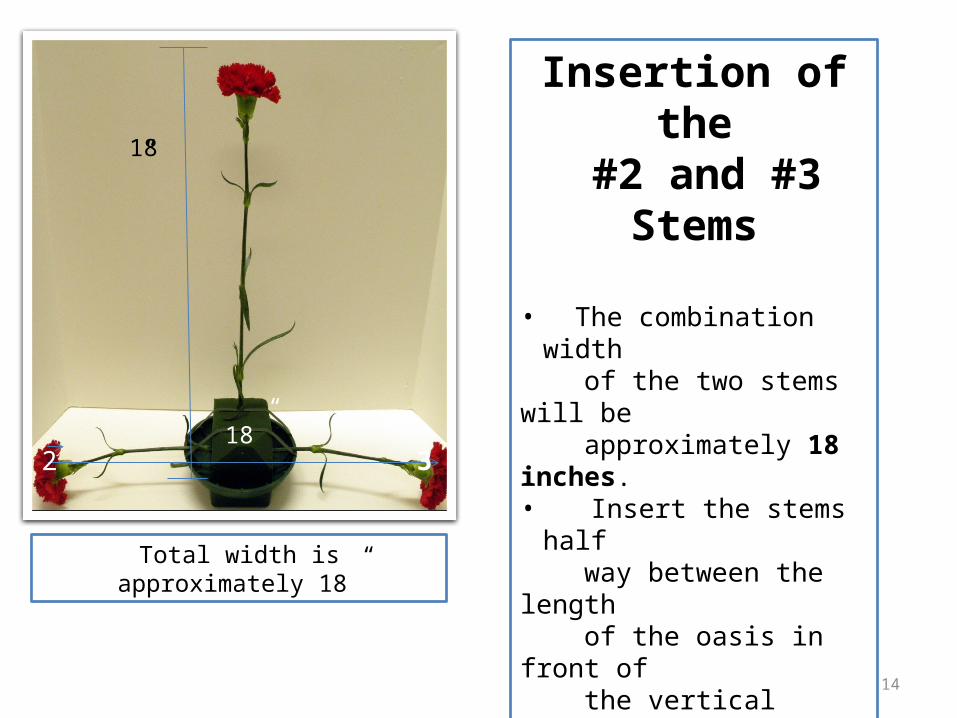
Insertion of the #2 and #3 Stems
• The combination width of the two stems will be approximately 18 inches.• Insert the stems half way between the length of the oasis in front of the vertical stem. • You are creating depth and space within the arrangement by placement of these insertions.
Total width is approximately 18”
18”
118”2 3
15
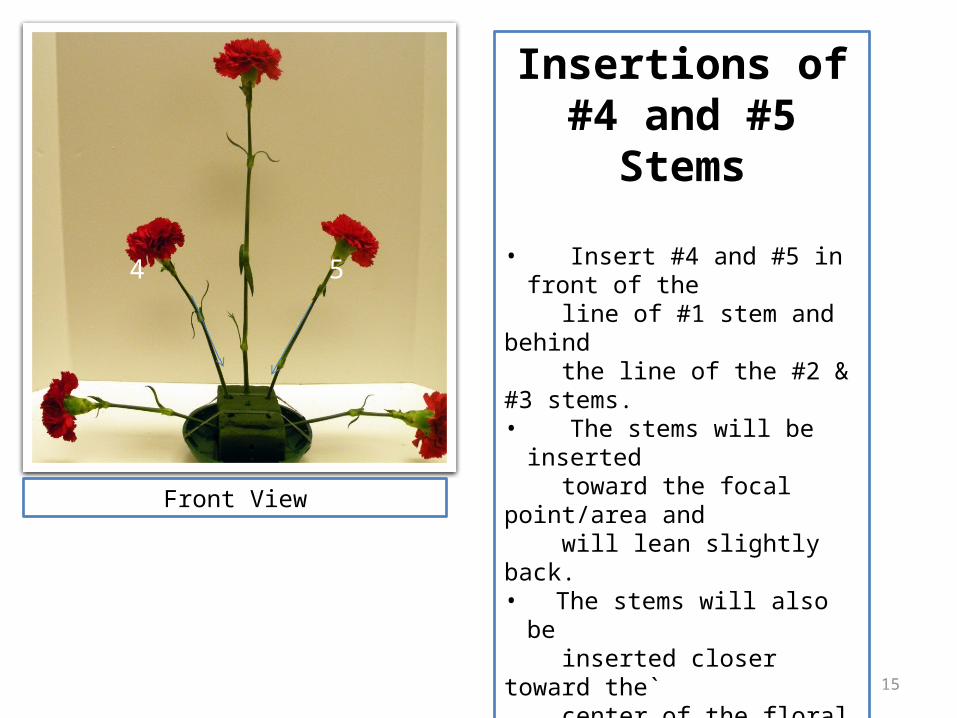
Insertions of#4 and #5 Stems
• Insert #4 and #5 in front of the
line of #1 stem and behind the line of the #2 & #3 stems. • The stems will be inserted toward the focal point/area and will lean slightly back.• The stems will also be inserted closer toward the` center of the floral foam.
Front View
4 5
16
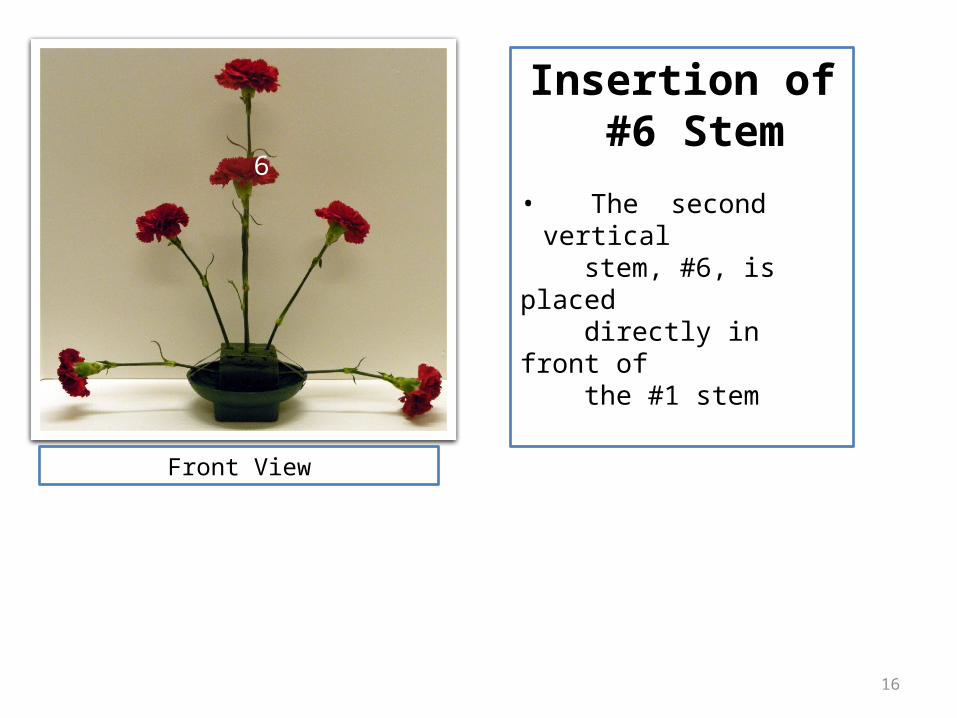
Insertion of #6 Stem
• The second vertical stem, #6, is placed directly in front of the #1 stem
Front View
6
17
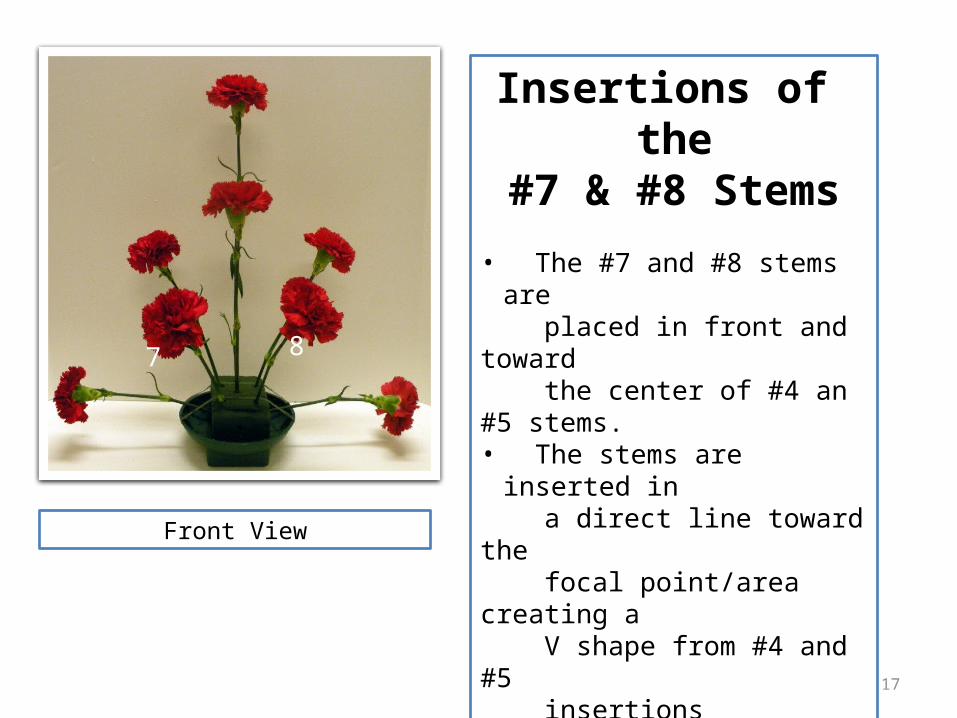
Insertions of the#7 & #8 Stems
• The #7 and #8 stems are placed in front and toward the center of #4 an #5 stems.• The stems are inserted in a direct line toward the focal point/area creating a V shape from #4 and #5 insertions
Front View
7 8
18
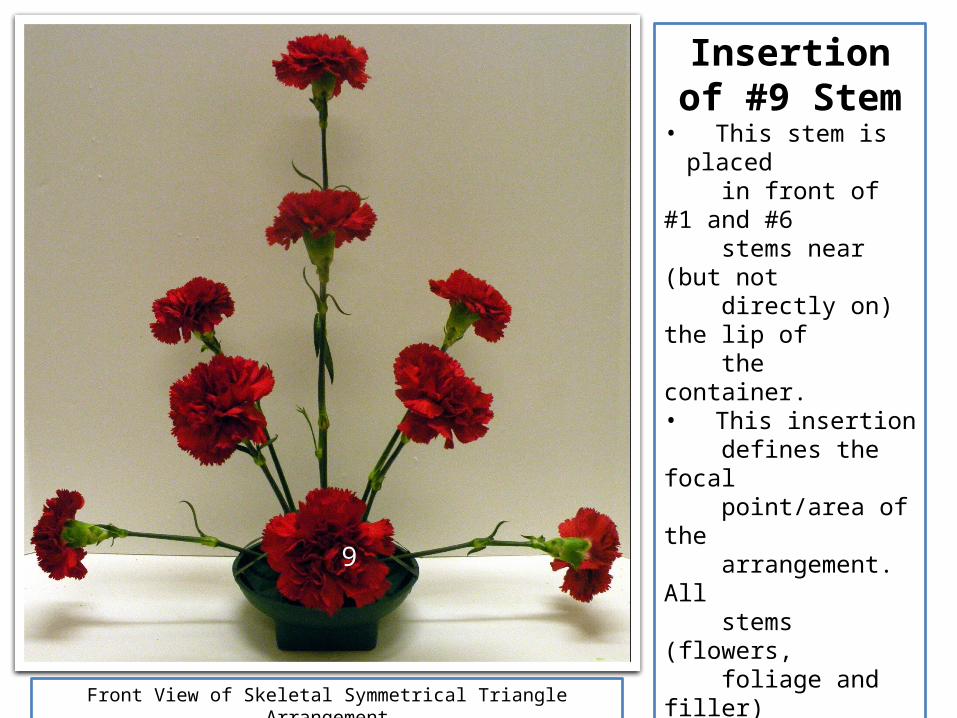
Insertion of #9 Stem
• This stem is placed in front of #1 and #6 stems near (but not directly on) the lip of the container.• This insertion defines the focal point/area of the arrangement. All stems (flowers, foliage and filler) will radiate from this point.• Stems become shorter and tighter, as they near the focal point/area
Front View of Skeletal Symmetrical Triangle Arrangement
9
19
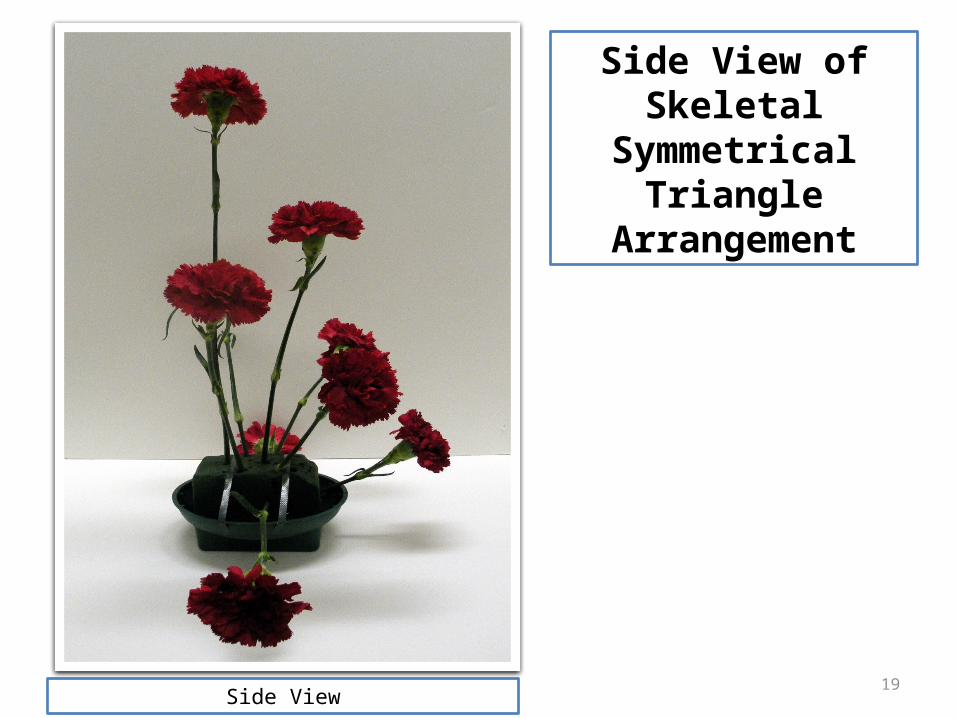
Side View ofSkeletal
SymmetricalTriangle
Arrangement
Side View
20
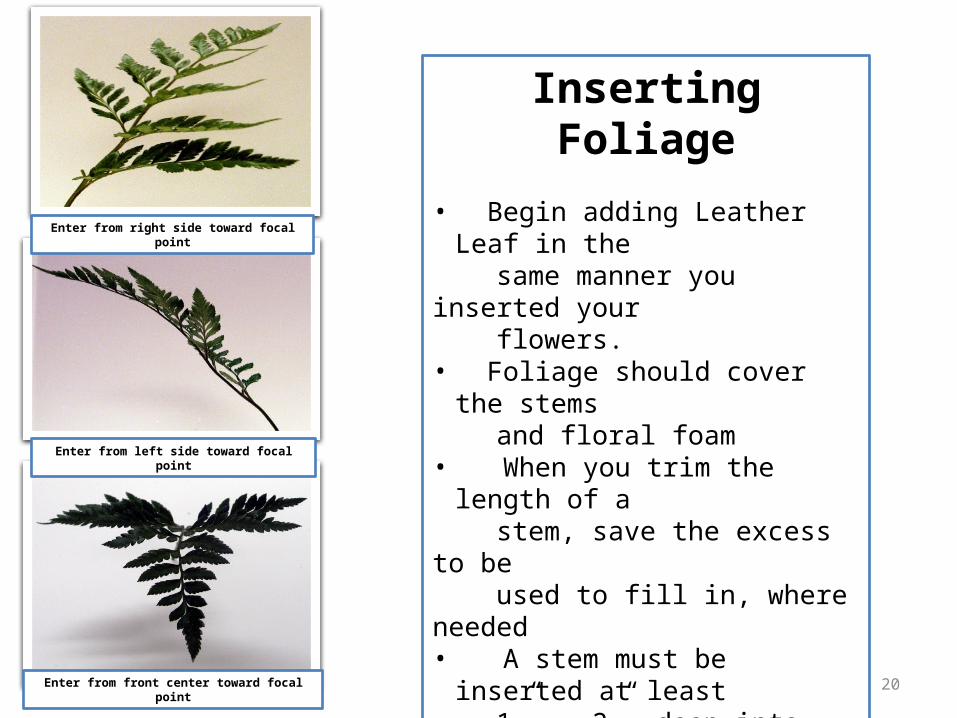
Enter from right side toward focal point
Enter from left side toward focal point
Enter from front center toward focal point
Inserting Foliage
• Begin adding Leather Leaf in the same manner you inserted your flowers. • Foliage should cover the stems and floral foam• When you trim the length of a stem, save the excess to be used to fill in, where needed• A stem must be inserted at least 1” - 2” deep into the oasis, in order to take up water

21
Insert Leather Leaf Fern
• Follow same insertion pattern as carnations• Leather should support carnation stems• Insert leather closely behind carnations• Keep greenery wings for filler pieces, i.e. front spaces and to fill gaps and cover foam• No anchor tape should be visible• No floral foam should be showing• Do not cut foliage into tiny pieces and insert into floral foam
22
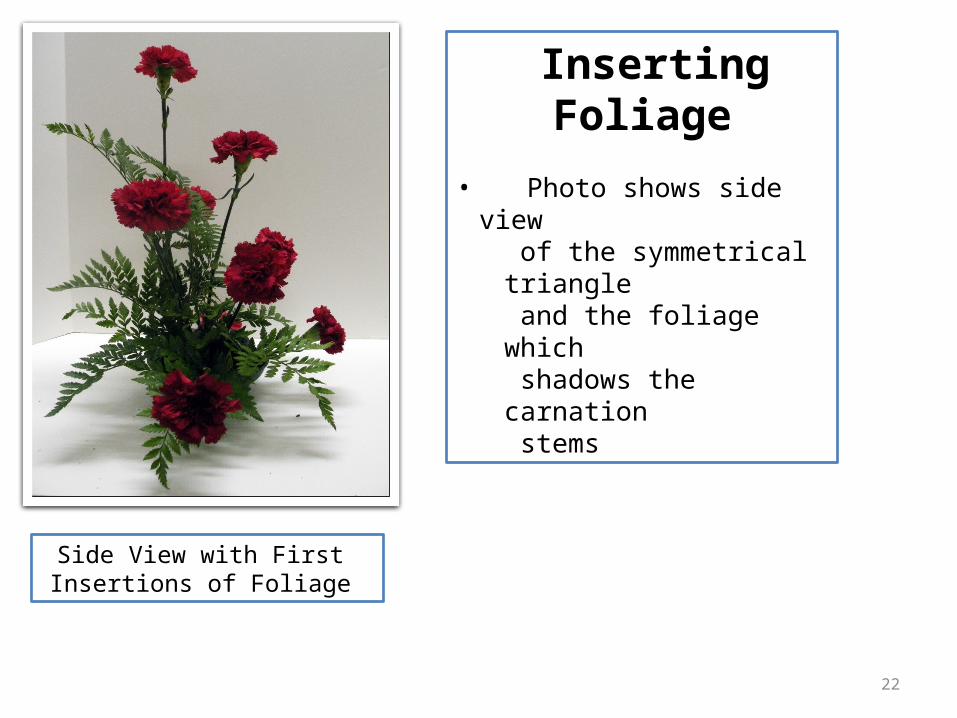
Inserting Foliage
• Photo shows side view of the symmetrical triangle and the foliage which shadows the carnation stems
Side View with First Insertions of Foliage
23
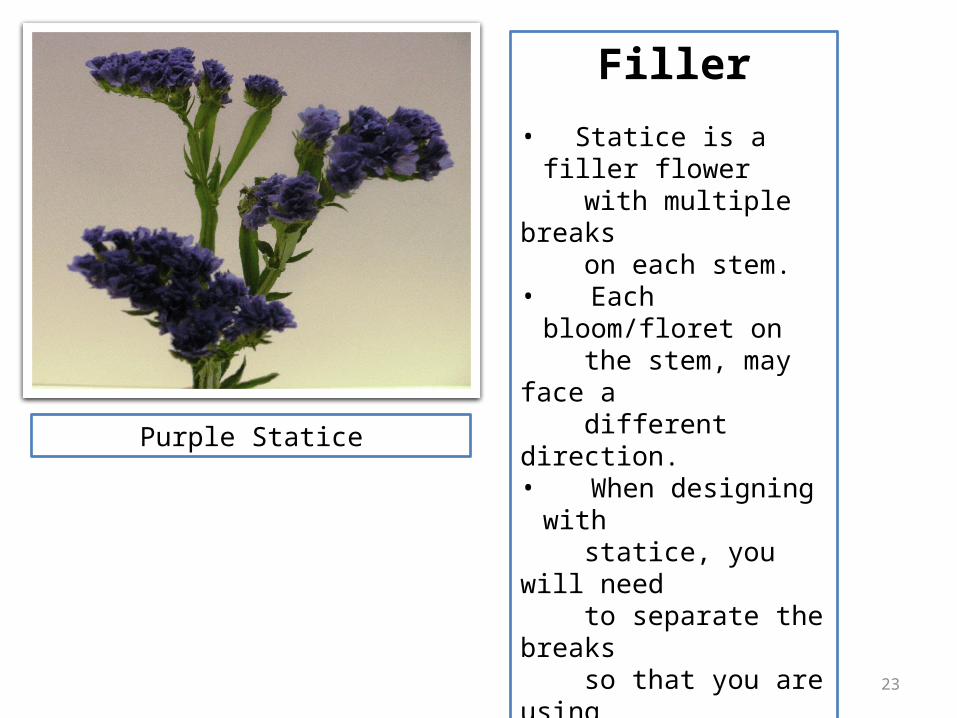
Filler
• Statice is a filler flower with multiple breaks on each stem. • Each bloom/floret on the stem, may face a different direction.• When designing with statice, you will need to separate the breaks so that you are using the blooms/florets in the correct direction. They must follow the lines within the arrangement.
Purple Statice
24
Insert Filler
• Should be placed deeper than carnations to fill in
empty spaces• If using fillers that face directions, should radiate out of design• Insert filler securely into floral foam Do not over fill design with filler; graders will count off for this; must consider price points of design, do not have to use all filler material provided
25
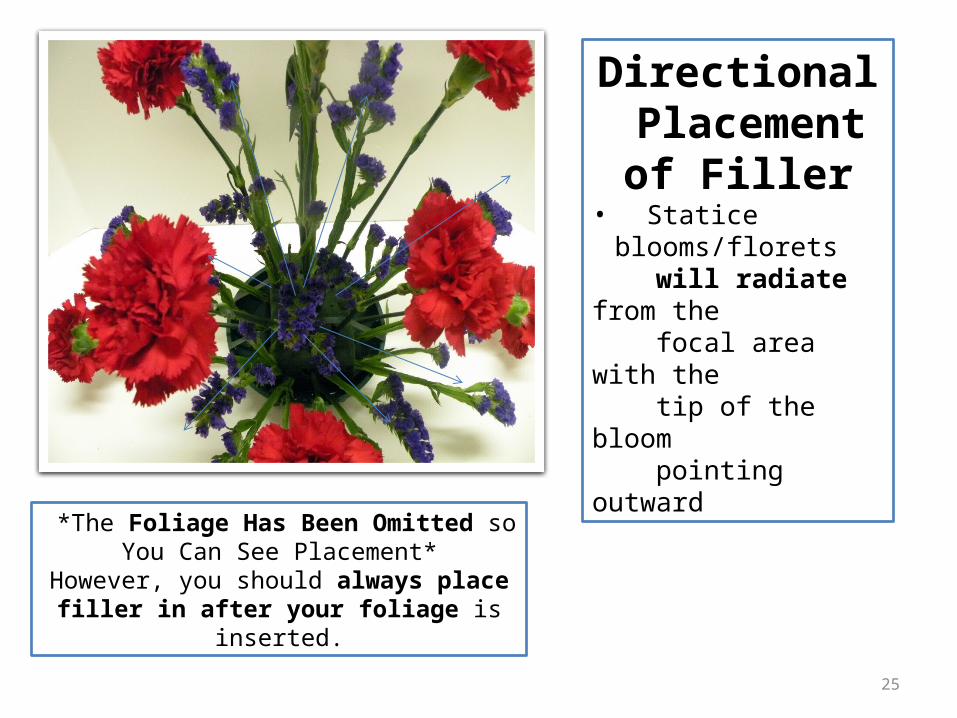
Directional Placement
of Filler• Statice blooms/florets will radiate from the focal area with the tip of the bloom pointing outward
*The Foliage Has Been Omitted soYou Can See Placement*
However, you should always place filler in after your foliage is inserted.
26
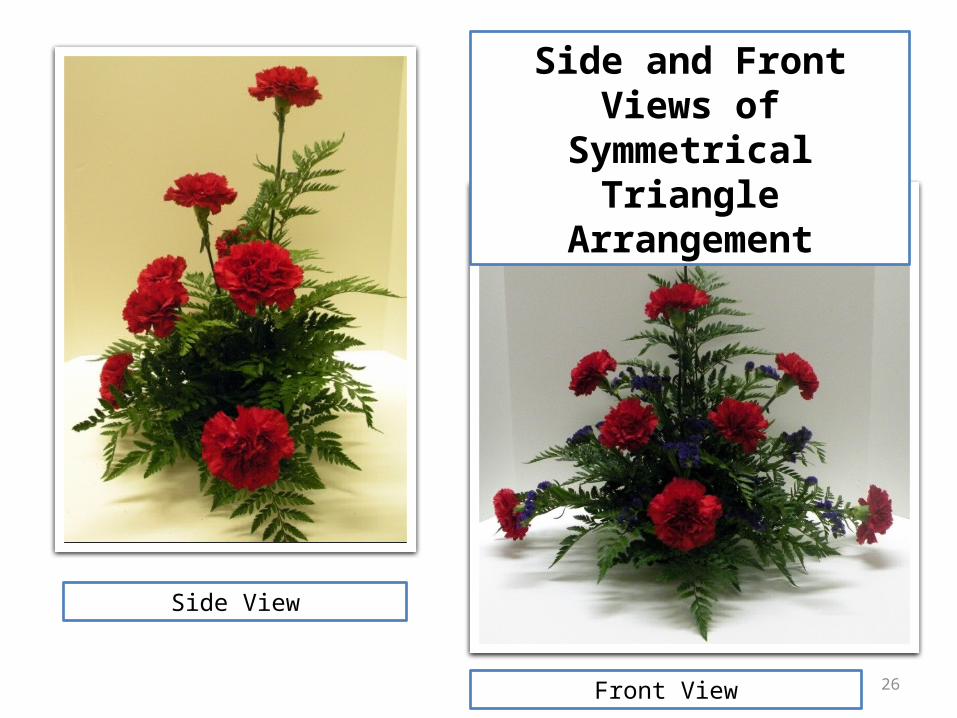
Side and Front Views of Symmetrical Triangle
Arrangement
Front View
Back View
Side View
27
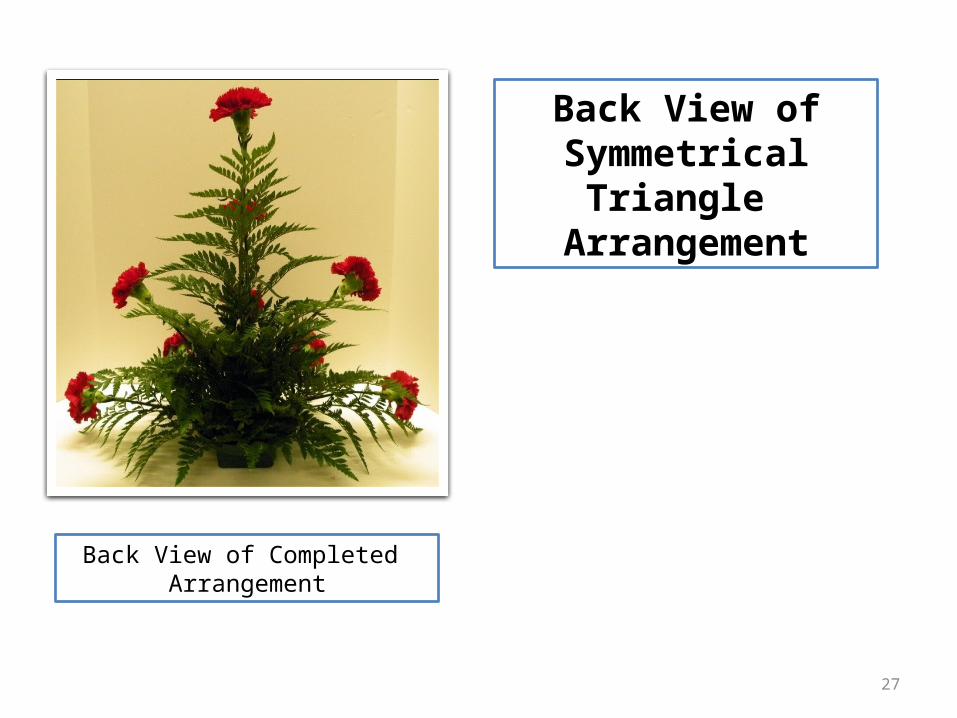
Back View ofSymmetrical
Triangle Arrangement
Back View of Completed Arrangement
28
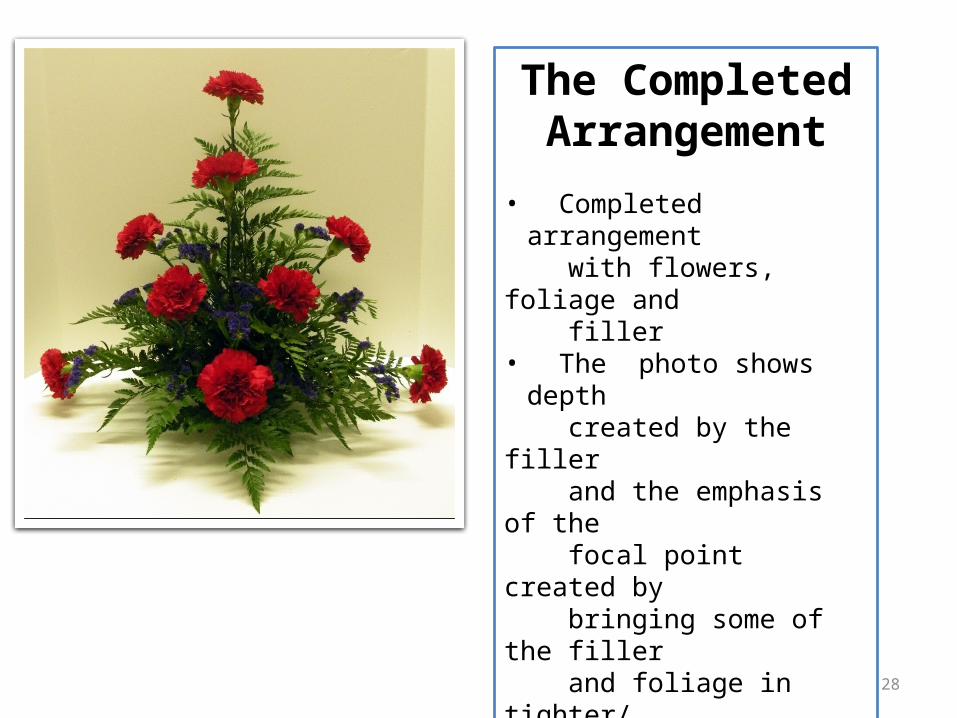
The CompletedArrangement
• Completed arrangement with flowers, foliage and filler• The photo shows depth created by the filler and the emphasis of the focal point created by bringing some of the filler and foliage in tighter/ shorter toward the #9 carnation
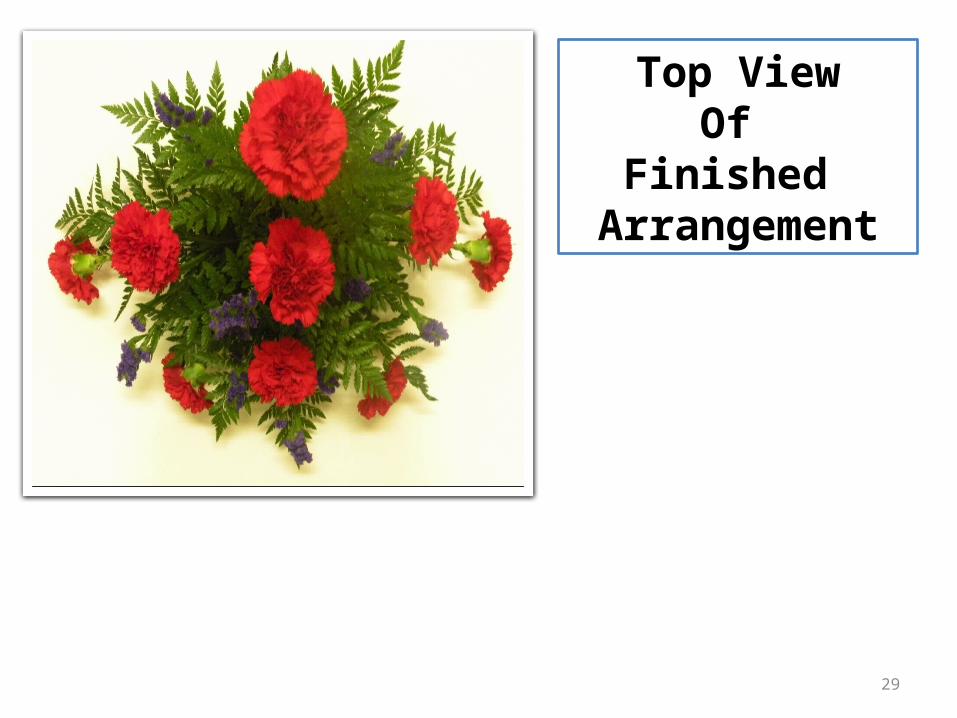
29
Top ViewOf
Finished Arrangement
30
Design Conclusions
• Design will be judged on stem placement, NOT product quality• Smaller blooms placed on outside edges of design and larger blooms to inside/interior of arrangement for depth and focal• DO NOT make design short and dense. Cannot determine space and proportion within arrangement Arrangement should be approximately 18” tall and approximately 18” wide. With this height and width, space will be created within the arrangement.• Mass flowers (carnations) MUST NOT touch each other.• Graders will not count off for broken carnation
stems that have been re-wired together and taped correctly. Repair broken stems/carnations as needed

31
A RoseBoutonniere
32
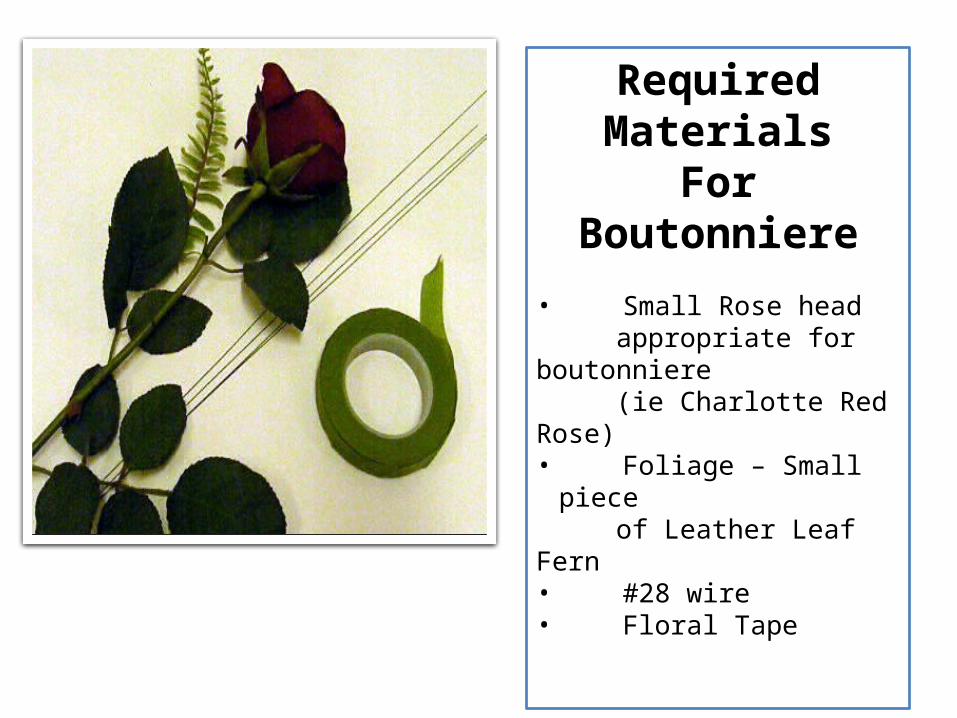
Required Materials
For Boutonniere
• Small Rose head appropriate for boutonniere (ie Charlotte Red Rose)• Foliage – Small piece of Leather Leaf Fern• #28 wire• Floral Tape
33
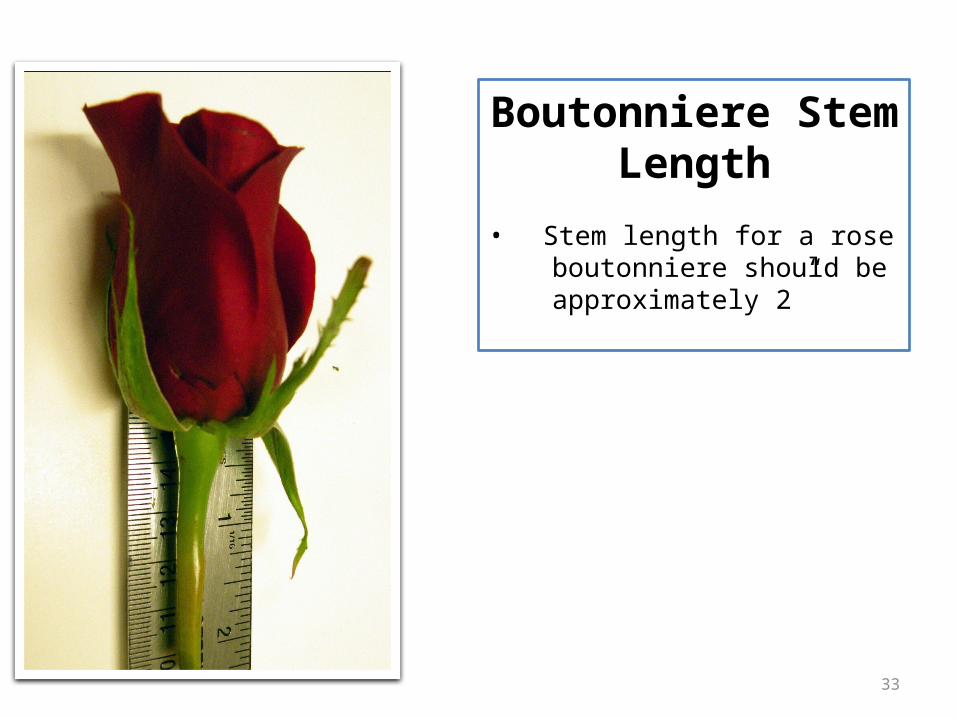
Boutonniere StemLength
• Stem length for a rose boutonniere should be approximately 2”
34
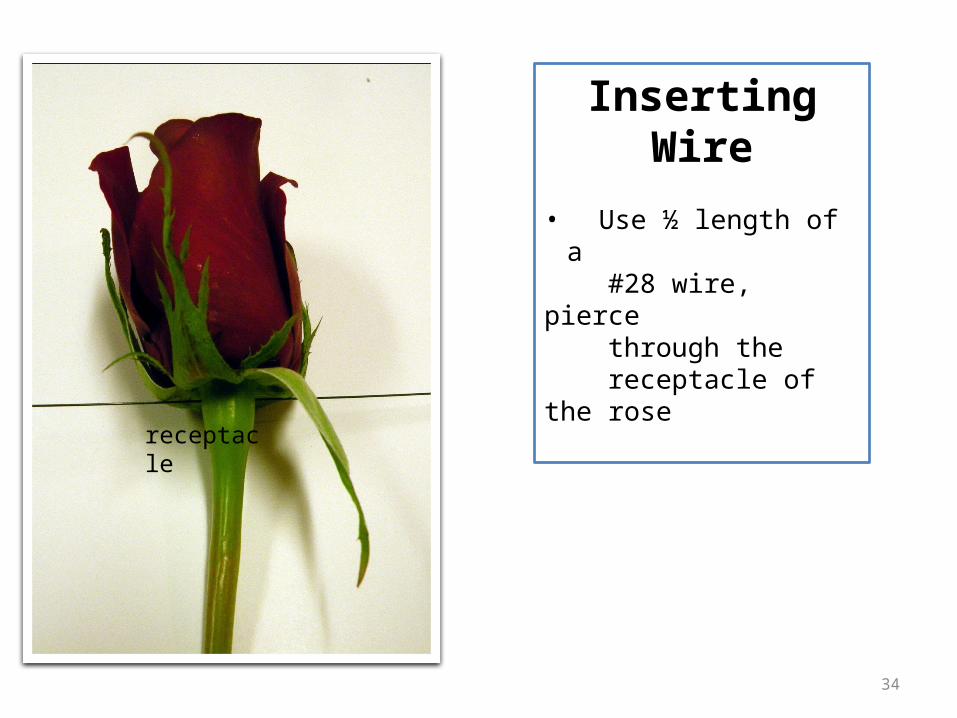
Inserting Wire
• Use ½ length of a #28 wire, pierce through the receptacle of the rose
receptacle

35
Inserting Second Wire
• Using a second #28 wire, cross pierce the receptacle slightly lower than the first insertion• See example pictures
36
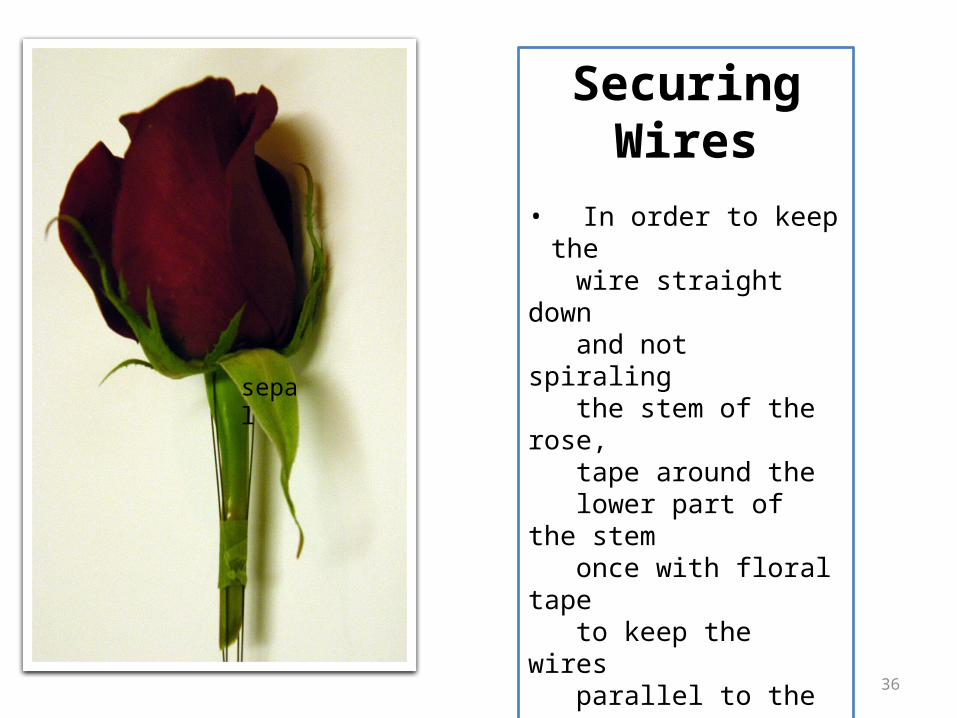
Securing Wires
• In order to keep the wire straight down and not spiraling the stem of the rose, tape around the lower part of the stem once with floral tape to keep the wires parallel to the stem• Do not remove the sepals
sepal
37
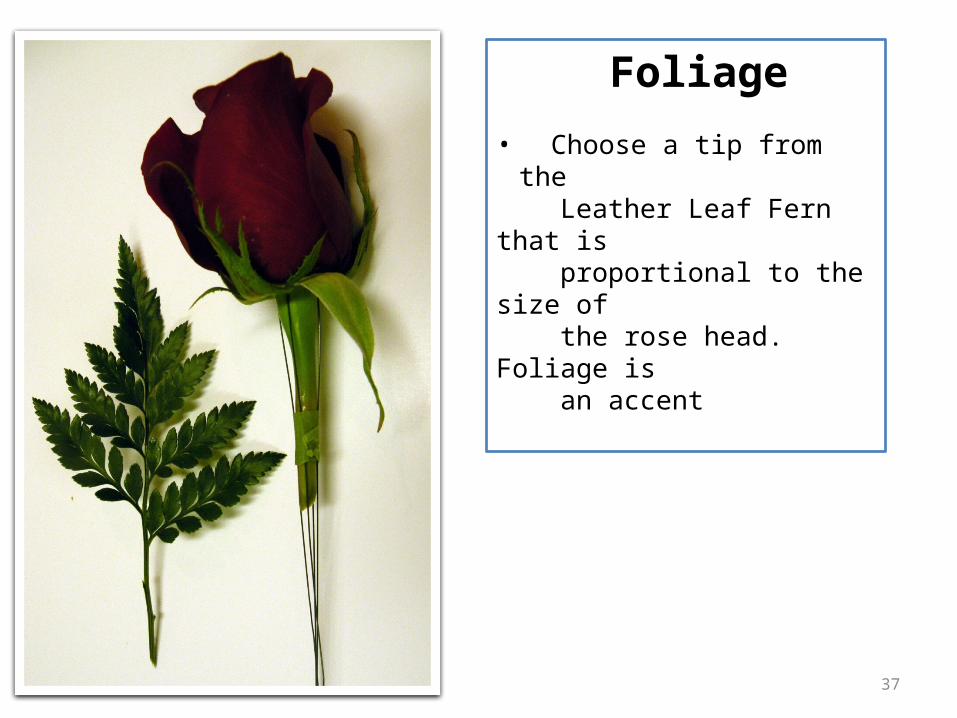
Foliage
• Choose a tip from the Leather Leaf Fern that is proportional to the size of the rose head. Foliage is an accent
38
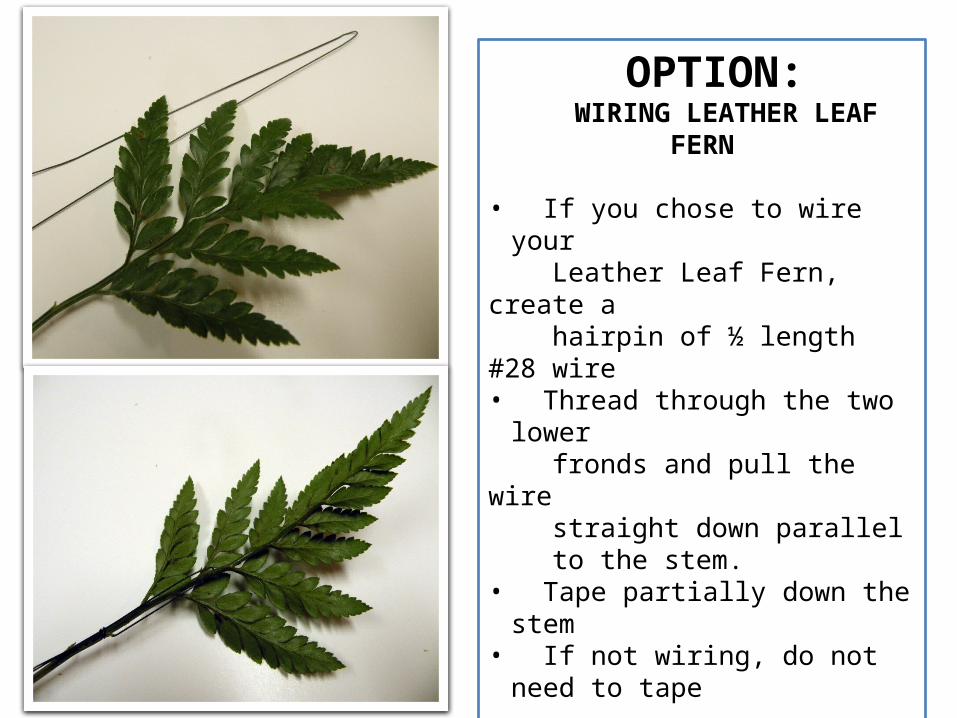
OPTION: WIRING LEATHER LEAF FERN
• If you chose to wire your Leather Leaf Fern, create a hairpin of ½ length #28 wire• Thread through the two lower fronds and pull the wire straight down parallel to the stem.• Tape partially down the stem• If not wiring, do not need to tape
39
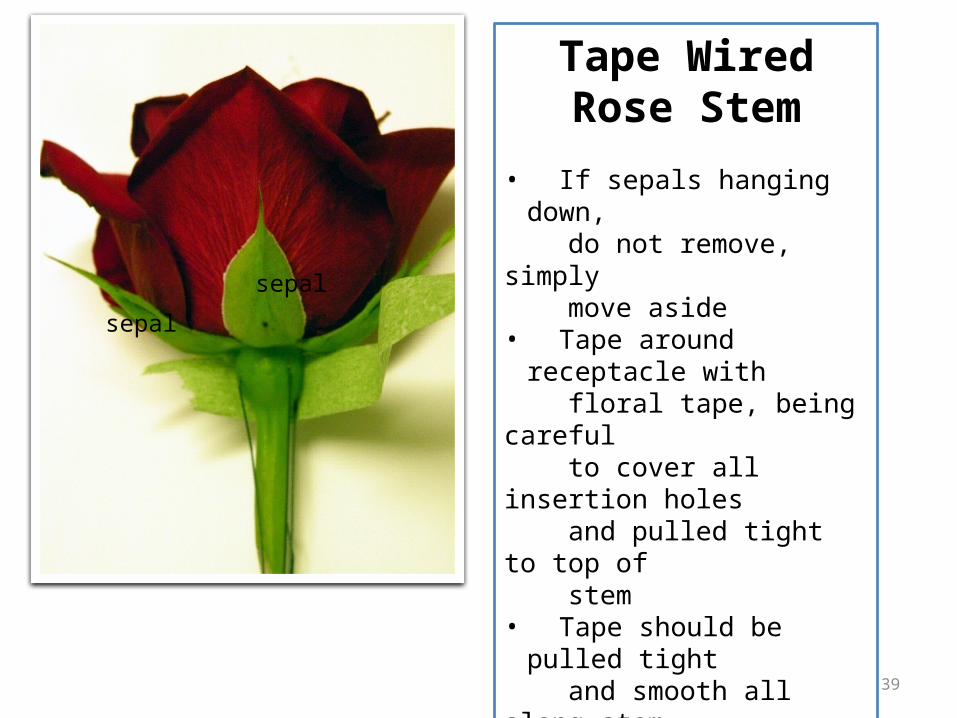
Tape Wired Rose Stem
• If sepals hanging down, do not remove, simply move aside• Tape around receptacle
with floral tape, being careful to cover all insertion holes and pulled tight to top of stem• Tape should be pulled tight and smooth all along stem• No curled (pig tail) stems, please• Be sure there are no barbs or pieces of wire showing along the stem or at the bottom of the stem
sepal
sepal
40
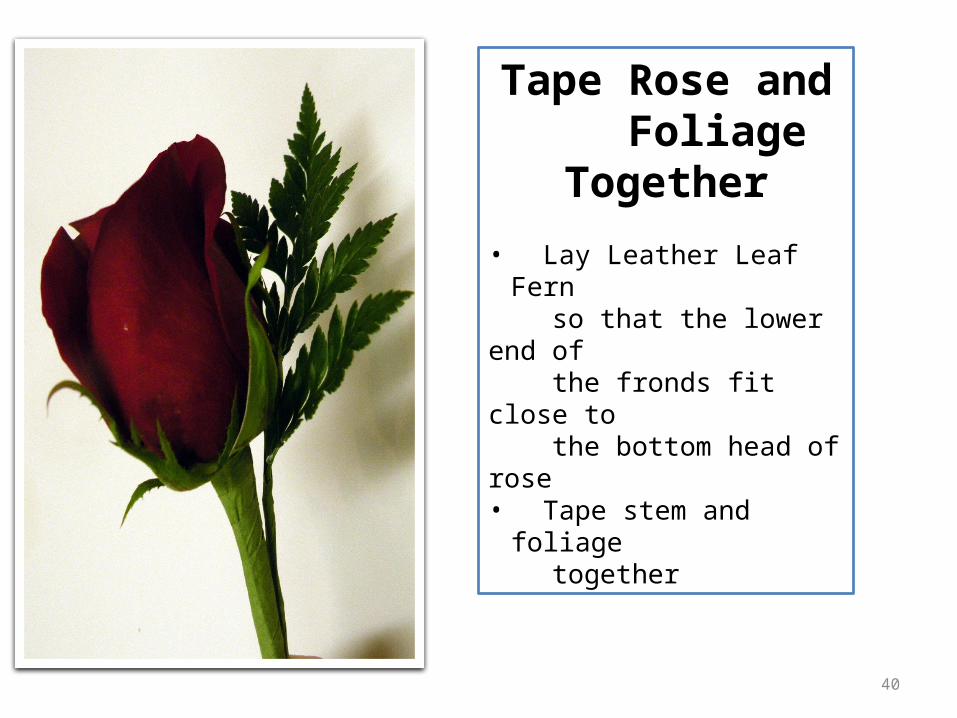
Tape Rose and Foliage Together
• Lay Leather Leaf Fern so that the lower end of the fronds fit close to the bottom head of rose • Tape stem and foliage together
41
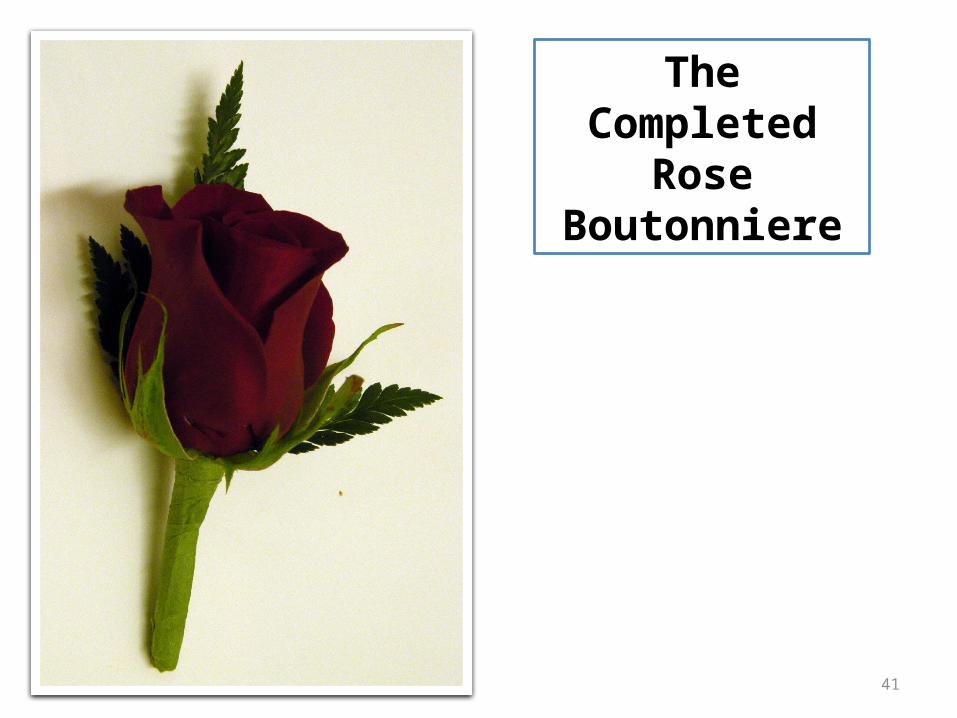
The Completed Rose
Boutonniere
42
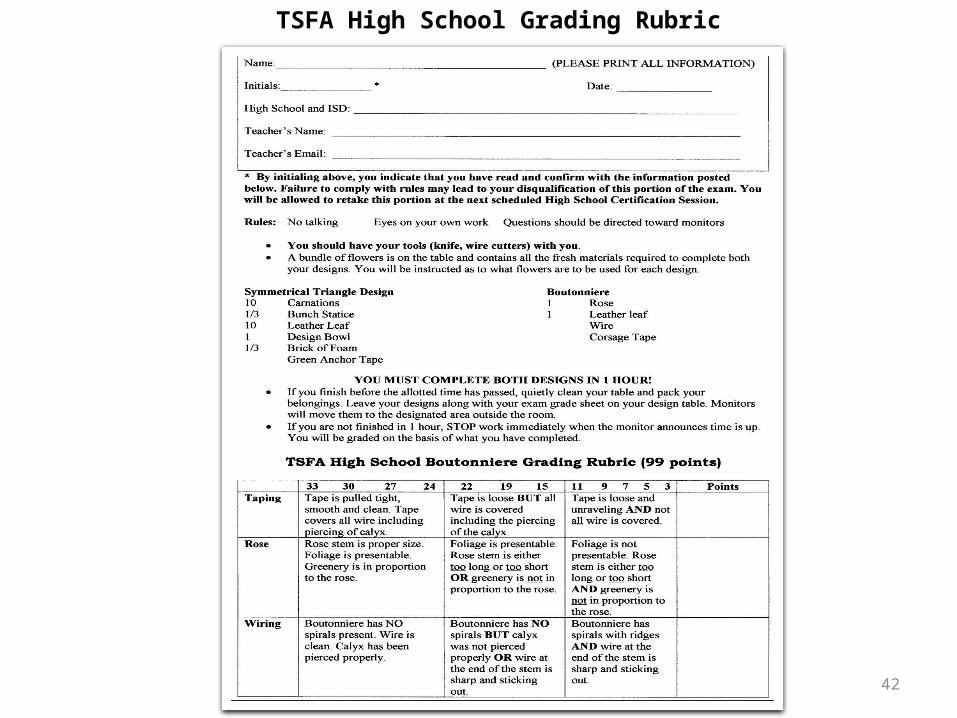
TSFA High School Grading Rubric
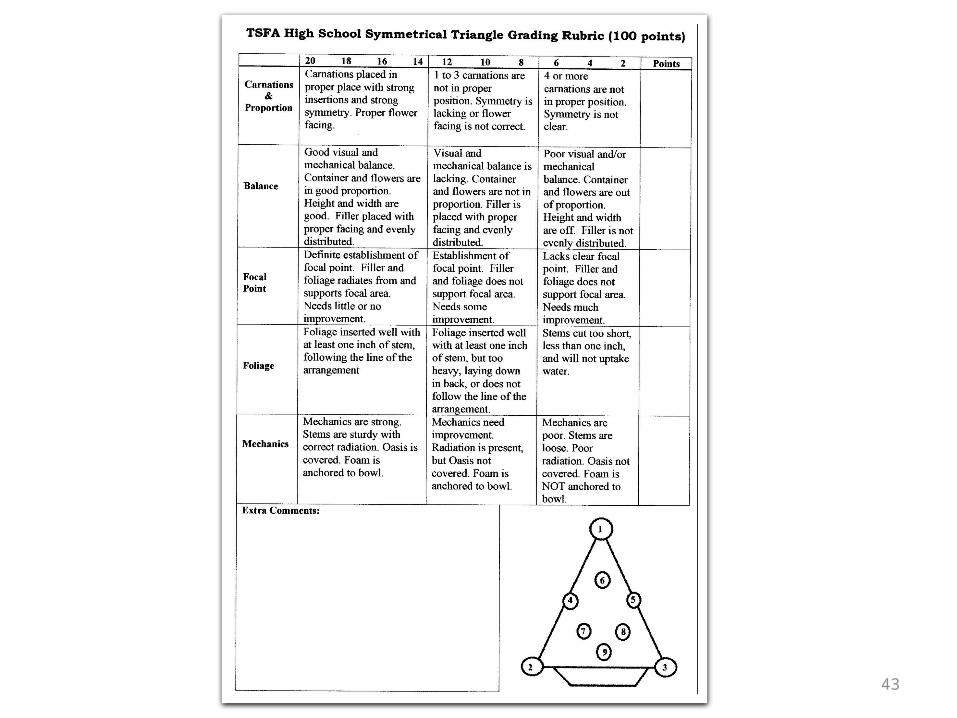
43