peoplesoft fundamentals presentation - lavc
TRANSCRIPT

1
PeopleSoftFundamentals and Overview
Published 7/19/2016

Click to edit Master title style
• Introductions
• Sign the Attendance Sheet
• Follow the Navigation of the Trainer
• Refrain from side conversations
• Check email during breaks only
Welcome

Click to edit Master title style
• Start, Stop and Break times
• Emergency Exits
• Restroom Locations
• Silence all cell phones
• Ask Questions!!
Welcome

Click to edit Master title style
• PeopleSoft Basics
• Introduction to the Staff/Faculty Portal
• Introduction to the Student Portal
• Understanding the 3C’s
• Basic and Reporting
Agenda

Click to edit Master title style
This course is intended for:
• All LACCD Employees
Roles for this Course
Click to edit Master title style
PeopleSoft Basics and Navigation

Click to edit Master title style
PeopleSoft is an integrated software package that provides a wide variety of business applications to assist in the day-to-day execution and operation of business processes.
PeopleSoft Overview

Click to edit Master title style
After completing this course, you will be able to:
1.Logon to PeopleSoft.
2.Terminology within PeopleSoft
3.Navigate PeopleSoft menu pagelet and pages.
4.Use Page components and elements
5.Search for records in PeopleSoft
6.Properly Log out of PeopleSoft.
PeopleSoft Fundamentals Objectives
Click to edit Master title style
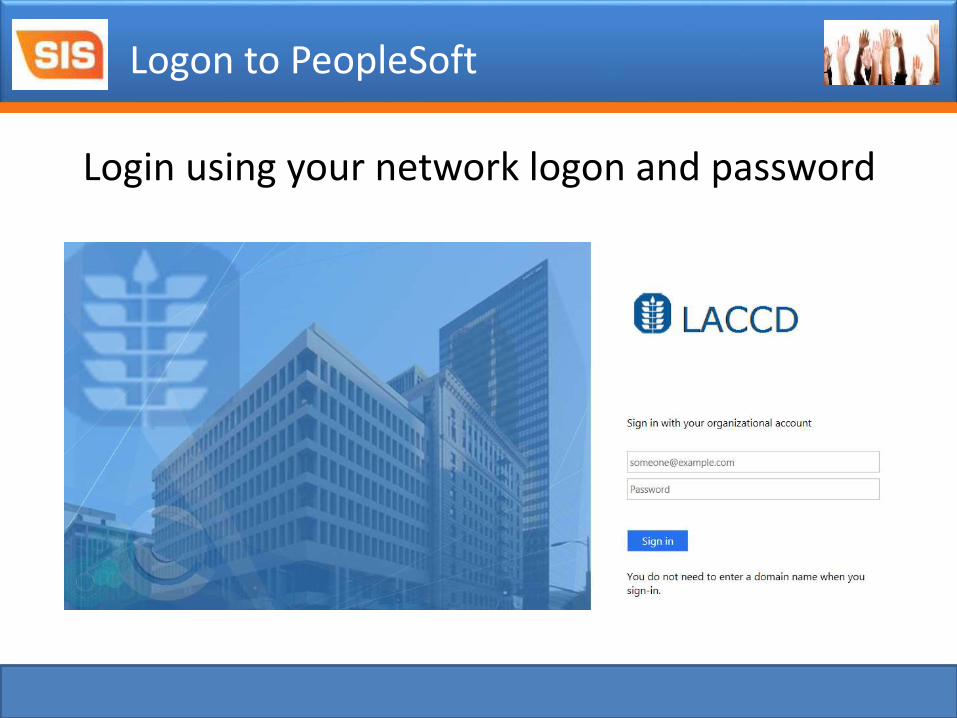
Login using your network logon and password
Logon to PeopleSoft
Click to edit Master title style
Menu Pagelet
(the menu list on the left side of the Home Page)
PeopleSoft uses a menu pagelet to display a menu structure composed of a hierarchy of folders and content references that you can use to navigate to various application pages.
Terminology

Click to edit Master title style
Page
The individual display and data-entry screens for each part of your PeopleSoft application. Pages appear in the browser window.
Terminology

Click to edit Master title style
Keys
The display-only fields that uniquely identify your data. To display a page, enter the keys so that the system can retrieve the correct row of data.
Terminology

Click to edit Master title style
Hover Text
When you hover over a link, button, or other action, you will notice that a hover (pop-up) box will appear describing the purpose of the link.
Terminology
Click to edit Master title style
Links and Hyperlinks
When you click on the link for a level in the menu pagelet to expand it, a component will display on the right of the menu pagelet.
The level displayed as a hyperlink is the lowest level. When you click a hyperlink, a component will display to the right of the menu pagelet.
Terminology

Click to edit Master title style
Components
You click the hyperlink to open a component (i.e. a group of related pages that pertain to a specific task. You access components from the menu. Components contain folder tabs with each tab containing a related page). When opening a component, a Search page is generally displayed first.
Terminology

Click to edit Master title style
Collapse Menu PageletYou can collapse the menu pagelet at any time to display more of the page in the window.
Expand Menu PageletYou can expand the menu pagelet at any time.
Expand Section ButtonWhen you click on the Expand Section (arrow) button for a level in the menu pagelet to expand it, the next level is displayed and highlighted (linear view).
Terminology

Click to edit Master title style
Search Field of Menu Pagelet
You use the Search field to search for a registered content reference within the system. You enter the name of the page you want to find, and press Enter or click the Search button. This action opens the Search page displaying the results.
Terminology

Click to edit Master title style
Navigating the Home Page
Navigate PeopleSoft Menu Pagelet and Pages

Click to edit Master title style
Universal Navigation Header
Displayed at the top of every page, is the Universal Navigation Header. The Header contains the following links: New Window, Help, Email and Log Out.
Navigate PeopleSoft Menu Pagelet and Pages

Click to edit Master title style
In addition to the menu pagelet, PeopleSoft applications include navigation pages, which serve as alternatives to the menu pagelet. There are two types of navigation on the navigation page:
• Breadcrumbs
• Section Folders
Navigate PeopleSoft Menu Pagelet and Pages

Click to edit Master title style
Breadcrumbs appear horizontally across the top of the page providing links back to each previous page the user navigated through to get to the current page.
Navigate PeopleSoft Menu Pagelet and Pages

Click to edit Master title style
Section Folders clicking on a folder to expand it to view additional folders and all of the links on a page.
Navigate PeopleSoft Menu Pagelet and Pages

Click to edit Master title styleUse Page Components and Elements
Action TypesAdd – Add a new row to a table with a new high level
key/primary key
Update/Display – Either data can be updated or displayed with a high level key
Include History – Works the same as the Update/Display but allows the user to review not only the current and future rows, but history rows as well.
Correct History – View, change and insert rows of data regardless of effective date
Save – Stores data in the system that is entered on a page and updates all the pages of the component

Click to edit Master title styleUse Page Components and Elements
Action Types
Previous in List – Displays the data for the previous data row in the users search results
Next in List – Displays the data for the next data row in the users search results
Return to Search – Allows the user to return to their last search results

Click to edit Master title styleUse Page Components and Elements
Action Types
Clear – Clears any information entered into fields on a panel.
New Window – This link can be used to open up a new window. Multiple windows may be open simultaneously allowing a user to multi-task.
Check Box – Small square box that enables or disables an option. Provides and On/Off or Yes/No response.
Click to edit Master title styleUse Page Components and Elements
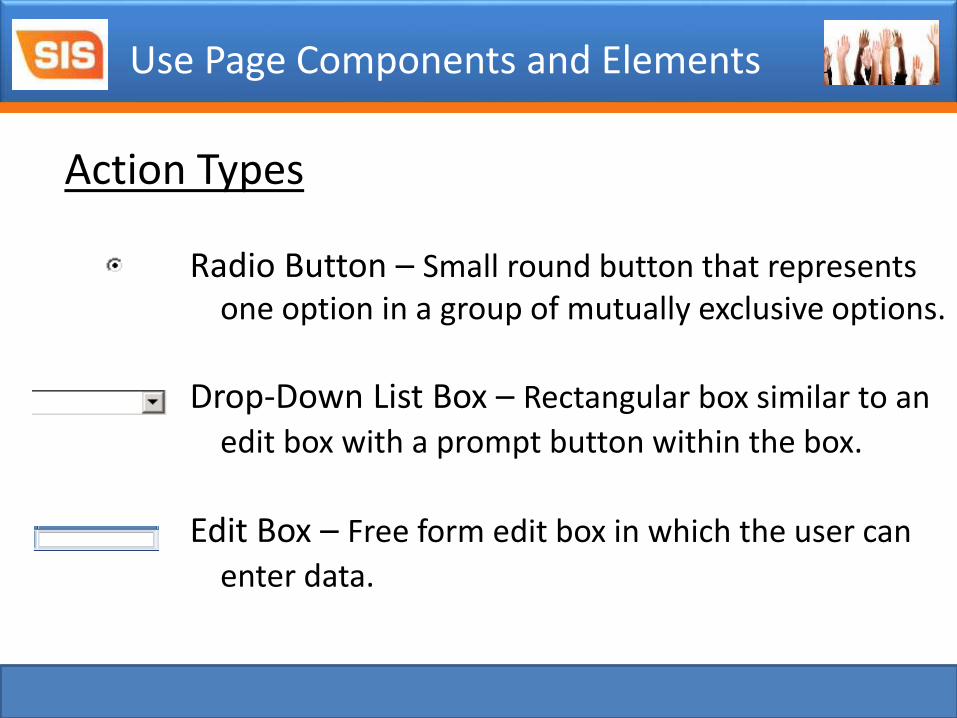
Action Types
Radio Button – Small round button that represents one option in a group of mutually exclusive options.
Drop-Down List Box – Rectangular box similar to an
edit box with a prompt button within the box.
Edit Box – Free form edit box in which the user can
enter data.
Click to edit Master title styleUse Page Components and Elements
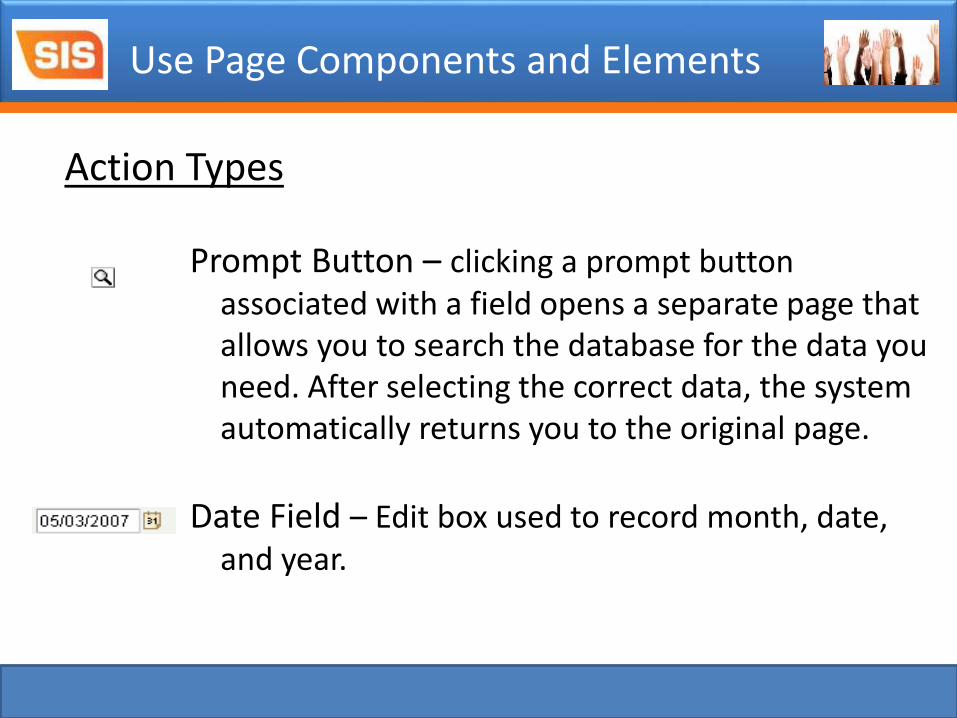
Action Types
Prompt Button – clicking a prompt button associated with a field opens a separate page that allows you to search the database for the data you need. After selecting the correct data, the system automatically returns you to the original page.
Date Field – Edit box used to record month, date, and year.
Click to edit Master title style
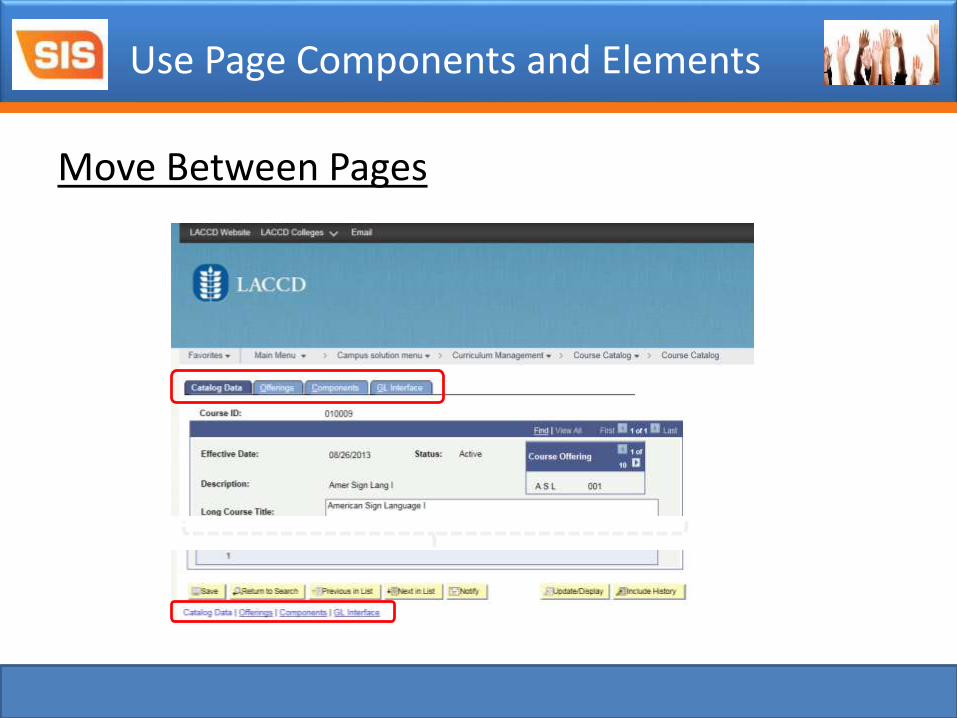
Move Between Pages
Use Page Components and Elements

Click to edit Master title style
Opening a New Window
Use Page Components and Elements

Click to edit Master title styleUse Page Components and Elements
Tips for Using New Window:
There are certain rules of thumb to keep in mind when using the New Window feature:
• Before opening a new window, save any changes made in the current window. If the session times out while you are working in a new window, you may lose any unsaved changes.
• Only use the New Window feature once to open up one additional new window.
• To be safe, it may be better for you to just open another instance of your browser. (e.g. open Internet Explorer another time and log on)

Click to edit Master title styleUse Page Components and Elements

Click to edit Master title style
Search Criteria
For any search field enter:
– Full value
– Partial value
– Wildcards
Search for Records in PeopleSoft
Click to edit Master title style
Search records are a list of defined search keys that help you locate data.
These are the fields you are prompted for on a search page. Every transaction page or component listed in the menu columns has a search record associated with it.
If you select other pages that have a common search record, such as pages within a component or an associated link, you will not be prompted to enter search criteria again.
Search for Records in PeopleSoft

Click to edit Master title style
You can use three different wildcard features to assist in searching for data. These wildcards can be helpful in finding the exact information you want to process. The following are the supported standard wildcard features:
Search for Records in PeopleSoft
Wildcard Function
% (percent sign) Match one or more characters
_ (underscore) Match any single character
\ (back slash) Escape character – “don’t treat the nextcharacter as a wildcard”

Click to edit Master title styleSearch for Records in PeopleSoft
Operator Field Use
begins with Character fields
contains Character fields
= All field types
not= All field types
< All field types
<= All field types
> All field types
>= All field types
between All field types
in All field types
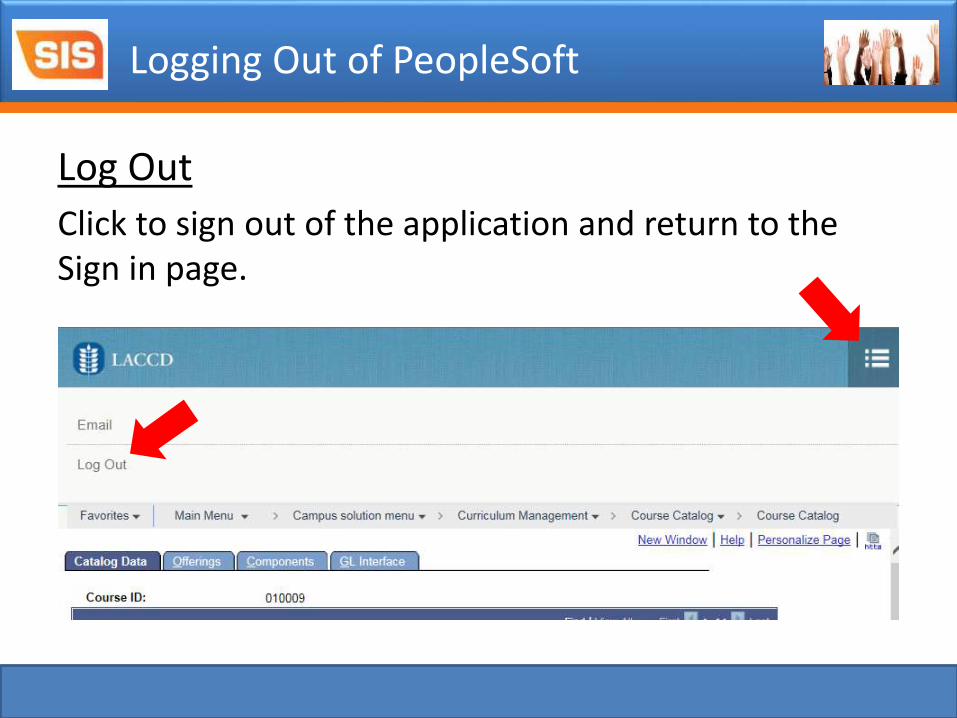
Click to edit Master title styleLogging Out of PeopleSoft
Log Out
Click to sign out of the application and return to the Sign in page.

Click to edit Master title style
In this lesson you have learned:
• How to Logon to PeopleSoft
• Terminology within PeopleSoft
• Navigating PeopleSoft menu pagelet and pages
• Using Page components and elements
• Searching for records in PeopleSoft
• Logging out of PeopleSoft
PeopleSoft Fundamentals Review

Click to edit Master title style
Introduction to the Staff Portal

Click to edit Master title style
After completing this course, you will be able to:
• Understand how to access:
– Email and Online Classrooms
– Menu Items
– Main Page Overview
Course Objectives

Click to edit Master title style
This course is intended for:
• Staff Users
• Faculty Users
Roles for this Course
Click to edit Master title style
EMAIL AND ONLINE CLASSROOMS

Click to edit Master title style
In this lesson you will understand how to access the following through Portal:
• Canvas
• eTudes
Email and Online Classrooms Objectives

Click to edit Master title style
Email and Online Classrooms

Click to edit Master title styleEmail and Online Classrooms

Click to edit Master title style
Online Classrooms
Email and Online Classrooms

Click to edit Master title styleEmail and Online Classrooms

Click to edit Master title styleEmail and Online Classrooms
Click to edit Master title style
• Accessing Email and Online Classrooms
Email and Online Classrooms UPK Practice
Click to edit Master title style
In this lesson you have learned how to access:
• Canvas
• eTudes
Email and Online Classrooms Review
Click to edit Master title style
MENU ITEMS

Click to edit Master title style
In this lesson you will learn how to access:
• Dashboards Menu
• Main Menu
• Faculty Schedule
Menu Items Objectives

Click to edit Master title style
Dashboards Menu
Menu Items
Click to edit Master title style
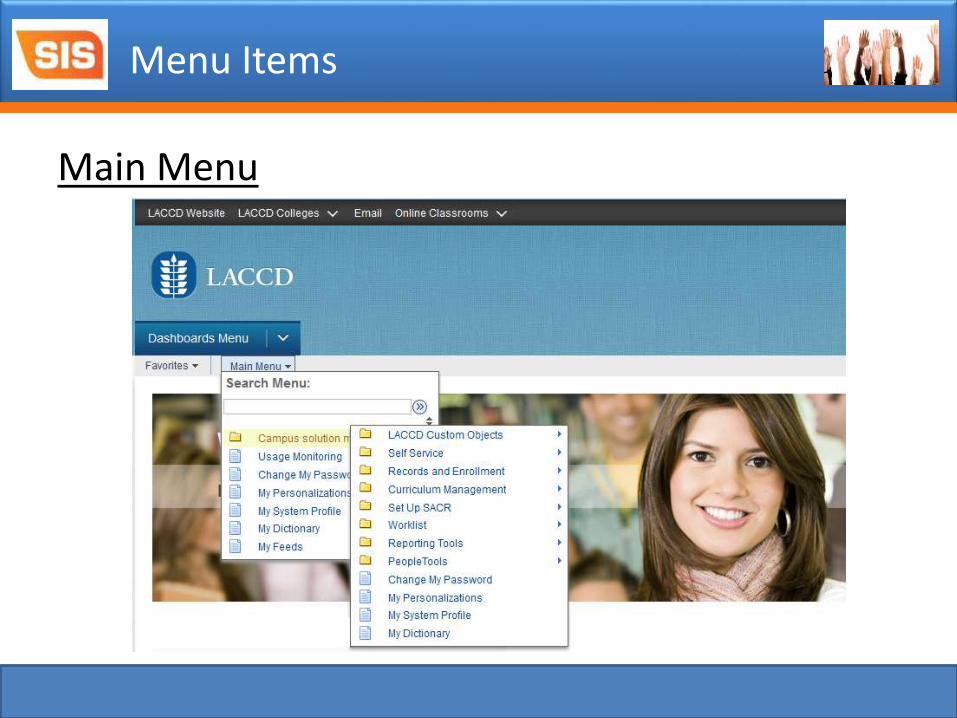
Main Menu
Menu Items

Click to edit Master title style
Faculty Schedule
Menu Items

Click to edit Master title style
In this lesson you have learned how to access:
• Dashboards Menu
• Main Menu
• Faculty Schedule
Menu Items Review

Click to edit Master title style
• Staff Portal – Menu Items
Menu Items UPK Practice

Click to edit Master title style
In this lesson you have learned how to access:
• Dashboards Menu
• Main Menu
• Faculty Schedule
Menu Items Review

Click to edit Master title style
Introduction to the Student Portal

Click to edit Master title style
After completing this course, you will be able to:
• Understand how to access:
– Email and Online Classrooms
– Menu Items
– Main Page Overview
Course Objectives

Click to edit Master title style
This course is intended for:
• Student Users
Roles for this Course

Click to edit Master title style
EMAIL AND ONLINE CLASSROOMS
Click to edit Master title style
In this lesson you will understand how to access the following through Portal:
• Canvas
• eTudes
Email and Online Classrooms Objectives

Click to edit Master title style
Email and Online Classrooms

Click to edit Master title styleEmail and Online Classrooms

Click to edit Master title style
Online Classrooms
Email and Online Classrooms

Click to edit Master title styleEmail and Online Classrooms

Click to edit Master title styleEmail and Online Classrooms

Click to edit Master title style
• Accessing Email and Online Classrooms
Email and Online Classrooms UPK Practice

Click to edit Master title style
In this lesson you have learned how to access:
• Canvas
• eTudes
Email and Online Classrooms Review

Click to edit Master title style
MENU ITEMS

Click to edit Master title style
In this lesson you will learn how to access:
• Dashboards Menu
• Academics Menu
• Finances Menu
• My Profile Menu
• Actions Menu
Menu Items Objectives

Click to edit Master title style
Dashboards Menu
Menu Items
Click to edit Master title style
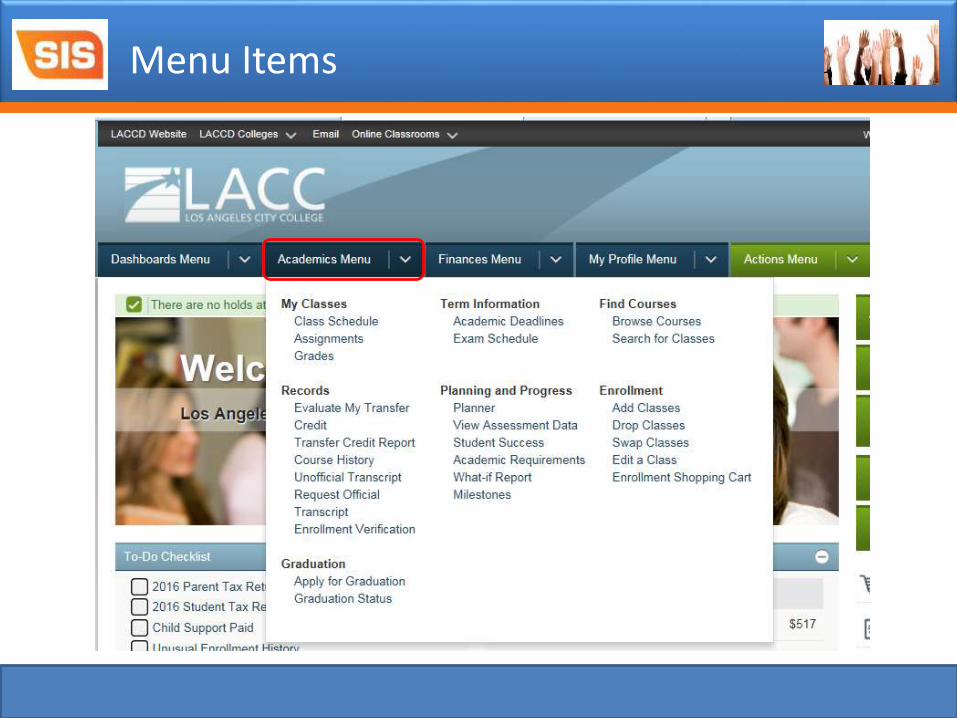
Academics Menu
• My Classes
• Records
• Graduation
• Term Information
• Planning and Progress
• Find Courses
• Enrollment
Menu Items
Click to edit Master title styleMenu Items

Click to edit Master title style
My Classes
Menu Items
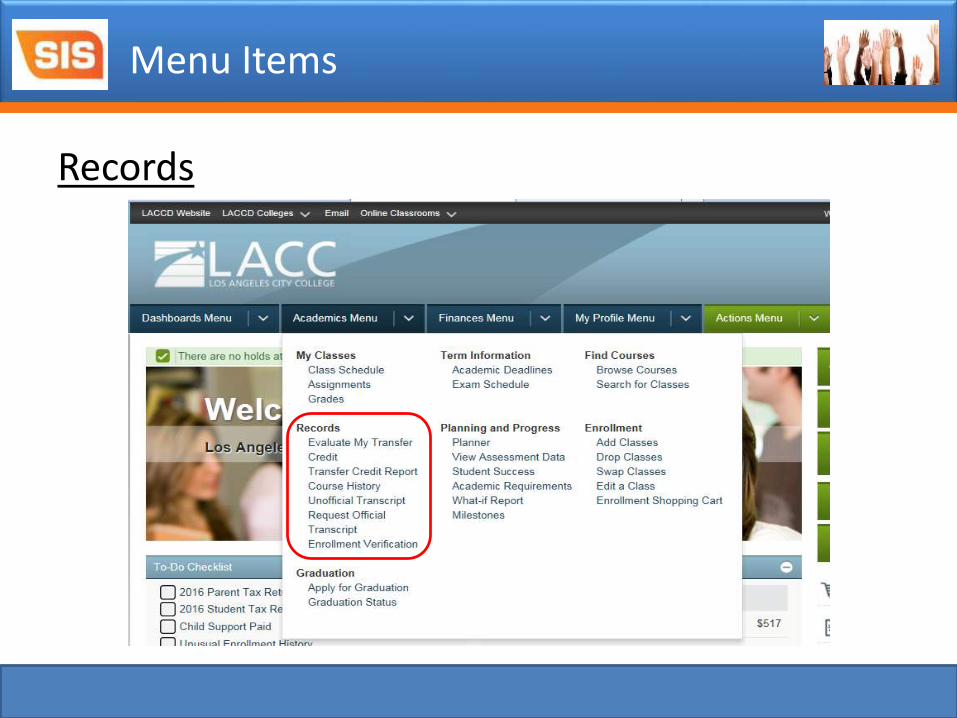
Click to edit Master title style
Records
Menu Items

Click to edit Master title style
Graduation
Menu Items

Click to edit Master title style
Term Information
Menu Items
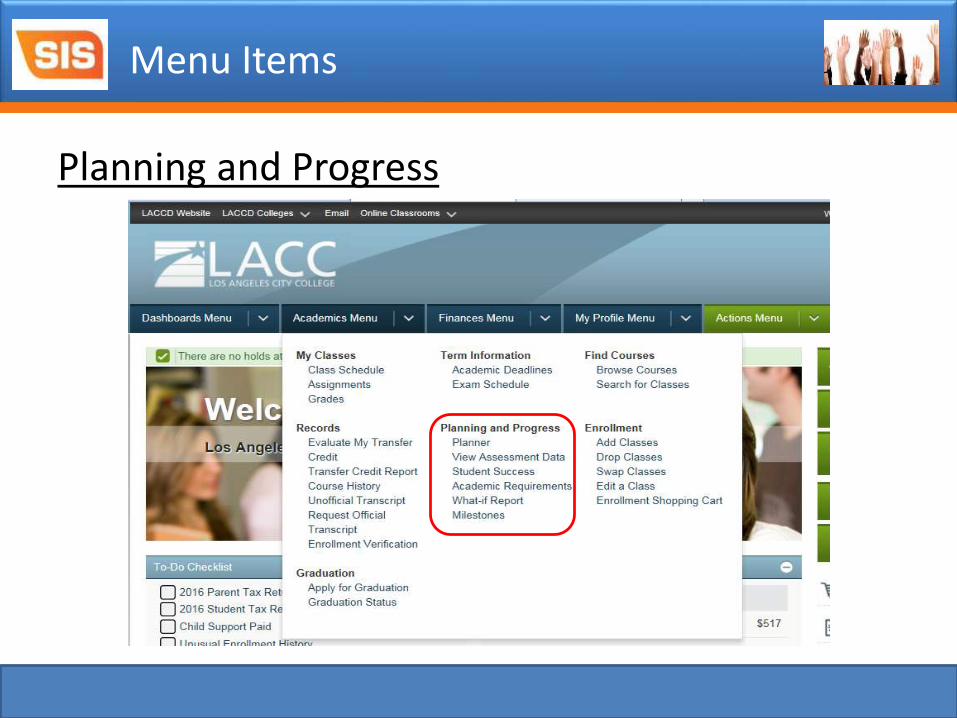
Click to edit Master title style
Planning and Progress
Menu Items

Click to edit Master title style
Find Courses
Menu Items

Click to edit Master title style
Enrollment
Menu Items
Click to edit Master title style
Finances Menu
• My Account
• Electronic Payments
• Financial Aid
• Tax Information
Menu Items

Click to edit Master title style
Finances Menu
Menu Items

Click to edit Master title style
My Account
Menu Items

Click to edit Master title style
Electronic Payment
Menu Items
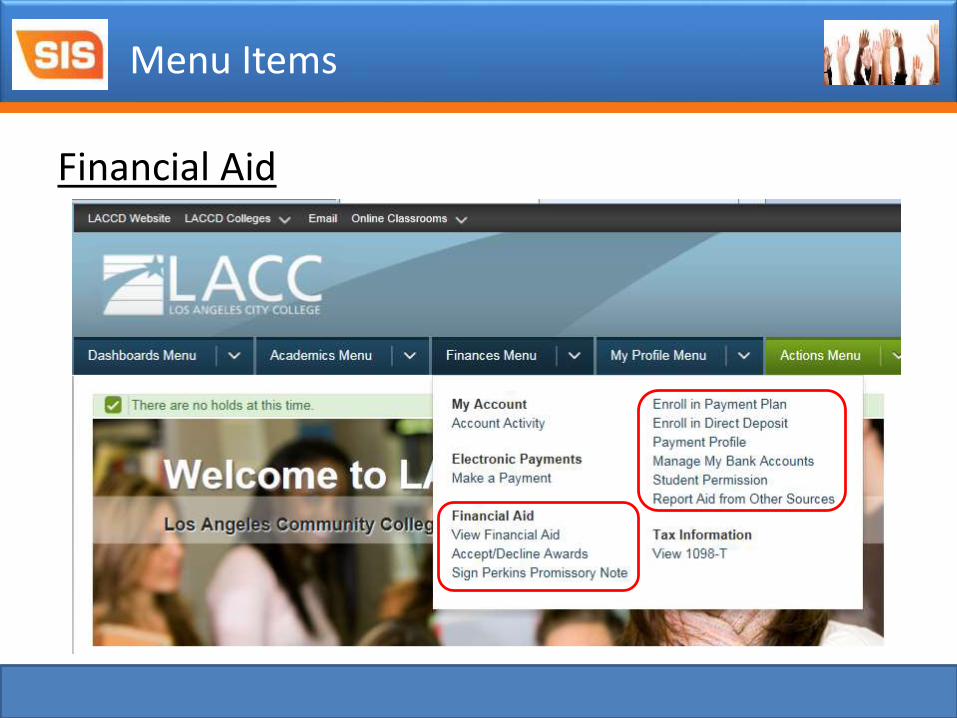
Click to edit Master title style
Financial Aid
Menu Items

Click to edit Master title style
Tax Information
Menu Items

Click to edit Master title style
My Profile Menu
• Personal Information
• Credentials
• Participation
Menu Items

Click to edit Master title style
My Profile Menu
Menu Items
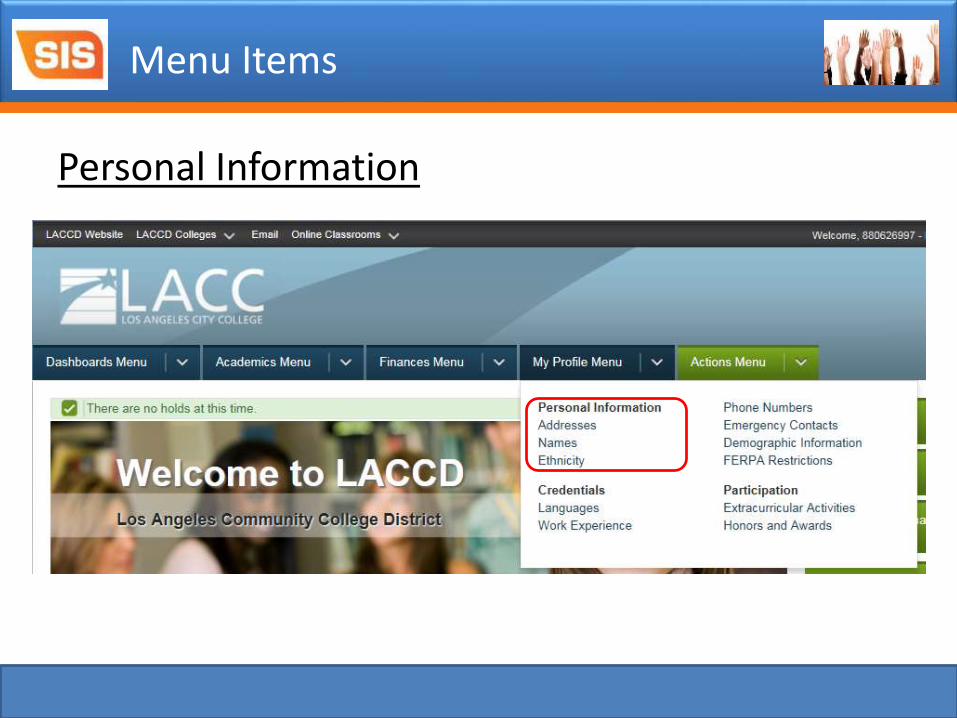
Click to edit Master title style
Personal Information
Menu Items

Click to edit Master title style
Credentials
Menu Items

Click to edit Master title style
Participation
Menu Items

Click to edit Master title style
Actions Menu
Menu Items
Click to edit Master title style
• Student Portal – Menu Items
Menu Items UPK Practice

Click to edit Master title style
In this lesson you have learned how to access:
• Dashboards Menu
• Academics Menu
• Finances Menu
• My Profile Menu
• Actions Menu
Menu Items Review
Click to edit Master title style
MAIN PAGE REVIEW
Click to edit Master title style
In this lesson you will see other pagelets available on the Main Page.
Main Page Review Objectives

Click to edit Master title style
Hold
Main Page Review
Click to edit Master title style
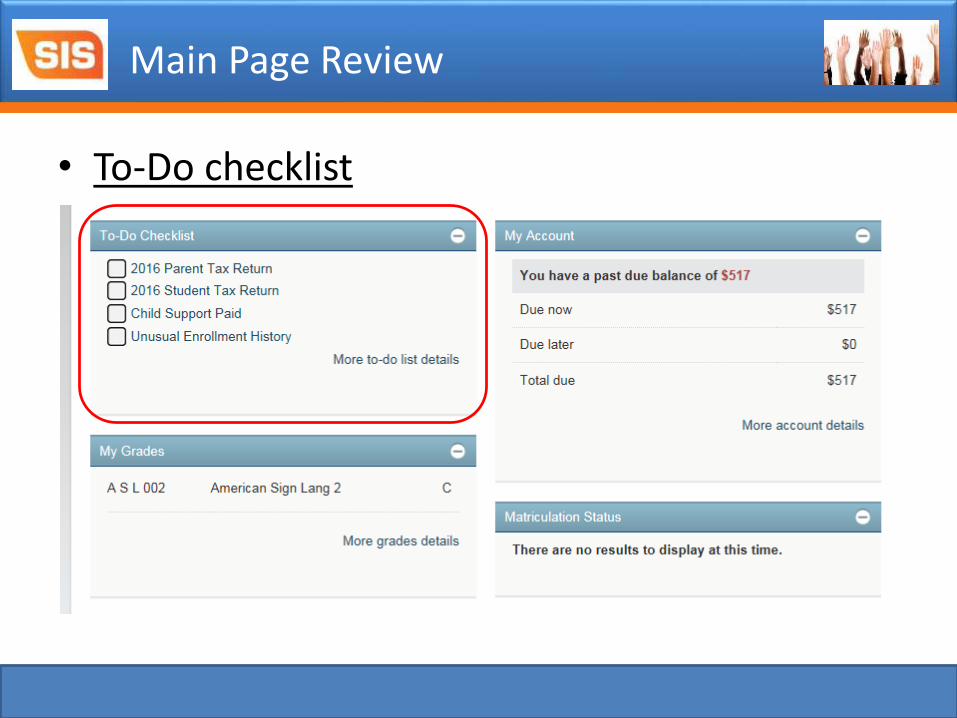
• To-Do checklist
Main Page Review

Click to edit Master title style
• My Grades
Main Page Review

Click to edit Master title style
• My Account
Main Page Review

Click to edit Master title style
• Matriculation Status
Main Page Main Page Review

Click to edit Master title style
• Right-side Menu
Main Page Review UPK Practice

Click to edit Master title style
• Main Page Review_Student Portal
Main Page Review UPK Practice

Click to edit Master title style
In this lesson you have learned the various hyperlinks and the pagelets available on the main page of student portal.
Main Page Overview Review
Click to edit Master title style
Understanding the 3Cs

Click to edit Master title style
After completing this course, you will be able to:
• Understand what the 3Cs are
• Manage:
– Communications
– Checklists
– Comments
Course Objectives

Click to edit Master title style
This course is intended for:
• A&R
• Outreach
• ISSO
Roles for this Course
Click to edit Master title style
The 3Cs (communications, checklists, and comments) are a flexible way to track and analyze correspondence, list of requirements, and notes about the students, staff, constituents, and organizations in PeopleSoft.
Understand the 3Cs

Click to edit Master title style
Communications, checklists, and comments can be entered manually in PeopleSoft or by batch.
You can define events and triggers to have the system add communications, add comments, and add or update checklists for individuals or organizations automatically.
Understand the 3Cs

Click to edit Master title style
The 3C update/inquiry group provides user-level security access to categories of communications, checklists, and comments, while providing or restricting the user’s ability to edit the data.
Understand the 3Cs

Click to edit Master title style
Communications
• The Communications Management page allows you to review or create communications for the individual or organization like letters, phone calls, meetings, email, and in-person contacts.
• All communication for applicants will be generated, stored, and managed within PeopleSoft.
Understand the 3Cs

Click to edit Master title style
Checklists
• The Checklists Management page allows you to review or create checklists for the individual or organization.
• Checklists may be lists of steps that must be performed, or documents that must be provided, or communications that are planned to occur, and so on.
• Students can view their missing checklist items in student portal
Understand the 3Cs

Click to edit Master title style
Comments
– The Comments page allows you to review or enter comments about the individual or organization.
Understand the 3Cs

Click to edit Master title style
MANAGE COMMUNICATIONS

Click to edit Master title style
Communication management enables you to track and analyze all of LACCD’s contacts with students, staff, constituents, and organizations inside and outside the institutions.
Manage Communications

Click to edit Master title style
You can track:
• All incoming and outgoing communications.
• Types of communication (letters, emails, personal contact)
• Communications generated by other offices that affect your office.
• All staff involved with a communication
Manage Communications
Click to edit Master title style
To assign a communication, you will use a speed key that identifies: method, category, context, direction, and letter code for that communication to identify basic information about the communication.
Manage Communications

Click to edit Master title style
You are able to view only those communications that are associated with the communication 3C groups to which you have security access. With 3C group inquiry access, you can view communication assignments, but you cannot change them.
Manage Communications

Click to edit Master title style
Set up codes for the standard letters that LACCD wants to use.
Set up communication
contexts.
Set up communication
categories.
Set up communication 3c
groups.
(Optional) Set up communication
speed keys (Comm keys).
Assign communications to
individuals or organizations.
Review communications
assigned to individuals or organizations.
Generate the communications.
Review the data that was extracted for
each of the IDs processed.
Process to Generate and Manage Communications
Click to edit Master title style
MANAGE CHECKLISTS
Click to edit Master title style
In this lesson you will learn:
• Setting up Checklists
• How to assign checklists to:
– Individuals
– Organizations
– Events
• Review Checklists
• Delete Checklists
Manage Checklists Objectives

Click to edit Master title style
For each checklist item that you assign, you can specify the individual who is responsible for that item and the due date.
If the item is also associated with an organization, you can specify the name of the organization responsible for the item. You can also specify an ultimate due date for the overall checklist.
Manage Checklists
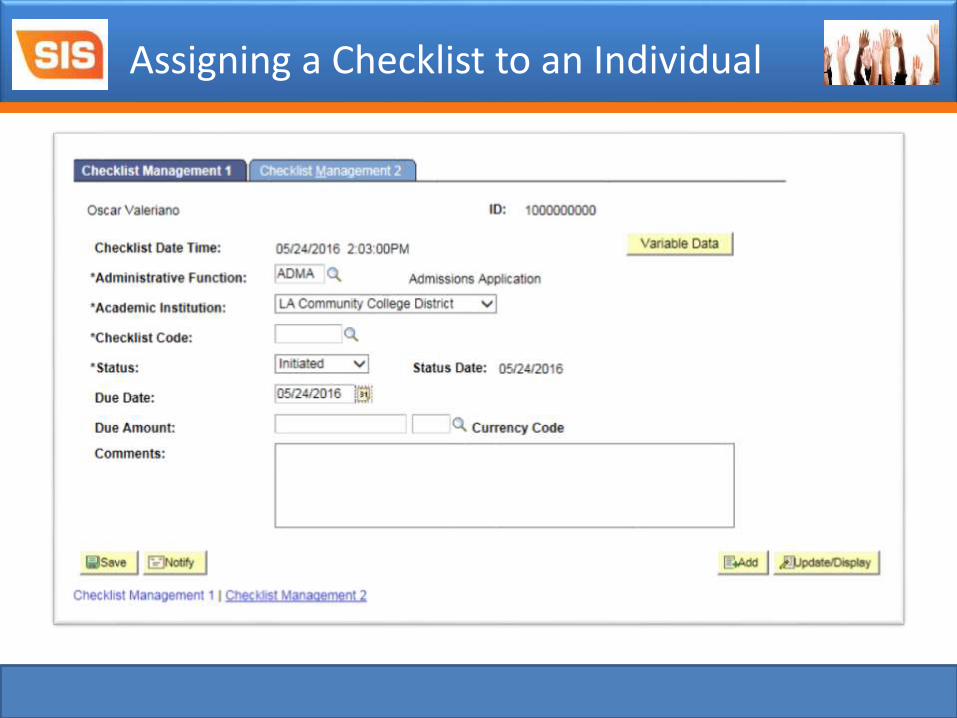
Click to edit Master title styleAssigning a Checklist to an Individual

Click to edit Master title styleAssigning Checklist Items to an Individual’s Checklist

Click to edit Master title styleAssigning a Checklist to Organizations

Click to edit Master title styleAssigning Checklist Items to an Organization Checklist
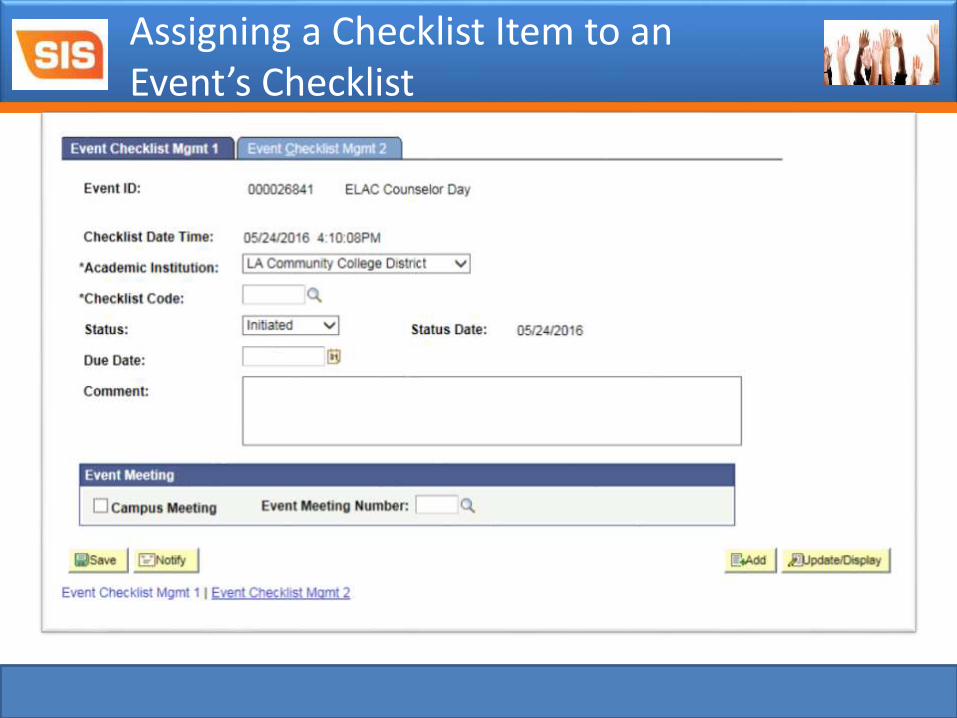
Click to edit Master title styleAssigning a Checklist Item to an Event’s Checklist

Click to edit Master title styleAssigning Checklist Items to an Event

Click to edit Master title styleDelete Checklists

Click to edit Master title style
MANAGE COMMENTS
Click to edit Master title style
In this lesson you will be able to:
• Setting Up Comments
• Enter comments
– About an individual
– About an organization
• Review comments
• Delete comments
Manage Comments Objectives

Click to edit Master title styleManage Comments Overview
You can enter and track comments about individuals and organizations. You can review all comments about an individual or organization or all comments entered by a specific individual.

Click to edit Master title styleManage Comments Overview
Because comments are subjective and often confidential, carefully analyze LACCD's needs and requirements for entering and tracking comments.
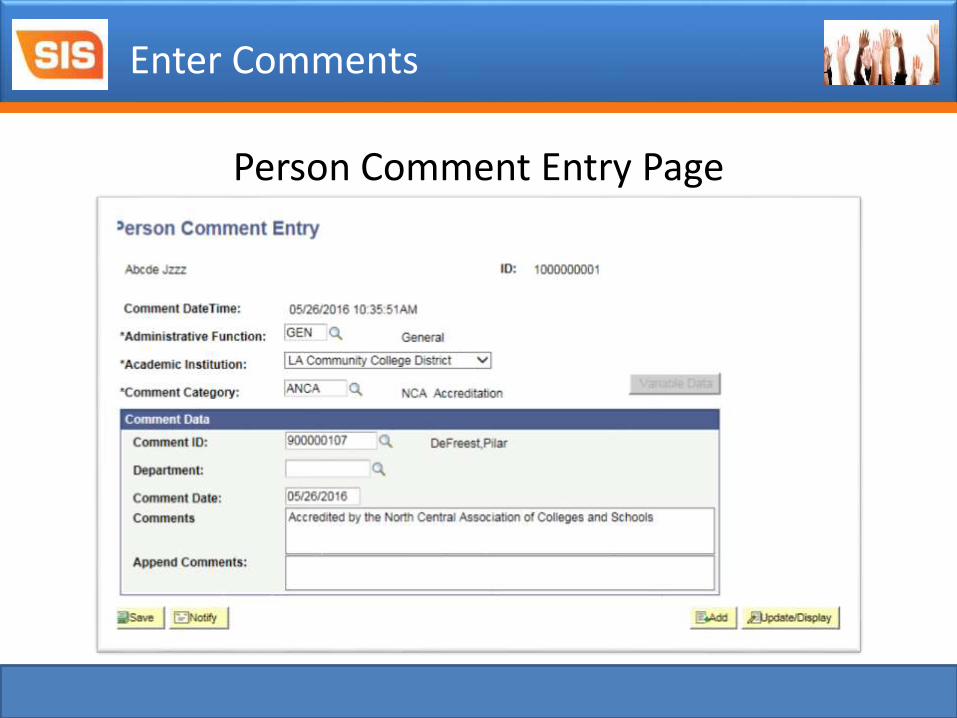
Click to edit Master title styleEnter Comments
Person Comment Entry Page

Click to edit Master title styleEnter Comments
Organization Comment Entry Page

Click to edit Master title styleEnter Comments
Variable Data Page

Click to edit Master title style
Navigation Usage
• Campus Community > Comments > Comments - Person > Person Comments Summary
Define processing parameters to run the Delete Comments process.
Delete Comments

Click to edit Master title styleDelete Comments

Click to edit Master title style
• Adding an Admission Comment
• Viewing 3Cs and Event Summaries
Manage Comments UPK Practice

Click to edit Master title style
• Adding an Admission Comment
• Viewing 3Cs and Event Summaries
Manage Comments Training Exercise
Click to edit Master title style
In this lesson you have learned:
• How to set up comments
• Entering comments
• Deleting comments
Manage Comments Review
Click to edit Master title style
In today’s class you have learned:
• PeopleSoft Basics
• Introduction to the Staff/Faculty Portal
• Introduction to the Student Portal
• Understanding the 3C’s
• Basic and Reporting
Class Completion

Click to edit Master title style
Basic Queries and Reporting

Click to edit Master title style
QUERIES AND REPORTINGQUERIES

Click to edit Master title style
Type of Query
Public:
All query users can run Public queries, but only the SIS Business Analyst team and SIS Developers can create, edit, and save public queries.
Queries

Click to edit Master title style
• Always output to an html version or Excel.
• Users should use the .CSV format to save the query output to their desktop.
• The data will automatically parse the data into the worksheet.
Queries

Click to edit Master title style
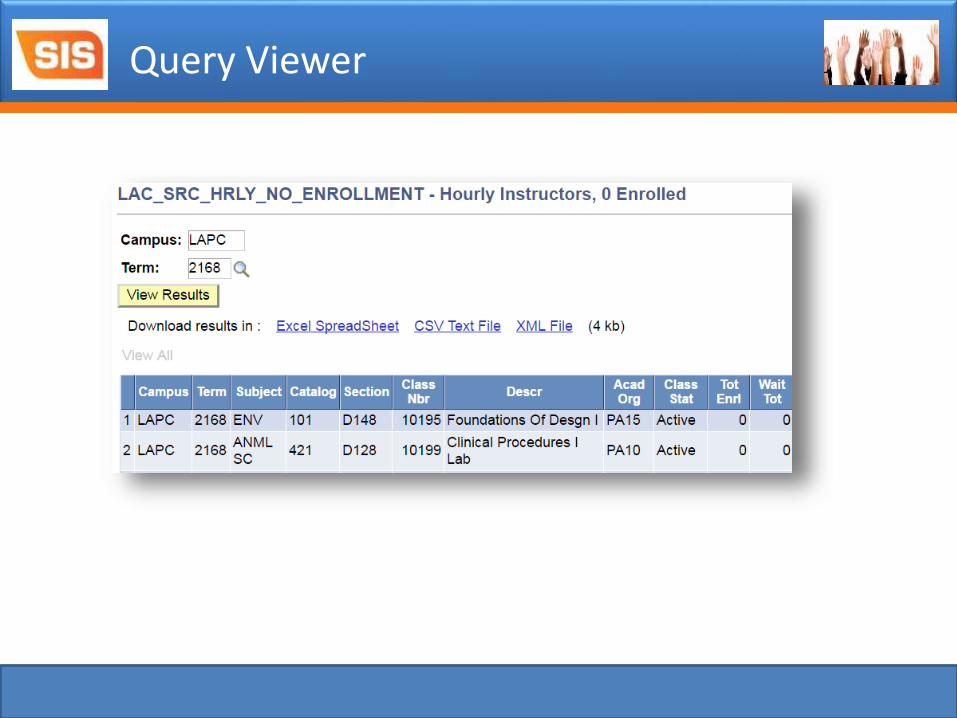
Accessing the Query Viewer
Run a Query to Excel:
• You can run a predefined query from your browser and view it online using Query Viewer.
Queries

Click to edit Master title styleQuery Viewer
Click to edit Master title styleQuery Viewer

Click to edit Master title style
REPORTS
Click to edit Master title style
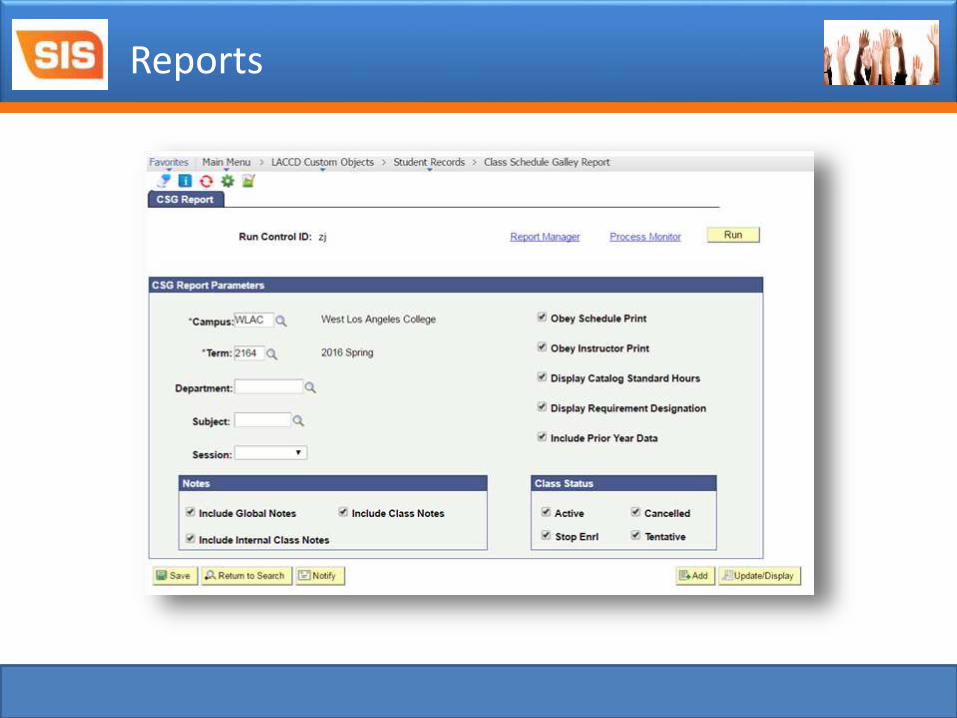
Run Control
• A run control is a database record that provides values for these settings.
• Instead of entering the same values each time you run a report, you create (and save) a run control with those settings.
• The next time you run the report, you select the run control, and the system fills in the settings.
Reports

Click to edit Master title style
Run Control
• A run control is created in “Add” mode and is saved when either the save button is pressed or when the selected report runs successfully.
• Once you create a run control ID you should always use the same one OR you can multiple Run IDs if you are running the same report with different criteria.
Reports

Click to edit Master title style
• Report output:
– .pdf – file format that has captured all the elements of a printed document as an electronic image that does not require a specific software to be viewed, navigated, printed, or forwarded
– .xls – an Excel file
– .rtf – a “rich text file” has no formatting applied to the document
Reports
Click to edit Master title styleReports

Click to edit Master title style
QUERY REPORTS

Click to edit Master title style
For every query report, you also have the option to run the query through query viewer (if you want to download the raw data).
Every query report will look different.
Query Reports

Click to edit Master title styleQuery Reports

Click to edit Master title styleQuery Reports
Click to edit Master title style
WRAP-UP

Click to edit Master title styleTraining Materials
Training materials can be found online at:
www.laccd.edu/sismodernization
These materials can be downloaded for your
use. All training materials will have a
published date to ensure you have the most
recent materials.

Click to edit Master title styleEPTRG – Portal
Please feel free to go in to the Portal Training environment to
“play” around when you are back in the office to keep fresh.
https://eptrng.laccd.edu:8001/psp/eptrg/?cmd=login
Please use the login you used during your training session.
Username: TRG_STAFF#
Password: TRG_STAFF#
Note: please understand that users IDs are being used by many different
people. If you find that you are “kicked out” of the environment, it means that
someone else has logged in with the same ID.
Click to edit Master title style
For additional help, please contact your college Training Mentor.
Q&A

Click to edit Master title style
Thank You!