lesson by lesson guide - pbworks by lesson guide air and weather ... takes up space and has mass....
TRANSCRIPT

Air and Weather Page 1
Lesson By Lesson Guide
Air and Weather
(FOSS)

Air and Weather Page 2
Table of Contents NC Essential Standards and Clarifying Objectives ........................................................................ 3
Essential Questions for the Unit ..................................................................................................... 4
Unit Pre-Assessment ....................................................................................................................... 4
Unit Preparations ............................................................................................................................ 4
Lesson 1 .......................................................................................................................................... 5
Investigation 1, Part 1: Air is There ............................................................................................... 5
Lesson 2 .......................................................................................................................................... 7
Investigation 1, Part 2: Air Under Water ....................................................................................... 7
Lesson 3 .......................................................................................................................................... 9
Investigation 1, Part 3: Parachutes ................................................................................................. 9
Lesson 4 ........................................................................................................................................ 11
Investigation 1, Part 4: Pushing on Air ........................................................................................ 11
Lesson 5 ........................................................................................................................................ 13
Investigation 1, Part 5: Air and Water Fountain .......................................................................... 13
Lesson 6 ........................................................................................................................................ 15
Investigation 1, Part 6: Balloon Rockets...................................................................................... 15
Lesson 7 ........................................................................................................................................ 17
Investigation 2, Part 1: Weather Calendars.................................................................................. 17
Lesson 8 ........................................................................................................................................ 19
Investigation 2, Part 2: Measuring Temperature.......................................................................... 19
Lesson 9 ........................................................................................................................................ 21
Investigation 2, Part 3: Watching Clouds .................................................................................... 21
Lesson 10 ...................................................................................................................................... 23
Investigation 2, Part 4: Measuring Rain ...................................................................................... 23
Lesson 11 ...................................................................................................................................... 25
Investigation 3, Part 1: Bubbles in the Wind ............................................................................... 25
Lesson 12 ...................................................................................................................................... 27
Investigation 3, Part 2: Wind Speed ............................................................................................ 27
Lesson 13 ...................................................................................................................................... 29
Investigation 3, Part 3: Pinwheels ................................................................................................ 29
Lesson 14 ...................................................................................................................................... 31
Investigation 3, Part 4: Wind Vanes ............................................................................................ 31
Lesson 15 ...................................................................................................................................... 33
Investigation 3, Part 5: Kites ........................................................................................................ 33
Lesson 16 ...................................................................................................................................... 35
Investigation 4, Part 1 – Weather Graphs ..................................................................................... 35
Lesson 17 ...................................................................................................................................... 36
Investigation 4, Part 2 – Comparing the Seasons ......................................................................... 36
Lesson 18 ...................................................................................................................................... 38
Investigation 4, Part 3 – The Night Sky ........................................................................................ 38

Air and Weather Page 3
NC Essential Standards and Clarifying Objectives
2.E.1 Understand patterns of weather and factors that affect weather.
2.E.1.1 Summarize how energy from the sun serves as a source of light that warms the land, air,
and water.
2.E.1.2 Summarize weather conditions using qualitative and quantitative measures to describe:
Temperature
Wind direction
Wind speed
Precipitation
2.E.1.3 Compare weather patterns that occur over time and relate observable patterns to time of
day and time of year.
2.E.1.4 Recognize the tools scientists use for observing, recording, and predicting weather
changes from day to day and during the seasons.
3.P.2 Understand the structure and properties of matter before and after they undergo a
change.*
3.P.2.1 Recognize that air is a substance that surrounds us, takes up space and has mass.
3.P.2.2 Compare solids, liquids, and gases based on their basic properties.
1.E.1 Recognize the features and patterns of the earth/moon/sun system as observed from
Earth.**
1.E.1.1 Recognize differences in the features of the day and night sky and apparent movement of
objects across the sky as observed from Earth.
1.E.1.2 Recognize patterns of observable changes in the Moon’s appearance from day to day.
*This 3rd
grade Essential Standard and related Clarifying Objectives are covered in the 2nd
grade
unit Air & Weather. The 3rd
grade Essential Standard and Clarifying Objective 3.P.2.2 are shared
with the 2nd
grade unit Solids and Liquids, where students study properties of solids and liquids.
Investigation 1 of the Air & Weather unit addresses the properties of air, a mixture of gases.
**This 1st grade Essential Standard and related Clarifying Objectives are covered in the 2
nd
grade unit Air & Weather. Investigation 4 of the Air & Weather unit addresses features of the day
and night sky as students observe weather as well as observable changes in the Moon’s
appearance. The emphasis in 2nd
grade is to notice that the Moon’s appearance changes in a
predictable pattern that repeats about every 4 weeks. The phases of the Moon and what causes
them will be addressed in the 3rd
grade unit Objects in the Sky.

Air and Weather Page 4
Essential Questions for the Unit
What is air? What are the properties of air? How does air relate to weather? How do we gather information about weather? What are some patterns of seasonal weather? What changes can we observe in the appearance of the Moon?
Unit Pre-Assessment
A formative assessment probe called “Thermometer” is available on page 33 of Uncovering
Student Ideas in Science Volume 3 (Orange Cover), by Page Keeley et al. This probe can be
demonstrated for students using a red alcohol thermometer. You might consider administering
the probe at the beginning of Lesson 8 (Investigation 2, part 2 – Measuring Temperature).
One of the Essential Questions can be posed to students throughout the unit. Students can share
what they know in a 5 minute discussion while the teacher creates a class KWL chart to record
what children may know about the question:
Investigation 1 (Lessons 1- 6): What is air? What are the properties of air?
Investigation 2 (Lessons 7-10): How do we gather information about weather?
Investigation 3 (Lessons 11-15): How does air relate to weather?
Investigation 4 (Lessons 16-18): What are some patterns of seasonal weather? or What changes
can we observe in the appearance of the Moon?
Unit Preparations Notes about Lesson 7 – Weather calendars are introduced to students and standards for
recording weather observations are established. For example, the picture of a sun would indicate
a sunny day. Recording weather observations is recommended year round.
Notes about Lesson 16 – It is recommended to analyze the weather observations collected at the
end of each month. Help students notice patterns such as more sunny days than cloudy days or
less precipitation this month than last month.
Notes about Lesson 17 – This lesson makes comparisons between the seasons of the year. The
Teacher Guide recommends recording weather observations particularly during the months of
July (if Year Round), October, January, and April in order to make comparisons and
generalizations about the seasons. This data collection may already be happening throughout the
year as recommended in Lesson 7.
Notes about Lesson 18 – The Teacher Guide recommends beginning observations of the Moon
when it is in its Third Quarter phase because it will be visible in the sky from the morning
through the early afternoon. Check online resources or the newspaper to know the current Moon
phase. As some students may not be able to observe the Moon at night, consider using an online
resource to confirm the Moon’s appearance the following day in class, including weekends.
Consider having students conduct Moon observations 3 or 4 months of the year in order to see an
emerging pattern in the phases of the Moon. Remember, 2nd
graders are not required to name the
Moon phases but rather notice that the pattern repeats approximately every four weeks.

Air and Weather Page 5
Lesson 1
Investigation 1, Part 1: Air is There Students work with a set of objects to see how objects can be moved by and through air.
Air is something real and is called matter.
Air takes up space.
Air interacts with objects. Cut flexible straws in half so each student will get one half with a flexible end. Save the other
halves for later. Prepare an air bag for each student by placing these items in a zip-bag: feather,
plastic foam ball, flexible straw half, scratch paper, cotton ball, and a round balloon.
Clarifying Objectives 3.P.2.1 Recognize that air is a substance that surrounds us, takes up space and has mass.
3.P.2.2 Compare solids, liquids, and gases based on their basic properties.
Focus Question How does air interact with objects?
Activity Guiding Questions
To begin the investigation, introduce
the air bags. Go over each object in the
bag and have children identify them.
Once the bag is empty, ask if there is
anything else in the bag. Tell children
that they will get a bag and use it to
explore and find out what they can
about air.
Review the ground rules. Remind
children not to blow on neighbors or
release filled balloons in the
classroom. Tell children not to tie the
balloon shut; they will need to reuse it.
Distribute air bags to children.
Monitor children as they explore.
Encourage them to describe what they
are doing and to try different things.
(Many children will spend the entire
time blowing up the balloon and not
attempt other activities. You may
choose to hold the balloons back until
the children have had time to explore
the other objects.)
Collect non-consumable items and have
children put other items in their bag to
take home. (Make sure they write their
How can you tell when air is in a bag or
another container?
What did you find out about air?

Air and Weather Page 6
name on the paper in the bag.)
Give children paper to draw pictures
showing what they now know about air
and have them write a sentence or two
to describe their drawing.
Gather students together and give them
time to describe what they experienced
with their materials. (If you have
already done the Changes Unit you can
have the students discuss the other
types of matter.)
Begin a word bank and a content chart
to wrap up this lesson. (These will
grow as the unit continues).
Make sure to include any unanswered
questions on your content chart.
Ask students what questions they have
now about air.
Science Content Words Allow children to come up with words that they want to use in their word bank about the study
of air. Make sure to include the following if they do not think of them.
• air • matter • gas • invisible
Integration Hints Have children sort a set of common objects into categories such as: can/cannot be moved easily
by air, uses air/or does not use air to function, or makes/does not make air move.
Science Notebook Helper Have children draw and write about the object they enjoyed using the most. Then have them
pick an object that they think would be interesting to use for this experiment and predict what
they think would happen.
Assessment Opportunities Use the drawing created during the activity as your assessment.

Air and Weather Page 7
Lesson 2
Investigation 1, Part 2: Air Under Water Students use vials, paper towels, and basins to explore the idea that air takes up space.
Air is matter.
Air takes up space.
Air can be captured. This activity is planned in the manual for four groups of four students. If you would like to have
the entire class participate at one time, you will need to gather more basins so that children can
have no more than 4 in a group.
Clarifying Objectives 3.P.2.1 Recognize that air is a substance that surrounds us, takes up space and has mass.
3.P.2.2 Compare solids, liquids, and gases based on their basic properties.
Focus Question How can I keep a paper towel dry under water?
Activity Guiding Questions
Divide students into groups. If you are
not having all children work on this
simultaneously, you will want to have
alternate activities for those students
waiting their turns.
Allow children to explore air using
vials and water for 5-8 minutes. Add
foam balls to their materials after a few
minutes of exploration.
If students don’t think of bubbles, guide
them to explore with vials placed
upside down in water.
Have students remove materials from
the water and discuss their findings.
Have children dry their vials and
challenge them to keep a dry piece of
paper towel in the bottom of the vial
dry while submerging the vial in water.
Many children will need more than one
dry paper towel as they explore.
Discuss their observations.
Ask students what questions they now
have about air under water.
What is air? Is there air in the vial?
How do you know?
If you push the vial straight down into
the water, is the air still in the vial?
How do you know?
How did it feel when you pushed the
vial into the water upside down?
Where do the bubbles come from?
Can you submerge your vial and still
keep the paper towel dry?
What did you do to keep the paper
towel dry? Why do you think that
worked?

Air and Weather Page 8
Science Content Words Allow children to come up with words that they want to use in their word bank about the study
of air. Make sure to include the following if they do not think of them.
• vial • bubble • water • paper towel • submerge
Integration Hints Have children make a list of common objects that obviously contain air. Have them explain how
they know that there is air in these objects. Sort the lists by items that you put air into such as
tires and items that air rests in such as empty cups.
Science Notebook Helper Use Air and Weather Journals. On pages 2 and 3, have the students draw X’s on each picture to
show where there is air. Below the pictures have them write a few words or a sentence to tell
something about air, related to the investigation. Students indicate where the air is when vials
are pushed underwater.
Assessment Opportunities The notebook activity is a good assessment tool. Also, observe children during exploration with
towel and see what strategies children use to accomplish this task. Some will have knowledge of
appropriate strategies and others will not. This can show you level 4 thinking by some students.
Air and Weather Page 9
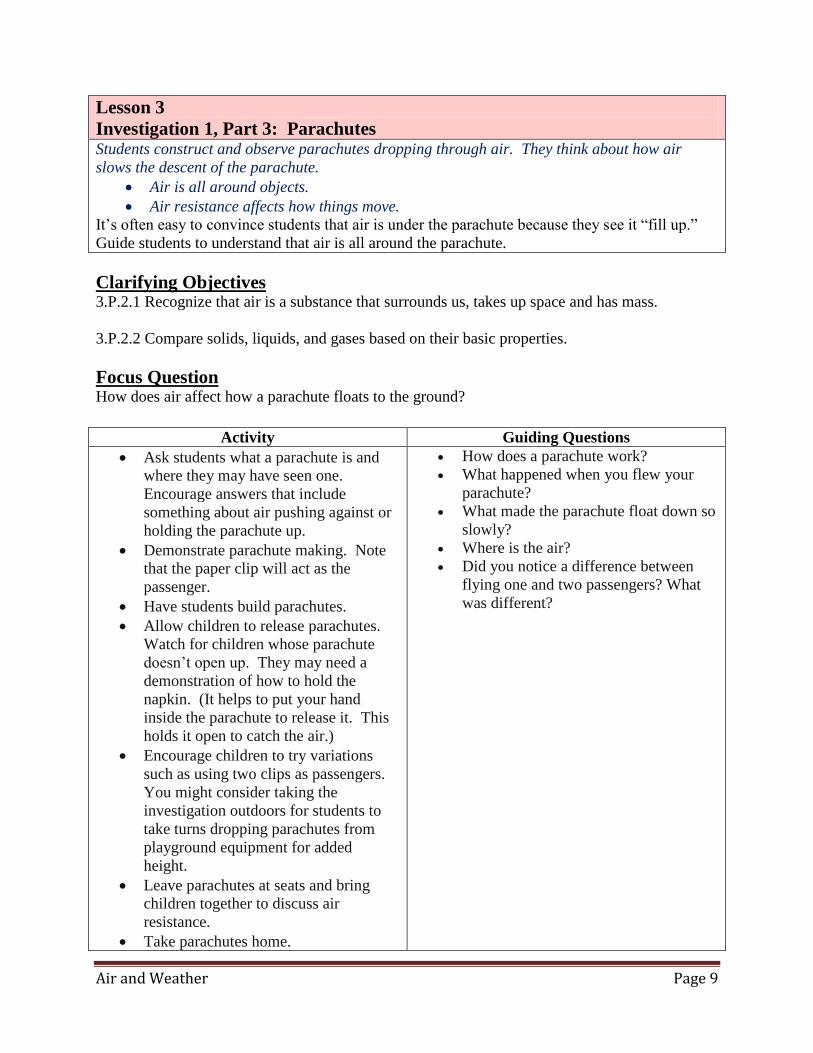
Lesson 3
Investigation 1, Part 3: Parachutes Students construct and observe parachutes dropping through air. They think about how air
slows the descent of the parachute.
Air is all around objects.
Air resistance affects how things move. It’s often easy to convince students that air is under the parachute because they see it “fill up.”
Guide students to understand that air is all around the parachute.
Clarifying Objectives 3.P.2.1 Recognize that air is a substance that surrounds us, takes up space and has mass.
3.P.2.2 Compare solids, liquids, and gases based on their basic properties.
Focus Question How does air affect how a parachute floats to the ground?
Activity Guiding Questions
Ask students what a parachute is and
where they may have seen one.
Encourage answers that include
something about air pushing against or
holding the parachute up.
Demonstrate parachute making. Note
that the paper clip will act as the
passenger.
Have students build parachutes.
Allow children to release parachutes.
Watch for children whose parachute
doesn’t open up. They may need a
demonstration of how to hold the
napkin. (It helps to put your hand
inside the parachute to release it. This
holds it open to catch the air.)
Encourage children to try variations
such as using two clips as passengers.
You might consider taking the
investigation outdoors for students to
take turns dropping parachutes from
playground equipment for added
height.
Leave parachutes at seats and bring
children together to discuss air
resistance.
Take parachutes home.
How does a parachute work?
What happened when you flew your
parachute?
What made the parachute float down so
slowly?
Where is the air?
Did you notice a difference between
flying one and two passengers? What
was different?

Air and Weather Page 10
Ask students what questions they now
have about air acting upon a parachute
or similar object.
Science Content Words Allow children to come up with words that they want to use in their word bank about the study
of air. Make sure to include the following if they do not think of them.
• parachute • air resistance
Integration Hints Have children imagine that they are the passengers and either describe orally or in writing what
that would feel like. Once students have the opportunity to build a parachute, create a center for
students to create additional parachutes from materials such as foil, waxed paper, plastic
shopping bags, etc. Students can predict then test which parachute works best.
Science Notebook Helper Have students write about parachutes in their notebook. Have them indicate how air affects a
parachute’s descent. Accept labeled pictures as well.
Assessment Opportunities Evaluate notebook entry specifically looking for children to note that there is air inside the
parachute slowing it down and that there is air above and around the parachute. Look also for
reference to air resistance.

Air and Weather Page 11
Lesson 4
Investigation 1, Part 4: Pushing on Air Students use syringes to investigate air. They discover that air can be compressed and that air
under pressure can push objects around.
Air is matter and takes up space.
Air can be compressed.
The pressure from compressed air can move things.
Clarifying Objectives 3.P.2.1 Recognize that air is a substance that surrounds us, takes up space and has mass.
3.P.2.2 Compare solids, liquids, and gases based on their basic properties.
Focus Question What happens when I push air into a smaller space?
Activity Guiding Questions
Tell students they will use a new tool to
find out more about air.
Demonstrate how a plunger can travel
up and down the barrel of a syringe.
Also show a piece of flexible tubing but
do not show students how to connect
them.
Make sure to go over rules: 1. Do not
point either end of the syringe at
anyone. 2. Do not pretend to give
yourself or others a shot.
Challenge students to explore with their
new tools. Monitor exploration.
After a few minutes as you circulate,
show students how to crimp the tubing.
After about 10 minutes, assign students
to work with partners and continue to
see what they can learn about air. Do
not demonstrate how to connect
syringes, let them work it out. Monitor
students during this exploration.
As you visit groups, introduce the
words pressure and compress into
discussions. If students have found the
key to popping off the plunger, remind
them to keep both ends of syringes
pointed away from classmates and
themselves.
Can you compress all the air into one of
the syringes?
What might happen if you put too much
pressure on the system?
What is happening to the air inside the
syringe system?
Is there more air in the system now?
What will happen if I increase the
pressure in the system by pushing one
of the plungers in?
What new evidence do we have to
show that air is matter?
What happens to the air when you push
air into a smaller place?

Air and Weather Page 12
Collect materials.
Have students gather to discuss what
they discovered. Discuss air wrestling
(trying to push both plungers in against
each other).
Discuss the pop off (pulling both
plungers out and replacing them so that
both syringes are full of air and pushing
so that one plunger pops out).
Ask students what questions they have
now about air being forced into a
smaller space.
Science Content Words Allow children to come up with words that they want to use in their word bank about the study
of air. Make sure to include the following if they do not think of them.
• syringe • plunger • barrel • tubing
• compress • pressure • system
Integration Hints Math: have students measure the distance that their plungers travel when popped.
Science: Have students design a device that could use this concept. Draw this device and
describe how it works.
Science Notebook Helper Complete pages 5 and 6 in the Air and Weather Journals. Students indicate how air can be
compressed and how air pressure can be used to move things.
Assessment Opportunities Assess the children using teacher observations and student participation in discussion.
Air and Weather Page 13
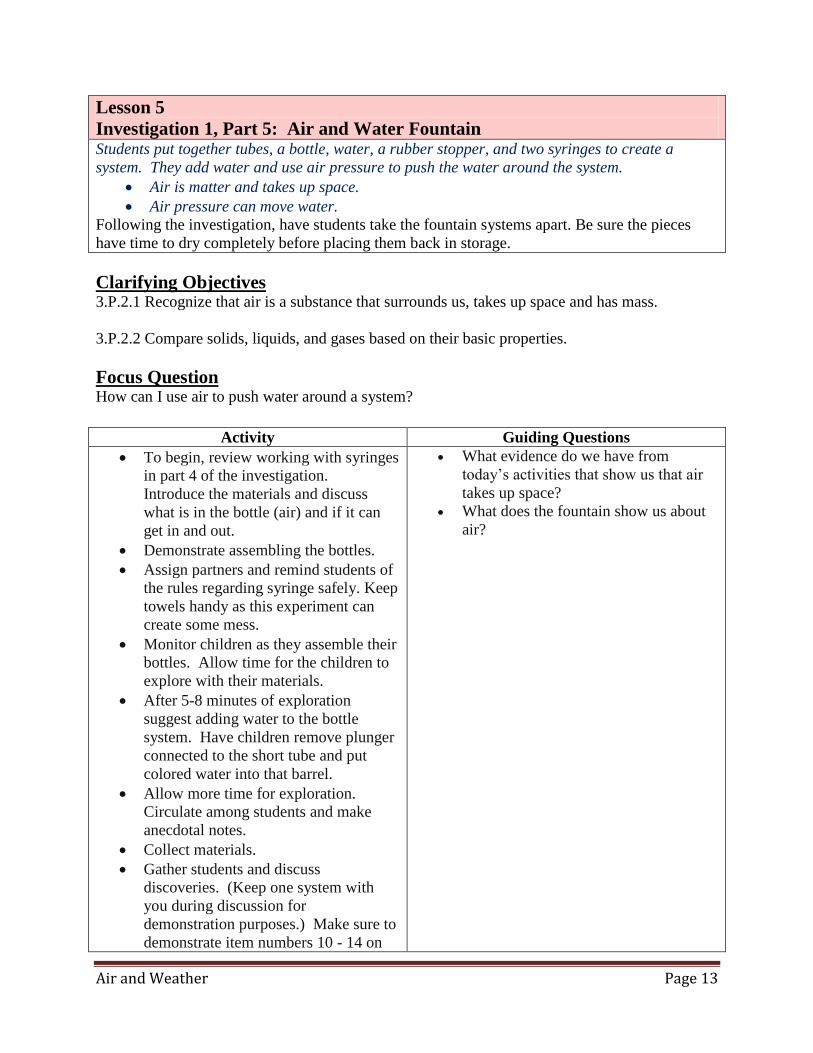
Lesson 5
Investigation 1, Part 5: Air and Water Fountain Students put together tubes, a bottle, water, a rubber stopper, and two syringes to create a
system. They add water and use air pressure to push the water around the system.
Air is matter and takes up space.
Air pressure can move water. Following the investigation, have students take the fountain systems apart. Be sure the pieces
have time to dry completely before placing them back in storage.
Clarifying Objectives 3.P.2.1 Recognize that air is a substance that surrounds us, takes up space and has mass.
3.P.2.2 Compare solids, liquids, and gases based on their basic properties.
Focus Question How can I use air to push water around a system?
Activity Guiding Questions
To begin, review working with syringes
in part 4 of the investigation.
Introduce the materials and discuss
what is in the bottle (air) and if it can
get in and out.
Demonstrate assembling the bottles.
Assign partners and remind students of
the rules regarding syringe safely. Keep
towels handy as this experiment can
create some mess.
Monitor children as they assemble their
bottles. Allow time for the children to
explore with their materials.
After 5-8 minutes of exploration
suggest adding water to the bottle
system. Have children remove plunger
connected to the short tube and put
colored water into that barrel.
Allow more time for exploration.
Circulate among students and make
anecdotal notes.
Collect materials.
Gather students and discuss
discoveries. (Keep one system with
you during discussion for
demonstration purposes.) Make sure to
demonstrate item numbers 10 - 14 on
What evidence do we have from
today’s activities that show us that air
takes up space?
What does the fountain show us about
air?
Air and Weather Page 14
pages 31-32 of the Foss Teacher’s
Manual.
Ask students what questions they have
now about air and air pressure.
Science Content Words Allow children to come up with words that they want to use in their word bank about the study
of air. Make sure to include the following if they do not think of them.
• fountain
Integration Hints Science: If students are interested, they may want to experiment in a center using different
configurations of the bottle system. They may want to use two long pipes or two short pipes and
see what happens.
Science Notebook Helper Have children draw and write about this activity in their notebook.
Assessment Opportunities Assess the children using teacher observations and student participation in discussion.

Air and Weather Page 15
Lesson 6
Investigation 1, Part 6: Balloon Rockets Students set up a balloon-rocket system and find out how far the air in the balloon will propel the
system along a flight line.
Air can be compressed.
The pressure from compressed air can move things.
You may want to provide other activities for children who are waiting their turn to fly the
balloon rocket. It is also a good idea to use permanent marking pens to write student names or
initials on balloons before launch time. Because of the safety issue with children blowing up
balloons, it is recommended that the balloons only be blown up with the pumps provided in the
kits. Because of this, you will want to have another adult around to help with this. Remind
children not to release balloons or to tie them off. They will want to reuse their balloons.
Clarifying Objectives 3.P.2.1 Recognize that air is a substance that surrounds us, takes up space and has mass.
3.P.2.2 Compare solids, liquids, and gases based on their basic properties.
Focus Question How can I use compressed air to propel a balloon rocket?
Activity Guiding Questions
At the beginning of the balloon rockets
investigation, introduce balloons and
ask students how to make it bigger.
Then ask students what happens when a
balloon is blown up and released before
it is tied. Ask students why they think
this happens to the balloon.
Explain balloon rockets and
demonstrate releasing balloon rockets.
Organize students into groups at each
flight line.
Circulate the classroom and assess
student understanding with teacher
observations and their explanations of
the process.
Gather students and discuss results.
Pump up zip bag on the flight line and
attempt to launch it as a rocket.
Discuss why this will not work.
Describe outside balloon release.
Take balloons outside and release
simultaneously.
Have children stand beside their
What happens to a balloon when you
blow it up and let it go before you tie
it? Why does that happen?
What is a rocket?
How does air make the balloon rocket
move down the line?
How did you get the balloon rocket to
travel the farthest?
Do you think the zip bag will work the
same way as the balloon? Why or why
not?
Why didn’t the zip-bag balloon rocket
work?
How are zip bags and balloons alike?
Different?
How far do you think the balloon
would travel if we just let it go without
the zip bag?
What did you learn about air and how it
makes a balloon move?

Air and Weather Page 16
balloon after it lands and determine
which direction most of the balloons
went. If there is a noticeable wind, ask
what effect that might have had on the
balloon paths. *Students should pick up
balloons before returning to the
classroom so they do not litter the
playground.
Ask students what questions they have
now about compressed air moving
objects.
Science Content Words Allow children to come up with words that they want to use in their word bank about the study
of air. Make sure to include the following if they do not think of them.
• inflate • rocket • propel
• distance • move • travel
Integration Hints - Make a list of items that are propelled by air pressure. Sort the list by characteristics.
- Read "What is All Around Us?" in the Foss Science Stories book. Questions to guide the
reading and extension activity ideas are available behind the Science Stories tab in the Foss
Teacher’s Guide.
Science Notebook Helper Draw and or write what happened to the balloon rockets.
Assessment Opportunities Assess the children using teacher observations and student participation in discussion. Look for
children explaining how air moves the balloon.

Air and Weather Page 17
Lesson 7
Investigation 2, Part 1: Weather Calendars The class shares what they know about weather and how it relates to air. A class meteorologist
begins recording daily weather observations on a class calendar. Symbols are used to indicate
five basic types of weather.
Weather describes conditions in the air outside.
Meteorologists are scientists who study the weather.
Scientific journals record what is observable.
Clarifying Objectives 2.E.1.2 Summarize weather conditions using qualitative and quantitative measures to describe:
Temperature
Wind direction
Wind speed
Precipitation
Focus Question How can we keep a record of daily weather conditions?
Activity Guiding Questions
Begin the investigation by connecting
air and weather.
Discuss where you find weather and
what air has to do with it.
Go outside and let children feel the air.
Make a chart of words related to
weather.
Introduce the 5 weather symbols that
you will use on the calendar.
Introduce class calendar and record
today’s weather.
Give the children a schedule of class
meteorologists. (Each child will have
the opportunity to take on this
responsibility. You need to
demonstrate what you want this person
to do each day.)
Discuss the idea of a scientific
notebook and demonstrate an entry.
Let students know that they will be
keeping a weather notebook and
making entries every day to describe
the day’s weather.
Have children record the date, draw a
How does the air feel?
Can you feel the air moving?
Do you see anything that tells you that
the air is moving?
What kind of weather do you see?
What are some words we use to
describe the weather?
What kind of weather are we having
today?
Why is it important to include today’s
date?
How would you describe today’s
weather?
What would you draw to show today’s
weather?
What does a meteorologist do?
What is the difference between
personal journals and scientific
notebooks?

Air and Weather Page 18
picture, and write words in their science
notebooks to describe today’s weather.
Collect or check science notebooks.
Ask students what questions they have
now about recording weather.
Science Content Words Allow children to come up with words that they want to use in their word bank about the study
of air. Make sure to include the following if they do not think of them.
• weather • meteorologist • monitor
• symbol • sunny • partly cloudy
• overcast • rainy • snowy
Integration Hints Watch a meteorologist on television and see what kinds of things they discuss.
Science Notebook Helper Children will record daily observations of the weather. They will write words or sentences to
describe the weather on a daily basis.
Assessment Opportunities Use anecdotal observations and the journal entries to assess student knowledge.

Air and Weather Page 19
Lesson 8
Investigation 2, Part 2: Measuring Temperature Students learn to use a thermometer and take turns measuring and recording the temperature.
They construct a model thermometer and practice reading various temperatures.
Temperature describes how hot or cold the air is.
Temperature is measured with a thermometer.
The unit used to measure temperature is degrees Celsius (˚C) or degrees Fahrenheit
(˚F)
Clarifying Objectives 2.E.1.2 Summarize weather conditions using qualitative and quantitative measures to describe:
Temperature
Wind direction
Wind speed
Precipitation
2.E.1.4 Recognize the tools scientists use for observing, recording, and predicting weather
changes from day to day and during the seasons.
Focus Question How does a thermometer work to measure the temperature?
Activity Guiding Questions
You might begin by administering the
formative assessment probe called
“Thermometer.”
Begin the investigation by discussing
how the air around us feels. Air that is
cold to one person may be warm to
others.
Even though we can’t see the air, we
can feel how hot or cold it is.
Temperature describes/measures how
hot or cold the air is.
Brainstorm words we might use to
describe temperature.
Demonstrate the working thermometer.
Show how to take the temperature in
the room.
Demonstrate how the red line on the
thermometer moves when put in cold or
warm water.
Take the thermometer outside and
discuss the difference.
How does the air outside feel today? Is
it hot or cold?
What do you think will happen to the
red line on the thermometer if we put it
in the cold water? In the warm water?
Did you have to move the red line on
the thermometer up or down? Is it
warmer or colder outside?
What do we use to measure
temperature?
Why is it helpful to know the
temperature?

Air and Weather Page 20
Predict what will happen to the
thermometer when you return to the
class.
Read the room temperature and have a
child show the measurement using the
demonstration thermometer.
Describe how the meteorologist will
measure and record the temperature
every day.
Make model thermometers.
Ask students what questions they have
now about measuring temperature.
Science Content Words Allow children to come up with words that they want to use in their word bank about the study
of air. Make sure to include the following if they do not think of them.
• temperature • thermometer • degrees Celsius (˚C)/Fahrenheit (˚F)
• weather instrument • tool • freezing
• cold • cool • warm
• hot
Integration Hints Make a meteorologist tool kit. Directions can be found on page 38 in Investigation #2
Science Notebook Helper Have children draw a line down the center of a page in their notebook. Write warm on one side
and cold on the other. Have the children brainstorm things they do in each type of weather.
Assessment Opportunities Use anecdotal observations and the journal entries to assess student knowledge.
Air and Weather Page 21
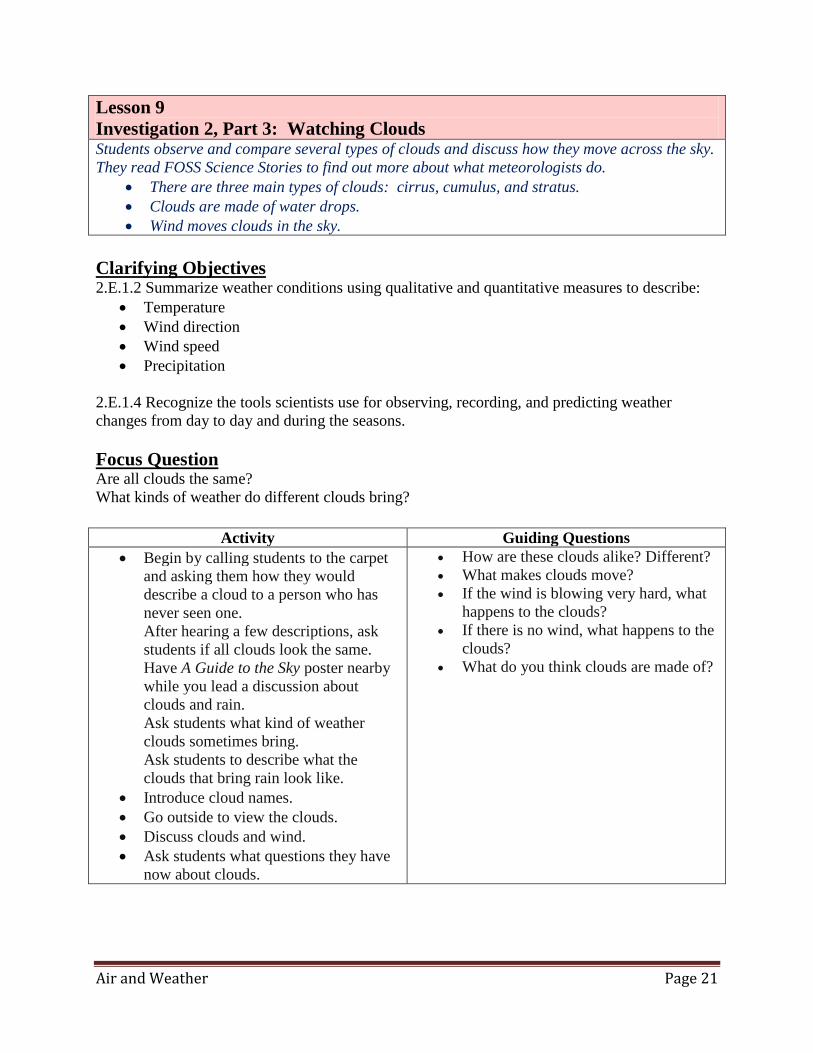
Lesson 9
Investigation 2, Part 3: Watching Clouds Students observe and compare several types of clouds and discuss how they move across the sky.
They read FOSS Science Stories to find out more about what meteorologists do.
There are three main types of clouds: cirrus, cumulus, and stratus.
Clouds are made of water drops.
Wind moves clouds in the sky.
Clarifying Objectives 2.E.1.2 Summarize weather conditions using qualitative and quantitative measures to describe:
Temperature
Wind direction
Wind speed
Precipitation
2.E.1.4 Recognize the tools scientists use for observing, recording, and predicting weather
changes from day to day and during the seasons.
Focus Question Are all clouds the same?
What kinds of weather do different clouds bring?
Activity Guiding Questions
Begin by calling students to the carpet
and asking them how they would
describe a cloud to a person who has
never seen one.
After hearing a few descriptions, ask
students if all clouds look the same.
Have A Guide to the Sky poster nearby
while you lead a discussion about
clouds and rain.
Ask students what kind of weather
clouds sometimes bring.
Ask students to describe what the
clouds that bring rain look like.
Introduce cloud names.
Go outside to view the clouds.
Discuss clouds and wind.
Ask students what questions they have
now about clouds.
How are these clouds alike? Different?
What makes clouds move?
If the wind is blowing very hard, what
happens to the clouds?
If there is no wind, what happens to the
clouds?
What do you think clouds are made of?

Air and Weather Page 22
Science Content Words Allow children to come up with words that they want to use in their word bank about the study
of air. Make sure to include the following if they do not think of them.
• clouds • cirrus • cumulus
• stratus
Integration Hints -Read one of several trade books on clouds.
-Read “What’s the Weather Today?” from FOSS Science Stories.
-In response to the story It Looked Like Spilt Milk by Charles G. Shaw, students can drip a few
large drops of white paint on dark blue construction paper and carefully blow at the paint with a
straw.
Science Notebook Helper Write what you have learned about clouds today.
Assessment Opportunities Use anecdotal observations and the journal entries to assess student knowledge.

Air and Weather Page 23
Lesson 10
Investigation 2, Part 4: Measuring Rain The class discusses the kinds of clouds that bring rain or snow and natural sources of water.
Students use a rain gauge to measure rain or snowfall. The class meteorologist’s daily report
now includes weather condition, temperature, cloud type, and amount of rainfall.
Meteorologists use rain gauges to measure how much rain or snow has fallen.
Natural sources of water include streams, rivers, lakes (fresh water), and the oceans
(salt water).
Clarifying Objectives 2.E.1.2 Summarize weather conditions using qualitative and quantitative measures to describe:
Temperature
Wind direction
Wind speed
Precipitation
2.E.1.3 Compare weather patterns that occur over time and relate observable patterns to time of
day and time of year.
2.E.1.4 Recognize the tools scientists use for observing, recording, and predicting weather
changes from day to day and during the seasons.
Focus Question How can we measure the amount of rain that falls?
Activity Guiding Questions
Talk about clouds and rain. Have A
Guide to the Sky poster nearby.
Introduce the rain gauge. Have
children speculate on how it works.
Discuss and decide where to put the
rain gauge where it can effectively do
its job.
Go outside and set up rain gauge.
When the opportunity arises, observe
the gauge after the rain. Discuss how
long it takes for the rain to accumulate.
Discuss natural sources of water. Have
the Natural Sources of Water poster
nearby.
Ask students what questions they have
now about measuring rain.
How do you think a rain gauge works?
Where do you think we should place
the rain gauge?
How can we tell if it is going to rain?
How do we measure how much rain has
fallen?

Air and Weather Page 24
Science Content Words Allow children to come up with words that they want to use in their word bank about the study
of air. Make sure to include the following if they do not think of them.
• rain gauge
Integration Hints Make a rain gauge for your meteorologist’s tool kit.
Have children practice reading the thermometer and rain gauge.
Science Notebook Helper Write what you have learned about rain today.
Assessment Opportunities Use anecdotal observations and the journal entries to assess student knowledge. Evaluate the
children’s records of the daily weather.
Air and Weather Page 25
Lesson 11
Investigation 3, Part 1: Bubbles in the Wind Students use bubble wands to blow bubbles outside. They investigate how the air moves bubbles
in a variety of locations around the school building.
Bubbles are filled with air.
Wind is moving air.
Bubbles can show the changing direction and speed of the wind.
For the wind investigations, you will want to have a reliable source of wind for the wind speed
activity such as a hair dryer or fan.
Clarifying Objectives 2.E.1.2 Summarize weather conditions using qualitative and quantitative measures to describe:
Temperature
Wind direction
Wind speed
Precipitation
Focus Question How can bubbles be used to find out about wind speed and direction?
Activity Guiding Questions
Tell students they will be using bubbles
to continue their investigation of air
and weather.
Blow a bubble. Then ask students,
"What’s inside the bubble?", "What’s
outside the bubble?", and "What moves
bubbles around?”
Propose a search for moving air using
bubbles.
Go outdoors and feel the wind.
Distribute wands and soap. Let the
explorations begin.
As the children explore, circulate and
pose questions to help focus their
observations.
Clean up and return to class.
Discuss what the students observed.
Ask students what questions they have
now about bubbles moving in the wind.
How can you use bubbles to show if air
moves around corners?
How can you use bubbles to show
where the air moves fastest?
How can you use bubbles to show
where the air moves slowest?
How can you use bubbles to show how
air moves in a doorway?
What do bubbles have to do with air?
What can bubbles tell you about the
air?

Air and Weather Page 26
Science Content Words Allow children to come up with words that they want to use in their word bank about the study
of air. Make sure to include the following if they do not think of them.
• bubble • wind
Integration Hints -Read aloud Gilberto and the Wind by Marie Hall Ets or Can You See the Wind? by Allan
Fowler. The books can also be shared in the listening center.
-Students can make a whirligig (available behind the Investigation Duplication Masters tab in the
Foss Teacher’s Guide) at school and take it home to search for air movement around their
homes. Students can list the places they found air movement at home and share the list with their
classmates.
Science Notebook Helper Describe what the wind did to the bubbles in different locations outside.
Assessment Opportunities Use anecdotal observations and the journal entries to assess student knowledge.

Air and Weather Page 27
Lesson 12
Investigation 3, Part 2: Wind Speed Students go outside to feel and observe the wind. They are introduced to a descriptive wind
scale (an adaptation of the Beaufort scale) and an anemometer, a tool used by scientists to more
accurately measure the speed of the wind.
Meteorologists use a wind scale to describe the strength of the wind.
Meteorologists use anemometers to measure the speed of the wind.
Clarifying Objectives 2.E.1.2 Summarize weather conditions using qualitative and quantitative measures to describe:
Temperature
Wind direction
Wind speed
Precipitation
2.E.1.4 Recognize the tools scientists use for observing, recording, and predicting weather
changes from day to day and during the seasons.
Focus Question How do people describe the strength of the wind?
Activity Guiding Questions
To begin the wind speed investigation,
gather students on the carpet and lead a
discussion about wind.
Have students share their responses
and confirm that wind is moving air.
Introduce the wind scale. Have poster
of the scale nearby.
Introduce the anemometer.
Demonstrate how it works.
Have the students count how many
times the anemometer goes around in
10 seconds. There should be a black
circle on one of the cups to aid in
counting.
Discuss results.
Take the anemometer and poster
outside to observe the wind speed.
Ask students what questions they have
now about wind speed.
Is the wind blowing today? How can
we tell how fast it is blowing?
What determines how fast the
anemometer turns?
What will happen to the anemometer if
there is a gentle breeze? A strong
breeze?
Can you see the wind moving
anything? Are the clouds moving?
How strong does the wind have to be to
make the anemometer move?
How do meteorologists measure the
speed of the wind?

Air and Weather Page 28
Science Content Words Allow children to come up with words that they want to use in their word bank about the study
of air. Make sure to include the following if they do not think of them.
• anemometer • wind scale • calm
• gentle breeze • moderate breeze • strong breeze
Integration Hints -Read Gilberto and the Wind or Can You See the Wind? if you haven’t already.
Science Notebook Helper Continue to draw and write each day describing the days weather.
Assessment Opportunities Use anecdotal observations and the journal entries to assess student knowledge.
Air and Weather Page 29
Lesson 13
Investigation 3, Part 3: Pinwheels Students construct a pinwheel and observe how it operates when they blow on it, move it through
air, and hold it in front of a fan. They compare the action of the pinwheels to the class
anemometer.
Meteorologists use anemometers to measure the speed of the wind.
A pinwheel provides evidence about how fast the wind is blowing.
Clarifying Objectives 2.E.1.2 Summarize weather conditions using qualitative and quantitative measures to describe:
Temperature
Wind direction
Wind speed
Precipitation
2.E.1.4 Recognize the tools scientists use for observing, recording, and predicting weather
changes from day to day and during the seasons.
Focus Question How can we use pinwheels to observe wind speed?
Activity Guiding Questions
Introduce pinwheels. Gather
information about which children have
experience with this instrument. Ask
which weather tool is similar to a
pinwheel. [anemometer]
Demonstrate pinwheel construction.
When pinwheels are finished allow
children to experiment with them.
Discuss children’s experiences.
Take pinwheels outside
As children are experimenting with
pinwheels outside, walk around and
quickly interview them about their
thoughts on how the pinwheel is like an
anemometer and how can you tell how
fast the wind is blowing.
Ask students what questions they have
now about using pinwheels.
What can an anemometer or pinwheel
tell us about the wind?
How did you get the pinwheel to spin?
What happened when you moved them
through the air? Why did that happen?
How else were you able to make the
pinwheels spin?
Where else might you find moving air?
How is a pinwheel like an anemometer?
How is it different?

Air and Weather Page 30
Science Content Words Allow children to come up with words that they want to use in their word bank about the study
of air. Make sure to include the following if they do not think of them.
• pinwheel
Integration Hints -Have various store-bought pinwheels available in a center for students to explore.
Science Notebook Helper Continue to draw and write each day describing the day’s weather. Use the notebook to describe
what you know about pinwheels as a tool to explore the wind.
Assessment Opportunities Use anecdotal observations and the journal entries to assess student knowledge.

Air and Weather Page 31
Lesson 14
Investigation 3, Part 4: Wind Vanes Students learn about wind vanes, a tool to determine wind direction. They compare the
movement of the wind vane to those of bubbles and clouds.
Meteorologists use a wind vane to observe the direction of the wind.
A wind vane points in the direction the wind is coming from.
Clarifying Objectives 2.E.1.2 Summarize weather conditions using qualitative and quantitative measures to describe:
Temperature
Wind direction
Wind speed
Precipitation
2.E.1.4 Recognize the tools scientists use for observing, recording, and predicting weather
changes from day to day and during the seasons.
Focus Question How can we use a wind vane to observe the direction of the wind?
Activity Guiding Questions
Introduce the wind vane and its
purpose. Discuss when and where
children may have seen one.
Demonstrate how to make a wind vane.
Distribute materials.
Take wind vanes outside to explore
wind direction.
Observe cloud movement. Relate the
bubbles lesson, the pinwheel, and the
wind vane to how the clouds are
behaving. Note: The wind on the
ground and the wind higher in the
atmosphere may not be traveling in the
same direction. You may want to
explain to the children how this could
be.
Ask students what questions they have
now about wind direction.
What does the wind vane tell you about
the wind?
Which direction does it point when the
wind is blowing?
Looking at the clouds, which direction
do you think the wind is coming from?
Do clouds move with the wind or
against it?
Are there any other objects around that
can help us find the wind direction?
What does a wind vane tell us?
Science Content Words Allow children to come up with words that they want to use in their word bank about the study
of air. Make sure to include the following if they do not think of them.
• wind vane • direction • north, south, east, west (optional)

Air and Weather Page 32
Integration Hints An optional activity might be to introduce the children to the compass.
Research what other instruments people have used over the years to measure the wind.
Read the “Understanding the Weather” in the FOSS Science Stories.
Continue to add to the meteorologist’s tool kit.
Science Notebook Helper Continue to draw and write each day describing the day’s weather.
Assessment Opportunities Use anecdotal observations and the journal entries to assess student knowledge.

Air and Weather Page 33
Lesson 15
Investigation 3, Part 5: Kites Students construct kites. They use the anemometer and wind vane to help them determine the
best location and direction for flying kites.
Wind pushes kites up into the sky.
An anemometer can give evidence that there is a good wind for kite flying.
A wind vane can be used to determine the direction that kites will fly.
Clarifying Objectives 2.E.1.2 Summarize weather conditions using qualitative and quantitative measures to describe:
Temperature
Wind direction
Wind speed
Precipitation
2.E.1.4 Recognize the tools scientists use for observing, recording, and predicting weather
changes from day to day and during the seasons.
Focus Question How can we use weather instruments to improve kite flying?
Activity Guiding Questions
Invite students to the carpet and tell
them they are going to make something
new that uses air.
Show the sample kite and ask students
how a kite uses air.
Demonstrate two different ways to
make kites. (Depending on the model
you choose.)
Test kites indoors with fans or
hairdryers.
Discuss flying kites and what it takes to
be successful at it.
Discuss what instruments we have
studied so far that could help us be
better at kite flying.
Go outside to fly kites.
As students are experimenting, conduct
short 30-second interviews about how
wind vanes and anemometers can help
them fly the kite.
Discuss flying kites.
Ask students what questions they have
Does it take more or less wind to fly a
kite than to move a bubble? Than to
spin a pinwheel?
How could the wind vane be useful
when we try to fly kites?
How could an anemometer be useful
when we try to fly kites?
From what wind direction is the wind
blowing?
How should you stand so your kite will
catch the wind?
What did you feel when your kite flew
up in the air?
What made the kite go up?
How did the wind vane help you decide
which direction to fly your kite?
Did the direction that the wind was
blowing always stay the same? How
could you tell?

Air and Weather Page 34
now about instruments that can help
you fly a kite.
Science Content Words Allow children to come up with words that they want to use in their word bank about the study
of air. Make sure to include the following if they do not think of them.
• kite • tail • flying line
Integration Hints Learn the words and music to the song Let’s Go Fly a Kite from Mary Poppins.
Try variations on making the kites – different designs or different materials.
Create wind catchers.
Research kites from other cultures.
Science Notebook Helper Continue to draw and write each day describing the day’s weather.
Write about how it feels to fly a kite and what you experience with kites has been.
Assessment Opportunities Use anecdotal observations and the journal entries to assess student knowledge. Your short
interview will help with anecdotal notes.

Air and Weather Page 35
Lesson 16
Investigation 4, Part 1 – Weather Graphs Students organize and graph the class weather data recorded over a period of 4 weeks. The
class will continue recording the weather on the calendar and graph the following month.
Weather conditions change over time.
Weather observations can be organized and used to make comparisons. Estimated time – two forty-five-minute sessions scheduled 4 weeks apart
Clarifying Objectives 2.E.1.3 Compare weather patterns that occur over time and relate observable patterns to time of
day and time of year.
Focus Question How can we organize weather data collected for a month to look for change?
Activity Guiding Questions
Before graphing:
Introduce graphing. Children should have
some prior experience with this from both
science and math.
Demonstrate graphing.
Start weather graphs.
After graphing for 4 weeks:
Discuss weather graphs.
Ask students what questions they have now
about organizing weather data.
Which type of weather did we have the
most of? How many days?
Which type of weather did we have the
least of? How many days?
How many days was it sunny?
How many days did it rain? Snow?
(depending on the season)
How are graphs useful?
Science Content Words Allow children to come up with words that they want to use in their word bank about the study
of air. Make sure to include the following if they do not think of them.
• graph • column • row
Integration Hints Math – make a variety of graphs with the class. This should have been happening all along.
Make your own data collection activity and then graph the results.
Science Notebook Helper Continue to draw and write each day describing the day’s weather.
Assessment Opportunities Use anecdotal observations and the journal entries to assess student knowledge.

Air and Weather Page 36
Lesson 17
Investigation 4, Part 2 – Comparing the Seasons
The class moves from recording weather data on a calendar to creating seasonal graphs of the
weather, temperature, and precipitation. Each season, new graphs are created and compared
with the preceding seasons.
Daily changes in temperature, precipitation, and weather type can be observed
compared, and predicted.
Each season has a typical weather pattern that can be observed, compared, and
predicted.
The Sun can be seen only in the day.
The Sun heats the Earth during the day. Estimated time –five-minutes each day throughout the year; twenty-thirty minutes at the end of
each season.
Clarifying Objectives 2.E.1.1 Summarize how energy from the sun serves as a source of light that warms the land, air,
and water.
2.E.1.3 Compare weather patterns that occur over time and relate observable patterns to time of
day and time of year.
Focus Question How can we organize weather data taken over different seasons to look for change?
Activity Guiding Questions
Make calendars for conditions,
temperature, and precipitation.
Introduce calendars to the children.
Plan with children how to keep the
graphs current.
Every few weeks look for patterns in
the data.
At the end of each season, compare the
graphs for that season to the others.
Read the science story Seasons.
Where in the sky do you see the sun in
the morning? At noon? In the
afternoon?
When during the day might the highest
temperature be recorded? The lowest?
Which season was the rainiest?
Snowiest? Cloudiest?
Which season had the highest total of
rainfall?
Which season had the coldest
temperature?
What was the warmest day we had this
year?
Science Content Words Allow children to come up with words that they want to use in their word bank about the study
of air. Make sure to include the following if they do not think of them.
• total • precipitation • season • Sun

Air and Weather Page 37
Integration Hints -Because this project is year long, it can constantly be integrated into math with the data
collection and graphing, social studies because of the impact the weather has on cultures and
individuals, and language with stories to read and write. If you are in a climate that has a wide
variety of weather types, it can make for excellent discussions and language projects.
- Read "Seasons" from the Foss Science Stories book. Questions to guide reading and extension
activities can be found behind the Science Stories tab in the Foss Teacher's Guide.
-Read a trade book about the Moon aloud or share it in the class listening center. Book
suggestions can be found behind the resource tab in the Foss Teacher's Guide.
Science Notebook Helper Continue to draw and write each day describing the day’s weather.
Assessment Opportunities Use anecdotal observations and the journal entries to assess student knowledge. Make sure to
have children make generalizations at the end of seasons that will help them recognize patterns
in the weather and the need to monitor weather as a profession.

Air and Weather Page 38
Lesson 18
Investigation 4, Part 3 – The Night Sky Students discuss their observations of the night sky, including any changes they have discovered
in the Moon’s appearance and location. Weather at night is compared to weather during the
day.
Weather occurs at night as well as during the day.
The Moon can be seen sometimes at night and sometimes during the day. It looks
different every day, but looks the same again about every 4 weeks.
There are more stars in the sky than anyone can easily count.
The Sun and Moon move across the sky during a day and night and appear in different
locations in the sky. Estimated time –twenty-minutes to introduce the part; 2-3 minutes each day for a month; 20
minutes to discuss observations.
Clarifying Objectives 2.E.1.3 Compare weather patterns that occur over time and relate observable patterns to time of
day and time of year.
2.E.1.4 Recognize the tools scientists use for observing, recording, and predicting weather
changes from day to day and during the seasons.
1.E.1.1 Recognize differences in the features of the day and night sky and apparent movement of
objects across the sky as observed from Earth.
1.E.1.2 Recognize patterns of observable changes in the Moon’s appearance from day to day.
Focus Question What is in the night sky and how can we monitor and record our observations to look for
change?
Activity Guiding Questions
Invite students to the carpet and discuss
what students usually see in the sky
during the day.
Brainstorm a list of possible
observations.
Go outside to observe the sky. Discuss
the Moon and its location in the sky
and its shapes.
Confirm observations with a checklist
of what they have observed.
Draw the moon.
Introduce the moon calendar.
Describe to students how they will
Does the weather change or stay the same
at night?
Do the stars and moon change or stay the
same every night?
When can you see the sun? Moon? Stars?
What can you see on a clear night? What
observations have you made about stars?
What have you observed about the shape
of the moon?

Air and Weather Page 39
observe the night sky. Propose keeping
a record of their findings.
Introduce the night-sky observations
sheets. Send home a letter to parents
describing this activity.
Discuss where to keep the logs at home
so they don't get misplaced.
Answer any questions that might arise.
Record observations on the moon
calendar.
Look for patterns with the calendar.
Have the students draw what they have
observed.
Science Content Words Allow children to come up with words that they want to use in their word bank about the study
of air. Make sure to include the following if they do not think of them.
• Moon • star • change
Integration Hints Create a poem about the moon.
Research our country’s investigation of the moon.
Science Notebook Helper Describe what you see and make predictions about what you will see next.
Assessment Opportunities Use anecdotal observations and the journal entries to assess student knowledge.