getting started - scenario design...
TRANSCRIPT

Getting Started
This tutorial will teach you the basics of the Campaign 1814 game. By following the instructions below you will become capable at moving, firing and meleeing with the units under your command. So let's get started!
First, you need to start up the Main Program. The installer created a folder for Campaign 1814 in your Programs folder found under the Start menu. Click on Start at the bottom left of your desktop and then select Programs and then the Campaign 1814 folder. Choose the Main Program icon and the battle engine will start up.

The first screen you will see is the Scenario Dialog. Here you will select the first Getting Started scenario. We are going to play the 000. Getting Started scenario. In the Files section the 000-Getting_Started.scn file is selected by default. Read the Description text and then click on OK as we will not be changing any of the selections.
Later on as you play different scenarios you will be making other selections. And you can open up an older game as well from this menu.

At the AI Selection Dialog change the Allies A/I selection to Automatic. We will not use Fog of War for this tutorial so you can see how the A/I reacts to your moves.
Next we will review the Rules settings in the Optional Rules Dialog. Click on the Rules button.

The Optional Rules Dialog opens. Your rules will be set to the Default settings. Click on the check boxes to have your settings be exactly as per the above image. The click on the OK button. Back at the A/I Selection Dialog click on the OK button. This will start up the game.
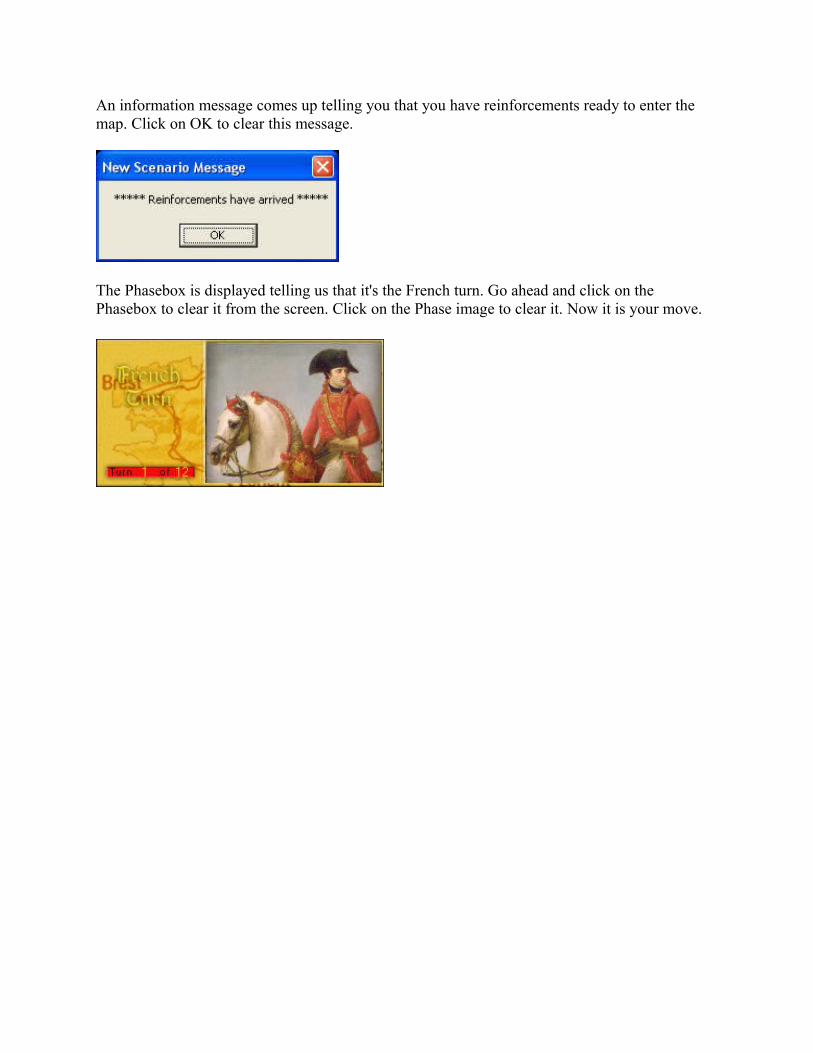
An information message comes up telling you that you have reinforcements ready to enter the map. Click on OK to clear this message.
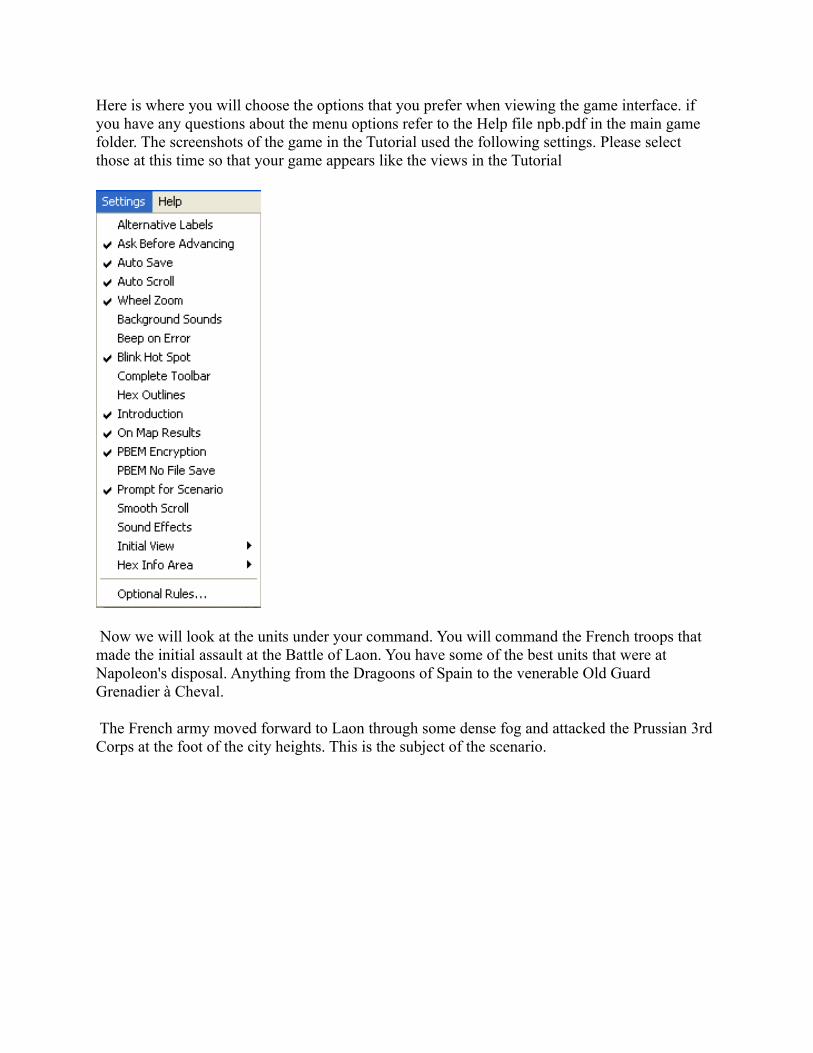
The Phasebox is displayed telling us that it's the French turn. Go ahead and click on the Phasebox to clear it from the screen. Click on the Phase image to clear it. Now it is your move.

Here is the view of the game once you clear the Phasebox:
Your French forces are on the lower left corner of the map. Your reinforcements are going to enter from the southern map edge.
You will now want to get used to the interface of the game. The interface is well laid out to help you in accessing the various commands and features of the game. First we will check the various menus. You will want to open the Main Program Help file from the Campaign 1814 Start Menu folder to refer to as we go over the interface. This file is also found in the main game folder. It is called nbp.pdf.

In the file take a look at the Menu help text and pictures to get some idea of what each item does in the program. Then look at the Other Features heading (near bottom of headings on left side of screen) and the Hex Info Area, Toolbar and Status Bar sections. These are very helpful as you play the game. Once you are finished keep the document open in case you want to review any of this information again or look up other topics of interest.
Now you are going to check out the interface settings under the Settings menu. Here you can determine if you want to see On Screen combat reports, set the initial view to your choice of either 2D Zoom In, 2D Zoom Out, 3D Zoom In or 3D Zoom Out or have many other features enabled. Open up the Settings menu at this time to get familiar with the various choices. Here is the default view of the Settings menu.
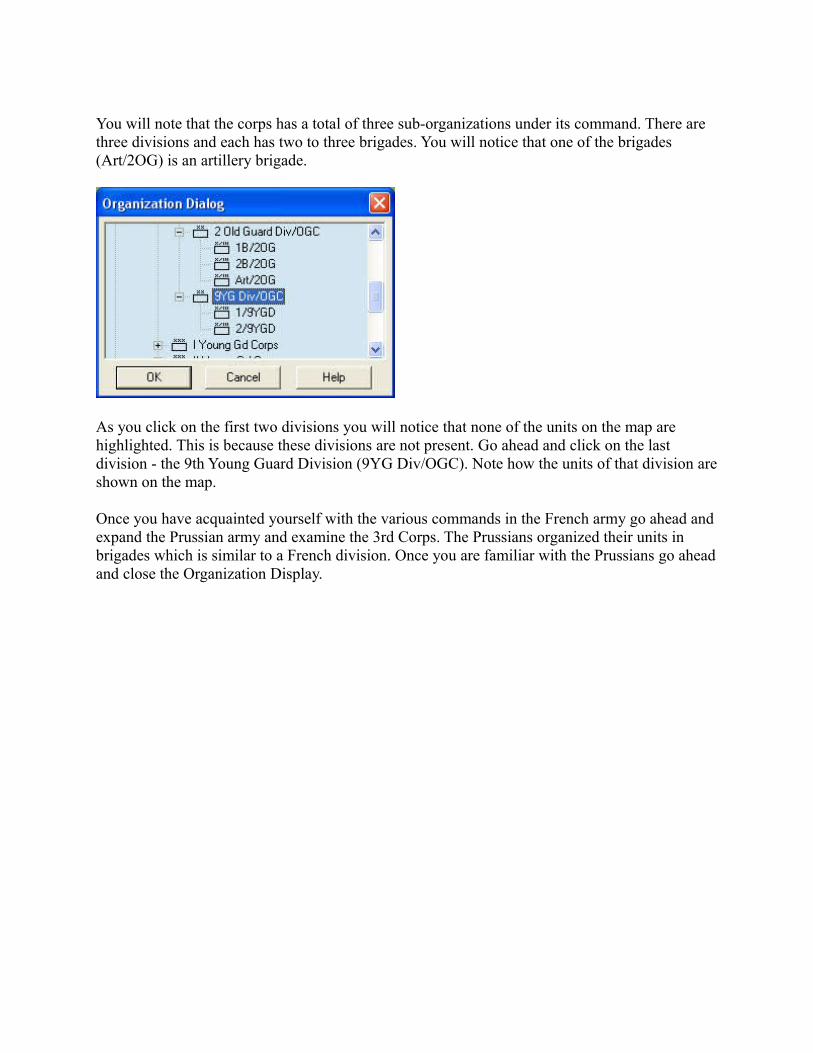
Here is where you will choose the options that you prefer when viewing the game interface. if you have any questions about the menu options refer to the Help file npb.pdf in the main game folder. The screenshots of the game in the Tutorial used the following settings. Please select those at this time so that your game appears like the views in the Tutorial
Now we will look at the units under your command. You will command the French troops that made the initial assault at the Battle of Laon. You have some of the best units that were at Napoleon's disposal. Anything from the Dragoons of Spain to the venerable Old Guard Grenadier à Cheval.
The French army moved forward to Laon through some dense fog and attacked the Prussian 3rd Corps at the foot of the city heights. This is the subject of the scenario.

Next, on the Toolbar, click on the button (highlighted in yellow) for Contours. This will help you to see the various terrain differences easier.
Now let's get used to the troops under your command. Choose the View menu and then select Show Organization.

The following dialog is shown:
The French army organization is always shown after the first Allied major formation and any subsequent Allied formations will follow the French.

Click on the "+" sign under the French army and the click on "La Grande Armée." Notice that all of the French units are now selected in red.

Click on the "Old Guard Corps" and note how only those units under that organization are highlighted.
Now click on the "+" sign to the left of the Old Guard Corps in the Organization Dialog to expand it so that you can see its full organization.
You will note that the corps has a total of three sub-organizations under its command. There are three divisions and each has two to three brigades. You will notice that one of the brigades (Art/2OG) is an artillery brigade.
As you click on the first two divisions you will notice that none of the units on the map are highlighted. This is because these divisions are not present. Go ahead and click on the last division - the 9th Young Guard Division (9YG Div/OGC). Note how the units of that division are shown on the map.
Once you have acquainted yourself with the various commands in the French army go ahead and expand the Prussian army and examine the 3rd Corps. The Prussians organized their units in brigades which is similar to a French division. Once you are familiar with the Prussians go ahead and close the Organization Display.

Let's go ahead and inspect the 9th Young Guard Division on the map. Locate hex 13, 33 on the map and click on this hex to select it. This is a leader - he is Maréchal Mortier, the commander of the Old Guard Corps.
At this point he is not selected. Select his image from the Info Area (where you see his picture). Note how the image becomes brighter. And if you right click with the mouse on the image you can see additional information for the leader.
The values for the leader are explained below. Note that its facing is indicated by the gold arrow. The remaining movement points are noted (42). Also its full organization association is listed as well.

In the game are five types of units: Leaders, Infantry, Cavalry, Artillery and Wagons. We just looked at one of these types in the Info Area.
Let's look at some of the other unit types in the game. Infantry units are located in hex 13,32. They can form Column, Line or Square. Infantry is known as the "Queen of the Battlefield." They are essential units for holding key terrain features. Another form of infantry are skirmishers which are a special unit type operating on the battlefield in a loose formation. They cannot change formation. They are either detached from a Parent Unit (infantry battalion) or are a stand-alone unit. We will be detaching skirmishers in the coming turns and using them to screen formed units.
You will find cavalry in hex 15, 33. These will not be able to change formation unless they are the Dragoon unit type which can dismount into Line formation (only).
An Artillery unit is located in hex 9, 30 and can either be limbered (cannot fire) or unlimbered (can fire). Supply Wagons are for replenishing any unit that uses infantry weapons that is listed in the Info Area as "Low on Ammo" or "No Ammo". They have one formation which is similar to Column in that they can use Path, Road or Pike movement values to negate the costs of the terrain in the hex. A Supply Wagon is located in hex 12, 32.
Look over each of the unit's in the Info Area as well. You will note that they also have a picture and an organization listing similar to the leader. They also have a Strength, Casualty level (in percentage which drops as it loses men), a Quality or Morale value, a Movement Allowance, Fatigue level (which rises as it accrues Fatigue), a Weapon value (in this case Lancers), and a weapon class. I have selected one of the units in hex 13, 32. It is the 2 Voltigeur of the 2nd Brigade of the 9th Young Guard Division of the Old Guard Corps:
You will note that it has 487 men, it is at full strength (100%), it is Quality C Morale, it has 16 Movement Points available, it has no Fatigue accrued, it is a Light unit, the unit is in Column formation and it is facing "up-right."
Now go ahead and right click on the unit's picture to get more information about the unit.
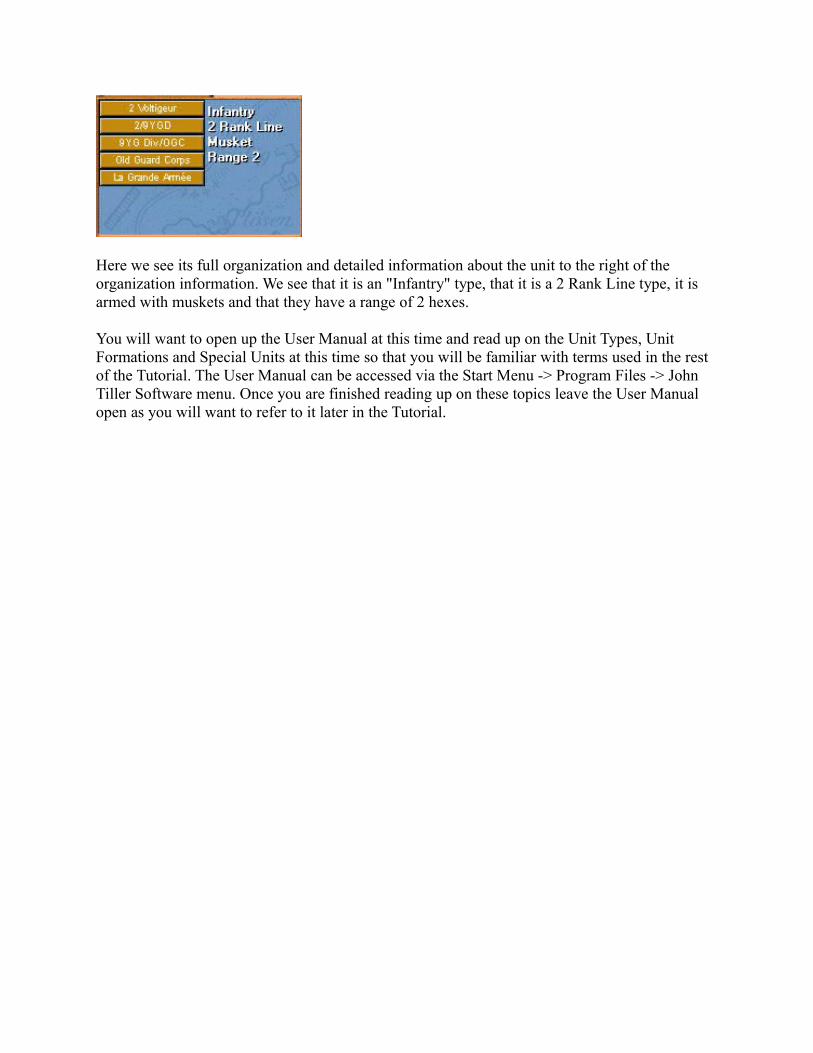
Here we see its full organization and detailed information about the unit to the right of the organization information. We see that it is an "Infantry" type, that it is a 2 Rank Line type, it is armed with muskets and that they have a range of 2 hexes.
You will want to open up the User Manual at this time and read up on the Unit Types, Unit Formations and Special Units at this time so that you will be familiar with terms used in the rest of the Tutorial. The User Manual can be accessed via the Start Menu -> Program Files -> John Tiller Software menu. Once you are finished reading up on these topics leave the User Manual open as you will want to refer to it later in the Tutorial.

For the next area of instruction you will learn about the importance of the leader' command radius and command control. First, let's select the "Leaders on Top" option from the Toolbar.
Now all of the leaders will appear at the top of the stacks in the 2D view. This is helpful when you go to check stacks that contain leaders to determine their Command Control range.
The organization of the units is very important for Command Control. We are going to select the leader in hex 13, 32. It is GB Leclerc. Once you select the leader his units under his command are highlighted. Now we want to see his Command Range. Pull down the View menu and then select "Command Range."

The command range of the leader is now displayed. You always want to try your best to keep your units within the command control range. This will help them to recover from Disorder. Likewise you will want to try and keep your Brigade leaders within the radius of their Division commander. And likewise for all leaders up to the Wing command level. The Army commander of course has no superior leader.
We will now talk about the Command Control rules.There are two values for each leader: one is the Leadership value and the other is the Command value. The first is helpful in rallying units. Stacking a leader with units of its own organization is very useful if they are routed. This way they can gain the Leadership value if it is higher than the Quality (Morale) value of the unit. If the Quality value is equal to or greater than the Leadership value then the unit will gain a +1 for morale recovery. This is essentially a d6 roll done during the Command Phase. If the unit Rout recovery roll is equal to or less than the Quality value then it rallies.
Thus a Quality value unit of B (5) will recover from Rout on a roll of 5 or less. If the Leadership value was applied that would reduce the roll needed from a 5 to a. A careful reading of the Command section of the User guide (user.pdf) will help you better understand all that goes into the Rout recovery process.

The Command Test is also done during the Command Phase and is very important. Units that Disorder can only recover to good order if they pass their Recovery Test. Leaders can greatly aid the recovery process if they pass their Command Test. To learn more about the Command Test read that portion of the User Guide to better understand how it works. Important: by clicking on the "D" button on the right side of the Toolbar all leaders that failed their Command Test will be highlighted. This may indicate that your leader is out of command range.
Thus it is very important that you keep your units in command range of their brigade leaders and also keep your leaders within the command range of their superior officers. You will want to check the command radius of all superior leaders to get an idea of how far their radius extends. This is absolutely vital as the units will eventually Disorder and become reduced in combat ability. Read the User guide on the penalties of being Disordered. You can click on other leaders while the Command Range is highlighted to see their command ranges.
Tip: get to know the shortcut keys which will allow you to quickly perform functions in the game. For instance the Command Control range can be shown on the screen by typing the a letter "K" on the keyboard. Then select any of your leaders and their command range will be displayed.
To deselect the Command Range you can use the View menu to turn off the Command Range. Another tip is to toggle the Visible Hexes button on the Toolbar. See if you can find this button and toggle it on and off. If you like pick a unit and see what its visible hexes are. We will use this later when we fire artillery.
Now that you are somewhat familiar with the Command rules let's move on to actually moving your units.
The French units are probably two to three turns out of "contact" with the enemy so the following will be a summary of how to move the units, perform fire combat with them and also melee the enemy, which is essential if you want to capture a location or cause damage to the enemy through other means than firing at them.
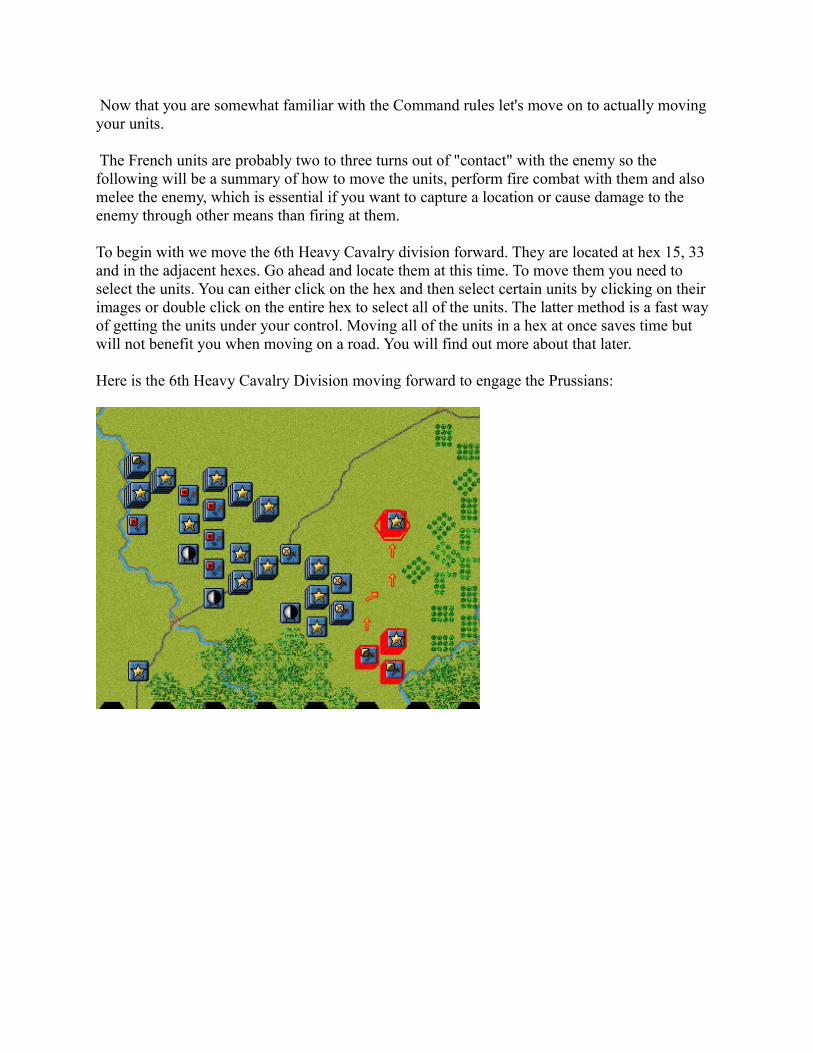
To begin with we move the 6th Heavy Cavalry division forward. They are located at hex 15, 33 and in the adjacent hexes. Go ahead and locate them at this time. To move them you need to select the units. You can either click on the hex and then select certain units by clicking on their images or double click on the entire hex to select all of the units. The latter method is a fast way of getting the units under your control. Moving all of the units in a hex at once saves time but will not benefit you when moving on a road. You will find out more about that later.
Here is the 6th Heavy Cavalry Division moving forward to engage the Prussians:

There are two methods for moving units in the game: 1. Drag and drop by selecting the unit or units and pick a hex where they should move or 2. Select the unit or units and right click on adjacent hexes. Using the latter format the unit will move one hex at a time. And of course you could always get the AI to move your units for you but we will use the manual move format for this tutorial.
We have moved the first stack forward. Try and emulate the move in your game. The right click method of moving the units will help you avoid the units moving into terrain that could Disorder them. However, it is more time consuming. Once you play the game several times you will get used to using a combination of "drag and drop" and the "right click" methods of movement.
There are weather effects in effect in this scenario. Note at the bottom of the screen to see the Weather Data in effect and then open up the Parameter Data to see its effects.
The Weather Data is located near the end of the list of information and is sorted by date and time. For instance this turn is the 8:00AM turn of March 9, 1814. It is the French Turn, Turn 1 of 12, the Visibility is 12 hexes, it is a Dawn turn with Fog and the ground is noted as "Mud." Thus movement will be reduced.

Here is the Weather Data for this turn:
We use the 07:00 time for the current turn. Once the time reaches 09:00 then the next weather line would be used. Read over this data to get used to the effects it will have on movement and combat.
As you move your units you will notice that they expend movement points. Once you are to the point where a unit can no longer move into any hexes its movement is over.
Move your units at this time and note how many movement points remain as you move through each hex. Refer to the Terrain Effects Chart (TEC) included in the game. The file is called TEC.pdf and it is located in the main game folder. You can also access the Parameter Data in the game. This data supersedes the data on the TEC (which is meant to be a visual aid for the players). To open up the Parameter Data go to the Help menu and pick "Parameter Data." You can also press the F2 button on your keyboard.

You now need to learn about Stacking. Each unit has a manpower value (except leaders and wagons) which will add against the stacking limit of a hex. In the Campaign 1814 game the Stacking Value is usually set to 1800 men. You can find the value in the Parameter Data. Open it up at this time. A dialog box will show up which looks like this:
Look carefully over the various values. The first heading is called "General Data." Here you find the Title, First Side and other values that are independent of unit types or other categories. Below that are the "Time Parameters" values. Now look down to the Stacking Parameters. Note that the "Max Stacking" value is 1800 men. However, note that cavalry has a max stacking value of 900 men. Thus cavalry add in a value of "x2" to the Stacking Value of any hex.

Let's check the cavalry stacking for one of the hexes in the game. In this case we used the 6th Heavy Cavalry Division units which we moved in our example above. We will get familar with the Hex Info area also at this time. Here is the Hex Info for the hex that the cavalry are located in. It is hex 16, 29:
The Terrain type is "Clear," the combat modification for this hex is "0%," the elevation is 60 feet, the ammunition level for the French player is 144. Now right click on the Hex Info Area for this hex. The following is revealed:
The amount of Stacking Points being used is listed (938) as well as the Threat Value for the hex. The latter is very important if you try and change formation with your units. The higher the value the more prone your units will be to Disorder based on the presence of enemy units.
Artillery also have a different gauge for stacking. The maximum number of guns you can stack in a hex is 14 according to the Parameter Data. Thus every gun is worth approximately 125 men. A check of the foot battery in hex 9, 31 shows that they account for "1000" towards the 1800 limit. As you move different types of units through a hex check the Stacking Value to see how it changes. This will help you get used to the stacking rules.
Infantry count for x1 amount thus 500 men are worth 500 Stacking Points. They work on a "1 for 1" basis. Supply Wagons can stack for free but only 1 wagon may stack in a hex. This is important to know when you go to move several wagons in close proximity to each other. You will not be able to move one Supply Wagon unit onto a road hex, for instance, and then move another Supply Wagon unit into the same hex with the other wagon.
Reopen the Parameter Data. Lets scroll down to the Movement Costs for each unit type so that you can get used to how much it costs for each type of terrain. Look over the Cavalry costs first to get an idea of how much it costs them to move on the battlefield. Some terrain types are prohibitive such as Blocked or High (which are High Wall hexsides). There are two terrain types: full hex and hex side terrain. Some of them cannot be passed through except by special rule. An

example of this would be Water hexes being crossed by units that HAS BOATS capability. Impassable hexes are just that: you can never move into them.

Go ahead and move all of the French units forward towards the Prussian army. Then bring on the reinforcements. To do this select the Units menu and pick "Arrived" from the menu. Click on the list of units in the dialog and double click on them. They will appear on the map in the lower left portion of the map. Select the entire stack. Move them forward down the road to hex 9, 32 using the "right click" form of movement. Here is the resulting move by the reinforcements:
Using the "drag and drop" format will result in the units not gaining the full benefit of the Pike. They will all move in one stack using the "Clear" terrain type cost instead of the more beneficial Pike movement cost. Compare the costs for these two terrain types at this time to see the difference.
Tip: moving your Division, Corps, Wing and Army level leaders last is not a bad idea and many veteran players do this so that they can check their command ranges at the end of a move to aid in Disorder recovery.
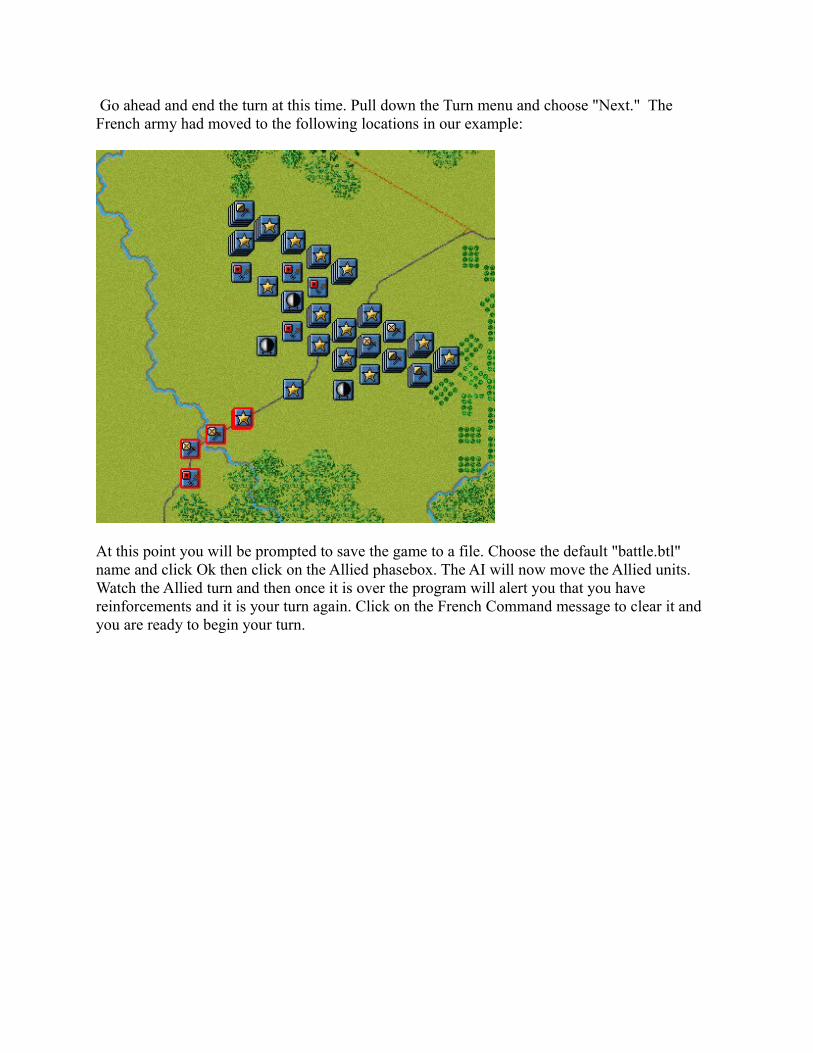
Go ahead and end the turn at this time. Pull down the Turn menu and choose "Next." The French army had moved to the following locations in our example:
At this point you will be prompted to save the game to a file. Choose the default "battle.btl" name and click Ok then click on the Allied phasebox. The AI will now move the Allied units. Watch the Allied turn and then once it is over the program will alert you that you have reinforcements and it is your turn again. Click on the French Command message to clear it and you are ready to begin your turn.

Let's check to see what units are arriving as reinforcements this turn. Open up the Units menu and select "Arrived." A screen like this appears:
Select the group in the dialog by left clicking on it and then choose "OK." The group now has entered the map. Now we are ready to start moving the French army forward.
Movement tip: you can easily find units that have not moved by highlighting them on the map using the "Moved Units" button on the Toolbar (pictured below left):
Also helpful is the "Next Stack" button on the Toolbar (pictured above right):

We chose to move the 2nd Young Guard Cavalry Division to make a flanking move to the left towards hex 8, 21. We are going to face off against the Prussian cavalry located on the Allied right flank near hex 12, 13. Here is the result of the French 2nd turn movement. There was no fire combat as our units are out of range:
Go ahead and move the French units and end your turn. The AI will move the Allied units and then it will be the French Turn 3 of 12 move.

We did our 3rd and 4th turn moves and here is what the situation looked like in our game at the end of turn 4 before we ended the phase:

We are now "in contact" with the enemy. Our units suffered small losses this turn. Open up the Victory Dialog screen by pulling down the Info menu and choosing "Victory."
Now open up the Victory Point Calculator in the main folder. The file is called VP_Calc.pdf. This file will help you understand the victory points won and lost for each troop type. Note how that French have suffered nine infantry losses. This results in 1 victory point being lost. Supply unit losses are usually not used in the scenarios unless the Scenario Description says otherwise.
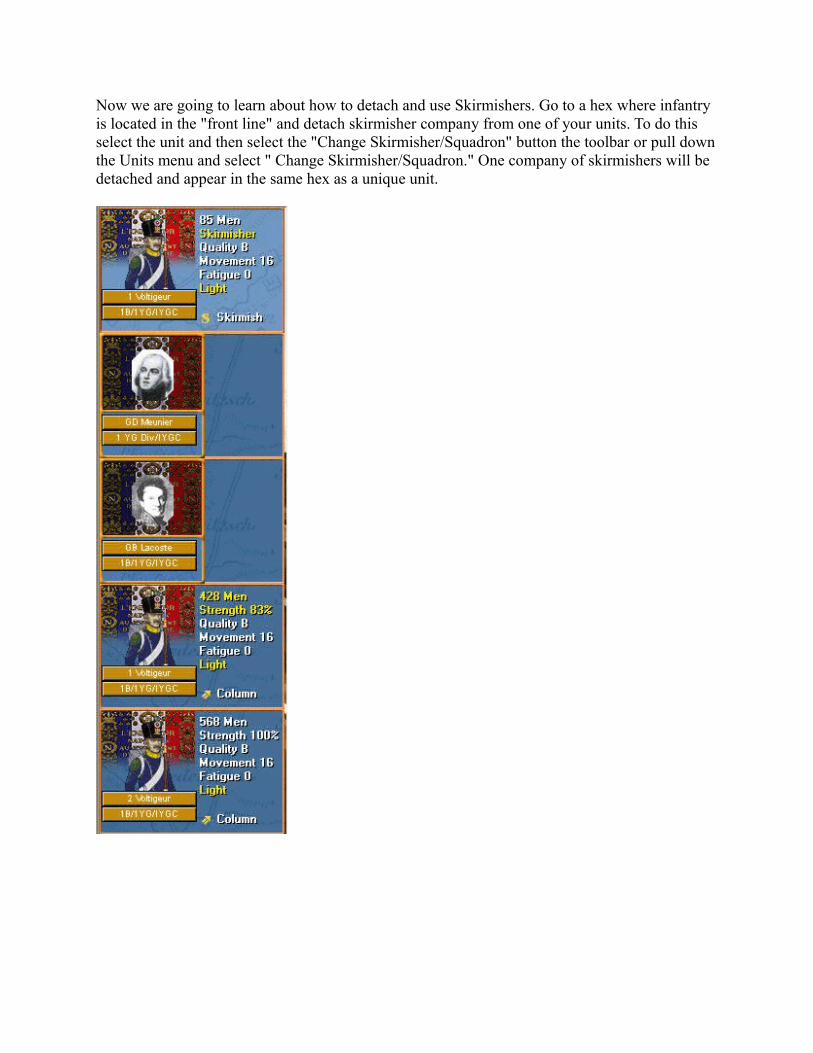
Now we are going to learn about how to detach and use Skirmishers. Go to a hex where infantry is located in the "front line" and detach skirmisher company from one of your units. To do this select the unit and then select the "Change Skirmisher/Squadron" button the toolbar or pull down the Units menu and select " Change Skirmisher/Squadron." One company of skirmishers will be detached and appear in the same hex as a unique unit.

In this case the "1 Voltigeur" detached one company. Note that this is a "Light" battalion and thus can deploy up to six companies of skirmishers. The "Parent Unit" will remain on the map at a reduced amount. To reincorporate skirmishers just move them to the hex where the Parent Unit is located and select the skirmisher and then the "Change Skirmisher/Squadron" button the toolbar.
Note that the skirmisher will accrue fatigue and losses just like any other unit. Skirmishers are very vulnerable to elimination. Cavalry can overrun them if the skirmisher is in Clear terrain. Always keep an eye out for cavalry. Infantry can eliminate skirmishers if the latter are surrounded on all sides. Formed units (Infantry and Cavalry) that retreat can overrun skirmishers in their rear hexes unless the "No Skirmisher Overrun" rule is enabled at the start of the game.
Movement for skirmishers is similar to other units in the game. Skirmishers and Leaders cannot enter a Clear hex that is adjacent to cavalry. Skirmishers are useful at screening units. All fire that goes through a skirmisher's hex will reduce any fire at units in hexes behind it by 10%. Any unit in the same hex as a skirmisher does not gain this bonus. Always put units behind skirmishers if you wish to enjoy their protective bonus. Skirmishers that are fired on enjoy a fire reduction as long as the stacking in the hex is less than 1/8 of the total stacking limit. Thus if 225 or more skirmishers are stacked in a hex they will be considered a formed target and subject to losing more men. Let's move forward some skirmishers to give protection to our advancing French units. Detach several companies and move them in front of your formed units to form a continuous line of skirmishers as seen here:

Here is a view of the end of turn 5. Several units (highlighted in light green) changed formation. Infantry was put into square to prevent enemy cavalry that charges from penetrating into the rear area of our line. Artillery was unlimbered so that they could fire on Turn 6.

The AI did the Allied move for Turn 5 and now it is time for the French to do their move. First, use some of your artillery units that you unlimbered to fire on the enemy to weaken their units. The unit will have to check during its next Command Phase to see if it must take a Morale Test. It may Disorder or Rout. Disordered units suffer a reduction in their ability to move and fire.
After making some initial moves with our units we chose to fire on the Prussians units that had charged our infantry. Here is a view of the battlefield before we fired.
Follow along with us in your game. If you have unlimbered an artillery battery go ahead and fire it. To do this simply select the unit, note its facing, then press on the far left button on the Toolbar to toggle it to "Fire mode" and then right click on a target unit in range. You can also hold down the CTRL key on your keyboard to enable "Fire Mode." If you are unsure of the artillery unit's range just right click on its image in the Unit Info area.

This is the range (value highlighted in green) info for one of the artillery units we fired.
We usually use the "On Map Results" for fire combat reports but for this Tutorial we will use the default Fire Report dialog. If you have enabled "On Map Results" deselect it at this time (in the Setting Menu).
To choose a target have your artillery unit in Fire Mode and then right click on the target unit.
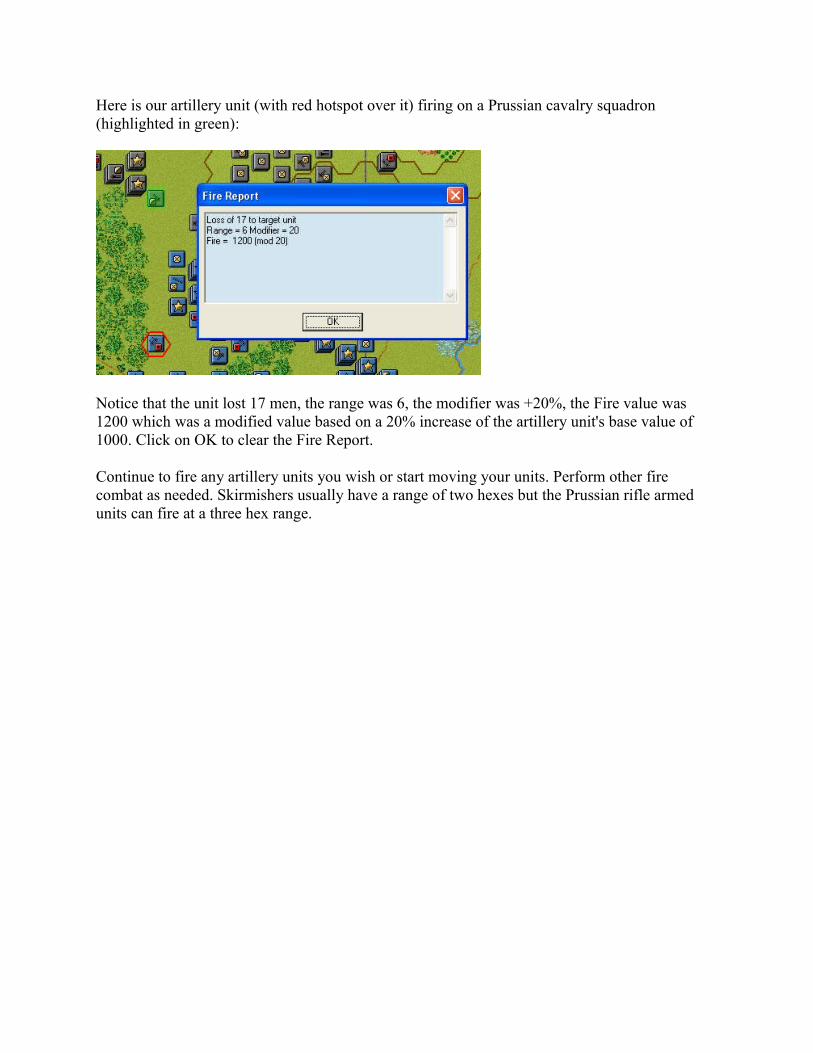
Here is our artillery unit (with red hotspot over it) firing on a Prussian cavalry squadron (highlighted in green):
Notice that the unit lost 17 men, the range was 6, the modifier was +20%, the Fire value was 1200 which was a modified value based on a 20% increase of the artillery unit's base value of 1000. Click on OK to clear the Fire Report.
Continue to fire any artillery units you wish or start moving your units. Perform other fire combat as needed. Skirmishers usually have a range of two hexes but the Prussian rifle armed units can fire at a three hex range.

The enemy fired on our units as we advanced. Here is the fire report:
Fortunately our unit did not Disorder. It was stacked with a leader and so enjoyed a -1 to its die roll for its morale test. We are closing now with the enemy!
Continue to move your units forward. We are going to perform a melee next. Select an infantry stack and move it next to an artillery or infantry unit. Infantry can also attack cavalry in village hexes. Here is a sample melee from our game:

To initiate a melee the units should be in "Move Mode" and adjacent to an enemy hex. Select the units you wish to participate in the melee. You may use more than one stack of units. Attack on the flank/rear of an enemy unit will increase your attack in most cases (skirmishers exempt from this). Artillery and wagons cannot attack. Then "drag and drop" the units onto the enemy hex. The Melee Status screen will appear showing you the detailed information of the proposed attack. Click Ok at this screen when you are done reading it. If the enemy fires at you (which often happens) just read each dialog and then click Ok for each.
You can also use the Melee menu to initiate the melee, add units to the melee, cancel the melee or resolve it. You can also use the "Resolve Melee" button found to the left of the "Zoom In" button on the Toolbar to resolve the melee and see how your units performed.
Here is the results of our sample melee. Our units pushed back the skirmishers (highlighted in green).

A short word on Fire Combat is order. Try to avoid stacking more than one battalion of infantry together in Line formation in the same hex in line of sight to artillery unit as each infantry unit will suffer losses when fired on by artillery. Depending on whether you have the "Column Pass Through Fire" option enabled your infantry in Column can also suffer this fate as well if more than one unit in Column is stacked together. Infantry in Square does not suffer this penalty but does have a higher modifier for casualties for all fire directed against it. Finally, if the Target Density Modifier is enabled then any hex that has more than 1200 men will suffer an additional fire loss.
Do not stack infantry and cavalry together or they will Disorder. Infantry battalions in different formations which stack with each other will also Disorder. See the Terrain Effects Charge (TEC.pdf) for terrain types that will cause certain Unit Types to Disorder.
It's time to do a Cavalry Charge. These are probably the most deadly melees of the game. Cavalry that charges can attack more than once and has a follow up distance it can use to reach other targets. When used correct the charge can be devastating to an enemy's line. Or you can watch as the enemy rolls up your line as well!
Select a stack of cavalry that is in movement range of the enemy. The path should be through Clear hexes and not cross over any terrain hexsides such as a Stream or Hedge. In this scenario you should choose a target stack that is no more than four hexes away.
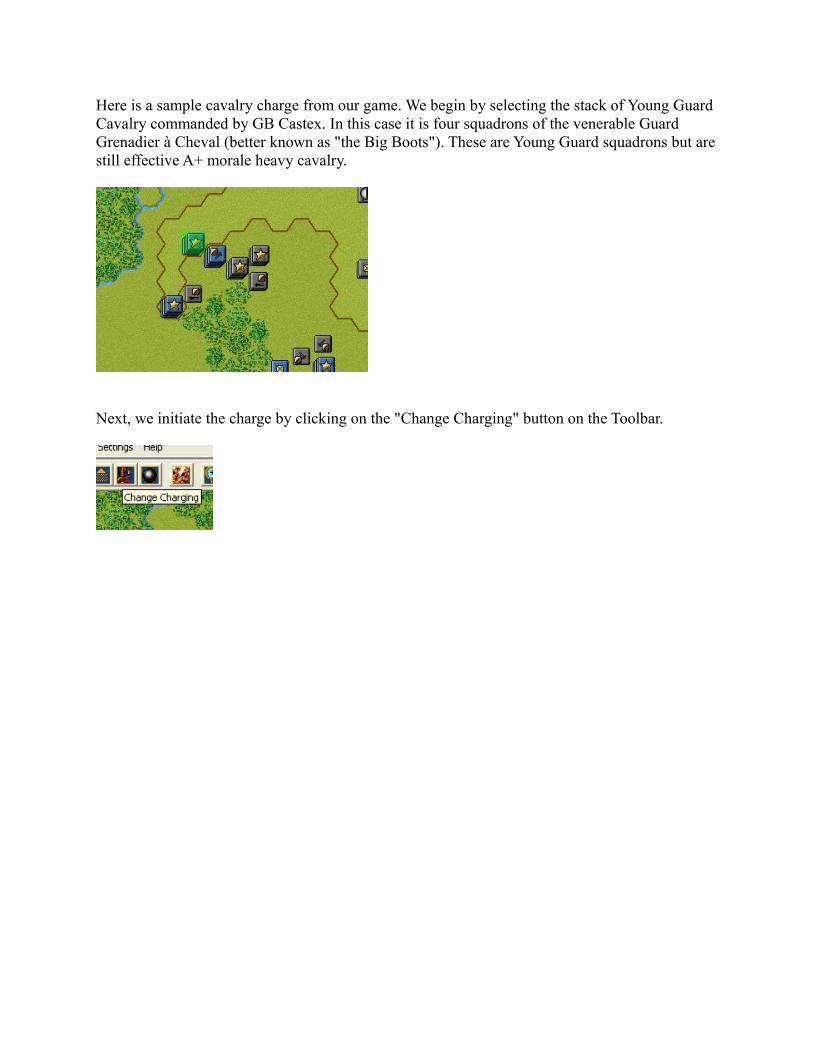
Here is a sample cavalry charge from our game. We begin by selecting the stack of Young Guard Cavalry commanded by GB Castex. In this case it is four squadrons of the venerable Guard Grenadier à Cheval (better known as "the Big Boots"). These are Young Guard squadrons but are still effective A+ morale heavy cavalry.
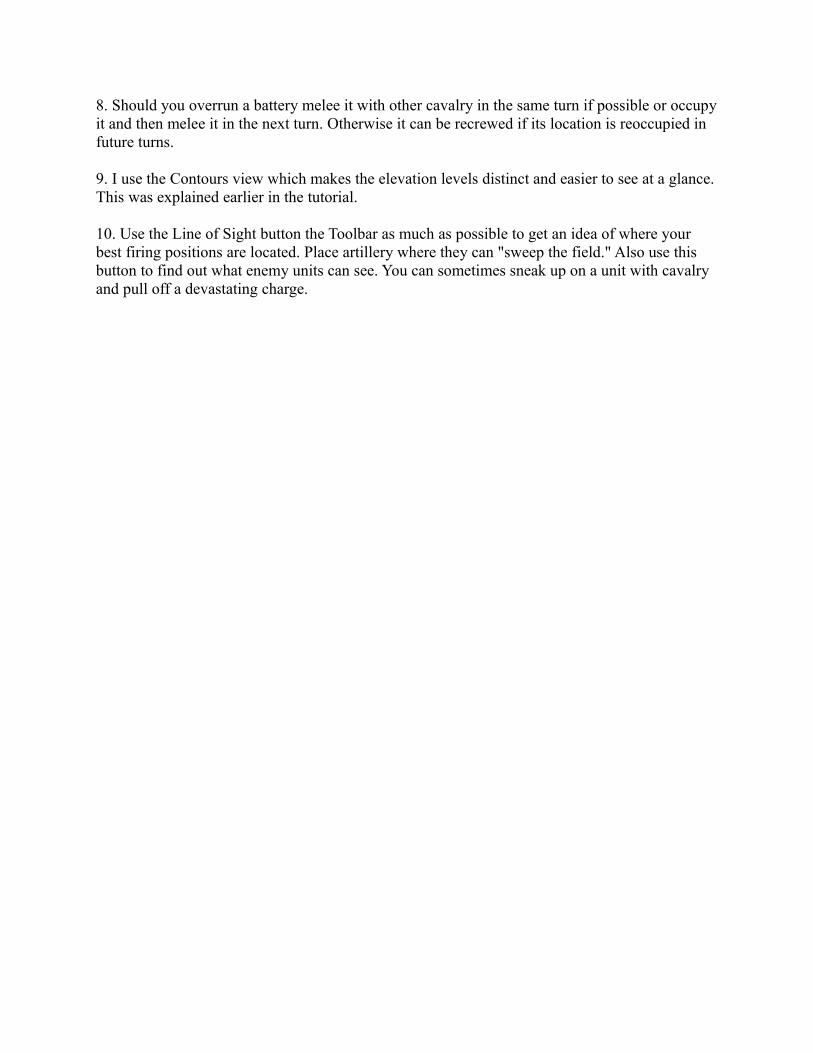
Next, we initiate the charge by clicking on the "Change Charging" button on the Toolbar.

The cavalry are then marked as "Charging."

We then move the cavalry stack one hex at a time until we reach a target. In this case it is the Pomeranian Landwehr Cavalry in hex 12, 13 (highlighted in light green):
Next, we initiate melee as we have done in the previous examples.

Finally, we perform the melee.
Now we perform a follow up melee on the same enemy cavalry. This time we are attacking them on the flank. We initiate the Melee.

The odds are not favorable so we decide if we will perform any follow up movement instead. We split our stack up into two stacks of two units each. They each use the full two hex follow up distance.
Now we are poised to attack the main Prussian line on the hill next turn if our units undisorder.

We have played through seven of the twelve turns in the game. Will the French win? Go ahead and finish up the scenario applying what you have learned so far. Refer to the manual if you have a question and if you cannot find something please feel free to contact us at John Tiller Software Support at: http://johntillersoftware.com/Support.php
There are objectives on the map that if captured by your forces will improve your chances of victory. Mainly the destruction of the enemy should be your goal. Concentrate on pressuring the enemy in one sector with an overwhelming force and if time allows reduce other units as the opportunity arises.

Here are some tips to follow during game play:
1. Always keep a good front line. Paint an imaginary line across the front and keep as few gaps as possible between your units. Allow for cavalry units to move through these gaps in order to avoid disordering infantry.
2. Keep good fire lanes for your artillery. Place them in a location where they are in range and have as wide of a line of sight as possible. The best targets are infantry in square and cavalry. Avoid firing on skirmishers and leaders unless they are the only target available.
3. Keep skirmishers with formed units or in protective terrain if cavalry are present. Otherwise put them in front of your formed units to help screen them from incoming fire. Just remember that cavalry can overrun skirmishers in Clear terrain.
4. Infantry advances best in Column but fires best in Line. Infantry in Line if defeated in melee will retreat facing their enemy. Infantry in Column will have their facing turned to one of their flank hexes and be vulnerable to fire and flank attacks.
5. Use leaders in melees sparingly. If lost they will be replaced but only with less quality leaders. Often the gain in using a leader in a melee is offset by their loss in combat and thus in the Command Test to follow.
6. Division, Corps, Wing and Army leaders can help Rally units. Corps, Wing and Army leaders will help rally any unit adjacent to them during daylight turns.
7. Keep a reserve! Expect the unexpected. Putting a couple of units in square behind the lines is not a bad idea. Putting artillery in a square is a good idea as well as they cannot be overrun by charging enemy cavalry. Cavalry is useless against a square .
8. Should you overrun a battery melee it with other cavalry in the same turn if possible or occupy it and then melee it in the next turn. Otherwise it can be recrewed if its location is reoccupied in future turns.
9. I use the Contours view which makes the elevation levels distinct and easier to see at a glance. This was explained earlier in the tutorial.
10. Use the Line of Sight button the Toolbar as much as possible to get an idea of where your best firing positions are located. Place artillery where they can "sweep the field." Also use this button to find out what enemy units can see. You can sometimes sneak up on a unit with cavalry and pull off a devastating charge.