pallet positioner al30 series - lift-tables.net positioner al30 series installation, operation and...
TRANSCRIPT

PalletPositioner
AL30 SeriesInstallation,
Operation andOwner's Service Manual
Model Number ___________________Serial # _________________________Date placed in service _____________
IMPORTANT: READ CAREFULLY
BEFORE INSTALLING OR OPERATING LIFT
Part orders are subject to a $50 net minimum charge.
February 2013

Page 2 — PRESTO OWNER’S MANUAL: AL30 SERIES
This manual was current at the time of printing. To obtain the latest, most updated version, please contact the Customer Service Department or go to our website: www.PrestoLifts.com -- you will find a complete list of current owner’s manuals to print.

PRESTO OWNER’S MANUAL: AL30 SERIES — Page 3
TABLE OF CONTENTSINTRODUCTION ................................................................................................... 4
SAFETY ................................................................................................................... 4
INSTALLATION INSTRUCTIONS ...................................................................... 5 Inspection ........................................................................................................ 5 Preparation ....................................................................................................... 5 Installation ....................................................................................................... 5 Testing lift with no load ................................................................................... 5
OPERATING INSTRUCTIONS ........................................................................... 6 Method of Operation… ................................................................................... 6 Operating Procedures ...................................................................................... 6
MAINTENANCE ..................................................................................................... 8 Hazards ............................................................................................................ 8 Maintenance Device Installation & Removal .................................................. 8 Routine Inspection and Maintenance .............................................................. 9 Troubleshooting ............................................................................................... 9 Removal & Installation of Air Actuator .......................................................... 9 Removal & Installation of Turn Table Bearings ............................................ 10 Removal & Installation of Roller Assembly ................................................. 10 Removal & Installation of Foot Control ........................................................ 10 Removal & Installation of Pressure Relief Valve ...........................................11
OPTIONS ................................................................................................................11 Spring Positioner ............................................................................................11 Portability Package .........................................................................................11
ORDERING REPLACEMENT PARTS ............................................................. 19
RESTOCKING POLICY ....................................................................................... 20
RETURN MATERIALS AUTHORIZATION (RMA) PROCEDURES ............ 21
WARRANTY ......................................................................................................... 22
LIST OF FIGURES & DIAGRAMS Fig. 1 Loading Manually ............................................................................. 6 Fig. 2 Unloading Manually.......................................................................... 6 Fig. 3 Loading with a forklift ...................................................................... 7 Fig. 4 Unloading with a forklift ................................................................... 7 Fig. 5 Pinch Points ....................................................................................... 8
Diag. 1 Pneumatic Schematic ....................................................................... 12 Diag. 2 Welding Detail ................................................................................. 12 Diag. 3 Roller Assembly............................................................................... 13 Diag. 4 Maintenance Device ........................................................................ 13 Diag. 5 Parts Identification ........................................................................... 14 Diag. 6 Detail "A" Pneumatic Schematic .................................................... 14 Diag. 7 Parts Identification ........................................................................... 15 Diag. 8 Label and Nameplate Locations ...................................................... 16 Diag. 9 Carrier Handle Assembly (optional) ................................................ 17 Diag. 10 Portable Base Assembly (optional) ................................................. 17 Diag. 11 Spring Positioner (optional) ............................................................ 18
Page 4 — PRESTO OWNER’S MANUAL: AL30 SERIES
INTRODUCTION
Presto Lifts Model AL30 allows positioning of the lift for the operator to either load or unload it at the ideal ergonomic work height. The pallet positioner is engi-neered to meet or exceed ANSI MH29.1 standard. The pallet positioner is designed for pneumatic operation requiring clean, dry air supply of 80 PSI at 15 CFM free air and may be used in a wide variety of industrial settings.
This manual contains instructions on the safe and proper installation, use and maintenance of the pallet positioner. Be sure this manual is available, read and un-derstood by the personnel who will install, service, and operate the unit. The instructions in this manual cover most typical industrial applications. Where unique situ-ations arise, not covered by this manual, contact Presto
Lifts for additional instructions. Additional manuals are available upon request.
Presto Lifts’ product warranty is shown on the rear cover of this manual. This owners manual is not intended to be or create any implied warranty of merchantability or fitness for a particular purpose, all of which are hereby expressly excluded. As set forth more specifi-cally in the product warranty, Presto Lifts’ obligation un-der that warranty is limited to the repair or replacement of defective components, which shall be the buyer’s sole remedy, and Presto Lifts’ shall not be liable for any loss, injury, or damage to persons or property, nor for any direct, indirect, or consequential damage of any kind resulting from the pallet positioner.
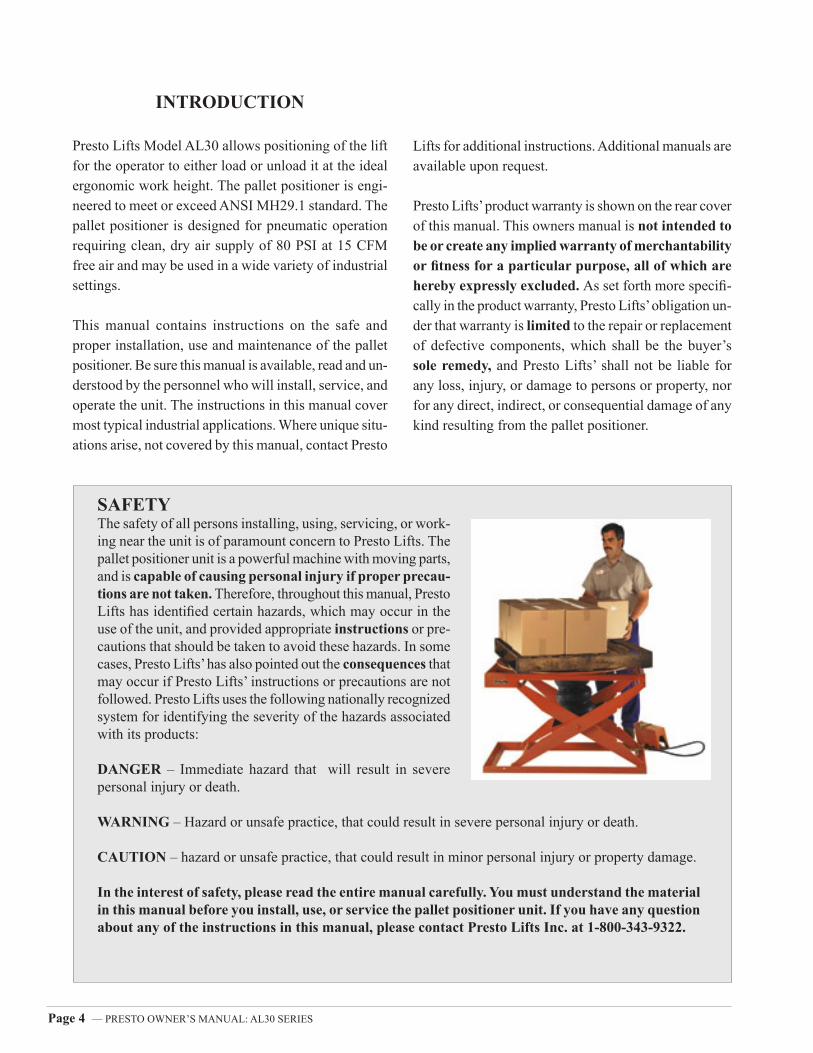
SAFETYThe safety of all persons installing, using, servicing, or work-ing near the unit is of paramount concern to Presto Lifts. The pallet positioner unit is a powerful machine with moving parts, and is capable of causing personal injury if proper precau-tions are not taken. Therefore, throughout this manual, Presto Lifts has identified certain hazards, which may occur in the use of the unit, and provided appropriate instructions or pre-cautions that should be taken to avoid these hazards. In some cases, Presto Lifts’ has also pointed out the consequences that may occur if Presto Lifts’ instructions or precautions are not followed. Presto Lifts uses the following nationally recognized system for identifying the severity of the hazards associated with its products:
DANGER – Immediate hazard that will result in severe personal injury or death.
WARNING – Hazard or unsafe practice, that could result in severe personal injury or death.
CAUTION – hazard or unsafe practice, that could result in minor personal injury or property damage.
In the interest of safety, please read the entire manual carefully. You must understand the material in this manual before you install, use, or service the pallet positioner unit. If you have any question about any of the instructions in this manual, please contact Presto Lifts Inc. at 1-800-343-9322.

PRESTO OWNER’S MANUAL: AL30 SERIES — Page 5
INSPECTIONUpon receipt of the pallet positioner AL-30 remove the shipping material and inspect the unit completely to determine if there is any shipment damage and the lift is complete. Rotate the turntable to be sure the table rotates freely without binding and inspect for loose bearings. Do not use the lift if there appears to be any damage. Verify that the maintenance device is provided (See Diagram 4)
PREPARATION1. Before you start to use the unit check for local codes
and ordinance, which may apply.
2. Read all of the installation instructions carefully. Be sure to read and understand all of the precautionary information.
3. The unit should be used indoors and be protected from liquids and harsh environments.
4. To remove the unit from the skid, you will need a crane, hoist or lift truck. Raise the unit by the base only. Lift the unit until it clears the skid. Slide the skid from under the unit. Lower unit to the floor.
5. Check the lift’s nameplate for load capacity rating, serial number and model identifications. Write on the front of this manual all the data and the date of instal-lation. Please refer to this data when ordering parts or requesting further information. (See Diagram 8)
CAUTIONDo not operate the lift until the installation pro-cedures are completed. Do not lift the unit by the turntable, use a sling, or place forks under the base to move the unit.
INSTALLATION1. Make sure the floor in the installation/operating area
is flat, stable and free from surface defects.
CAUTION When moving the lift never attempt to pick it up by the turntable. The lift should be picked up by the base only.
2. The pallet positioner must have the base in full contact with the floor. In order to provide full contact with the floor the base may be shimmed or grouted.
3. Lift must be securely anchored to the floor using 4 1/2” anchor bolts. Each bolt must be capable of with-standing 1000 lbs. of upward force.
4. Pallet positioners are designed for normal factory environments.
CAUTIONQualified and authorized installation personnel should perform all pneumatic connections.
5. The lift requires a minimum of 80 PSI; at 15 CFM free air clean and dry air for optimum performance. (See Diagram 1)
6. Be certain the supply line is turned off and residual air is purged. Connect the supply line to the “In” port of the foot control.
CAUTION It is recommended that a lockout tagout valve as-sembly with a purge port be added to the installation for maintenance and servicing of the unit.
7. Open the air supply slowly and check for leaks. Repair as needed following the instructions on page 8.
WARNINGThe lift is equipped with a pressure relief valve. The valve is factory preset at the safe operation limits of the air actuator. Tampering or replacing with compo-nents not supplied by Presto Lifts will void warranty and could result in serious bodily injury.
TESTING THE LIFTWITH NO LOAD
1. Clear the area of any loose material before testing the lift. Be sure the lift has no obstructions above it or on any side. Using the foot control provided, briefly operate the lift (5-10 seconds). If the lift begins to rise and functions properly, continue to the full upright position.
INSTALLATION INSTRUCTIONS

Page 6 — PRESTO OWNER’S MANUAL: AL30 SERIES
CAUTION If the lift does not rise immediately, refer to the trouble shooting section of this manual (See page 9) and correct the abnormal condition before continu-ing.
2. After raising the lift completely, lower the lift com-pletely. It should lower slowly and smoothly. If satisfied with the lift’s operation, raise and lower the lift and stop at different levels in order to familiarize yourself with the lift’s operating characteristics.
OPERATING INSTRUCTIONS
METHOD OF OPERATIONThe pallet positioner model AL30 lifts are equipped with a pressure relief valve factory preset to the maximum safe capacity of your lift.
The foot valve, controls the flow of air into and out of the air stroke actuator. As the actuator is pressurized, the scissor legs are forced apart causing the tabletop to rise. Releasing the pressure causes the table top to lower.
CAUTIONDo not maintain the control valve in the operating position if the lift does not move or it has reached its up limits. Damage to the pneumatic system may result.
OPERATING PROCEDURES
Loading ManuallyAdd boxes or parts until the pallet is full. Always add loads in layers, rotating the pallet to work from the nearside. The unit will gradually lower the pallet until it reaches the bot-tom. See Figure 1.
Removing Loads ManuallyRemove boxes or parts until the pallet is empty. Always remove loads in layers, rotating the pallet to work from the nearside. The unit will gradually raise the pallet. See Figure 2.
Operating Safety -- Manual Use1. Do not use this unit with a load greater than the rated
load. This includes the weight of the payload and
the weight of the pallet. If you overload the unit, it may be damaged.
2. Never push the load off of the side of the unit. If you do this, the frame of the unit may jump upward.
3. Never use the unit when anyone is sitting or riding on the turntable.
Figure 1. Loading Manually
Figure 2. Unloading Manually
WARNING! Ensure that loading and unloading of the AL30 is done in even layers. Loading or unloading a load on one side may cause the load to tip over and you may be injured. This can also damage the unit.
PRESTO OWNER’S MANUAL: AL30 SERIES — Page 7
4. Do not try to use this unit with damaged or broken pallets. Broken pallets may have boards or nails which hang down below the main part of the pallet. As the pallet is turned, these boards or nails may catch on the frame. The pallet may stop turning suddenly and this can cause the load to shift. You may be injured and the unit may be damaged. If the boards or nails on the bottom of the pallet extend down more than 1/8 inch, they will interfere with the turning action.
5. Stay clear of the turntable when it is moving. As the pallet turns, a part of the load may rotate around and hit you.
6. Keep the area around the unit clean. Do not allow any dirt, debris, spilled oil, or excess grease to collect. These materials may cause you to slip while the unit is operating and you may be injured.
2. Be sure the load is centered on the unit.WARNING!
If the load is off-center, it may shift when the turntable is turned. You may be hurt or the unit or load may be damaged.
Figure 3. Loading with a Fork Lift
Loading with a Fork Lift1. Place the load on the lift, then lower the fork lift. Before removing the load, be sure the unit is carrying the weight, not the fork lift. See Figure 3.
• Be sure the forks on the lift are clear of the inside of the pallet.
WARNING! If you skip these steps, the load may drop sud-denly when you remove the fork lift. You may be hurt or the unit or load may be damaged.
WARNING! Never drop the load on the turntable. If you do this while the turntable is moving, the load may shift. You may be injured or the unit may be dam-aged. If you drop the load while the turntable is stopped, the unit may be damaged.
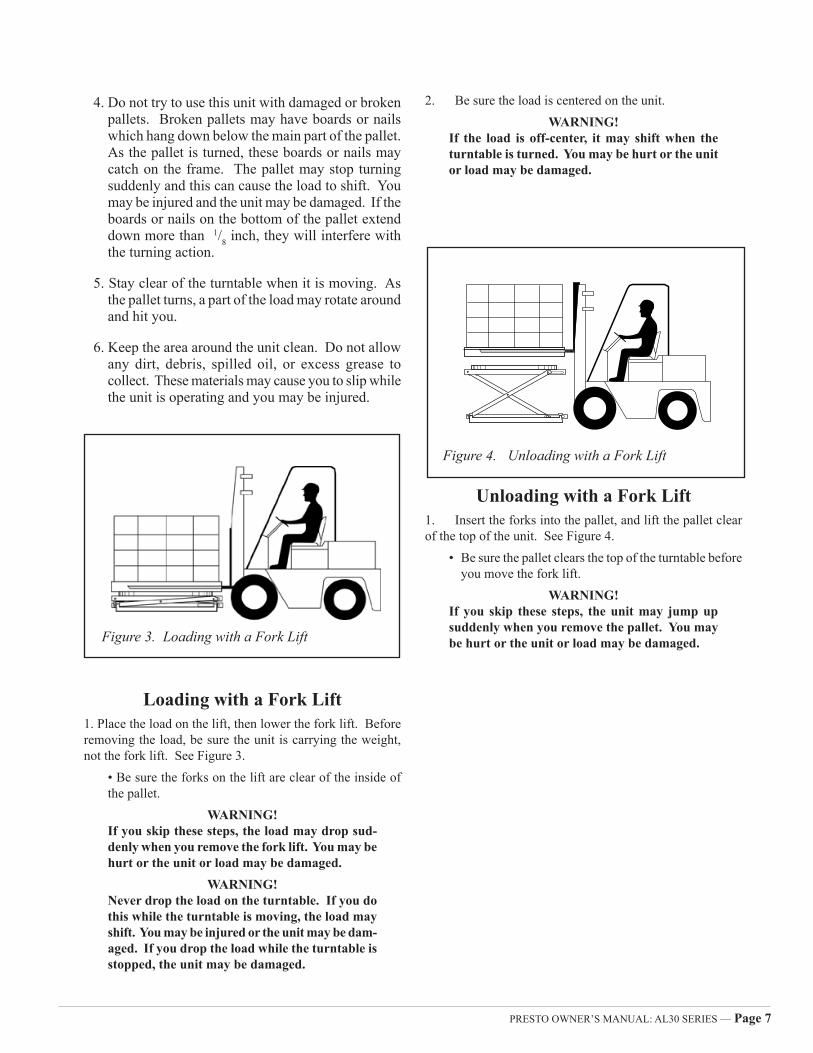
Figure 4. Unloading with a Fork Lift
Unloading with a Fork Lift1. Insert the forks into the pallet, and lift the pallet clear of the top of the unit. See Figure 4.
• Be sure the pallet clears the top of the turntable before you move the fork lift.
WARNING! If you skip these steps, the unit may jump up suddenly when you remove the pallet. You may be hurt or the unit or load may be damaged.

Page 8 — PRESTO OWNER’S MANUAL: AL30 SERIES
MAINTENANCEBefore servicing, read and understand all of this sec-tion and operating instructions. Qualified personnel should do all servicing. Qualified personnel should be able to read and understand pneumatic circuits and schematics.
They should also be able to troubleshoot pneumatic circuits safely in accordance with industry-accepted practice. If in doubt as to the instructions or unusual circumstances contact Presto Lifts for further informa-tion.
HAZARDSThere are several hazards you should be aware of as you service the unit.
DANGERThe pneumatic unit when fully pressurized can cause serious injury if the air is suddenly released under pressure. Be sure to shut off air supply. Purge all the air from the unit and disconnect supply line prior to servicing pneumatic power supply and lines.
WARNINGBefore servicing the unit install the maintenance device per instructions. “ Maintenance Device In-stallation” on page 8. Never go under or service the lift with a load on it. If possible service the unit in a down position. If the pneumatic system requires repairs, shut off, and lockout tagout lift.
If no lockout tagout system is available, shut off air sup-ply, purge the lift system of any pressure and disconnect the supply line before beginning repair. The model AL 30 series lifts can be maintained and serviced in a raised position. Maintenance devices are provided for safely blocking the lift in a raised position.
MAINTENANCE DEVICE INSTALLATION & REMOVAL
(Refer to Diagram 4)
WARNING!Only authorized personnel should perform inspec-tion or maintenance and service procedures. Unau-thorized personnel attempting these procedures do so at the risk of severe injury or death.
DANGER!Failure to properly adhere to lift blocking procedures is to risk the sudden and uncontrolled descent of the lift during maintenance or inspection. A falling lift can cause injury or death.
This procedure describes the only factory-approved method of working under a lift. Follow these instruc-tions EVERY time you plan to reach or crawl beneath the lift to perform service or maintenance- no matter how momentary that might be.
If the factory-provided maintenance device is damaged or missing, stop immediately and consult the factory for assistance. The manufacturer is not liable for your failure to use the approved maintenance device and procedures that have been provided.
1. Any load must be removed from the lift prior to engag-ing the maintenance device. These devices are designed to support an unloaded lift only. Failure to remove the load from the lift prior to blocking could cause the failure of the maintenance device and allow the to fall unexpectedly. This can result in personal injury or death, or permanent to the maintenance device and/or the lift.
2. Raise the lift to its fully raised position. If you do not, the maintenance device may not be able to be placed properly in its designed blocking position.
3. Remove the maintenance device (item A Diag. 4) from its storage location and place it into the engaged position and secure with locking pin (item B Diag. 4).
Pinch Points

PRESTO OWNER’S MANUAL: AL30 SERIES — Page 9
4. Lower the lift until it makes complete contact with the maintenance device. Re- check to ensure that all provided devices are fully and securely engaged. If the device is not fully engaged the lift could fall unexpect-edly, resulting in permanent damage to the device or the lift.
DANGER!If for any reason you are unable to lower the lift com-pletely onto the maintenance device, stop immedi-ately and consult the factory approved maintenance device could result in severe injury or death.
5. (For single-acting hydraulic, and pneumatic lift) once the maintenance device is properly and securely engaged, continue to press the down button, valve or switch for an additional 10-20 seconds to relieve all pressure in the operating system.
WARNING!Failure to relieve operating system pressure could result in the sudden and unexpected release of high-pressure fluids (or air) during maintenance and/or repair of the lift and result in severe injury or death.
6. Follow OSHA pneumatic lock-out/tagout procedures. Disconnect and tag all other power sources to prevent an unplanned or unexpected actuation of the lift.
7. Once inspection or work is complete, reverse the performance of the steps above to raise the lift off the maintenance device and place the device back into its designated storage position.
ROUTINE INSPECTIONAND MAINTENANCE
All routine inspection and maintenance should be performed on a weekly basis for continual usage, semi-monthly for daily usage and monthly for intermittent usage.
CHECKS 1-6 MUST BE PERFORMEDWITH MAINTENANCE DEVICE IN PLACE.
1. Check the pneumatic system for leaks with the lift unloaded and in it’s fully raised position.
a) Check all fittings, lines, and components for escaping air.
b) In addition to listening for an audible hissing, perform a soap solution bubble test. (Solution maybe purchased or made. By using dishwash-ing soap and water in a spray bottle. Spray fittings to detect leaking.)
c) Repair any leaks immediately. Following all the precautionary procedures outlines in this manual.
2. Check air stroke actuator for any signs of wear, chafing, nicks, splits, etc. Replace as specified in section “Re-moval & Installation of Air stroke Actuator"(pg. 9)
3. Check rollers for signs of wear. Replace if damaged. Clear roller track of any debris. (See Diagram 3)
4. Check roller snap ring and washer. Replace if dam-aged. (See Diagram 3)
5. Tighten all nuts and bolts.
6. Bearings on all lifts are permanently lubricated and do not require servicing.
TROUBLESHOOTINGUnit does not rise:
⇑ Check air supply, supply line valve open, lockout tagout valve reset.
⇑ Check foot valve - lever pin in place.⇑ Check weight on lift, does it exceed the lift capacity?
(See Diagram 8, nameplate)
Unit does not lower:⇑ Check foot valve – lever pin in place.⇑ Check for any obstruction in base roller track.
Unit raises slowly:⇑ Check air supply. Does it meet the minimum require-
ment of 80 psi at 15 CFM, free air?⇑ Over loaded lift. Check load weight, capacity rating of
lift is on nameplate attached to the lift (See Diag. 8)
REMOVAL AND INSTALLATION OF AIR STROKE ACTUATOR
1. Install the maintenance device on the lift as specified on page 8. Be sure air supply is locked out, tagged out and purged.

Page 10 — PRESTO OWNER’S MANUAL: AL30 SERIES
2. Remove the stainless steel braided hose (14) and brass elbow (24) (See Diagram 6)
3. Remove the (4) 3/8-16 hex bolts (29) & washers (9). The actuator will collapse as the first two bolts are removed. (See Diagram 5)
4. Installation is the reverse of removal. Be sure to use a Teflon sealant on all pneumatic connections.
REMOVAL AND INSTALLATIONOF TURNTABLE BEARINGS
1. Install the maintenance device lift as specified on page 8. Be sure air supply is locked out and purged.
2. Using an allen wrench with extension. Remove the (2) allen screws on the collar of the center flange bear-ing. (See Diagram 5)
3. Remove turntable raising in a straight up motion.
4. Remove and replace bearings (See Diag. 5, detail B)
5. Reinstall turntable and secure with the two allen set screws.
REMOVAL AND INSTALLATIONOF ROLLER ASSEMBLIES
(See Diag. 2, item 2)
1. Install maintenance device as specified on page 8. Be sure air supply is locked out and purged.
2. Remove turntable as specified in section “Removal and Installation of Turntable Bearings” (See page 10).
3. Remove the top (2) bolts from air actuator. The air actuator will collapse when the bolts are removed.
4. Grind the weld off top pivot pin (2 places) (See weld-ing detail Diag. 2 item 2)
5. Remove pins and remove table by rotating 45 degrees and raising so as to disengage top rollers from captive portion of top assembly.
6. Remove and replace top roller assembly, washer and retaining ring. (See Diagram 3)
7. Raise and support leg assembly (mechanically using fork lift or hoist) exposing the lower rollers in a raised position.
8. Remove and replace lower roller assembly, washer and retaining ring. (See Diagram 3)
9. Reverse procedure in item 7 so lift is supported on maintenance device.
10. Reinstall top pins p/n 1044-025 (See diag. 2, item 2)
11. Weld pins in position per Diagram 2, item 2.
WARNING!An AWS certified welder must do the welding. Sub-standard welds can cause failure and damage to equipment and possibly personal injury.
12. Bolt air actuator in place.
13. Reinstall turntable and secure with the two Allen set screws in center flange bearing.
14. Cycle the lift pneumatically and verify performance both empty and loaded as specified in “Testing With No Load” (pg. 4)and in “Operating Instructions” on page 5.
REMOVAL AND INSTALLATIONOF FOOT CONTROL
(See Diagram 6)
1. Be sure air supply is locked out, tagged out, purged and lift is in a fully lowered position.
2. Remove two (2) plugs (5), muffler (4), and elbow (6).
3. Disconnect hose (13) and supply line.
4. Remove two securing nuts/ bolts and remove valve from air guard.
5. Installation is the reverse of removal. Be sure to use
Teflon sealant on pneumatic connections.

PRESTO OWNER’S MANUAL: AL30 SERIES — Page 11
REMOVAL AND INSTALLATIONOF PRESSURE RELIEF VALVE
(See Diagram 6, item 21)1. Block the lift as specified in “Maintenance Device
Installation & Removal” on page 8. Be sure the air sup-ply is locked out and purged.
2. Remove valve (21).
3. Use only Presto supplied relief valves.
4. Installation is the reverse of removal. Be sure to use Teflon sealant on pneumatic connections.
OPTIONS
Spring Positioning (See Diagram 11)Positioners are designed for holding the turntable in place, it is not designed to stop or brake a rotating load. The positioner is available with positioning in 90-degree increments. (See Presto Dealer for pricing and availability)
Portability Package (See Diagram 10)This option is designed for relocating the lift (without a load) to multiple locations. It is not designed to move with a load. (See Diagram 9 & 10 service parts)
CAUTION!Attempting to move the lift with a load could cause structural damage to the lift as well as personal injury to the person attempting to move the lift.
Accordion Safety SkirtThis option is available for perimeter protection. It’s designed to cover the scissor leg assembly. Order part number 1000-083-02.

Page 12 — PRESTO OWNER’S MANUAL: AL30 SERIES
DIAGRAM 2 - Welding Detail
DIAGRAM 1 - Pneumatic Schematic
ITEM QTY DESCRIPTION P/N1 2 Pin, Pivot (Bottom) 1001-0092 2 Pin, Pivot (Top) 1044-025

PRESTO OWNER’S MANUAL: AL30 SERIES — Page 13
DIAGRAM 3 - Roller Assembly
DIAGRAM 4 - Maintenance Device
ITEM QTY DESCRIPTION P/N1 4 Assy. Roller 100-1772 4 Washer N03383 4 Ring Retaining PSL28D

Page 14 — PRESTO OWNER’S MANUAL: AL30 SERIES
DIAGRAM 5 - Parts Identification
DIAGRAM 6 - Detail "A" Pneumatic Schematic (Top View)
NOTE: Items 24 & 14 are to be oriented as shown to avoid crimping of hose

PRESTO OWNER’S MANUAL: AL30 SERIES — Page 15
DIAGRAM 7 - Parts Identification
ITEM QTY DESCRIPTION PART NUMBER2 1 ASSY, TURNTABLE 1044-0473 8 BEARING 23321774 8 BEARING, BRONZE 1015-0655 1 BEARING, FLANGE 1015-0867 4 NUT, HEX 3/8-16 N01008 4 NUT, HEX 1/2-13 N01609 8 WASHER, LOCK 3/8" N026010 4 SCREW, FLT HD 3/8-16 X 1-1/2" N046711 4 SCEW, SOC HD 1/2-13 X 2-1/2" N096212 1 ACTUATOR, AIRSTROKE 1016-014-0213 1 LINE, CONTROL - AIR 1016-026VR14 1 ASSY, HOSE - SS BRAID 1016-07915 1 NIPPLE, 1/4" X 1/4" H104-0416 1 MUFFLER, PNEUMATIC 1016-08917 1 FITTING, ADAPTER H103F18 1 FITTING, BULKHEAD 1/4" 1016-09219 1 VALVE, AIR - FOOT 1016-097-0120 1 GUARD, AIR VALVE 1016-097-0221 1 VALVE, RELIEF 1044-04522 8 WASHER, LOCK 1/2" N028023 2 PLUG 1/4" N121024 2 ELBOW, STREET 1/4" A41125 1 TEE, FEMALE 1/4" H103J26 1 NAMEPLATE (S/N) C165L27 1 NAMEPLATE (CAPACITY) C165B-3028 1 DECAL (DANGER) 299835329 4 SCREW, HEX HD 3/8-16 X 1" N092030 2 SCREW, DRIVE N130031 1 DEVICE, MAINTENANCE 1028-103-01VR32 1 DECAL (WARNING) C20033 2 DECAL (DANGER) C190XLR34 1 DECAL (PRESTO) C183N35 1 DECAL (MADE IN USA) C190

Page 16 — PRESTO OWNER’S MANUAL: AL30 SERIES

PRESTO OWNER’S MANUAL: AL30 SERIES — Page 17
DIAGRAM 9 - Carrier Handle Assembly (Optional)
P/N 100-030-01VR
DIAGRAM 10 - Portable Base Assembly (Optional)

DIAGRAM 11 - Spring Positioner (Optional) P/N 1015-051VR
ITEM QTY DESCRIPTION PART NUMBER1 1 ASSY, BASE PLATE 1015-0482 1 ASSY, ARM 1015-0503 1 SPRING 1015-0594 2 BEARING C1145 1 SPACER 99100-46 1 SCREW, 3/8-16 X 1 1/2 HHCS N09617 1 SCREW SET, 3/8-16 X 1 1/2 N04668 1 WASHER, LOCK 3/8 N02609 1 NUT, HEX NYLON INSERT 1/2 -20 N0140-0110 1 NUT, HEX 3/8-16 N0100

Ordering Replacement PartsPresto Lifts has carefully chosen the components in your unit to be the best available for the purpose. Replacement parts should be identical to the original equipment. Presto Lifts will not be responsible for equipment failures resulting from the use of incorrect replacement parts or from unauthorized modifications to the unit. Presto Lifts can supply all replacement parts for your lift. With your order, please include the model number and the serial number of the unit. You can find these numbers on the name plate. This plate is located on the base frame.To order replacement parts, please call the Presto Parts Department. Parts are shipped subject to the following terms:
• FOB factory• Returns only with the approval of our parts department.• Credit cards preferred (except parts covered by warranty).• Freight collect for truck (except parts covered by warranty).• Freight – prepaid and invoice for small parcel shipments (except parts covered by warranty).
Parts replaced under warranty are on a “charge-credit” basis. We will invoice you when we ship the replacement part, then credit you when you return the worn or damaged part.
Presto Parts Department50 Commerce WayNorton, MA 02766
Telephone: 800-343-9322FAX: 888-788-6496
Email: [email protected]
Troubleshooting
Troubleshooting Check ListProblem Possible Cause Check This
The top of the unit rotates The frame of the unit may not Move the unit to a level surface or away from you. be level. install the optional adjusting feet.
Excessive “rumble” when Wear or lack of lubrication to Remove turntable, replace bearings.unit operates. bearings under turntable.
Wear on underside Normal condition caused by No repair necessary.of turntable. wear-hardening of metal.

PARTSStandard parts may be returned with a 20% restocking fee. Modified or custom-engineered parts are not returnable. Unfortunately, due to potentially concealed damage, all sales of electrical assemblies are final.
QUALITY ISSUESShould you feel there is a quality problem, please contact the seller to ask questions and gather information on how to rectify the issue. Presto Lift Inc. reserves the right to determine potential credits, as a result of factory defects, based on its inspection of the merchandise.
GENERALAll products shipped from our factory have passed Quality Assurance inspection and testing. The carrier of choice has signed for, and accepted the product in new working condition. The customer should inspect to ensure it is not received damaged, has no concealed damage or is not incomplete. Parts orders are determined to be complete based upon Presto Lift, Inc. inspection sheets and carrier shipping weights.

RETURN GOODS AUTHORIZATION POLICY
Presto Lifts provides the Return Goods Authorization (RGA) Policy, for specific models, as a courtesy to our distributors in the event they do not receive what they ordered. If a customer wishes to return a Presto Lifts product, please contact the Customer Service Department and request an RGA number. This request must be made on or before the fifteenth calendar day following the date of Presto Lifts’ invoice for the merchandise. Not all units are returnable. Quantity orders and special designs cannot be returned under any circumstances. Presto Cus-tomer Service reserves the right for final judgment on all product returns.
The RGA number must appear on the outside of any packaging material for a return to be ac-cepted and processed by Presto Lifts. Customers shipping returns from the Continental US, Canada, or Mexico have thirty (30) days from date of RGA issue to have the product arrive at Presto Lifts’ facility. All merchandise must arrive Free on Board at Presto Lifts’ facility or the shipment will be refused and returned to the sender. All credits are issued less restocking and refurbishing charges, regardless if the merchandise was damaged in transit.
Return addresses: please refer to your RMA for the address to which your product should be returned.
Presto Lift Inc.715 Highway 77
Manila, Arkansas 72442
Telephone: 800-343-9322Fax: 888-788-6496

Presto Lifts Limited Warranty PolicyPresto Lifts warrants all of its products against defects in the welded structural frame and, if applicable, scissor legs from faulty material and workmanship for a period of five (5) years from the date of invoice.
A lifetime limited warranty is provided for the Airstroke ActuatorTM in all pneumatic lifts against any defect due to faulty material or workmanship.
All other components have a limited warranty against defects in faulty material and workmanship for a two (2) year period from the date of invoice date of invoice and 30 day limited warranty on labor. Please note that prior authorization from Presto Lifts is required on all warranty work.
There are no implied warranties of any kind, more specifically, there are no warranties of merchantability or fitness for any particular purpose. Presto Lifts' sole warranty shall be as set forth in this limited warranty.
Presto Lifts will elect to repair or replace a defective component without charge, if any components should become defective within the limited warranty period. Proof of pur-chase is required for warranty. The charge for shipping the defective component is the responsibility of the buyer and must be accompanied with an RMA number. The shipping charge to return the component to the buyer is the responsibility of Presto Lifts, Inc.
This limited warranty does not cover labor expense for removal or reinstallation of com-ponents after thirty days. This limited warranty shall not cover, among other things: dam-ages resulting from foreign matter or water, failure to provide reasonable and necessary maintenance or failure to follow operating instructions. The limited warranty is not valid for damage resulting from negligence, accident, unreasonable use, abuse or misuse, ex-ceeding data plate capacities or altering the product without Presto Lifts authorization.
Presto Lifts expressly disclaims and excludes any liability for consequential, incidental, indirect or punitive damages or financial loss to people or property resulting from any breach of warranty or the operation or failure of this product.
Presto Lifts makes no representation that this product complies with local, state, or federal safety/product standards codes. Should this product fail to comply in any way with those codes, it shall not be considered a defect of materials or workmanship. Presto Lifts shall not be held liable for any damages resulting from noncompliance. It is the dealer's responsibility to exercise this limited warranty. This limited warranty is provided to the original purchaser (defined as the original end user) and is nontransferable. This constitutes the complete and final agreement involving Presto Lifts and limited warranty obligations for products.

LET PRESTO MEET THOSE NEEDS!
MANY NEEDS REQUIRE MANY OPTIONS...
Call Presto Sales for stock or
customized lift inquiries:
800-343-9322
Email: [email protected]