oxi modul1
TRANSCRIPT
8/14/2019 Oxi modul1
http://slidepdf.com/reader/full/oxi-modul1 1/7
Oxi module — folding instructionsThese are folding instructions for the Oxi module designed by Michał Kosmulski. This module is my first published modular origami unit andwas inspired by Thomas Hull's Hi!! unit. "ince #'m too la$y to draw nice diagrams% # &ust made photographs of the module at differentstages of folding. The module is uite simple so # hope such pictures are clear enough.The module desing itself is copyrighted ( )**+ by Michał Kosmulski but of course you are free ,and encouraged- to use for folding yourmodels and to use it as an inspiration when inenting your own modules.The pictures ,diagrams- below are aailable under a /reatie /ommons license.
#mage thumbnails on this page and the ful l0si$e images they link to are licensed under a /reatie /ommons 1icense ,2ttribution0"hare2like3
2sk me about other licensing terms-.
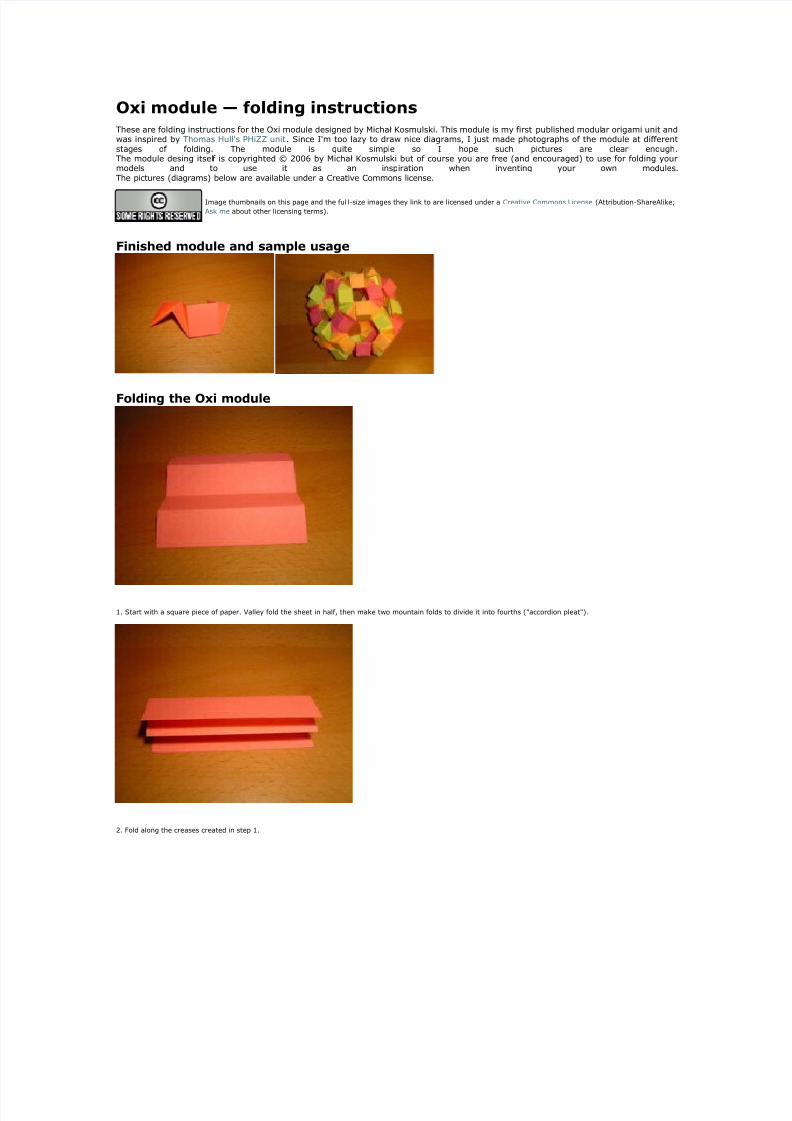
Finished module and sample usage
Folding the Oxi module
4. "tart with a suare piece of paper. 5alley fold the sheet in half% then make two mountain folds to diide it into fourths ,6accordion pleat6-.
). 7old along the creases created in step 4.
8/14/2019 Oxi modul1
http://slidepdf.com/reader/full/oxi-modul1 2/7
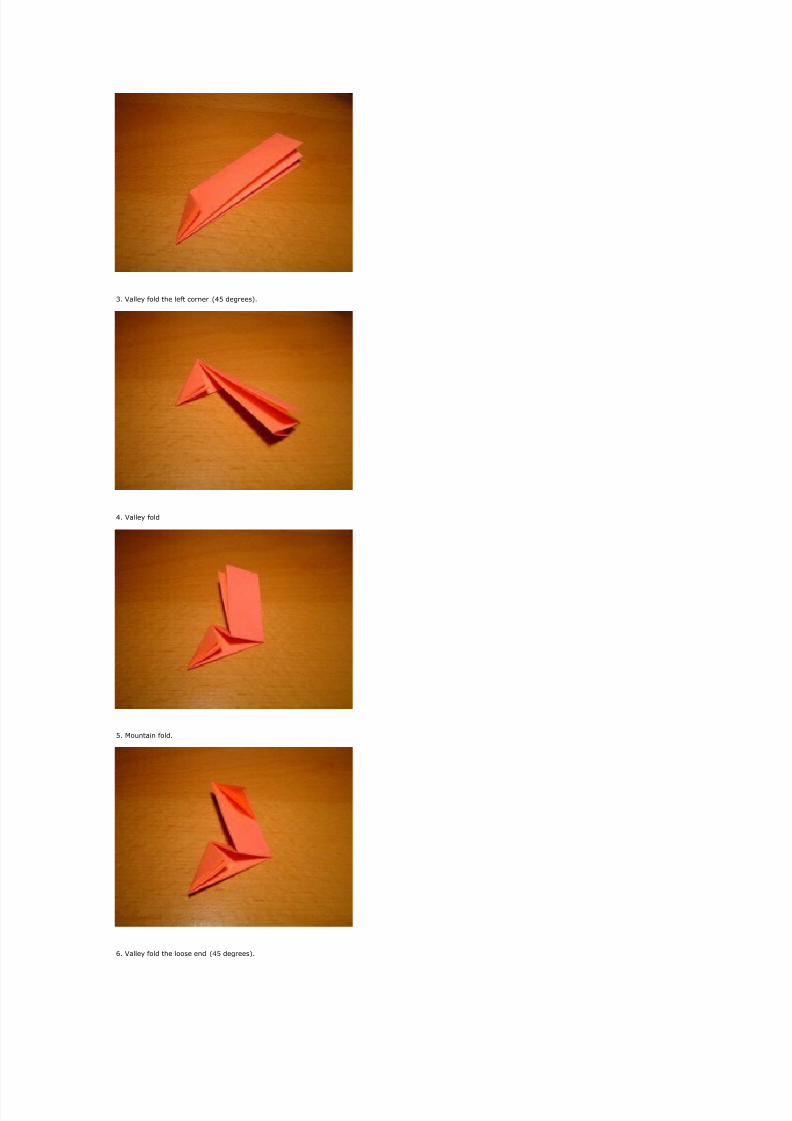
8. 5alley fold the left corner ,9: degrees-.
9. 5alley fold
:. Mountain fold.
+. 5alley fold the loose end ,9: degrees-.
8/14/2019 Oxi modul1
http://slidepdf.com/reader/full/oxi-modul1 3/7
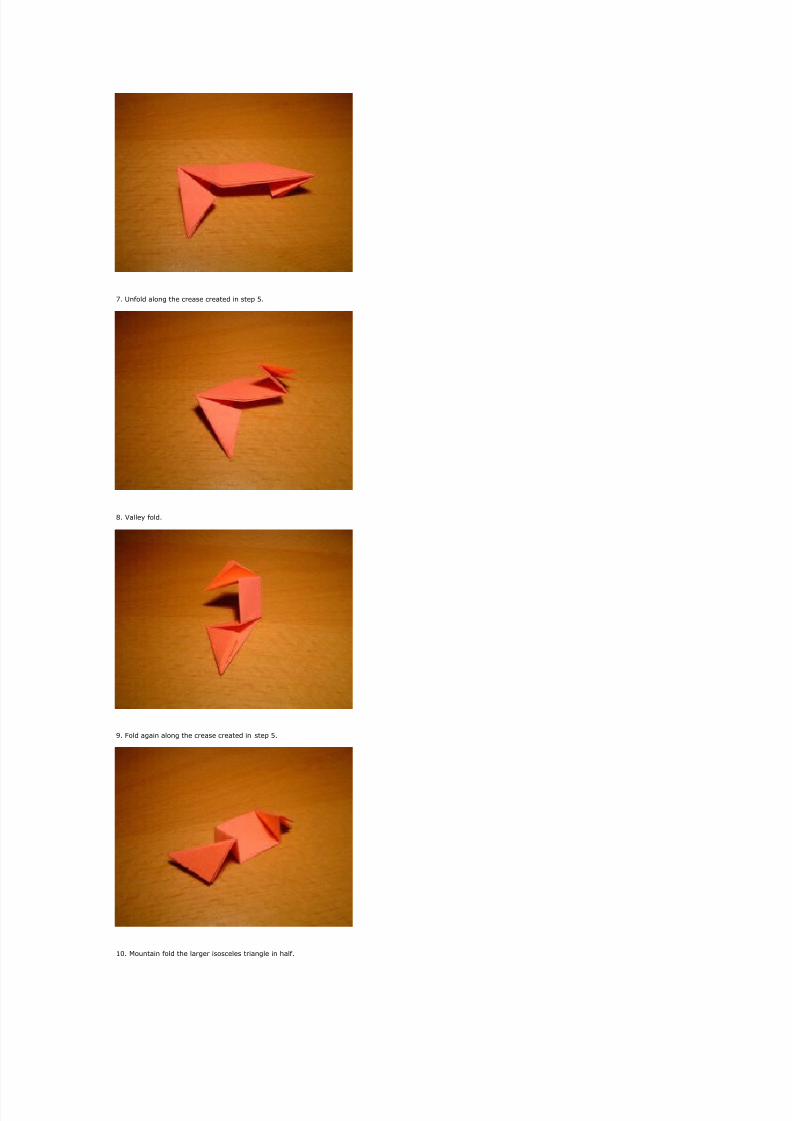
;. <nfold along the crease created in step :.
=. 5alley fold.
>. 7old again along the crease created in step :.
4*. Mountain fold the larger isosceles triangle in half.
8/14/2019 Oxi modul1
http://slidepdf.com/reader/full/oxi-modul1 4/7
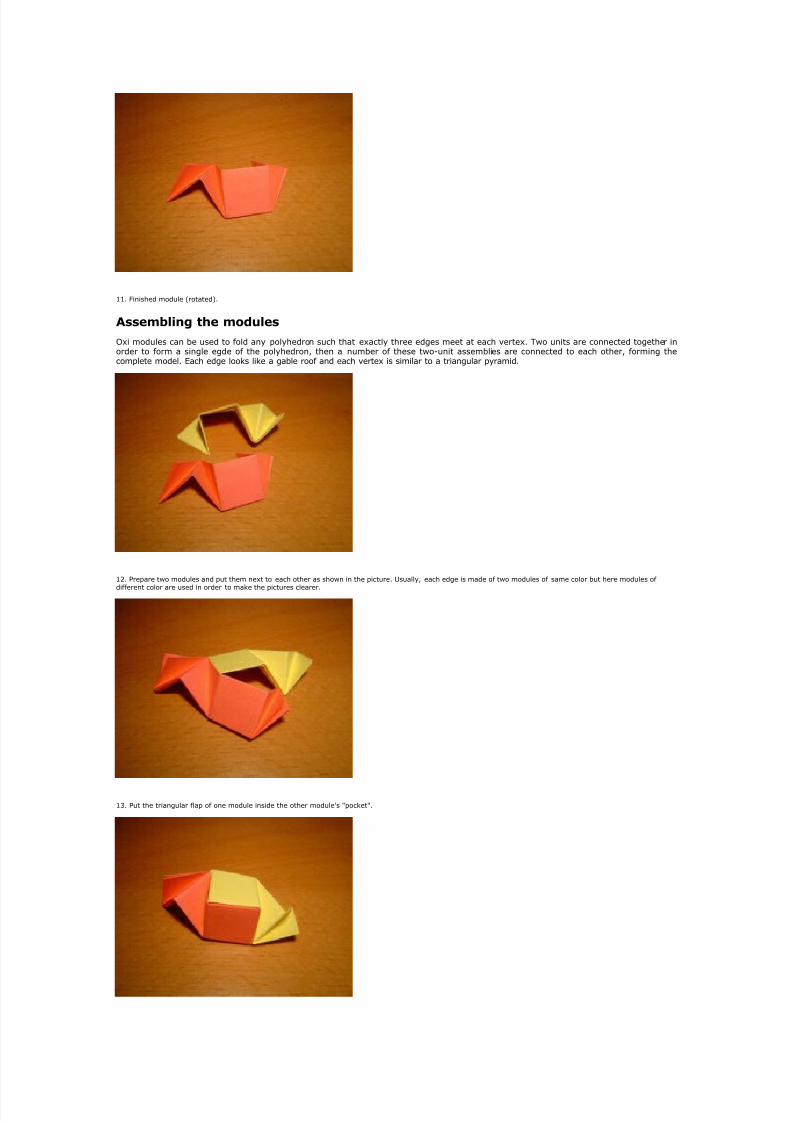
44. 7inished module ,rotated-.
Assembling the modules
Oxi modules can be used to fold any polyhedron such that exactly three edges meet at each ertex. Two units are connected together inorder to form a single egde of the polyhedron% then a number of these two0unit assemblies are connected to each other% forming thecomplete model. ?ach edge looks like a gable roof and each ertex is similar to a triangular pyramid.
4). repare two modules and put them next to each other as shown in the picture. <sually% each edge is made of two modules of same color but here modules of
different color are used in order to make the pictures clearer.
48. ut the triangular flap of one module inside the other module's 6pocket6.
8/14/2019 Oxi modul1
http://slidepdf.com/reader/full/oxi-modul1 5/7
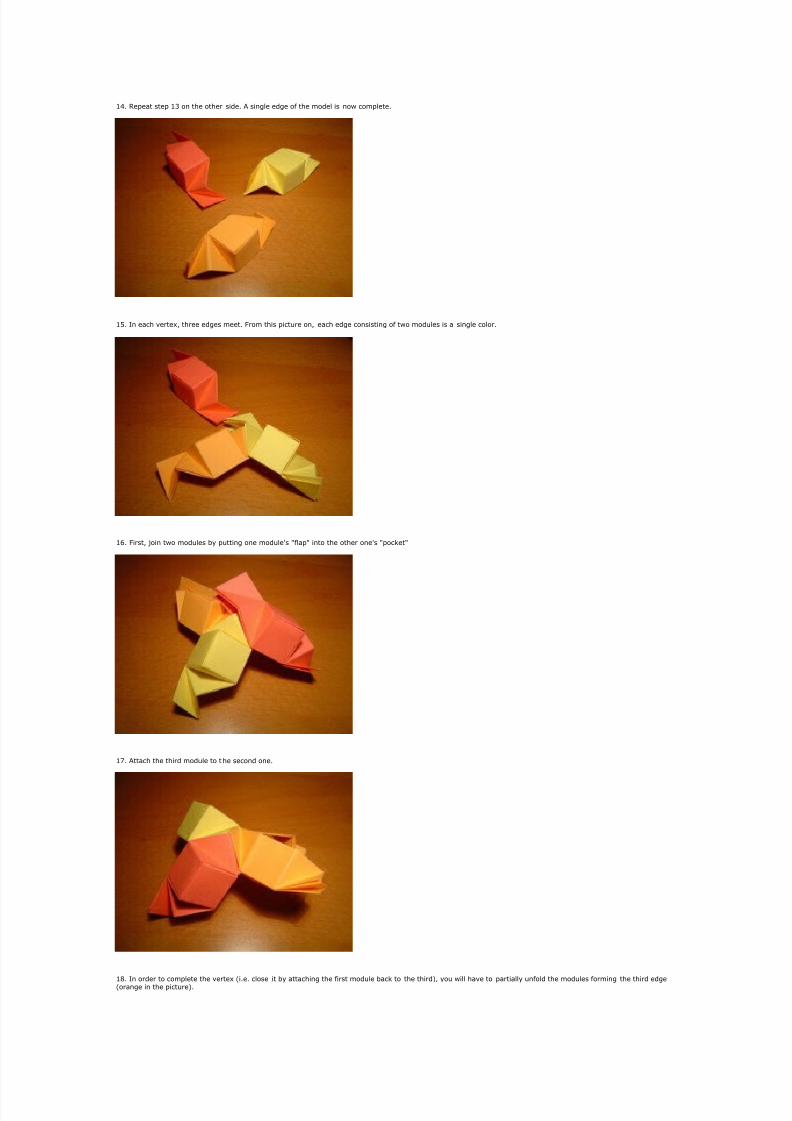
49. @epeat step 48 on the other side. 2 single edge of the model is now complete.
4:. #n each ertex% three edges meet. 7rom this picture on% each edge consisting of two modules is a single color.
4+. 7irst% &oin two modules by putting one module's 6flap6 into the other one's 6pocket6
4;. 2ttach the third module to t he second one.
4=. #n order to complete the ertex ,i.e. close it by attaching the first module back to the third-% you will hae to partially unfold the modules forming the third edge,orange in the picture-.
8/14/2019 Oxi modul1
http://slidepdf.com/reader/full/oxi-modul1 6/7
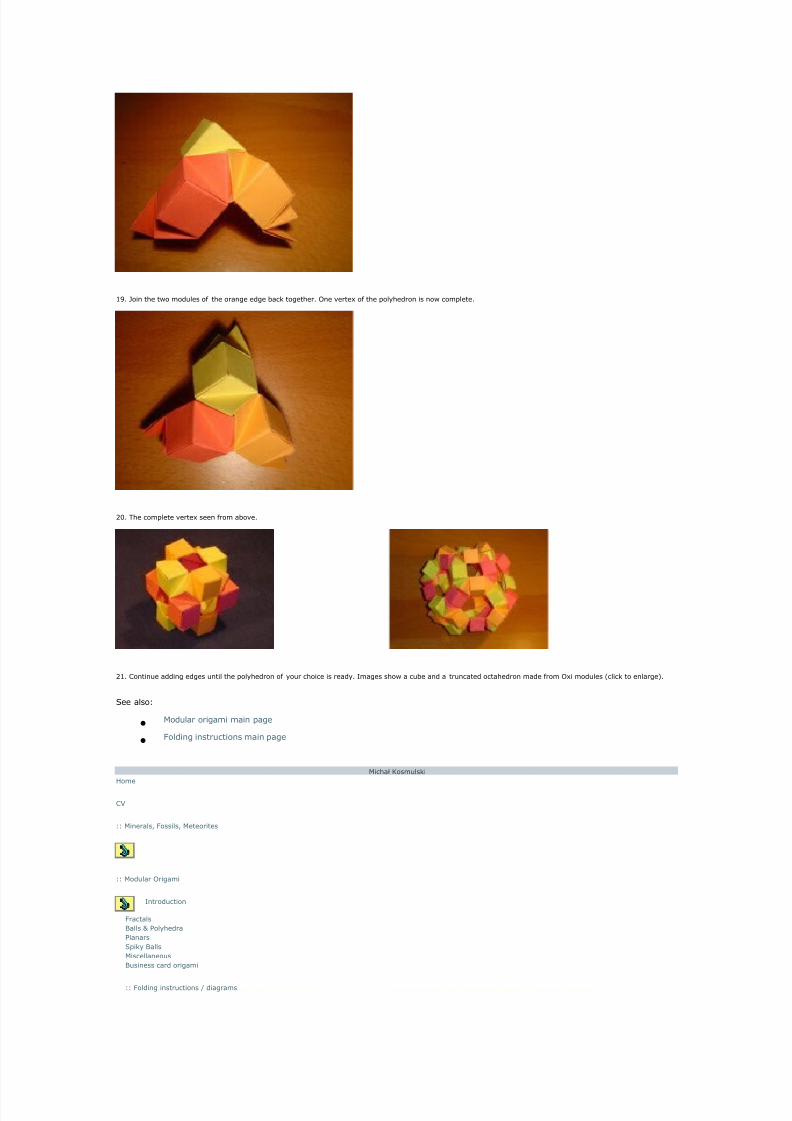
4>. Aoin the two modules of the orange edge back together. One ertex of the polyhedron is now complete.
)*. The complete ertex seen from aboe.
)4. /ontinue adding edges until the polyhedron of your choice is ready. #mages show a cube and a truncated octahedron made from Oxi modules ,click to enlarge-.
"ee alsoB
•Modular origami main page
•7olding instructions main page
Michał Kosmulski
Home
/5
BB Minerals% 7ossils% Meteorites
BB Modular Origami
#ntroduction
7ractals
Calls D olyhedra
lanars
"piky Calls
Miscellaneous
Cusiness card origami
BB 7olding instructions E diagrams

8/14/2019 Oxi modul1
http://slidepdf.com/reader/full/oxi-modul1 7/7
Oxi module
1inks
BB /omputing
BB Aulius$ "łowacki
BB Marian "moluchowski
7eedback
Tools
rintable ersion
/opyright
<nless indicated otherwise% all content ( )**90)**> Michał Kosmulski. 2ll rights resered.