oracle - installing and configuring kvm on bare …...4 | installing and configuring kvm on bare...
TRANSCRIPT

Installing and Configuring KVM on Bare Metal Instances with Multi-VNIC O R A C L E W H I T E P A P E R | F E B R U A R Y 2 0 1 8

2 | INSTALLING AND CONFIGURING KVM ON BARE METAL INSTANCES WITH MULTI-VNIC
Disclaimer
The following is intended to outline our general product direction. It is intended for information
purposes only, and may not be incorporated into any contract. It is not a commitment to deliver any
material, code, or functionality, and should not be relied upon in making purchasing decisions. The
development, release, and timing of any features or functionality described for Oracle’s products
remains at the sole discretion of Oracle.
Revision History
The following revisions have been made to this white paper since its initial publication:
February 15, 2018: Corrected a mistake in the command shown in step 4 of “Step 1:
Prepare the Bare Metal Instance” on page 8.
3 | INSTALLING AND CONFIGURING KVM ON BARE METAL INSTANCES WITH MULTI-VNIC
Table of Contents
Overview 4
Assumptions 4
Prerequisites 5
Step 1: Prepare the Bare Metal Instance 7
Step 2: Configure the Network 9
Step 3: Install the KVM Guest 12
Install a Guest OS from an Installation ISO 12
Import a Guest OS from a Pre-existing Image 14
Step 4: Attach the Network Device to the Domain 15
Hostdev Networking 15
Direct Networking 16
Guest Network Configuration 17
Conclusion 18
Appendix A: Troubleshooting Installation 18
Appendix B: Description of Network Connection Modes 18
Hostdev 18
Direct 19
Appendix C: Script Library 19
Common VF Network Configuration Functions: common.sh 19
Automatically Attach iSCSI Volumes: iscsiattach.sh 21
Select and Configure a VNIC to Use for the Guest: selectvnic.sh 23
Reconfigure Previously Selected VFs: netconfig.sh 26
4 | INSTALLING AND CONFIGURING KVM ON BARE METAL INSTANCES WITH MULTI-VNIC
Overview
Oracle Cloud Infrastructure doesn’t offer a prepackaged image with KVM preconfigured. However,
we want to provide you with the ability to start using KVM within your environments and move
virtual machines into the cloud. This white paper details how to use KVM on a bare metal instance.
Offering KVM in a cloud environment has two benefits:
It allows the extension of existing on-premises KVM environments into the Oracle Cloud.
It provides the ability to install legacy operating systems and prepackaged virtual
machines to use within your environment.
The ability to bring the KVM hypervisor is unique to Oracle and is enabled by using several Oracle
Cloud Infrastructure features:
Block Volume service
Bare metal Compute instances
Multiple virtual network interface cards (multi-VNIC) capabilities within the Networking
service
Before we released the multi-VNIC feature, instances were limited to a single network interface.
This limit prevented the use of any hypervisor on bare metal instances because guest operating
systems could not connect to the subnet within the virtual cloud network (VCN). With the multi-
VNIC feature, you can now allocate up to 16 VNICs in a bare metal instance. This also means that
you can install only 16 guest operating systems within a single KVM environment.
Assumptions
To perform the tasks in this white paper, you need the following knowledge and information:
You have a passing knowledge of KVM and some of the core concepts of working with
this hypervisor.
You understand the impact of guests sharing block storage devices and can determine
how your guests should share storage.
You understand how to install an operating system as a guest, or you know how to copy
a virtual disk image between systems.
You have a working knowledge of Linux system administration and can navigate your
way around Linux and edit files.
You have created a VCN within your environment and you have provisioned one or more
subnets within this VCN.

5 | INSTALLING AND CONFIGURING KVM ON BARE METAL INSTANCES WITH MULTI-VNIC
You have provisioned (or know how to provision) an Oracle Cloud Infrastructure bare
metal Compute instance and at least one block storage device from the Block Volume
service.
Your Compute instance is on a public subnet (one that has outbound access to the
internet).
If you are importing a virtual machine image, we assume that the image is already in
either KVM raw or QEMU qcow2 format. This document doesn’t cover how to perform
this conversion. For information about this conversion, see the man page for qemu-img.
NOTE: Instructions in this document are for Oracle Linux version 7.3. We can’t comment on any issues that
you might encounter on other distributions. We have not tested all variations in the operating system root disk
storage requirements, in particular UEFI versus BIOS, and IDE versus SCSI. We assume that the operating
system will support a particular boot method, possibly with the slipstream injection of drivers during the
installation process, or the preinstallation of drivers prior to image export. In addition, you may have to install
additional drivers and the KVM guest tools to get full functionality in your guest after you have installed or
imported it.
Prerequisites
To prepare for using KVM, you must perform the following tasks:
Provision a bare metal Compute instance with Oracle Linux 7.3. Ensure that you have
access to the instance. We recommend that you select the BM.Standard shape for this
instance because this there is no requirement for NVMe storage for this process.
Provision at least one block storage device and attach it to the instance that you
provisioned. This block storage device holds the guest operating systems that you install
in the KVM environment. Don’t install the guests on the root volume because the capacity
of the root volume on a bare metal instance is only 46G, which is not enough for the
installation of a guest operating system. Also, block storage provides higher performance.
We recommend that you provision devices larger than your anticipated guest operating
system sizes so that you have enough space in which to store the files needed for the
guests. You can provision multiple devices if you want to store each guest on a different
device.
Create a VCN with at least one subnet fully configured, including security lists, an internet
gateway, and any appropriate route tables. Ensure that the security list can connect via
SSH to the hypervisor from the internet on at least one subnet.
Ensure that you have access to the following information: the subnet name and OCID
that you want to use for the hypervisor, and the subnet names and OCIDs that you want
to use for the guests. Guests are not required to be on the same subnet as the

6 | INSTALLING AND CONFIGURING KVM ON BARE METAL INSTANCES WITH MULTI-VNIC
hypervisor. This is helpful if you want to create a barrier between access to the
hypervisor and access to the guests.
Provision at least one extra VNIC on the bare metal instance that you are using. This
VNIC will be used to allow the guest to communicate with other instances within your
environment. When you provision the VNIC or VNICs, note the IP address/MAC/VLAN
Tag combination that is returned.
Install a VNC client on a desktop or laptop so that you can perform the initial
configuration of your guests. Initially, especially when creating newly installed guests, you
must have console access to the guest so you can perform certain configuration tasks.
However, in most modern operating systems, there is an assumption that a GUI-enabled
console is available for the installation process that can be accessed. The virtualization
API, libvirt, provides a rudimentary serial console to the guests but does not provide any
GUI interface. To get around this issue, we recommend that you configure a VNC-
enabled console for each guest and use a combination of SSH tunneling and VNC to get
access to the guest during installation. Identify a TCP port in the range of 59XX that isn't
used on the bare metal instance on which you install the guest.
Install an SSH and SCP client on your desktop to allow for communication with and file
transfer to the hypervisor. Ensure that the SSH client has port tunneling capabilities.
If you plan to import an existing virtual machine image, ensure that it can be converted to
either KVM raw format or QEMU qcow2 format. For more information, see the man page
for qemu-img. This paper assumes that the imported image is already in either raw or
qcow2 format; it doesn’t cover the process for performing the conversion.
If you plan to create a new guest, plan on the size of the virtual disk that you will create to
hold the guest image.
Identify how much RAM and how many CPUs you want to assign to the guest, whether
you are importing an existing virtual machine image or creating a new guest. The
BM.Standard shapes used in testing have 256 GB of RAM and 32 cores available for
use.
Know the limitations and capabilities of the operating system or system image that you
want to install as a guest. The operating system and system image determine both the
connection method to network interfaces and any other drivers and software required to
make the guest work. This is true for many parts of the operating system: CPU and RAM
drivers, storage devices, and network. The KVM-specific drivers for Windows are
provided as part of the installation process detailed in a following section. However, this
might not cover the network configuration. The network configuration in particular is
complicated because there are two different methods for providing guest access to the
network: hostdev and direct. If your operating system can support the use of the Intel
82599 10G driver, or already has it built in, we recommend that you use the hostdev
method. If you are use an older operating system, or are installing a prepackaged one,

7 | INSTALLING AND CONFIGURING KVM ON BARE METAL INSTANCES WITH MULTI-VNIC
we recommend that you use the direct method. For a detailed look at the two methods,
see “Appendix B: Description of Network Connection Modes.”
NOTE: We don’t use standard KVM bridging for guests because our network doesn’t support bridging or
routing natively. Guests on our network require a MAC address that is supplied by our configuration
management system. Bridged or routed networks assign their own MAC address, which our network would
not recognize. Consequently, all traffic would be silently dropped. To have KVM guests participate on our
network, they must be provided with a specific MAC address. This address must be used at the guest
operating system level for all network activity. We recommend that you understand your guest operating
system before you install it within this environment.
Step 1: Prepare the Bare Metal Instance
After you have completed the prerequisites, preparation the bare metal instance as follows.
1. Update the system and install KVM and other software:
yum update -q –y
wget https://dl.fedoraproject.org/pub/epel/epel-release-latest-
7.noarch.rpm
wget https://fedorapeople.org/groups/virt/virtio-win/virtio-win.repo -O
/etc/yum.repos.d/virtio-win.repo
yum -q -y install virtio-win
yum -q -y --nogpgcheck localinstall epel-release-latest-7.noarch.rpm
yum -q -y install qemu-kvm qemu-img virt-manager libvirt libvirt-python
libvirt-client virt-install virt-viewer bridge-utils wget jq
NOTE: We install the latest EPEL releases and the standard patches, which allows more features to
be installed as needed.
2. Open /etc/default/grub and add the following line to the end of the
GRUB_CMDLINE_LINUX entry:
intel_iommu=on
The file will look as follows:
GRUB_CMDLINE_LINUX="crashkernel=auto LANG=en_US.UTF-8 console=tty0
console=ttyS0,9600 rd.luks=0 rd.lvm=0 rd.md=0 rd.dm=0 ip=dhcp
netroot=iscsi:169.254.0.2::::iqn.2015-02.oracle.boot:uefi
iscsi_param=node.session.timeo.replacement_timeout=6000 intel_iommu=on"

8 | INSTALLING AND CONFIGURING KVM ON BARE METAL INSTANCES WITH MULTI-VNIC
NOTE: If you use an operating system other than Oracle Linux 7, the changes to the grub
configuration and the method of committing those changes could be different. Consult your operating
system documentation on how to enable SR-IOV as a boot option to the kernel.
3. Enable tuned and set the performance optimization for virtual-host:
systemctl enable tuned
systemctl start tuned
tuned-adm profile virtual-host
4. Commit the changes so that this configuration will always be used at boot time:
cp /boot/efi/EFI/redhat/grub.cfg /boot/efi/EFI/redhat/grub.cfg.orig
grub2-mkconfig -o /boot/efi/EFI/redhat/grub.cfg
5. Ensure that the block storage devices are attached to the bare metal instance and are
ready for use. You can use either of the following methods:
o Open the console’s iSCSI Commands & Information page and copy the commands
associated with the block storage device.
o Use the iscsiattach.sh script (in the Appendix C) to automatically scan for all the block
volumes that are attached and configure them.
6. Create a persistent mount for the block volume. For more information, see Connecting to
a Volume in the Oracle Cloud Infrastructure documentation.
7. Reboot to implement the changes.

9 | INSTALLING AND CONFIGURING KVM ON BARE METAL INSTANCES WITH MULTI-VNIC
Step 2: Configure the Network
This implementation of KVM uses a combination of SR-IOV virtual functions (VFs) and the mutli-
VNIC feature of Oracle Cloud Infrastructure. You have already created one or more VNICs to
support the connectivity of the guest operating systems to the network. The VNIC provides two
things: the MAC address that the Oracle Cloud Infrastructure network will recognize and the IP
address information needed by the guest.
NOTE: This configuration is not persistent across reboots. We recommend that you either adapt the script in
the appendix or write your own script to make the configuration persist across reboots. However, note that
every time you add or subtract guests, you must modify the configuration to reflect the current network
configuration.
To configure the network, perform the following tasks as root (either using sudo or sudo su).
1. Identify the device that represents the primary interface of the hypervisor. For example:
URL=http://169.254.169.254/opc/v1/vnics/
baseAddress=`curl -s ${URL} | jq -r '.[0] | .privateIp'`
PHYSDEV=`ip -o -4 addr show | grep ${baseAddress} | awk -F: '{gsub(/^[
\t]|[ \t]$/,"",$2);split($2,out,/[ \t]+/);print out[1]}'`
echo ${PHYSDEV}
NOTE: The URL in the example is part of the Oracle Cloud Infrastructure Compute metadata
service. The metadata service provides information about an instance’s configuration. You can
access this by performing a GET on a URL. In this case we are getting information about the VNICs
attached to this system.
2. Enable the VFs on the operating system. Echo the number of VFs required into a file
contained in sysfs. We recommend a number of VFs that match the current maximum
number of VNICs, 16.
echo "16" > /sys/class/net/${PHYSDEV}/device/sriov_numvfs
This command typically takes about 10 to 20 seconds to complete.
3. Set the bridging mode for the Ethernet devices to vepa. The Intel Ethernet card provides
an automatic bridge between the main device and all VFs.
bridge link set dev ${PHYSDEV} hwmode vepa
NOTE: Repeat the following steps to configure additional interfaces for use by each guest operating
system that you configure.

10 | INSTALLING AND CONFIGURING KVM ON BARE METAL INSTANCES WITH MULTI-VNIC
4. Select the VNIC that you want to use for this guest, and locate the following information
for the VNIC:
o IP address (which you might have selected yourself)
o MAC address
o VLAN tag
5. Identify the VF that you want to use. If you are adding to an existing configuration, do not
overwrite an existing VF that is already in use. VFs typically have MAC addresses of
00:00:00:00:00:00.
ip link show ${PHYSDEV} | grep -v {PHYSDEV} | grep -i vf
If you are using the hostdev method of connecting your guest to the outside world, the
network device information is not needed beyond identifying which VF to use and the port,
slot, and function numbers. The following instructions are necessary if you need configure
the interface in direct mode, but will also help you get the required information from the
VFs.
6. Configure both the VF and the corresponding network device:
ip link set ${PHYSDEV} vf <VF_number> mac <MAC_address> spoofchk off
Use the MAC address (<MAC_address>) associated with the VNIC that you created to
support the guest. Case is irrelevant.
Use the following steps to help you find the VF information:
A. Find the PCI address of the primary network device.
ethtool -i ${PHYSDEV} | grep bus-info
For example:
ethtool -i ${PHYSDEV} | grep bus
bus-info: 0000:13:00.0
The bus-info line tells you the PCI address of the primary network device. You can
then use that to determine the addresses of all the VFs associated with that device.
B. Find the VFs associated with the base device.
lspci -nn | grep -i virtual

11 | INSTALLING AND CONFIGURING KVM ON BARE METAL INSTANCES WITH MULTI-VNIC
For example:
lspci -nn | grep -i virtual
13:10.0 Ethernet controller [0200]: Intel Corporation 82599 Ethernet
Controller Virtual Function [8086:10ed] (rev 01)
13:10.2 Ethernet controller [0200]: Intel Corporation 82599 Ethernet
Controller Virtual Function [8086:10ed] (rev 01)
13:10.4 Ethernet controller [0200]: Intel Corporation 82599 Ethernet
Controller Virtual Function [8086:10ed] (rev 01)
13:10.6 Ethernet controller [0200]: Intel Corporation 82599 Ethernet
Controller Virtual Function [8086:10ed] (rev 01)
13:11.0 Ethernet controller [0200]: Intel Corporation 82599 Ethernet
Controller Virtual Function [8086:10ed] (rev 01)
13:11.2 Ethernet controller [0200]: Intel Corporation 82599 Ethernet
Controller Virtual Function [8086:10ed] (rev 01)
The PCI address is port_number:slot_number.function_number. For example, the
first entry has an address of 13:10.0:
Port number: 13
Slot number: 10
Function number: 0
NOTE: The device addressing assigns even-numbered PCI addresses to VFs associated with
the base device that ends with an even number, and odd-numbered PCI addresses to VFs
associated with the base device that ends with an odd number. In the earlier example, the PCI
address is 13:00.0, an even address.
C. Convert the hexadecimal base address to decimal. For example, 13.10.0 becomes
19.16.0.
D. Format the base address to Intel’s naming standard for their network devices file
associated with a VF:
enp<port_number>s<slot_number>[f<function_number>]
For example:
enp19s16f0
NOTE: Device naming standards imply that if the VF has a function number of 0, the f entry is
truncated and not used. So, in this example, the actual device file is enp19s16.

12 | INSTALLING AND CONFIGURING KVM ON BARE METAL INSTANCES WITH MULTI-VNIC
E. Configure the device file with the right MAC address by setting the VF device down,
up, down, and up.
ip link set <VF_device_name> down
ip link set <VF_device_name > up
ip link set <VF_device_name > down
ip link set <VF_device_name > up
You should now see that the MAC address of the VF network device matches what you
set for the VF itself, and both should match the VNIC that you selected.
7. Create an interface that uses the VLAN tag. The device file that you just found is ready to
go, just not on the right VLAN. You could have set the VLAN on the VF directly, however,
in order to clear or change the VLAN, you would have to reboot the whole bare metal
instance and reset the network all over. To avoid this, you create a linked interface to the
VF network device that is specific to the VNIC VLAN. You are simply creating a new
interface:
ip link add link <VF_network_device> name vlan<VLAN_tag> type vlan id <VLAN_tag>
ip link set vlan<VLAN_tag> up
The VLAN (<VLAN_tag>) device is the one that will be used during the guest installation
process. Make a note of it.
NOTE: This procedure has been consolidated into a sample script that allows you to select a VNIC to use and
perform the configuration based on the information provided. The result will be stored in an inventory file that
could be used at boot time to correctly start the entire network stack. However, as with all of our provided
scripts, we can’t guarantee that this script will suit your particular needs.
Step 3: Install the KVM Guest
The method that you use to create your instances depends on how you want to create the
instances:
Install a new guest, with a brand new operating system copy from an original ISO
Import an existing image with a preconfigured operating system already installed
Install a Guest OS from an Installation ISO
In this scenario, you create a new guest from an installation ISO. You must have all the drivers
ready for use when you do this, and a VNC client ready to connect to the guest as it’s being
installed. This procedure assumes that you have already configured the network interface for use
by this guest, have mounted the block device on a mount point of your choosing, and have made

13 | INSTALLING AND CONFIGURING KVM ON BARE METAL INSTANCES WITH MULTI-VNIC
the correct entries in the /etc/fstab file to ensure that the block device is remounted in the event
of a reboot.
Run the following commands as root.
1. Use SSH to connect to the bare metal instance, opening an SSH tunnel for the VNC port
you are going to use to connect to the guest's console. This is the port (59XX) you
identified in the prerequisites. The Mac/Linux method of opening a port tunnel is shown in
the following example. For Windows, consult your SSH client software on instructions for
configuring a local port tunnel.
ssh -L <VNC_port>:localhost:<VNC_port> opc@<public_IP_of_BM_instance>
2. Copy the operating system installation ISO and any driver ISOs to the bare metal
instance. These should go in either the block device that will hold the guest or in a
separate directory structure that you build specifically to hold ISO images. We created
/usr/local/share/images for all of our ISOs.
3. Create the virtual disk that will be the boot drive of the guest:
qemu-img create -f raw <path_to_block_mount_point_with_file_name>.img
<size of virtual disk in GB>G
The G at the end tells qemu-img to use GB as the unit of measure. Consult the qemu-img
man page for more information.
4. Create the domain that will contain the guest. Domains are containers that hold guests
within KVM. By creating a domain, you are telling KVM what the parameters of the guest
are in terms of virtual hardware. Pick a name for the domain that makes sense to you. It
doesn’t have to match the hostname of the guest.
virt-install --arch=x86_64 --name=<domain_name> --ram=<RAM_in_MB> --cpu
Haswell-noTSX \
--vcpus <number_of_CPUs> --hvm --video qxl --nonetwork --os-type
<linux_or_windows> \
--noautoconsole --boot cdrom,hd \
--disk <ISO_location>,device=cdrom,bus=ide \
--disk <ISO_location #1>,device=cdrom,bus=ide \
--disk <virtual_disk_path>,format=raw,bus=virtio \
--graphics vnc,port=<VNC_port>,listen=0.0.0.0,password=<password>
Some notes about the parameters:
o The first ISO location tag should contain the path to the boot ISO.

14 | INSTALLING AND CONFIGURING KVM ON BARE METAL INSTANCES WITH MULTI-VNIC
o The second ISO location tag should contain the path to any drivers that you want to
install as part of the initial operating system installation. For Windows, this is required
to be /usr/share/virtio-win/virtio-win.iso. This particular ISO contains all the
drivers needed for the storage, memory, and network devices.
o If you need additional drivers, you can add a third ISO line and mount another
CDROM image. These devices can be removed after installation; consult the QEMU
and libvirt documentation for instructions on how to remove these types of devices
from the domain.
o Note that --nonetwork is specified. The way in which the network will be implemented
can’t be specified on the command line and requires the devices to be inserted after
the domain is created.
o The VNC port is the port that you identified in the prerequisites. We also strongly
recommend setting a password on your console.
o If your operating system doesn’t have a driver for the virtio storage bus, substitute a
line in the configuration with the appropriate bus type. A number of different bus types
are available and are documented in the virt-install man page.
5. Skip to the next step, Step 4: Attach the Network Device to the Domain.
Import a Guest OS from a Pre-existing Image
When you import a preconfigured image, there are limitations based on how the operating system
was installed and whether you can make changes to the image to meet the requirements of the
KVM environment. This procedure assumes that you have already created a VNIC, understand
which network interface method and type you want to use, and have all the prerequisites
completed (block device mounted, and so on) that will make this process successful. It also
assumes that the image files are already in the correct format (KVM raw or qcow2), or that the
conversion process will take place after the files are copied to the bare metal instance.
Run the following commands as root.
1. Use SSH to connect to the bare metal instance, opening an SSH tunnel for the VNC port
that you are going to use to connect to the guest's console. This is the port (59XX) that
you identified in the prerequisites. The Mac/Linux method of opening a port tunnel is
shown in the following example. For Windows, consult your SSH client software on how to
configure a local port tunnel.
ssh -L <VNC_port>:localhost:<VNC_port> opc@<public_IP_of_BM_instance>
2. Copy the virtual disk image files to the block storage device. Do not copy them to the root
device because they probably won’t fit.
15 | INSTALLING AND CONFIGURING KVM ON BARE METAL INSTANCES WITH MULTI-VNIC
3. Create the domain that will contain the guest:
virt-install --arch=x86_64 --name=<domain_name> --ram=<RAM_in_MB> --cpu
Haswell-noTSX \
--vcpus <number_of_CPUs> --hvm --video qxl --nonetwork --os-type
<linux_or_windows> --noautoconsole \
--disk <virtual_disk_path>,format=raw,bus=virtio \
--graphics vnc,port=<VNC_port>,listen=0.0.0.0,password=<password> --import
Some notes about the parameters:
o If you need to attach an ISO to the image for some reason, insert a line similar to the
following one in the configuration:
--disk <ISO_location>,device=cdrom,bus=ide \
o If your image has multiple virtual disks, list them in order by specifying multiple
virtual disk path lines in the configuration command.
o Note that --nonetwork is specified. The way in which the network will be implemented
can’t be specified on the command line and requires the devices to be inserted after
the domain is created.
o The VNC port is the port that you identified in the prerequisites. We also strongly
recommend setting a password on your console.
o If your operating system does not have a driver for the virtio storage bus, substitute
a line in the configuration with the appropriate bus type. A number of different bus
types are available and are documented in the virt-install man page.
4. Continue to the next step, Step 4: Attach the Network Device to the Domain.
Step 4: Attach the Network Device to the Domain
After creating the domain, attach the resulting network device. Follow the appropriate tasks for
your networking type.
Hostdev Networking
1. Gather the required VNIC information:
o MAC address
o VLAN tag
o PCI port, slot, and function number of the VF (gathered earlier)

16 | INSTALLING AND CONFIGURING KVM ON BARE METAL INSTANCES WITH MULTI-VNIC
2. Create a file that details the network interface by using the following template. Substitute
your information for the various placeholders and save it as an XML file (for example,
attach.xml).
<interface type='hostdev' managed='yes'>
<source>
<address type='pci' domain='0x0000' bus='[port_number_in_hex]'
slot='[slot_number_in_hex]' function='[VF_number_in_hex]'/>
</source>
<vlan>
<tag id='[VLAN_tag]'/>
</vlan>
<mac address='[VNIC_MAC_address]'/>
</interface>
3. Attach the network device to the domain:
virsh attach-device <your_domain_name> ./attach.xml --config
If you named your file something other than attach.xml, change the file name to match.
4. Force restart the domain. This command forcibly stops the domain (the destroy part),
and then restarts it. You need to do this in order for the network device to be picked up as
part of the installation process.
virsh destroy <your_domain_name>
virsh start <your_domain_name>
5. After the domain restarts, continue with the installation process associated with the
operating system that you put on the guest. Connect to the guest console by using the
VNC software installed on your desktop or laptop by using localhost:59XX (with XX as
the port number that you selected earlier) to perform any operating system configuration
tasks.
Direct Networking
1. Gather the required VNIC information:
o MAC address
o Name of the VLAN network device created earlier
o Network card model to be emulated (for example, e1000 or virtio)
17 | INSTALLING AND CONFIGURING KVM ON BARE METAL INSTANCES WITH MULTI-VNIC
2. Create a file that details the network information by using the following template.
Substitute your information for the various placeholders and save it as an XML file (for
example, attach.xml).
<interface type='direct'>
<mac address='[VNIC_MAC_address]'/>
<source dev='[VLAN_network_device_name]' mode='passthrough'/>
<model type='[NIC_model_for_guest]'/>
</interface>
3. Attach the network device to the domain:
virsh attach-device <your_domain_name> ./attach.xml --config
If you named your file something other than attach.xml, change the file name to match.
4. Force restart the domain. This command forcibly stops the domain (the destroy part),
and then restarts it. You need to do this in order for the network device to be picked up as
part of the installation process.
virsh destroy <your_domain_name>
virsh start <your_domain_name>
5. After the domain restarts, continue with the installation process associated with the
operating system that you put on the guest. Connect to the guest console by using the
VNC software installed on your desktop or laptop by using localhost:59XX (with XX as
the port number you selected earlier) to perform any operating system configuration
tasks.
Guest Network Configuration
The network information associated with the VNIC that you create for the guest is not provided to
the guest through DHCP at this time. As a result, you must configure the guest's IP information
manually according to the individual procedures associated with the particular operating system or
image that you are installing. This information includes the IP address, netmask, and default route
for the particular subnet the guest is attached to via the VNIC.
If you are importing an image, almost all images allow you to set all IP information statically. In this
case, statically set both the IP address (from the VNIC configuration) and the default gateway as
persistent configurations.

18 | INSTALLING AND CONFIGURING KVM ON BARE METAL INSTANCES WITH MULTI-VNIC
Conclusion
Congratulations! You have successfully installed a guest within KVM running on a bare metal
instance that can interact with the rest of the Oracle Cloud Infrastructure.
Appendix A: Troubleshooting Installation
If the virtual drive that you created for the guest operating system is not visible, this
typically means that you need to insert the virtio driver as part of the operating system
installation process (typically required for Windows). Attach/mount an ISO with the
appropriate drivers and try again; consult the KVM and libvirt pages for information about
how to do this.
Not having the network interface available during the installation is also symptomatic of
not having the correct driver during installation, and requires the same procedure for
installing the driver as indicated for the virtual drive. However, if you do not require the
network during the operating system installation, you can always configure the network
interfaces after the fact.
The IP address that you were assigned or specified during the VNIC creation process is
provided by DHCP. As long as the bare metal instance is instantiated, that address will
always be assigned to that VNIC—and by implication always assigned to the guest that
you just created. It is not necessary to statically assign the IP address information from
within the guest unless you have some compelling reason to do so. However, you must
define a static default route within the operating system. If you must enter all IP address
information, DHCP will be ignored and the IP information will be applied within the guest
operating system.
Appendix B: Description of Network Connection Modes
Hostdev
The hostdev method is preferred for both performance and guest isolation reasons. It provides the
guest with direct access to the PCI device, created as part of the configuration of SR-IOV on the
hypervisor. A PCI device is known as a virtual function (VF) and represents an actual interface into
the hardware of the hypervisor (bare metal instance). This allows the guest to have both maximum
throughput and maximum isolation:
Maximum throughput because there is no operating system between the guest and the
network
Maximum isolation because the hypervisor operating system is not involved beyond
providing the hardware interface (the overhead is minimal)

19 | INSTALLING AND CONFIGURING KVM ON BARE METAL INSTANCES WITH MULTI-VNIC
The disadvantage of the hostdev method is that it isn’t possible to emulate a different device type.
So, the guest operating system must have a driver available that matches the hardware type
provided by the hypervisor. Oracle uses Intel 82599 10G Ethernet interfaces for the bare metal
instances. Each guest operating system must either have a device driver installed that can support
this device or have a way to install that driver after the guest installation or import is complete. The
driver sets that were used for many of the legacy operating systems that were tested are at Intel®
Ethernet Adapter Connections CD. We recommend downloading the complete driver set and
creating an ISO from the download. Review the documentation for the driver set and be sure that
your operating system has a driver available for this product before selecting this network
connectivity method.
Direct
The direct method relies on hypervisor-configured network interfaces to provide connectivity to the
guest operating systems. However, the network configuration provided by the hypervisor is
minimal: the guest operating system still issues all the DHCP and related higher-level networking
management, while the hypervisor simply provides an interface for the guest to operate on.
The direct method allows KVM to natively emulate some common network interface types that are
typically found in most current and legacy operating systems. The following emulations have been
observed to work: the e1000 (Intel FastEthernet driver) and the virtio (KVM native) device types,
although the virtio driver might still require you to inject a driver into a Windows operating system.
This is useful for prepackaged, virtual machines because their configurations are typically static
and are looking for specific hardware types. The most common type for VMs is the e1000
emulation. This is what we use when showing the direct network device method.
Appendix C: Script Library
The following scripts automate some of the tasks listed earlier. These scripts have worked in our
environment. However, we cannot guarantee that they will work exactly in your environment.
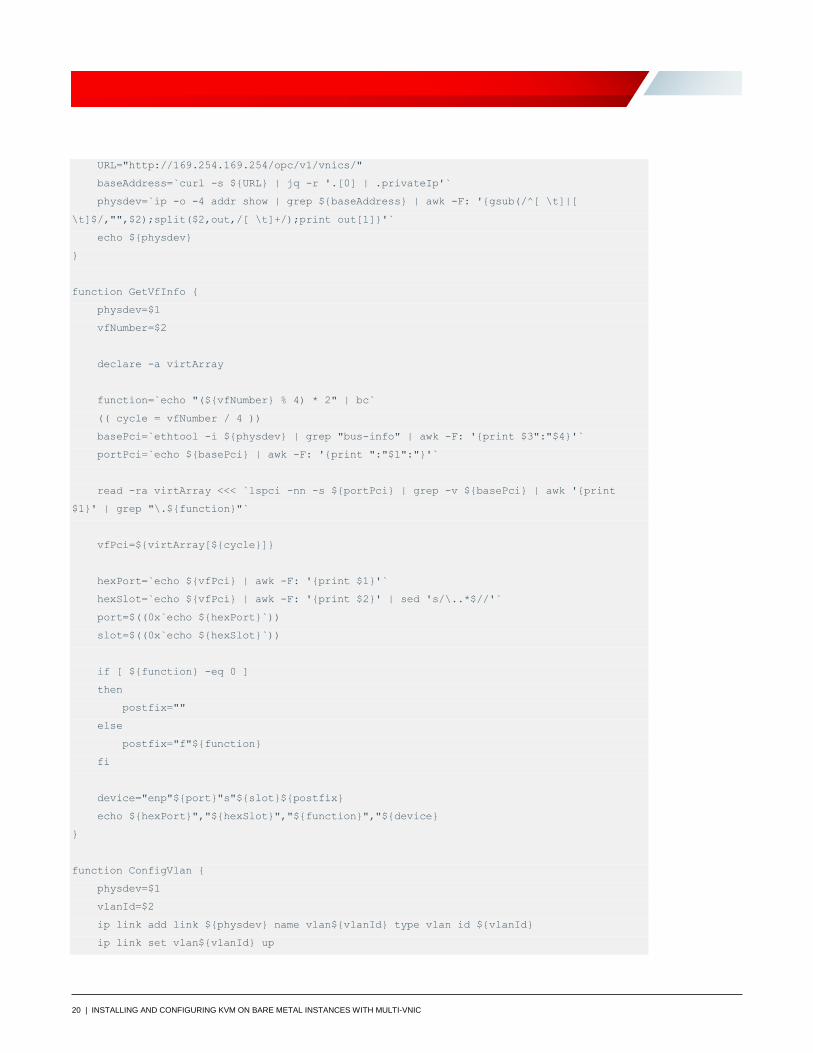
Common VF Network Configuration Functions: common.sh #!/bin/bash
#
# common.sh - common functions
#
# Copyright Oracle, Inc. All rights reserved.
# This is provided "as is" without warrantee, either explicit or implied
function GetPhysDev {
20 | INSTALLING AND CONFIGURING KVM ON BARE METAL INSTANCES WITH MULTI-VNIC
URL="http://169.254.169.254/opc/v1/vnics/"
baseAddress=`curl -s ${URL} | jq -r '.[0] | .privateIp'`
physdev=`ip -o -4 addr show | grep ${baseAddress} | awk -F: '{gsub(/^[ \t]|[
\t]$/,"",$2);split($2,out,/[ \t]+/);print out[1]}'`
echo ${physdev}
}
function GetVfInfo {
physdev=$1
vfNumber=$2
declare -a virtArray
function=`echo "(${vfNumber} % 4) * 2" | bc`
(( cycle = vfNumber / 4 ))
basePci=`ethtool -i ${physdev} | grep "bus-info" | awk -F: '{print $3":"$4}'`
portPci=`echo ${basePci} | awk -F: '{print ":"$1":"}'`
read -ra virtArray <<< `lspci -nn -s ${portPci} | grep -v ${basePci} | awk '{print
$1}' | grep "\.${function}"`
vfPci=${virtArray[${cycle}]}
hexPort=`echo ${vfPci} | awk -F: '{print $1}'`
hexSlot=`echo ${vfPci} | awk -F: '{print $2}' | sed 's/\..*$//'`
port=$((0x`echo ${hexPort}`))
slot=$((0x`echo ${hexSlot}`))
if [ ${function} -eq 0 ]
then
postfix=""
else
postfix="f"${function}
fi
device="enp"${port}"s"${slot}${postfix}
echo ${hexPort}","${hexSlot}","${function}","${device}
}
function ConfigVlan {
physdev=$1
vlanId=$2
ip link add link ${physdev} name vlan${vlanId} type vlan id ${vlanId}
ip link set vlan${vlanId} up

21 | INSTALLING AND CONFIGURING KVM ON BARE METAL INSTANCES WITH MULTI-VNIC
}
function ConfigVf {
physdev=$1
vfNumber=$2
macAddr=$3
ip link set ${physdev} vf ${vfNumber} mac ${macAddr} spoofchk off
}
function ConfigDev {
physdev=$1
vfNumber=$2
macAddr=$3
declare -a vfDev
IFS="," read -ra vfDev <<< $(GetVfInfo ${physdev} ${vfNumber})
ip link set ${vfDev[3]} down
ConfigVf ${physdev} ${vfNumber} ${macAddr}
ip link set ${vfDev[3]} up
ip link set ${vfDev[3]} down
sleep 5
ip link set ${vfDev[3]} up
sleep 10
echo ${vfDev[3]}
}
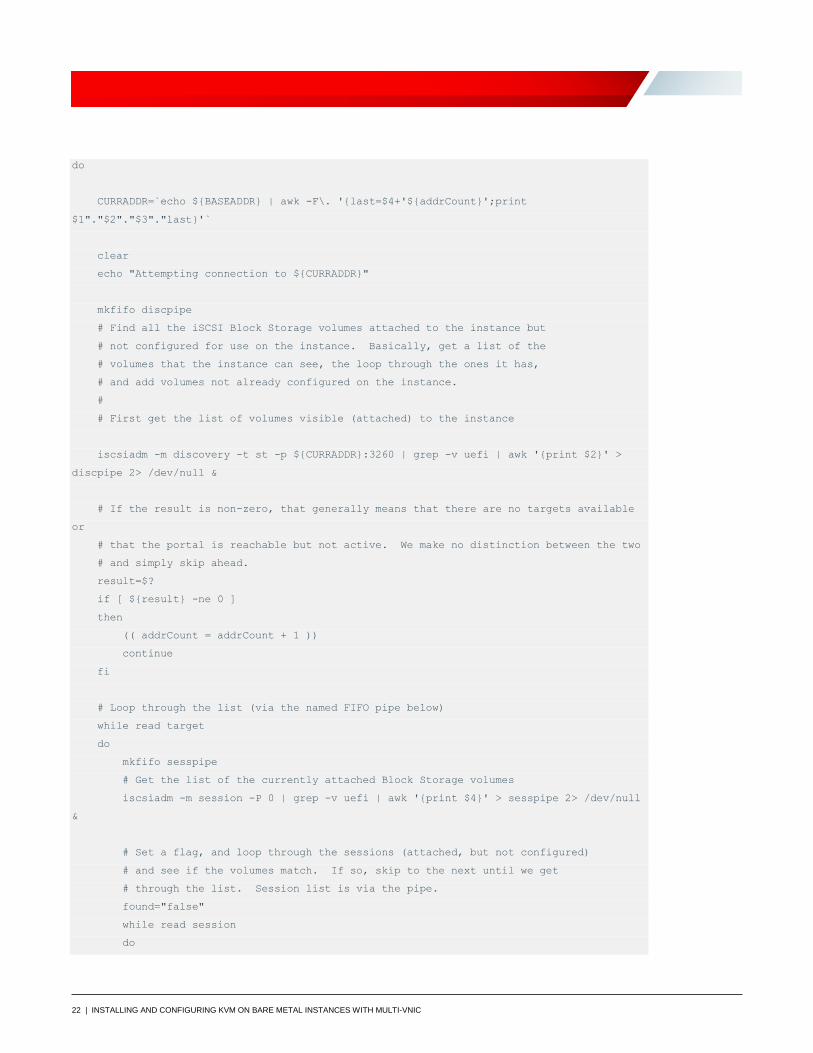
Automatically Attach iSCSI Volumes: iscsiattach.sh #!/bin/bash
# iscsiattach.sh - Scan and automatically attach new iSCSI targets
#
# Author: Steven B. Nelson, Sr. Solutions Architect
# Oracle Cloud Infrastructure
#
# 20 April 2017
# Copyright Oracle, Inc. All rights reserved.
BASEADDR="169.254.2.2"
# Set a base address incrementor so we can loop through all the
# addresses.
addrCount=0
while [ ${addrCount} -le 32 ]
22 | INSTALLING AND CONFIGURING KVM ON BARE METAL INSTANCES WITH MULTI-VNIC
do
CURRADDR=`echo ${BASEADDR} | awk -F\. '{last=$4+'${addrCount}';print
$1"."$2"."$3"."last}'`
clear
echo "Attempting connection to ${CURRADDR}"
mkfifo discpipe
# Find all the iSCSI Block Storage volumes attached to the instance but
# not configured for use on the instance. Basically, get a list of the
# volumes that the instance can see, the loop through the ones it has,
# and add volumes not already configured on the instance.
#
# First get the list of volumes visible (attached) to the instance
iscsiadm -m discovery -t st -p ${CURRADDR}:3260 | grep -v uefi | awk '{print $2}' >
discpipe 2> /dev/null &
# If the result is non-zero, that generally means that there are no targets available
or
# that the portal is reachable but not active. We make no distinction between the two
# and simply skip ahead.
result=$?
if [ ${result} -ne 0 ]
then
(( addrCount = addrCount + 1 ))
continue
fi
# Loop through the list (via the named FIFO pipe below)
while read target
do
mkfifo sesspipe
# Get the list of the currently attached Block Storage volumes
iscsiadm -m session -P 0 | grep -v uefi | awk '{print $4}' > sesspipe 2> /dev/null
&
# Set a flag, and loop through the sessions (attached, but not configured)
# and see if the volumes match. If so, skip to the next until we get
# through the list. Session list is via the pipe.
found="false"
while read session
do

23 | INSTALLING AND CONFIGURING KVM ON BARE METAL INSTANCES WITH MULTI-VNIC
if [ ${target} = ${session} ]
then
found="true"
break
fi
done < sesspipe
# If the volume is not found, configure it. Get the resulting device file.
if [ ${found} = "false" ]
then
iscsiadm -m node -o new -T ${target} -p ${CURRADDR}:3260
iscsiadm -m node -o update -T ${target} -n node.startup -v automatic
iscsiadm -m node -T ${target} -p ${CURRADDR}:3260 -l
sleep 10
fi
done < discpipe
(( addrCount = addrCount + 1 ))
find . -maxdepth 1 -type p -exec rm {} \;
done
echo "Scan Complete."
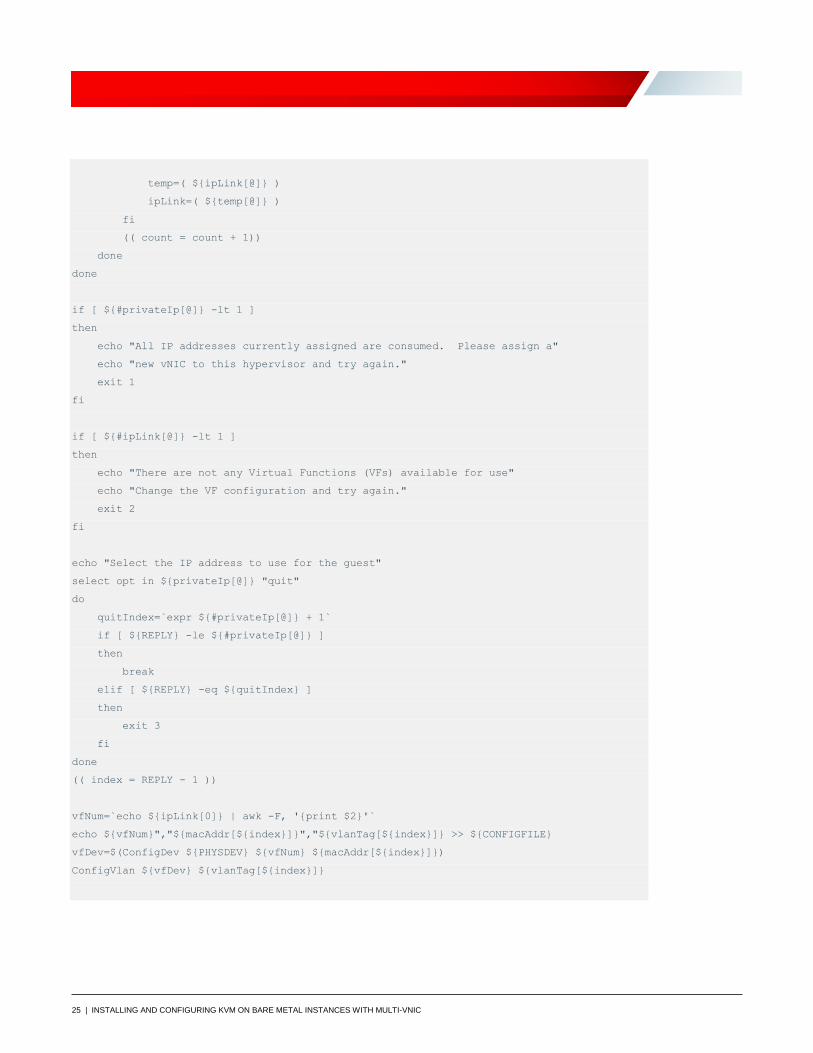
Select and Configure a VNIC to Use for the Guest: selectvnic.sh #!/bin/bash
# selectvnic.sh - Select and configure the vNIC to use for the KVM configuration
#
# Steven B. Nelson, Sr. Solutions Architect
# Oracle, Inc.
#
. ./common.sh
URL="http://169.254.169.254/opc/v1/vnics/"
CONFIGFILE=./kvmnet.conf
MAXVFS=16
PHYSDEV=$(GetPhysDev)
declare -a privateIp
declare -a macAddr
declare -a vlanTag
declare -a ipLink
numvfs=`cat /sys/class/net/${PHYSDEV}/device/sriov_numvfs`

24 | INSTALLING AND CONFIGURING KVM ON BARE METAL INSTANCES WITH MULTI-VNIC
if [ ${numvfs} -eq 0 ]
then
echo "No VFs appear to have been configured. Setting up ${MAXVFS} VFs now. Stand
by."
echo "${MAXVFS}" > /sys/class/net/${PHYSDEV}/device/sriov_numvfs
sleep 30
echo "Setting the bridging mode."
bridge link set dev ${PHYSDEV} hwmode vepa
fi
read -ra ipLink <<< `ip link show ${PHYSDEV} | grep vf | awk -F, '{print $1}' | sed 's/^
*//g;s/ /,/g'`
echo "Stand by. Gathering link information"
for field in privateIp vlanTag macAddr
do
read -ra ${field} <<< `curl -s ${URL} | jq -r '.[1:(length)] | .[].'"${field}"''`
done
for link in ${ipLink[@]}
do
IFS="," read -ra linkInfo <<< ${link}
count=0
while [ ${count} -lt ${#macAddr[@]} ]
do
uMacvNic=`echo ${macAddr[${count}]} | awk '{print toupper($0)}'`
uMacLink=`echo ${linkInfo[3]} | awk '{print toupper($0)}'`
preConfig=`grep ${macAddr[${count}]} ${CONFIGFILE}`
if [ ${uMacvNic} = ${uMacLink} ] || [ -n "${preConfig}" ]
then
echo "IP address ${privateIp[${count}]} appears to be used. Removing from
list"
unset privateIp[${count}]
unset macAddr[${count}]
unset vlanTag[${count}]
unset ipLink[${count}]
declare -a temp=( ${privateIp[@]} )
privateIp=( ${temp[@]} )
temp=( ${vlanTag[@]} )
vlanTag=( ${temp[@]} )
temp=( ${macAddr[@]} )
macAddr=( ${temp[@]} )
25 | INSTALLING AND CONFIGURING KVM ON BARE METAL INSTANCES WITH MULTI-VNIC
temp=( ${ipLink[@]} )
ipLink=( ${temp[@]} )
fi
(( count = count + 1))
done
done
if [ ${#privateIp[@]} -lt 1 ]
then
echo "All IP addresses currently assigned are consumed. Please assign a"
echo "new vNIC to this hypervisor and try again."
exit 1
fi
if [ ${#ipLink[@]} -lt 1 ]
then
echo "There are not any Virtual Functions (VFs) available for use"
echo "Change the VF configuration and try again."
exit 2
fi
echo "Select the IP address to use for the guest"
select opt in ${privateIp[@]} "quit"
do
quitIndex=`expr ${#privateIp[@]} + 1`
if [ ${REPLY} -le ${#privateIp[@]} ]
then
break
elif [ ${REPLY} -eq ${quitIndex} ]
then
exit 3
fi
done
(( index = REPLY - 1 ))
vfNum=`echo ${ipLink[0]} | awk -F, '{print $2}'`
echo ${vfNum}","${macAddr[${index}]}","${vlanTag[${index}]} >> ${CONFIGFILE}
vfDev=$(ConfigDev ${PHYSDEV} ${vfNum} ${macAddr[${index}]})
ConfigVlan ${vfDev} ${vlanTag[${index}]}

26 | INSTALLING AND CONFIGURING KVM ON BARE METAL INSTANCES WITH MULTI-VNIC
Reconfigure Previously Selected VFs: netconfig.sh #!/bin/bash
# netconfig.sh - Configuration of network at boot time for KVM
#
# Steven B. Nelson, Sr. Solutions Architect
# Oracle, Inc.
. ./common.sh
NUMVFS=16
CONFIGFILE=./kvmnet.conf
PHYSDEV=$(GetPhysDev)
currvfs=`cat /sys/class/net/${PHYSDEV}/device/sriov_numvfs`
if [ ${currvfs} -eq 0 ]
then
echo "Standby - configuring ${NUMVFS} VF devices"
echo ${NUMVFS} > /sys/class/net/${PHYSDEV}/device/sriov_numvfs
sleep 30
fi
echo "Setting the bridging mode"
bridge link set dev ${PHYSDEV} hwmode vepa
while IFS="," read -ra netConfig
do
if grep -q "#" <<< ${netConfig[0]}
then
continue
else
vfDev=$(ConfigDev ${PHYSDEV} ${netConfig[0]} ${netConfig[1]})
ConfigVlan ${vfDev} ${netConfig[2]}
fi
done < ${CONFIGFILE}
Oracle Corporation, World Headquarters Worldwide Inquiries
500 Oracle Parkway Phone: +1.650.506.7000
Redwood Shores, CA 94065, USA Fax: +1.650.506.7200
Copyright © 2018, Oracle and/or its affiliates. All rights reserved. This document is provided for information purposes only, and the
contents hereof are subject to change without notice. This document is not warranted to be error-free, nor subject to any other warranties or conditions, whether expressed orally or implied in law, including implied warranties and conditions of merchantability or fitness for a particular purpose. We specifically disclaim any liability with respect to this document, and no contractual obligations are formed either directly or indirectly by this document. This document may not be reproduced or transmitted in any form or by any means, electronic or mechanical, for any purpose, without our prior written permission. Oracle and Java are registered trademarks of Oracle and/or its affiliates. Other names may be trademarks of their respective owners. Intel and Intel Xeon are trademarks or registered trademarks of Intel Corporation. All SPARC trademarks are used under license and are trademarks or registered trademarks of SPARC International, Inc. AMD, Opteron, the AMD logo, and the AMD Opteron logo are trademarks or registered trademarks of Advanced Micro Devices. UNIX is a registered trademark of The Open Group. 0218 Installing and Configuring KVM on Bare Metal Instances with Multi-VNIC February 2018 Author and Technical Contact: Steven B. Nelson
C O N N E C T W I T H U S
blogs.oracle.com/oracle
facebook.com/oracle
twitter.com/oracle
oracle.com