onweb 7.5.0 developer’s guide€¦ · onweb developer’s guide iii chapter 1: overview onweb...
TRANSCRIPT

OnWeb 7.5.0Developer's Guide

Micro Focus (IP) Ltd. The Lawn22-30 Old Bath RoadNewbury, Berkshire RG14 1QNUKhttp://www.microfocus.com
�Copyright 2010 Micro Focus (IP) Limited. All Rights Reserved.
�MICRO FOCUS, the Micro Focus logo and RUMBA are trademarks or registered trademarks ofMicro Focus (IP) Limited or its subsidiaries or affiliated companies in the United States, UnitedKingdom and other countries.
�All other marks are the property of their respective owners.
��
ii

OnWeb Developer’s Guide iii
Chapter 1: Overview
OnWeb components • 7OnWeb Server • 7OnWeb Designer • 7OnWeb Source Server • 8OnWeb Administrator • 8OnWeb Application Manager • 9OnWeb Object Builder • 9
About this guide • 10Learning more about OnWeb • 11
Chapter 2: Creating Host Publishing Applications
Creating a simple Host Publishing application • 13Customizing a Host Publishing application • 14Customizing default templates • 14Customizing individual screens presentation • 16
Chapter 3: Host Publishing Advanced Features
Using template groups • 22Template groups ‐ example • 23Creating template groups • 25
Using screen groups • 25Customizing final HTML pages • 26Using Pre‐Display and Submit procedures • 27Using lookup tables • 29Using headers and footers • 31Customizing launch page • 32Optimizing application performance • 32Pooling connections • 32Limiting connections • 34
Adding a Logon/Logoff script to the application • 34
Table of Contents

Table of Contents
iv OnWeb Developer’s Guide
Using Host Publishing HTML tags • 34Adding User Preferences dialog to the application • 38Using OnWeb Macro Editor • 40Using session variables in the scripts • 41Session variables • 41CGI variables • 42
Using Host Publishing with OnWeb ActiveX control • 44Advanced features ‐ example • 44
Chapter 4: Using LiveConnect Functionality
JavaScript to Java communication • 47Using Packages object • 48Using JavaArray object • 49Passing arguments of type char • 49Initializing static initializer blocks • 49
Data type conversions • 50StringValue JavaScript Extension • 50JavaScript to Java Conversions • 51
Catching exceptions • 53Catching JavaScript exceptions • 53Catching Java exceptions in JavaScript • 54
Chapter 5: Creating OnWeb Mobile Applications
Creating an OnWeb Mobile application in Designer • 55Designate application for mobile devices • 55Capture and customize screens • 56
Creating mobile application components in OnWeb Object Builder • 58
Chapter 6: Deploying Applications
Step 1: Create Installable OnWeb Application • 59Step 2: Deploy IOA • 60
Chapter 7: Using OnWeb Assembly
Programming interface • 61tOnWebServer object • 62
OnWeb Assembly ‐ sample program • 65

OnWeb Developer’s Guide v
Table of Contents
Chapter 8: Using OnWeb UJB
Setting up development environment • 69Accessing OnWeb Server using OnWeb UJB • 70Using OnWeb UJB • 71Specifying properties • 71Making OnWeb UJB work • 73
Putting it all together • 76Using the IObject • 77
Chapter 9: Using OWJ2MEClient Component
Programing interface • 79OnWebServer class • 80IObject class • 84Error class • 85Table class • 85Table.Schema class • 86Table.Schema.Column class • 86Table.Schema.Column.Type class • 87Parameters class • 87Parameter class • 88
OWJ2MEClient ‐ sample code • 89
Chapter 10: Integrating Your Business Systems with OnWeb
Using OnWeb Connectors • 95Using OnWeb BizTalk Adapter • 97Preparing OnWeb components for integration • 97Incorporating OnWeb components into BizTalk Server project • 98
Appendix A: Supported Codepages
Appendix B: Reserved Words
Appendix C: Using MQSeries with OnWeb
Environment requirements • 108

Table of Contents
vi OnWeb Developer’s Guide
Configuration with OnWeb • 108MQAX interfaces • 110Sample programming and test environment • 111Control commands • 112
Index • 113

OnWeb Developer’s Guide 7
Overview 1
OnWeb® gives you the power to build Web applications that take advantage of the existing data and business logic in your enterprise. OnWeb also provides the tools to create new, reusable logic for your organization’s Web applications.
An application that works with OnWeb can be a Web page in a browser or a stand‐alone executable. You can also create applications that will be run on a mobile device.
OnWeb applications are stored on OnWeb Server that can be installed either on the Microsoft Windows®, Solaris™, Linux®, orAIX® platforms, or the iSeries™ systems.
OnWeb componentsOnWeb consists of several core components: OnWeb Server, OnWeb Designer, OnWeb Source Server, OnWeb Administrator, OnWeb Application Manager, and OnWeb Object Builder. Each component is briefly described below.
For more information about installing OnWeb components, see OnWeb Administrator Guide.
OnWeb ServerOnWeb Server is a high performance, scalable, multi‐user run time environment that accesses and integrates multiple data sources in real time, executes business logic, and delivers the application to the desktop. It runs on either the Microsoft Windows, Solaris, Linux, AIX, or iSeries systems and fully utilizes their performance capabilities.
OnWeb DesignerOnWeb Designer is a development environment for creating OnWeb applications. An OnWeb application has a single mainframe application as its

Chapter 1 ‐ Overview
8 OnWeb Developer’s Guide
primary source and brings the legacy host content into the customized HTML pages. It can be developed for both the Windows and the UNIX® platform.
When building an application, you use Designer’s white‐board to organize objects into a hierarchical structure, as shown below.
To write the objects’ code, you can use JavaScript™, HTML, or XML.
To use OnWeb Designer, you must log on to OnWeb Server and must be connected to the OnWeb Source Server.
See OnWeb Designer Help for detailed information on how to use Designer.
OnWeb Source ServerOnWeb Source Server is a database server used by Designer to store components of OnWeb applications.
OnWeb AdministratorOnWeb Administrator is a tool for administering OnWeb Server. It requires Microsoft Internet Explorer 5.5 or higher to run. Use the Administrator to configure basic and advanced server settings, view server logs, view session information, and manage users and user groups.
OnWeb Developer’s Guide 9
Chapter 1 ‐ Overview
See OnWeb Administrator Help for detailed information on how to use this tool.
OnWeb Application ManagerOnWeb Application Manager is a tool to be used for deploying and managing OnWeb applications on a production server.
See OnWeb Application Manager Help for details on how to use the tool.
OnWeb Object BuilderOnWeb Object Builder is used to extend the 3rd party development environment to access host information. It allows to create a variety of reusable components that encapsulate captured host transactions. The supported components are: Web services, .NET assemblies, JavaBeans™, EJBs™, portlets, BizTalk® schemas, and Web‐To‐Host pages. OnWeb Object Builder can be run as a stand‐alone tool or as an add‐in in Microsoft Visual Studio® .NET and Borland® JBuilder™.
See OnWeb Object Builder Help and OnWeb Object Builder Tutorial for details on how to use the tool.

Chapter 1 ‐ Overview
10 OnWeb Developer’s Guide
About this guideThis guide describes the process and various issues related to creating OnWeb applications. It is divided into the following chapters and appendices:
Chapter/Appendix Description
Chapter 2, “Creating Host Publishing Applications”
Describes the process of creating a Host Publishing application.
Chapter 3, “Host Publishing Advanced Features”
Describes several advanced features used in creating Host Publishing applications.
Chapter 4, “Using LiveConnect Functionality”
Describes how to use LiveConnect™ functionality to facilitate communication between Java™ and JavaScript.
Chapter 5, “Creating OnWeb Mobile Applications”
Describes how to create an OnWeb application that can be accessed from a mobile device.
Chapter 6, “Deploying Applications”
Describes the process of deploying your finished application into a production server.
Chapter 7, “Using OnWeb Assembly”
Describes OnWeb Assembly API.
Chapter 8, “Using OnWeb UJB”
Describes how to use OnWeb UJB in Java code.
Chapter 9, “Using OWJ2MEClient Component”
Describes how to use the OWj2meClient component to access OnWeb Server from a mobile device.
Chapter 10, “Integrating Your Business Systems with OnWeb”
Describes how to use OnWeb Connectors and OnWeb BizTalk Adapter to integrate other application solutions with OnWeb.
Appendix A, “Supported Codepages”
Lists codepages supported by Designer and Navigator.
Appendix B, “Reserved Words”
Lists reserved words that should not be used as parameter names.
Appendix C, “Using MQSeries with OnWeb”
Describes how to use MQSeries® Automation Classes for ActiveX® with OnWeb applications.

OnWeb Developer’s Guide 11
Chapter 1 ‐ Overview
Learning more about OnWebOnWeb user documentation is available in two formats: online help and online guides.
OnWeb Online Help
When exists, the componentʹs online help is accessible from its user interface. It contains a brief overview of the component’s features and detailed procedures on how to use the component.
OnWeb also installs two stand‐alone help files that are accessible from the Windows Start menu (Start > Programs > NetManage OnWeb > Documentation):
OnWeb Scripting Help
This help contains reference information for the OnWeb scripting environment.
Host Publishing HTML Tags Help
This help contains reference information for the custom HTML tags developed by Micro Focus® to use with the Host Publishing applications.
OnWeb Online Guides
The following online guides installed with OnWeb will help you with the process of creating OnWeb applications:
OnWeb Host Publishing Training Guide
Introduces basic features of Host Publishing and guides you through the process of creating a simple Host Publishing application.
OnWeb Migration Guide
Discusses issues related to upgrading your applications from one version of OnWeb to the next.

Chapter 1 ‐ Overview
12 OnWeb Developer’s Guide

OnWeb Developer’s Guide 13
Creating Host Publishing Applications 2
A Host Publishing application is a browser‐based application that has a single host application as its primary data source. Using OnWeb Designer, you can create anything from a very simple application that connects to the host and presents all the host screens inside a single Web page, to a highly customized application that uses Web features and custom graphics to present the data.
This chapter describes the basic concepts used in Host Publishing and explains the simple customization features. For information on advanced customization features, see Chapter 3, “Host Publishing Advanced Features”.
Creating a simple Host Publishing applicationThe create an instant Host Publishing application, follow these general steps:
1. Provide the name for the new Host Publishing application.
2. Provide information about the host application, such as the host address and the type of emulation the host application uses. If required, you can also configure advanced host settings such the code page used and the type of connection.
3. Specify a default HTML template to be used to display the host application screens in the browser. OnWeb comes with several pre‐defined template which you can use as is, or modify to suit your requirements. See “Customizing default templates” on page 14 .
In Designer, you can either use the Host Publishing Wizard that will guide you through the process of creating this type of Host Publishing application, or create the application manually. See OnWeb Designer Help for details.
Once the application is configured, all you need to do is to connect to the host and run it. All the host application screens will be shown in a large rectangle inside the HTML page, as illustrated below.

Chapter 2 ‐ Creating Host Publishing Applications
14 OnWeb Developer’s Guide
See OnWeb Training Guide for Host Publishing for detailed instructions on how to create a simple Host Publishing application.
Customizing a Host Publishing applicationYou customize your Host Publishing application in two ways:
• by customizing the HTML template that will be used to present the host screens
• by editing individual captured screens to customize the way they are presented in the browser
Customizing default templatesA default template is an HTML page that is used to present your host application screens. All the host screens that are not individually modified are presented using this page. Designer comes with several pre‐designed default templates. You can use these templates as is, modify them, or create your own default templates. Each template contains an area where the host screen is

OnWeb Developer’s Guide 15
Chapter 2 ‐ Creating Host Publishing Applications
displayed and one or more virtual keyboards that the user can use to navigate through the host screens. For a detailed description of all the installed templates, see OnWeb Designer online help (on the Index tab, type “templates”, and select the “overview” entry).
Because these installed templates cannot be modified, if you want to base your own template on one of them, you must first make a copy of the template and then edit it.
When customizing a template, you can do one or more of the following:
• remove OnWeb graphics and links
• add your company graphics and links
• add text
• modify page background and text color
• change the placement of the rectangle that displays the host screens
• modify the number and placement of the virtual keyboards.
Some of these modifications, such as adding a virtual keyboard, are accomplished by using special Host Publishing HTML tags. For a full list and description of these tags, see Host Publishing HTML Tags Help available from the Start > Programs > NetManage OnWeb menu.
The following picture illustrates how the original template, shown on page 14, was customized to include the company logo and a white background.

Chapter 2 ‐ Creating Host Publishing Applications
16 OnWeb Developer’s Guide
To apply a default template
1. On the Components white‐board, right‐click the NonCapturedScreens object and choose Edit from the menu.
2. In the Select Template dialog box, select the template that you want to apply to all the host screens that were not captured and click OK.
Note: Virtual keyboards may not display correctly in some versions of Netscape® browser.
Customizing individual screens presentationYou can further customize your application by editing the presentation of the individual host screens. This is accomplished in three stages:
Stage 1. Using OnWeb Navigator to capture screens
OnWeb Navigator opens from within Designer allowing you to navigate through the host application screens and to capture the screens for which you want to customize presentation. Using Navigator, you can also create a navigation sequence which allows you to skip (not display) certain host screens in your application. You define the starting screen for the navigation sequence, then navigate through the screens that should not be displayed and specify the final screen to display. Navigator records all the keystrokes required to navigate from the first to the last screen. Optionally, you can also collect data from these screens in order to present it on the final screen.
For more information on how to use Navigator, see OnWeb Navigator Help.
All the captured screens are displayed on the Designer white‐board as objects. Each object contains screen data in XML format. Captured screen objects are connected with lines that show the flow of the application. A dotted line connects consecutive screens; a solid line connects the first and the last screen in a navigation sequence.

OnWeb Developer’s Guide 17
Chapter 2 ‐ Creating Host Publishing Applications
Stage 2. Using transforms
Because captured host screens are saved in XML format, you must transform them into an editable format before editing the screen presentation. OnWeb Designer comes with several pre‐defined transforms that will preform the required conversion.
Transform name Description
HTML Transforms the screen into an HTML format, which uses special HTML tags supported by Host Publishing. See Host Publishing HTML Tags Help for details.
Several versions of the HTML transform are available:
• HTML - Full Screen creates a page that contains areas for displaying the host screen, header and footer, title, navigation, and error messages. The page background is white.
• HTML - Header, Footer and Screen creates a page that contains areas for displaying the host screen and the header and footer. The page background is white.
• HTML - Horizontal create a page where the areas for displaying the host screen, header and footer, title, navigation, and error messages are organized hori-zontally. The page background is white.
• HTML - No footer, no error creates a page that con-tains areas for displaying the host screen, header, title and navigation. The page background is white.
• HTML - No title, no error creates a page that con-tains areas for displaying the host screen, header and footer, and navigation. The page background is white.
• HTML - Screen only creates a page that displays the host screen on a white background.
XSL Transforms the screen into an XSL format.
OnWeb Plugin Transforms the screen into a special HTML format that enables it to be edited in Microsoft FrontPage® using OnWeb component called OnWeb Plugin.The HTML page that it creates is initially blank.
OnWeb Plugin for Mobile Devices
These versions of the OnWeb Plugin transform should be used in OnWeb applications that are created for mobile devices.
Chapter 2 ‐ Creating Host Publishing Applications
18 OnWeb Developer’s Guide
Transforms are written in XML format. You can use the existing transforms, edit them to customize the way the screens are converted (for example including in the transform a common element that must be inserted into each screen), or develop your own transforms.
To apply a transform
1. Right‐click the captured screen object on the white‐board and choose Edit from the menu.
2. Select the required transform from the list and click OK. Designer transforms the screen into the selected format and opens the default editor for this format.
Stage 3. Editing the screens
Now you can fully customize how the screen is presented in the browser by editing its code.
To facilitate this process, OnWeb installs a FrontPage component called OnWeb Plugin that automates many tasks in screen editing and customization. In order to use this component, you must use the OnWeb Plugin transform and specify FrontPage as your default HTML editor in Designer.
To edit a screen in FrontPage
1. Double‐click the screen you want to edit. If you created template groups, Designer prompts you to select the group for which you want to edit the screen. See “Using template groups” on page 22 for more information. Designer opens the page in FrontPage.
2. [FrontPage 2000] From the Insert menu, point to Components, then choose Additional Components.[FrontPage 2002] From the Insert menu, choose Web Components.
3. [FrontPage 2000] In the FrontPage Components dialog box, select “OnWeb Plugin” and click OK.[FrontPage 2002] In the Component type list, select “Additional Components”, then from the Choose a component pane, select “OnWeb Plugin”. Click Finish.

OnWeb Developer’s Guide 19
Chapter 2 ‐ Creating Host Publishing Applications
4. The screen displays inside the OnWeb Plugin window, where you can:
› modify font attributes for the text in a host field
› convert host fields into text boxes, check boxes, radio buttons, drop‐down menus, and push buttons
› convert selected fields into hyperlinks
› add user defined variables
› replace text displayed on the screen using lookup tables
› specify which part of the host screen to display on the page
› convert parts of the host screen into a keyboard
For a detailed description of all the features available in OnWeb Plugin, see the OnWeb FrontPage Components help.
The following picture shows how a fully customized screen presentation may look.

Chapter 2 ‐ Creating Host Publishing Applications
20 OnWeb Developer’s Guide

OnWeb Developer’s Guide 21
Host Publishing Advanced Features 3
To further customize your Host Publishing application, you can use these advanced Host Publishing features:
• Template groups. A template group is a set of presentation templates that displays host data using common characteristics based on the pre‐set conditions. See “Using template groups” on page 22 for details.
• Screen groups. You can customize presentation of a group of screen based on common matching criteria specified in a script. See “Using screen groups” on page 25 for details.
• HTML customization. You can add a script to your Host Publishing application that will further customize HTML pages generated by the application prior to displaying them in a browser. See “Customizing final HTML pages” on page 26 for details.
• Pre‐Display and Submit procedures. Use a Pre‐Display procedure to add data from a secondary data source or to modify data before the page is displayed in a browser. Use a Submit procedure to submit data back to the secondary data source or to modify data before the user moves to the next page. See “Using Pre‐Display and Submit procedures” on page 27 for details.
• Lookup tables. Using this feature, you can substitute the text coming from the host screen for an associated text to be displayed on HTML page and vice versa. The associated values are configured in advance and kept in an XML file. See “Using lookup tables” on page 29 for details.
• Header and footer files. You can add a header and footer files to your pages to display common elements at the top and bottom of the pages. for example, you can use the header to display your company logo at the top of every application page. See “Using headers and footers” on page 31.
• Launch page. Use a standard page at the start of your application. You can customize the default page installed with OnWeb or create your own. See “Customizing launch page” on page 32.

Chapter 3 ‐ Host Publishing Advanced Features
22 OnWeb Developer’s Guide
• Optimizing application performance. Use session pooling to enhance application response at run time, and connection capping to limit number of connection for a data source. See “Optimizing application performance” on page 32.
• Logon/logoff script. You can replace a default logon script used by OnWeb to connect to the host application with your own custom logon script. You can also replace the default logoff script with a custom one. See “Adding a Logon/Logoff script to the application” on page 34.
• Host Publishing HTML tags. Use these OnWeb‐specific HTML tags to further customize your Host Publishing application. See “Using Host Publishing HTML tags” on page 34.
• User Preferences. In your application, you can create a link to the User Preferences dialog box, where users will be able to map keyboard keys to specific application commands, configure various colors displayed by the application, and record macros for the application. See “Adding User Preferences dialog to the application” on page 38.
• Macro Editor. Use this standalone tool to convert PC‐to‐Host or Web‐to‐Host macros to Host Publishing macros, and to create your own macros. Macros converted or created in this tool became available in the User Preferences dialog box. See “Using OnWeb Macro Editor” on page 40.
Using template groupsFor some applications, you may want to change screen presentation in a browser depending on the received data, such as user input or the user ID. An example of such a case is a multilingual application, where a user can choose the language for displaying all the application screens.
To accommodate this type of requirement, Designer uses template groups. A template group is a set of presentation templates that displays host data using common characteristics based on the pre‐set conditions. For example, if a user selects French from the menu on the first screen, all the text on the consecutive screens will be presented in French.
A template group may contain presentation templates for individual captured screens, and a single template for all the non‐captured screens. A Default group is always present in the application. Templates from this default group will be used to present data if a template for a particular screen does not exist in the group.

OnWeb Developer’s Guide 23
Chapter 3 ‐ Host Publishing Advanced Features
Template groups - exampleLetʹs suppose that you created three template groups that display text on a page in different languages: French, German, and Spanish; and that the Default group will display text in English.
Then, you captured two host screens: “ISPF Menu” and “Welcome”.
In each of the groups, you created the following HTML templates to display the ISPF Menu screen, the Welcome screen, and the non‐captured screens:
The following diagram illustrates how the above templates will be used for displaying host screens:
Group Templates
Default ispf_menu.htmwelcome.htmNonCapturedScreens.htm
French ispf_menu.htmwelcome.htmNonCapturedScreens.htm
German welcome.htmNonCapturedScreens.htm
Spanish ispf_menu.htmwelcome.htm

Chapter 3 ‐ Host Publishing Advanced Features
24 OnWeb Developer’s Guide
Menu 1 screen(startup screen)
Welcome screen(captured)
ISPF Menu screen(captured)
Search screen(non-captured)
Mary Text displayed in English (default language)
Mary chooses French from the menu.
French template for the Welcome screen is applied.
Welcome screen displayed in French
French template for the ISPF Menu screen is applied.
ISPF menu displayed in French
French template for the non-captured screens is applied.
Elements of the screen that are defined in the template are displayed in French.
Dave Text displayed in English (default language)
Dave chooses German from the menu.
German template for the Welcome screen is applied.
Welcome screen displayed in German
Because there is no ISPF Menu template in the German group, the Default ISPF Menu template is applied.
ISPF menu displayed in English
German template for the non-captured screens is applied.
Elements of the screen that are defined in the template are displayed in German.
John Text displayed in English (default language)
John chooses Spanish from the menu.
Spanish template for the Welcome screen is applied.
Welcome screen displayed in Spanish
Spanish template for the ISPF Menu screen is applied.
ISPF menu displayed in Spanish
Because there is no non-captured screen template in the Spanish group, the Default template for the non-captured screens is applied.
Screen text is displayed in English.
Default template group (English)
French template group
German template group
Spanish template group

OnWeb Developer’s Guide 25
Chapter 3 ‐ Host Publishing Advanced Features
Creating template groupsTo develop your template groups, follow these general steps:
• Step 1. For each presentation condition, create a template group.
• Step 2. For each captured screen, create a template in each group.
• Step 3. For non‐captured screens, create a template in each group.
• Step 4. Specify when to apply a template from each group.
You can also use template groups as a trigger for running the Pre‐Display/Submit procedures. For details see “Using Pre‐Display and Submit procedures” on page 27.
Using screen groupsIn your application, you can minimize the amount of screens that need to be captured to customize their appearance, by using screen groups. This feature allows you to apply a custom template to a group of screens identified by a set of common criteria specified in a script. An application may have multiple screen groups, each one using a different presentation template.
For example, you may divide your application into two sets of screens, one that shows menus and one that shows data. For the menu screens, you may specify that the word “Menu” must be found on the screen in order to apply a template designed for presenting menus. For the data screens, you may specify that the word “list” must appear on the screen in order to apply a template designed for presenting data.
Here are the general steps to follow when implementing screen groups in your application:
1. Group screens in your application based on their common element.
2. For every group of common screens, create a screen group object on the Host Publishing white‐board in Designer. Provide a name for the object that clearly identifies the group.
3. Assign a presentation template to each screen group. You can use standard presentation templates installed with Designer or develop your own templates.
4. Edit the script in the CustomMatch object that resides on the Components white‐board. In this script, you specify matching criteria for each screen group identified in your application.

Chapter 3 ‐ Host Publishing Advanced Features
26 OnWeb Developer’s Guide
See Designer online help for a detailed description on how to create screen group objects and how to edit the CustomMatch script.
Customizing final HTML pagesDesigner allows you to add an extra customization step that is performed after the HTML page is rendered by the Host Publishing engine but before it is displayed in a browser. For example, you may want to add or remove some elements of the screen based on certain conditions.
This final HTML customization is done through the HTMLCustomization object created by Designer for each Host Publishing application. This object is located on the Components white‐board. You can add a script to this object that will be utilized at run time to introduce your final modifications.
To create HTML customization script
1. In the Components white‐board, right‐click the HTMLCustomization object and choose Properties from the menu.
2. In the HTMLCustomization Properties dialog box, select the scripting language for the objectʹs script. Click OK to return to the white‐board.
Note: When you are connected to OnWeb Server installed on UNIX, this step is not required because UNIX only supports one scripting language, JavaScript.
3. Right‐click the HTMLCustomization object and choose Edit Script from the menu.
4. In the Create New Script dialog box:
› to use one of the sample scripts installed with Designer, select the Use sample script option and select the script from the list.
› to open an empty script, select the Use empty script option.

OnWeb Developer’s Guide 27
Chapter 3 ‐ Host Publishing Advanced Features
Using Pre-Display and Submit proceduresTo further customize your Host Publishing application, you can create special procedures that run either before displaying the page in a browser or before submitting data back to the host. A procedure is a collection of one or more routines that perform the assigned task.
A procedure that runs before displaying the page is called Pre‐Display. It can collect additional data to be added to the page or modify data to be displayed on the page. A procedure that submits data to the server before the user moves to the next page is called Submit.
While you can have a number of procedures attached to a screen, what determines which procedure is run is the template currently associated with the screen. For each template, you can create one Pre‐Display and one Submit procedure.
The Pre‐Display and Submit procedures should be used primarily to collect or submit data from and to the secondary data sources. A secondary data source is a data source other than the host application accessed by your Host Publishing application (a primary data source). It is possible to use the procedures to access your primary data source, but caution should be used as users may disrupt the flow of host screens recognized by the application.
You can add the Pre‐Display and Submit procedures to each captured screen and to the NonCapturedScreens object.
Example
An example of a Pre‐Display procedure will be a procedure that collects additional information about the user from an ODBC database. This data is then displayed in a browser in addition to the data that comes from a host screen. If a user then changes any of the additionally collected data, the Submit procedure can be used to update the ODBC database before displaying the next host screen.

Chapter 3 ‐ Host Publishing Advanced Features
28 OnWeb Developer’s Guide
When creating a procedure, you specify:
• A default scripting language to use in the routine associated with the procedure. The choice of the scripting language is not available when Designer is connected to OnWeb Server installed on UNIX.
• The name and description that uniquely identifies the procedure.
• The template group that will trigger the running of the procedure. You can have as many procedures of each type for the screen as you have template groups in your application.
• A type of routine associated with the procedure. You can have a routine that accesses another host application in order to collect or submit data, a routine that performs ODBC SQL query or update, or a routine that runs a simple script. You can associate multiple routines with each procedure.
When creating scripts for your procedures, you can use Session variables and CGI variable described in “Using session variables in the scripts” on page 41
See OnWeb Designer Help for details on how to add the procedures and routines to your application.

OnWeb Developer’s Guide 29
Chapter 3 ‐ Host Publishing Advanced Features
Using lookup tablesLookup tables are a quick way of replacing the value found on a host screen with the corresponding value stored in a lookup table for the purpose of displaying it on an HTML page. In reverse, this process can be used to replace the value entered on an HTML page with a corresponding value that is submitted to the host application.
To use a lookup table, follow these steps:
Step 1. Create a lookup data file.
The lookup data file is a character‐delimited text file, with the extension csv. It contains Host Value/HTML Value pairs, where the Host Value is the value that comes from or is placed back on a host screen, and the HTML Value is the value that is displayed or entered on the HTML page.
The lookup data file might look like this:
where the first, third, fifth, and seventh string is the text coming from the host, and the second, fourth, sixth, and eighth string is the text to be displayed in a browser. Consequently, the string “g875629” sent by the host application will be displayed on the page as “glow plugs”.
Use any text editor to prepare the lookup data file. This type of file can also be saved from other tools, such as Microsoft Excel.
Note: The csv file must contain an even number of entries separated by a common character. If the file contains that character as a last character, OnWeb assumes there is null value that follows it.
Step 2. Import lookup data file into your project.
To use the values stored in the lookup file, you must import the file into your application. You can import as many lookup data files as you need. Upon importing, the file is converted into an XML format.
Depending on the locale of your machine, entries in the automatically created csv file may be different than a comma. When importing a lookup file, you will be asked to specify the separator character used in your csv file.

Chapter 3 ‐ Host Publishing Advanced Features
30 OnWeb Developer’s Guide
To import lookup data file
1. Open the Components white‐board for your application.
2. Right‐click the white‐board, point to New and choose Lookup.
3. Click inside the white‐board.
4. In the Select Lookup File dialog box, select the .csv file that you want to import and click Open.
5. In the Select Separator Character dialog box, specify the separator character that is used in the csv file that you are importing. The default separator character is a coma.
The XML file created from the data file created in Step 1 will look like this:
To modify a lookup table entries, you can either edit the generated XML file or edit the lookup data file and re‐import it into the application. When modifying the XML file, make sure not to change the structure of the file as it will make it unusable.
Step 3. Call the lookup table from your HTML pages.
You utilize a lookup table when designing an HTML page. If you are using the OnWeb Plugin component in Microsoft FrontPage to create the HTML

OnWeb Developer’s Guide 31
Chapter 3 ‐ Host Publishing Advanced Features
pages, you can specify the lookup table for several elements created in the Plugin, such as a text field, a drop down menu, or a hot‐spot keyboard. If you are using other HTML editors, you can use a Host Publishing HTML tag OW:LOOKUP or the lookup attribute in several HTML tags. See the Host Publishing HTML Tags Help for details.
For example, you can use the lookup table created in Step 1 to replace a part name that the user selects from a drop down list with a part number that is then sent back to the host application.
Note: Using large lookup tables will impair performance. If you have a large number of value pairs in your lookup table, consider using a database and a query to extract required data instead.
Using headers and footers
You can create a header and a footer file to display common elements at the top and bottom of the application pages. An example of the header will be your company logo or a menu bar, an example of the footer will be the copyright information.
The placement of the header and footer is controlled by the two HTML tags, OW:APPLICATION‐HEADER and OW:APPLICATION‐FOOTER. These tags are placed automatically in the HTML file when you use a transform to convert a captured screen into an editable format. They are also present in the default templates used for non‐captured screens. See the Host Publishing HTML Tags Help for more information about the HTML tags supported by Host Publishing.
At run time, this tags will place on the application page the content of the _header.htm and _footer.htm files found in the application folder. The header and footer files are added to the serverʹs application folder only after you initialize them and rebuild your application.
After initializing the header and footer files, you can manage them by editing them further, checking the history of changes, and updating the files with the latest changes made by another developer.
If you no longer want to have a header and/or footer on your pages, you can remove it from your application.
See Designer Help for details on how to use headers and footers in your application.

Chapter 3 ‐ Host Publishing Advanced Features
32 OnWeb Developer’s Guide
Customizing launch pageBy default, every new Host Publishing application displays a launch page when you start the application. The default launch page contains a variety of information about the host application, such as the application name, the host address and port, the type of connection and the host screen size. You can modify the default launch page to suit your individual needs, create your own launch page, or choose not to use a launch page at all.
See Designer Help for details on how to use a launch page in your application.
Optimizing application performanceTo optimize resource usage and application performance, use the following advanced features available to Host Publishing applications: session pooling and connection capping.
Pooling connectionsWhen a new user starts an OnWeb application, certain amount of time is spent on establishing a connection to the host and navigating to the start of the application. You can significantly reduce this initial amount of time by using session pooling.
Session pooling
When you enable session pooling in your application, ready‐to‐use connections are pooled on the server. At first, new sessions are established as described above. Then, when a user ends the session, the session is not terminated but goes into the pool. The next user is given the first available session from the pool. You can specify the maximum number of connected but not used host sessions to be maintain in the pool. The pool size depends on the system resources available to your application. A larger pool stores more sessions thus making more users benefit from the feature, but it will also use more system resources. Each session pool applies to one application only and cannot be shared between different applications.
Parking screen
In order for the session to be returned to the pool, it must end at a common screen called a parking screen. A parking screen is the first screen that the user sees when given the pooled session. If this is not the first host application screen, you may need to create a navigation sequence which will

OnWeb Developer’s Guide 33
Chapter 3 ‐ Host Publishing Advanced Features
automatically take the user to this screen. When selecting a parking screen, choose one where the action of the previous user does not affect the next user of the session. For example, for a call center an example of a parking screen will be the screen that displays the applicationʹs menu, or a screen where you enter customerʹs number in order to retrieve the customerʹs account information. To designate a screen as a parking screen, you must first capture it when creating your application.
ReturnToParkingScreen script
In a typical application, user ends a host session by clicking the “Logout” button. This frees the host session from the OnWeb session. In the pooled sessions scenario, you can also use this button to invoke the ReturnToParkingScreen script. This script serves two roles:
• it provides a mechanism for cleaning up the session, such as clearing up sensitive information from the fields. This step is important to ensure data safety in the shared session pooling environment.
• it returns the session to the parking screen
If the user does not log off the OnWeb session, the host session will be terminated without being returned to the pool when the OnWeb session times out.
Enabling session pooling
Because of the session sharing, session pooling can only be implemented for applications which either do not require logging on, allow multiple log on with a single user ID, or allow multiple log on with a set of equivalent user IDs.
Before you enable session pooling for your application, you need to determine if your application is suitable. Consider the nature of your application, availability of a common screen, user access, and system resources. Then, in OnWeb Designer:
1. Enable session pooling in the application properties. Because not all application are suitable for session pooling, by default, this feature is turned off in a new Host Publishing application.
2. Designate a suitable parking screen.
3. Specify the size of the session pool.
4. Create the ReturnToParkingScreen script. This script is attached to the ReturnToParkingScreen object located on the Components white‐board.

Chapter 3 ‐ Host Publishing Advanced Features
34 OnWeb Developer’s Guide
See OnWeb Designer help for details on how to configure session pooling for your application.
Limiting connectionsYou can specify the maximum number (cap) of host connections per data source for your application. When the specified cap is reached, the subsequent connections will be rejected and an error message will be issued. By default, capping is disabled in the application.
See OnWeb Designer help for details on how to enable connection capping.
Adding a Logon/Logoff script to the applicationWhen a Host Publishing application connects to the host, the server automatically uses a logon procedure that ensures that the user is presented with the correct host screen. This is done by using the session object to retrieve relevant data source properties from the launch page.
You can create your own Logon script which will be used instead of the default script. When creating such script, you have to ensure that the correct datasource properties are set before the connection.
A sample Logon script called “Host logon” is distributed with Designer. It shows sample calls that retrieve datasource parameters.
You can also add a Logoff script to your Host Publishing application.
See OnWeb Designer help for details on how to add these scripts to your application.
Using Host Publishing HTML tagsA set of OnWeb‐specific HTML tags is available to help you further customize your Host Publishing application. Some of these tags are automatically inserted into a page when you use the OnWeb Plugin transform, and later when you edit your page using OnWeb FrontPage Plugin.
Several of the tags allow for inclusion of custom files which greatly improve the complexity of the host screen presentation and automate some conversion tasks.
The following table provides a list and a brief description of the available tags. For a detailed description of each tag, see OnWeb Host Publishing HTML

OnWeb Developer’s Guide 35
Chapter 3 ‐ Host Publishing Advanced Features
Tags Help available either from the Windows Start menu (Start>All Programs>NetManage OnWeb) or the Help menu in OnWeb Designer.
Tag Description
OW:APPLICATION-FOOTER Inserts the contents of the footer.htm file located in the application folder.
See “Using headers and footers” on page 31 for details.
OW:APPLICATION-HEADER Inserts the content of the header.htm file located in the application folder.
See “Using headers and footers” on page 31 for details.
OW:APPLICATION-NAME Returns the name of the current Host Publishing application.
OW:CGI-HVAR Displays information found in the specified CGI stream header variable.
OW:CGI-VAR Displays information found in the specified CGI stream body variable.
OW:ENABLE-KEYBOARD At runtime, preserves the current status of the custom keyboard on the consecutive pages.
OW:HOST-WARNING Provides feedback from the user operations.
OW:HOT-SPOT-KEYBOARD Presents function and aid keys from the specified screen area as the action buttons or the hyperlinks.
A custom keyboard file in xml format may be used to further customize the appearance of the keyboard and automate conversion of the host screen text into the Web page elements.
OW:INPUT Creates a reference to an unprotected field on the current host screen.

Chapter 3 ‐ Host Publishing Advanced Features
36 OnWeb Developer’s Guide
OW:INSERT-FILE-CONTENT Inserts the content of the specified file. You can insert the file that contains other Host Publishing tags.
OW:INSERT_KEYBOARD Inserts one of the predefine keyboards.
OW:INSERT-SCREEN-HERE Inserts a grey screen representation of the current host screen.
Several new attributes as well as a custom file automate conversion of the host text into Web page elements.
OW:INVALID_KEYS Defines which keys cannot be typed on the page. Used when developing VT emulation application.
OW:LOOKUP Displays the value associated with a key, by looking up the key in a specified table.
See “Using lookup tables” on page 29 for details.
OW:NAME-OF Returns the object name.
OW:PASSWORD Generates a password field on the page.
OW:POPUP-SCREEN Inserts the content of the host sub-screen (pop-up screen) into an HTML page.
Several new attributes as well as a custom file automate conversion of the host text into Web page elements.
OW:PRINT-SCREEN Creates the Printer Friendly button on the page. Clicking this button, displays the current host screen in a printer-friendly format.
OW:RAW Displays the specified area of the text from the current host screen.
OW:RUN-APP-SERVER-VAR Inserts the required server variables.
OW:SCREEN-TABLE Allows you to present elements from the host screen in a table format.
Tag Description

OnWeb Developer’s Guide 37
Chapter 3 ‐ Host Publishing Advanced Features
OW:SESSION-DATA 1 Retrieves the value of the variable from the session memory.
OW:SESSION-DATA 2 Associated a value with a variable in the session memory.
OW:SESSION-DATA 3 Associates a region of the host screen with a variable in the session memory.
OW:SQL Allows you to specify an SQL query to be run against a database.
OW:SUBMIT_KEYS Defines the keys which, when typed on the screen, will be sent directly to the host without pressing the Enter key. Used when developing VT emulation application.
OW:TABLE-DATA Displays values from the specified table.
OW:TEXT Displays text from the protected field on the host screen.
OW:TYPE_KEYS Defines which keys can be typed on the screen. Used when developing VT emulation application.
OW:USER-DEFINED Searches all the user-defined tables and returns the first value found in the second column that matches the specified variable.
OW:VALUE-OF Returns the value of the specified object.
OW:VIRTUAL-INPUT Creates a virtual input field which is composed of the specified real input fields.
OW:X-CLOCK Provides user feedback about the keyboard status.
Tag Description

Chapter 3 ‐ Host Publishing Advanced Features
38 OnWeb Developer’s Guide
Adding User Preferences dialog to the applicationYou can allow users to configure certain aspects of the application, such as mapping keyboards keys to the specific application commands, how colors are displayed by the application, and recording of macros. This is done by exposing the User Preferences dialog box in the application. This dialog box is installed with OnWeb Server and can be exposed in two ways:
• Default templates provided with OnWeb 7.2 or higher, contain a text link to the User Preferences dialog box. This link will be visible only when you apply default templates for the new Host Publishing applications created in a new project.
• For the applications created in earlier versions of OnWeb, or if you want to customize the appearance and location of the link, invoke a JavaScript function called openUserPreferences(). For example, to create a text link that says User Preferences, add this code to your application:
<a href=’javascript:openUserPreferences()’>User Preferences </a>
The User Preferences dialog box contains 4 tabs:
• The Keyboard Mapping tab is used to record a key combination that will invoke a specific command in the application.
• The Color tab is used to specify how various colors in the application will be displayed on your screen. The user can configure colors for protected and unprotected fields, field marks, and screen background. The screen background is configurable only when viewing in Microsoft Internet Explorer.
OnWeb Developer’s Guide 39
Chapter 3 ‐ Host Publishing Advanced Features
• The Macros tab is used to create macros that automate routine tasks in the application. The user can record a sequence of keystrokes and commands under a given name, and then assign a key combination that will play it back. The list of available macros displayed on this tab also contains macros created using OnWeb Macro Editor.
• The Settings tab is used to specify where user preferences are saved. User preferences can be saved as browser cookies or in a file on the local system.
The User Preferences dialog box also contains a link to a help file. This help file, called user_preferences_help.htm, is a generic file that explains how to use all the features in the User Preferences dialog box. The file is installed by default in the OnWeb Server location, in the Apache2/htdocs directory. If you want to use this file in its current format, you need to substitute the phrase “<name> application” with the actual name of your application.
Currently, the User Preferences dialog box can only be used for applications that will be viewed using the latest versions of Internet Explorer, Netscape, or Firefox browsers.
Notes: If the users want to save their user preferences in a file on their local system, they must have Java Plug‐in 1.4.2 from Sun Microsystems, Inc. installed on their machines.
When the user switches from saving preferences in browser cookies to saving in a local file system, he/she will be asked to accept a security certificate distributed by Micro Focus.

Chapter 3 ‐ Host Publishing Advanced Features
40 OnWeb Developer’s Guide
Using OnWeb Macro EditorOnWeb Macro Editor is a new OnWeb tool that allows you to:
• Convert macros created in Web‐to‐Host or PC‐to‐Host to macros supported by the Host Publishing applications.
• Convert macros recorded in a Host Publishing application into a Web‐to‐Host macros.
• Edit previously recorded or written Host Publishing and Web‐to‐Host macros.
•Write a new macro script for the Host Publishing and Web‐to‐Host macros.
Host Publishing macros are all saved in one file called onweb‐hostpub‐macros.txt located in the Documents and Settings\<user>\onweb‐hostpub‐preferences directory. This file is created when user preferences are saved locally (not in cookies). When the newly created macros are added to this file, they became available to the application users and are listed in on the Macros tab in the User Preferences dialog box. Please note, that macros created in Macro Editor are by default configured to run from any
screen in the application (run anywhere).
OnWeb Macro Editor is available from two locations:
• Windows Start menu (NetManage OnWeb > Development Tools > OnWeb Macro Editor)
• OnWeb Server location (HTML_Pages\MacroEditor)
For more information on how to use this tool, see OnWeb Macro Editor help.

OnWeb Developer’s Guide 41
Chapter 3 ‐ Host Publishing Advanced Features
Using session variables in the scriptsWhen creating scripts for your Host Publishing application, you can utilize the session variables and the CGI variables described below.
Session variables
CURRENT_HP_APPLICATION
Contains the case sensitive name of the Host Publishing application that the server will use for recognizing screens, performing lookups, etc. Read/Write.
CURRENT_HP_SCREEN
If the screen is matched, contains a case sensitive screen name assigned to the captured screen in Navigator. Read/Write.
CURRENT_HP_SCREEN_TYPE
If the screen is matched and the template has been created for the screen, the variable contains the type of the assigned template (HTML, navigation sequence, XSLT). Read/Write.
CURRENT_HP_SCREEN_DOC
If the screen is matched and the template has been created for the screen, the variable contains the name of the template to be used by the server when generating the final HTML page. Read/Write.
TemplateGroup
Contains the name of the template group to be used for the matched screen. Read/Write.
HostControl
When set to “user”, the Submit procedure script takes control of any typing on the host. If set to “hostpub” (default), Host Publishing engine controls typing on the host. The variable is always reset to “hostpub”. Read/Write.

Chapter 3 ‐ Host Publishing Advanced Features
42 OnWeb Developer’s Guide
TypePressDelay
If not using a WaitFor method or the eRTS count, a custom Wait function is used to wait for the new screen. The function tries to determine when the new screen finished arriving by putting the running thread to sleep at every iteration. The function will run for the number of milliseconds specified in the variable. Read/Write.
TypePressTimeOut
Contains the maximum allowed time, in seconds, to wait for the new incoming screen. The default is 30 seconds. Read/Write.
TypePressState
If the variable’s value is “reset”, the TypePressTimeOut and TypePressDelay variables will be reset to their default values after each run. To preserve values in the TypePressTimeOut and TypePressDelay variables for the duration of the session, set the TypePressState value to “preserve”. Default value is “reset”. Read/Write.
RematchHost
If the Pre‐Display procedure attached to a screen (Screen1) connects to the main data source and moves the application to another screen (Screen2), set the variable value to “true” to rematch the application to the new screen (Screen2). This will result in repopulating the CURRENT_HP_SCREEN, CURRENT_HP_SCREEN_TYPE, CURRENT_HP_SCREEN_DOC variables with information related to the new current screen (Screen2). Note that any Pre‐Display procedures attached to Screen2 will not be run. The default for the variable is “false”. Read/Write.
CGI variablesWhen submitting a request, Host Publishing will look for the existence of the following CGI variables.
TypePressDelay
If a value exists for this variable, it will be set to the value in the TypePressDelay session variable.

OnWeb Developer’s Guide 43
Chapter 3 ‐ Host Publishing Advanced Features
TypePressTimeOut
If a value exists for this variable, it will be set to the value in the TypePressTimeOut session variable.
TypePressState
If a value exists for this variable, it will be set to the value in the TypePressState session variable.
TypePressWaitString
If a value exists, the specified string will be used to wait for a new screen. For example:
<input type="hidden" name="TypePressWaitString" value="WELCOME">
TypePressWaitRTSCount
If a value exists, the specified RTS count will be used to wait for a new screen.
owdebug
When set to “true”, the debugging information will be displayed. Default value is “false”.
Note: TypePressWaitString and TypePressWaitRTSCount can be used at the same time. The HP engine will start with the RTS count, and if it fails, it will use the wait for.
Chapter 3 ‐ Host Publishing Advanced Features
44 OnWeb Developer’s Guide
Using Host Publishing with OnWeb ActiveX controlYou can access the Host Publishing engine through the OnWeb ActiveX control’s rule called “_Update”. The parameter for the _Update rule represents the entire CGI stream containing the submitted Host Publishing HTML form. It returns all the tables created during at run time.
ExampleOnwebCtrl1.ClearParameters
OnwebCtrl1.AddParameter cgiFromIIS
OnwebCtrl1.RunARule("myHPApp._Update")
Advanced features - exampleThe following example uses several of the advanced Host Publishing features described in this chapter. It will show you how to use a Submit procedure to change the current template group based on the logon ID entered by the user.
The example is based on the following scenario:
When the user starts the application, the first displayed screen is a Logon screen. On it, the user types his/her logon ID and clicks the Submit button. Based on the logon ID, the application chooses one of the available template groups to display the consecutive application screens. For example, although some screens contain both the managerial and the administrative elements, when a manager logs on, only the management related elements are displayed, and when an administrator logs on, only the administrative elements are displayed. For each type of user, the application has a set of templates that show only the relevant parts of the host screens.
The process of evaluation of the user ID and selection of the template group is accomplished by using a Submit procedure on the first application screen (a Logon screen). The user ID is passed as a parameter from the HTML form element and used in the Submit script by the TemplateGroup session variable.
Note: The following procedure assumes that you are familiar with how to use the advanced Host Publishing features in Designer.
The host application used for the example must have a Logon screen.

OnWeb Developer’s Guide 45
Chapter 3 ‐ Host Publishing Advanced Features
How to create an application that changes template groups based on a user ID
1. In Designer, create a new Host Publishing application and specify the address of the host application that you want to connect to.
2. In Navigator, capture the application’s Logon screen and a few consecutive screens to test the HP application.
3. Apply OnWeb Plugin transform to the Logon screen.
4. When the Logon screen opens in FrontPage, create the page that contains logon instructions, an input box to enter a user ID (call the input box “UserID”), and Submit button that presses the Enter key.
5. In Designer, create a new Submit procedure for the Logon screen. In the Add Procedure dialog box, specify to use Script. The dialog box should look like this:
6. Click Parameters to add a parameter called UserID to the procedure.
7. For now, leave the script empty.
8. Open the Logon screen in FrontPage and select the Parameter Mapping component. The parameter from the Submit procedure automatically appears on the list of parameters.
9. Map the UserID parameter to the UserID input box.
10. Back in Designer, create 2 template groups called “manager” and “administrator”.

Chapter 3 ‐ Host Publishing Advanced Features
46 OnWeb Developer’s Guide
11. For all the screens except the Logon screen, create templates in each group.
12. Add the following code to the Submit procedure script:
Sub Collect()
' Initialize variablestrTemplateGroup = ""strParm1Val = Parameters("UserID").Value
' Specify user ids for which the template group ' will changeSelect Case strParm1Val
case "user01" strTemplateGroup = "administrator"
case "user02" strTemplateGroup = "manager"
End Select
' Check if TemplateGroup session variable needs ' to be aupdatedif (Len(strTemplateGroup) > 0) then
' Verify existence of the variable, ' it should always existif (Session.Variables.Exists("TemplateGroup")) then
Session.Variables.Remove("TemplateGroup")end ifSession.Variables.Add "TemplateGroup",strTemplateGroup
end if
End Sub
13. Build your application to the server and test it.

OnWeb Developer’s Guide 47
Using LiveConnect Functionality 4
Your OnWeb application that is using JavaScript may need to communicate with code written in other languages, such as Java or C. To communicate with Java code, you use JavaScript’s LiveConnect functionality.
This may be required when you are developing an application that will be run on a UNIX platform. In this case the Use LiveConnect option must be activated when you are creating scripts in procedures and routines in Designer or new methods in OnWeb Object Builder. See the help files in Designer and OnWeb Object Builder for details on how to select this option.
To allow OnWeb Server to find Java packages used by LiveConnect, do one of the following:
• For OnWeb Server for Windows (Multiplatform), place the required .jar file in the following directory:
Program Files\OnWeb Server for Windows (Multiplatform)\j2re1.4.2_04\lib\ext
• For OnWeb Server for UNIX, place the required .jar file in the following directory:
/usr/local/onweb/j2re1.4.2_04/lib/ext
• In the OnWeb Administrator for UNIX or Windows Multiplatform, on the OnWeb Applications tab, specify the location of the jar file in the Java CLASSPATH box.
JavaScript to Java communicationTo use a Java package or class or work with Java object or array from JavaScript, you use one of the special LiveConnect “wrapper” objects. In JavaScript, a “wrapper” is an object of the target language data type that encloses an object of the source language. When a JavaScript object is sent to Java, the run time engine creates a Java wrapper of type JSObject. When a JSObject is sent from Java to JavaScript, the run time engine unwraps it to its original JavaScript object type. The JSObject class provides an interface for invoking JavaScript methods and examining JavaScript properties.

Chapter 4 ‐ Using LiveConnect Functionality
48 OnWeb Developer’s Guide
All JavaScript access to Java takes place using one of the following objects:
The existence of the LiveConnect objects is, in most cases, transparent. For example, you can create a Java String object and assign it to the JavaScript variable myString by using the new operator with the Java constructor:var myString = new java.lang.String("Hello world");
In this example, the variable myString is a JavaObject because it holds an instance of the Java object String. As a JavaObject, myString has access to the public instance methods of java.lang.String and its superclass java.lang.Object. These Java methods are available in JavaScript as methods of the JavaObject, and you can call them using the following call:
myString.length() // returns 11
You access constructors, fields, and methods in a class with the same syntax that you use in Java.
Using Packages objectIf a Java class is not part of the java or sun packages, you access it with the Packages object.
For example, suppose the Oak corporation uses a Java package called oak to contain various Java classes that it implements. To create an instance of the HelloWorld class in oak, you access the constructor of the class as follows:var beige = new Packages.oak.HelloWorld();
The LiveConnect java and sun objects provide shortcuts for commonly used Java packages. For example, you can use the following:var myString = new java.lang.String("Hello world");
instead of the longer version:var myString = new Packages.java.lang.String
("Hello world");
Object Description
JavaArray A wrapped Java array, accessed from within JavaScript code.
JavaClass A JavaScript reference to a Java class.
JavaObject A wrapped Java object accessed from within JavaScript code.
JavaPackage A JavaScript reference to a Java package.

OnWeb Developer’s Guide 49
Chapter 4 ‐ Using LiveConnect Functionality
Using JavaArray objectWhen Java method creates an array and you reference that array in JavaScript, you use the JavaArray object. For example, the following code creates the JavaArray x with ten elements of type int:x = java.lang.reflect.Array.newInstance(java.lang.Integer, 10);
The JavaArray object has a length property which returns the number of elements in the array. It is a read‐only property, because the number of elements in a Java array is fixed at the time of creation.
Passing arguments of type charYou cannot pass a one‐character string to a Java method which requires an argument of type char. You must pass an integer which corresponds to the Unicode value of the character. For example, the following code assigns the value “H” to the variable c:c = new java.lang.Character(72)
Initializing static initializer blocksStatic Java classes that contain static initializer blocks such as some JDBC drivers and objects following the Singleton design pattern, are not initialized properly. It is recommended that if your OnWeb application requires the use of such an object, you create a helper class. See OnWeb Scripting Help for details.
An example of such a class is com.netmanage.onweb.Helpers (located in C:\Program Files\OnWeb Server for Windows (Multiplatform)\bin\classes\LiveConnect.jar or /usr/local/onweb/bin/classes/LiveConnect.jar).
public class Helpers{
static public java.sql.Connection createConnection( String szClassName, String szConnectString ) throwsjava.lang.ClassNotFoundException,
java.lang.InstantiationException, java.lang.IllegalAccessException,java.sql.SQLException
{java.sql.Connection connection = null;
java.lang.Class.forName( szClassName ).newInstance();

Chapter 4 ‐ Using LiveConnect Functionality
50 OnWeb Developer’s Guide
connection = java.sql.DriverManager.getConnection( szConnectString );
return connection;}
static public java.sql.Connection createConnection( String szClassName, String szConnectString,String szUserid, String szPassword )
throwsjava.lang.ClassNotFoundException, java.lang.InstantiationException, java.lang.IllegalAccessException,java.sql.SQLException
{java.sql.Connection connection = null;
java.lang.Class.forName( szClassName ).newInstance();
connection = java.sql.DriverManager.getConnection( szConnectString, szUserid, szPassword );
return connection;}
}
Data type conversionsBecause Java is a strongly typed language and JavaScript is weakly typed, the JavaScript run time engine converts argument values into the appropriate data types for the other language when you use LiveConnect.
StringValue JavaScript ExtensionTo facilitate the conversion of Java values into JavaScript Strings, OnWeb implements a JavaScript function called StringValue(). This function will attempt to convert most Java/JavaScript variables into Strings. See OnWeb Scripting Help for details.
For example:
theInt = java.lang.Class.forName("java.lang.Integer");
x = java.lang.reflect.Array.newInstance(theInt, 10);
IObject.Contents.Add( "JSArrayLength", StringValue( x.length ) );
IObject.Contents.Add( "JavaArrayLength",
StringValue(java.lang.reflect.Array.getLength(x)));

OnWeb Developer’s Guide 51
Chapter 4 ‐ Using LiveConnect Functionality
In the first IObject.Contents.Add, x.length returns a JavaScript integer value that is converted into a JavaScript String. In the second IObject.Contents.Add, java.lang.reflect.Array.getLength(x) returns a Java int that is converted to a JavaScript String.
JavaScript to Java Conversions When you call a Java method and pass it parameters from JavaScript, the data types of the parameters you pass in are converted according to the rules described below.
Number values
When you pass JavaScript number types as parameters to Java methods, Java converts the values according to the rules described in the following table:
Java parameter type Conversion rules
double The exact value is transferred to Java without rounding and without a loss of magnitude or sign.
java.lang.Doublejava.lang.Object
A new instance of java.lang.Double is created, and the exact value is transferred to Java without rounding and without a loss of magnitude or sign.
float • Values are rounded to float precision.• Values that are unrepresentably large or small
are rounded to +infinity or -infinity.
bytecharintlongshort
• Values are rounded using round-to-negative-infinity mode.
• Values which are unrepresentably large or small result in a run-time error.
• NaN ( "Not-a-Number" ) values are con-verted to zero.
java.lang.String Values are converted to strings.
For example, 237 becomes "237"
boolean • 0 and NaN ( "Not-a-Number" ) values are converted to false.
• Other values are converted to true.

Chapter 4 ‐ Using LiveConnect Functionality
52 OnWeb Developer’s Guide
Boolean Values
When you pass JavaScript Boolean types as parameters to Java methods, Java converts the values according to the rules described in the following table.
String values
When you pass JavaScript string types as parameters to Java methods, Java converts the values according to the rules described in the following table.
Java parameter type Conversion rules
boolean All values are converted directly to the Java equivalents.
java.lang.Booleanjava.lang.Object
A new instance of java.lang.Boolean is created. Each parameter creates a new instance, not one instance with the same primitive value.
java.lang.String Values are converted to strings. For example:• true becomes "true" • false becomes "false"
bytechardoublefloatintlongshort
• true becomes 1 • false becomes 0
Java parameter type Conversion rules
java.lang.Stringjava.lang.Object
A JavaScript string is converted to an instance of java.lang.String with an ASCII value.
bytedoublefloatintlongshort
All values are converted to numbers as described in ECMA-262.
char All values are converted to numbers.

OnWeb Developer’s Guide 53
Chapter 4 ‐ Using LiveConnect Functionality
Null values
When you pass null JavaScript values as parameters to Java methods, Java converts the values according to the rules described in the following table.
Catching exceptions
Catching JavaScript exceptionsJavaScript exceptions can be thrown using the throw keyword, and caught using a try / catch block. For example:try {
throw 'Some exception';} catch (e) { OnWeb.Log("Exception caught: " + e.toString());}
would log the following:Exception caught: Some exception
A JavaScript value or variable of any type can be thrown as an exception.
boolean • The empty string becomes false. • All other values become true.
Java parameter type Conversion rules
Java parameter type Conversion rules
Any classAny interface type
The value becomes null.
bytechardoublefloatintlongshort
The value becomes 0.
boolean The value becomes false.

Chapter 4 ‐ Using LiveConnect Functionality
54 OnWeb Developer’s Guide
Catching Java exceptions in JavaScriptJava exceptions are reflected back into JavaScript when a line of LiveConnect code triggers a Java exception. For example: try { java.lang.Class.forName("blah");} catch (e) { OnWeb.Log ("Java Exception caught: " + e);}
would log the following:Java Exception caught: java.lang.ClassNotFoundException: blah
It is also possible to verify what the Java exception type is and then to call methods specific to that exception by comparing the class name of the exception:try{
var connection = com.netmanage.onweb.Helpers.createConnection(Driver, ConnectString );
}catch ( e ){
try{
if (e.getClass().toString() ) == "class java.sql.SQLException" )
{IObject.Errors.Post(2,Name + ".Collect()",
"Failure : createConnection():" + StringValue( e.toString() ) + ":" + StringValue( e.getSQLState() ) );
}else{
IObject.Errors.Post(1, Name + ".Collect()", "Failure : createConnection():" + StringValue( e.toString() ) );
}}catch ( u ){
IObject.Errors.Post(1, Name + ".Collect()", "Failure : createConnection():" + "JavaScript Exception" + StringValue( e.toString() ) );
} }

OnWeb Developer’s Guide 55
Creating OnWeb Mobile Applications 5
OnWeb 7.2.2 and higher supports applications for the Windows Mobile 2003 based mobile devices. Support for more devices is planned in the future.
The following OnWeb development tools provide support for mobile devices:
• OnWeb Designer ‐ use it to create a Host Publishing application that will be run on a mobile device. Because mobile devices do not support many standard features present in the desktop browsers, special care must be taken when developing such an application.
• OnWeb Object Builder ‐ use it to create Web services and assemblies that can be incorporated in the mobile application.
In order to run an application from a mobile device, OnWeb Server used by the application must have a license that supports OnWeb Mobile. If the required license is not present, the application will receive the following message:
“The server is not licensed for the requested feature: OnWeb Mobile.”
Creating an OnWeb Mobile application in DesignerThe process of developing a Host Publishing application for mobile devices is very similar to that of creating a standard HP application.
Designate application for mobile devicesAfter you create a new Host Publishing application, open the Properties dialog box and select the Compatible with Mobile Devices option. Although you can select this option in any existing application, it is recommended that you create a new application to be used with mobile devices.

Chapter 5 ‐ Creating OnWeb Mobile Applications
56 OnWeb Developer’s Guide
Modified features
When you designate an application as compatible with mobile devices, certain features in Designer are either modified or not available to accommodate specific need of a mobile application:
• The NonCapturedScreen template is not available ‐ Because mobile applications must consist of only captured screens, when you try to edit the NonCapturedScreen template, a warning message will be displayed.
• A special transform is applied to captured screens ‐ A special transform called OnWeb Plugin for Mobile Devices becomes available. Unless you have other user‐defined transforms for mobile devices, this default transform is applied automatically when you start editing a captured screen.
• A special launch page becomes available ‐ A launch page called “Mobile Devices Launch page” becomes available. This a simplified launch page that contains fewer settings and one button.
Capture and customize screensThe next step in the development process is to use OnWeb Navigator to capture all the host screens that the user might visit. At run time, if the server encounters a non‐captured screen, it will issue the following message:
“Unknown area of application. Please report this error to your site administrator.”
You can customize this error message by modifying this file: OnWeb/Server/HTML_Pages/OWP/mobile_default.htm.
After all the screens are captured, use your favorite HTML editor to customize presentation of each page. Make sure that you only use presentation methods and elements that are supported by mobile devices.
Using Input box in OnWeb Plugin
If you are using OnWeb Plugin in Microsoft FrontPage, the input box created with this plugin will not work on mobile devices. Here is a different method of creating an input box:
1. Open the captured screen in FrontPage.
2. On the Insert menu, point to Form and choose Textbox.

OnWeb Developer’s Guide 57
Chapter 5 ‐ Creating OnWeb Mobile Applications
3. In the Text Box Properties dialog box, type the name for the text box, for example “myInput”.
4. Start OnWeb Plugin and open the Push Button dialog box.
5. Click the Add button to open the Action Rule Builder dialog box.
6. On the screen representation, select an unprotected field that you want to type the text into.
7. Click the ... button to open the Select Value Option dialog box.
8. Click the Dynamic tab.
9. In the Existing Form Elements table, select the name of the text box element that you created in step 3 and click Insert.
10. Click OK to return to the Action Rule Builder dialog box.
11. Click the Keyboard button and select the ENTER key from the template.
12. Click Create to return to the Push Button dialog box.
Actions listed in the Component Properties section indicate that when you click this button, the value from the standard HTML myInput text box will be inserted in to the host field specified in the Field column.

Chapter 5 ‐ Creating OnWeb Mobile Applications
58 OnWeb Developer’s Guide
Creating mobile application components in OnWeb Object Builder
From the captured host transactions, you can built two components in OnWeb Object Builder that can be used in applications for mobile devices: a Web service component and a .NET assembly component.
A Web service built for a standard application can be reused in a mobile device application without any changes.
To create a Web service component
1. In the Run‐time Containers window, select the method (or object) that you want to include in the Web service.
2. From the Build menu, choose Web Service.
3. In the Build‐Web Service dialog box, provide the required information and click Build to create the Web service.
When building a .NET assembly for a mobile device application, OnWeb Object Builder uses the Compact SDK Framework. Before building the component, you must first modify the Settings to pint to the Compact SDK Framework location, as described below.
To create a .NET assembly component
1. From the File menu choose Settings.
2. In the Settings tree, expand the Environment node and select Configuration.
3. In the Compact Framework SDK Path box specify the location of the Compact SDK Framework binaries.
4. From the Build menu choose Assembly.
5. In the Build‐Assembly dialog box, select True in the Target Compact list.
To build an assembly for a regular application, you must set the Target Compact option to False and rebuild the assembly.
Note: Components built in previous versions of OnWeb Object Builder cannot be used with mobile applications.

OnWeb Developer’s Guide 59
Deploying Applications 6
When your OnWeb application is finished and fully tested, you can transfer it (deploy) to the production server where users can access it.
The deployment process consists of two steps as described below. Who performs each step depends on your system configuration. You may need to notify your system administrator about the name and location of the IOA file that is ready to be deployed.
Step 1: Create Installable OnWeb ApplicationThe first step of the deployment process is performed in Designer. It involves creating an Installable OnWeb Application (IOA) that can be then easily transferred into the production environment. IOA is a single file that contains all the elements of your application, such as objects, scripts, HTML pages, graphics, and other.
Before creating the IOA file, make sure that all the presentation files used by the application are added to the white‐board. These could be the graphic files, sound files, and HTML files that are used in presenting the application in the browser.
To create an IOA file
1. Open OnWeb Designer and load the project that contains your application.
2. In the tree view, right‐click the name of the application that you want to deploy and choose Make IOA from the menu.
3. In the Create Installable OnWeb Application File dialog box, specify the name and location of the IOA file and click Save.

Chapter 6 ‐ Deploying Applications
60 OnWeb Developer’s Guide
Step 2: Deploy IOAIOA can be deployed to the production server only through OnWeb Application Manager.
If this step is performed by your production server administrator, place the IOA file created in Step 1 at the location where the administrator can pick it up.
To deploy an IOA file
1. Start OnWeb Application Manager.OnWeb Application Manager can be started from the Windows Start menu (click Start, then point to Programs or All Programs, then to Micro Focus OnWeb, and click Application Manager).
2. Logon to the server.
3. In the OnWeb Application Manager main window, click Add/Update.
4. In the Add/Update IOA dialog box, specify the full path and name of the IOA file that you want to publish. To locate the file on the system, click Browse, select the file, and click Open.After the application is built to the server, its name will appear in the list of applications currently installed on the server. Please note that the application name derives from the name specified in OnWeb Designer, not from the name of the IOA file.See OnWeb Application Manager online help for more information on how to use this tool.
Notes: The IOA file should not be used to transfer applications between development environments. Use Designer’s export and import features instead.
The IOA file should only be used for deployment. Do not use this file to import an application.
It is not recommended to copy the IOA file directly into the production OnWeb Server. publishing process performed in OnWeb Application Manager will overwrite this file and may result in file corruption.

OnWeb Developer’s Guide 61
Using OnWeb Assembly 7
OnWeb Assembly is a Microsoft .NET type assembly that can be used to run OnWeb objects from a client application. The assembly, called OWClient.dll can be run from a machine where Microsoft Windows and Microsoft .NET Framework is installed to access objects stored on OnWeb Server for Windows (Classic) or OnWeb Server for UNIX. This dll is installed with OnWeb in the OnWeb .NET Client directory.
See “OnWeb Assembly ‐ sample program” on page 65 for an example on how to use OnWeb Assembly.
Programming interfaceTo use the assembly, the calling program needs a “using” statement for the namespace NetManage.OnWeb.DotNet.Assemblies. There are three public classes in this namespace: tOnWebServer, ReplyParsingException, and ServerConnectionException.
Additional “using” statements may be required for
• System.Data to handle the results of running an object, which are returned in a System.Data.DataSet object
• System.Collections.Specialized to pass parameters as a System.Collections.Specialized.NameValueCollection object

Chapter 7 ‐ Using OnWeb Assembly
62 OnWeb Developer’s Guide
tOnWebServer object
Description The public object used to run an OnWeb object from OnWeb Server.
Syntax tOnWebServer (address, port, server type, security);
Parameters
Methods The tOnWebServer object has several methods that can be used to manage the session and to run an OnWeb object.
address The IP address of OnWeb Server the object connects to.
port The listening port of OnWeb Server the object connects to.
server type Optional. The type of OnWeb Server the object connects to. When you know the type of server that you are connecting to, specify it in your call:• use eOnWebType.Classic when connecting to
OnWeb Server for Windows• use eOnWebType.Multiplatform when connect-
ing to OnWeb Server for UNIX
security Security setting for the proxy server. Set to “true” to use a secure HTTPS connection, set to “false” to use a regular HTTP connection.
Method Description
Init Use this method to initialize the tOnWebServer object. The initialization returns the OnWeb server type (Windows or UNIX).
BeginSession Use this method to start a session with OnWeb Server.
GetResultString Use this method to run the specified OnWeb object and return the results as a string containing an IObject expressed as XML.
GetResultDataSet Use this method to run the specified OnWeb object and return the results as a System.Data.DataSet.
TerminateSession Use this method to terminate the current session with OnWeb Server.

OnWeb Developer’s Guide 63
Chapter 7 ‐ Using OnWeb Assembly
Properties
RunHPString Use this method to run a Host Publishing application and return a string containing an IObject in XML format.
Syntax:RunHPString (hpAppName)-or-RunHPString (hpAppName, parameters)
If you specify only the name of the application, OnWeb will use the default values for all the required parameters.
RunHPDataSet Use this method to run a Host Publishing application and return a DataSet object containing the tables found in the IObject. Variables found in IObject will be returned in a DataTable called VariableTable. Errors found in IObject will be returned in a DataTable called ErrorTable. Other results will be returned in a DataTable with the same name as the IObject Table. If an IObject Table does not have a name, the DataTable will be called TableX, where X represents a number.
Syntax:RunHPDataSet (hpAppName)-or-RunHPDataSet (hpAppName, parameters)
If you specify only the name of the application, OnWeb will use the default values for all the required parameters.
Method Description
Property Description
ConnectionLimit Changes an environment setting in IIS ASP .NET environment that controls the number of simultaneous connections permitted to the same HTTP server.
SecureConnection Returns True if the object is using a secure connection (HTTPS). Returns False if the object is using an HTTP connection.

Chapter 7 ‐ Using OnWeb Assembly
64 OnWeb Developer’s Guide
Exceptions The tOnWebServer methods can throw one of the following exceptions:
Remarks The communication requests are sent in two different formats:
• when connecting to OnWeb Server for Windows (Classic), the request is sent as an HTTP request
• when connecting to OnWeb Server for UNIX, the request is sent as an XML request to the tTransmuter object listening port. This port is set in the OnWeb Server configuration file, in the <server_port> xml element.
ProxyInformation If a proxy server is used in a secure connection, use this property to set the required server information. For example, if you are using Microsoft Internet Information Server (MIIS) as a proxy server for accessing OnWeb Server, provide server information in the following format:
<MIISAddress>/Onwebisapi.dll/<OnWebName>
where
<MIISAddress> is the IP address of MIIS
<OnWebName> is the name you assigned to your OnWeb Server when you configured MIIS to use OnwebISAPI plug-in.
Note: In order to use this feature, you must have OnwebISAPI plug-in installed on your system. For details about installing OnWebISAPI, see “Appendix B, Using OnWeb Server with MIIS" in OnWeb Administrator Guide.
Property Description
Exception Description
ReplyParsingException Thrown if OnWeb Assembly is unable to handle an OnWeb Server reply.
ServerConnectionException Thrown if the connection problem occurs between OnWeb Assembly and OnWeb Server.

OnWeb Developer’s Guide 65
Chapter 7 ‐ Using OnWeb Assembly
OnWeb Assembly - sample programusing System;using System.Data; // For DataSet & DataTableusing System.Collections.Specialized; // For NameValueCollectionusing NetManage.OnWeb.DotNet.Assemblies; // For tOnWebServer
namespace OWClientSampleUse{ /// <summary> /// This is a sample program that uses the OWClient assembly dll to /// call OnWeb server objects. /// </summary> class Tester { // Enter a valid OnWeb server IP address and listening port. static readonly string ONWEB_ADDRESS = "127.0.0.1"; static readonly ushort ONWEB_PORT = 80;
/// <summary> /// The main entry point for the application. /// </summary> [STAThread] static void Main(string[] args) { tOnWebServer oOnWeb = null; DataSet oDSResult = null; String szResult = null;
Console.WriteLine("Enter test program...");
try { // Create the OnWeb server object. oOnWeb = new tOnWebServer( ONWEB_ADDRESS, ONWEB_PORT );
// Initialize the OnWeb server object. oOnWeb.Init();
// Begin a session with the OnWeb server oOnWeb.BeginSession(); if( oOnWeb.HaveSession ) { // Call a rule that returns two tables and // handle the result as a string. Console.WriteLine(); Console.WriteLine("Call TwoTables using strings."); szResult = oOnWeb.GetResultString("DotNetTester",
"TwoTables",null ); Console.WriteLine("Result=" + szResult );
// Call a rule that returns two tables and // handle the result as a DataSet. Console.WriteLine(); Console.WriteLine("Call TwoTables using DataSets."); oDSResult = oOnWeb.GetResultDataSet("DotNetTester",
"TwoTables",null); DumpDataSet( oDSResult );
// Call a rule that requires two parameters. // Handle the result as a DataSet. Console.WriteLine(); Console.WriteLine("Call Parms using DataSets.");

Chapter 7 ‐ Using OnWeb Assembly
66 OnWeb Developer’s Guide
//Create the parameter collection NameValueCollection oParms =
new NameValueCollection(); oParms.Clear(); oParms.Add( "CityName", "Smallville" ); oParms.Add( "Population", "6,000" ); // Make the call oDSResult = oOnWeb.GetResultDataSet("DotNetTester",
"Parms",oParms); oParms.Clear(); DumpDataSet( oDSResult );
// Terminate the session. If this is not called, the // session will eventually be timed out by // the OnWeb server.
oOnWeb.TerminateSession(); } else
Console.WriteLine("BeginSession failed."); } catch( ReplyParsingException rpEx ) { // This exception may be thrown if there is a problem // parsing the reply from the OnWeb server. Console.WriteLine( rpEx.Message ); } catch( ServerConnectionException scEx ) { // This exception may be thrown if there is a connection // problem with the OnWeb server. Console.WriteLine( scEx.Message ); } catch( Exception allEx ) { // Anything can happen. Console.WriteLine( allEx.Message ); }
Console.WriteLine("Exit test program..."); }
/// <summary> /// Utility function to dump all the tables in the DataSet. /// </summary> /// <param name="oResultSet">A DataSet object.</param> private static void DumpDataSet( DataSet oResultSet ) { if( oResultSet != null ) { foreach( DataTable oTable in oResultSet.Tables ) { DumpTable( oTable ); } } else Console.WriteLine( "ResultSet is null." ); }

OnWeb Developer’s Guide 67
Chapter 7 ‐ Using OnWeb Assembly
/// <summary> /// Utility function to dump a DataTable. /// </summary> /// <param name="oResultTable">A DataTable object.</param> private static void DumpTable( DataTable oResultTable ) { if( oResultTable != null ) { Console.WriteLine(""); Console.WriteLine( "Table name=" +
_oResultTable.TableName ); Console.WriteLine( "Number of rows=" +
_oResultTable.Rows.Count );
Console.WriteLine( "Number of columns=" + _oResultTable.Columns.Count );
foreach( DataRow myRow in oResultTable.Rows ) { Console.WriteLine(""); foreach(DataColumn myCol in oResultTable.Columns ) { Console.Write( myRow[myCol] ); Console.Write( " " ); } } Console.WriteLine(""); }
}}
}

Chapter 7 ‐ Using OnWeb Assembly
68 OnWeb Developer’s Guide

OnWeb Developer’s Guide 69
Using OnWeb UJB 8
This chapter explains how to use OnWeb Universal Java Bean (UJB) in Java code that accesses OnWeb Server and runs OnWeb objects to retrieve data in the form of an Information Object (IObject).
OnWeb objects can be accessed using any of the following:
• a Java Bean (com.NetManage.onweb.OnWebServer)
• a browser (HTTP)
• a DCOM interface (IOnweb)
• an ActiveX Control
• OnWeb Designer (the development environment)
In order to use OnWeb UJB, JavaBean support must be enabled in OnWeb Server using OnWeb Administrator. Contact your OnWeb administrator to ensure that this feature is enabled.
Note: The Reference help for OnWeb UJB is located in your OnWeb installation directory in the Documentation\JavaBean subdirectory. To start the help, double‐click the index.html file.
Setting up development environmentWhether you will deploy the OnWeb UJB using java applets, stand‐alone applications, JSP, or servlet pages, follow these steps to configure development environment for JavaBean.
1. From the installation folder OnWeb\Server\Java, copy the onweb‐ujb.jar file to the development machine.
2. Add the copied file to the CLASSPATH. For example, if you copied onweb‐ujb.jar to the C:\jars folder, in the environment settings for the development computer add c:\jars\onweb‐ujb.jar at the end of the CLASSPATH. Depending on the operating system, you may be required to restart the machine for this change to take effect.
Chapter 8 ‐ Using OnWeb UJB
70 OnWeb Developer’s Guide
Accessing OnWeb Server using OnWeb UJBYou can write classes which run OnWeb objects, using OnWeb UJB. By embedding OnWeb UJB in an appropriate application or container, it is possible to use it to establish OnWeb sessions, run scripts, and work with the information objects which the scripts produce.
When using OnWeb UJB, you typically follow these general steps:
1. Start a session with OnWeb Server.
2. Run one or more OnWeb objects.
3. Log off from OnWeb Server (optional).
4. Access the Information Objects which the objects produce.
The key characteristics of a session are:
• Each session is capable of hosting one script at a time.
• An application or container may have one or more active sessions at a time (by creating one OnWeb UJB for each session).
• Most OnWeb installations have a finite number of available sessions. As a result, sessions should be short‐lived.
To successfully connect with OnWeb Server and run OnWeb objects, the following information is required:
• The location of OnWeb Server (IP address and port)
• The names of the available objects, including the parameters they accept, and any restrictions that apply.
The output of an object is an Information Object (IObject). It is a composite object consisting of tables and variables, each represented by a Java class.

OnWeb Developer’s Guide 71
Chapter 8 ‐ Using OnWeb UJB
Using OnWeb UJBBelow are the general steps outlining how to use OnWeb UJB in your application.
To use OnWeb UJB
1. Deploy the OnWeb UJB package to your development environment. JRE™ 4.2 or higher is required.
2. Obtain necessary information from the OnWeb Server administrator: IP address, listening port, object names, user names, etc.
3. Drag OnWeb UJB into a container or instantiate it from the Java code.
4. Set the OnWeb UJB’s properties.
5. Complete the client application which uses OnWeb UJB to run objects and retrieve Information Objects. To run objects concurrently, you need multiple instances of OnWeb UJB.
Note: After you deploy your application to the client machine, add the location of the onweb‐ujb.jar files to the CLASSPATH on the client machine.
Specifying propertiesYou can set the following properties for OnWeb UJB:
Name Description Value
Server Location
Required. The IP address of OnWeb Server with which you want to communicate.
See “Setting the Server Location property” on page 72.
Port Required. The listening port of OnWeb Server.
Usually set during installation of OnWeb Server, to reflect options set by the administrator.
Server Type
Optional. The type of OnWeb Server that you are connecting to.
See “Specifying Server Type” on page 72.
Chapter 8 ‐ Using OnWeb UJB
72 OnWeb Developer’s Guide
If you use OnWeb UJB in a visual development environment, you can set these properties either at design time or at run time. If you create OnWeb UJB using plain Java code, you can set the properties only at run time.
Setting the Server Location property
You need to supply OnWeb UJB with the name of the computer on which OnWeb Server is running. The computer name is usually set during installation of OnWeb Server, and allows you to start using OnWeb without having to contact an administrator for an address. However, you can also set the OnWeb UJBʹs Server Location property at design time or at run time.
The remote computer name can be any recognizable name, including a DNS name, an IP address, or a Windows computer name. The IP address 127.0.0.1, which identifies the local computer, is also a valid address.
Specifying Server Type
If you know the type of OnWeb Server that your application will be connecting to, you can specify it when creating an OnWeb UJB. This will improve your application performance by reducing the number of calls to OnWeb Server.
The following Server Types are supported:
• OnWebServer.Type.UNKNOWN ‐ The type of OnWeb Server is not known. Default setting.
• OnWebServer.Type.CLASSIC ‐ Your application is connecting to OnWeb Server for Windows (Classic).
• OnWebServer.Type.MULTI‐PLATFORM ‐ Your application is connecting to OnWeb Server for UNIX.

OnWeb Developer’s Guide 73
Chapter 8 ‐ Using OnWeb UJB
Making OnWeb UJB work
Importing packages
Code which uses OnWeb Bean will need to import package com.netmanage.onweb.
Sample codes
The following sample codes illustrate how to use OnWeb UJB in an OnWeb application. For a full list of OnWeb UJB exceptions, see “Exceptions thrown by OnWeb UJB” on page 76.
import com.netmanage.onweb.*;public class OnwebBeanClient{
public static void main(String args[]) {
// create an OnWeb UJB.OnWebServer bean = new OnWebServer
_("127.0.0.1", 80, OnWebServer.Type.CLASSIC);try{
bean.connect(); bean.getParameters().add("param1", "value1"); IObject iobject = bean.runARule
_("myapp", "myrule"); for (Enumeration e = iobject.getTables()
_.elements() ; e.hasMoreElements(); ){ Table table = (Table)e.nextElement(); System.out.println( table.getName() ); } bean.disconnect(); { catch(CommunicationFailureException e){ _System.out.println( e.getMessage() ); }
}}

Chapter 8 ‐ Using OnWeb UJB
74 OnWeb Developer’s Guide
Starting and ending a session
To run objects, you need to start a session with OnWeb Server. Below is a sample code that starts and ends a session:
import com.netmanage.onweb.*;public class OnwebBeanClient{
public static void main(String args[]) {
// create an OnWeb UJB.OnWebServer bean = new OnWebServer
("127.0.0.1", 80);try{
bean.connect(); // […] bean.disconnect(); { catch(CommunicationFailureException e){ System.out.println( e.getMessage() ); }
}}
Note: Sessions are not automatically cleaned up when using OnWeb UJB. You must use disconnect() to close the session.
Running an object
Most objects require parameters. To run an object, you supply OnWeb UJB with an array of strings containing the required parameters, specified in the same order in which they need to appear. Next, you call the runARule method with the name of the object. Object names are case‐sensitive.
The following example calls an object which takes two parameters: name and description.
import com.netmanage.onweb.*;public class OnwebBeanClient{
public static void main(String args[]) {
// create an OnWeb UJB.OnWebServer bean = new OnWebServer
("127.0.0.1", 80);try{
bean.connect();

OnWeb Developer’s Guide 75
Chapter 8 ‐ Using OnWeb UJB
bean.getParameters().add( "param1", "value1"); IObject result = bean.runARule
("myapp", "myrule"); // […] bean.disconnect(); { catch(CommunicationFailureException e){ System.out.println( e.getMessage() ); }
}}
Accessing the Information Object produced by an object
A successful call to runARule produces an Information Object, represented below by the IObject class. To the client of OnWeb UJB, an Information Object is a composite, read‐only object which usually contains other objects such as Errors, Tables and Variables.
Below is a sample code which prints the names of all the tables contained in an Information Object:
import com.netmanage.onweb.*;public class OnwebBeanClient{
public static void main(String args[]) {
// create an OnWeb UJBOnWebServer bean = new OnWebServer
("127.0.0.1", 80);try{
bean.connect(); bean.getParameters().add("param1", "value1"); IObject iobject = bean.runARule
("myapp", "myrule"); for (Enumeration e = iobject.getTables()
.elements() ; e.hasMoreElements(); ){ Table table = (Table)e.nextElement(); System.out.println( table.getName() ); } bean.disconnect(); { catch(CommunicationFailureException e){ System.out.println( e.getMessage() ); }
}}

Chapter 8 ‐ Using OnWeb UJB
76 OnWeb Developer’s Guide
Exceptions thrown by OnWeb UJB
The OnWeb UJB class contains 1 exception.
Putting it all togetherOnWeb UJB is a class which conforms to the JavaBeans model. You can therefore use it in visual development environments, or create it with Java code.
Below is a sample code which creates and uses OnWeb UJB.
import com.netmanage.onweb.*;import com.netmanage.onweb.exception.*;import java.util.*;
public class OnwebBeanClient{
public static void main(String args[]){
// These variables could be set from the UI.String serverAddress = "127.0.0.1";String application = "myAppName";String ruleName = "OnWebInfoRuleName";int portNumber = 80;
/*-- First create an instance of an OnWeb UJB.--*/OnWebServer bean = new OnWebServer(serverAddress,
portNumber);try{
// Start a sessionbean.connect();IObject iobject = bean.runARule
(application, ruleName);// Look at the tables returned.for (Enumeration e = iobject.getTables()
.elements() ;e.hasMoreElements(); )
Exception name Superclass Thrown by Reason
CommunicationFailureException Exception all Communication failure between OnWeb UJB and OnWeb Server.
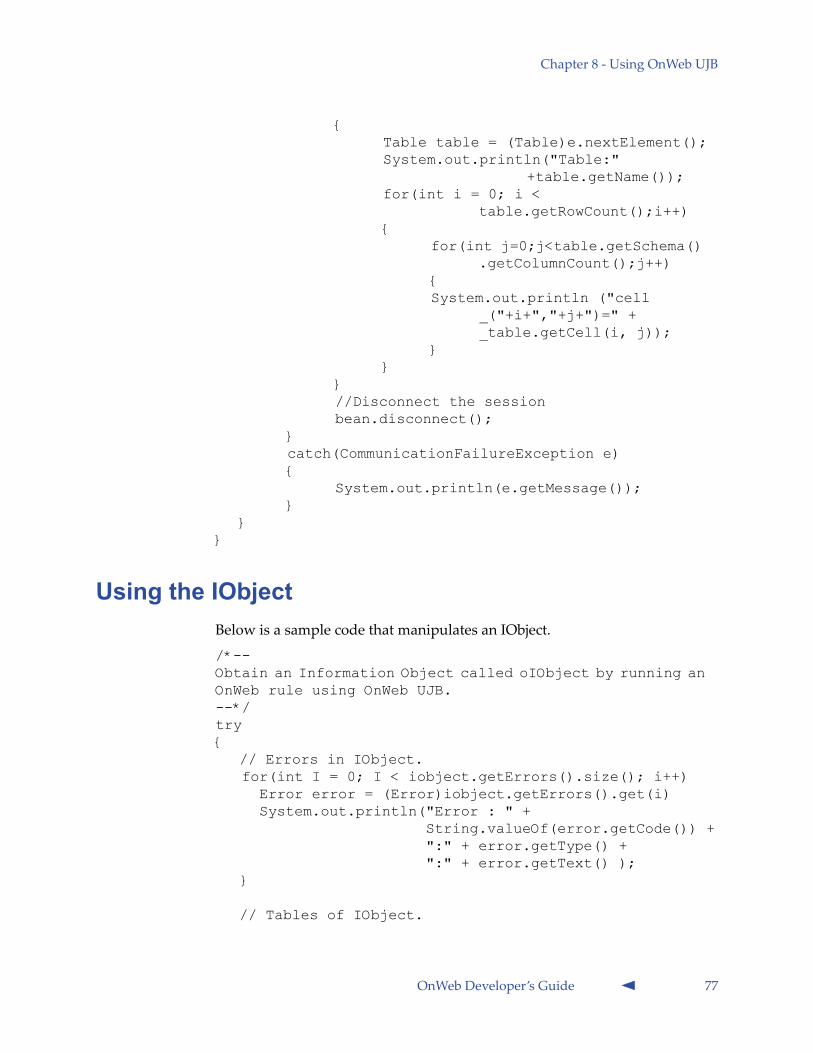
OnWeb Developer’s Guide 77
Chapter 8 ‐ Using OnWeb UJB
{Table table = (Table)e.nextElement();System.out.println("Table:"
+table.getName());for(int i = 0; i <
table.getRowCount();i++){
for(int j=0;j<table.getSchema().getColumnCount();j++)
{System.out.println ("cell
_("+i+","+j+")=" +_table.getCell(i, j));
}}
}//Disconnect the sessionbean.disconnect();
}catch(CommunicationFailureException e){
System.out.println(e.getMessage());}
}}
Using the IObjectBelow is a sample code that manipulates an IObject.
/*-- Obtain an Information Object called oIObject by running an OnWeb rule using OnWeb UJB. --*/ try {
// Errors in IObject. for(int I = 0; I < iobject.getErrors().size(); i++) Error error = (Error)iobject.getErrors().get(i) System.out.println("Error : " + String.valueOf(error.getCode()) + ":" + error.getType() + ":" + error.getText() ); }
// Tables of IObject.

Chapter 8 ‐ Using OnWeb UJB
78 OnWeb Developer’s Guide
for (Enumeration e = iobject.getTables().elements() ; e.hasMoreElements(); ){ Table table = (Table)e.nextElement(); System.out.println("Table:"+table.getName());
for(int i = 0; i < table.getRowCount();i++){ for(int j=0;j<table.getSchema()
.getColumnCount();j++){ System.out.println("cell("+i+","+j+")=" + oTable.getCell(i, j)); }
} }
// Variables of IObject. for (Enumeration e = iobject.getVariables()
.propertyNames() ; e.hasMoreElements(); ){ String name = (String)e.nextElement(); String value = iobject.getVariables()
.getProperty(name); System.out.println("variable " + name + ":" + value);
}

OnWeb Developer’s Guide 79
Using OWJ2MEClient Component 9
The OWJ2MEClient component runs on the Java 2 Micro Edition (J2ME™) environment. It can be used to access OnWeb Server from a J2ME device running Connected Limited Device Configuration (CLDC) 1.1 and the Mobile Information Device Profile (MIDP) 2.0, such as BlackBerry™ device.
The OWJ2MEClient component consists of two jar files called OWj2meClient.jar and NanoXmlParser.jar located in the OnWeb J2me Client directory under you OnWeb installation directory.
Both jar files must be packaged with the MIDlet or CLDC application that you want to deploy to the target device. For example, if a MIDlet is to be deployed to a BlackBerry device using an ALX file from the Application Loader of the BlackBerry Desktop Manager, the ALX file must include NanoXmlParser and OWJ2MEClient COD files in its <files> XML element. These can be generated from the NanoXmlParser and OWJ2MEClient jar files using BlackBerry utilities. For more information on deploying applications to BlackBerry devices, consult your BlackBerry Java Development Environment (JDE) help. A sample MIDlet that uses the OnWeb J2ME Client to make a call to execute an object on OnWeb Server is provided in “OWJ2MEClient ‐ sample code” on page 89.
The OWJ2MEClient component can be used to access both OnWeb Server for Windows and OnWeb Server for UNIX through the HTTP or HTTPS protocol. When the HTTPS protocol is required, OnWeb Server must be accessed via a proxy server that supports SSL (IIS or Apache™).
Programing interfaceTo use the OWJ2MEClient component, the calling program must import the com.netmanage.onweb.j2meclient package. The public API for the component is provided by the OnWebServer class which contains a number of methods. The possible exceptions thrown when using these methods consist of ReplyParsingException, ConnectionFailureException, and RequestExecutionException. The methods return either the raw OnWeb server reply in a Java String or an instance of the IObject class. IObject instances may contain Table or Error objects. The Table objects contain

Chapter 9 ‐ Using OWJ2MEClient Component
80 OnWeb Developer’s Guide
Schema, Row, and Column objects. The OnWebServer method signatures accept instances of the Parameters class which in turn may contain any number of Parameter class instances.
Below is a brief description of the classes in the com.netmanage.onweb.j2meclient package. For a detailed description of this package, check the OnWeb J2me Client\Documentation folder in the OnWeb installation directory.
OnWebServer classThis class represents OnWeb Server.
OnWebServer constructors
OnWebServer
Description Create a new instance of the OnWebServer class.
Syntax OnWebServer(address, port, type, secure)
Parameters
address The address of the target server. Either the OnWeb Server address or the proxy server address.
port The listening port of the specified server. For the type MULTI_PLATFORM, specify the internal listening port.
server type The type of the specified server. Valid types are CLASSIC, MULTI_PLATFORM, and MULTI_PLATFORM_HTTP.
security Security setting for the proxy server. Set to “true” to use a secure HTTPS connection, set to “false” to use a regular HTTP connection. Only valid for the CLASSIC and MULTI_PLATFORM_HTTP types.

OnWeb Developer’s Guide 81
Chapter 9 ‐ Using OWJ2MEClient Component
OnWebServer methods
init
Description Use this method to initialize the OnWebServer object. It will trigger a request to the given IP address and port to discover the OnWeb server type if none was specified in the constructor. This method must be called before the BeginSession method.
Syntax init(address, port, type)
Parameters
beginSession
Description Begin a session with the OnWeb server. Must be used after the init call. Once a session is established, any number of calls can be made within the same session.
Syntax beginSession()
terminateSession
Description Terminates the current session with the server.
Syntax terminateSession()
address The address of the target server. Either the OnWeb Server address or the proxy server address.
port The listening port of the specified server. For the type MULTI_PLATFORM, specify the internal listening port.
server type The type of the specified server. Valid types are CLASSIC, MULTI_PLATFORM, and MULTI_PLATFORM_HTTP.

Chapter 9 ‐ Using OWJ2MEClient Component
82 OnWeb Developer’s Guide
getResultString
Description Runs the specified OnWeb object on the server and returns the raw XML reply in a String.
Syntax getResultString(application, rule, parameters)
Parameters
getResultIObject
Description Runs the specified OnWeb object on the server and returns the reply as an IObject instance.
Syntax getResultIObject(application, rule, parameters)
Parameters
runHPString
Description Runs the specified Host Publishing application on OnWeb Server. Returns the raw XML reply in a String.
Syntax runHPString(application, parameters)
Parameters
application The name of the OnWeb application that contains the object on the server.
rule The name of the OnWeb object to run on the server.
parameters Parameters in the Parameters object.
application The name of the OnWeb application that contains the object on the server.
rule The name of the OnWeb object to run on the server.
parameters Parameters in the Parameters object.
application The name of the Host Publishing application to run.
parameters The Host Publishing parameters.

OnWeb Developer’s Guide 83
Chapter 9 ‐ Using OWJ2MEClient Component
runHPIObject
Description Runs the specified Host Publishing application on OnWeb Server. Returns the reply as an IObject instance.
Syntax runHPIObject(application, parameters)
Parameters
OnWebServer properties
application The name of the Host Publishing application to run.
parameters The Host Publishing parameters.
Property Description
getAddress Returns the address of the targeted OnWeb Server or proxy.
getPort Returns the listening port of the targeted OnWeb Server or proxy.
getProxyInformation Returns the proxy information string that is required when a proxy server is used. If a proxy server is used, the proxy information may include a virtual directory, the plug-in name, and the name of OnWeb Server. This is required if a secure connection was requested in the constructor used for this class.
getSequenceToken Returns the sequence token recovered from the last OnWeb server reply or an empty String if no session exists. Only applies to OnWeb Server for Windows.
getServerType Returns the type of the target OnWeb Server as an OnWebType instance.

Chapter 9 ‐ Using OWJ2MEClient Component
84 OnWeb Developer’s Guide
IObject classThis class is returned as a result of running an OnWeb object or running a Host Publishing application.
IObject methods
getSessionToken Returns the session token in use for the current session with OnWeb Server, or an empty String if no session exists.
haveSession Returns a boolean value to indicate whether a session currently exists with the targeted OnWeb Server.
isSecureConnection Returns a boolean value to indicate whether HTTPS is or will be used in the communication with OnWeb Server.
setProxyInformation(proxyString) Sets the proxy server information. If a proxy server is used, the proxy information may include a virtual directory, the plug-in name, and the name of OnWeb Server. This is required if a secure connection was requested in the constructor used for this class.
Property Description
Methods Description
getErrors Returns the list of errors contained in the IObject.
getName Returns the name of the IObject.
getParameters Returns the parameter collection contained in the IObject.

OnWeb Developer’s Guide 85
Chapter 9 ‐ Using OWJ2MEClient Component
Error classThis class contains the details of an error that occurred during an operation on OnWeb Server.
Error methods
Table classThis class represents a table in an IObject returned from executing an OnWeb object.
Table methods
getTables Returns the Table collection contained in the IObject.
getVariables Returns the Variable collection contained in the IObject.
getXML Returns the raw XML representation of the IObject.
Methods Description
Method Description
getCode Returns the error code associated with the Error object.
getText Returns the error text associated with the Error object.
getType Returns the error type associated with the Error object.
Method Description
getCell(row, column) Returns the content of the table cell specified by its row/column coordinates.
getName Returns the name of the Table object.
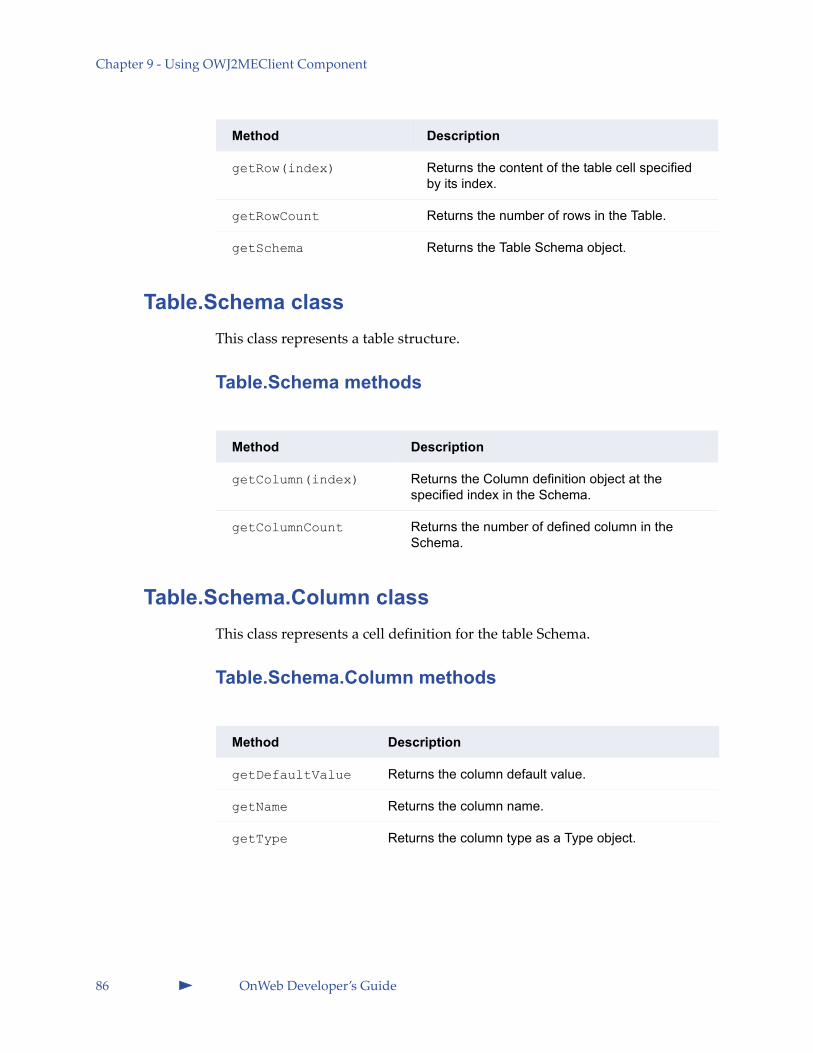
Chapter 9 ‐ Using OWJ2MEClient Component
86 OnWeb Developer’s Guide
Table.Schema classThis class represents a table structure.
Table.Schema methods
Table.Schema.Column classThis class represents a cell definition for the table Schema.
Table.Schema.Column methods
getRow(index) Returns the content of the table cell specified by its index.
getRowCount Returns the number of rows in the Table.
getSchema Returns the Table Schema object.
Method Description
Method Description
getColumn(index) Returns the Column definition object at the specified index in the Schema.
getColumnCount Returns the number of defined column in the Schema.
Method Description
getDefaultValue Returns the column default value.
getName Returns the column name.
getType Returns the column type as a Type object.

OnWeb Developer’s Guide 87
Chapter 9 ‐ Using OWJ2MEClient Component
Table.Schema.Column.Type classThis class represents a valid column definition types.
Table.Schema.Column.Type methods
Parameters classThis class represents a collection of parameters used when executing object on OnWeb Server.
Parameters constructors
Parameters methods
Method Description
toString Returns the String representation of the type.
Constructor Description
Parameters Creates a new instance of the Parameters object.
Method Description
add(name, value) Add a new parameter to the Parameters object.
clear Clears the entire Parameters collection.
count Returns the number of Parameter objects in the Parameters collection.
get(index) Retrieves the Parameter object found at the specified index in the Parameters collection.
get(name) Retrieves the Parameter object specified by its name from the Parameters collection.

Chapter 9 ‐ Using OWJ2MEClient Component
88 OnWeb Developer’s Guide
Parameter classThis class represents a parameter to be used when executing an OnWeb object.
Parameter constructors
Parameter methods
remove(name) Removes the Parameter object specified by its name from the Parameters collection.
toArray Returns all the parameters found in the Parameters collection as an array of the Parameter objects.
Method Description
Constructor Description
Parameter (name, value) Creates a new instance of the Parameter object with a given name and value.
Method Description
getName Returns the name of the Parameter object.
getValue Returns the value of the Parameter object.
setName(name) Sets the name of the Parameter object.
setValue(value) Sets the value of the Parameter object.

OnWeb Developer’s Guide 89
Chapter 9 ‐ Using OWJ2MEClient Component
OWJ2MEClient - sample codeThe following sample shows the minimal MIDLet code necessary to use with the OWJ2MEClient component to run objects on OnWeb Server./** * CallOnWebMIDlet.java ** Sample MIDlet to call OnWeb rules using the OWJ2MEClient component. * The call is done from the RunRuleThread class.
*/
import javax.microedition.midlet.*; import javax.microedition.lcdui.*; import java.util.*;
/*** The MIDLet extends MIDlet. It must implement startApp, pauseApp and * destroyApp as shown below.
*/public class CallOnWebMIDLet extends MIDlet implements CommandListener{
private final Command exit = new Command( "Exit", Command.OK, 1 ); private final Command runRule = new Command( "Execute Rule",
command.OK, 1 ); private Form form; private Display display; private TextField tfAddress = null; private TextField tfPort = null; private TextField tfParameter = null; private TextField tfApplication = null; private TextField tfRule = null; private TextField tfOutput = null;
/** * startApp */ public void startApp() { System.out.println("Enter startApp ....."); display = Display.getDisplay(this);
//Create the form with a title form = new Form( "OnWeb Sample MIDlet" );
//Create a textfield to hold the OnWeb server address tfAddress = new TextField( "Enter Onweb server address", "martineau-ws", 30, TextField.ANY ); form.append( tfAddress );
//Create a textfield to hold the OnWeb server port tfPort = new TextField( "Enter Onweb server port", "8081", 10, TextField.DECIMAL ); form.append( tfPort );
//Create a textfield to hold the OnWeb application tfApplication = new TextField( "Enter application", "Test720", 30, TextField.ANY ); form.append( tfApplication );
//Create a textfield to hold the OnWeb rule tfRule = new TextField( "Enter rule", "Simple", 30, TextField.ANY ); form.append( tfRule );

Chapter 9 ‐ Using OWJ2MEClient Component
90 OnWeb Developer’s Guide
//Create a textfield to hold a parameter tfParameter = new TextField( "Enter a parameter", "Default parameter value", 30, TextField.ANY ); form.append( tfParameter );
//Create a textfield to hold the result tfOutput = new TextField( "Result", "", 1024, TextField.ANY ); form.append( tfOutput );
//Add commands to buttons form.addCommand( exit ); form.addCommand( runRule ); form.setCommandListener(this); display.setCurrent(form);
System.out.println("Exit startApp ....."); }
/** * pauseApp */ public void pauseApp() { System.out.println("Enter pauseApp ....."); System.out.println("Exit pauseApp ....."); }
/*** destroyApp*/ public void destroyApp( boolean unconditional ) { System.out.println("Enter destroyApp ....."); System.out.println("Exit destroyApp ....."); }
/** * commandAction */ public void commandAction( Command c, Displayable disp ) { System.out.println("Enter commandAction ");
if( c == exit ) { destroyApp( false ); notifyDestroyed(); } else if( c == runRule ) { RunRuleThread p = new RunRuleThread( tfAddress.getString(), tfPort.getString(), fApplication.getString(), tfRule.getString(), tfParameter.getString(), tfOutput ); new Thread(p).start(); }
System.out.println("Exit commandAction ....."); } }
/**

OnWeb Developer’s Guide 91
Chapter 9 ‐ Using OWJ2MEClient Component
* RunRuleThread.java * * The RunRuleThread class uses the OWJ2MEClient component to run * a rule on a target OnWeb server. The OWJ2MEClient component is * in OWj2meClient.jar. It also requires NanoXmlParser.jar to do * the XML parsing of the IObject XML returned by OnWeb server rules. */
import javax.microedition.lcdui.*; import java.util.*;
// import the OWJ2MEClient componentimport com.netmanage.onweb.j2meclient.*;
/** * The RunRuleThread is used so that the call to the OnWeb server * is not done on the UI thread. */class RunRuleThread implements Runnable{ private String_parm = ""; private String_address = ""; private String_application = ""; private String_rule = ""; private int_nPort = 0; private TextField_tfOutput = null;
/** * Constructor */ RunRuleThread( String address, String port, String application, String rule, String parameter, TextField output ) { _address = address; _application = application; _rule = rule; _parm = parameter; _tfOutput = output; _nPort = Integer.parseInt( port, 10 ); }
/** * ThreadProc */ public void run() { try { // Create a new OnWebServer object OnWebServer oOnWeb = new OnWebServer( _address, _nPort, OnWebServer.OnWebType.CLASSIC );
// Create the required Parameters collection for // the given rule. Parameters oParms = new Parameters(); oParms.add( "P1", _parm ); oParms.add( "P2", _parm );
// Initialize the OnWebServer object. oOnWeb.init();
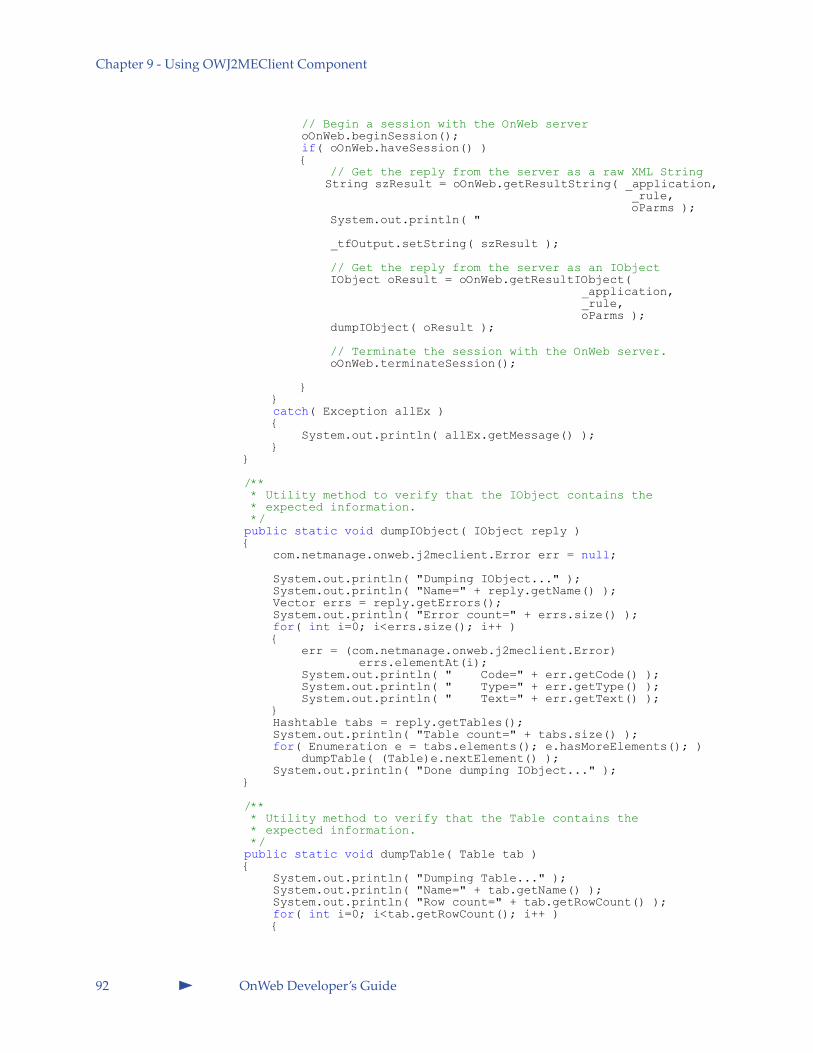
Chapter 9 ‐ Using OWJ2MEClient Component
92 OnWeb Developer’s Guide
// Begin a session with the OnWeb server oOnWeb.beginSession(); if( oOnWeb.haveSession() ) { // Get the reply from the server as a raw XML String String szResult = oOnWeb.getResultString( _application, _rule, oParms ); System.out.println( "
_tfOutput.setString( szResult );
// Get the reply from the server as an IObject IObject oResult = oOnWeb.getResultIObject( _application, _rule, oParms ); dumpIObject( oResult );
// Terminate the session with the OnWeb server. oOnWeb.terminateSession();
} } catch( Exception allEx ) { System.out.println( allEx.getMessage() ); } }
/** * Utility method to verify that the IObject contains the * expected information. */ public static void dumpIObject( IObject reply ) { com.netmanage.onweb.j2meclient.Error err = null;
System.out.println( "Dumping IObject..." ); System.out.println( "Name=" + reply.getName() ); Vector errs = reply.getErrors(); System.out.println( "Error count=" + errs.size() ); for( int i=0; i<errs.size(); i++ ) { err = (com.netmanage.onweb.j2meclient.Error) errs.elementAt(i); System.out.println( " Code=" + err.getCode() ); System.out.println( " Type=" + err.getType() ); System.out.println( " Text=" + err.getText() ); } Hashtable tabs = reply.getTables(); System.out.println( "Table count=" + tabs.size() ); for( Enumeration e = tabs.elements(); e.hasMoreElements(); ) dumpTable( (Table)e.nextElement() ); System.out.println( "Done dumping IObject..." ); }
/** * Utility method to verify that the Table contains the * expected information. */ public static void dumpTable( Table tab ) { System.out.println( "Dumping Table..." ); System.out.println( "Name=" + tab.getName() ); System.out.println( "Row count=" + tab.getRowCount() ); for( int i=0; i<tab.getRowCount(); i++ ) {

OnWeb Developer’s Guide 93
Chapter 9 ‐ Using OWJ2MEClient Component
for( int j=0; j<tab.getSchema().getColumnCount(); j++ ) System.out.print( "<==>" + tab.getCell( i, j ) ); System.out.println( "" ); } System.out.println( "Done dumping Table..." ); }
}

Chapter 9 ‐ Using OWJ2MEClient Component
94 OnWeb Developer’s Guide

OnWeb Developer’s Guide 95
Integrating Your Business Systems with OnWeb 10
OnWeb provides several ways to integrate your current business applications and systems with the applications created in OnWeb. You can use OnWeb Connectors to integrate traditional host‐based applications with other information sources (such as SAP®), and OnWeb BizTalk Adapter to extend BizTalk solutions to include legacy systems.
Using OnWeb ConnectorsUsing OnWeb Connectors in your OnWeb application allows you to access transactions and information from a wide variety of enterprise applications and reuse them in your application. The following OnWeb Connectors are supported:
• OnWeb Connector for SAP R/3®
• OnWeb Connector for PeopleSoft®
• OnWeb Connector for JD Edwards®
• OnWeb Connector for Siebel®
• OnWeb Connector for Oracle® Applications
• OnWeb Connector for CICS®
• OnWeb Connector for IMS™
• OnWeb Connector for MQSeries
• OnWeb Connector for DB2®
• OnWeb Connector for Sybase®
• OnWeb Connector for Informix®
• OnWeb Connector for CA‐IDMS®

Chapter 10 ‐ Integrating Your Business Systems with OnWeb
96 OnWeb Developer’s Guide
To use any of the above Connectors, they must be installed and configured on your system. Contact Micro Focus sales representative for information on how to purchase the required Connector(s). After installing the Connector, follow instructions in the OnWeb Administrator Guide to configure the installed Connector for use with OnWeb.
To facilitate the process of integrating Connector objects and methods into an OnWeb application, OnWeb scripting model has been enhanced by adding several methods and properties to the Onweb object.
To use OnWeb Connectors with OnWeb applications
1. In the Micro Focus EICS (Enterprise Integration Component Server) development environment:
› Create a new Integration Component (Connector object)
› Create methods that access and manipulate data in an external application supported by the Connector.
For details on how to create Integration Components, see the User Guide for the OnWeb Connect that you have.
OnWeb Developer’s Guide 97
Chapter 10 ‐ Integrating Your Business Systems with OnWeb
2. In your OnWeb application, create a Collect script which creates an XML input document based on the Connector schema. Use the following Onweb object methods to create and populate this document:
› use the Connect.CreateInputDocument method to create an empty document for the desired Connector object method.
› use the Connector.EditInputDocument method to populate the document with the parameters required by the Connector.
› use the Connector.Invoke method to invoke the Connector created in step 1. This invokes the specified Connector method and returns the XML output document.
› use the Connector.OutputToIObject method to parse the XML document into the IObject.
For a detailed description of all the methods and properties related to OnWeb Connectors, see OnWeb Scripting Help.
Using OnWeb BizTalk AdapterOnWeb BizTalk Adapter enables you to integrate existing host based transactions created with OnWeb Object Builder into your BizTalk Solutions.
Note: Procedures outlined in this section are general in nature and assume that you are familiar with using OnWeb Object Builder and Microsoft Visual Studio .NET.
Preparing OnWeb components for integrationIn OnWeb Object Builder, create the required host transaction and build the BizTalk schemas from it. The building process will create the Request and Response schemas and the Send Port.
Note: If you open OnWeb Object Builder directly from a project in Microsoft Visual Studio .NET, the schemas and the port will be automatically added to your project.

Chapter 10 ‐ Integrating Your Business Systems with OnWeb
98 OnWeb Developer’s Guide
The Request and Response schemas are added to the Solution Explorer.
The Send Port is added to the BizTalk Explorer.
Incorporating OnWeb components into BizTalk Server project
OnWeb components created in OnWeb Object Builder can now be integrated into your BizTalk Server project by creating an orchestration that represents your company business process.
To create a BizTalk Server project that uses OnWeb components
1. In Microsoft Visual Studio .NET, create new project and add to it new OnWeb Orchestration.
2. In Orchestration Designer, create business process workflow. Include business components that will send data to OnWeb and receive data from OnWeb.

OnWeb Developer’s Guide 99
Chapter 10 ‐ Integrating Your Business Systems with OnWeb
A sample workflow might look like the one shown to the right:
3. Create variables for the message instances and associate them with OnWeb Request and Response schemas.
4. Using the Port Configuration Wizard, create and configure three ports, one to send request, one to accept messages, and one to send request declined messages. For example, if you created the following ports: OnWebPort, SendResPort, and ReceiveReqPort, configure the following parameters for each port:
Parameters OnWebPort SendResPort ReceiveReqPort
New Port Type Name
OnWebPortType SendResType ReceiveReqType
Communication pattern
Request-Response One-Way One-Way
Direction of communication
Sending request and receiving response on this port.
Sending messages on this port.
Receiving messages on this port.
Port binding Specify later(binding for this port will be done in BizTalk Explorer - see step 8 of this procedure)).
Specify now Specify now
URI and Transport
- Type the location of the Response XML file.Select File as transport type.
Type the location of the Response XML fileSelect File as transport type.

Chapter 10 ‐ Integrating Your Business Systems with OnWeb
100 OnWeb Developer’s Guide
5. Configure required actions and connect them to the appropriate ports.The final business process might look like this:
6. Build the project to generate the project assembly. An assembly is a collection of resources in the project that is stored in a DLL file.
7. Deploy created assembly using Deployment Wizard.
8. In BizTalk Explorer, associate the logical send port (OnWebPort) created in Orchestration Designer with the port you created in BizTalk Explorer. This allows you to specify the target server (OnWeb Server for the port).

OnWeb Developer’s Guide 101
Supported Codepages A
The following table lists the codepages supported when using 3270 or 5250 emulation in OnWeb.
Codepage 3270 emulation 5250 emulation
Bokmal Norwegian Yes Yes
Czech Yes No
Czech Euro Yes No
Danish Yes Yes
Danish Euro Yes Yes
Dutch Yes Yes
Dutch Belgian Yes Yes
Dutch Belgian Euro Yes Yes
Dutch Euro Yes Yes
English Australian Yes Yes
English Australian Euro Yes Yes
English Canadian Yes Yes
English Canadian Euro Yes Yes
English Irish Yes Yes
English Irish Euro Yes Yes
English New Zealand Yes Yes
English New Zealand Euro Yes Yes

Appendix A ‐ Supported Codepages
102 OnWeb Developer’s Guide
English UK Yes Yes
English UK Euro Yes Yes
English US Yes Yes
English US Euro Yes Yes
Estonian Euro Yes No
Finnish Yes Yes
Finnish Euro Yes Yes
French Yes Yes
French Belgian Yes Yes
French Belgian Euro Yes Yes
French Canadian Yes Yes
French Canadian Euro Yes Yes
French Euro Yes Yes
French Swiss Yes Yes
French Swiss Euro Yes Yes
German Yes Yes
German Euro Yes Yes
German Austrian Yes Yes
German Austrian Euro Yes Yes
German Swiss Yes Yes
German Swiss Euro Yes Yes
Greek Yes No
Greek Euro Yes No
Hebrew Yes No
Codepage 3270 emulation 5250 emulation

OnWeb Developer’s Guide 103
Appendix A ‐ Supported Codepages
Hebrew Euro Yes No
Hungarian Yes No
Hungarian Euro Yes No
Icelandic Yes No
Icelandic Euro Yes No
Italian Yes Yes
Italian Euro Yes Yes
Italian Swiss Yes Yes
Italian Swiss Euro Yes Yes
Latvian Euro Yes No
Lithuanian Euro Yes No
Norwegian Euro Yes Yes
Nynorsk Norwegian Yes Yes
Polish Yes No
Polish Euro Yes No
Portuguese Yes Yes
Portuguese Euro Yes Yes
Portuguese Brazilian Yes Yes
Portuguese Brazilian Euro Yes Yes
Russian Yes No
Russian Euro Yes No
Spanish Mexican Yes Yes
Spanish Mexican Euro Yes Yes
Spanish Modern Sort Yes Yes
Codepage 3270 emulation 5250 emulation

Appendix A ‐ Supported Codepages
104 OnWeb Developer’s Guide
Spanish Modern Sort Euro Yes Yes
Spanish Traditional Sort Yes Yes
Spanish Traditional Sort Euro Yes Yes
Swedish Yes Yes
Swedish Euro Yes Yes
Turkish Yes No
Turkish Euro Yes No
Ukrainian Euro Yes No
Codepage 3270 emulation 5250 emulation

OnWeb Developer’s Guide 105
Reserved Words B
When creating JavaScript scripts, do not use the following words to name your parameters .
abort GID return_code
application Header return_status
arg_name id row
arg_value integer rowset
argument iobject rule_iobject
Body name server
call_stack no session_token
cancel off string
class on sub_target
client OnWeb_Request table
client_id OnWeb_Response target
command password timeout
complete persistent tracing
component project trc_level
dbg_client reject trc_remote
dbg_value remote_app_object trc_value

Appendix B ‐ Reserved Words
106 OnWeb Developer’s Guide
debugging remote_iobject type
decimal request userid
exit request_type version
fail response yes
float

OnWeb Developer’s Guide 107
Using MQSeries with OnWeb C
MQSeries Automation Classes for ActiveX (MQAX) enables your ActiveX application to interact with other, non‐ActiveX, applications throughout your enterprise.
It gives your ActiveX application the ability to run transactions and access data on any of your enterprise systems that you can access through MQSeries. It gives you integration between ActiveX and MQSeries software, extending the scope of ActiveX to include data and transactions that are part of other environments.
The MQAX is an Application Programming Interface (API) that you call from ActiveX scripting clients to access MQSeries. It requires an MQSeries environment and a corresponding MQSeries application with which to communicate.
It is possible to access MQSeries client or server from within OnWeb rules using VB Script to enlarge the scope of OnWeb in your enterprise environments.
MQAX is designed to:
• provide an infrastructure to enable you to develop applications that integrate your ActiveX environment with your traditional transaction system applications and their data
• give you access with all the functions and features of the MQSeries API, permitting full interconnectivity to other MQSeries platforms
• to conform to the normal conventions expected of an ActiveX extension
• to conform to the MQSeries object model
• enable you to take advantage of the following benefits provided by MQSeries:
› access to enterprise application logic, not just the data
› access to a wide variety of platforms
› queued entry into high throughput asynchronous messaging environments

Appendix C ‐ Using MQSeries with OnWeb
108 OnWeb Developer’s Guide
Environment requirementsMQSeries Automation Classes for ActiveX can only be used with 32 bit ActiveX scripting clients. It requires either an MQSeries Client or an MQSeries Server to be installed in the same environment.
To run the MQAX in an MQSeries Server environment you need at least one of the following installed on your system:
• MQSeries for Windows NT Version 2.0 or later
• MQSeries for Windows Version 2.1 (32 bit) or later running on Windows NT
To run the MQAX in an MQSeries Client environment you need the following installed on your system:
• MQSeries Client on Windows NT
• MQSeries Client on Windows 95
Configuration with OnWebThere are 2 possible configurations of all parts:
1. OnWeb is installed on the same PC where MQSeries Server is working.

OnWeb Developer’s Guide 109
Appendix C ‐ Using MQSeries with OnWeb
2. OnWeb is installed on different PC from MQSeries Server PC
Environment variable MQSERVER on the client PC must specify location and name of the channel on the server PC. For example, MQSERVER=CHAN1/TCP/SERVERPC. SERVERPC is the PC name on which MQSeries server was installed. CHAN1 is the name of the channel.

Appendix C ‐ Using MQSeries with OnWeb
110 OnWeb Developer’s Guide
MQAX interfacesIn MQAX, following classes are supplied to make communication with MQSeries.
Class Description
MQSession Class This is the root class for MQSeries Automation Classes for ActiveX. There is always one and only one MQSession object per ActiveX client process
MQQueueManager Class This represents a connection to a queue manager. The queue manager may be running locally (an MQSeries server) or remotely with access provided by the MQSeries client. An application must create an object of this class and connect it to a queue manager.
MQQueue Class This represents access to an MQSeries Queue. This connection is provided by an associated MQQueueManager object.
MQMessage Class This class represents an MQSeries message. It includes properties to encapsulate the MQSeries message descriptor (MQMD), and provides a buffer to hold the application-defined message data.
MQPutMessageOptions Class This class encapsulates the various options that control the action of putting a message onto an MQSeries Queue.
MQGetMessageOptions Class This class encapsulates the various options that control the action of getting a message from an MQSeries Queue.

OnWeb Developer’s Guide 111
Appendix C ‐ Using MQSeries with OnWeb
Sample programming and test environmentMQSeries server must be running. Queue manager queue.manager.1 and channel CHAN1 must be created on the MQSeries server. A model queue with name Q_M1 must also be created on the MQSeries server. This queue must allow creation of permanent dynamic queues. Permanent queues are required for passing messages between 2 or more different OnWeb scripts.
To test the samples, use following command to start MQSeries server:
strmqm
runmqlsr -t tcp -m queue.manager.1
Send message using information rule through MQseries:
http://onweb_server_site/?&ONWEB_InfoRule=sendMessage('my message','qname')
Receive message using information rule through MQSeries:
http://onweb_server_site/?&ONWEB_InfoRule=recvMessage('my message','qname')
where:
'my message' is your message text
'qname' is the queue name where you put/get your message in/out. MQSeries server can dynamically create the queue for you, so you donʹt need to create the queue by your self.
sendMessage and recvMessage are the information rules previously defined in your OnWeb Server.
onweb_server_site is the place where your OnWeb Server is running.
Note: Once a rule runs, a session is created. Since rules which invoke MQSeries do not use persistent sessions, you must include the following code in your Present script:
Session.DisconnectSession = true
This code will remove the session once the rule is run.

Appendix C ‐ Using MQSeries with OnWeb
112 OnWeb Developer’s Guide
Control commandsHere are some basic MQSeries control commands with examples.
Create default queue manager:
crtmqm -c "default queue manager" -ll -q queue.manager.1
Start queue manager:
strmqm ; start default queue manager
strmqm QM1 ; start QM1 queue manager
End queue manager:
endmqm QM1
Delete queue manager:
dltmqm QM1
Define channel:
runmqsc queue.manager
DEFINE CHANNEL(CHAN1) CHLTYPE(SVRCONN) TRPTYPE(TCP) DESCR('first channel')
Define model queue:
(A model queue is not a real queue, but a collection of attributes that you can use when creating dynamic queues with MQOPEN API call)
runmqsc queue.manager
DEFINE QMODEL(Q_M1) PUT(ENABLED) GET(ENABLED) MSGDLVSQ(FIFO) MAXDEPTH(1000) MAXMSGL(2000) USAGE(NORMAL) DEFTYPE(PERMDYN)
Run listener process:
runmqlsr -t tcp -m queue.manager.1
Note: For more information about MQSeries, visit this IBM® Web site:
http://www‐4.ibm.com/software/ts/mqseries/library/manuals99/
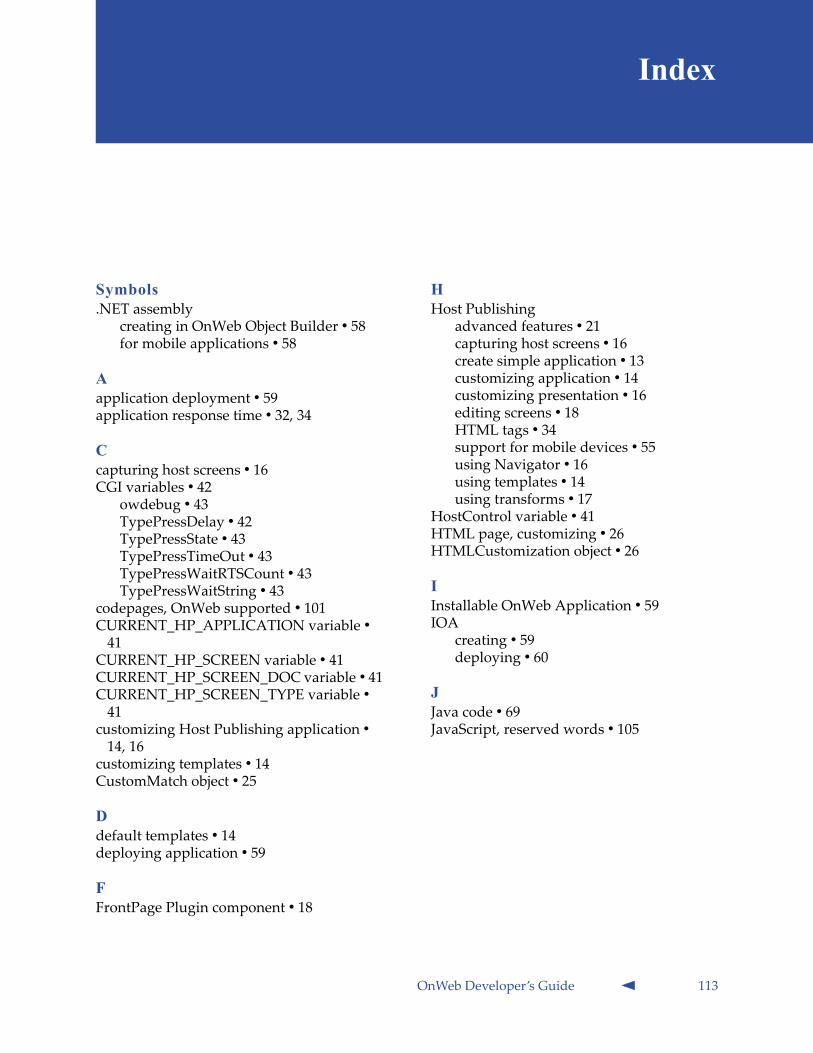
OnWeb Developer’s Guide 113
Symbols.NET assembly
creating in OnWeb Object Builder • 58for mobile applications • 58
Aapplication deployment • 59application response time • 32, 34
Ccapturing host screens • 16CGI variables • 42
owdebug • 43TypePressDelay • 42TypePressState • 43TypePressTimeOut • 43TypePressWaitRTSCount • 43TypePressWaitString • 43
codepages, OnWeb supported • 101CURRENT_HP_APPLICATION variable • 41
CURRENT_HP_SCREEN variable • 41CURRENT_HP_SCREEN_DOC variable • 41CURRENT_HP_SCREEN_TYPE variable • 41
customizing Host Publishing application • 14, 16
customizing templates • 14CustomMatch object • 25
Ddefault templates • 14deploying application • 59
FFrontPage Plugin component • 18
HHost Publishing
advanced features • 21capturing host screens • 16create simple application • 13customizing application • 14customizing presentation • 16editing screens • 18HTML tags • 34support for mobile devices • 55using Navigator • 16using templates • 14using transforms • 17
HostControl variable • 41HTML page, customizing • 26HTMLCustomization object • 26
IInstallable OnWeb Application • 59IOA
creating • 59deploying • 60
JJava code • 69JavaScript, reserved words • 105
Index

Index
114 OnWeb Developer’s Guide
LLiveConnect • 47
activate option • 47data type conversions • 50exceptions • 53JavaArray object • 49objects • 48Packages object • 48passing argument of type char • 49static initializer blocks • 49
Logoff script, adding to HP application • 22, 34
Logon script, adding to HP application • 22, 34
lookupcreating data file • 29importing data file • 29using in HP application • 30
Mmobile application
building Web services and assemblies • 58
creating in Designer • 55supported devices • 55
MQGetMessageOptions class • 110MQMessage class • 110MQPutMessageOptions class • 110MQQueue class • 110MQQueueManager class • 110MQSeries Automation Classes • 107MQSession class • 110
NNavigator • 16
Oobjects
CustomMatch • 25tOnWebServer • 62
OnWeb ActiveXin Host Publishing • 44
OnWeb Application Manager • 60OnWeb Assembly • 61
example • 65programming interface • 61
OnWeb BizTalk Adapter • 97incorporating OnWeb components • 98preparing OnWeb components • 97
OnWeb Connectors • 95OnWeb scripting extensions • 97supported • 95using • 96
OnWeb Mobile • 55OnWeb Navigator • 16OnWeb Object Builder
creating mobile application components • 58
overview • 9OnWeb UJB • 69
accessing Information Obejct • 75accessing server • 70development environment • 69ending a session • 74exceptions • 76properties • 71running an object • 74samples • 73starting a session • 74using • 71
onweb‐ujb.jar in CLASSPATH • 69, 71OW tags • 34OWClient.dll • 61owdebug variable • 43OWJ2MEClient • 79
Error class • 85IObject class • 84OnWebServer class • 80Parameter class • 88Parameters class • 87programming interface • 79sample code • 89Table class • 85Table.Schema class • 86Table.Schema.Column class • 86Table.Schema.Column.Type class • 87
Pparking screen • 32Pre‐Display procedure • 27procedures
Pre‐Display • 27Submit • 27
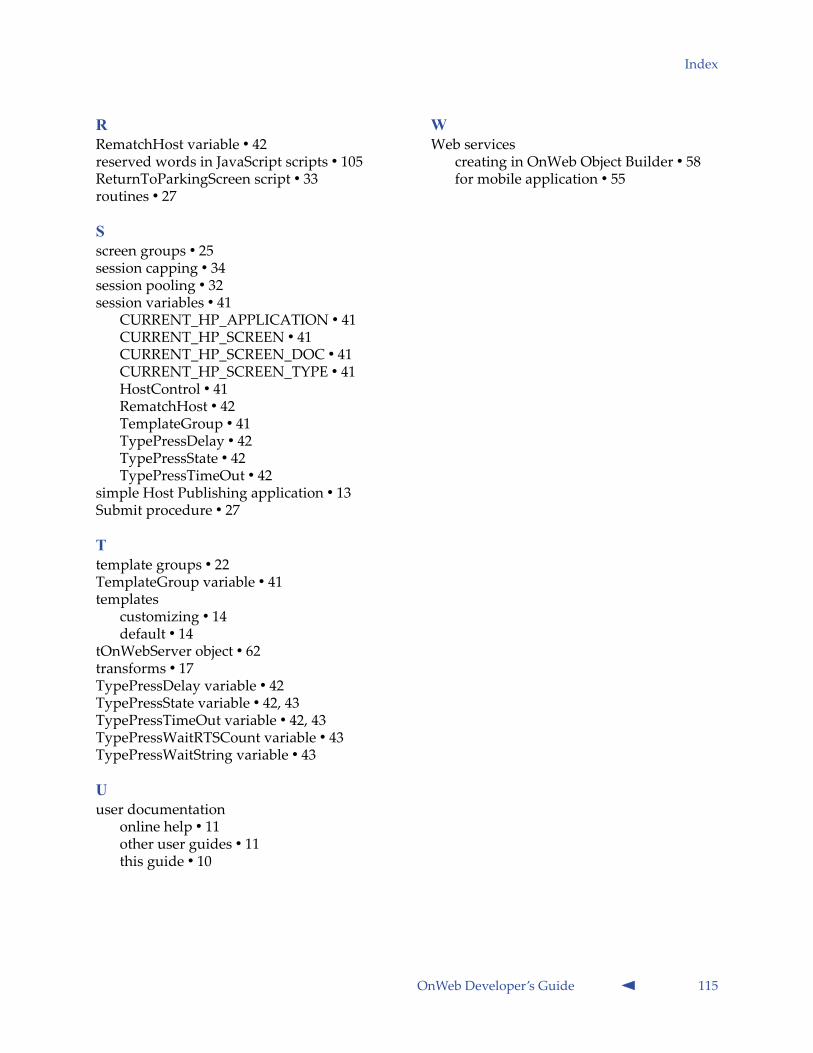
OnWeb Developer’s Guide 115
Index
RRematchHost variable • 42reserved words in JavaScript scripts • 105ReturnToParkingScreen script • 33routines • 27
Sscreen groups • 25session capping • 34session pooling • 32session variables • 41
CURRENT_HP_APPLICATION • 41CURRENT_HP_SCREEN • 41CURRENT_HP_SCREEN_DOC • 41CURRENT_HP_SCREEN_TYPE • 41HostControl • 41RematchHost • 42TemplateGroup • 41TypePressDelay • 42TypePressState • 42TypePressTimeOut • 42
simple Host Publishing application • 13Submit procedure • 27
Ttemplate groups • 22TemplateGroup variable • 41templates
customizing • 14default • 14
tOnWebServer object • 62transforms • 17TypePressDelay variable • 42TypePressState variable • 42, 43TypePressTimeOut variable • 42, 43TypePressWaitRTSCount variable • 43TypePressWaitString variable • 43
Uuser documentation
online help • 11other user guides • 11this guide • 10
WWeb services
creating in OnWeb Object Builder • 58for mobile application • 55