objective 4.02: apply procedures to develop landscape and irrigation plans. what procedures are...
TRANSCRIPT

Objective 402Apply procedures to develop landscape and irrigation plans What procedures are used to select
methods to develop plans What procedures are used to develop a
landscape plan What procedures are used to develop an
irrigation plan
John MHess
Selection of appropriate method to develop plans
Survey available design tools supplies equipment and software
Hand Drawn - The landscape design is drawn by hand using instruments
Computer Aided - Software is used to draw landscape and landscape features
Selection of appropriate method to develop plans
Hand Drawn instruments1048707 Instrumentso pencilso paperso surfaces (drafting board)o T-squareo triangleso scaleso templateo erasero erasing shield
Selection of appropriate method to develop plans
Computer Aided instruments1048707 Instrumentso computer with adequate memory and hard drive capacityo design software programso storage devices (CD DVD memory stick etc)o printer or plotter
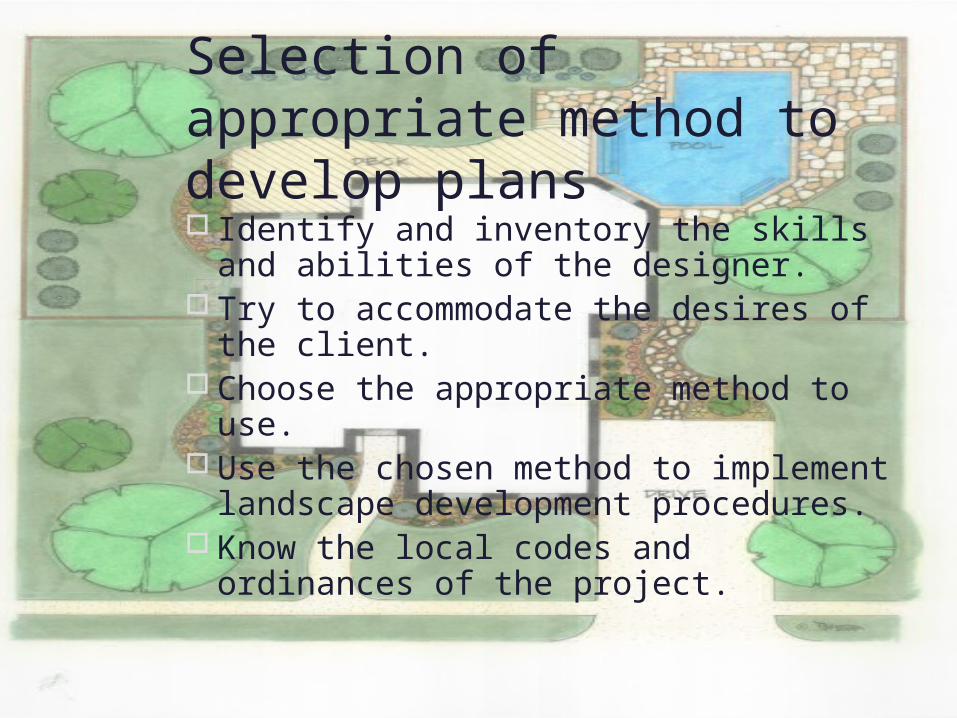
Selection of appropriate method to develop plans Identify and inventory the skills and
abilities of the designer Try to accommodate the desires of the
client Choose the appropriate method to use Use the chosen method to implement
landscape development procedures Know the local codes and ordinances of
the project
Procedures Used to Develop Landscape Plans
Planning Phase Conduct a client interview Client will
have information about the site wants needs and visions This is the time to educate the client about possibilities the outdoor site has to offer Follow the client interview guidelines
Planning Phase
Conducting a client interview ( Guidelines) Ask the client questions to gather information needed to
design a plan
When we first meet you at your home we will interview you to
find out your desires and ideas Well ask you questions about your lifestyle likes and dislikes and budget requirements For example if you are thinking about a back yard patio some questions we might ask include 1How much time do you and your family enjoy spending outside 2When you entertain family and friends how large is the gathering 3When you are inside the house what views are important when you are looking out
Our Landscape Design Questionnaire Please let us help you in creating your personalized outdoor living experience This form will be most helpful to us if you elaborate and detail your wants and needs How should your new landscape function How much do you plan on entertaining guests Are aesthetics
highest priority What are your pressing needs Specific needs How old are your children if any Future family plans What do you want Do you desire or plan to grow food or other consumables ie cut flowers medicinal culinary herbs fruit trees food forest garden mushroom logs and herb spiral Have you considered the possibility of deriving an income from your property Do you plan on having Terra Nova continue with maintenance after install completion What are some favorite features ie favorite colors fragrances favorite plants What plants are specifically not desired What type of animals do you have How many Future plans for a chicken coop etc When you close your eyes and imagine your idealdream garden what does it look like What do you hear
And smell What do you see in your neighborhood that you like or that are appropriate Or in the closest natural area Are you concerned with resource conservation and reducing your monthly utility bills Can we explore grading
and greywater techniques that significantly reduce your water consumption for irrigation Irrigation Automatic or manual Drip OK What are known drainage issues or problems How about other house foundation neighbor issues
underground utilities etc that may not be visible What are known pest problems Do you currently use compost andor worm bins May we assist you in doing so What are your interests in landscaping for beneficials and wildlife habitat How do you feel about substituting conventional lawn for an herb lawn or a flowering meadow when
appropriate What is your current budget 6 months from now 1 year from now Long-term What are specific questions and concerns or additional comments you wish to share with us
Planning Phase
Conduct a Site Analysis The designer examines the natural man-made cultural physcial and visual characteristics of the site This collection should be a thorough inventory of the sitersquos positive and negative qualities
Conduct a site analysis to identify existing features in the area(s) to be landscapes
Take measurements and photos for reference and scaling
Planning Phase Site Analysis
Planning Phase Site Analysis 1048707 Identify orientation of the house on the lot 1048707 Identify direction that the house faces 1048707 Identify natural conditions bull Soil bull Existing plant material bull Existing shade (microclimate) bull Presence of wildlife bull Winds (breezes) bull Terrain features 1048707 Identify man made features bull Recreational areas (swimming pools etc) bull Lighting bull Off site views bull Noise bull Architectural style bull Closeness of neighbors bull Parking areas bull Utilities bull Existing structures 1048707 Identify cultural features (features associated with human society) bull Zoning regulations bull Closeness of public transportation
Planning Phase
Develop a Problem Statement ndash Defines the scope of the project in words and explains direction for the designer to follow This statement points out the current situation including both positive and negatives
Determine Objectives for the Design Project
USE Client interview Site survey Problem statement
Objectives should state what is to be addressed in the design
List how all objectives will be developed
Bubble Design
Bubble design are quick free flowing ideas of accommodating the clients wants needs and desires
This design action is to get a feel for the lay out it is not time consuming Public Area ndash Front of the house ldquoCurb
Appealrdquo 3 functions Attractive front Create a point of
entry and access to entry
Bubble Design conrsquot
Family Living Area The extension of the interior on the exterior An area that serves for outdoor entertaining EX Pool grill play area patio
Bubble Design conrsquot
Service Area The portion of the landscape that is utilitarian Normally located near the kitchen on the side or back of house This area is for sheds trash cans gardens etc This is not part of the public or private areas
Bubble Design conrsquot
Private Living Area The part of the landscape that typically joins the master bedroom Not normally in view of the public This area is designated for adult relaxation reading Normally small area may be screened Not always used based on house design
Design Phase
Draw a preliminary design- Refine the bubbles into actual rough draft objects and show how the landscape will be shaped There are normally more than 1 preliminary design presented to the client In some cases the designer will make over
layes to show modifications from original landscape
Design Phase o Draw the final planmdashincorporates all the suggestions
and reactions of the client into a master drawing that is detailed and completely specific in
its intent for the landscape 1048707 Select a scale that will allow the total site to be
reproduced on a workable size paper and still leave room for title block notes and other
needed information 1048707 Place paper on a drawing board Use a T-square to
square the paper on the drawing board and tape down the corners of the paper to the
drawing board 1048707 Select the appropriate drawing instruments needed to
begin the plan 1048707 Begin the sheet layout bull Title Information (Title Block) should be located on right
bottom or extreme right
Design Phase o Client and designer information 1048707 clientrsquos name 1048707 clientrsquos address 1048707 designerrsquos name 1048707 designerrsquos address o Drawing information 1048707 sheet title 1048707 scale 1048707 North arrow 1048707 date bull Location on the paper o Plan should be off center toward the left andor toward the top of the paper to allow for title block legend notes etc in blank white space on the right andor at the bottom of the paper o Draw a border about frac12 inch to 1 inch at the top bottom and right side of paper and make the left side border about an extra inch 1 frac12 to 2 inches from the side to allow for stapling or fastening the pages together
Design Phase
1048707 Assign use areas to appropriate parts of the property 1048707 Select focal points and locate them within the appropriate use areas 1048707 Shape each use area to direct attention to the focal point and to relate focal point
to adjoining use areas 1048707 Retain the shapes from the step above and convert the lines to planting beds and other outdoor wall elements 1048707 Define the function to be served by each plant in the design 1048707 Select plant species that will serve the roles needed and use symbols to
represent their mature size and plant type 1048707 Select enclosure surfacing and enrichment items to complement the total design and use symbols to represent them 1048707 Label all elements of the plan and keep the lettering on or near the symbols 1048707 Compile a list of all plant species used and the total number needed of each 1048707 Trace the completed design on appropriate type paper if hand-drawn If using computer design program print appropriate size plan
Procedures Used to Develop Irrigation Plans
Program Planning Phase -Analyze characteristics of the site to determine water requirements of the plants to be irrigatedo Determine the needs and desires of the clientso Match needs of clients and capabilities of the site as closely as possibleo Determine the Gallons Per Minute (GPM) that the main water supply can provide to the irrigation systemo Divide the number in half and that is the maximum amount of gallons per minute that can be sent to any zone at one timeo Analyze the area to be irrigated and determine the best type of sprinkler to use in that location
Procedures Used to Develop Irrigation Plans o Take notice of the shape of the area and the irrigation
needs of the plant May be able to use a spray head instead of a rotary sprinkler o The sprinkler throw areas need to overlap to the
sprinkler head This allows for good coverage in windy conditions o Divide the sprinklers into zones based on the water
usage of the sprinklers in that area and the types of sprinklers in the area o Use the correct symbols to represent materials that will
be used o Locate the main water supply line All irrigation for the
system will come from the main supply line
Procedures Used to Develop Irrigation Plans
o Determine if water supply source is public or private All systems that use a public water
supply must have a back flow preventer off the main line to the irrigation system The symbol on an irrigation plan for a back flow preventer is
o For each Zone you will need a remote control valve The symbol for a remote control valve is
o The sprinkler is designated with a small round circle Ex
o To show the throw area of a sprinkler draw in the approximate area of the throw
Irrigation Design Phase o Select a scale that will allow the total site to be reproduced on a workable size
paper and still leave room for title block notes and other needed information o Place paper on a drawing board Use a T-square to square the paper on the drawing board and tape down the corners of the paper to the drawing board o Select the appropriate drawing instruments needed to begin the plan o Begin the sheet layout 1048707 Title Information (Title Block) should be located on right bottom or extreme right side of sheet bull client and designer information bull clientrsquos name bull clientrsquos address bull designerrsquos name bull designerrsquos address 1048707 Drawing information bull sheet title bull scale bull North arrow bull date 1048707 Location on the paper
Irrigation Design Phase 1048707 Plan should be off-center toward the left andor toward the top of the
paper to allow for title block legend notes etc in blank white space on the right andor
at the bottom of the paper 1048707 Draw a border about frac12 inch to 1 inch at the top bottom and right side
of paper and make the left side border about an extra inch 1 frac12 to 2 inches from the side to allow for stapling or fastening the pages together
o Draw or copy existing features from the lot including buildings property lines utilities plants hardscapes etc
o Select irrigation components that will serve the roles needed and use symbols to represent their types and locations
o Label all elements of the plan and keep the lettering on or near the symbols
o Compile a list of all irrigation components used and the total number needed of each
o Trace the completed design on appropriate type paper if hand-drawn If using
computer design program print appropriate size plan
Landscape Blueprint

Selection of appropriate method to develop plans
Survey available design tools supplies equipment and software
Hand Drawn - The landscape design is drawn by hand using instruments
Computer Aided - Software is used to draw landscape and landscape features
Selection of appropriate method to develop plans
Hand Drawn instruments1048707 Instrumentso pencilso paperso surfaces (drafting board)o T-squareo triangleso scaleso templateo erasero erasing shield
Selection of appropriate method to develop plans
Computer Aided instruments1048707 Instrumentso computer with adequate memory and hard drive capacityo design software programso storage devices (CD DVD memory stick etc)o printer or plotter
Selection of appropriate method to develop plans Identify and inventory the skills and
abilities of the designer Try to accommodate the desires of the
client Choose the appropriate method to use Use the chosen method to implement
landscape development procedures Know the local codes and ordinances of
the project
Procedures Used to Develop Landscape Plans
Planning Phase Conduct a client interview Client will
have information about the site wants needs and visions This is the time to educate the client about possibilities the outdoor site has to offer Follow the client interview guidelines
Planning Phase
Conducting a client interview ( Guidelines) Ask the client questions to gather information needed to
design a plan
When we first meet you at your home we will interview you to
find out your desires and ideas Well ask you questions about your lifestyle likes and dislikes and budget requirements For example if you are thinking about a back yard patio some questions we might ask include 1How much time do you and your family enjoy spending outside 2When you entertain family and friends how large is the gathering 3When you are inside the house what views are important when you are looking out
Our Landscape Design Questionnaire Please let us help you in creating your personalized outdoor living experience This form will be most helpful to us if you elaborate and detail your wants and needs How should your new landscape function How much do you plan on entertaining guests Are aesthetics
highest priority What are your pressing needs Specific needs How old are your children if any Future family plans What do you want Do you desire or plan to grow food or other consumables ie cut flowers medicinal culinary herbs fruit trees food forest garden mushroom logs and herb spiral Have you considered the possibility of deriving an income from your property Do you plan on having Terra Nova continue with maintenance after install completion What are some favorite features ie favorite colors fragrances favorite plants What plants are specifically not desired What type of animals do you have How many Future plans for a chicken coop etc When you close your eyes and imagine your idealdream garden what does it look like What do you hear
And smell What do you see in your neighborhood that you like or that are appropriate Or in the closest natural area Are you concerned with resource conservation and reducing your monthly utility bills Can we explore grading
and greywater techniques that significantly reduce your water consumption for irrigation Irrigation Automatic or manual Drip OK What are known drainage issues or problems How about other house foundation neighbor issues
underground utilities etc that may not be visible What are known pest problems Do you currently use compost andor worm bins May we assist you in doing so What are your interests in landscaping for beneficials and wildlife habitat How do you feel about substituting conventional lawn for an herb lawn or a flowering meadow when
appropriate What is your current budget 6 months from now 1 year from now Long-term What are specific questions and concerns or additional comments you wish to share with us
Planning Phase
Conduct a Site Analysis The designer examines the natural man-made cultural physcial and visual characteristics of the site This collection should be a thorough inventory of the sitersquos positive and negative qualities
Conduct a site analysis to identify existing features in the area(s) to be landscapes
Take measurements and photos for reference and scaling
Planning Phase Site Analysis
Planning Phase Site Analysis 1048707 Identify orientation of the house on the lot 1048707 Identify direction that the house faces 1048707 Identify natural conditions bull Soil bull Existing plant material bull Existing shade (microclimate) bull Presence of wildlife bull Winds (breezes) bull Terrain features 1048707 Identify man made features bull Recreational areas (swimming pools etc) bull Lighting bull Off site views bull Noise bull Architectural style bull Closeness of neighbors bull Parking areas bull Utilities bull Existing structures 1048707 Identify cultural features (features associated with human society) bull Zoning regulations bull Closeness of public transportation
Planning Phase
Develop a Problem Statement ndash Defines the scope of the project in words and explains direction for the designer to follow This statement points out the current situation including both positive and negatives
Determine Objectives for the Design Project
USE Client interview Site survey Problem statement
Objectives should state what is to be addressed in the design
List how all objectives will be developed
Bubble Design
Bubble design are quick free flowing ideas of accommodating the clients wants needs and desires
This design action is to get a feel for the lay out it is not time consuming Public Area ndash Front of the house ldquoCurb
Appealrdquo 3 functions Attractive front Create a point of
entry and access to entry
Bubble Design conrsquot
Family Living Area The extension of the interior on the exterior An area that serves for outdoor entertaining EX Pool grill play area patio
Bubble Design conrsquot
Service Area The portion of the landscape that is utilitarian Normally located near the kitchen on the side or back of house This area is for sheds trash cans gardens etc This is not part of the public or private areas
Bubble Design conrsquot
Private Living Area The part of the landscape that typically joins the master bedroom Not normally in view of the public This area is designated for adult relaxation reading Normally small area may be screened Not always used based on house design
Design Phase
Draw a preliminary design- Refine the bubbles into actual rough draft objects and show how the landscape will be shaped There are normally more than 1 preliminary design presented to the client In some cases the designer will make over
layes to show modifications from original landscape
Design Phase o Draw the final planmdashincorporates all the suggestions
and reactions of the client into a master drawing that is detailed and completely specific in
its intent for the landscape 1048707 Select a scale that will allow the total site to be
reproduced on a workable size paper and still leave room for title block notes and other
needed information 1048707 Place paper on a drawing board Use a T-square to
square the paper on the drawing board and tape down the corners of the paper to the
drawing board 1048707 Select the appropriate drawing instruments needed to
begin the plan 1048707 Begin the sheet layout bull Title Information (Title Block) should be located on right
bottom or extreme right
Design Phase o Client and designer information 1048707 clientrsquos name 1048707 clientrsquos address 1048707 designerrsquos name 1048707 designerrsquos address o Drawing information 1048707 sheet title 1048707 scale 1048707 North arrow 1048707 date bull Location on the paper o Plan should be off center toward the left andor toward the top of the paper to allow for title block legend notes etc in blank white space on the right andor at the bottom of the paper o Draw a border about frac12 inch to 1 inch at the top bottom and right side of paper and make the left side border about an extra inch 1 frac12 to 2 inches from the side to allow for stapling or fastening the pages together
Design Phase
1048707 Assign use areas to appropriate parts of the property 1048707 Select focal points and locate them within the appropriate use areas 1048707 Shape each use area to direct attention to the focal point and to relate focal point
to adjoining use areas 1048707 Retain the shapes from the step above and convert the lines to planting beds and other outdoor wall elements 1048707 Define the function to be served by each plant in the design 1048707 Select plant species that will serve the roles needed and use symbols to
represent their mature size and plant type 1048707 Select enclosure surfacing and enrichment items to complement the total design and use symbols to represent them 1048707 Label all elements of the plan and keep the lettering on or near the symbols 1048707 Compile a list of all plant species used and the total number needed of each 1048707 Trace the completed design on appropriate type paper if hand-drawn If using computer design program print appropriate size plan
Procedures Used to Develop Irrigation Plans
Program Planning Phase -Analyze characteristics of the site to determine water requirements of the plants to be irrigatedo Determine the needs and desires of the clientso Match needs of clients and capabilities of the site as closely as possibleo Determine the Gallons Per Minute (GPM) that the main water supply can provide to the irrigation systemo Divide the number in half and that is the maximum amount of gallons per minute that can be sent to any zone at one timeo Analyze the area to be irrigated and determine the best type of sprinkler to use in that location
Procedures Used to Develop Irrigation Plans o Take notice of the shape of the area and the irrigation
needs of the plant May be able to use a spray head instead of a rotary sprinkler o The sprinkler throw areas need to overlap to the
sprinkler head This allows for good coverage in windy conditions o Divide the sprinklers into zones based on the water
usage of the sprinklers in that area and the types of sprinklers in the area o Use the correct symbols to represent materials that will
be used o Locate the main water supply line All irrigation for the
system will come from the main supply line
Procedures Used to Develop Irrigation Plans
o Determine if water supply source is public or private All systems that use a public water
supply must have a back flow preventer off the main line to the irrigation system The symbol on an irrigation plan for a back flow preventer is
o For each Zone you will need a remote control valve The symbol for a remote control valve is
o The sprinkler is designated with a small round circle Ex
o To show the throw area of a sprinkler draw in the approximate area of the throw
Irrigation Design Phase o Select a scale that will allow the total site to be reproduced on a workable size
paper and still leave room for title block notes and other needed information o Place paper on a drawing board Use a T-square to square the paper on the drawing board and tape down the corners of the paper to the drawing board o Select the appropriate drawing instruments needed to begin the plan o Begin the sheet layout 1048707 Title Information (Title Block) should be located on right bottom or extreme right side of sheet bull client and designer information bull clientrsquos name bull clientrsquos address bull designerrsquos name bull designerrsquos address 1048707 Drawing information bull sheet title bull scale bull North arrow bull date 1048707 Location on the paper
Irrigation Design Phase 1048707 Plan should be off-center toward the left andor toward the top of the
paper to allow for title block legend notes etc in blank white space on the right andor
at the bottom of the paper 1048707 Draw a border about frac12 inch to 1 inch at the top bottom and right side
of paper and make the left side border about an extra inch 1 frac12 to 2 inches from the side to allow for stapling or fastening the pages together
o Draw or copy existing features from the lot including buildings property lines utilities plants hardscapes etc
o Select irrigation components that will serve the roles needed and use symbols to represent their types and locations
o Label all elements of the plan and keep the lettering on or near the symbols
o Compile a list of all irrigation components used and the total number needed of each
o Trace the completed design on appropriate type paper if hand-drawn If using
computer design program print appropriate size plan
Landscape Blueprint
Selection of appropriate method to develop plans
Hand Drawn instruments1048707 Instrumentso pencilso paperso surfaces (drafting board)o T-squareo triangleso scaleso templateo erasero erasing shield
Selection of appropriate method to develop plans
Computer Aided instruments1048707 Instrumentso computer with adequate memory and hard drive capacityo design software programso storage devices (CD DVD memory stick etc)o printer or plotter
Selection of appropriate method to develop plans Identify and inventory the skills and
abilities of the designer Try to accommodate the desires of the
client Choose the appropriate method to use Use the chosen method to implement
landscape development procedures Know the local codes and ordinances of
the project
Procedures Used to Develop Landscape Plans
Planning Phase Conduct a client interview Client will
have information about the site wants needs and visions This is the time to educate the client about possibilities the outdoor site has to offer Follow the client interview guidelines
Planning Phase
Conducting a client interview ( Guidelines) Ask the client questions to gather information needed to
design a plan
When we first meet you at your home we will interview you to
find out your desires and ideas Well ask you questions about your lifestyle likes and dislikes and budget requirements For example if you are thinking about a back yard patio some questions we might ask include 1How much time do you and your family enjoy spending outside 2When you entertain family and friends how large is the gathering 3When you are inside the house what views are important when you are looking out
Our Landscape Design Questionnaire Please let us help you in creating your personalized outdoor living experience This form will be most helpful to us if you elaborate and detail your wants and needs How should your new landscape function How much do you plan on entertaining guests Are aesthetics
highest priority What are your pressing needs Specific needs How old are your children if any Future family plans What do you want Do you desire or plan to grow food or other consumables ie cut flowers medicinal culinary herbs fruit trees food forest garden mushroom logs and herb spiral Have you considered the possibility of deriving an income from your property Do you plan on having Terra Nova continue with maintenance after install completion What are some favorite features ie favorite colors fragrances favorite plants What plants are specifically not desired What type of animals do you have How many Future plans for a chicken coop etc When you close your eyes and imagine your idealdream garden what does it look like What do you hear
And smell What do you see in your neighborhood that you like or that are appropriate Or in the closest natural area Are you concerned with resource conservation and reducing your monthly utility bills Can we explore grading
and greywater techniques that significantly reduce your water consumption for irrigation Irrigation Automatic or manual Drip OK What are known drainage issues or problems How about other house foundation neighbor issues
underground utilities etc that may not be visible What are known pest problems Do you currently use compost andor worm bins May we assist you in doing so What are your interests in landscaping for beneficials and wildlife habitat How do you feel about substituting conventional lawn for an herb lawn or a flowering meadow when
appropriate What is your current budget 6 months from now 1 year from now Long-term What are specific questions and concerns or additional comments you wish to share with us
Planning Phase
Conduct a Site Analysis The designer examines the natural man-made cultural physcial and visual characteristics of the site This collection should be a thorough inventory of the sitersquos positive and negative qualities
Conduct a site analysis to identify existing features in the area(s) to be landscapes
Take measurements and photos for reference and scaling
Planning Phase Site Analysis
Planning Phase Site Analysis 1048707 Identify orientation of the house on the lot 1048707 Identify direction that the house faces 1048707 Identify natural conditions bull Soil bull Existing plant material bull Existing shade (microclimate) bull Presence of wildlife bull Winds (breezes) bull Terrain features 1048707 Identify man made features bull Recreational areas (swimming pools etc) bull Lighting bull Off site views bull Noise bull Architectural style bull Closeness of neighbors bull Parking areas bull Utilities bull Existing structures 1048707 Identify cultural features (features associated with human society) bull Zoning regulations bull Closeness of public transportation
Planning Phase
Develop a Problem Statement ndash Defines the scope of the project in words and explains direction for the designer to follow This statement points out the current situation including both positive and negatives
Determine Objectives for the Design Project
USE Client interview Site survey Problem statement
Objectives should state what is to be addressed in the design
List how all objectives will be developed
Bubble Design
Bubble design are quick free flowing ideas of accommodating the clients wants needs and desires
This design action is to get a feel for the lay out it is not time consuming Public Area ndash Front of the house ldquoCurb
Appealrdquo 3 functions Attractive front Create a point of
entry and access to entry
Bubble Design conrsquot
Family Living Area The extension of the interior on the exterior An area that serves for outdoor entertaining EX Pool grill play area patio
Bubble Design conrsquot
Service Area The portion of the landscape that is utilitarian Normally located near the kitchen on the side or back of house This area is for sheds trash cans gardens etc This is not part of the public or private areas
Bubble Design conrsquot
Private Living Area The part of the landscape that typically joins the master bedroom Not normally in view of the public This area is designated for adult relaxation reading Normally small area may be screened Not always used based on house design
Design Phase
Draw a preliminary design- Refine the bubbles into actual rough draft objects and show how the landscape will be shaped There are normally more than 1 preliminary design presented to the client In some cases the designer will make over
layes to show modifications from original landscape
Design Phase o Draw the final planmdashincorporates all the suggestions
and reactions of the client into a master drawing that is detailed and completely specific in
its intent for the landscape 1048707 Select a scale that will allow the total site to be
reproduced on a workable size paper and still leave room for title block notes and other
needed information 1048707 Place paper on a drawing board Use a T-square to
square the paper on the drawing board and tape down the corners of the paper to the
drawing board 1048707 Select the appropriate drawing instruments needed to
begin the plan 1048707 Begin the sheet layout bull Title Information (Title Block) should be located on right
bottom or extreme right
Design Phase o Client and designer information 1048707 clientrsquos name 1048707 clientrsquos address 1048707 designerrsquos name 1048707 designerrsquos address o Drawing information 1048707 sheet title 1048707 scale 1048707 North arrow 1048707 date bull Location on the paper o Plan should be off center toward the left andor toward the top of the paper to allow for title block legend notes etc in blank white space on the right andor at the bottom of the paper o Draw a border about frac12 inch to 1 inch at the top bottom and right side of paper and make the left side border about an extra inch 1 frac12 to 2 inches from the side to allow for stapling or fastening the pages together
Design Phase
1048707 Assign use areas to appropriate parts of the property 1048707 Select focal points and locate them within the appropriate use areas 1048707 Shape each use area to direct attention to the focal point and to relate focal point
to adjoining use areas 1048707 Retain the shapes from the step above and convert the lines to planting beds and other outdoor wall elements 1048707 Define the function to be served by each plant in the design 1048707 Select plant species that will serve the roles needed and use symbols to
represent their mature size and plant type 1048707 Select enclosure surfacing and enrichment items to complement the total design and use symbols to represent them 1048707 Label all elements of the plan and keep the lettering on or near the symbols 1048707 Compile a list of all plant species used and the total number needed of each 1048707 Trace the completed design on appropriate type paper if hand-drawn If using computer design program print appropriate size plan
Procedures Used to Develop Irrigation Plans
Program Planning Phase -Analyze characteristics of the site to determine water requirements of the plants to be irrigatedo Determine the needs and desires of the clientso Match needs of clients and capabilities of the site as closely as possibleo Determine the Gallons Per Minute (GPM) that the main water supply can provide to the irrigation systemo Divide the number in half and that is the maximum amount of gallons per minute that can be sent to any zone at one timeo Analyze the area to be irrigated and determine the best type of sprinkler to use in that location
Procedures Used to Develop Irrigation Plans o Take notice of the shape of the area and the irrigation
needs of the plant May be able to use a spray head instead of a rotary sprinkler o The sprinkler throw areas need to overlap to the
sprinkler head This allows for good coverage in windy conditions o Divide the sprinklers into zones based on the water
usage of the sprinklers in that area and the types of sprinklers in the area o Use the correct symbols to represent materials that will
be used o Locate the main water supply line All irrigation for the
system will come from the main supply line
Procedures Used to Develop Irrigation Plans
o Determine if water supply source is public or private All systems that use a public water
supply must have a back flow preventer off the main line to the irrigation system The symbol on an irrigation plan for a back flow preventer is
o For each Zone you will need a remote control valve The symbol for a remote control valve is
o The sprinkler is designated with a small round circle Ex
o To show the throw area of a sprinkler draw in the approximate area of the throw
Irrigation Design Phase o Select a scale that will allow the total site to be reproduced on a workable size
paper and still leave room for title block notes and other needed information o Place paper on a drawing board Use a T-square to square the paper on the drawing board and tape down the corners of the paper to the drawing board o Select the appropriate drawing instruments needed to begin the plan o Begin the sheet layout 1048707 Title Information (Title Block) should be located on right bottom or extreme right side of sheet bull client and designer information bull clientrsquos name bull clientrsquos address bull designerrsquos name bull designerrsquos address 1048707 Drawing information bull sheet title bull scale bull North arrow bull date 1048707 Location on the paper
Irrigation Design Phase 1048707 Plan should be off-center toward the left andor toward the top of the
paper to allow for title block legend notes etc in blank white space on the right andor
at the bottom of the paper 1048707 Draw a border about frac12 inch to 1 inch at the top bottom and right side
of paper and make the left side border about an extra inch 1 frac12 to 2 inches from the side to allow for stapling or fastening the pages together
o Draw or copy existing features from the lot including buildings property lines utilities plants hardscapes etc
o Select irrigation components that will serve the roles needed and use symbols to represent their types and locations
o Label all elements of the plan and keep the lettering on or near the symbols
o Compile a list of all irrigation components used and the total number needed of each
o Trace the completed design on appropriate type paper if hand-drawn If using
computer design program print appropriate size plan
Landscape Blueprint

Planning Phase
Conducting a client interview ( Guidelines) Ask the client questions to gather information needed to
design a plan
When we first meet you at your home we will interview you to
find out your desires and ideas Well ask you questions about your lifestyle likes and dislikes and budget requirements For example if you are thinking about a back yard patio some questions we might ask include 1How much time do you and your family enjoy spending outside 2When you entertain family and friends how large is the gathering 3When you are inside the house what views are important when you are looking out
Our Landscape Design Questionnaire Please let us help you in creating your personalized outdoor living experience This form will be most helpful to us if you elaborate and detail your wants and needs How should your new landscape function How much do you plan on entertaining guests Are aesthetics
highest priority What are your pressing needs Specific needs How old are your children if any Future family plans What do you want Do you desire or plan to grow food or other consumables ie cut flowers medicinal culinary herbs fruit trees food forest garden mushroom logs and herb spiral Have you considered the possibility of deriving an income from your property Do you plan on having Terra Nova continue with maintenance after install completion What are some favorite features ie favorite colors fragrances favorite plants What plants are specifically not desired What type of animals do you have How many Future plans for a chicken coop etc When you close your eyes and imagine your idealdream garden what does it look like What do you hear
And smell What do you see in your neighborhood that you like or that are appropriate Or in the closest natural area Are you concerned with resource conservation and reducing your monthly utility bills Can we explore grading
and greywater techniques that significantly reduce your water consumption for irrigation Irrigation Automatic or manual Drip OK What are known drainage issues or problems How about other house foundation neighbor issues
underground utilities etc that may not be visible What are known pest problems Do you currently use compost andor worm bins May we assist you in doing so What are your interests in landscaping for beneficials and wildlife habitat How do you feel about substituting conventional lawn for an herb lawn or a flowering meadow when
appropriate What is your current budget 6 months from now 1 year from now Long-term What are specific questions and concerns or additional comments you wish to share with us
Planning Phase
Conduct a Site Analysis The designer examines the natural man-made cultural physcial and visual characteristics of the site This collection should be a thorough inventory of the sitersquos positive and negative qualities
Conduct a site analysis to identify existing features in the area(s) to be landscapes
Take measurements and photos for reference and scaling
Planning Phase Site Analysis
Planning Phase Site Analysis 1048707 Identify orientation of the house on the lot 1048707 Identify direction that the house faces 1048707 Identify natural conditions bull Soil bull Existing plant material bull Existing shade (microclimate) bull Presence of wildlife bull Winds (breezes) bull Terrain features 1048707 Identify man made features bull Recreational areas (swimming pools etc) bull Lighting bull Off site views bull Noise bull Architectural style bull Closeness of neighbors bull Parking areas bull Utilities bull Existing structures 1048707 Identify cultural features (features associated with human society) bull Zoning regulations bull Closeness of public transportation
Planning Phase
Develop a Problem Statement ndash Defines the scope of the project in words and explains direction for the designer to follow This statement points out the current situation including both positive and negatives
Determine Objectives for the Design Project
USE Client interview Site survey Problem statement
Objectives should state what is to be addressed in the design
List how all objectives will be developed
Bubble Design
Bubble design are quick free flowing ideas of accommodating the clients wants needs and desires
This design action is to get a feel for the lay out it is not time consuming Public Area ndash Front of the house ldquoCurb
Appealrdquo 3 functions Attractive front Create a point of
entry and access to entry
Bubble Design conrsquot
Family Living Area The extension of the interior on the exterior An area that serves for outdoor entertaining EX Pool grill play area patio
Bubble Design conrsquot
Service Area The portion of the landscape that is utilitarian Normally located near the kitchen on the side or back of house This area is for sheds trash cans gardens etc This is not part of the public or private areas
Bubble Design conrsquot
Private Living Area The part of the landscape that typically joins the master bedroom Not normally in view of the public This area is designated for adult relaxation reading Normally small area may be screened Not always used based on house design
Design Phase
Draw a preliminary design- Refine the bubbles into actual rough draft objects and show how the landscape will be shaped There are normally more than 1 preliminary design presented to the client In some cases the designer will make over
layes to show modifications from original landscape
Design Phase o Draw the final planmdashincorporates all the suggestions
and reactions of the client into a master drawing that is detailed and completely specific in
its intent for the landscape 1048707 Select a scale that will allow the total site to be
reproduced on a workable size paper and still leave room for title block notes and other
needed information 1048707 Place paper on a drawing board Use a T-square to
square the paper on the drawing board and tape down the corners of the paper to the
drawing board 1048707 Select the appropriate drawing instruments needed to
begin the plan 1048707 Begin the sheet layout bull Title Information (Title Block) should be located on right
bottom or extreme right
Design Phase o Client and designer information 1048707 clientrsquos name 1048707 clientrsquos address 1048707 designerrsquos name 1048707 designerrsquos address o Drawing information 1048707 sheet title 1048707 scale 1048707 North arrow 1048707 date bull Location on the paper o Plan should be off center toward the left andor toward the top of the paper to allow for title block legend notes etc in blank white space on the right andor at the bottom of the paper o Draw a border about frac12 inch to 1 inch at the top bottom and right side of paper and make the left side border about an extra inch 1 frac12 to 2 inches from the side to allow for stapling or fastening the pages together
Design Phase
1048707 Assign use areas to appropriate parts of the property 1048707 Select focal points and locate them within the appropriate use areas 1048707 Shape each use area to direct attention to the focal point and to relate focal point
to adjoining use areas 1048707 Retain the shapes from the step above and convert the lines to planting beds and other outdoor wall elements 1048707 Define the function to be served by each plant in the design 1048707 Select plant species that will serve the roles needed and use symbols to
represent their mature size and plant type 1048707 Select enclosure surfacing and enrichment items to complement the total design and use symbols to represent them 1048707 Label all elements of the plan and keep the lettering on or near the symbols 1048707 Compile a list of all plant species used and the total number needed of each 1048707 Trace the completed design on appropriate type paper if hand-drawn If using computer design program print appropriate size plan
Procedures Used to Develop Irrigation Plans
Program Planning Phase -Analyze characteristics of the site to determine water requirements of the plants to be irrigatedo Determine the needs and desires of the clientso Match needs of clients and capabilities of the site as closely as possibleo Determine the Gallons Per Minute (GPM) that the main water supply can provide to the irrigation systemo Divide the number in half and that is the maximum amount of gallons per minute that can be sent to any zone at one timeo Analyze the area to be irrigated and determine the best type of sprinkler to use in that location
Procedures Used to Develop Irrigation Plans o Take notice of the shape of the area and the irrigation
needs of the plant May be able to use a spray head instead of a rotary sprinkler o The sprinkler throw areas need to overlap to the
sprinkler head This allows for good coverage in windy conditions o Divide the sprinklers into zones based on the water
usage of the sprinklers in that area and the types of sprinklers in the area o Use the correct symbols to represent materials that will
be used o Locate the main water supply line All irrigation for the
system will come from the main supply line
Procedures Used to Develop Irrigation Plans
o Determine if water supply source is public or private All systems that use a public water
supply must have a back flow preventer off the main line to the irrigation system The symbol on an irrigation plan for a back flow preventer is
o For each Zone you will need a remote control valve The symbol for a remote control valve is
o The sprinkler is designated with a small round circle Ex
o To show the throw area of a sprinkler draw in the approximate area of the throw
Irrigation Design Phase o Select a scale that will allow the total site to be reproduced on a workable size
paper and still leave room for title block notes and other needed information o Place paper on a drawing board Use a T-square to square the paper on the drawing board and tape down the corners of the paper to the drawing board o Select the appropriate drawing instruments needed to begin the plan o Begin the sheet layout 1048707 Title Information (Title Block) should be located on right bottom or extreme right side of sheet bull client and designer information bull clientrsquos name bull clientrsquos address bull designerrsquos name bull designerrsquos address 1048707 Drawing information bull sheet title bull scale bull North arrow bull date 1048707 Location on the paper
Irrigation Design Phase 1048707 Plan should be off-center toward the left andor toward the top of the
paper to allow for title block legend notes etc in blank white space on the right andor
at the bottom of the paper 1048707 Draw a border about frac12 inch to 1 inch at the top bottom and right side
of paper and make the left side border about an extra inch 1 frac12 to 2 inches from the side to allow for stapling or fastening the pages together
o Draw or copy existing features from the lot including buildings property lines utilities plants hardscapes etc
o Select irrigation components that will serve the roles needed and use symbols to represent their types and locations
o Label all elements of the plan and keep the lettering on or near the symbols
o Compile a list of all irrigation components used and the total number needed of each
o Trace the completed design on appropriate type paper if hand-drawn If using
computer design program print appropriate size plan
Landscape Blueprint

Planning Phase
Conduct a Site Analysis The designer examines the natural man-made cultural physcial and visual characteristics of the site This collection should be a thorough inventory of the sitersquos positive and negative qualities
Conduct a site analysis to identify existing features in the area(s) to be landscapes
Take measurements and photos for reference and scaling
Planning Phase Site Analysis
Planning Phase Site Analysis 1048707 Identify orientation of the house on the lot 1048707 Identify direction that the house faces 1048707 Identify natural conditions bull Soil bull Existing plant material bull Existing shade (microclimate) bull Presence of wildlife bull Winds (breezes) bull Terrain features 1048707 Identify man made features bull Recreational areas (swimming pools etc) bull Lighting bull Off site views bull Noise bull Architectural style bull Closeness of neighbors bull Parking areas bull Utilities bull Existing structures 1048707 Identify cultural features (features associated with human society) bull Zoning regulations bull Closeness of public transportation
Planning Phase
Develop a Problem Statement ndash Defines the scope of the project in words and explains direction for the designer to follow This statement points out the current situation including both positive and negatives
Determine Objectives for the Design Project
USE Client interview Site survey Problem statement
Objectives should state what is to be addressed in the design
List how all objectives will be developed
Bubble Design
Bubble design are quick free flowing ideas of accommodating the clients wants needs and desires
This design action is to get a feel for the lay out it is not time consuming Public Area ndash Front of the house ldquoCurb
Appealrdquo 3 functions Attractive front Create a point of
entry and access to entry
Bubble Design conrsquot
Family Living Area The extension of the interior on the exterior An area that serves for outdoor entertaining EX Pool grill play area patio
Bubble Design conrsquot
Service Area The portion of the landscape that is utilitarian Normally located near the kitchen on the side or back of house This area is for sheds trash cans gardens etc This is not part of the public or private areas
Bubble Design conrsquot
Private Living Area The part of the landscape that typically joins the master bedroom Not normally in view of the public This area is designated for adult relaxation reading Normally small area may be screened Not always used based on house design
Design Phase
Draw a preliminary design- Refine the bubbles into actual rough draft objects and show how the landscape will be shaped There are normally more than 1 preliminary design presented to the client In some cases the designer will make over
layes to show modifications from original landscape
Design Phase o Draw the final planmdashincorporates all the suggestions
and reactions of the client into a master drawing that is detailed and completely specific in
its intent for the landscape 1048707 Select a scale that will allow the total site to be
reproduced on a workable size paper and still leave room for title block notes and other
needed information 1048707 Place paper on a drawing board Use a T-square to
square the paper on the drawing board and tape down the corners of the paper to the
drawing board 1048707 Select the appropriate drawing instruments needed to
begin the plan 1048707 Begin the sheet layout bull Title Information (Title Block) should be located on right
bottom or extreme right
Design Phase o Client and designer information 1048707 clientrsquos name 1048707 clientrsquos address 1048707 designerrsquos name 1048707 designerrsquos address o Drawing information 1048707 sheet title 1048707 scale 1048707 North arrow 1048707 date bull Location on the paper o Plan should be off center toward the left andor toward the top of the paper to allow for title block legend notes etc in blank white space on the right andor at the bottom of the paper o Draw a border about frac12 inch to 1 inch at the top bottom and right side of paper and make the left side border about an extra inch 1 frac12 to 2 inches from the side to allow for stapling or fastening the pages together
Design Phase
1048707 Assign use areas to appropriate parts of the property 1048707 Select focal points and locate them within the appropriate use areas 1048707 Shape each use area to direct attention to the focal point and to relate focal point
to adjoining use areas 1048707 Retain the shapes from the step above and convert the lines to planting beds and other outdoor wall elements 1048707 Define the function to be served by each plant in the design 1048707 Select plant species that will serve the roles needed and use symbols to
represent their mature size and plant type 1048707 Select enclosure surfacing and enrichment items to complement the total design and use symbols to represent them 1048707 Label all elements of the plan and keep the lettering on or near the symbols 1048707 Compile a list of all plant species used and the total number needed of each 1048707 Trace the completed design on appropriate type paper if hand-drawn If using computer design program print appropriate size plan
Procedures Used to Develop Irrigation Plans
Program Planning Phase -Analyze characteristics of the site to determine water requirements of the plants to be irrigatedo Determine the needs and desires of the clientso Match needs of clients and capabilities of the site as closely as possibleo Determine the Gallons Per Minute (GPM) that the main water supply can provide to the irrigation systemo Divide the number in half and that is the maximum amount of gallons per minute that can be sent to any zone at one timeo Analyze the area to be irrigated and determine the best type of sprinkler to use in that location
Procedures Used to Develop Irrigation Plans o Take notice of the shape of the area and the irrigation
needs of the plant May be able to use a spray head instead of a rotary sprinkler o The sprinkler throw areas need to overlap to the
sprinkler head This allows for good coverage in windy conditions o Divide the sprinklers into zones based on the water
usage of the sprinklers in that area and the types of sprinklers in the area o Use the correct symbols to represent materials that will
be used o Locate the main water supply line All irrigation for the
system will come from the main supply line
Procedures Used to Develop Irrigation Plans
o Determine if water supply source is public or private All systems that use a public water
supply must have a back flow preventer off the main line to the irrigation system The symbol on an irrigation plan for a back flow preventer is
o For each Zone you will need a remote control valve The symbol for a remote control valve is
o The sprinkler is designated with a small round circle Ex
o To show the throw area of a sprinkler draw in the approximate area of the throw
Irrigation Design Phase o Select a scale that will allow the total site to be reproduced on a workable size
paper and still leave room for title block notes and other needed information o Place paper on a drawing board Use a T-square to square the paper on the drawing board and tape down the corners of the paper to the drawing board o Select the appropriate drawing instruments needed to begin the plan o Begin the sheet layout 1048707 Title Information (Title Block) should be located on right bottom or extreme right side of sheet bull client and designer information bull clientrsquos name bull clientrsquos address bull designerrsquos name bull designerrsquos address 1048707 Drawing information bull sheet title bull scale bull North arrow bull date 1048707 Location on the paper
Irrigation Design Phase 1048707 Plan should be off-center toward the left andor toward the top of the
paper to allow for title block legend notes etc in blank white space on the right andor
at the bottom of the paper 1048707 Draw a border about frac12 inch to 1 inch at the top bottom and right side
of paper and make the left side border about an extra inch 1 frac12 to 2 inches from the side to allow for stapling or fastening the pages together
o Draw or copy existing features from the lot including buildings property lines utilities plants hardscapes etc
o Select irrigation components that will serve the roles needed and use symbols to represent their types and locations
o Label all elements of the plan and keep the lettering on or near the symbols
o Compile a list of all irrigation components used and the total number needed of each
o Trace the completed design on appropriate type paper if hand-drawn If using
computer design program print appropriate size plan
Landscape Blueprint
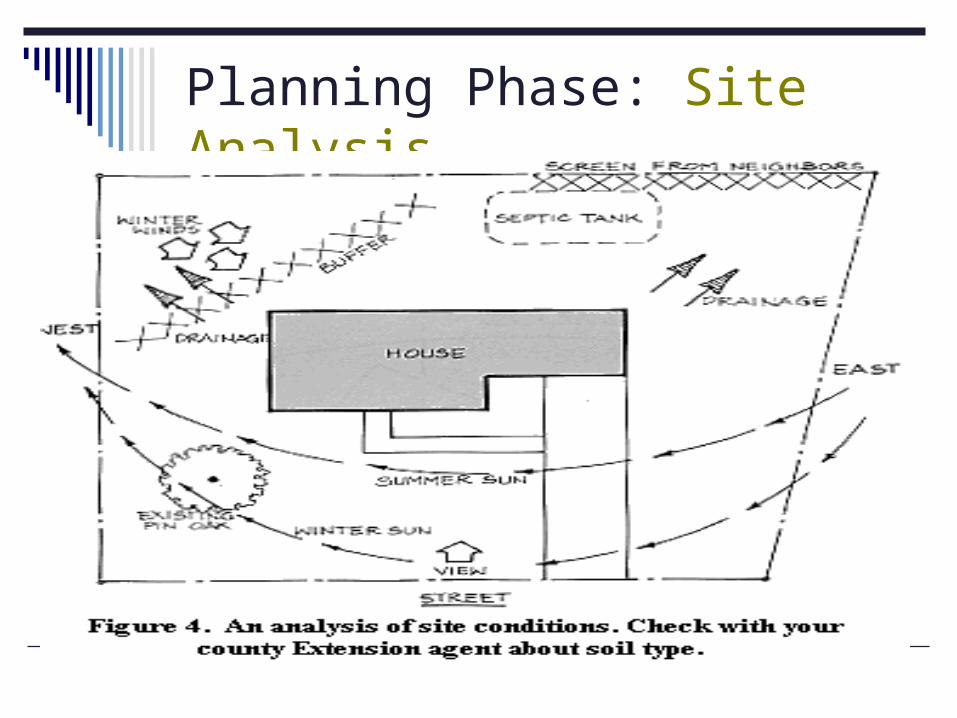

Bubble Design conrsquot
Service Area The portion of the landscape that is utilitarian Normally located near the kitchen on the side or back of house This area is for sheds trash cans gardens etc This is not part of the public or private areas
Bubble Design conrsquot
Private Living Area The part of the landscape that typically joins the master bedroom Not normally in view of the public This area is designated for adult relaxation reading Normally small area may be screened Not always used based on house design
Design Phase
Draw a preliminary design- Refine the bubbles into actual rough draft objects and show how the landscape will be shaped There are normally more than 1 preliminary design presented to the client In some cases the designer will make over
layes to show modifications from original landscape
Design Phase o Draw the final planmdashincorporates all the suggestions
and reactions of the client into a master drawing that is detailed and completely specific in
its intent for the landscape 1048707 Select a scale that will allow the total site to be
reproduced on a workable size paper and still leave room for title block notes and other
needed information 1048707 Place paper on a drawing board Use a T-square to
square the paper on the drawing board and tape down the corners of the paper to the
drawing board 1048707 Select the appropriate drawing instruments needed to
begin the plan 1048707 Begin the sheet layout bull Title Information (Title Block) should be located on right
bottom or extreme right
Design Phase o Client and designer information 1048707 clientrsquos name 1048707 clientrsquos address 1048707 designerrsquos name 1048707 designerrsquos address o Drawing information 1048707 sheet title 1048707 scale 1048707 North arrow 1048707 date bull Location on the paper o Plan should be off center toward the left andor toward the top of the paper to allow for title block legend notes etc in blank white space on the right andor at the bottom of the paper o Draw a border about frac12 inch to 1 inch at the top bottom and right side of paper and make the left side border about an extra inch 1 frac12 to 2 inches from the side to allow for stapling or fastening the pages together
Design Phase
1048707 Assign use areas to appropriate parts of the property 1048707 Select focal points and locate them within the appropriate use areas 1048707 Shape each use area to direct attention to the focal point and to relate focal point
to adjoining use areas 1048707 Retain the shapes from the step above and convert the lines to planting beds and other outdoor wall elements 1048707 Define the function to be served by each plant in the design 1048707 Select plant species that will serve the roles needed and use symbols to
represent their mature size and plant type 1048707 Select enclosure surfacing and enrichment items to complement the total design and use symbols to represent them 1048707 Label all elements of the plan and keep the lettering on or near the symbols 1048707 Compile a list of all plant species used and the total number needed of each 1048707 Trace the completed design on appropriate type paper if hand-drawn If using computer design program print appropriate size plan
Procedures Used to Develop Irrigation Plans
Program Planning Phase -Analyze characteristics of the site to determine water requirements of the plants to be irrigatedo Determine the needs and desires of the clientso Match needs of clients and capabilities of the site as closely as possibleo Determine the Gallons Per Minute (GPM) that the main water supply can provide to the irrigation systemo Divide the number in half and that is the maximum amount of gallons per minute that can be sent to any zone at one timeo Analyze the area to be irrigated and determine the best type of sprinkler to use in that location
Procedures Used to Develop Irrigation Plans o Take notice of the shape of the area and the irrigation
needs of the plant May be able to use a spray head instead of a rotary sprinkler o The sprinkler throw areas need to overlap to the
sprinkler head This allows for good coverage in windy conditions o Divide the sprinklers into zones based on the water
usage of the sprinklers in that area and the types of sprinklers in the area o Use the correct symbols to represent materials that will
be used o Locate the main water supply line All irrigation for the
system will come from the main supply line
Procedures Used to Develop Irrigation Plans
o Determine if water supply source is public or private All systems that use a public water
supply must have a back flow preventer off the main line to the irrigation system The symbol on an irrigation plan for a back flow preventer is
o For each Zone you will need a remote control valve The symbol for a remote control valve is
o The sprinkler is designated with a small round circle Ex
o To show the throw area of a sprinkler draw in the approximate area of the throw
Irrigation Design Phase o Select a scale that will allow the total site to be reproduced on a workable size
paper and still leave room for title block notes and other needed information o Place paper on a drawing board Use a T-square to square the paper on the drawing board and tape down the corners of the paper to the drawing board o Select the appropriate drawing instruments needed to begin the plan o Begin the sheet layout 1048707 Title Information (Title Block) should be located on right bottom or extreme right side of sheet bull client and designer information bull clientrsquos name bull clientrsquos address bull designerrsquos name bull designerrsquos address 1048707 Drawing information bull sheet title bull scale bull North arrow bull date 1048707 Location on the paper
Irrigation Design Phase 1048707 Plan should be off-center toward the left andor toward the top of the
paper to allow for title block legend notes etc in blank white space on the right andor
at the bottom of the paper 1048707 Draw a border about frac12 inch to 1 inch at the top bottom and right side
of paper and make the left side border about an extra inch 1 frac12 to 2 inches from the side to allow for stapling or fastening the pages together
o Draw or copy existing features from the lot including buildings property lines utilities plants hardscapes etc
o Select irrigation components that will serve the roles needed and use symbols to represent their types and locations
o Label all elements of the plan and keep the lettering on or near the symbols
o Compile a list of all irrigation components used and the total number needed of each
o Trace the completed design on appropriate type paper if hand-drawn If using
computer design program print appropriate size plan
Landscape Blueprint

Design Phase
Draw a preliminary design- Refine the bubbles into actual rough draft objects and show how the landscape will be shaped There are normally more than 1 preliminary design presented to the client In some cases the designer will make over
layes to show modifications from original landscape
Design Phase o Draw the final planmdashincorporates all the suggestions
and reactions of the client into a master drawing that is detailed and completely specific in
its intent for the landscape 1048707 Select a scale that will allow the total site to be
reproduced on a workable size paper and still leave room for title block notes and other
needed information 1048707 Place paper on a drawing board Use a T-square to
square the paper on the drawing board and tape down the corners of the paper to the
drawing board 1048707 Select the appropriate drawing instruments needed to
begin the plan 1048707 Begin the sheet layout bull Title Information (Title Block) should be located on right
bottom or extreme right
Design Phase o Client and designer information 1048707 clientrsquos name 1048707 clientrsquos address 1048707 designerrsquos name 1048707 designerrsquos address o Drawing information 1048707 sheet title 1048707 scale 1048707 North arrow 1048707 date bull Location on the paper o Plan should be off center toward the left andor toward the top of the paper to allow for title block legend notes etc in blank white space on the right andor at the bottom of the paper o Draw a border about frac12 inch to 1 inch at the top bottom and right side of paper and make the left side border about an extra inch 1 frac12 to 2 inches from the side to allow for stapling or fastening the pages together
Design Phase
1048707 Assign use areas to appropriate parts of the property 1048707 Select focal points and locate them within the appropriate use areas 1048707 Shape each use area to direct attention to the focal point and to relate focal point
to adjoining use areas 1048707 Retain the shapes from the step above and convert the lines to planting beds and other outdoor wall elements 1048707 Define the function to be served by each plant in the design 1048707 Select plant species that will serve the roles needed and use symbols to
represent their mature size and plant type 1048707 Select enclosure surfacing and enrichment items to complement the total design and use symbols to represent them 1048707 Label all elements of the plan and keep the lettering on or near the symbols 1048707 Compile a list of all plant species used and the total number needed of each 1048707 Trace the completed design on appropriate type paper if hand-drawn If using computer design program print appropriate size plan
Procedures Used to Develop Irrigation Plans
Program Planning Phase -Analyze characteristics of the site to determine water requirements of the plants to be irrigatedo Determine the needs and desires of the clientso Match needs of clients and capabilities of the site as closely as possibleo Determine the Gallons Per Minute (GPM) that the main water supply can provide to the irrigation systemo Divide the number in half and that is the maximum amount of gallons per minute that can be sent to any zone at one timeo Analyze the area to be irrigated and determine the best type of sprinkler to use in that location
Procedures Used to Develop Irrigation Plans o Take notice of the shape of the area and the irrigation
needs of the plant May be able to use a spray head instead of a rotary sprinkler o The sprinkler throw areas need to overlap to the
sprinkler head This allows for good coverage in windy conditions o Divide the sprinklers into zones based on the water
usage of the sprinklers in that area and the types of sprinklers in the area o Use the correct symbols to represent materials that will
be used o Locate the main water supply line All irrigation for the
system will come from the main supply line
Procedures Used to Develop Irrigation Plans
o Determine if water supply source is public or private All systems that use a public water
supply must have a back flow preventer off the main line to the irrigation system The symbol on an irrigation plan for a back flow preventer is
o For each Zone you will need a remote control valve The symbol for a remote control valve is
o The sprinkler is designated with a small round circle Ex
o To show the throw area of a sprinkler draw in the approximate area of the throw
Irrigation Design Phase o Select a scale that will allow the total site to be reproduced on a workable size
paper and still leave room for title block notes and other needed information o Place paper on a drawing board Use a T-square to square the paper on the drawing board and tape down the corners of the paper to the drawing board o Select the appropriate drawing instruments needed to begin the plan o Begin the sheet layout 1048707 Title Information (Title Block) should be located on right bottom or extreme right side of sheet bull client and designer information bull clientrsquos name bull clientrsquos address bull designerrsquos name bull designerrsquos address 1048707 Drawing information bull sheet title bull scale bull North arrow bull date 1048707 Location on the paper
Irrigation Design Phase 1048707 Plan should be off-center toward the left andor toward the top of the
paper to allow for title block legend notes etc in blank white space on the right andor
at the bottom of the paper 1048707 Draw a border about frac12 inch to 1 inch at the top bottom and right side
of paper and make the left side border about an extra inch 1 frac12 to 2 inches from the side to allow for stapling or fastening the pages together
o Draw or copy existing features from the lot including buildings property lines utilities plants hardscapes etc
o Select irrigation components that will serve the roles needed and use symbols to represent their types and locations
o Label all elements of the plan and keep the lettering on or near the symbols
o Compile a list of all irrigation components used and the total number needed of each
o Trace the completed design on appropriate type paper if hand-drawn If using
computer design program print appropriate size plan
Landscape Blueprint

Procedures Used to Develop Irrigation Plans
Program Planning Phase -Analyze characteristics of the site to determine water requirements of the plants to be irrigatedo Determine the needs and desires of the clientso Match needs of clients and capabilities of the site as closely as possibleo Determine the Gallons Per Minute (GPM) that the main water supply can provide to the irrigation systemo Divide the number in half and that is the maximum amount of gallons per minute that can be sent to any zone at one timeo Analyze the area to be irrigated and determine the best type of sprinkler to use in that location
Procedures Used to Develop Irrigation Plans o Take notice of the shape of the area and the irrigation
needs of the plant May be able to use a spray head instead of a rotary sprinkler o The sprinkler throw areas need to overlap to the
sprinkler head This allows for good coverage in windy conditions o Divide the sprinklers into zones based on the water
usage of the sprinklers in that area and the types of sprinklers in the area o Use the correct symbols to represent materials that will
be used o Locate the main water supply line All irrigation for the
system will come from the main supply line
Procedures Used to Develop Irrigation Plans
o Determine if water supply source is public or private All systems that use a public water
supply must have a back flow preventer off the main line to the irrigation system The symbol on an irrigation plan for a back flow preventer is
o For each Zone you will need a remote control valve The symbol for a remote control valve is
o The sprinkler is designated with a small round circle Ex
o To show the throw area of a sprinkler draw in the approximate area of the throw
Irrigation Design Phase o Select a scale that will allow the total site to be reproduced on a workable size
paper and still leave room for title block notes and other needed information o Place paper on a drawing board Use a T-square to square the paper on the drawing board and tape down the corners of the paper to the drawing board o Select the appropriate drawing instruments needed to begin the plan o Begin the sheet layout 1048707 Title Information (Title Block) should be located on right bottom or extreme right side of sheet bull client and designer information bull clientrsquos name bull clientrsquos address bull designerrsquos name bull designerrsquos address 1048707 Drawing information bull sheet title bull scale bull North arrow bull date 1048707 Location on the paper
Irrigation Design Phase 1048707 Plan should be off-center toward the left andor toward the top of the
paper to allow for title block legend notes etc in blank white space on the right andor
at the bottom of the paper 1048707 Draw a border about frac12 inch to 1 inch at the top bottom and right side
of paper and make the left side border about an extra inch 1 frac12 to 2 inches from the side to allow for stapling or fastening the pages together
o Draw or copy existing features from the lot including buildings property lines utilities plants hardscapes etc
o Select irrigation components that will serve the roles needed and use symbols to represent their types and locations
o Label all elements of the plan and keep the lettering on or near the symbols
o Compile a list of all irrigation components used and the total number needed of each
o Trace the completed design on appropriate type paper if hand-drawn If using
computer design program print appropriate size plan
Landscape Blueprint

Landscape Blueprint
