multi-point insertion k-bar 2000b mass flow elements
TRANSCRIPT

QGIS Handy Hints
Christina Robinson
Contents
Introduction 2
Connecting to a Microsoft Access database in QGIS 3
Actions 6
MapInfo files 8
Field calculator 9
SPIT plugin 10
Manuals and documentation produced by Oxford Archaeology North:
Hodgkinson, Anna (2010) Open Source Survey & GIS Manual. Documentation. OxfordArchaeology North. (Unpublished): http://library.thehumanjourney.net/367/
Robinson, Christina and Campbell, Dana and Hodgkinson, Anna (2010) Archaeological maps fromQGIS and Inkscape: A brief guide. Documentation. Oxford Archaeology North. (Unpublished):http://library.thehumanjourney.net/366/
Hodgkinson, Anna (2011) Using the Helmert (twopoint) transformation in Quantum GIS.Documentation. Oxford Archaeological Unit Ltd.. (Unpublished):http://library.thehumanjourney.net/462/
Software sources and downloads:Qqis: http://QGIS.org/GRASS GIS: http://grass.fbk.eu/pgAdmin: http://www.pgadmin.org/Inkscape: http://inkscape.org/
IntroductionThis document is just a collection of a few handy hints that we have made whilst working withQGIS, which we believe are helpful and useful. This is by no means a full and detailed manual onhow to use QGIS, but how to use some of the functions within QGIS. This document will hopefullybe updated with new hints on a regular basis to keep you informed of our progress, but also theprogress of QGIS as well.
2

Connecting to A Microsoft Access database in QGIS:In order to establish a connection between QGIS and an access database the first thing thatneeds to be done is to go to the control panel/administrative tools/data sources (ODBC). Click onthe user DSN tab and then ‘add’ and scroll down to Microsoft Access Driver (*mdb) and click‘finish’.
Give the connection a name then choose ‘select’ to browse to the location of the database, thenclick ‘ok’ to exit the dialogue and again to close the dsn window.
3

In QGIS go to “add vector layer” and select the “database” option. Ensure the database ‘type’ boxsays ‘ODBC’ and click ‘new’. In the name box type a name for connection. The host is “localhost”.The database name is the name of the dsn you created in step 4.
All other boxes should be blank but you can tick ‘save password’ box. Test the connection andmake a note of any errors. When successful, click ‘ok’ to return to the ‘add vector layer’ dialogue.
Click ‘open’ to open this connection, and if asked for password, click ‘ ok’. Choose your layer (tablefrom database), bearing in mind it may not have any geometry.
Select a shapefile and right click and select ‘properties’. In the ‘properties’ box select the ‘joins’ tab,and click the ‘+’ symbol. This will produce an ‘add vector join’ box. In the ‘join layer’ tab select thedatabase which has just been added to the project. In ‘join field’ select the common field betweenthe database and the shapefile. For the ‘target field’ again select the common field between theshapefile and the database.
4

Make sure the cache join layer in virtual memory is checked, but not the create attribute index onjoin field then select ‘ok’. This then should have attached the appropriate data from the database tothe shapefile and search as required.
One can also add a CSV/DBF file as a vector layer and join tables with other shapefiles throughthe joins tab in the properties section.
5

Actions
This allows links to be made to PDFs and JPEGs so that images can be viewed that relate tospecific features within QGIS. To prepare to use the action function it is wise to make sure all thesoftware for viewing the images is located in the same place on the hard drive of all computers thatare going to be used to view the project.
The action can be attached to any type of feature (polygon, line or point), but in the attribute tableof the shapefile that the action is required, an extra column is needed. This extra column willcontain the file location of the image that is required for that feature.
To create the action select the properties of the layer that is required and select the actions tab.
In the name box give the action a name and in the action box the location of the software that isgoing to be used needs to be added and needs double quotation marks around e.g. "C:/ProgramFiles/Adobe/Reader 10.0/Reader/AcroRd32.exe". In the same action box a field needs to beinserted and this is done by selecting the field that has the file location from the drop down box,below the action box, and then click insert field. The action box should now look like this:"C:/Program Files/Adobe/Reader 10.0/Reader/AcroRd32.exe" "%Hyperlink2".
Make sure the capture output box is checked then click the 'insert action' and then hit 'apply' and'ok'. This should enable the action.
To activate the action use the information arrow to select the object and in the results there is a
6

section called actions. Click on the '+' next to the actions label, this should open up the action andthe name of the action should be next to a little image of a cog. Just left click on this icon and theimage should appear.
7

Mapinfo filesThese can be loaded into QGIS and then can be saved as shapefiles, however this sometimesdoesn’t work and only converts part of the files. There is a way round this and this is to add thegeometry column through the vector tool bar.
Add as vector layer, then try and save as shapefile. If this fails, then go to the vector menu, thengeometry tools and then export/add geometry column. Pick the MapInfo layer that is required forconversion, then browse to where the output shapefile is required and name it. Click “OK” and thenthere should be a complete shapefile with all your information from the MapInfo file.
8

Field CalculatorThe field calculator is located in the attribute table tool bar and can only be used when in “toggleediting” mode.
Field calculator
When the field calculator is opened you need to check either one of the first two boxes. To useupdate existing fields select an existing field from the drop down box and type your equation in the'field calculator expression' box.
It is only on the 'only update selected features' that a new field maybe created.
An equation to replace a group of attributes using the field calculator.
REPLACE (name of field, what is in field currently, ‘name of contents to replace’)
9

SPIT plugin
This plugin allows the up load of shapefile attribute tables, with geometries, into a postreSQLdatabase and query between the two data sets.
To do this a connection needs to be made to the postreSQL database, if this hasn't been donebefore a new database will be needed to be added. Click on new and and add the databaseinformation and test the connection.
Then select the database that has just been set up from the drop down box at the top and thenselect connect. Make sure that the SRID box has the correct co-ordinate system that is being usedfor the project and leave all the other boxes as they are.
10
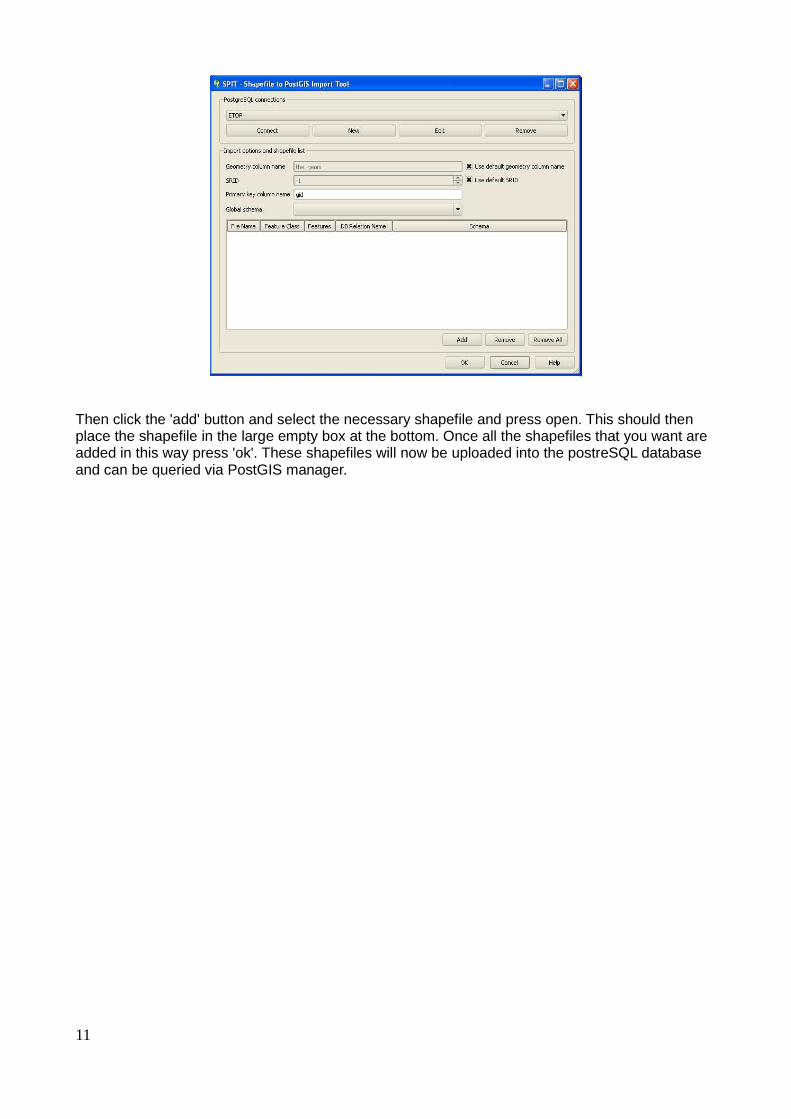
Then click the 'add' button and select the necessary shapefile and press open. This should thenplace the shapefile in the large empty box at the bottom. Once all the shapefiles that you want areadded in this way press 'ok'. These shapefiles will now be uploaded into the postreSQL databaseand can be queried via PostGIS manager.
11

Adding a view from pgAdmin IIITo add a view that has been created in pgAdmin III select the 'add postGIS table(s)' and connect toyour pgAdmin III database. If the database is already connected to the project then just select theconnect button. If you need to add the connection select new and add your details of yourdatabase and test the connection (this is just like the connection for the SPIT plugin).
Once you have connected to postGIS tables in pgAdmin you should be able to see a list of all theviews which have been created within pgAdmin. Pressing shift you can select multiply views andthen select 'select' and these will be added to your current project.
Add postGIS table(s)
Views created in pgAdmin III