module successful presentation skills - the ritz-carlton · | 61 | module successful presentation...
TRANSCRIPT

M O D U L E Successful Presentation Skills

| 61 |
M O D U L E S u c c e s s f u l P r e s e n t a t i o n S k i l l s
M O D U L E G U I D E
We have developed a Module Guide to assist you with delivering Successful Presentation Skills. It is intended as a guide only and can be adapted to best meet the needs of the students. The overarching objective of the presentation is to INSPIRE the students to do their best!
The Module Guide begins with the Enduring Understanding and Learning Outcomes. The Guide contains a Module Overview, which may be used to plan the delivery of the segments. The segments, which are mini-lessons, allow the classroom teacher and facilitator(s) to collaborate for effective grouping of segments into a flexible time frame. The short segments also enable choice among facilitators, as they may select which topic/segment they would like to cover. Some of the longer or more complex segments include a specific Enhancement(s) or Follow-up Idea(s). These optional ideas may be utilized by either the facilitator(s) or by a classroom teacher, who may be interested in extending the module.
Resources to Enrich and Extend the module are provided in the Succeed Through Service Resource Guide to help facilitators and the classroom teacher further expand the segments in the module. These resources are aligned with the Universal Design for Learning (UDL). The Succeed Through Service Resource Guide also provides additional information including links to the Common Core Standards.
Remember to incorporate FUN into the module. Consider using music, additional visuals, personal stories and examples, and/or some of the additional resources to bring the presentation alive!
endurinG underStandinGPresentation skills impact one’s ability to successfully communicate with others.
learninG outCoMeSAt the end of this module, students will be able to do the following:
• Avoid committing the top five mistakes made by presenters.
• Overcome presentation anxiety.
• Apply the six presentation delivery basics.

S u c c e e d T h r o u g h S e r v i c e | T O O L K I T
| 62 |
tiMe: 1 hour+ (can be adapted to meet the class schedule). note: There is enough content in Module Guide to build a two-hour session, if needed).
loCation: On-property or in the classroom
eQuiPMent: Laptop, LCD projector, document, camera/overhead, and screen.
MaterialS: A summary of the session (example attached), one copy per student; sticky notes; laptop;LCD projector; document camera/overhead projector; chart paper and markers.
FaCilitatorS: Succeed Through Service Team, made up of employees from a selection of departments. The suggested Script(s) and Segues with their italicized words are provided as a guide.
overvieW: This module is designed to actively involve the attendees in developing the knowledge, skills and abilities crucial to achieving the Enduring Understanding and demonstrating the outcomes listed to the left.
M o d u l e o v e r v i e W
This Module is designed to introduce the students to Successful Presentation Skills by educating the students on how to overcome anxiety and practicing the delivery basics (eye contact, facial expressions, gestures, movement, appearance and voice). Part of the series of Succeed Through Service presentations, Successful Presentation Skills consists of 11 segments captured under four categories.
Welcome and Purpose1. Welcome to Successful Presentation
Skills2. Overview of today’s session
Presentation Pitfalls3. Top five presenter’s mistakes4. Overcoming anxiety
Presentation Pointers5. Delivery basics6. Eye contact and facial expression7. Movement and gestures8. Appearance 9. Voice
Recap and Post-Test/Application10. Recap11. Practice/post-test

| 63 |
M O D U L E 3 S u c c e s s f u l P r e s e n t a t i o n S k i l l s |
W e l C o M e a n d P u r P o S e
SeGMent 1: Welcome to Successful Presentation Skills
tiMe: 5 minutes
SeGMent 2: overview of Today’s Session
tiMe: 2 minutes
aCtivitieS:
1. Teacher introduces the facilitators to the class.2. Brief introductions by the facilitators (names, positions and brief
career paths), but only if this is the first time they have met the class. Depending on the size of the class and space available, the icebreaker can be done in one group or smaller groups.
icebreaker Script:“I would like to find out something about each of you. Take a minute and write down one thing about yourself that you think is interesting and put your name at the top.”
Collect the papers so the Facilitators can review later.
SEGUE: Thank you, I’m looking forward to reading what you’ve written about yourself. Let’s find out about what we’ll be covering today.
aCtivity/SCriPt: During the next hour, the Successful Presentation Skills module will provide you with the necessary knowledge and skills to help you understand how to:1. Avoid committing the top five mistakes made by presenters.2. Overcome presentation anxiety. 3. Apply the six presentation delivery basics.
SEGUE: Let’s start by discussing the top five mistakes made.
Topic/Timing Scripting/Direction Resources

S u c c e e d T h r o u g h S e r v i c e | T O O L K I T
| 64 |
P r e S e n tat i o n P i t Fa l l S
SeGMent 3: top Five Presenter’s Mistakes
tiMe: 7 minutes
aCtivity/SCriPt: Pre-assess through Turn and Talk to the person next to you): What would you say are the most common mistakes people make when giving presentations? (Solicit responses and recognize participants. Write the answers on the black/whiteboard or flip chart).
1. Great job everyone! Here are the top five common mistakes: • No presentation goals or objectives • Poor delivery techniques • Poor first impression • No preparation • Lack of enthusiasm
2. Some other common mistakes could be: • No audience involvement • Lack of facial expressions • Sticky floor syndrome (staying stuck to one spot)
By being aware of the above, we can ensure that we don’t fall into the trap of those common pitfalls or mistakes.
ENHANCEMENTLocate a video or a lecture that exemplifies these mistakes and have students critique the presenter, noting all of the mistakes that contribute to the poor presentation.
SEGUE: Do you feel your legs will never stop shaking while standing up to speak? If you are thinking yes, then you have to manage your anxiety to become effective presenters. Let’s review some techniques on how to overcome anxiety.
Topic/Timing Scripting/Direction Resources

| 65 |
M O D U L E 3 S u c c e s s f u l P r e s e n t a t i o n S k i l l s |
SeGMent 4: overcoming anxiety
tiMe: 8 minutes
aCtivity/SCriPt: Everyone, even experienced presenters, have some anxiety when presenting in front of a group of people. This is perfectly normal. The best way to deal with this anxiety is to first acknowledge that this fear is perfectly normal and that you are not alone.
How do you think you can overcome this fear or anxiety? (Solicit responses and recognize participants. Write the answers on the black/whiteboard or flip chart).
First and foremost you need to make sure you properly and thoroughly prepare yourself before you speak. Remember, Fail to Plan = Plan to Fail!
Factoid: Did You Know?• The fear of presenting in public is the number one fear of most
people?
• Over 41% of people have some fear or anxiety dealing with presenting in front of groups?
• People who have this fear can experience all kinds of symptoms- sweaty palms, accelerated heart rate, memory loss and even difficulty in breathing.
• Proper preparation and rehearsal can help to reduce this fear by at least 75%.
I would like to introduce you to five steps you can take to overcome your anxiety:
1. Visual-slide:
• Step 1: Know your material – If you are not familiar with your material or are uncomfortable with it, your nervousness will increase. Practice your speech or presentation and revise it until you can present it with ease.

S u c c e e d T h r o u g h S e r v i c e | T O O L K I T
| 66 |
SeGMent 4: overcoming anxiety cont ...
• Step 2: Learn how to relax – You can ease tension by doing exercises. Sit comfortable with your back straight. Breathe in slow-ly, hold your breath for 4 to 5 seconds, and then slowly exhale. To relax your facial muscles, open your mouth and eyes wide, and then close them tightly.
• Step 3: Visualize yourself speaking – Imagine yourself walking confidently to the stage as the audience applauds. Imagine yourself speaking, your voice loud, clear and assured. When you visualize yourself as successful, you will be successful.
• Step 4: Concentrate on your message, not yourself – Your nervous feelings will dissipate if you focus your attention away from your anxieties and concentrate on your message and your audience, not yourself.
• Step 5: Turn nervousness into positive energy – The same nervous energy that causes stage fright can be an asset to you. Harness it, and transform it into vitality and enthusiasm.
ENHANCEMENT
1. Pair up students.
2. Give each pair a page that contains at least three short pieces (5-8 lines) of high-interest text.
3. Ask the students to practice the five steps for about five minutes.
4. Have each student in the pair stand and present to his/her partner while you circulate.
SEGUE: Now that we know how to control anxiety, let’s review some effective delivery basics.

| 67 |
M O D U L E 3 S u c c e s s f u l P r e s e n t a t i o n S k i l l s |
P r e S e n tat i o n P o i n t e r S
Topic/Timing Scripting/Direction Resources
SeGMent 5: delivery basics
tiMe: 10 minutes
aCtivity/SCriPt: When you present, you communicate verbally and nonverbally. Like any type of communication, the presentation requires a message, a message sender and a message receiver. Your role in the communication may change: sometimes you will be the sender, sometimes you will be the receiver and sometimes you will be both.
1. brainstorm: In what ways do we communicate nonverbally? (Solicit responses and recognize participants. Write the answers on the black/ whiteboard or flip chart).
2. Visual-slide: • Eye Contact • Facial Expressions • Movement • Gestures • Appearance • Voice
3. Practice: • Divide the participants into 6 small teams and assign one of these
six delivery basics for each group. • In your group, you have 5 minutes to: - Define the delivery basic - Tell how to make it effective. • Ask one student from each team to share the teams’ findings.

S u c c e e d T h r o u g h S e r v i c e | T O O L K I T
| 68 |
SeGMent 6: Eye Contact and Facial expression
tiMe: 5 minutes
aCtivity/SCriPt: People speak with their eyes as well as their words. Eye contact and facial expression are an emotional handshake. One of the best ways to make your audience feel a part of the presentation is through effective eye contact. By doing that, you will get their undivided attention and keep them interested.
1. Practice: • Ask the students to establish and maintain eye contact with each
other for few seconds. • Ask: How did you feel? 2. Visual-slide:
Be careful not to hold eye contact too long or the audience member may feel intimidated by your stare.
In addition, be careful not to have “roller coaster eyes,” which are darting glances to audience members all around the room.
Use eye contact to check understanding.
When it comes to facial expression, smile and let your face reflect what you are saying. Don’t force phony expressions. Relax your facial muscles through laughter and smiling!
ENHANCEMENT
1. Pair up students.2. Give each pair a page that contains at least three short pieces (5-8 lines) of high-interest text. If you used the
Enhancement from Segment 4, ask students to apply the new learnings to the same piece of text.3. Ask the students to practice the five steps for about five minutes.4. Have each student in the pair stand and present to his/her partner while
you circulate.

| 69 |
M O D U L E 3 S u c c e s s f u l P r e s e n t a t i o n S k i l l s |
SeGMent 6: Eye Contact and Facial expression cont ...
SeGMent 7: Movement and Gestures
tiMe: 5 minutes
2. Practice: Ask the students to practice facial expressions while chatting with each other.
SEGUE: Now that we know the importance of eye contact and facial expression, let’s review movement.
aCtivity/SCriPt:
1. Brainstorm/Visual-slide: What are some movements to avoid as a presenter? (Solicit responses and recognize participants. Write the answers on the black/ white board or flip chart).
• Rocking/swaying • Podium freeze • Nervous movement • Hands in pockets2. Visual-slide: A speaker should establish three positions in the room to
which he/she travels throughout the presentation. • Home position: This position is where you spend most of your time
during the presentation. • Across from the home position, on the same side of the room: This
position is designed to create a change of pace and increase inter-est in your presentation.
• The third position is designed for special points in your presentation, and it should be used sparingly: This position is the only one that crosses the imaginary line between you and the audience.
3. Visual-slide: What about gestures? • Make gestures purposeful and natural • Use gestures to stress, demonstrate, or complement what you say • Use expansive gestures above the waist • Keep your elbows away from your body
Ask the students to practice the above techniques while telling the plot of a favorite movie or book.
S u c c e e d T h r o u g h S e r v i c e | T O O L K I T
| 70 |
SeGMent 7: Movement and Gestures cont ...
SeGMent 8: appearance
tiMe: 2 minutes
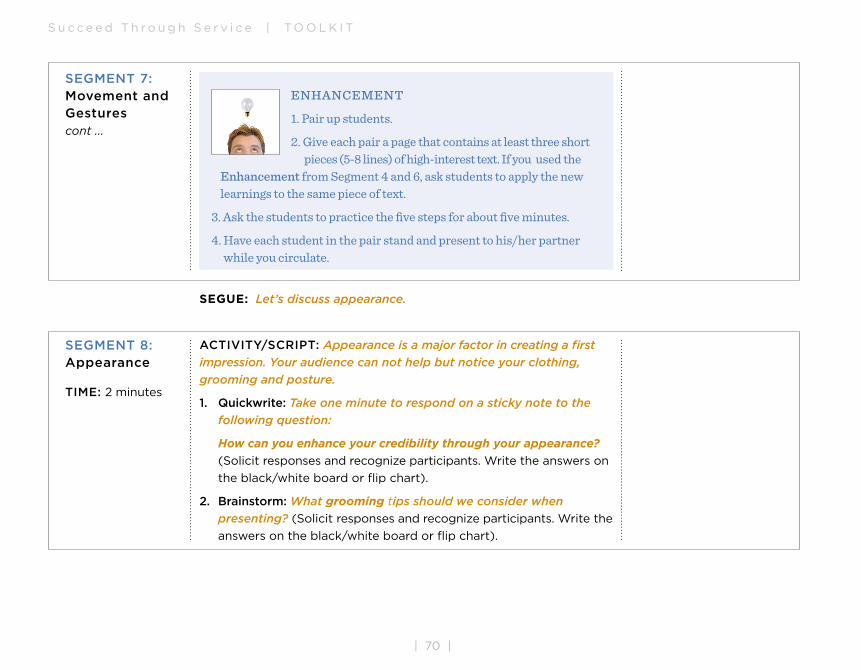
ENHANCEMENT
1. Pair up students.
2. Give each pair a page that contains at least three short pieces (5-8 lines) of high-interest text. If you used the
Enhancement from Segment 4 and 6, ask students to apply the new learnings to the same piece of text.
3. Ask the students to practice the five steps for about five minutes.
4. Have each student in the pair stand and present to his/her partner while you circulate.
SEGUE: Let’s discuss appearance.
aCtivity/SCriPt: Appearance is a major factor in creating a first impression. Your audience can not help but notice your clothing, grooming and posture.
1. Quickwrite: Take one minute to respond on a sticky note to the following question:
How can you enhance your credibility through your appearance? (Solicit responses and recognize participants. Write the answers on the black/white board or flip chart).
2. brainstorm: What grooming tips should we consider when presenting? (Solicit responses and recognize participants. Write the answers on the black/white board or flip chart).

| 71 |
M O D U L E 3 S u c c e s s f u l P r e s e n t a t i o n S k i l l s |
SeGMent 8: appearance cont ...
SeGMent 9: voice
tiMe: 4 minutes
4. Visual-slide:
• Your dress should communicate a professional image • Posture: stand up straight, but not stiff • Attitude: The only attitude that is appropriate for a presentation is an
upbeat positive one! No audience wants to listen to an unenthusiastic, disinterested speaker.
SEGUE: The last communication delivery basic is voice.
aCtivity/SCriPt: What are some things to consider to effectively use your voice? (Solicit responses and recognize participants. Write the answers on the black/white board or flip chart).
Visual-slide:
• Projection: Make sure you speak loud enough for the audience to hear you
• Pitch: Don’t speak in a monotone voice • Pace: Alternate the pace of your voice • Slow down for important points • Diction: Speak more clearly than normal • Get rid of the “Ums” and “Uhs”

S u c c e e d T h r o u g h S e r v i c e | T O O L K I T
| 72 |
SeGMent 9: voice cont ...
SeGMent 10: reCaP and rehearSe
tiMe: 7 minutes
ENHANCEMENT
1. Pair up students.2. Give each pair a page that contains at least three short
pieces (5-8 lines) of high-interest text. If you used the Enhancement from Segments 4, 6 and 7, ask students to apply the new
learnings to the same piece of text.3. Ask the students to practice the five steps for about five minutes.4. Have each student in the pair stand and present to his/her partner.
SEGUE: Let’s recap what we’ve covered!
aCtivity/SCriPt: Let’s go over the steps we covered today to ensure you will be able to make a successful presentation. Provide the recap in the form of a handout. Sample is attached.
Visual-slide:
r e C a P a n d P o S t- a S S e S S M e n t/a P P l i C at i o n
Topic/Timing Scripting/Direction Resources
the 5 StePS to overCoMe your anxiety 1. Know your materials 2. Learn how to relax 3. Visualize yourself speaking 4. Concentrate on your message 5. Turn nervousness into positive
energy
the 6 delivery baSiCS: 1. Eye Contact 2. Facial Expressions 3. Movement 4. Gestures 5. Appearance 6. Voice

| 73 |
SeGMent 10: reCaP and rehearSe cont ...
SeGMent 11: PraCtiCe PoSt- aSSeSSMent
tiMe: 10 minutes
Give students the opportunity to apply the Steps and basics as they rehearse independently and/or with a partner. See enhancement below for a source of content for their presentations.
ENHANCEMENT
1. Pair up students.
2. Give each pair a page that contains at least three short pieces (5-8 lines) of high-interest text. If you used the
Enhancement from Segments 4, 6 and 7, ask students to apply the new learnings to the same piece of text.
3. Ask the students to practice the five steps for about five minutes.
4. Have each student in the pair stand and present to his/her partner while you circulate.
SEGUE: Let’s now practice what we’ve learned today!
aCtivity/SCriPt: Remember:
I hear and I forget, I see and I remember, I do and I understand!
So it is time to practice what we learned today through your presentations! Are you ready?
Option 1: Volunteers Present Ask for volunteers to present (using the above techniques), applying the three learning outcomes from today’s session. OR
Option 2: DLIQ Survey (immediately follows Segment 11) Provide recognition and feedback. Fond farewell.
M O D U L E 3 S u c c e s s f u l P r e s e n t a t i o n S k i l l s |

S u c c e e d T h r o u g h S e r v i c e | T O O L K I T
| 74 |
the Five StePS to overCoMe your anxiety
1. Know your materials
2. Learn how to relax
3. Visualize yourself speaking
4. Concentrate on your message
5. Turn nervousness into positive energy
the Six delivery baSiCS
1. Eye contact
2. Facial expressions
3. Movement
4. Gestures
5. Appearance
6. Voice
M O D U L E H o w t o D e l i v e r a S u c c e s s f u l P r e s e n t a t i o n
H A N D O U T

| 75 |
M O D U L E 3 S u c c e s s f u l P r e s e n t a t i o n S k i l l s |
M O D U L E S u c c e ss f u l P re se nt at i o n S k i l l s SURVEY
Did? What did you do during this presentation?
Learn? What did you learn during this presentation?
Interesting? What did you find interesting during this presentation?
Questions? What questions do you have about something in this presentation?

THE RITz-CARLTON HOTEL COMPANY, LLC | 4445 Willard Avenue | Suite 800 | Chevy Chase, MD 20815 | www.ritzcarlton.com