modelling production
TRANSCRIPT

Firstly when I started my model, I change the pre-sets to the one I’m used to and then after I did this I started the initially designing of my model following my design pack.
When I first started I decided to start with the bottom layer so I had a mind set on the size of the model and how large everything would be within it. Once creating the floor piece I then started
adding basic shapes to represent the basic idea of how I want the buildings to be placed and how I want them shaped.
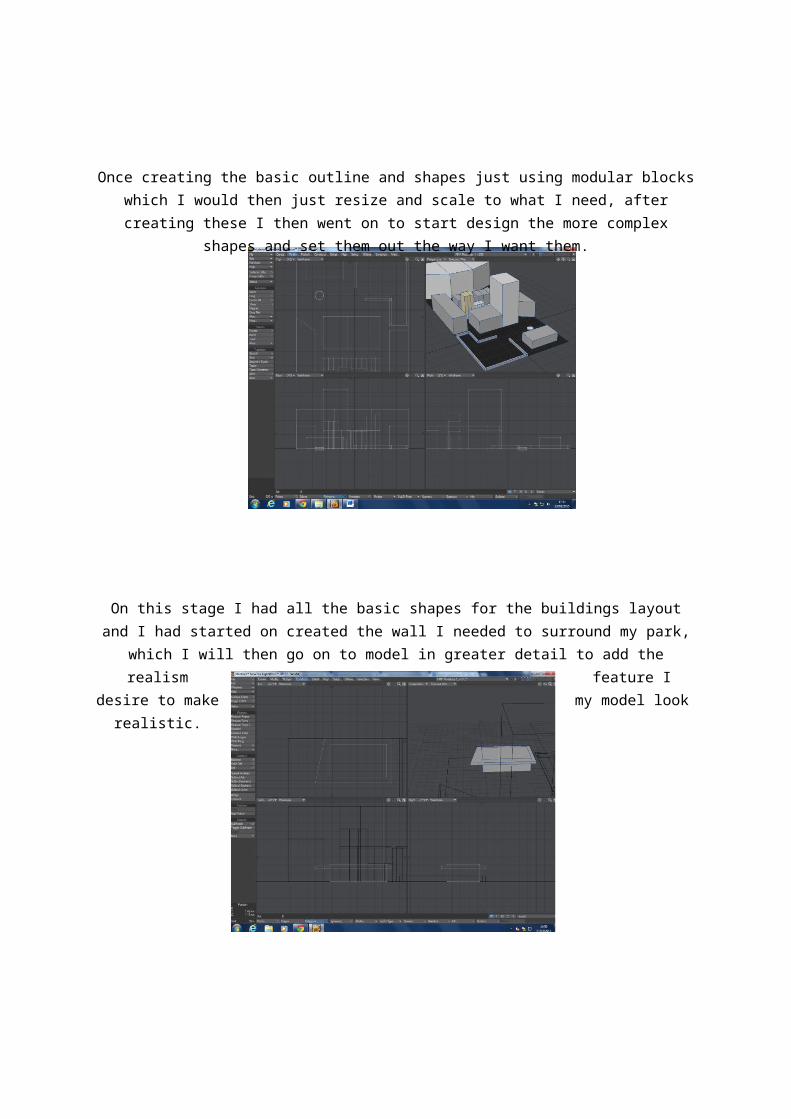
Once creating the basic outline and shapes just using modular blocks which I would then just resize and scale to what I need, after creating these I then went on to start design the more complex
shapes and set them out the way I want them.
On this stage I had all the basic shapes for the buildings layout and I had started on created the wall I needed to surround my park, which I will then go on to model in greater detail to add the realism
feature I desire to make my model look realistic.
On this one I started to add more detail to that fast food parlour to make It look more realistic and attractive when looking at it. I chose this design because I like the look of how the roof over hangs the outside dining area.

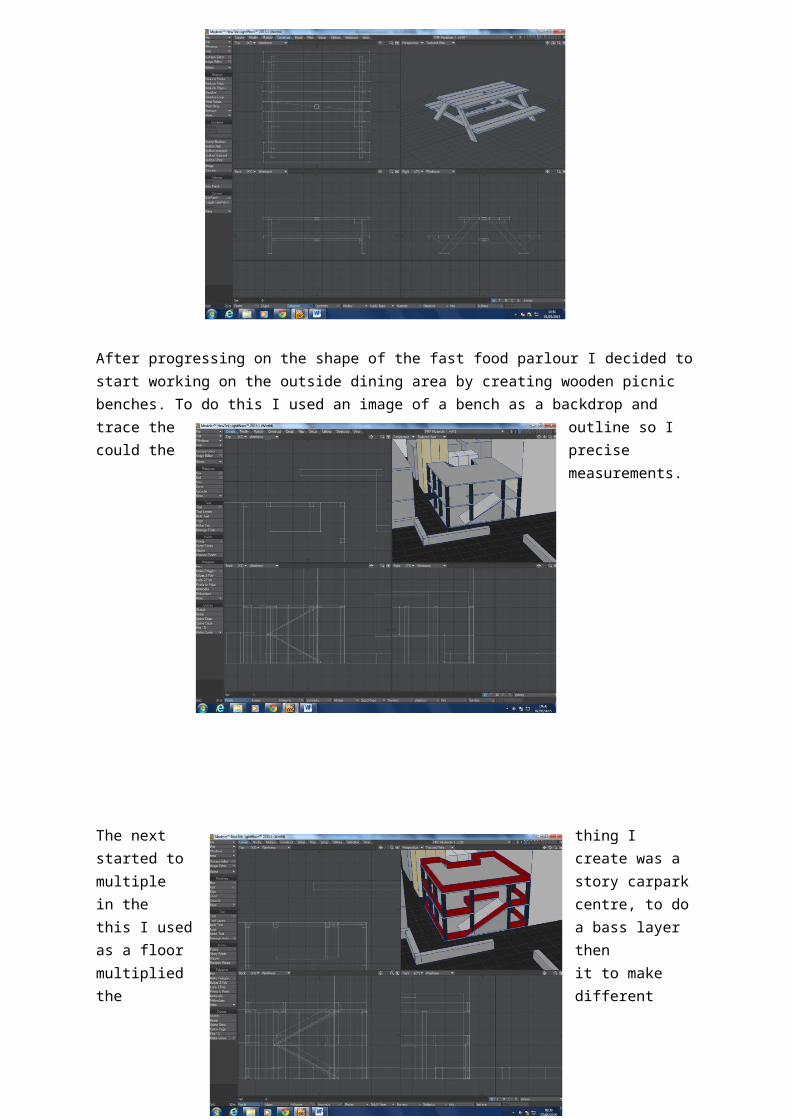
After progressing on the shape of the fast food parlour I decided to start working on the outside dining area by creating wooden picnic benches. To do this I used an image of a bench as a backdrop and trace the outline so I could the precise measurements.
The next thing I started to create was a multiple story carpark in the centre, to do this I used a bass layer as a floor then multiplied it to make the different floors then using the box tool I created the pillars. To create the ramps I used a stencil to mark out the shape and then inserted my ramp which I created using the box tool again and just applying different tools to it.
Then once completing all the main structures for the car park, I then added walls to make it look more like a finished product; Once again I did this using the box tool and then just resizing it to the size that I required.
Once completing the car park the next model I started to work on, was my burger shop based in the corner of my map, to complete this firstly I made a simply box using the create tab and then once my main structures was up I was then able to build it up using the text tool to complete the name of the shop, followed by duplicate a bench I had made earlier in the production stage. Once I had all the items in the suitable place I was then able to texture them by adding surfaces from the pre-set panel and UV maps where required.
The next thing I wanted to complete was the park layout and the basketball courts within the park, to do this, the first thing I did was layout the floor plan my adding simple rectangles to show where the basketball courts would be placed. Once completing this I then did the walkway and the grass within it by adding planes of textures surfaces to mark out the floor, to get the shape I did to make it look like this was by using the pen tool and drew where I want the path to be placed. To complete the basketball courts I firstly placed a UV map on the rectangle then found a suitable image that could represent the court. To complete the basketball hoops I used simple shapes and then using

multishift and the bevel tool I extended and curved this shapes to come up with the correct shape for a hoop.
To finish off the park the last model I created within it was a small play area in the corner, to create this I used the create tab again to come up with a basic structure and then after this I started to move, bend and resize pieces to come up with the slated walkways, pointed roofs and the steel slide. Once again I created and used surfaces chosen from the pre-set panel to create a wood effect for the structures and a shiny metal effect on the slide.
The next set of models I set on completing were the two apartment blocks placed on each side of the map, firstly I started out by using a rectangle and then bevelling it out to make the arch style brink in the middle. Secondly I started to do the windows, at first I found this to be a bit tricky as the drill tool wouldn’t create the polygons correctly so after messing around with that I found it easier to just take the knife tool and cut out the polygons individually. To create the window view I used UV maps found in the map tab within modeller, by doing this I took an image of google and placed it within my model to make it look more realistic.

After Completing he main apartments blocks, the next model I was going to create was the bank located near the centre next to the carpark, this wasn’t a very hard model to complete as it only took a few bevel movements to reshape the rectangle to the shape I wanted to create. Once I had completed the main shape of it, all I had to then do was texture the surfaces with materials I found within the pre-set panel and then the building was finished, Along with adding the text in finally.
After completing the bank structure, I decided that I was going to try and complete every building to a suitable level so that half of my map was incomplete, so after deciding this, I then moved on to creating a supermarket based opposite the bank, this wasn’t a very hard task, it just got a little bit fussy when the drill tool wouldn’t create what I wanted it to so I had to go back to using the knife tool to cut out shapes.

For the next building I was going to complete I took ideas from a building located in Manchester called the Hilton, I choose this because I like the design of the other hanging front. It wasn’t too difficult to create this as it was very similar to the other and only involved a few steps, which I have done many times before so I was getting used to the tools and what they do now.
For my next building design I decided that I would go for a modern design with a container stacked building design, to do this design I firstly started off with just a square base and then to create the stacking effect, I firstly created a rectangle, then just copied and pasted them to make the stacking design.

This was the last set of apartments I created, I just used the same techniques and tools as I did with the other set of apartments , by simply multi-shifting, bevelling and reshaping it til I get the correct shape.