microsoft outlook for mac 2011 - pearsoncmg.com of the microsoft office for mac 2011 suite of...
TRANSCRIPT


Microsoft® Outlook® for Mac 2011Step by Step
Maria Langer

Copyright © 2011 Maria Langer.
Complying with all applicable copyright laws is the responsibility of the user. All rights reserved. Without limiting the rights under copyright, no part of this document may be reproduced, stored in or introduced into a retrieval system, or transmitted in any form or by any means (electronic, mechanical, photocopying, recording, or otherwise), or for any purpose, without express written permission of Microsoft Press, Inc.
Printed and bound in the United States of America.
1 2 3 4 5 6 7 8 9 M 6 5 4 3 2 1
Microsoft Press titles may be purchased for educational, business or sales promotional use. Online editions are also available for most titles (http://my.safaribooksonline.com). For more information, contact our corporate/institutional sales department: (800) 998-9938 or send comments to [email protected].
Microsoft, Microsoft Press, ActiveX, Excel, FrontPage, Internet Explorer, PowerPoint, SharePoint, Webdings, Windows, and Windows 7 are either registered trademarks or trademarks of Microsoft Corporation in the United States and/or other countries. Other product and company names mentioned herein may be the trademarks of their respective owners.
Unless otherwise noted, the example companies, organizations, products, domain names, email addresses, logos, people, places, and events depicted herein are fictitious, and no association with any real company, organization, prod-uct, domain name, email address, logo, person, place, or event is intended or should be inferred.
This book expresses the author’s views and opinions. The information contained in this book is provided without any express, statutory, or implied warranties. Neither the author, Microsoft Corporation, nor their respective resellers or distributors, will be held liable for any damages caused or alleged to be caused either directly or indirectly by such information.
Acquisitions and Development Editor: Kenyon BrownProduction Editor: Kristen BorgProduction Services: Online Training Solutions, Inc.Technical Reviewer: Andy Ruff, Richard Kmieciak, and Albert AndersenIndexing: Potomac Indexing, LLCCover: Karen MontgomeryIllustrator: Robert Romano
978-0-735-65189-0

To Chuck Joiner, with thanks.


v
What do you think of this book? We want to hear from you! Microsoft is interested in hearing your feedback so we can continually improve our books and learning resources for you. To participate in a brief online survey, please visit:
microsoft.com/learning/booksurvey
ContentsIntroducing Microsoft Outlook for Mac 2011 . . . . . . . . . . . . . . . . . . . . . . . . . . . . . . . . . . . xi
New Features . . . . . . . . . . . . . . . . . . . . . . . . . . . . . . . . . . . . . . . . . . . . . . . . . . . . . . . . . . . . xiiLet’s Get Started! . . . . . . . . . . . . . . . . . . . . . . . . . . . . . . . . . . . . . . . . . . . . . . . . . . . . . . . . . xii
Modifying the Display of the Ribbon . . . . . . . . . . . . . . . . . . . . . . . . . . . . . . . . . . . . . . . . . xiiiDynamic Ribbon Elements . . . . . . . . . . . . . . . . . . . . . . . . . . . . . . . . . . . . . . . . . . . . . . . . .xiiiChanging the Width of the Ribbon . . . . . . . . . . . . . . . . . . . . . . . . . . . . . . . . . . . . . . . . .xivAdapting Exercise Steps . . . . . . . . . . . . . . . . . . . . . . . . . . . . . . . . . . . . . . . . . . . . . . . . . . .xiv
Features and Conventions of This Book . . . . . . . . . . . . . . . . . . . . . . . . . . . . . . . . . . . . . . . xviiUsing the Practice Files . . . . . . . . . . . . . . . . . . . . . . . . . . . . . . . . . . . . . . . . . . . . . . . . . . . . . xixGetting Support and Giving Feedback . . . . . . . . . . . . . . . . . . . . . . . . . . . . . . . . . . . . . . . xxiiiHow to Access Your Online Edition Hosted by Safari . . . . . . . . . . . . . . . . . . . . . . . . . . . . xxvAcknowledgments . . . . . . . . . . . . . . . . . . . . . . . . . . . . . . . . . . . . . . . . . . . . . . . . . . . . . . . . xxix
Part 1 Start Here 1 Getting Started Using Outlook 3
Setting Up Email Accounts in Outlook. . . . . . . . . . . . . . . . . . . . . . . . . . . . . . . . . . . . . . . . 4Adding an Exchange Account . . . . . . . . . . . . . . . . . . . . . . . . . . . . . . . . . . . . . . . . . . . . . . . 8Adding an Email Account. . . . . . . . . . . . . . . . . . . . . . . . . . . . . . . . . . . . . . . . . . . . . . . . . . 11Importing Entourage Data into Outlook . . . . . . . . . . . . . . . . . . . . . . . . . . . . . . . . . . . . . 14Troubleshooting Connection Problems . . . . . . . . . . . . . . . . . . . . . . . . . . . . . . . . . . . . . . 17
Setting Up Exchange Accounts . . . . . . . . . . . . . . . . . . . . . . . . . . . . . . . . . . . . . . . . 17Setting Up Other Email Accounts . . . . . . . . . . . . . . . . . . . . . . . . . . . . . . . . . . . . . . 18
Setting Additional Email Account Options . . . . . . . . . . . . . . . . . . . . . . . . . . . . . . . . . . . 18Key Points . . . . . . . . . . . . . . . . . . . . . . . . . . . . . . . . . . . . . . . . . . . . . . . . . . . . . . . . . . . . . . . 19

vi Contents
2 Introducing the Outlook Interface 21Exploring the Outlook Interface . . . . . . . . . . . . . . . . . . . . . . . . . . . . . . . . . . . . . . . . . . . . 22Working with the Ribbon . . . . . . . . . . . . . . . . . . . . . . . . . . . . . . . . . . . . . . . . . . . . . . . . . . 25Working in Mail View . . . . . . . . . . . . . . . . . . . . . . . . . . . . . . . . . . . . . . . . . . . . . . . . . . . . . 28Working in Calendar View . . . . . . . . . . . . . . . . . . . . . . . . . . . . . . . . . . . . . . . . . . . . . . . . . 36Working in Contacts View . . . . . . . . . . . . . . . . . . . . . . . . . . . . . . . . . . . . . . . . . . . . . . . . . 41Working in Tasks View . . . . . . . . . . . . . . . . . . . . . . . . . . . . . . . . . . . . . . . . . . . . . . . . . . . . 46Working in Notes View. . . . . . . . . . . . . . . . . . . . . . . . . . . . . . . . . . . . . . . . . . . . . . . . . . . . 50Key Points . . . . . . . . . . . . . . . . . . . . . . . . . . . . . . . . . . . . . . . . . . . . . . . . . . . . . . . . . . . . . . . 53
Part 2 Mail 3 Composing and Sending Email Messages 57
Creating Messages . . . . . . . . . . . . . . . . . . . . . . . . . . . . . . . . . . . . . . . . . . . . . . . . . . . . . . . 58Formatting Message Text. . . . . . . . . . . . . . . . . . . . . . . . . . . . . . . . . . . . . . . . . . . . . . . . . . 63Inserting Media in Messages . . . . . . . . . . . . . . . . . . . . . . . . . . . . . . . . . . . . . . . . . . . . . . . 71Attaching Files to Messages . . . . . . . . . . . . . . . . . . . . . . . . . . . . . . . . . . . . . . . . . . . . . . . 74Changing Message Settings . . . . . . . . . . . . . . . . . . . . . . . . . . . . . . . . . . . . . . . . . . . . . . . 76Sending Messages. . . . . . . . . . . . . . . . . . . . . . . . . . . . . . . . . . . . . . . . . . . . . . . . . . . . . . . . 79Key Points . . . . . . . . . . . . . . . . . . . . . . . . . . . . . . . . . . . . . . . . . . . . . . . . . . . . . . . . . . . . . . . 81
4 Reading and Responding to Email Messages 83Retrieving Messages . . . . . . . . . . . . . . . . . . . . . . . . . . . . . . . . . . . . . . . . . . . . . . . . . . . . . .84Reading Messages. . . . . . . . . . . . . . . . . . . . . . . . . . . . . . . . . . . . . . . . . . . . . . . . . . . . . . . . 87Working with Email Attachments . . . . . . . . . . . . . . . . . . . . . . . . . . . . . . . . . . . . . . . . . . . 93Viewing Message Sender Information . . . . . . . . . . . . . . . . . . . . . . . . . . . . . . . . . . . . . . . 96Replying to Messages . . . . . . . . . . . . . . . . . . . . . . . . . . . . . . . . . . . . . . . . . . . . . . . . . . . . . 98Forwarding Messages . . . . . . . . . . . . . . . . . . . . . . . . . . . . . . . . . . . . . . . . . . . . . . . . . . . . 101Printing Messages . . . . . . . . . . . . . . . . . . . . . . . . . . . . . . . . . . . . . . . . . . . . . . . . . . . . . . .103Automatically Replying to Messages . . . . . . . . . . . . . . . . . . . . . . . . . . . . . . . . . . . . . . .106Scheduling Meetings from Messages . . . . . . . . . . . . . . . . . . . . . . . . . . . . . . . . . . . . . .109Key Points . . . . . . . . . . . . . . . . . . . . . . . . . . . . . . . . . . . . . . . . . . . . . . . . . . . . . . . . . . . . . .111
5 Organizing Your Inbox 113Sorting and Grouping Messages . . . . . . . . . . . . . . . . . . . . . . . . . . . . . . . . . . . . . . . . . . 114Assigning Categories to Messages . . . . . . . . . . . . . . . . . . . . . . . . . . . . . . . . . . . . . . . . .120

Contents vii
Organizing with Folders . . . . . . . . . . . . . . . . . . . . . . . . . . . . . . . . . . . . . . . . . . . . . . . . . .122Searching for Messages with Filters . . . . . . . . . . . . . . . . . . . . . . . . . . . . . . . . . . . . . . . .128Using Smart Folders . . . . . . . . . . . . . . . . . . . . . . . . . . . . . . . . . . . . . . . . . . . . . . . . . . . . .133Deleting Messages and Folders . . . . . . . . . . . . . . . . . . . . . . . . . . . . . . . . . . . . . . . . . . .135Key Points . . . . . . . . . . . . . . . . . . . . . . . . . . . . . . . . . . . . . . . . . . . . . . . . . . . . . . . . . . . . . .137
6 Fine-Tuning Email Settings 139Setting Reading and Composing Options. . . . . . . . . . . . . . . . . . . . . . . . . . . . . . . . . . .140Defining Default Font Settings . . . . . . . . . . . . . . . . . . . . . . . . . . . . . . . . . . . . . . . . . . . . 145Working with Signatures . . . . . . . . . . . . . . . . . . . . . . . . . . . . . . . . . . . . . . . . . . . . . . . . . 147Scheduling Actions . . . . . . . . . . . . . . . . . . . . . . . . . . . . . . . . . . . . . . . . . . . . . . . . . . . . . .153Using Rules to Process Messages . . . . . . . . . . . . . . . . . . . . . . . . . . . . . . . . . . . . . . . . . .160Managing Mailing Lists. . . . . . . . . . . . . . . . . . . . . . . . . . . . . . . . . . . . . . . . . . . . . . . . . . .167Blocking Spam . . . . . . . . . . . . . . . . . . . . . . . . . . . . . . . . . . . . . . . . . . . . . . . . . . . . . . . . . . 171Securing Your Email. . . . . . . . . . . . . . . . . . . . . . . . . . . . . . . . . . . . . . . . . . . . . . . . . . . . . . 174Exploring Advanced Account Settings. . . . . . . . . . . . . . . . . . . . . . . . . . . . . . . . . . . . . .177Key Points . . . . . . . . . . . . . . . . . . . . . . . . . . . . . . . . . . . . . . . . . . . . . . . . . . . . . . . . . . . . . .181
Part 3 Calendar 7 Scheduling Appointments and Meetings 185
Scheduling Appointments . . . . . . . . . . . . . . . . . . . . . . . . . . . . . . . . . . . . . . . . . . . . . . . .186Scheduling Meetings . . . . . . . . . . . . . . . . . . . . . . . . . . . . . . . . . . . . . . . . . . . . . . . . . . . . 191Modifying Calendar Items . . . . . . . . . . . . . . . . . . . . . . . . . . . . . . . . . . . . . . . . . . . . . . . .195Responding to Meeting Invitations . . . . . . . . . . . . . . . . . . . . . . . . . . . . . . . . . . . . . . . .201Setting Event Options . . . . . . . . . . . . . . . . . . . . . . . . . . . . . . . . . . . . . . . . . . . . . . . . . . . .204Key Points . . . . . . . . . . . . . . . . . . . . . . . . . . . . . . . . . . . . . . . . . . . . . . . . . . . . . . . . . . . . . . 210
8 Managing Your Calendar 213Setting Calendar Options. . . . . . . . . . . . . . . . . . . . . . . . . . . . . . . . . . . . . . . . . . . . . . . . . 214Working with Calendar Views . . . . . . . . . . . . . . . . . . . . . . . . . . . . . . . . . . . . . . . . . . . . . 216Working with Multiple Calendars . . . . . . . . . . . . . . . . . . . . . . . . . . . . . . . . . . . . . . . . . .219Sharing Calendar Information . . . . . . . . . . . . . . . . . . . . . . . . . . . . . . . . . . . . . . . . . . . . .224Printing Calendars . . . . . . . . . . . . . . . . . . . . . . . . . . . . . . . . . . . . . . . . . . . . . . . . . . . . . . .229Key Points . . . . . . . . . . . . . . . . . . . . . . . . . . . . . . . . . . . . . . . . . . . . . . . . . . . . . . . . . . . . . .232
viii Contents
Part 4 Contacts 9 Managing Contact Information 235
Creating Contact Records . . . . . . . . . . . . . . . . . . . . . . . . . . . . . . . . . . . . . . . . . . . . . . . .236Viewing Contact Information . . . . . . . . . . . . . . . . . . . . . . . . . . . . . . . . . . . . . . . . . . . . .244Modifying and Deleting Contact Records. . . . . . . . . . . . . . . . . . . . . . . . . . . . . . . . . . . 247Working with Contact Groups. . . . . . . . . . . . . . . . . . . . . . . . . . . . . . . . . . . . . . . . . . . . .250Key Points . . . . . . . . . . . . . . . . . . . . . . . . . . . . . . . . . . . . . . . . . . . . . . . . . . . . . . . . . . . . . . 255
10 Organizing Your Contacts List 257Viewing and Sorting the Contacts List. . . . . . . . . . . . . . . . . . . . . . . . . . . . . . . . . . . . . .258Assigning Categories to Contacts. . . . . . . . . . . . . . . . . . . . . . . . . . . . . . . . . . . . . . . . . .265Organizing Contacts with Folders . . . . . . . . . . . . . . . . . . . . . . . . . . . . . . . . . . . . . . . . .269Searching for Contacts . . . . . . . . . . . . . . . . . . . . . . . . . . . . . . . . . . . . . . . . . . . . . . . . . . .273Using Smart Folders . . . . . . . . . . . . . . . . . . . . . . . . . . . . . . . . . . . . . . . . . . . . . . . . . . . . .277Key Points . . . . . . . . . . . . . . . . . . . . . . . . . . . . . . . . . . . . . . . . . . . . . . . . . . . . . . . . . . . . . .279
11 Working with Contact Records 281Setting Contact Options. . . . . . . . . . . . . . . . . . . . . . . . . . . . . . . . . . . . . . . . . . . . . . . . . .282Working with Contact Information. . . . . . . . . . . . . . . . . . . . . . . . . . . . . . . . . . . . . . . . .286Creating and Sharing vCards . . . . . . . . . . . . . . . . . . . . . . . . . . . . . . . . . . . . . . . . . . . . . .290Printing Contact Records . . . . . . . . . . . . . . . . . . . . . . . . . . . . . . . . . . . . . . . . . . . . . . . . .295Synchronizing Contacts . . . . . . . . . . . . . . . . . . . . . . . . . . . . . . . . . . . . . . . . . . . . . . . . . .300Key Points . . . . . . . . . . . . . . . . . . . . . . . . . . . . . . . . . . . . . . . . . . . . . . . . . . . . . . . . . . . . . .303
Part 5 Tasks and Notes 12 Tracking Tasks 307
Creating Tasks . . . . . . . . . . . . . . . . . . . . . . . . . . . . . . . . . . . . . . . . . . . . . . . . . . . . . . . . . .308Flagging Items for Follow Up . . . . . . . . . . . . . . . . . . . . . . . . . . . . . . . . . . . . . . . . . . . . . 314Viewing Tasks . . . . . . . . . . . . . . . . . . . . . . . . . . . . . . . . . . . . . . . . . . . . . . . . . . . . . . . . . . . 317Filtering Tasks. . . . . . . . . . . . . . . . . . . . . . . . . . . . . . . . . . . . . . . . . . . . . . . . . . . . . . . . . . .321Searching for Tasks . . . . . . . . . . . . . . . . . . . . . . . . . . . . . . . . . . . . . . . . . . . . . . . . . . . . . .323Modifying and Removing Tasks . . . . . . . . . . . . . . . . . . . . . . . . . . . . . . . . . . . . . . . . . . .326Printing Tasks . . . . . . . . . . . . . . . . . . . . . . . . . . . . . . . . . . . . . . . . . . . . . . . . . . . . . . . . . . .329Key Points . . . . . . . . . . . . . . . . . . . . . . . . . . . . . . . . . . . . . . . . . . . . . . . . . . . . . . . . . . . . . .333

Contents ix
13 Taking Notes 335Creating Notes . . . . . . . . . . . . . . . . . . . . . . . . . . . . . . . . . . . . . . . . . . . . . . . . . . . . . . . . . . 335Formatting Notes . . . . . . . . . . . . . . . . . . . . . . . . . . . . . . . . . . . . . . . . . . . . . . . . . . . . . . .339Viewing and Organizing Notes . . . . . . . . . . . . . . . . . . . . . . . . . . . . . . . . . . . . . . . . . . . .343Sharing Notes. . . . . . . . . . . . . . . . . . . . . . . . . . . . . . . . . . . . . . . . . . . . . . . . . . . . . . . . . . .348Key Points . . . . . . . . . . . . . . . . . . . . . . . . . . . . . . . . . . . . . . . . . . . . . . . . . . . . . . . . . . . . . . 351
Part 6 Program Management 14 Using Shared Features 355
Managing Categories . . . . . . . . . . . . . . . . . . . . . . . . . . . . . . . . . . . . . . . . . . . . . . . . . . . .356Using the Toolbox . . . . . . . . . . . . . . . . . . . . . . . . . . . . . . . . . . . . . . . . . . . . . . . . . . . . . . .362Searching with Spotlight . . . . . . . . . . . . . . . . . . . . . . . . . . . . . . . . . . . . . . . . . . . . . . . . .366Checking Spelling and Grammar . . . . . . . . . . . . . . . . . . . . . . . . . . . . . . . . . . . . . . . . . . 371Using AutoCorrect and AutoFormat . . . . . . . . . . . . . . . . . . . . . . . . . . . . . . . . . . . . . . .377Using the My Day Application. . . . . . . . . . . . . . . . . . . . . . . . . . . . . . . . . . . . . . . . . . . . .382Importing and Exporting Data . . . . . . . . . . . . . . . . . . . . . . . . . . . . . . . . . . . . . . . . . . . .386Key Points . . . . . . . . . . . . . . . . . . . . . . . . . . . . . . . . . . . . . . . . . . . . . . . . . . . . . . . . . . . . . .390
Glossary . . . . . . . . . . . . . . . . . . . . . . . . . . . . . . . . . . . . . . . . . . . . . . . . . . . . . . . . . . . . . . . . . 391
Index. . . . . . . . . . . . . . . . . . . . . . . . . . . . . . . . . . . . . . . . . . . . . . . . . . . . . . . . . . . . . . . . . . . . 397
About the Author. . . . . . . . . . . . . . . . . . . . . . . . . . . . . . . . . . . . . . . . . . . . . . . . . . . . . . . . . 415


Introduction xi
Introducing Microsoft Outlook for Mac 2011
Microsoft Outlook for Mac 2011 is an electronic communication and personal information management application that can help you take control of your email Inbox, contacts list, and calendar—all with one attractive and consistent interface. From one place, you can store, organize, manage, and retrieve many types of information. With Outlook for Mac, you can:
● Send, receive, forward, and organize email messages.
● Include images and other multimedia files as attachments to email messages you send.
● Send files created with Microsoft Office or other applications to clients, coworkers, family, or friends.
● Preview file attachments received as email attachments from others.
● Filter out junk or spam email messages.
● Schedule events, such as appointments or meetings, including recurring events.
● Invite people to meetings and keep track of their responses so that you know who will attend.
● View upcoming events and get reminders for them.
● Store contact information, including phone numbers, email addresses, Web sites, and mailing addresses, for people you know.
● Maintain and organize tasks lists.
● Store information as notes.
● Search through email messages, calendar events, contacts lists, tasks, and notes to find the information you need when you need it.
In an enterprise environment, Outlook interacts with a Microsoft Exchange Server to provide unified communications services, including real-time presence and status in-formation, specialized functionality for internal messaging, scheduling information, and many other useful features.

xii Introduction
New FeaturesPart of the Microsoft Office for Mac 2011 suite of applications, Outlook replaces Entourage 2008 with a whole new look and powerful new features. Here’s a quick list of some of the ones you’ll find most useful:
● The Microsoft Office ribbon puts the features and commands you use most right at the top of the Outlook window, organized by tabs.
● A unified Inbox displays all of your incoming messages together.
● Conversations make it possible to view long email threads under a single subject.
● Displaying your calendar in meeting invitations makes it easy to see, at a glance, whether you’re free to attend a meeting.
● .PST import makes it easy to switch from the Windows version of Outlook to the Mac OS version.
● Mac OS X integration taps into standard Mac OS features such as Quick Look and Spotlight.
● The cleaner, more attractive interface makes it easier to work with your information.
Let’s Get Started!Outlook for Mac 2011 offers many great features to help you work smarter and more ef-ficiently with your email, calendar, contacts, tasks, and notes. But don’t just take my word for it. Dive in and see for yourself on the pages that follow.

Modifying the Display of the Ribbon xiii
Modifying the Display of the RibbonThe goal of the Microsoft Office working environment is to make working with Office documents—for example, Microsoft Outlook for Mac 2011 email messages—as intuitive as possible. You work with an Office document and its contents by giving commands to the application in which the document is open. All Office for Mac 2011 applications or-ganize commands on a horizontal bar called the ribbon, which appears across the top of each application window whether or not there is an active document.
Toolbar
Spotlight Search
Ribbon
Commands are organized on task-specific tabs of the ribbon, and in feature-specific groups on each tab. In Outlook for Mac, commands generally take the form of buttons and lists.
Throughout this book, we discuss the commands and ribbon elements associated with the Outlook feature being discussed. In this topic, we discuss the general appearance of the ribbon, things that affect its appearance, and ways of locating commands that aren’t visible on compact views of the ribbon.
Dynamic Ribbon ElementsThe ribbon is dynamic, meaning that the appearance of commands on the ribbon changes as the width of the ribbon changes. A command might be displayed on the rib-bon in the form of a large button, a small button, a small labeled button, or a list entry. As the width of the ribbon decreases, the size, shape, and presence of buttons on the ribbon adapt to the available space.

xiv Modifying the Display of the Ribbon
For example, when sufficient horizontal space is available, the buttons on the Home tab of the Outlook application window are spread out and you’re able to see the commands available in each group as large or wide buttons.
If you decrease the width of the ribbon, some buttons shrink and their button labels disappear.
Changing the Width of the RibbonThe width of the ribbon is dependent on the horizontal space available to it, which de-pends on these two factors:
● The width of the application window Resizing the application window to full size provides the most space for ribbon elements. You can resize the application win-dow by dragging the resize handle in the lower-right corner of the window.
● Your screen resolution Screen resolution is the size of your screen display ex-pressed as pixels wide × pixels high. The greater the screen resolution, the greater the amount of information that will fit on one screen. Your screen resolution op-tions are dependent on your monitor. At the time of writing, possible screen resolutions range from 800 × 600 to 2048 × 1152. In the case of the ribbon, the greater the number of pixels wide (the first number), the greater the number of buttons that can be shown on the ribbon, and the larger those buttons can be. You can change the screen resolution in the Displays preferences pane of System Preferences.
Adapting Exercise StepsThe screen images shown in the exercises in this book were captured at a screen resolu-tion of 1024 × 768 at 72 dots per inch. If any of your settings are different, the ribbon on your screen might not look the same as the one shown in the book. Specifically, the but-tons you see might be represented by larger or smaller icons than those shown, with or without button labels.

Modifying the Display of the Ribbon xv
When we instruct you to give a command from the ribbon in an exercise, we do it in this format:
● On the Home tab, click the Reply button.
If the command is on a menu, we give the instruction in this format:
● On the Home tab, click the New button and then, in the menu, click Folder.
The first time we instruct you to click a specific button in each chapter, we display an im-age of the button in the page margin to the left of the exercise step.
If differences between your display settings and ours cause a button on your screen to look different from the one shown in the book, you can easily adapt the steps to locate the command. First, click the specified tab. Then look for a button that features the same icon in a larger or smaller size than that shown in the book. If necessary, point to buttons to display their names in ScreenTips.
If you prefer not to have to adapt the steps, set up your screen to match ours while you read and work through the exercises in the book.


Features and Conventions of This Book xvii
Features and Conventions of This Book
This book has been designed to lead you step by step through all the tasks you’re most likely to want to perform in Microsoft Outlook for Mac 2011. If you start at the begin-ning and work your way through all the exercises, you will gain enough proficiency to be able to create and work with email messages, calendar events, contact records, tasks, and notes. However, each topic is self-contained. If you complete all the exercises and later need help remembering how to perform a procedure, the following features of this book will help you locate specific information:
● Detailed table of contents Search the listing of the topics and sidebars within each chapter.
● Chapter thumb tabs Easily locate the beginning of the chapter you want.
● Topic-specific running heads Within a chapter, quickly locate the topic you want by looking at the running heads at the top of odd-numbered pages.
● Glossary Look up the meaning of a word or the definition of a concept.
● Keyboard Shortcuts If you prefer to work from the keyboard rather than with a mouse, find keyboard shortcuts in many places throughout the book.
● Detailed index Look up specific tasks and features in the index, which has been carefully crafted with the reader in mind.
You can save time when reading this book by understanding how the Step by Step series shows exercise instructions, keys to press, buttons to click, and other information.

xviii Features and Conventions of This Book
Convention MeaningSET UP This paragraph preceding a step-by-step exercise indicates
the practice files that you will use when working through the exercise. It also indicates any requirements you should attend to or actions you should take before beginning the exercise.
CLEAN UP This paragraph following a step-by-step exercise provides instructions for saving and closing open files or programs before moving on to another topic. It also suggests ways to reverse any changes you made to your computer while working through the exercise.
1
2
Blue numbered steps guide you through hands-on exercises in each topic.
1
2
Black numbered steps guide you through procedures in sidebars and expository text.
See Also This paragraph directs you to more information about a topic in this book or elsewhere.
Troubleshooting This paragraph alerts you to a common problem and pro-vides guidance for fixing it.
Tip This paragraph provides a helpful hint or shortcut that makes working through a task easier.
Important This paragraph points out information that you need to know to complete a procedure.
Keyboard Shortcut This paragraph provides information about an available key-board shortcut for the preceding task.
Command+B A plus sign (+) between two keys means that you must press those keys at the same time. For example, “Press Command+B” means that you should hold down the Command key while you press the B key.
Save
Pictures of buttons appear in the margin the first time the button is used in a chapter.
Black bold In exercises that begin with SET UP information, the names of program elements, such as buttons, commands, windows, and dialog boxes, as well as files, folders, or text that you interact with in the steps, are shown in black, bold type.
Blue bold In exercises that begin with SET UP information, text that you should type is shown in blue bold type.

Using the Practice Files xix
Using the Practice FilesBefore you can complete the exercises in this book, you need to copy the book’s practice files to your computer. These practice files, and other information, can be downloaded from here:
http://aka.ms/651890/files
Display the detail page in your Web browser and follow the instructions for downloading the files.
Important The Microsoft Outlook for Mac 2011 program is not available from this Web site. You should purchase and install that program before using this book.
The following table lists the practice files for this book.
Chapter FileChapter 3: Composing and Sending Email Messages
ImagesAntelope Canyon.jpgGC Clouds.jpgGC Trees.jpgKaibab Plateau.jpgLCRG.jpgLondon Bridge.jpgLP Aerial.jpgSan Juan Aerial.jpgStucco-100.jpgStucco-50.jpg
MoviesExploringSedona.mp4Gila Monster.m4vGrandCanyonDayTrip.mp4
Other FilesFlyer.docxMore Message Text.textClipping

xx Using the Practice Files
Chapter FileChapter 3: Composing and Sending Email Messages (continued)
vCardsBen Andrews.vcfJosh Bailey.vcfKim Akers.vcfLisa Andrews.vcfMaria Langer.vcfNancy Anderson.vcf
Chapter 6: Fine-Tuning Email Settings Coho Winery.jpgGrapes.jpg
Chapter 9: Managing Contact Information Mike Entin.jpgvCards
Ben Andrews.vcfJosh Bailey.vcfKim Akers.vcfLisa Andrews.vcfMaria Langer.vcfNancy Anderson.vcf
Chapter 10: Organizing Your Contacts List Ben Andrews.vcfJosh Bailey.vcfKim Akers.vcfLisa Andrews.vcfMichael Entin.vcfNancy Anderson.vcf
Chapter 11: Working with Contact Records April Reagan.vcfEric Gilmore.vcfKim Akers.vcf
Chapter 12: Tracking Tasks Report.docx

Using the Practice Files xxi
Chapter FileChapter 13: Taking Notes Phone Call Note.txt
ImagesAntelope Canyon.jpgGC Clouds.jpgGC Trees.jpgKaibab Plateau.jpgLCRG.jpgLondon Bridge.jpgLP Aerial.jpgSan Juan Aerial.jpg
Chapter 14: Using Shared Features Message Text.txt


Getting Support and Giving Feedback xxiii
Getting Support and Giving Feedback
ErrataWe’ve made every effort to ensure the accuracy of this book and its companion content. If you do find an error, please report it on our Microsoft Press site:
1. Go to www.microsoftpressstore.com.
2. In the Search box, enter the book’s ISBN or title.
3. Select your book from the search results.
4. On your book’s catalog page, find the Errata & Updates tab
You’ll find additional information and services for your book on its catalog page. If you need additional support, please send an email message to Microsoft Press Book Support at [email protected].
Please note that product support for Microsoft software is not offered through the addresses above.
Getting Help with Microsoft Outlook for Mac 2011If your question is about Microsoft Outlook for Mac 2011, and not about the content of this Microsoft Press book, your first recourse is the Outlook for Mac 2011 Help system. You can find general or specific Help information by clicking the Help button (labeled with a question mark) located in the upper-right corner of the Outlook for Mac program window.
If your question is about Microsoft Outlook for Mac 2011 or another Microsoft software product and you cannot find the answer in the product’s Help system, please search the appropriate product solution center or the Microsoft Knowledge Base at:
support.microsoft.com

xxiv Getting Support and Giving Feedback
You can post questions and search previously answered questions at the Microsoft Answers community-based forums at:
answers.microsoft.com
In the United States, Microsoft software product support issues not covered by the Microsoft Knowledge Base are addressed by Microsoft Product Support Services. Location-specific software support options are available from:
support.microsoft.com/gp/selfoverview/
We Want to Hear from YouAt Microsoft Press, your satisfaction is our top priority, and your feedback our most valu-able asset. Please tell us what you think of this book at:
www.microsoft.com/learning/booksurvey
The survey is short, and we read every one of your comments and ideas. Thanks in advance for your input!
Stay in TouchLet’s keep the conversation going! We’re on Twitter: http://twitter.com/MicrosoftPress.

How to Access Your Online Edition Hosted by Safari xxvii
How to Download the Online Edition to Your Computer
In addition to reading the online edition of this book, you can also download it to your computer. First, follow the steps in the preceding section. After Step 7, do the following:
1. On the page that appears after Step 7 in the previous section, click the Extras tab.
2. Find “Download the complete PDF of this book,” and click the book title:
A new browser window or tab will open. Your browser will either immediately be-gin downloading the file or will display a dialog box you can use to instruct it to save the file in the default download location.
3. When the file has finished downloading, locate it on your hard disk—it will likely be in your Downloads folder on your Desktop—and double-click its icon to extract the PDF file from the ZIP archive.
4. Double-click the book’s PDF file icon to open it in your default PDF reader application.
Note If you have a problem with your voucher or access code, please contact [email protected], or call 800-889-8969, where you’ll reach O’Reilly Media, distributor of Microsoft Press books.


Acknowledgments xxix
AcknowledgmentsI’d like to thank the people that were instrumental in helping me create this book.
First, at O’Reilly, Kenyon Brown. Ken and I worked together in the early 1990s on one of my very first books, back when he was with another publisher. He remembered me and was kind enough to give me a try for this project. For that, I thank him.
Also, at O’Reilly and Online Training Solutions, Inc. (OTSI), a long stream of editors and production people, including Sumita Mukherji (O’Reilly), Kristen Borg (O’Reilly), Jean Trenary (OTSI), Jaime Odell (OTSI), and Kathy Krause (OTSI). These folks helped make sure the book’s text was grammatically correct, met style guidelines, and looked great in print.
At Microsoft Corporation, Andy Ruff, Richard Kmieciak, and Albert Andersen. These guys helped make sure the information I provided was technically correct.
I’d also like to thank Chuck Joiner, for letting me know that Microsoft Press was looking for an Outlook book author. I owe my participation in this project to him. Thanks, Chuck.
Finally, a big thanks goes out to my husband, Michael Chilingerian, for taking my usual vented frustrations and giving his usual support.


Chapter at a GlanceOutlook makes it easy to address messages to contacts, page 58
The Message tab offersmany text formattingoptions, page 63
Use the Media Browser to insertphotos, audio, or movies into
your e-mail messages, page 71
Messages are stored as draftsuntil they are sent, page 76

57
3 Composing and Sending Email MessagesIn this chapter, you will learn how to✔ Create messages.✔ Format message text.✔ Insert media in messages.✔ Attach files to messages.✔ Change message settings.✔ Send messages.
Although Microsoft Outlook for Mac 2011 includes views for managing appointments, meetings, contacts, tasks, and notes, it’s most often used for sending and receiving email in Mail view. Email, which is short for electronic mail, has all but replaced old-fashioned printed and mailed letters for most business and personal communication. It’s much faster and cheaper to send email messages, so sending paper-based or so-called snail mail is becoming a thing of the past. In a world where many people are becoming con-cerned about conserving resources, email, which is not usually printed, saves paper (and money spent on paper) and prevents waste. Whether you need to communicate about business or personal matters, email simply makes sense.
Email, however, can go beyond simple text communication. You can format your mes-sages so they look good and are easier to read. You can include clickable hyperlinks to make it easy for recipients to go directly to Internet content you specify. You can also include images or attach other computer files.
Tip In this chapter and throughout this book, we often refer to email messages as simply messages. When discussing other types of messages—for example, instant messages or text messages—we use those full terms.

58 Chapter 3 Composing and Sending Email Messages
For example, you might compose a message to a client about a job proposal and attach a copy of the proposal as a Microsoft Word or Adobe PDF file for the client to review. You might also attach images of what your product looks like to help your client visualize what you’re writing about. A link to the product page on your company’s Web site would be a handy way to provide access to more information. Email makes all this easy.
You can also set options for email messages that are just not possible with paper-based mail. For example, you can set a message as high priority so the recipient knows it’s im-portant. If a message has sensitive content, you can encrypt it. And if you want the re-cipient to be certain that the message came from you, you can digitally sign it.
See Also For more information about security features for email, see the section titled “Securing Your Email” in Chapter 6, “Fine-Tuning Email Settings.”
In this chapter, you will use Mail view within Outlook for Mac to create, address, and compose messages. You will also include a custom signature, format message text, em-bed images, and attach files. Finally, you will set basic options for your message and send it on its way.
Important You’ll use the messages you create in this chapter as practice files for exercises in later chapters of this book.
Practice Files Before you can complete the exercises in this chapter, you need to copy the book’s practice files to your computer. The practice files you’ll use to complete the exercises in this chapter are in the Chapter03 practice file folder. A complete list of practice files is provided in “Using the Practice Files” at the beginning of this book.
Creating MessagesCreating an email message is a relatively straightforward process. You begin by display-ing a message composition window and then provide the recipient addresses, subject, and content of the message.
If you have more than one email account configured in Outlook, a From pop-up menu appears in the message header. This menu includes all of the email accounts configured in Outlook and determines the return address for the message.
Tip If you use one email account far more often than others, you might want to specify that account as the default account for sending messages. You can set your default email account in Outlook preferences, as discussed in Chapter 6.
Outlook offers three different fields for addressing a message. You can find them in the message header of the message composition window:

Creating Messages 59
● To Enter the email address of the primary recipient in this field.
The primary recipient is the person or persons you expect to respond to the message.
● Cc Enter the email addresses for additional recipients to receive a copy of the message.
Cc stands for carbon copy. In the days before copy machines, typists would use car-bon paper to make copies of documents as they typed them. The term cc is from that era; a carbon copy would go to each of the Cc recipients. In Outlook, a list of these recipients appears in this field for all recipients to see.
● Bcc Enter the email addresses for additional recipients to receive a copy of the message without others knowing they received it.
Bcc stands for blind carbon copy. This field works very much like the Cc field, but Bcc recipients are hidden in the recipients’ copy of the message.
Tip By default, the Bcc field does not appear in the message form. To display it, on the Options tab of the message composition window, click the Bcc button.
You must have at least one email address in at least one of these fields. (You cannot send an email message without a recipient!) You can have any number of recipients in each field.
There are several different ways to enter a recipient’s email address in Outlook:
● Type the complete email address into the field.
Tip To type more than one email address in an address field, separate each address with a semicolon (;).
● Type part of a previously used address into the field. Outlook displays a list of match-es as you type. You can then click the address you want to enter it into the field.
● Click the Contacts Search button on the right side of the address field and, in the Contacts Search pane that appears, search your Outlook contacts for the recipient. In the list of search results, click the To, Cc, or Bcc button to assign that recipient to an address field.
See Also You can learn more about working with the Outlook Contact features in Chapter 9, “Managing Contact Information.”
You enter the content of your message in the message body. This part of the window works like a little word processor with word wrap and formatting capabilities. You can enter as much text as you like in the message body. You can even paste in content from another document. You can also embed images right within the message body or attach files to the message.

60 Chapter 3 Composing and Sending Email Messages
See Also Formatting text, embedding images, and attaching files are covered later in this chapter, in the sections titled “Formatting Message Text,” “Inserting Media in Messages,” and “Attaching Files to Messages.”
When you create a message, you have the option of sending it to its recipients or saving it as a draft. Saving it as a draft is a way to put it aside and finish it later if you get inter-rupted while composing the message or if you need additional information you have to wait to get. Draft messages are saved into the Drafts folder, which is listed in the navi-gation pane. You can open a draft message at any time to complete and send it—or to delete it if you change your mind about sending it.
In this exercise, you’ll open a message composition window and fill in the message head-er with recipients and a subject. You’ll then enter a brief message in the message body. You’ll finish up by saving the message as a draft that you can finish in a later exercise.
SET UP You need the six vCard files located in the Chapter03/vCards folder and the More Message Text text clipping file in the Chapter03/Other Files folder to complete this exercise. Drag the vCard files into the Contact View window to add them to your address book. In the Outlook view switcher, click the Mail button to switch to Mail view. Then follow these steps.
1. On the Home tab, click the Email button.
Keyboard Shortcut Press Command+N.
An empty message composition window opens.
2. If the message header includes a From field, click it to display its pop-up menu. Then click the email account you want to use to send the message.
3. In the To field, type [email protected].
4. Press Tab to move to the Cc field.

Creating Messages 61
5. Type and. Outlook attempts to match what you typed with your contacts and dis-plays results in the Contacts And Recent Addresses menu.
6. Click Ben Andrews. His name is entered into the Cc field.
7. In the Cc field after Ben’s name, type your email address.
8. Press Tab. If your name and email address is in your contacts list, your email ad-dress is replaced with your name. Otherwise, it appears as an email address.
9. In the Options tab of the message composition window, click the Bcc button. A Bcc field appears in the message header beneath the Cc field. It appears for just this message.
See Also You can set Outlook preferences so the Bcc field appears in all message composition windows. The section titled “Setting Reading and Composing Options” in Chapter 6 explains how.
10. On the right end of the Bcc field, click the Contacts Search button. The Contacts Search pane appears.
11. In the search field at the top of the Contacts Search pane, type Kim. Kim Akers’s name appears in the list.
Bcc
Contacts Search
62 Chapter 3 Composing and Sending Email Messages
12. Click the Bcc button in Kim’s record to add her name to the Bcc field.
13. In the Subject field, enter New Postcards.
14. In the message body, type I just got back from a trip to the Grand Canyon and have two new photos to add to our postcard collection. Press Return twice and then type Grand Canyon Trees is a photo of the Grand Canyon.
As you can see, you enter text into the message composition window’s message body the same way you’d enter text into Word or any other word processor.
Because you’re not reading this book to get typing practice, copy and paste the remaining message text from a text clipping.
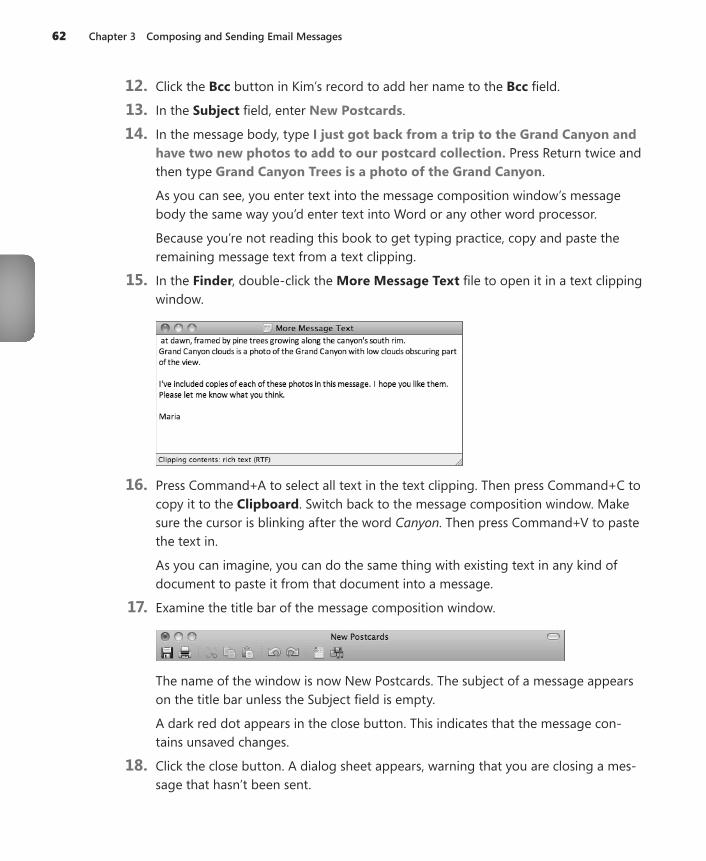
15. In the Finder, double-click the More Message Text file to open it in a text clipping window.
16. Press Command+A to select all text in the text clipping. Then press Command+C to copy it to the Clipboard. Switch back to the message composition window. Make sure the cursor is blinking after the word Canyon. Then press Command+V to paste the text in.
As you can imagine, you can do the same thing with existing text in any kind of document to paste it from that document into a message.
17. Examine the title bar of the message composition window.
The name of the window is now New Postcards. The subject of a message appears on the title bar unless the Subject field is empty.
A dark red dot appears in the close button. This indicates that the message con-tains unsaved changes.
18. Click the close button. A dialog sheet appears, warning that you are closing a mes-sage that hasn’t been sent.

Formatting Message Text 63
19. Click Save as Draft. The message is saved and the window closes.
20. In the navigation pane, click Drafts. The draft message you just saved appears in the item list.
21. In the item list, select the draft message you just created. Its content appears in the reading pane.
CLEAN UP No clean-up steps are required. You are ready to continue to the next exercise.
Formatting Message TextOutlook offers two options when it comes to text formatting:
● Plain Text is just that—plain text. No formatting options are available. All text ap-pears in 12-point Consolas font in the message composition window. How it ap-pears in a recipient’s email client software depends on how his or her software is configured.
● HTML is formatted text that uses hypertext markup language—the same for-matting technique used for most Web pages. HTML gives you control over many aspects of a message’s formatting. Best of all, it’s understood by almost all email client software, so there’s a good chance that the formatting you include in your messages will be seen by the messages’ recipients.
64 Chapter 3 Composing and Sending Email Messages
By default, Outlook is set up to create new messages in HTML format. You can switch to plain text on a message-by-message basis. If you always want to use plain text for the messages you write, you can set Outlook preferences to use plain text as the default for all new messages.
See Also You can learn how to set the default formatting option for new messages in the section titled “Setting Reading and Composing Options” in Chapter 6.
If you use HTML formatting for the messages you write, Outlook offers a wide range of formatting options for your message text:
● Change the font, font size, and color of text.
● Apply font styles such as bold, italic, underline, and strikethrough.
● Highlight text characters.
● Create bulleted or numbered lists.
● Adjust indentation.
● Set paragraph alignment.
● Set a background color or picture.
● Format text as a clickable hyperlink.
You apply formatting to message text in Outlook the same way you might apply format-ting in Word or another word processor: select the text you want to format and then apply formatting. You can see the results immediately. If you don’t like what you see, you can use the Undo command to undo a formatting change.
In Outlook, you can apply formatting using five different interface elements:
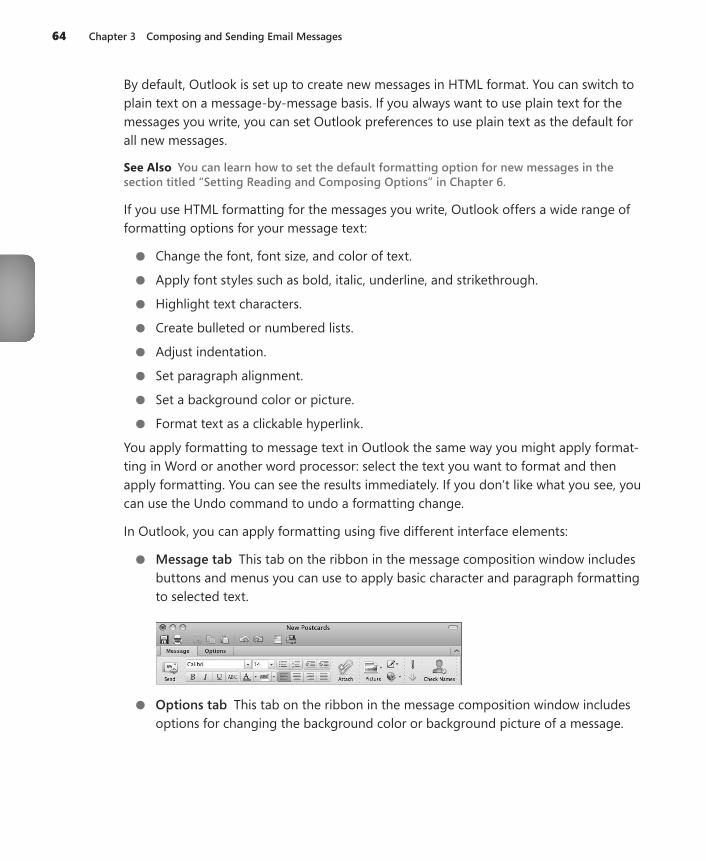
● Message tab This tab on the ribbon in the message composition window includes buttons and menus you can use to apply basic character and paragraph formatting to selected text.
● Options tab This tab on the ribbon in the message composition window includes options for changing the background color or background picture of a message.

Formatting Message Text 65
● Fonts panel The Mac OS X Fonts panel offers a standard interface for setting font formatting options. You can display the Fonts panel by clicking Choose at the bot-tom of the Font menu on the Message tab.
Important With the Fonts panel, you can apply any font installed on your computer to selected message text. If the font you apply is not installed on the message recipient’s computer, he or she will not see the message formatted as you intended.
● Format menu Using the commands on this menu’s submenus, you can apply all kinds of formatting to selected text in a message.

66 Chapter 3 Composing and Sending Email Messages
● Keyboard shortcuts Many formatting options have keyboard shortcuts. Here’s a table for reference.
Command Keyboard ShortcutBold Command+BItalic Command+IUnderline Command+UStrikethrough Shift+Command+XIncrease Font Size Shift+Command+=Decrease Font Size Command+- (Minus)Left Align Shift+Command+[Centered Shift+Command+\Right Aligned Shift+Command+]Increase Indent Command+]Decrease Indent Command+[Hyperlink Control+Command+K
In this exercise, you’ll open the New Postcards message you created in the previous exer-cise and format the text. You’ll also experiment with background colors and pictures.
SET UP You need the Stucco-50 and Stucco-100 images in the Chapter03/Images folder to complete this exercise.
1. In the navigation pane, click Drafts.
2. In the item list, double-click the New Postcards message to opens it in a message composition window.
3. On the Options tab, click the Format button. A confirmation dialog sheet appears, asking if you’re sure you want to turn off HTML formatting.
4. Click Yes. The document’s text changes to 12-point Consolas font.
Format
Formatting Message Text 67
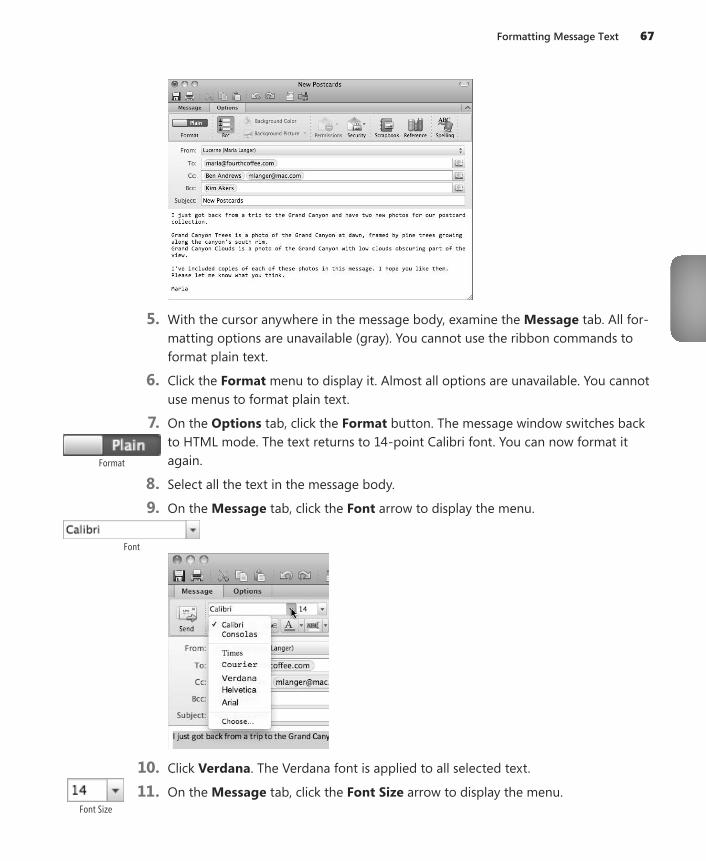
5. With the cursor anywhere in the message body, examine the Message tab. All for-matting options are unavailable (gray). You cannot use the ribbon commands to format plain text.
6. Click the Format menu to display it. Almost all options are unavailable. You cannot use menus to format plain text.
7. On the Options tab, click the Format button. The message window switches back to HTML mode. The text returns to 14-point Calibri font. You can now format it again.
8. Select all the text in the message body.
9. On the Message tab, click the Font arrow to display the menu.
10. Click Verdana. The Verdana font is applied to all selected text.
11. On the Message tab, click the Font Size arrow to display the menu.
Format
Font
Font Size

68 Chapter 3 Composing and Sending Email Messages
12. Click 12. The font size of all selected text is reduced to 12 points.
Tip Another way to set the font size is to type a value in the Font Size box instead of choosing from the menu, and then press Return.
13. Select the words Grand Canyon Trees at the beginning of the second paragraph.
14. On the Message tab, click the Bold button. The selected text turns bold.
15. On the Message tab, click the Font Color arrow to display the menu.Bold
Font Color

Formatting Message Text 69
16. Click Dark Green. The dark green color is applied to the selected text, and the color on the Font Color button becomes dark green. You have not only applied the color but you have set the default color for the button.
17. Select the words Grand Canyon Clouds at the beginning of the third paragraph.
18. On the Message tab, click the Bold button. The selected text turns bold.
19. On the Message tab, click the Font Color button. The dark green color is applied to the selected text.
20. Select the two paragraphs beginning with the bold words Grand Canyon. On the Message tab, click the Bulleted List button. The two paragraphs become indented bullet items.
Tip If a third bullet appears at an empty paragraph after the list, click to the right of it and click the Bulleted List button to reset that paragraph without bullets.
21. Select the name Maria at the end of the message.
22. On the Message tab, click the Font arrow to display the menu, and then click Choose. The Fonts panel appears.
23. In the Family scrolling list, click Lucida Calligraphy. The font applied to the select-ed text changes.
24. In the Size box, enter 14. The font size of the selected text changes.
25. On the Fonts panel title bar, click the close button to close it.
26. On the Options tab, click the Background Picture arrow, and then click Choose from the menu that appears. A standard Open dialog sheet appears. Use it to navi-gate to the Chapter03/Images folder.
27. Click the Stucco-100 image file, and then click Open. The image is placed in the background of the message. Unfortunately, because the image is so dark, the text is difficult to read.
Bulleted List
Background Picture

70 Chapter 3 Composing and Sending Email Messages
28. On the Options tab, click the Background Picture arrow, and then click Choose. The Open dialog sheet that appears should point to the Images folder inside the Chapter03 folder.
29. Click the Stucco-50 image file, and then click Open. The image replaces the origi-nal image. Because it’s a lighter color, the text is legible.
30. On the Options tab, click the Background Picture arrow, and then click Remove. The image is removed from the background.
31. On the Options tab, click the Background Color button. A standard Mac OS Colors panel appears.
32. In the Colors panel, use one of the color pickers to select a light color. The color is immediately applied to the background of the message, so you can see how it will look before you make a final decision.
33. On the Colors panel title bar, click the close button to close it.
34. Select the words Grand Canyon in the first paragraph.
35. On the Message tab, click the Insert a Hyperlink button. A dialog sheet with a Link field appears.
36. In the Link field, type http://www.nps.gov/grca, and then click OK. The selected text turns into a blue, underlined hyperlink, similar to what you might find on a Web page. Clicking this text opens web page of the URL you typed.
Background Color
Insert a Hyperlink

Inserting Media in Messages 71
37. On the message composition window toolbar, click the Save button or press Command+S to save changes to the message.
CLEAN UP No clean-up steps are required. You are ready to continue to the next exercise.
Inserting Media in MessagesWith Outlook, you can insert images, sounds, and movies into messages. You can do this in one of four ways:
● Media Browser You can use this feature to select a photo from your iPhoto library, an audio file from your iTunes library, or a movie from your Movies folder or iTunes library. This integration with Mac OS and popular Apple applications makes it easy to find and insert the media you want.
Important You must have Apple’s iPhoto application, which is part of the iLife suite of products, installed on your computer to use the Photo Browser to insert images in your email messages.
● Picture From File This command displays a standard Open dialog sheet that you can use to locate, select, and open an image file to insert.
● Copy and Paste As you might expect, you can copy and paste an image from an-other application into an Outlook message body. This is a handy technique when the image is already open on your computer.
● Drag and drop Outlook supports drag-and-drop copying from the Finder. Just drag the icon for the media file you want to include from a Finder window into the message body to copy the file to the message.
Important You can only insert media into an HTML format message. HTML format is discussed in the section titled “Formatting Message Text” earlier in this chapter. If you want to include media files in a plain message, they must be attached. Attaching files is covered in the section “Attaching Files to Messages” later in this chapter.
When you insert a picture, the image appears embedded in the message body instead of as an attachment. Sounds and movies appear as attachments. If the message recipi-ent has an email application that supports media in HTML messages, all media may ap-pear in the body of the message, and sounds and movies can be played from within the message.
Save
72 Chapter 3 Composing and Sending Email Messages
Inserting Media: Outlook vs. Entourage
If you’re upgrading from Microsoft Entourage to Outlook, you may notice that Outlook handles multimedia elements differently. In Entourage, inserted pictures, sounds, and movies appeared inline, within the message body. In Outlook, only pic-tures appear within the message body; other multimedia appears as an attachment.
Microsoft made this change when it rewrote the message authoring code for Outlook 2011 to be more consistent with the way attachments are handled within other email applications. Keep in mind, however, that if the recipient’s email appli-cation supports media in HTML messages—as Apple Mail does—the media might appear within the message, even if it is attached.
Tip It's a good idea to make sure that recipients can view or play back multimedia format files you share with them. Although each computer supports different file formats, the most commonly supported formats include JPEG, GIF, and PNG for images; MP3 for sound; and MPEG or QuickTime for movies.
In this exercise, you’ll use three different techniques to insert a number of multimedia elements into the draft message you created earlier in this chapter.
SET UP If you have iPhoto installed, you need the photo files located in the Chapter03/Images folder to complete some of this exercise. Drag all but the Stucco photos onto the iPhoto icon to copy them into iPhoto. If you have iTunes installed, you need the three movie files located in the Chapter03/Movies folder to complete some of this exercise. Drag the movie files onto the iTunes icon to copy them into iTunes. Quit both iPhoto and iTunes. Drag the Gila Monster movie to the Movies folder in your Home folder. Make sure you have access to the Chapter03 files from the Finder. Open the draft message you worked on in the previous exercise if it is not already open.
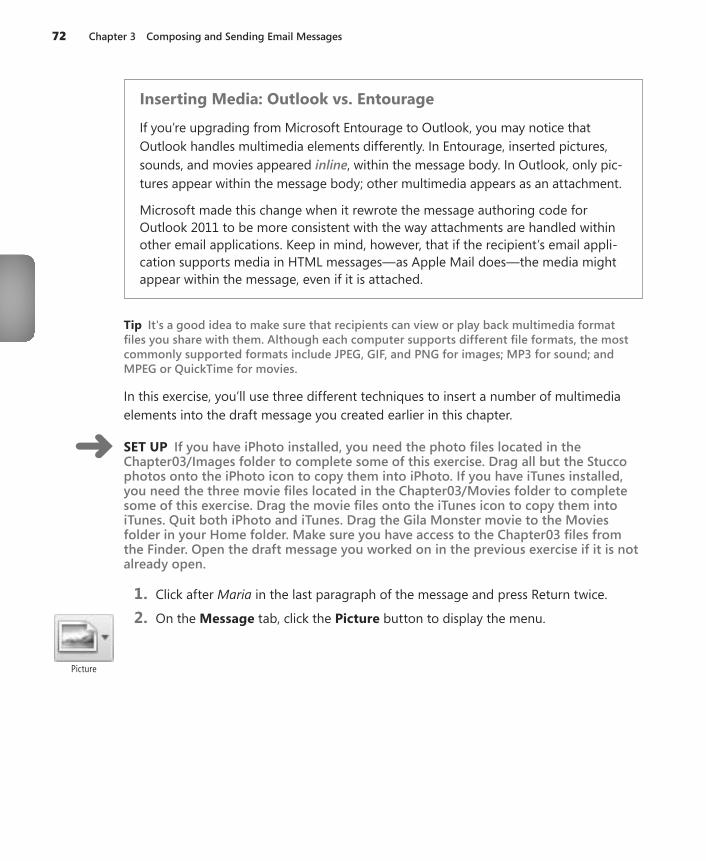
1. Click after Maria in the last paragraph of the message and press Return twice.
2. On the Message tab, click the Picture button to display the menu.
Picture

Inserting Media in Messages 73
3. Click Photo Browser to open the Media Browser. If necessary, click the Photos button.
If you have iPhoto installed, the top half of the Media Browser is populated with your iPhoto library information. (If you don’t have iPhoto installed, skip to step 6.)
4. Click Last Import to display the photos you imported for this exercise.
Important The image files may appear in a different order than what is shown here.
5. Drag the GC Clouds photo from the Media Browser to the space at the end of the message body. The photo is pasted into the message body.
6. On the Media Browser title bar, click the close button.
7. Make sure the cursor is just to the right of the inserted image. Then, on the Message tab, click the Picture button to display its menu again.
8. Click Picture from File. A standard Open dialog sheet appears.
Photos

74 Chapter 3 Composing and Sending Email Messages
9. Navigate to the Chapter03/Images folder, click GC Trees.jpg, and then click Open. The image is inserted into the message beneath the other image. (If you don’t have iPhoto installed, you can repeat this process to insert the GC Clouds image.)
10. On the message composition window toolbar, click the Media Browser button. The Media Browser opens again.
11. In the Media Browser, click the Movies button. The top half of the Media Browser displays the Movies folder and, if you have iTunes installed, an iTunes icon.
12. Click either Movies or iTunes to display movies in the bottom half of the window.
13. Drag the Gila Monster movie from the Media Browser to the message body. The movie appears as an attachment in the message header.
14. On the message composition window toolbar, click the Save button or press Command+S to save changes to the message.
CLEAN UP No clean-up steps are required. You are ready to continue to the next exercise.
Attaching Files to MessagesYou can attach any kind of file to an email message to send it to a message recipient. This enables you to collaborate with coworkers on the creation of Microsoft Office docu-ments, taking full advantage of its powerful commenting and change-tracking features. It also makes it possible to share any kind of file with someone else.
In addition to using the Media Browser to attach sounds and movies, which was cov-ered in the previous section of this chapter, Outlook offers two ways to attach a file to a message:
● Attach command This button or command displays a standard Open dialog sheet that you can use to locate, select, and open the files you want to attach. This makes it possible to attach any file you can access from your computer.
● Drag and drop With Outlook, you can drag file icons from the Finder into a mes-sage window. If the file is not an image file, it is automatically attached.
You can attach files to any message, whether it’s in HTML or plain text format. Attachments are added to the attachments list in the message header.
Media Browser
Movies
Attaching Files to Messages 75
If you change your mind about an attachment, you can easily remove it before sending the message by simply selecting it and pressing Delete. The attachment is removed from the message but is not removed from its source location on disk.
File Attachment Considerations
You should keep in mind a few important things when attaching files to share with message recipients:
● Attaching a file does not guarantee that the recipient will be able to open it. When attaching a document created with a specific application, you may want to ask the message recipient whether he or she has software that can open it before attaching and sending it. If there’s any doubt about document compatibility, you might consider saving the document as a PDF—just re-member that all editing capabilities will likely be lost.
● Consider file size when attaching any file—including the multimedia elements discussed in the previous section. Some email accounts have restrictions on incoming message sizes or mailbox size. If, for example, you attempt to send 8 MB of attached files to an email account that can accept only 5 MB, that message will not be received. It’s often more practical to use FTP or some other file transfer option when sharing very large files.
● When attaching multiple files to an email message, you may want to use the built-in Mac OS compression feature to compress or “zip” the files into one archive. Not only will this make the total file size smaller, but it will keep the files together in one neat package.
In this exercise, you’ll attach a Word document to the draft message you’ve been work-ing on throughout this chapter. You’ll also remove an attachment so it is not sent with the message.
SET UP You need the Flyer document located in the Chapter03/Other Files folder to complete this exercise. Make sure you have access to the Chapter03 files. Open the draft message you worked on in the previous exercise if it is not already open.
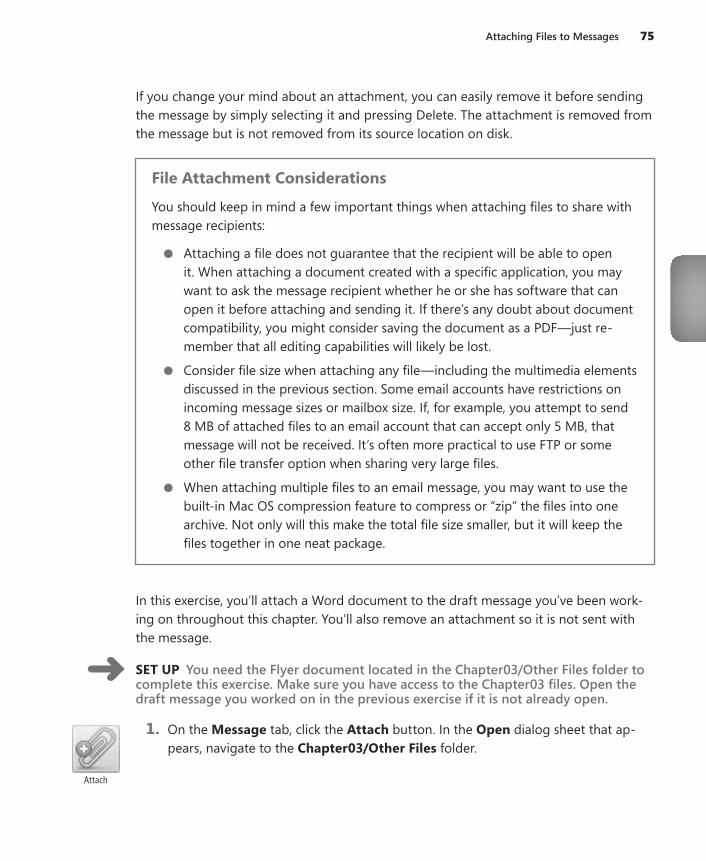
1. On the Message tab, click the Attach button. In the Open dialog sheet that ap-pears, navigate to the Chapter03/Other Files folder.
Attach

76 Chapter 3 Composing and Sending Email Messages
2. Click Flyer, and then click Choose. The file is added to the attachments field in the message header.
3. In the attachments field, click the Gila Monster movie file you attached in the previous exercise.
4. Press Delete. The attachment is removed.
5. On the message composition window toolbar, click the Save button or press Command+S to save changes to the message.
CLEAN UP No clean-up steps are required. You are ready to continue to the next exercise.
Changing Message SettingsBefore sending a message, you might want to set additional message options for it. Outlook offers a number of useful settings, such as the following:
● Signature This is a predefined footer for the bottom of the message. Normally, it includes the sender’s name and contact information, but it can include any text you like. Signatures are optional, but you can set up Outlook so it automatically appends a signature to every message you write.
See Also Creating and managing signatures is covered in detail in the section titled “Working with Signatures” in Chapter 6.
● Security These features enable you to digitally sign or encrypt a message. This helps protect the message from unauthorized access. By default, new messages are neither digitally signed nor encrypted.
See Also Security features for email messages are covered in the section titled “Securing Your Email” in Chapter 6.
● Priority This setting offers one way to tell the message recipient how important the message is. By default, each message is set for normal priority, but you can also set it for high or low priority.

Changing Message Settings 77
It’s important to note that all of the message settings discussed in this part of the chap-ter are completely optional. You might never use any of them. Or you might focus on those you find most useful. Explore them to see which ones can help you work better with Outlook.
In this exercise, you’ll insert a signature and set the priority for the draft message you’ve been working with throughout this chapter.
SET UP You don’t need any practice files to complete this exercise. Open the draft message you worked on in the previous exercise if it is not already open.
1. If necessary, click to position the cursor at the very end of the message body, right after the second image, and then press Return twice. This inserts two empty para-graphs at the end of the message.
2. On the Message tab, click the Signatures button to display the menu. This menu includes the Edit Signatures command, as well as at least one signature.
3. Click Standard. The standard signature is inserted at the cursor.
Important If you have not yet configured a signature, the Standard signature may appear as just two dashes. You can customize the Standard signature or create other signatures that will appear in the Signatures menu. Chapter 6 explains how.
Tip You can modify or delete an inserted signature just like any other message body text.
4. On the Message tab, click the High Priority button. The button turns dark gray to indicate that it is selected.
Tip You can set a message to normal priority by clicking the selected priority button again to deselect it.
Signatures
High Priority

78 Chapter 3 Composing and Sending Email Messages
5. On the message composition window toolbar, click the Save button or press Command+S to save changes to the message.
6. On the message composition window’s title bar, click the close button. The window closes.
7. In the navigation bar, click Drafts, and then click the New Postcards message you’ve been working with. You should see several things:
❍ In the item list, icons for attachments and high priority appear beneath the message time.
❍ In the reading pane, the message header includes attachment information.
❍ Beneath the message header, a note indicates that the message is high priority.
CLEAN UP No clean-up steps are required. You are ready to continue to the next exercise.

Sending Messages 79
Sending MessagesWhen your message has been addressed, composed, formatted, and fine-tuned as desired, it’s ready to send. Just click the Send button, and the message is sent to its recipients.
There are a few additional things to consider when sending an email message:
● If you don’t have an Internet connection, you cannot send the message. Instead, when you click the Send button, Outlook places the message in an Outbox that ap-pears right above the view switcher. The message remains there until you are con-nected to the Internet and it can be sent.
Tip If you plan on working with Outlook for an extended period of time while offline, choose Work Offline from the Outlook menu. This will avoid any error messages that might appear when Outlook tries to connect to the Internet. When Internet access is available, be sure to choose Work Offline from the Outlook menu to disable this feature. Outlook should immediately connect to the Internet to send and receive messages.
● Email travels quickly, but it won’t be received by the recipient until he or she checks email. So although a recipient sitting at his or her computer might receive a mes-sage from you almost immediately after you send it, a recipient on vacation with-out Internet connectivity might not receive your message until he or she returns a week or more later. Many people don’t check work-related email accounts during off-work hours or personal email accounts while at work. Be patient if you don’t get an immediate response.
● Spam filters on the recipient’s email server or within the recipient’s email client software could also prevent your message from reaching the recipient—or simply delay it until the recipient checks his or her Junk E-mail or Spam folder. Spam filters look for words and patterns within a message to identify potential spam content; no spam filter is perfect. Spam filters don’t normally notify senders when messages are marked as spam, so you might never know your recipient didn’t get the mes-sage you sent.

80 Chapter 3 Composing and Sending Email Messages
● If the email address you send a message to is incorrect, the message should bounce back with some sort of notification. This could be immediate if the information af-ter the @ symbol is correct, or it could be several days later if the part after the @ symbol is wrong. Keep this in mind the first time you contact someone by email; if the message bounces back, chances are that you entered the email address incor-rectly in Outlook or the address is old and the email account has since been closed.
Checking Names
The Check Names button, which appears on the Message tab, makes it possible to validate the names of message recipients before sending the message. The trouble is, this feature requires either a Microsoft Exchange account with EWS/HTTP services enabled or that an LDAP server be set up as part of your Outlook configuration. In addition, it requires that each recipient either have an account on your Exchange server or be listed in a configured LDAP server.
If you do not have an LDAP server configured, this feature will not work at all. If a recipient is not listed on a configured LDAP server, this feature will not work for that recipient.
After a message has been sent, it moves from the Drafts folder to the Sent Items folder. Once it is there, you can open it to consult it, resend it, or delete it. How long an item remains in the Sent Items folder depends on the type of account it was sent from and the settings for that account.
See Also You can learn more about working with email messages stored in Outlook in Chapter 5,”Organizing Your Inbox,” and about account settings in Chapter 6.
In this exercise, we’ll take a last look at the draft message we’ve been working on throughout this chapter before sending it out to its recipients.
SET UP You don’t need any practice files to complete this exercise.
1. In Mail view, in the navigation pane, click Drafts, and then double-click the New Postcards message. The message opens in a message composition window.
Check Names

Key Points 81
2. Note that although the email message includes four recipients, only one of them—you in the Cc field—is valid. If you send the message with all recipients, you’ll likely get three error messages. If you prefer not to see these error messages, select the invalid addresses ([email protected], Ben Andrews, and Kim Akers) one at a time and press Delete to remove them. Be sure to retain at least one email address.
Tip If you’re curious about what happens when you send email to invalid addresses, you can leave all recipients in the message header. Shortly after sending the message you should begin to get “Undelivered Mail” messages.
3. On the Message tab, click the Send button. The message window closes and the message is sent.
CLEAN UP No clean-up steps are required. Leave Outlook open if you are continuing to exercises in the next chapter.
Key Points● You create email messages in a message composition window.
● You can use the Contacts Search feature of Outlook to address messages to recipients.
● A message can include plain or formatted text, images, and other attached files.
● You can save a message as a draft so you can finish it at a later time if you need to.
● You can insert a preconfigured signature at the end of your messages and set mes-sage priority before sending.
● You need to be connected to the Internet to send a message; if you’re not con-nected, Outlook will save the message in an Outbox until you are connected and the message can be sent.
Send


397
Index
Aabbreviations, AutoCorrect to expand 380Accept, as meeting invitation response 201, 203Account Description field 18Account headers, in Mail view 29Accounts window 18
displaying 6, 8actions
on individual emails 160scheduling 153–159types 155
Add Account option, in Welcome window 4Address Book 41
adding mailing list to 169folders 41printing 296printing style 297
Address Book (Entourage) 25Advanced account settings dialog sheet, Security
pane 175Advanced pane, for mailing lists 168alert sounds, for checked email 86alignment of text 66All day event field, for appointment 187All Items button, for searches 129All Mail button, as search filter 129alphabetizing. See sortingAny Recipient is Me filter 128AOL mail 4Apple Mail, importing data from 14, 386Apple MobileMe accounts 300, 303
contracts synchronized by 302deleting messages 135Folders pane 180folder synchronization 84Outlook support for 4support for folders on server 122
appointments 38, 185adding to calendar 223changing 197converting to meeting 196default reminder for 215
deleting 196, 198, 209–210dragging between calendars 223, 224modifying 195scheduling 186–191setting options 204–210
Appointment tab on ribbon 37Categorize 208–209Delete 210Edit Series 209–210Invite 198Private 208Recurrence 206Reminder drop-down list 206Save & Close 190, 208Status menu 206–207
Appointment toolbar 196appointment window 186
changing meeting window to 40opening 189, 197
archiving email messages 122area code, default 282, 284Arrange By options
for contacts list 259for messages 114–116
Attachment button 101, 102attachment field, for email 32Attachments filter, for searches 130attachments to email 58, 93–96
considerations 75filter based on 128filter based on size 131note as 349sounds and movies as 71
attribution of original email 143audio file, selecting to insert in email 71authentication method, for Exchange account 9AutoCorrect 377–382AutoCorrect preferences pane 379AutoFormat 379–382automatically synchronizing folders 124automatic configuration of email accounts
failure 17–18automatic replies to email 106–109
disabling 108, 109

398 background of message
sharing information 224–229stopping shared 229working with multiple 219–224
Calendar view 36–41, 185, 216–218appointment display 190–191displaying 39imported holidays displayed 388keyboard shortcut for 24meeting display 194Spotlight search of 368, 370
Calibri font 67, 145Call Contact icon 96canceling
meetings 196, 200searches 130
Capitalize first letter of sentences option for AutoCorrect 378
Capitalize names of days option for AutoCorrect 378
carbon copy 59. See also Cc field for emailcategories 113, 213
in Address Book 41applied to moved events 224assigning to contact records 265–269assigning to note 345for calendar events 204for calendars 216, 220
displaying list 222in Calendar view 37in Contact view 44deleting
from contact 265, 269from message 122from Outlook 361
displaying 361managing 356–361in Notes view 51predefined in Outlook 120, 265, 356printing
all tasks in one 330contacts for one 297
and project management 314for tasks 309in Tasks view 47
Categories preferences pane 356, 357, 360, 361Categorize menu, Clear All 120Category filter 128Cc field for email 32, 59, 60–61
automatic inclusion of self 144including for reply 98
center alignment of text 66certificate
for digital signature 175for email account 176for encrypting email 175
Bbackground of message
color for 70inclusion when printing 104picture for 69
Bcc field for emailautomatic inclusion of self 144displaying 61entering address in 59in message header 32and replies 98
Bilingual Dictionary 362birthdays
Add Reminder button for 289field for contacts 242
black and white printing of calendar 231blind carbon copy 59. See also Bcc field for emailBlocked Senders pane, in Junk E-mail Protection
dialog box 171blue arrow, as forwarded message indicator 101bold text 34, 66, 68
AutoFormat for 379in notes 53, 340
bounce back of email 80browser (web)
launching to view Microsoft Mactopia Web site 6opening from contact record 289
bulleted listAutoFormat for 379, 381–382converting text to 339in email 69
Busy status, for calendar event 204buttons to display menus 26
Ccalendar data (.ics) calendar format file 110calendar pane 37calendars
creating 219deleting 220deleting item 196displaying all categories 218indicator of tentative meeting acceptance 202item types 185modifying items 195–200opening another user’s 221, 227printing 229–232removing shared 229scheduling appointments 186–191, 223scheduling meetings 191–195setting event options 204setting options 214–216

Conversations option 399
permission to access calendar 225saving 252
contact management software, vCard support 291Contact menu, This Contact is Me 290contact records 281
address book for 41assigning categories 265–269creating 236–244displaying based on category 268exporting 387–389filter for those recently modified 276flagging for follow-up 314folders for organizing 269–273for vCard 290modifying and deleting 247–250moving between folders 271opening 287for personal information 290saving changes 249search for 273–276synchronizing 300–303viewing detailed information 244
contact records listadding vCard information to 290–291, 293choosing meeting invitees from 191configuration options 282–286displaying 246dragging vCard file to 294information display from 96viewing and sorting 258–264
contact record window 42–43, 45, 46Contacts And Recent Addresses menu 253Contacts button (My Day window) 383Contacts pane, in My Day window 385Contacts search
displaying options 285sort order for results 282
Contacts Search button 59Contacts Search pane 61Contacts Search window 273Contacts view 41–46, 235, 314
displaying 44keyboard shortcut for 24list view pane 244reading pane, display options 258Spotlight search 368, 369–371
Contact tab on ribbon, Save & Close 239, 244contact window 286–289
opening 97, 247opening vCard in 293
Contains pop-up menu, for search filter 275conversations
Inbox item list display as 89setting options for 141–142
Conversations optionfor arranging messages 115
Certificates pane, in contact window 245character formatting 64Check Document Now command 373Check Grammar With Spelling command 372Check Spelling While Typing command 372Choose Folder command 124Choose Folder dialog box 157, 164, 168, 170Clear All Filters 129clearing all categories from messages 120clearing filters 322Clipboard 374
copying text clipping to 62clipping in Scrapbook 363collapsed version of Print dialog box 230color
of categories 356, 358–359for messages 113, 120
of email background 64, 70of email in item list 121of email text 145of font in note 340for selected text 34for text 68
Colors panel 146columns
clicking heading to sort list by 116, 119in contact list
moving 264sorting by 262
displaying or hiding 120in Task view
hiding and displaying 319COMMAND key, for selecting multiple
messages 127comma-separated values (CSV) files,
importing 386comments, in response to meeting invitation 201,
203company, as contact 236Completed field, for task search filter 325completed tasks
filtering 321marking 50, 326
compression feature, for multiple attached files 75Configure automatically check box, for Exchange
account 9confirmation dialog sheet, for deleting folders 136Conflict Resolver dialog box 301connections, troubleshooting problems 17–18Consolas font 63, 145contact card, displaying 97contact card window, for mailing list 169contact groups 235, 250–254
deleting 254hiding member information 253

400 Copy and Paste
restoring view to 114for signature 148, 152
Deleted Items folder 135including in searches 129
Deleted Items, in Mail view 28Delete Junk Mail action 155Delete Mail action 155deleting
appointments 196, 198, 209–210calendar item 196calendars 220categories 361categories from contact 265, 269category 120category tag from message 122contact groups 254contact records 247, 250draft message 35email
and folders 135–137from folders 136junk email 171, 173on server 19
flagged contact 329folder for contacts list 269, 273notes 53signatures 152smart folders 278tasks 50, 326, 329
Description fieldchanging 195
description of task 309desktop, vCard icon on 292Details field, for appointment 188, 189Details pane, in Contacts view 45Details pane, in contact window 244Dictionary 362
adding word to 376displaying 364–365
digital signature 76, 174, 245disclosure triangle 29–30, 124
for categories in Calendar 39for conversation message list 89to display categories list 267to display smart folders 137for Out of Office reply options 108
disk drive, saving email attachment to 95Dock, Microsoft Outlook icon on 5Does Not Contain pop-up menu, for search
filter 275domains, blocking junk mail from specific 171downloading pictures embedded in incoming
messages, options 142
Copy and Pastein notes 337text clipping to Microsoft Office Clipboard 62to insert media in email 71
Copy To Folder command 124, 126Correct Spelling Automatically command 372Correct TWo INitial CApitals option for
AutoCorrect 378coworker’s calendar, opening 221, 227Create a task button (My Day window) 383Create New Folder dialog box 170criteria for rules 161current date, displaying in Calendar 40custom arrangements, for grouping and sorting
messages 116Custom Arrangements: Mail window 117–118custom folders for mail 113custom repeating interval, for
appointments 207–208
Ddash character 379date and time printing
on address book 297on message 104on note 348on task list 331
Date Modified column, sorting notes by 344date picker 187, 189Date Received
filter 128, 130item list sorted by 116, 117
Date Sent filter 128dates for automatic email replies 107, 108days of the week, setting as work days 214Day view 39
printing 230scaling window grid 217
Decline, as meeting invitation response 201declining meeting invitation 202Default Address Format 283–284default email application, setting Outlook as 6, 7default settings for Outlook 22
for area code 282, 284email account for replies or forwarded
messages 144email account for sending messages 58font and font size for plain text 145HTML for email 144for menu button 27reminder time for events 215restoring for arrangement 120

email messages. See also junk email 401
email addressesblocking email from 173encryption certificate for 245inclusion when printing 104, 105for meeting invitees 185, 191for recipient 59verifying for contact 283
Email address fieldfor email account 11for Exchange account 9
email attachments 58, 93–96considerations 75filter based on 128filter based on size 131note as 349sounds and movies as 71
email etiquette 98email messages. See also junk email
archiving 122automatic categories based on contacts 357automatic replies to 106–109basics 57–58changing settings 76–78COMMAND key for selecting multiple 127composing preferences 143–144content entry 59creating 58–63deleting 135–137dragging into folders 123, 126fields for arranging messages 115formatting text 63–71forwarding 101–103inserting media 71–74marking as junk 172moving to folders 124pictures in incoming 89printing 103–106reading 87–93reading preferences settings 140–142removing category from 120replies to 98–101retrieving 84–86rules to process 160–166saving as draft 60, 63scheduling actions 153–159scheduling meetings from 109–110security 174–177sending 79–81
to contact group 252–253signatures 147–153task creation from 49task from 314to send note 348to send vCard 291–292viewing list for Inbox 90with meeting invitation 203
Drafts folder 60, 80deleting email from 135searches of 129
Drafts in Mail view 28displaying 63saving 60, 63saving or discarding 35
draggingappointments 197–198
between calendars 223for attaching files 74events between calendars 220media from Finder 71messages into Inbox folders 123note contents 347vCard file to contacts list 294
Due datefor tasks 49, 309, 310, 326for task search filter 325
Due Today folder 322Duration field
changing 195for appointment 187–188, 189, 206
Eedit box
for folder name 124for smart folder name 134
Edit Custom Arrangements dialog box 116Edit Mailing List Rule dialog box 167, 169Edit menu
Delete 220Find and Advanced Find 323Paste 374Spelling And Grammar 371, 373, 374
Editor option, for calendar 226Edit Rule dialog box 161, 163Edit Schedule dialog box 153, 156, 158Edit Signatures command 77email accounts
adding 11–13additional options 18–19advanced settings 177–181
server settings 178checking for mail in all 86displaying list 124information needed for manual configuration 18listing messages from one 91multiple
displaying items for single 29Inboxes for each 87
Outlook for centralizing 5selecting for sending messages 58setting up 4–8

402 em-dash
FFamily category 120fields
in contact record 236adding 238
inclusion in printed Address Book 297search for contacts 274sorting contacts list by 262
file attachments. See attachments to emailfile formats
for multimedia 72importing and exporting 386–387
File menuImport 7Print 296, 330
file size, and attachment limitations 75filters 114
clearing 322cumulative 322for searches 128–133
criteria 274–276on Search tab 129smart filters for saving 133tasks 321–323
Finder 62, 293drag and drop media from 71dragging attachment into 95
First day of week setting 215Flagged Contacts smart folder 277Flagged field, for task search filter 325Flagged filter 128Flagged Items tasks, filtering 321Flagged Mail smart folder 133flagging items for follow-up 314–316Folder Properties: Calendar dialog box,
Permissions pane 228Folder Properties dialog box, Permissions
pane 224folders
Address book 41for calendars 221creating 162including in contacts search 274for mailing list messages 168, 170for organizing contacts 269–273
deleting 269, 273from synchronization 301moving records between 271–272
for organizing tasks 318Smart folders 277–279Spotlight search of 366, 367
em-dash 379.eml files 102Empty Deleted Items Folder schedule 153
changing 156encryption
certificate storage 245of email 76, 175
en-dash 379End date, for printed calendar 230, 232Ends field
changing 195for appointment 187
Ends time fieldfor meeting 194for printed calendar 230, 232
Entourage 3importing data from 386vs. Outlook
inserting media 72interface 25
upgrading from 5, 314envelope icon 87, 90error log window 85error messages, incorrect email address and 81errors, alert sound for 85Eudora, importing data from 386events on calendar. See also appointments;
meetingscategories to control display 217dragging between calendars 220
Excel Auto Web Publish action 155exceptions for Autocorrect 378Exchange accounts
adding 8–10advanced settings for security 180automatic replies from 106–109, 108calendar visibility to others 213creating folder for email 123Delegates pane for Advanced settings 179deleting messages 135dragging message from Inbox to folder 123folder synchronization 84Outlook support for 4sharing calendar between 224troubleshooting setup 17
Expanded display for groups 118expanded version of Print dialog box 230expanding conversations
settings for 141exporting data 386–389Export window 388

Home tab on ribbon 403
groups of contacts 235, 250–254deleting 254hiding member information 253permission to access calendar 225saving 252
HHas Attachment filter 128header for printed address book 299hiding
columns 120in Task view 319
contact group member information 253reading pane 92, 119, 260
High Priority filter 128High Priority folder 322High Priority Mail smart folder 133Holiday category 120holidays, importing 387–389Home tab on ribbon 25
Appointment 189, 223Attachment 101, 102for Calendar view 37, 39
Today button 40View Date button 40
Categorize 120, 265, 266, 269, 345, 359Add New 357Edit Categories 360
check boxes for task filtering 322Contact 239Contact Group 251for Contacts view 42
Contact button 46Email button 45
Delete 136, 273, 326, 329Details 261Email 253, 374Filters 128, 129, 130–132, 322
Clear All Filters 129, 130Date Received 130Unread 130
Find a Contact 273Follow Up 315
Clear Flag 329Forward 101, 102, 291, 348, 349Junk
Junk E-mail Protection 171, 173Mark As Not Junk 172, 174
List 261for Mail view 30
Email button 33, 60Meeting 40, 109–110, 110, 193, 253Move 124
folders for email 122–127as search filter 129creating 123creating for email account 124deleting 135–137, 136deleting email from 136dragging messages into 123, 126moving messages to 124restrictions on deleting 135selected, blue as indicator 136smart 133–134synchronizing 122, 124, 127
Folders panefor IMAP accounts 180
fonts for email message 34default settings 145–147
font size 68, 69changing 66
in notes 340for email 147
Fonts panel 65, 69footer for printed address book 299forcing folder synchronization 124Format menu 65, 67formatting
email message text 63–81notes 339–343signature 151
Forward As vCard command 290Forward button 101, 102forwarding
email messages 101–103HTML or plain text mode 144setting options for 143
notes 348, 349Free status, for calendar event 204Friends category 120From field
for meeting 191for message 60
From filter, for searches 129From pop-up menu, for selecting email account 58Full Name field 18
GGeneral pane, in contact window 244GIF file format 72Google Gmail 4Grammar check 371–376
limitations 374grouping messages 114–120
custom arrangements for 116

404 Home tab on ribbon
inserting 342print preview 351
selecting to insert in email 71in signatures 148, 150
IMAP (Internet Message Access Protocol) 4IMAP accounts
advanced settings for security 180automatic checks for new messages 153deleting messages 135dragging message from Inbox to folder 123Folders pane 180folder synchronization 84Outlook support for 4server settings for 179settings for 142setting up 12support for folders on server 122
Important field, for task search filter 325Import Complete page 16importing
data 386–389Entourage data 6, 14–16vCards 291
Import option, in Welcome window 4Import window 387Import wizard 14Inbox 28, 35, 87
messages remaining in 90unread messages in 87viewing list of messages 90
Inbox organizationbasics 113–114category assignment to messages 120–122deleting messages and folders 135–137filters for searches 128–133with folders 122–127with smart folders 133–134sorting and grouping messages 114–120
Inbox zero 123incoming mail. See email messagesIncoming server field, for email account 12indented text 66individuals. See usersINitial CAps panel for AutoCorrect exceptions 378initials, AutoCorrect to expand 380inserting
media in messages 71–74page breaks 298pictures in notes 342signature in email 77, 149
Internet connectiondial-up 155for running schedule 154for sending email 79
Internet information for contacts 237menu display 241
Home tab on ribbon, continuedChoose Folder 124Copy To Folder 124, 126folder name displayed in menu 125
New 26, 162Folder 123, 124, 219, 222, 269, 346
Note 337for Notes view 51
Delete button 53Open Calendar 227, 228Permissions 228Picture 341
Picture from File 342Read 90, 93Reply 98, 99Reply All 98Rules 160Send/Receive arrow 86Send/Receive button 85Task 310, 312for Tasks view 47
Delete button 50Follow Up arrow 49Follow Up button 49Task button 48
Unread 90, 93Hotmail account 4HTML (Hypertext markup language) 63–64
turning off formatting 66HTML mode
font color for 146font for 145, 147setting as default for email 144settings for 144
hyperlinksformatting text as 66in email 70URLs converted to 379, 382
I.ics (calendar data) calendar format file 110identities, selecting when importing Entourage
data 15If area for rule 161, 163Ignore Spelling command 376images
for contacts 236, 243embedded in incoming messages, download
options 142inclusion when printing message 104in incoming email message 89for message background 64, 69in notes 339

meeting response window, opening 405
left alignment of text 66Level pane, in Junk E-mail Protection dialog
box 171List address field, for mailing list rule 168list pane, in Tasks view 47list view, for calendar 217Location field
changing 195for appointment 186, 189, 206for meeting 194
Location filter 129–130
MMac OS X dictionary, adding word to 373Mac OS X Fonts panel 65magnification of contact record picture 243magnifying glass icon 288Mailing List Manager 139, 167
displaying 169mailing lists 167–170
Advanced pane 168mail proxy server 17mail server
POP account messages retained on 19SSL for 12
Mail view 28–36Categorize, Add New 358deleting items from 135keyboard shortcut for 24ribbon 30Spotlight search of 368
Manager category 120managing email. See Inbox organizationMark as read setting options 141MBOX format text file 386Media Browser 71, 74
opening 73Photos pane 341–342
meeting invitationsdeclining 202email message with 203responding to 201–204
meeting invitees 185email addresses for 191field for list of 191indicating importance of 199manually setting response 193, 200notice of meeting cancellation 196response from 194
changes to 196Meeting Response tab, Send 203meeting response window, opening 201
Internet Message Access Protocol (IMAP) 4. See also IMAP accounts
invitees to meeting 185email addresses for 191field for list of 191indicating importance of 199manually setting response 193, 200notice of meeting cancellation 196response from 194
changes to 196iPhoto 72iSync application 300italic text 66
AutoFormat for 379Item Contains filter bar 133, 134item lists 23, 32
font for 145iTunes 72
JJPEG file format 72Junk category 120junk email 140
blocking 171–174deleting, maximum age setting for 173in Mail view 29
Junk Email folderdeleting email from 135, 171including in searches 129reviewing messages in 172
Junk E-mail Protection dialog box 171, 173
KKerberos
for Exchange account authentication 9keyboard shortcuts
for opening message composition window 60for opening Outlook Preferences window 283for text formatting 66for views 24
Llast used filters, restoring 129Launch Alias action 155LDAP servers 246
for email address verification 283and organizational information for contact 244troubleshooting information access 45for validating message recipient names 80

406 meetings
message text in the item list, color of 120Method pop-up menu, for Exchange account 9Microsoft Communicator 286
launching from contact record 287Microsoft Exchange Server 4. See also Exchange
accountscalendar 185support for folders on server 122
Microsoft Hotmail 4Microsoft Mactopia Web site 6Microsoft Messenger for Mac 286Microsoft Office 286
copying text clipping to Clipboard 62Microsoft Outlook icon 5Microsoft Word, Flag for Follow Up command 47Minimize button 35minimizing ribbon 26MobileMe accounts (Apple) 300, 303
contacts synchronized with 302deleting messages 135Folders pane 180folder synchronization 84Outlook support for 4support for folders on server 122
Mobile Phone column, in contacts list 263Modified field, for task search filter 325month, filtering email for current 130Month view 39
printing 230movie, selecting to insert in email 71moving
appointments 197contact records between folders 271email messages to folders 124, 125
MP3 file format 72MPEG file format 72My Calendars heading 219My Day application 382–386
opening 384window 213, 355
NName format
for printed address book 297names
for Calendar folder 222for folders 125
changing 270inclusion when printing message 104, 105for rules 161for smart folders 134
navigation pane 22, 23, 123calendars in 219in Calendar view 36
meetings 38, 185canceling 196, 200changing 198converting appointments to 196default reminder for 215determining available times for participants 191scheduling from email messages 109–110modifying 195scheduling 97, 191–195setting options 204–210
Meeting tab on ribbon 26Cancel 198Decline 203Scheduling 199Send 192, 194Send Cancellation 200Send Update 196
Meeting window 38, 45for group invitation 253opening 40Scheduling Assistant 194
green check for invitee 192Menu bar 22, 23menus, buttons to display 26message body of email 32, 33message composition window 31, 45, 58, 253
displaying 97Message tab 64
Send 177opening 35, 60, 374Options tab 64
Bcc field 61Security 174, 177
text entry in 62title bar 62
Message field, for meeting 191Message header for email 32, 33Message menu, Attachments, Save 95message reading window 32, 88, 91, 92
opening reply 98Print button 104
messages. See email messagesmessage sender, viewing information 96–97Message tab on ribbon 34
Attach 75Check Names 80for character and paragraph formatting 64High Priority button 77Insert a Hyperlink 70for message composition window 31Picture 72plain text and 67Reply button 35Send 81, 100Signatures 77

Outlook Data File format, importing 407
openingattachment from within Outlook 94Outlook, running schedule when 154
Open Other User’s Folder dialog box 227, 228Open Outlook Contact icon 97Options tab on ribbon
Arrangement, Custom Arrangements 116Background Picture arrow 69for background of message 64for Mail view 35
Format button 67for message composition window 31Spelling 375
order of rules when running 162Organization pane in Contacts view 45, 244Organize tab on ribbon 25
All Read 90Arrange By 114, 116, 261, 320, 344
Custom Arrangements 117Make This The Default View 264Restore to Defaults 120
in Calendar view 37Categorize 345
Add New 357Completed 321for Contacts view 42Conversations 91Flagged Items 321Grid 217, 218List 218for Mail view 30Me 290Me button 46Month 218for Notes view 51Overdue 321Reading Pane 259, 317, 343
Hidden 92, 119Scale slider 217, 218Sync 124, 127
and deleted messages 135for Tasks view 47Week 218
outgoing email. See email messagesOutgoing Server field, for email account 12Outlook
checking for email 84information types 22opening attachment from within 94predefined categories 265search throughout 368setting as default email application 7views 24
Outlook Data File format, importing 386
clearing all displayed check boxes 267in Contact view 41in Tasks view 47, 317in Notes view 51Shared Calendars 227showing new categories 357
Networking category 120Newest on Top sort order 117notes
category assignment 345converting text to bulleted list 339copy and paste 337creating 335–338dragging contents 347font size change 340formatting 339–343forwarding 349inserting pictures 342about mailing list 168about meeting 201pasting clipping text into 364pictures in 339printing 348saving 336, 338sharing 348–351sorting by Date Modified column 344viewing and organizing 343–347
Notes lists 51Notes pane, in contact window 245Notes view 50–53, 336
displaying 52keyboard shortcut for 24Spotlight search of 368
note window 52, 336closing 337opening 337
numbered list, AutoFormat for 379
OOffice 2008 Identities folder, Entourage data in 14Office Reminders
turning on 316Office Reminders window 205–206, 208Office ribbon 21. See also ribbon.olm files
exporting 387importing 386
On My ComputerCalendars 219Inbox 122
creating folder for 123, 126Open dialog sheet 73
for attaching files 74

408 Outlook default settings
on printed note 348on printed task list 331
paper clip icon 93, 95paper copies, vs. electronic 103paragraph formatting 64Password field
for email account 12for Exchange account 9
pasting. See also Copy and Pasteclipping text into note 364
PDF file formatfor attachments 75for message output 105from Print dialog box 231
Permissions pane, for calendar 226, 228Personal category 120personal information for contacts 237–238
menu display 242Phone List 299–300
printing 296phone numbers
default format 240, 284for contacts 236format options 282menu of fields 240
Picture from File command 71pictures
for contacts 236, 243embedded in incoming messages, download
options 142inclusion when printing message 104in incoming email message 89inserting in note 342for message background 64, 69in notes 339in print preview of note 351selecting to insert in email 71in signatures 148, 150
plain text 63default font and font size 145font for 145and grayed-out formatting options 67settings for 144switching to 64
PNG file format 72POP accounts
advanced settings for security 180automatic checks for new messages 153dragging message from Inbox to folder 123folders for 122message storage on server 19Outlook support for 4server settings for 179setting up 12
Post Office Protocol (POP) 4
Outlook default settings 22for area code 282, 284email account for replies or forwarded
messages 144email account for sending messages 58font and font size for plain text 145HTML for email 144for menu button 27reminder time for events 215restoring for arrangement 120restoring view to 114for signature 148, 152
Outlook for Mac window 21Outlook for Windows, importing data from 14Outlook interface
basics 22–25Calendar view 36–41Contacts view 41–46vs. Entourage 25Mail view 28–36Notes view 50–53ribbon 25–27Tasks view 46–50troubleshooting appearance 22
Outlook menuPreferences 144, 147, 181Work Offline 79
Outlook Preferences window 283, 379Accounts preferences pane 176, 177, 181Calendar 214, 215Fonts preferences pane 145, 147General preferences 7Reading preferences pane 144Rules 160Schedules 153Signatures 148, 149
Outlook windowviewing messages in 32
Out Of Office Assistant 106, 108Out Of Office status, for calendar event 204Overdue field, for task search filter 325Overdue filter 128Overdue folder 322Overdue Mail folder 133Overdue tasks, filtering 321
Ppage breaks in printed address book 297
inserting 298page numbers
inclusion when printing message 105on printed address book 297on printed calendar 231
removing 232

Rules feature in Outlook 409
in Tasks view window 317moving to bottom 92opening attachment from 96
Received and Date Sent filter, for searches 130Receive Mail action 155Recently Completed folder 322Recently Completed smart folder 328record 236. See also contact recordsrecurrence dialog sheet 210Recurrence option
for schedule 154for task 309for repeating calendar events 204
Recurring Schedule dialog box 158recurring series of appointments, deleting 210recurring tasks 328Reference Tools panel 355, 362, 364reminder
for Birthday field 243for calendar event 204permanently dismissing window 205for task 309, 310, 326
removing. See deletingRepeating Schedule 154Replace text as you type option for
AutoCorrect 377replies to email 98–101
discarding 100HTML or plain text mode 144including original message text 99setting options for 143
request for an RSVP option, for calendar event 204responding to meeting invitations 201–204
changing 202response from meeting invitees 194
changing 196manually setting 193, 200
restoring last used filters 129reverse sort order 116Reviewer option for calendar 226ribbon 21, 23, 25–27. See also specific tab names
in Calendar view 37in Contacts view 42in Tasks view 47in Mail view 30for message composition window 31for message reading window 33minimizing 26
right alignment of text 66Rules feature in Outlook 123
for automatic email replies 107for mailing lists 139to process email messages 160–166testing 166
preconfigured Outlook filters 128–129preconfigured smart folders 133predefined categories 120predefined criteria, for message filters 114presets for printing 104preview
of message PDF 105of printed message 105
Preview button, for attachment 94, 95Previous Day button (My Day window) 384primary calendars 219Print dialog box
for calendar 230, 231for contacts 296, 298for messages 104, 105for notes 350for tasks 329–333variations in display 104
printingcalendars 229–232contact records 295–300email messages 103–106notes 348tasks 329–333
priorityfor email 76, 77for grouping items 118for tasks 309, 311
sorting list by 320Private option, for calendar events 204Progress window 85, 86project management, categories and 314projects 307.pst files, importing 386
QQualcomm Eudora, importing data from 386Quick Look, for attachments 94, 96QuickTime file format 72quitting Outlook, running schedule when 154
Rread, email message marked as 90reading email messages 87–93reading pane 22, 23, 35
for contact informationGeneral tab 246group member list in 252
for incoming messages 88hiding 92, 119, 260
in Task view 319
410 Rules preferences pane
Attachment 131Company 275displaying 131Email 275filters on 129–130Flagged 276Has Address 275Has Phone 275Modified 276Name 275Save 133, 277Subject 131
Secure Sockets Layer (SSL), for mail server 12security
for email messages 76, 140, 174–177setting options for 142
Select an Identity pane 15selected folders, blue as indicator 136selecting
all text in text clipping 62contact 42email account for sending messages 58multiple messages with COMMAND key 127multiple records in contact list 266text for inclusion in message reply 100, 102
Select User dialog box 225, 228, 229Send All action 155Send All schedule 153Send an Instant Message icon 96senders, blocking junk email from specific 171Send Mail button 96
for contact record 97, 287Send & Receive All schedule 153Sent Items folder 80
deleting email from 135including in searches 129
Sent Items in Mail view 28Sent To filter, for searches 130servers
advanced settings for email accounts 178email folders on 122LDAP 246
for email address verification 283and organizational information for contact 244troubleshooting information access 45for validating message recipient names 80
mailPOP account messages retained on 19SSL for 12
Settings button (My Day window) 383sharing
calendars 224–229removing 229
notes 348–351
Rules preferences pane 160displaying 163
Run AppleScript action 155
SSafe Domains pane, in Junk E-mail Protection
dialog box 171saving
appointment changes 197contact record changes 249contract groups 252email attachment to disk 95email message as draft 35, 60, 63filters in smart folders 133notes 52, 336, 338Outlook preferences changes 144search filters 277smart folder changes 278smart folder settings 133tasks 49, 384
changes 327Schedule Meeting button 97
for contact record 287Schedules preferences pane 156
Next Run column 158scheduling
actions 153–159appointments 186–191meetings 191–195
from email messages 109–110Scheduling Assistant 226
field for meetings 191Scheduling Assistant pane
options for changes 196when changing meeting 199–200
Scrapbook 355, 362ScreenTips 26, 287search. See also Spotlight search
for contacts 273–276for messages 114
canceling 130filters for 128–133
savingcriteria in smart folders 133filters 277
for tasks 323–325search box, for Copy to Folder command 126Search tab on ribbon 130, 366
Advanced 130, 134, 277, 278All Contacts 274, 370All Items 369All Mail 131All Tasks 323

tasks 411
for appointment 187, 189for tasks 326
Starts time fieldfor appointment 189, 206for meeting 194
Start time, for printed calendar 230, 232status bar 22, 23
item count for list on 125Status option, for calendar event 204street addresses
default format 283options for 289predefined formats 282
strikethrough text 66style
for printed task list 330for printed calendar 230, 231for task list 332
subfolders, as search filter 129Subject field
for appointment 186, 189, 206changing 195for email 32, 62of forwarded message 101for meeting 194of reply 98for task search filter 325
Subject filter bar 131–132Subject filter, for searches 130synchronizing contacts 300–303synchronizing folders 122, 127
automatic vs. forcing 124Sync Services 300
preferences pane 301synonyms 365
Ttab-delimited text file 386
exporting 386, 389tabs on ribbon 25. See also specific tab namestask lists 47
for current week 322selecting fields to include 331
task name field 49tasks
adding to My Day 384creating 308–314examples 307filtering 321–323flagging items for follow-up 314–316marking as completed 50, 326modifying and removing 326–329options for printed calendar 230
shortcut keys. See keyboard shortcutsfor saving notes 336
Show in Groups command 116Show Spelling and Grammar command 373signatures 76, 147–153
creating 150deleting 152formatting 151inserting 77setting default 152
Signatures preferences pane 148Size filter bar, closing 132size of attached files, filter based on 131size of font 34, 68, 69
changing 66Smart folders 133–134, 277–279
in Contacts view 42deleting 135–136displaying list 137in Mail view 29in Notes view 51preconfigured 133saving settings 133for tasks 321, 322in Tasks view 47
S/MIME standard 175Snooze button, for reminder window 205Sort groups, for custom arrangement 118sorting
Calendar list 217, 218contact records list 258–264contacts search result 282messages 114–120
custom arrangements for 116notes by Date Modified column 344printed address book records 297task list 317, 319
order for 47spam. See junk emailspam filters 29, 79Spelling check 371–376
limitations 374Spotlight search 366–371Spotlight search box 131SSL (Secure Sockets Layer), for mail server 12Standard signature 147
displaying 149Start a Video Call icon 97Start date
for meeting 194for printed calendar 230, 232for task 309for task search filter 325
Starts fieldchanging 195

412 tasks
Out Of Office 106, 109Schedules 153, 156Sync Service 301
Translation 362Travel category 120troubleshooting
connection problems 17–18LDAP server information 45Outlook window appearance 22ribbon appearance 23
Uunderline text 66Undo command 35
for formatting changes 64Unread field, for task search filter 325Unread filter 128, 130–131unread items 30unread messages in Inbox 91Updated Contacts smart folder 277URLs, converting to hyperlinks 379, 382User Name
for email account 12for Exchange account 9
users. See also specific account types (email accounts; Exchange accounts; etc.); contacts
permission to access calendar 225
VvCards 60
creating and sharing 290–295desktop icon for 292from another user, adding to contact list 290–291opening in contact window 293
.vcf file extension 290Verdana font 67View menu
Columns 116, 119–120, 262Me Contact 290Scrapbook 362
views 24Calendar view 36–41, 185, 216–218
appointment display 190–191displaying 39imported holidays displayed 388keyboard shortcut for 24meeting display 194Spotlight search of 368, 370
Contacts view 41–46, 235, 314displaying 44keyboard shortcut for 24
tasks, continuedprinting 329–333recurring 328search for 323–325viewing 317–321
Tasks button (My Day window) 383Tasks view 46–50, 308, 315
displaying 48keyboard shortcut for 24Spotlight search of 368
Task tab on ribbonCategorize 311, 312Mark Complete 327Recurrence 312–313Save & Close 312, 328Save & Close button 49
task window 308, 310opening 320, 327
Team category 120, 121Tentative status
as meeting invitation response 201, 202for calendar event 204
testing rules 162, 166text clipping window 62text for automatic email replies 107text wrap, in printed task list 332Then area for rule 161, 164Thesaurus 362
displaying 364–365Timed Schedule 154Time zone
for appointment 188, 189setting default for calendar events 215
title of task 309Today button (My Day window) 384to-do list 307. See also tasksTo field 59
for email 32, 60for meeting 191, 194
toolbar 22, 23for message composition window 31for message reading window 33My Day 383Print button 104, 105
Toolbox 355, 362–366Tools menu (Outlook), Accounts 8Tools menu (Word), Flag for Follow Up 315Tools tab on ribbon 25
in Calendar view 37for Contacts view 42Export 388Import 387Mailing Lists 169for Mail view 30for Notes view 51

yellow alert icon 413
Week viewprinting 230scaling window grid 217switching to 218
Welcome To Outlook For Mac window 4What’s New button 6
width of columnchanging 264in task list 319
Window menuCategories 361Error Log 85My Day 383Progress 85, 86
Windows Live ID account 286Windows Live Messenger 97Word document, flagging for follow-up 314Work day ends setting 214, 215Work day starts setting 214, 215Work Fax column, in contacts list 263Work Offline 79Work Schedule, options for 214Work week setting 214, 215Work Week view 39
printing 230, 231scaling window grid 217
wrapping text, in printed task list 332
Yyellow alert icon 85
list view pane 244reading pane display options 258Spotlight search 368, 369–371
Day view 39printing 230scaling window grid 217
Mail view 28–36Categorize, Add New 358deleting items from 135keyboard shortcut for 24ribbon 30Spotlight search of 368
Month view 39printing 230
Notes view 50–53, 336displaying 52keyboard shortcut for 24Spotlight search of 368
Tasks view 46–50, 308, 315displaying 48keyboard shortcut for 24Spotlight search of 368
view switcher 21, 22, 23, 189Contacts 314resizing 24Tasks 315
WWeb addresses, in contact record, opening 289Web browser
launching to view Microsoft Mactopia Web site 6opening from contact record 289
Web Search 362