mcafee alert manager 4.7.1 product guidedownloadcenter.mcafee.com/products/manuals/total... ·...
TRANSCRIPT
Alert Manager™
version 4.7.1
Product GuideRevision 1.0

COPYRIGHTCopyright © 2004 Networks Associates Technology, Inc. All Rights Reserved. No part of this publication may be reproduced, transmitted, transcribed, stored in a retrieval system, or translated into any language in any form or by any means without the written permission of Networks Associates Technology, Inc., or its suppliers or affiliate companies. To obtain this permission, write to the attention of the Network Associates legal department at: 5000 Headquarters Drive, Plano, Texas 75024, or call +1-972-963-8000.
TRADEMARK ATTRIBUTIONSActive Firewall, Active Security, ActiveSecurity (in Katakana), ActiveHelp, ActiveShield, AntiVirus Anyware and design, Bomb Shelter, Certified Network Expert, Clean-Up, CleanUp Wizard, ClickNet, CNX, CNX Certification Certified Network Expert and design, Covert, Design (Stylized E), Design (Stylized N), Disk Minder, Distributed Sniffer System, Distributed Sniffer System (in Katakana), Dr Solomon’s, Dr Solomon’s label, Entercept, Enterprise SecureCast, Enterprise SecureCast (in Katakana), ePolicy Orchestrator, EZ SetUp, First Aid, ForceField, GMT, GroupShield, GroupShield (in Katakana), Guard Dog, HomeGuard, Hunter, IntruShield, Intrusion Prevention Through Innovation, IntruVert Networks, LANGuru, LANGuru (in Katakana), M and Design, McAfee, McAfee (in Katakana), McAfee and design, McAfee.com, McAfee VirusScan, NA Network Associates, Net Tools, Net Tools (in Katakana), NetCrypto, NetOctopus, NetScan, NetShield, NetStalker, Network Associates, Network Associates Coliseum, NetXray, NotesGuard, Nuts & Bolts, Oil Change, PC Medic, PCNotary, PrimeSupport, Recoverkey, Recoverkey - International, Registry Wizard, RingFence, Router PM, SecureCast, SecureSelect, Sniffer, Sniffer (in Hangul), SpamKiller, Stalker, TIS, TMEG, Total Network Security, Total Network Visibility, Total Network Visibility (in Katakana), Total Virus Defense, Trusted Mail, UnInstaller, Virex, Virus Forum, ViruScan, VirusScan, WebScan, WebShield, WebShield (in Katakana), WebSniffer, WebStalker, WebWall, What’s The State Of Your IDS?, Who’s Watching Your Network, WinGauge, Your E-Business Defender, Zip Manager are registered trademarks or trademarks of Network Associates, Inc. and/or its affiliates in the US and/or other countries. Sniffer® brand products are made only by Network Associates, Inc. All other registered and unregistered trademarks herein are the sole property of their respective owners.
LICENSE INFORMATIONLicense AgreementNOTICE TO ALL USERS: CAREFULLY READ THE APPROPRIATE LEGAL AGREEMENT CORRESPONDING TO THE LICENSE YOU PURCHASED, WHICHSETS FORTH THE GENERAL TERMS AND CONDITIONS FOR THE USE OF THE LICENSED SOFTWARE. IF YOU DO NOT KNOW WHICH TYPE OF LICENSEYOU HAVE ACQUIRED, PLEASE CONSULT THE SALES AND OTHER RELATED LICENSE GRANT OR PURCHASE ORDER DOCUMENTS THATACCOMPANIES YOUR SOFTWARE PACKAGING OR THAT YOU HAVE RECEIVED SEPARATELY AS PART OF THE PURCHASE (AS A BOOKLET, A FILEON THE PRODUCT CD, OR A FILE AVAILABLE ON THE WEB SITE FROM WHICH YOU DOWNLOADED THE SOFTWARE PACKAGE). IF YOU DO NOTAGREE TO ALL OF THE TERMS SET FORTH IN THE AGREEMENT, DO NOT INSTALL THE SOFTWARE. IF APPLICABLE, YOU MAY RETURN THE PRODUCTTO NETWORK ASSOCIATES OR THE PLACE OF PURCHASE FOR A FULL REFUND.
AttributionsThis product includes or may include:
Software developed by the OpenSSL Project for use in the OpenSSL Toolkit (http://www.openssl.org/). Cryptographic software written by Eric A. Young andsoftware written by Tim J. Hudson. Some software programs that are licensed (or sublicensed) to the user under the GNU General Public License (GPL) or othersimilar Free Software licenses which, among other rights, permit the user to copy, modify and redistribute certain programs, or portions thereof, and have access tothe source code. The GPL requires that for any software covered under the GPL which is distributed to someone in an executable binary format, that the source codealso be made available to those users. For any such software covered under the GPL, the source code is made available on this CD. If any Free Software licensesrequire that Network Associates provide rights to use, copy or modify a software program that are broader than the rights granted in this agreement, then such rightsshall take precedence over the rights and restrictions herein. Software originally written by Henry Spencer, Copyright 1992, 1993, 1994, 1997 Henry Spencer.
Software originally written by Robert Nordier, Copyright © 1996-7 Robert Nordier. Software written by Douglas W. Sauder. Software developed by theApache Software Foundation (http://www.apache.org/). A copy of the license agreement for this software can be found at www.apache.org/licenses/LICENSE-2.0.txt. International Components for Unicode (“ICU”) Copyright © 1995-2002 International Business Machines Corporation and others. Software developedby CrystalClear Software, Inc., Copyright © 2000 CrystalClear Software, Inc. FEAD® Optimizer® technology, Copyright Netopsystems AG, Berlin, Germany.
Outside In® Viewer Technology © 1992-2001 Stellent Chicago, Inc. and/or Outside In® HTML Export, © 2001 Stellent Chicago, Inc. Software copyrighted byThai Open Source Software Center Ltd. and Clark Cooper, © 1998, 1999, 2000. Software copyrighted by Expat maintainers. Software copyrighted by TheRegents of the University of California, © 1989. Software copyrighted by Gunnar Ritter. Software copyrighted by Sun Microsystems®, Inc.© 2003. Softwarecopyrighted by Gisle Aas. © 1995-2003. Software copyrighted by Michael A. Chase, © 1999-2000. Software copyrighted by Neil Winton, © 1995-1996.
Software copyrighted by RSA Data Security, Inc., © 1990-1992. Software copyrighted by Sean M. Burke, © 1999, 2000. Software copyrighted by MartijnKoster, © 1995. Software copyrighted by Brad Appleton, © 1996-1999. Software copyrighted by Michael G. Schwern, © 2001. Software copyrighted byGraham Barr, © 1998. Software copyrighted by Larry Wall and Clark Cooper, © 1998-2000. Software copyrighted by Frodo Looijaard, © 1997. Softwarecopyrighted by the Python Software Foundation, Copyright © 2001, 2002, 2003. A copy of the license agreement for this software can be found at www.python.org.
Software copyrighted by Beman Dawes, © 1994-1999, 2002. Software written by Andrew Lumsdaine, Lie-Quan Lee, Jeremy G. Siek © 1997-2000 University ofNotre Dame. Software copyrighted by Simone Bordet & Marco Cravero, © 2002. Software copyrighted by Stephen Purcell, © 2001. Software developedby the Indiana University Extreme! Lab (http://www.extreme.indiana.edu/). Software copyrighted by International Business Machines Corporation and others,© 1995-2003. Software developed by the University of California, Berkeley and its contributors. Software developed by Ralf S. Engelschall<[email protected]> for use in the mod_ssl project (http://www.modssl.org/). Software copyrighted by Kevlin Henney, © 2000-2002. Softwarecopyrighted by Peter Dimov and Multi Media Ltd. © 2001, 2002. Software copyrighted by David Abrahams, © 2001, 2002. See http://www.boost.org/libs/bind/bind.html for documentation. Software copyrighted by Steve Cleary, Beman Dawes, Howard Hinnant & John Maddock, © 2000. Software copyrighted byBoost.org, © 1999-2002. Software copyrighted by Nicolai M. Josuttis, © 1999. Software copyrighted by Jeremy Siek, © 1999-2001. Software copyrightedby Daryle Walker, © 2001. Software copyrighted by Chuck Allison and Jeremy Siek, © 2001, 2002. Software copyrighted by Samuel Krempp, © 2001. Seehttp://www.boost.org for updates, documentation, and revision history. Software copyrighted by Doug Gregor ([email protected]), © 2001, 2002. Softwarecopyrighted by Cadenza New Zealand Ltd., © 2000. Software copyrighted by Jens Maurer, © 2000, 2001. Software copyrighted by Jaakko Järvi([email protected]), © 1999, 2000. Software copyrighted by Ronald Garcia, © 2002. Software copyrighted by David Abrahams, Jeremy Siek, and DaryleWalker, © 1999-2001. Software copyrighted by Stephen Cleary ([email protected]), © 2000. Software copyrighted by Housemarque Oy <http://www.housemarque.com>, © 2001. Software copyrighted by Paul Moore, © 1999. Software copyrighted by Dr. John Maddock, © 1998-2002. Softwarecopyrighted by Greg Colvin and Beman Dawes, © 1998, 1999. Software copyrighted by Peter Dimov, © 2001, 2002. Software copyrighted by Jeremy Siek andJohn R. Bandela, © 2001. Software copyrighted by Joerg Walter and Mathias Koch, © 2000-2002.
Issued JULY 2004 / Alert Manager™ software version 4.7.1DOCUMENT BUILD 004-EN

Contents
1 Introducing Alert Manager . . . . . . . . . . . . . . . . . . . . . . . . . . . . . . . 5
What’s new in this release . . . . . . . . . . . . . . . . . . . . . . . . . . . . . . . . . . . . . . . . . . . . . . . . . . 5
How Alert Manager works . . . . . . . . . . . . . . . . . . . . . . . . . . . . . . . . . . . . . . . . . . . . . . . . . . 6
Using this guide . . . . . . . . . . . . . . . . . . . . . . . . . . . . . . . . . . . . . . . . . . . . . . . . . . . . . . . . . . 9
Audience . . . . . . . . . . . . . . . . . . . . . . . . . . . . . . . . . . . . . . . . . . . . . . . . . . . . . . . . . . . 9
Conventions . . . . . . . . . . . . . . . . . . . . . . . . . . . . . . . . . . . . . . . . . . . . . . . . . . . . . . . 10
Resources . . . . . . . . . . . . . . . . . . . . . . . . . . . . . . . . . . . . . . . . . . . . . . . . . . . . . . . . . . . . . 11
Getting product information . . . . . . . . . . . . . . . . . . . . . . . . . . . . . . . . . . . . . . . . . . . . 11
Contacting McAfee Security & Network Associates . . . . . . . . . . . . . . . . . . . . . . . . . . 12
2 Installing Alert Manager . . . . . . . . . . . . . . . . . . . . . . . . . . . . . . . . 13
Installing Alert Manager . . . . . . . . . . . . . . . . . . . . . . . . . . . . . . . . . . . . . . . . . . . . . . . . . . . 13
System requirements . . . . . . . . . . . . . . . . . . . . . . . . . . . . . . . . . . . . . . . . . . . . . . . . 14
Using the Setup utility to install the product . . . . . . . . . . . . . . . . . . . . . . . . . . . . . . . . 15
Removing Alert Manager . . . . . . . . . . . . . . . . . . . . . . . . . . . . . . . . . . . . . . . . . . . . . . . . . . 19
Using the Setup utility to remove the product . . . . . . . . . . . . . . . . . . . . . . . . . . . . . . 20
Using the Add/Remove Programs utility to remove the product . . . . . . . . . . . . . . . . 20
3 Configuring Alerts . . . . . . . . . . . . . . . . . . . . . . . . . . . . . . . . . . . . . 21
Configuring recipients and methods . . . . . . . . . . . . . . . . . . . . . . . . . . . . . . . . . . . . . . . . . 22
Adding alert methods . . . . . . . . . . . . . . . . . . . . . . . . . . . . . . . . . . . . . . . . . . . . . . . . 23
Sending a test message . . . . . . . . . . . . . . . . . . . . . . . . . . . . . . . . . . . . . . . . . . 24
Setting the alert priority level for recipients . . . . . . . . . . . . . . . . . . . . . . . . . . . . 25
Viewing the Summary page . . . . . . . . . . . . . . . . . . . . . . . . . . . . . . . . . . . . . . . . . . . 26
Forwarding alert messages to another computer . . . . . . . . . . . . . . . . . . . . . . . . . . . 27
Sending an alert as a network message . . . . . . . . . . . . . . . . . . . . . . . . . . . . . . . . . . 31
Sending alert messages to e-mail addresses . . . . . . . . . . . . . . . . . . . . . . . . . . . . . . 33
Sending alert messages to a printer . . . . . . . . . . . . . . . . . . . . . . . . . . . . . . . . . . . . . 37
Sending alert messages via SNMP . . . . . . . . . . . . . . . . . . . . . . . . . . . . . . . . . . . . . . 39
Launching a program as an alert . . . . . . . . . . . . . . . . . . . . . . . . . . . . . . . . . . . . . . . . 40
Logging alert notifications in an event log . . . . . . . . . . . . . . . . . . . . . . . . . . . . . . . . . 43
Sending a network message to a terminal server . . . . . . . . . . . . . . . . . . . . . . . . . . . 45
Product Guide iii

Contents
Using centralized alerting . . . . . . . . . . . . . . . . . . . . . . . . . . . . . . . . . . . . . . . . . . . . . 47
Customizing alert messages . . . . . . . . . . . . . . . . . . . . . . . . . . . . . . . . . . . . . . . . . . . . . . . 49
Enabling and disabling alert messages . . . . . . . . . . . . . . . . . . . . . . . . . . . . . . . . . . . 50
Editing alert messages . . . . . . . . . . . . . . . . . . . . . . . . . . . . . . . . . . . . . . . . . . . . . . . 50
Changing alert priority . . . . . . . . . . . . . . . . . . . . . . . . . . . . . . . . . . . . . . . . . . . . 51
Editing alert message text . . . . . . . . . . . . . . . . . . . . . . . . . . . . . . . . . . . . . . . . . 53
Using Alert Manager system variables . . . . . . . . . . . . . . . . . . . . . . . . . . . . . . . 53
A Troubleshooting . . . . . . . . . . . . . . . . . . . . . . . . . . . . . . . . . . . . . . . 57
Frequently Asked Questions (FAQ) . . . . . . . . . . . . . . . . . . . . . . . . . . . . . . . . . . . . . . . . . . 57
General questions . . . . . . . . . . . . . . . . . . . . . . . . . . . . . . . . . . . . . . . . . . . . . . . . . . . 57
Active Directory questions . . . . . . . . . . . . . . . . . . . . . . . . . . . . . . . . . . . . . . . . . . . . . 58
Troubleshooting common problems . . . . . . . . . . . . . . . . . . . . . . . . . . . . . . . . . . . . . . . . . . 60
General issues . . . . . . . . . . . . . . . . . . . . . . . . . . . . . . . . . . . . . . . . . . . . . . . . . . . . . 61
Active Directory issues . . . . . . . . . . . . . . . . . . . . . . . . . . . . . . . . . . . . . . . . . . . . . . . 63
Glossary . . . . . . . . . . . . . . . . . . . . . . . . . . . . . . . . . . . . . . . . . . . . . 65
Index . . . . . . . . . . . . . . . . . . . . . . . . . . . . . . . . . . . . . . . . . . . . . . . . 69
iv Alert Manager™ software version 4.7.1

1
Introducing Alert ManagerAlert Manager provides you with immediate notification that your anti-virus client or server software has detected a virus. Alerting is incorporated into anti-virus software, such as VirusScan® Enterprise and other McAfee Security products. Alert Manager receives alerts and notifies you, or others, when viruses are detected on a computer in your network. It also provides a variety of options for what to do with alerts that do occur.
These topics are included in this section:
What’s new in this release
How Alert Manager works
Using this guide
Resources
What’s new in this releaseThis release of Alert Manager includes the following changes:
Any Patches that have been released since the previous release. See the Readme for specific details.
New alerts as required to be compatible with VirusScan Enterprise.
Product Guide 5

Introducing Alert Manager
How Alert Manager worksAlert Manager allows you to configure two basic aspects of alerting:
Where and how alerts are sent. Configure where and how to send alerts generated by anti-virus software. Messages can be sent to workstation users or anti-virus administrators using a variety of alerting methods. Some of these include network messages, e-mail messages, printed messages, and SNMP traps.
What text is shown in the alert. Configure both the message text and the priority levels of individual alerts. In addition, specific alerts can be completely disabled if desired.
Alert Manager handles alerts and events generated by your anti-virus software in real time. In a typical configuration, Alert Manager resides on a central server and listens for alert events sent to it by client or server anti-virus software applications on the network. These anti-virus software applications can be workstation or server applications such as VirusScan Enterprise or mail server applications like GroupShield® that are configured to send alerts to Alert Manager.
This diagram provides an overview of how Alert Manager works:
Figure 1-1. Workstations and servers send events to Alert Manager
6 Alert Manager™ software version 4.7.1

How Alert Manager works
Generally, you enable Alert Manager alerting in the client anti-virus application so that the application sends notification to the Alert Manager server. You must specify the server name where Alert Manager is installed, such as \\AlertManagerServer.
Note that you configure your client anti-virus software to point at the server where Alert Manager is installed. You do not configure Alert Manager to point at your client systems. Refer to your client or server anti-virus software documentation for more detailed information on how to configure it to send alerts to Alert Manager.
When the anti-virus software generates an alert, for example, when VirusScan Enterprise detects and cleans a virus from an infected e-mail message, it sends the alert to Alert Manager. Alert Manager receives the alert, then distributes it as an alert notification message according to pre-configured alert methods.
Figure 1-2. Specify the Alert Manager server
Product Guide 7

Introducing Alert Manager
This diagram describes how alerts are collected and distributed:
Alert Manager distributes alert notification messages depending on how you configure Alert Manager to handle alerts of the different priority levels. For example, when critical or major priority alerts are detected, you may want Alert Manager to send an e-mail notification to a network administrator’s pager for immediate action, and also to network users via a pop-up message. Similarly, you may choose to have lower priority alerts logged to a log file rather than distributed as e-mail messages.
See Configuring recipients and methods on page 22 for more information on the specific kinds of alert methods available.
Figure 1-3. Alert Manager collects and distributes alerts
8 Alert Manager™ software version 4.7.1

Using this guide
Using this guideThis guide includes this information:
Overview of the product.
Detailed instructions for installing the product.
Detailed instructions for configuring the product.
Troubleshooting information.
Glossary of terms.
When using this guide, consider the following:
Audience
Conventions
AudienceThis information is intended for system and network administrators who are responsible for their company’s anti-virus and security program.
Product Guide 9

Introducing Alert Manager
ConventionsThis guide uses the following conventions:
Bold All words from the user interface, including options, menus, buttons, and dialog box names.
ExampleType the User name and Password of the desired account.
Courier The path of a folder or program; a web address (URL); text that represents something the user types exactly (for example, a command at the system prompt).
ExamplesThe default location for the program is:
C:\Program Files\Network Associates\VirusScan
Visit the Network Associates web site at:http://www.networkassociates.com
Run this command on the client computer:C:\SETUP.EXE
Italic For emphasis or when introducing a new term; for names of product manuals and topics (headings) within the manuals.
ExampleRefer to the VirusScan Enterprise Product Guide for more information.
<TERM> Angle brackets enclose a generic term.
ExampleIn the console tree under ePolicy Orchestrator, right-click <SERVER>.
NOTE Supplemental information; for example, an alternate method of executing the same command.
WARNING Important advice to protect a user, computer system, enterprise, software installation, or data.
10 Alert Manager™ software version 4.7.1

Resources
ResourcesRefer to these sections for additional resources:
Getting product information
Contacting McAfee Security & Network Associates
Getting product information
Installation Guide *† System requirements and instructions for installing and starting the software.
Product Guide * Product introduction and features, detailed instructions for configuring the software, information on deployment, recurring tasks, and operating procedures.
Alert Manager™ Product Guide
McAfee Installation Designer™ Product Guide
ePolicy Orchestrator® Product Guide
Help § High-level and detailed information on configuring and using the software.
What’s This? field-level help.
Configuration Guide * For use with ePolicy Orchestrator®. Procedures for configuring, deploying, and managing your McAfee Security product through ePolicy Orchestrator management software.
Implementation Guide * Supplemental information for product features, tools, and components.
Release Notes ‡ ReadMe. Product information, resolved issues, any known issues, and last-minute additions or changes to the product or its documentation.
Contacts ‡ Contact information for McAfee Security and Network Associates services and resources: technical support, customer service, AVERT (Anti-Virus Emergency Response Team), beta program, and training. This file also includes phone numbers, street addresses, web addresses, and fax numbers for Network Associates offices in the United States and around the world.
* An Adobe Acrobat .PDF file on the product CD or the McAfee Security download site.
† A printed manual that accompanies the product CD. Note: Some language manuals may be available only as a .PDF file.
‡ Text files included with the software application and on the product CD.
§ Help accessed from the software application: Help menu and/or Help button for page-level help; right-click option for What’sThis? help.
Product Guide 11
Introducing Alert Manager
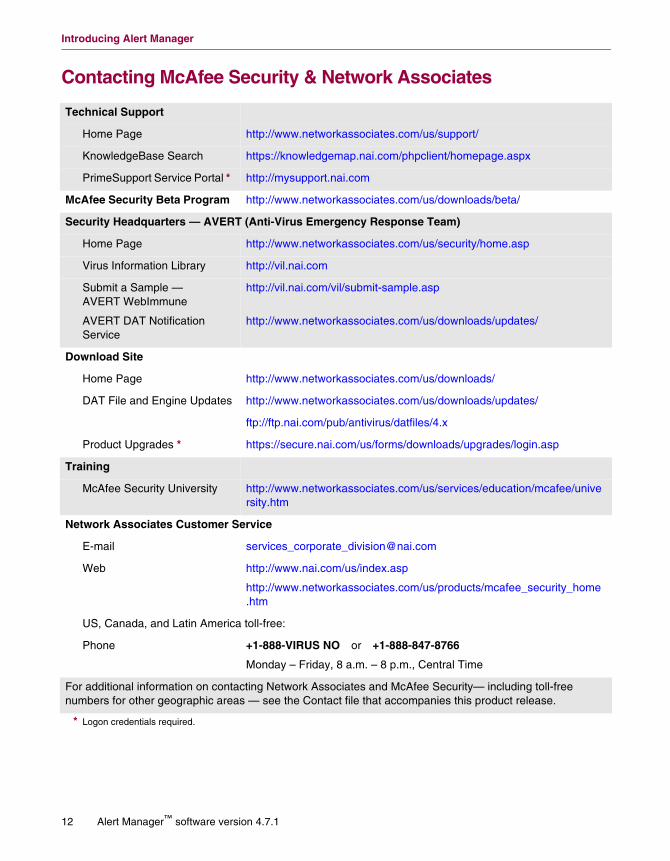
Contacting McAfee Security & Network Associates
Technical Support
Home Page http://www.networkassociates.com/us/support/
KnowledgeBase Search https://knowledgemap.nai.com/phpclient/homepage.aspx
PrimeSupport Service Portal * http://mysupport.nai.com
McAfee Security Beta Program http://www.networkassociates.com/us/downloads/beta/
Security Headquarters — AVERT (Anti-Virus Emergency Response Team)
Home Page http://www.networkassociates.com/us/security/home.asp
Virus Information Library http://vil.nai.com
Submit a Sample — AVERT WebImmune
AVERT DAT Notification Service
http://vil.nai.com/vil/submit-sample.asp
http://www.networkassociates.com/us/downloads/updates/
Download Site
Home Page http://www.networkassociates.com/us/downloads/
DAT File and Engine Updates http://www.networkassociates.com/us/downloads/updates/
ftp://ftp.nai.com/pub/antivirus/datfiles/4.x
Product Upgrades * https://secure.nai.com/us/forms/downloads/upgrades/login.asp
Training
McAfee Security University http://www.networkassociates.com/us/services/education/mcafee/university.htm
Network Associates Customer Service
E-mail [email protected]
Web http://www.nai.com/us/index.asp
http://www.networkassociates.com/us/products/mcafee_security_home.htm
US, Canada, and Latin America toll-free:
Phone +1-888-VIRUS NO or +1-888-847-8766
Monday – Friday, 8 a.m. – 8 p.m., Central Time
For additional information on contacting Network Associates and McAfee Security— including toll-free numbers for other geographic areas — see the Contact file that accompanies this product release.
* Logon credentials required.
12 Alert Manager™ software version 4.7.1

2
Installing Alert ManagerYou can install Alert Manager either as a stand-alone product or as part of a custom installation of another McAfee Security anti-virus product, such as VirusScan Enterprise.
These topics are included in this section:
Installing Alert Manager
Removing Alert Manager
Installing Alert ManagerThe instructions in this section describe installing Alert Manager as a stand-alone product. For detailed information on installing Alert Manager with another McAfee Security product, see the appropriate product documentation.
System requirements
Using the Setup utility to install the product
Product Guide 13

Installing Alert Manager
System requirementsVerify that your computer system meets the following requirements before you start the installation process.
The Alert Manager software installs and runs on a server or a workstation equipped with:
Processor — An Intel processor or compatible architecture. McAfee Security recommends an Intel Pentium or Celeron processor running at a minimum of 166MHz.
Operating system — Any of these Microsoft Windows platforms:
Free disk space — Adequate hard disk space:
1.5MB — A complete installation of all the program’s features and components occupies approximately 1.5MB of disk space on your computer.
2.6MB — The installation process uses an additional 2.6MB of temporary disk space, which is freed when the installation is complete.
Other — A CD-ROM drive or an Internet connection.
Server Workstation
Windows NT Server 4.0, with Service Pack 6 or 6a.
Windows NT Workstation 4.0, with Service Pack 6 or 6a.
Windows NT Enterprise Server 4.0, with Service Pack 6 or 6a.
Windows 2000 Professional, with Service Pack 2, 3, or 4.
Windows NT Terminal Server Edition, with Service Pack 6.
Windows XP Home and Professional, with Service Pack 1.
Windows 2000 Server, with Service Pack 2, 3, or 4.
Windows XP Tablet PC.
Windows 2000 Advanced Server, with Service Pack 2, 3, or 4.
Windows 2000 DataCenter Server, with Service Pack 2, 3, or 4.
Windows Server 2003 Standard Edition, with Service Pack 1.
Windows Server 2003 Enterprise Edition, with Service Pack 1.
Windows Server 2003 Web Edition, with Service Pack 1.
Windows Server 2003 DataCenter Edition
14 Alert Manager™ software version 4.7.1

Installing Alert Manager
Using the Setup utility to install the productTo install Alert Manager:
1 Extract the contents of the installation .ZIP file to a temporary folder on your hard drive.
2 Double-click the SETUP.EXE file to start the McAfee Alert Manager Setup utility.
3 On the License Agreement dialog box, accept the license agreement by clicking the appropriate option, then click Next. You cannot install Alert Manager without accepting the license agreement.
4 On the Service Account Information dialog box, specify the user name and password to be used.
a Select Use System Account to use the system account for the current user.
b In the User Name field, type both the domain and account name for this user.
c In the Password field, type the password for this user.
NOTEIf you specify a user name and password, make sure that this user account has sufficient rights on the specified system to perform all of the alerting methods you want to configure. Administrator rights are recommended.
d Click Next to continue.
Figure 2-4. License Agreement
Product Guide 15

Installing Alert Manager
Active Directory Configuration
Active Directory is a service available on newer versions of the Microsoft Windows operating system, such as Windows 2000, Windows 2003, and Windows XP. Publishing Alert Manager to Active Directory adds a Service Connection Point as a child of the local server object. This Service Connection Point can be used to search in Active Directory for the server on which Alert Manager is running, so that alerts can be forwarded to that server for processing without manual configuration. For additional information, see Active Directory questions on page 58 and Active Directory issues on page 63.
If you are installing Alert Manager on a computer that is running a Windows operating system with Active Directory and is already part of the Active Directory domain, the Active Directory Configuration dialog box appears.
NOTEIf you are publishing Alert Manager in the Active Directory but this dialog box does not appear, your server may not have Active Directory correctly configured. See your operating system documentation for information on how to do this.
Figure 2-5. Active Directory Configuration
16 Alert Manager™ software version 4.7.1

Installing Alert Manager
5 To publish Alert Manager to Active Directory:
a Select Publish Alert Manager in the Active Directory.
b Type a unique name for the Alert Manager in the text box. If you have multiple instances of Alert Manager published in the Active Directory, each one must have a unique name.
c If you want this installation of Alert Manager to be the default, select Select to set as the default Alert Manager.
NOTEWhile there can be many instances of Alert Manager in the Active Directory, there can be only one default.
If another Alert Manager in the Active Directory domain has also been set to be the default, the new Alert Manager instance does not publish to Active Directory.
d Select Next.
Product Guide 17

Installing Alert Manager
Cluster Configuration
If you are installing Alert Manager as a clustered resource, the Cluster Configuration dialog box appears.
NOTEThe Cluster Configuration dialog box appears only if the server on which you are installing Alert Manager is running Microsoft Cluster Server.
6 To configure Alert Manager to be a clustered resource on your network:
a Select Install Alert Manager as a Clustered Resource.
b Type the IP Address and Subnet Mask for the computer where you are installing Alert Manager.
c Type the Virtual Server Name of the computer where you are installing Alert Manager.
d Select Bring the Alert Manager Server Online to bring this installation of Alert Manager online as a clustered resource.
e Click Next.
Figure 2-6. Cluster Configuration
18 Alert Manager™ software version 4.7.1

Removing Alert Manager
7 On the Ready to install dialog box, click Install.
8 When the installation completes, click View Readme to display information about this product release. When finished, close the README file, then click Finish.
Removing Alert ManagerUse one of these methods to remove the Alert Manager program files:
Using the Setup utility to remove the product
Using the Add/Remove Programs utility to remove the product
Figure 2-7. Installation Completed
Product Guide 19

Installing Alert Manager
Using the Setup utility to remove the product1 To start the Setup utility, double-click the SETUP.EXE file.
2 Click Remove.
3 When the removal process completes, click Finish.
Using the Add/Remove Programs utility to remove the productUse the Add/Remove Programs that is included in the Windows Control Panel to remove Alert Manager:
1 Click Start, then select Settings | Control Panel | Add/Remove Programs.
2 Select the McAfee Alert Manager program from the list of installed programs, then click Remove.
3 Restart your computer after the removal process completes.
Figure 2-8. Uninstall McAfee Alert Manager
20 Alert Manager™ software version 4.7.1

3
Configuring AlertsAlert Manager controls how to handle alert messages generated by the anti-virus software. Most importantly, Alert Manager can send out alert notifications immediately when viruses are detected on computers in your network. These alerts can be sent using a variety of messaging media, such as e-mail, print, and SNMP traps.
You can start and configure Alert Manager either through your anti-virus software, for example VirusScan Enterprise, or directly from the Windows desktop. For information on configuring Alert Manager for a specific product, see that product’s documentation.
These topics are included in this section:
Configuring recipients and methods
Customizing alert messages
Product Guide 21

Configuring Alerts
Configuring recipients and methodsThe Alert Manager Configuration component allows you to configure the recipients of alert messages sent out by Alert Manager, and the method by which recipients receive alert messages. Recipients can be e-mail addresses or computers on your network. The notification methods can include e-mail messages or network messages.To configure the recipients for an alert method:
1 Click Start on the Windows desktop, then select Programs | Network Associates | Alert Manager Configuration to open the Alert Manager Properties dialog box.
2 Select the appropriate tab for a given alert method, such as Logging.
3 Configure the recipients that you want to receive alert notifications using that alert method.
4 Click other tabs to configure recipients for any additional alert methods as required.
5 When finished, click OK to save the configurations and close the Alert Manager Properties dialog box.
Figure 3-1. Alert Manager Properties
22 Alert Manager™ software version 4.7.1

Configuring recipients and methods
These topics are included in this section:
Adding alert methods on page 23.
Viewing the Summary page on page 26.
Forwarding alert messages to another computer on page 27.
Sending an alert as a network message on page 31.
Sending alert messages to e-mail addresses on page 33.
Sending alert messages to a printer on page 37.
Sending alert messages via SNMP on page 39.
Launching a program as an alert on page 40.
Logging alert notifications in an event log on page 43.
Sending a network message to a terminal server on page 45.
Using centralized alerting on page 47.
Adding alert methodsThe tabs of the Alert Manager Properties dialog box allow you to configure alerting methods. As you add each new method to your configuration, you have two options:
Sending a test message.
Setting the alert priority level for recipients.
Product Guide 23

Configuring Alerts
Sending a test messageWhen adding new alert notification recipients, such as a network computer or an e-mail address, you can test whether the destination can receive the message.
To send the selected destination a test message when configuring that method, click Test. The message should appear at the configured destination if all is configured correctly.
NOTEAn e-mail alert may take some time to reach its destination, depending on both your SMTP server and the receiving e-mail server.
Test messages that do not reach the target
If the target does not receive the message, review and confirm these items:
Any communication service required to implement the selected alerting method, such as e-mail or SNMP, is enabled.
Any device required to transmit or receive the message exists and is operational. For example, a modem or pager.
Any program that is to be executed in response to virus detection is located at the path specified and is installed properly.
Any destination printer or computer that you have targeted exists on your network.
Your network is functioning properly.
The configuration information you have provided is accurate and complete. Some property pages include secondary pages. For example, the E-Mail Properties page links to a Mail Settings page. Be certain to review the information on these secondary pages as well.
If you installed Alert Manager using an account and password, make sure that the specified account has sufficient rights for the action you are trying to perform.
24 Alert Manager™ software version 4.7.1

Configuring recipients and methods
Setting the alert priority level for recipientsYou can specify a priority level for each recipient that you add to your Alert Manager configuration. Alert Manager only sends alert notifications of that priority level or higher to the specified recipient.
Setting a priority level is useful for filtering alert notifications. For example, you may want to record alert messages of all priority levels to a computer’s event log using the Logging tab of the Alert Manager Properties dialog box (see Logging alert notifications in an event log on page 43). However, you may want Alert Manager to send only serious alert notifications to a network administrator’s pager via e-mail. To do this, set separate priority thresholds for your logging and e-mail recipients.
To set the alert priority level for a specific recipient:
1 On the Properties dialog box for an alert method, click the Priority Level button.
2 In the Priority Level dialog box, drag the slider right or left to set the priority level.
Drag to the right to send the recipient fewer, higher priority messages. Drag the slider to the left to send the recipient more alert messages, including lower priority messages.
3 Click OK to save the priority settings.
NOTEOn the Priority Level dialog box, you can specify the priority level for specific recipients, such as a computer on a network or an e-mail address. However, you cannot set the priority of individual alert messages here. For information on setting the priority levels of individual alert messages, see Customizing alert messages on page 49.
Figure 3-2. Priority Level
Product Guide 25

Configuring Alerts
Viewing the Summary pageThe Summary tab of the Alert Manager Properties dialog box lists the recipients to which Alert Manager sends any alert notifications it receives. Recipients are grouped by alert method, such as E-mail, Logging, and Network Message.
Click next to each alert method to display the recipient computers, printers, or e-mail addresses. To remove an alert notification recipient, select it, then click Remove. To change the configuration options for a listed recipient, select it, then click Properties to open the Properties dialog box for that alert method.
When you install Alert Manager, it is by default configured to send network messages to the computer on which it is installed and to log alert notifications in that computer’s event log. If you have not yet configured Alert Manager to send alert notifications to any recipients, the Summary tab displays only these two methods. Alert Manager sets priority levels for these two default methods to send alert notifications of all priorities except for the lowest, Informational. See Setting the alert priority level for recipients on page 25 for details on priority.
The following sections describe the options available for each method.
Figure 3-3. Alert Manager Properties — Summary tab
26 Alert Manager™ software version 4.7.1

Configuring recipients and methods
Forwarding alert messages to another computerAlert Manager can forward the alert messages received from McAfee Security anti-virus products to another computer on your network that has Alert Manager installed. Typically, you would forward messages to another Alert Manager server for further distribution.
NOTEAlert Manager can only forward alert notifications to, and receive alerts forwarded from, servers running the same version of Alert Manager. Forwarding alert notifications between servers running older versions of Alert Manager is not supported.
Forwarding alerts in a large organization
In a large organization you can use the forwarding feature to send alert notifications to a central notification system or to an MIS (Management Information System) department for tracking virus statistics and problem areas. Also, large organizations tend to be spread out geographically, often with offices in several countries. In this case, you may want to use a single Alert Manager installed on a local server to handle alerting for that local subnetwork. You can then configure that local Alert Manager server to forward high priority alert notifications to another server in another part of your network for further distribution.
Product Guide 27

Configuring Alerts
This diagram shows what happens when alerts are forwarded to another Alert Manager server:
Configure the local Alert Manager to forward alerts to the computer on which the second Alert Manager is installed, then configure the second Alert Manager to distribute alert notifications as desired. See Configuring alert forwarding options on page 29 for instructions.
Figure 3-4. Forward alerts to another Alert Manager
28 Alert Manager™ software version 4.7.1

Configuring recipients and methods
Forwarding alerts in a small organization
In a small organization, forwarding can also be useful. For example, you want to send all high priority alert notifications to a specific pager via e-mail, but only one server on your network has direct Internet access.
To satisfy this requirement:
1 Configure Alert Manager on each Alert Manager server to forward high priority alert messages to the modem-equipped computer.
2 Configure Alert Manager on the modem-equipped computer to send high priority messages to the target pager’s e-mail address.
Configuring alert forwarding options
To configure forwarding options:
1 From the Alert Manager Properties dialog box, select the Forward tab.
The Forward page appears with a list of all of the computers you have chosen to receive forwarded messages. If you have not yet chosen a destination computer, this list is blank.
Figure 3-5. Alert Manager Properties — Forward tab
Product Guide 29

Configuring Alerts
2 To update this list, you can do any of the following:
To add a computer, click Add to open the Forward Properties dialog box, then type the name of the computer that receives forwarded messages. You can type the computer name in Universal Naming Convention (UNC) notation, or click Browse to locate the computer on the network.
To remove a listed computer, select one of the destination computers listed, then click Remove.
To change configuration options, select one of the destination computers listed, then click Properties. Alert Manager opens the Forward Properties dialog box. Type the name of the computer to which you want Alert Manager to forward messages, or click Browse to locate the computer on the network.
3 Click Priority Level to specify which types of alert messages the destination computer receives. See Setting the alert priority level for recipients on page 25.
4 Click Test to send the destination computer a test message. See Sending a test message on page 24.
5 Click OK to return to the Alert Manager Properties dialog box.
Figure 3-6. Forward Properties
30 Alert Manager™ software version 4.7.1

Configuring recipients and methods
Sending an alert as a network messageAlert Manager can send alert messages to other computers. A standard message appears as a pop-up message on the recipient’s computer screen and requires the recipient to acknowledge it.
It is not necessary for the recipient computers to have Alert Manager installed. However, you might need to have the appropriate messaging client software for your operating system running on the recipient computer. This messaging software is always pre-installed on newer versions of the Windows operating system, such as Windows NT, Windows 2000, and Windows XP. It is usually running by default.
To configure Alert Manager to send alert notifications as network messages:
1 Open the Alert Manager Properties dialog box.
2 Select the Network Message tab. The Network Message page appears with a list of the computers that you have configured to receive a network message. If you have not yet chosen a recipient computer, this list is blank.
Figure 3-7. Alert Manager Properties — Network Message tab
Product Guide 31

Configuring Alerts
3 To update this list, you can do any of the following:
To add a computer, click Add to open the Network Message Properties dialog box. Specify a recipient computer by either typing the name of the computer directly into the Computer text box in UNC format, or by selecting Browse to locate the computer on the network.
To remove a listed computer, select one of the recipient names listed, then click Remove.
To change configuration options, select one of the recipient names listed, then click Properties to open the Network Message Properties dialog box. Change the information in the Computer text box as necessary.
4 Click Priority Level to specify which types of alert messages the recipient receives. See Setting the alert priority level for recipients on page 25.
5 Click Test to send the recipient a test message. See Sending a test message on page 24.
6 Click OK to return to the Alert Manager Properties dialog box.
Figure 3-8. Network Message Properties
32 Alert Manager™ software version 4.7.1

Configuring recipients and methods
Sending alert messages to e-mail addressesAlert Manager can send alert messages to a recipient’s e-mail address via Simple Mail Transfer Protocol (SMTP). Alert messages appear in the recipient’s mailbox. If your message is urgent, you can supplement an e-mail message with other methods, such as network messages, to ensure that your recipient sees the alert in time to take appropriate action.
NOTEAn e-mail alert may take some time to reach its destination, depending on both your SMTP server and the receiving e-mail server.
To configure Alert Manager to send e-mail alert notifications to recipients:
1 Open the Alert Manager Properties dialog box.
2 Select the E-Mail tab.
The E-Mail page appears with a list of the e-mail addresses that you have chosen to receive alert messages. If you have not yet chosen an e-mail address, this list is blank.
Figure 3-9. Alert Manager Properties — E-Mail tab
Product Guide 33

Configuring Alerts
3 To update this list, you can do any of the following:
To add an e-mail address to the list, click Add to open the E-Mail Properties dialog box. Type the e-mail address for your alert notification recipient in the Address text box, type a subject in the Subject text box, then type your e-mail address in the From text box. Use the standard Internet address format <username>@<domain>, such as [email protected].
To control the truncation of longer messages, for example, a message containing a long file and path name, append the address with a “*”, like this: [email protected]*. For more information, see Forcing truncation of messages sent to specific e-mail addresses on page 36.
To remove a listed address, select one of the e-mail addresses listed, then click Remove.
To change configuration options, select one of the e-mail addresses listed, then click Properties to open the E-Mail Properties dialog box. Change the information in the text boxes as necessary.
Figure 3-10. E-Mail Properties
34 Alert Manager™ software version 4.7.1
Configuring recipients and methods
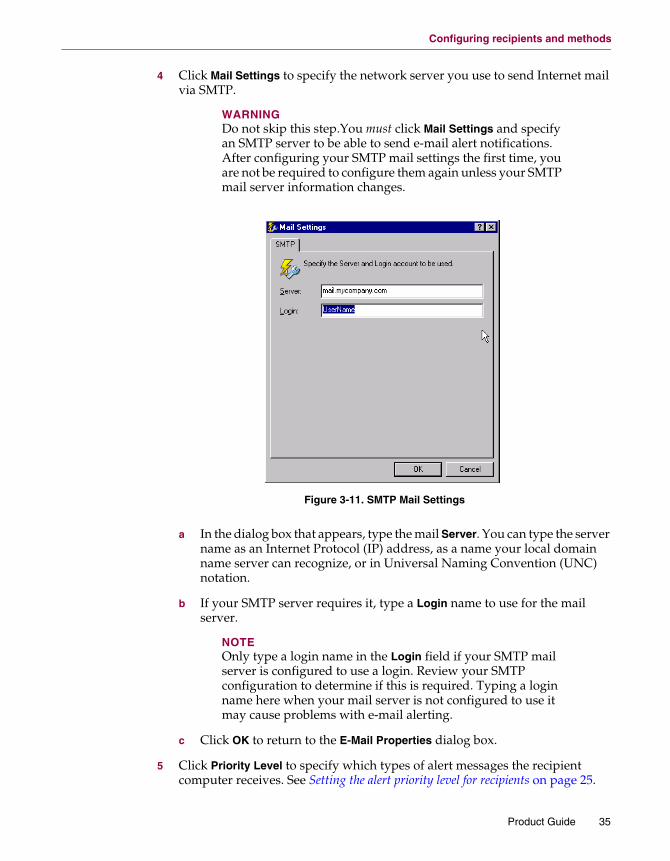
4 Click Mail Settings to specify the network server you use to send Internet mail via SMTP.
WARNINGDo not skip this step.You must click Mail Settings and specify an SMTP server to be able to send e-mail alert notifications. After configuring your SMTP mail settings the first time, you are not be required to configure them again unless your SMTP mail server information changes.
a In the dialog box that appears, type the mail Server. You can type the server name as an Internet Protocol (IP) address, as a name your local domain name server can recognize, or in Universal Naming Convention (UNC) notation.
b If your SMTP server requires it, type a Login name to use for the mail server.
NOTEOnly type a login name in the Login field if your SMTP mail server is configured to use a login. Review your SMTP configuration to determine if this is required. Typing a login name here when your mail server is not configured to use it may cause problems with e-mail alerting.
c Click OK to return to the E-Mail Properties dialog box.
5 Click Priority Level to specify which types of alert messages the recipient computer receives. See Setting the alert priority level for recipients on page 25.
Figure 3-11. SMTP Mail Settings
Product Guide 35

Configuring Alerts
6 Click Test to send the recipient computer a test message. See Sending a test message on page 24.
7 If the test message is successful, click OK to return to the Alert Manager Properties dialog box.
Forcing truncation of messages sent to specific e-mail addresses
Alert notification messages can become long, particularly when containing %FILENAME% system variables populated with file names containing long path information. Alert messages containing long file names and path information can be confusing and inconvenient. For example, when e-mail messages are sent to a pager, some pager services truncate long messages abruptly, potentially removing important information from the message. On the other hand, if a pager does receive a long message, the recipient might be required to scroll through lines of path information in a file name to get to the critical information contained in the alert.
You have two options for managing long messages in e-mail alert notifications:
Append e-mail addresses with an asterisk (*), such as [email protected]*. Alert Manager truncates alerts sent to e-mail addresses that are appended with an asterisk according to the current system SMTP message length settings. The default SMTP length is 240 characters.
This is valuable if Alert Manager sends alerts to pagers via e-mail. Some pager services have a short message length limit, for example 200 characters. If a message is intended to be delivered to a pager via an e-mail address, appending the address with an asterisk (*) lets you, rather than a pager company, control where the message is truncated.
You can also edit the message text in the Alert Manager Messages dialog box to ensure important message content is preserved in truncated messages. To do this, you could either abbreviate some parts of the message or move critical information to the beginning of the message, perhaps leaving long file names for the end of the message.
36 Alert Manager™ software version 4.7.1

Configuring recipients and methods
Sending alert messages to a printerAlert Manager can send alert notifications to a printer to print hardcopy messages. To configure Alert Manager to send alert notifications to a print queue:
1 Open the Alert Manager Properties dialog box.
2 Select the Printer tab.
The Printer page appears with a list of all of the printer queues that you have chosen to receive alert messages. If you have not yet chosen a printer queue, this list is blank.
Figure 3-12. Alert Manager Properties — Printer tab
Product Guide 37

Configuring Alerts
3 To update this list, you can do any of the following:
To add a print queue to the list, click Add to open the Printer Properties dialog box, then type the name of the print queue to which you want to send messages. You can type the print queue name or click Browse to locate the printer on the network.
To remove a listed print queue, select one of the printers listed, then click Remove.
To change configuration options, select one of the printers listed, then click Properties. Alert Manager opens the Printer Properties dialog box. Change the information in the Printer text box as necessary.
4 Click Priority Level to specify which types of alert notifications the recipient printer receives. See Setting the alert priority level for recipients on page 25.
5 Click Test to send the recipient printer a test message. See Sending a test message on page 24.
6 Click OK to return to the Alert Manager Properties dialog box.
Figure 3-13. Printer Properties
38 Alert Manager™ software version 4.7.1
Configuring recipients and methods
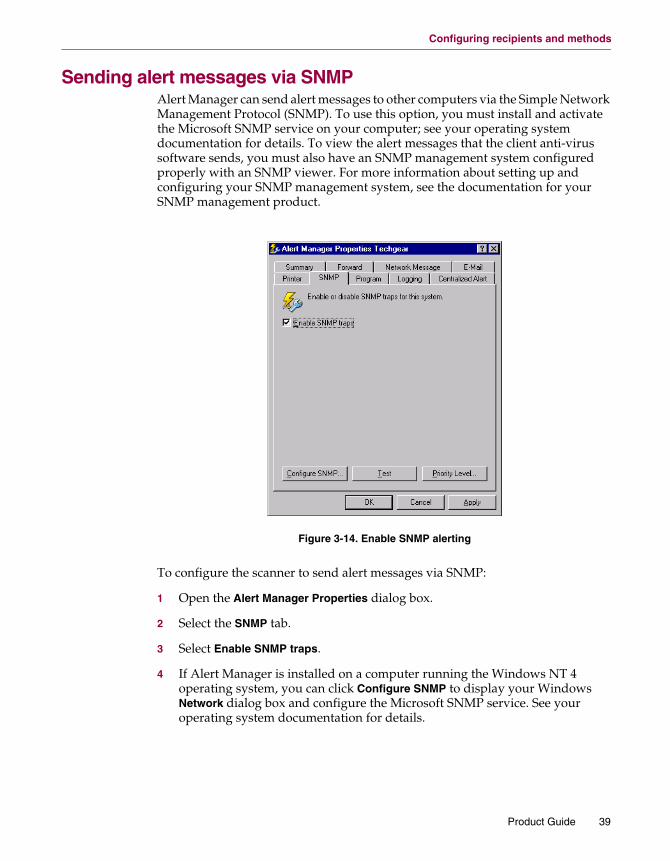
Sending alert messages via SNMPAlert Manager can send alert messages to other computers via the Simple Network Management Protocol (SNMP). To use this option, you must install and activate the Microsoft SNMP service on your computer; see your operating system documentation for details. To view the alert messages that the client anti-virus software sends, you must also have an SNMP management system configured properly with an SNMP viewer. For more information about setting up and configuring your SNMP management system, see the documentation for your SNMP management product.
To configure the scanner to send alert messages via SNMP:
1 Open the Alert Manager Properties dialog box.
2 Select the SNMP tab.
3 Select Enable SNMP traps.
4 If Alert Manager is installed on a computer running the Windows NT 4 operating system, you can click Configure SNMP to display your Windows Network dialog box and configure the Microsoft SNMP service. See your operating system documentation for details.
Figure 3-14. Enable SNMP alerting
Product Guide 39

Configuring Alerts
5 Click Priority Level to specify which types of alert messages the recipient computer receives. See Setting the alert priority level for recipients on page 25.
6 Click Test to send the recipient computer a test message via SNMP. See Sending a test message on page 24.
7 Click OK to save your changes and return to the Alert Manager Properties dialog box.
Launching a program as an alertWhenever Alert Manager receives an alert that a virus has been detected, it can automatically start any executable program on your computer or anywhere on your network. By default, Alert Manager runs VIRNOTFY.EXE, which is installed in your Alert Manager installation folder. VIRNOTFY.EXE displays names of infected files in a scrolling dialog box on the screen of the computer where Alert Manager is installed.
NOTEAlert Manager only launches a program when it receives alerts specifically pertaining to viruses. The %VIRUSNAME% and %FILENAME% system variables must be present in the alert message. See Using Alert Manager system variables on page 53. Alert Manager does not start a program unless these fields are present in the alert, regardless of the priority level set for the Program method. See Setting the alert priority level for recipients on page 25 for more information about priority levels.
40 Alert Manager™ software version 4.7.1

Configuring recipients and methods
To configure Alert Manager to execute a program when it finds a virus:
1 Open the Alert Manager Properties dialog box.
2 Select the Program tab to open the Program dialog box.
3 Select Execute program.
4 Type the path and file name of the executable program that you want to run when your anti-virus software finds a virus, or click Browse to locate the program file on your computer or network.
Figure 3-15. Alert Manager Properties — Program tab
Product Guide 41
Configuring Alerts
5 Select one of the following:
To start the program only when your anti-virus software first finds a virus, click First Time.
To start the program every time the scanner finds a virus, click Every Time.
NOTEIf you select First time, the program you designate starts as soon as the scanner initially encounters a virus. For example, if you designate VirusOne and the scanner finds more than one occurrence of VirusOne in the same folder, it does not start the program again. However, if, after encountering VirusOne, the scanner then encounters a different virus (VirusTwo), then encounters VirusOne again, the program starts in response to each encounter; in this example, three times in a row. Starting multiple instances of the same program might cause your server to run out of memory.
6 Click Priority Level to specify which types of alert messages the recipient computer receives. See Setting the alert priority level for recipients on page 25.
Remember that the Program method does not run a program unless the alert pertains specifically to viruses. In other words, the alert must contain the %VIRUSNAME% and %FILENAME% system variables. All other alerts, regardless of priority level, are ignored.
7 Click Test to send the recipient computer a test message. See Sending a test message on page 24.
42 Alert Manager™ software version 4.7.1

Configuring recipients and methods
Logging alert notifications in an event logAlert Manager can log alert messages to the local event log on your computer or the event log of another computer on your network.
To configure logging options:
1 Open the Alert Manager Properties dialog box.
2 Select the Logging tab.
The Logging dialog box appears with a list of all of the computers you have chosen to receive messages for logging. If you have not yet chosen a recipient computer, this list is blank.
Figure 3-16. Alert Manager Properties — Logging tab
Product Guide 43

Configuring Alerts
3 To update this list, you can do any of the following:
To add a computer, click Add to open the Logging Properties dialog box, then type the name of the computer that receives forwarded messages in the text box. You can type the computer name in Universal Naming Convention (UNC) notation, or click Browse to locate the computer on the network.
To remove a listed computer, select the computer in the list, then click Remove.
To change configuration options, select one of the recipient computers listed, then click Properties. Alert Manager opens the Logging Properties dialog box. Type the name of the computer to which you want Alert Manager to forward messages for logging. Click Browse to locate the destination computer.
4 Click Priority Level to specify which types of alert messages the recipient computer receives. See Setting the alert priority level for recipients on page 25.
5 Click Test to send the recipient computer a test message. See Sending a test message on page 24.
6 Click OK to return to the Alert Manager Properties dialog box.
Figure 3-17. Logging Properties
44 Alert Manager™ software version 4.7.1

Configuring recipients and methods
Sending a network message to a terminal serverAlert Manager can send alert messages to a terminal server. Pop-up network messages display to the user whose session originated the alert.
The Alert Manager Properties dialog box only displays the Terminal Server tab if the computer on which Alert Manager is installed is a terminal server.
To configure Alert Manager to send a message to a terminal server:
1 Open the Alert Manager Properties dialog box.
2 Select the Terminal Server tab.
3 To enable terminal server alerting, select Enable alerting to client.
Figure 3-18. Alert Manager Properties — Terminal Server tab
Product Guide 45

Configuring Alerts
4 Click Test to send the recipient computer a test message. The Select client for test message dialog box appears, listing the current terminal server user sessions for that computer.
5 Select a user from the list and click OK to send that user a test message and return to the Alert Manager Properties dialog box.
6 Click Priority Level to specify which types of alert messages the terminal server users should receive. See Setting the alert priority level for recipients on page 25.
7 Click OK to save the terminal server settings and return to the Alert Manager Properties dialog box.
Figure 3-19. Send a terminal server user a test message
46 Alert Manager™ software version 4.7.1

Configuring recipients and methods
Using centralized alertingCentralized alerting provides an alternative to using regular Alert Manager messaging. With centralized alerting, alert messages generated by anti-virus software, such as VirusScan Enterprise, are saved to a shared folder on a server. Then, Alert Manager is configured to read alert notifications from that same folder. When the contents of the shared folder change, Alert Manager sends new alert notifications using whatever alerting methods Alert Manager is already configured to use, such as sending e-mail messages to a pager.
WARNINGDue to security issues with shared folders, McAfee Security recommends that you do not use centralized alerting. Instead, you should configure your client anti-virus software to use the regular Alert Manager alert notification methods.
To configure centralized alerting:
1 Configure the anti-virus software on client computers to send alert messages to the appropriate alert folder. See your anti-virus software documentation for instructions on how to do this.
NOTETo allow other workstations on your network to send messages to this folder, you must give scan, write, create and modify permissions for this folder to all users and computers. See your operating system documentation for details.
2 Make sure that all your users and computers are able to read and write to this shared alert folder. If the folder is located on a computer running Windows NT, you must properly configure a null session share. See your operating system documentation for details.
Product Guide 47

Configuring Alerts
3 Configure Alert Manager to monitor the centralized alerting folder for activity. To do this:
a From the Alert Manager Properties dialog box, select the Centralized Alert tab.
b Select Enable centralized alerts.
c Type the location of the alert folder or click Browse to locate a folder elsewhere on your server or on the network. This must be the same folder that your anti-virus software on client computers is using for centralized alerts (see Step 1). The default location of the alert folder is:
C:\Program Files\Network Associates\Alert Manager\Queue\
4 Click Priority Level to specify which types of alert messages the recipient computer receives. See Setting the alert priority level for recipients on page 25.
5 Click Test to send the recipient computer a test message. See Sending a test message on page 24.
6 Click OK to save your centralized alerting settings and return to the Alert Manager Properties dialog box.
Figure 3-20. Alert Manager Properties — Centralized Alert tab
48 Alert Manager™ software version 4.7.1

Customizing alert messages
Customizing alert messagesThe Alert Manager Messages Config component allows you to configure the alert messages themselves. You can edit message text and set priority levels for specific alerts.
Alert Manager comes with a wide range of alert messages suited to nearly all of the situations you may encounter when a virus is detected on a computer in your network. The alert messages include a preset priority level and incorporate system variables that identify the infected file and system, the infecting virus, and other information that you can use to get a quick but thorough overview of the situation.
You can enable or disable individual alert messages or change the contents and priority level for any message to meet your individual needs. Because Alert Manager still activates the alert message in response to specific trigger events, you should try to retain the overall sense of any alert messages you choose to edit.
From here, you can do either of the following:
Enabling and disabling alert messages.
Editing alert messages.
Figure 3-21. Alert Manager Messages
Product Guide 49

Configuring Alerts
Enabling and disabling alert messagesAlthough Alert Manager can alert you whenever your anti-virus software finds a virus or whenever nearly any aspect of its normal operation changes significantly, you might not want to receive alert messages in each of these circumstances. Use the options in the Alert Manager Messages dialog box to disable specific alert messages that you do not want to receive.
By default, all of the available alert messages are enabled. To enable or disable alert messages:
1 Click Start on the Windows desktop, then select Programs | Network Associates | Alert Manager Messages Config to open the Alert Manager Messages dialog box.
2 Select or deselect the option for any alert messages that you want to enable or disable.
3 Click OK to save your changes and close the Alert Manager Messages dialog box.
Editing alert messagesYou can edit alert messages in the following two ways:
Changing alert priority.
Editing alert message text.
50 Alert Manager™ software version 4.7.1

Customizing alert messages
Changing alert prioritySome of the alerts that Alert Manager receives from your client anti-virus software require more immediate attention than others. A default priority level is set for each alert message, corresponding to the urgency most system administrators would assign them. You can reassign these priority levels to suit your own needs. Use them to filter the messages that Alert Manager sends to your recipients so your recipients can concentrate on the most important ones first.
To change the priority level assigned to an alert message:
1 On the Alert Manager Messages dialog box (see Customizing alert messages on page 49), click a message in the list to select it.
2 Click Edit to open the Edit Alert Manager Message dialog box.
Figure 3-22. Edit the priority and text of an alert message
Product Guide 51

Configuring Alerts
3 Choose a priority level from the Priority list. You can assign each alert message a Critical, Major, Minor, Warning, or Informational priority.
The icons shown beside each message listed in the Alert Manager Messages dialog box identify the priority level currently assigned to a message. Each icon corresponds to a choice in the Priority drop-down list. The priority levels are:
NOTEWhen you reassign the priority for a message, the icon beside it changes to show its new priority status.
4 Click OK.
Filtering messages by priority level
To filter your messages, configure each alert method you have set up in Alert Manager to accept only messages of a certain priority. For example, suppose you want to have Alert Manager page you whenever your client anti-virus software finds a virus on your network, but do not want it to send routine operational messages. To do this, you would assign a Critical or Major priority to virus alerts, and a Minor, Warning, or Informational priority to the routine informational messages. Then, configure Alert Manager to send only high priority messages to the e-mail address that goes to your pager.
See Setting the alert priority level for recipients on page 25 for information about applying priority level filters for specific recipients.
Critical
Indicates your anti-virus software detected viruses in files that could not be cleaned, quarantined or deleted.
Major
Indicates either that successful virus detection and cleaning has occurred or that serious errors and problems that might cause your anti-virus software to stop working. Examples include “Infected file deleted,” “No licenses are installed for the specified product,” or “Out of memory!”
Minor
Indicates lesser detection or status messages.
Warning
Indicates status messages that are more serious than informational messages. These often relate to non-critical problems encountered during scanning.
Informational
Indicates standard status and informational messages. For example, On-Access scan started or Scan completed. No viruses found.
52 Alert Manager™ software version 4.7.1

Customizing alert messages
Editing alert message textTo help you respond to a situation that requires your attention, Alert Manager includes enough information in its messages to identify the source of whatever problem it has found and some information about the circumstances in which it found the problem. You can edit the message text as desired. For example, you can add comments to the alert message that describe more about the problem or list support contact information.
NOTEAlthough you can edit the alert message text to state what you want, you should try to keep its essence intact because Alert Manager sends each message only when it encounters certain conditions. For example, Alert Manager sends the “task has started” alert message only when it starts a task.
To edit the alert message text:
1 From the Alert Manager Messages dialog box, select the alert message in the list.
2 Click Edit to open the Edit Alert Manager Message dialog box.
3 Edit the message text as desired. Text enclosed in percentage signs, such as %COMPUTERNAME%, represents a variable that Alert Manager replaces with text at the time it generates the alert message. See Using Alert Manager system variables on page 53.
4 Click OK to save your changes and return to the Alert Properties dialog box.
Using Alert Manager system variablesAlert Manager includes system variables that you can use in alert message text. These variables refer to system features such as system date and time, file names, or computer names. When sending alert notifications, Alert Manager dynamically replaces the variable with a specific value.
For example, the major alert Infected file successfully cleaned (1025) listed in the Alert Manager Messages dialog is by default set to the following:
The file %FILENAME% was infected with %VIRUSNAME% %VIRUSTYPE%. The file was successfully cleaned with Scan engine version %ENGINEVERSION% and DAT version %DATVERSION%.
When this alert is sent to Alert Manager from an anti-virus application, Alert Manager dynamically populates the system variables with real values, for example replacing MYDOCUMENT.DOC for the %FILENAME% variable.
Product Guide 53

Configuring Alerts
Some of the most commonly-used system variables are:
WARNINGBe careful when editing message text to include system variables that might not be used by the event generating that alert message. Using system variables in alerts that do not use that system variable field could cause unexpected results, including garbled message text or even a system failure.
%COMPUTERNAME% The name of a computer as it appears on the network. This could include an infected computer, a computer that reported a device driver error, or any other computer with which the program interacted.
%DATE% The system date of the Alert Manager computer.
%DATVERSION% The version of the current DAT files used by the anti-virus software that generated the alert.
%ENGINEVERSION% The version of the current anti-virus engine used by the anti-virus software to detect an infection or other problem.
%FILENAME% The name of a file. This could include the name of an infected file it found, or the name of a file it excluded from a scan operation.
%SOFTWARENAME% The file name of an executable file. This could include the application that detected a virus, an application that reported an error, or any other application with which the program interacted.
%SOFTWAREVERSION% The version number taken from an active software package. This could include the application that detected a virus, an application that reported an error, or any other application with which the program interacted.
%TASKNAME% The name of an active task, such as an on-demand task, in VirusScan Enterprise. Alert Manager uses this to report the name of the task that found a virus, or the name of a task that reported an error during a scan operation.
%TIME% The system time of the Alert Manager computer.
%USERNAME% The login name of the user currently logged on to the server. For example, you can use this to identify the user name of the person that cancelled a scan.
%VIRUSNAME% The name of an infecting virus.
54 Alert Manager™ software version 4.7.1

Customizing alert messages
These are the Alert Manager system variables that can be used in Alert Manager messages:
%ACCESSPROCESSNAME%
%CLIENTCOMPUTER%
%COMPUTERNAME%
%DATVERSION%
%DOMAIN%
%ENGINESTATUS%
%ENGINEVERSION%
%EVENTNAME%
%FILENAME%
%GMTDAY%
%GMTHOUR%
%GMTMIN%
%GMTMONTH%
%GMTSEC%
%GMTTIME%
%GMTYEAR%
%INFO%
%MAILIDENTIFIERINFO%
%MAILSUBJECTLINE%
%MAILTONAME%
%NOTEID%
%NOTESDBNAME%
%NOTESSERVERNAME%
%LANGUAGECODE%
%LOCALDAY%
%LOCALHOUR%
%LOCALMIN%
%LOCALMONTH%
%LOCALSEC%
%LOCALTIME%
%LOCALYEAR%
%LONGDESCRIPT%
%MAILCCNAME%
%MAILFROMNAME%
%NUMCLEANED%
%NUMDELETED%
%NUMQUARANTINED%
%NUMVIRS%
%OBRULENAME%
%OS%
%PROCESSORSERIA%
%RESOLUTION%
%SCANRETURNCODE%
%SEVERITY%
%SHORTDESCRIPT%
%SOFTWARENAME%
%SOFTWAREVERSION%
%SOURCEIP%
%SOURCEMAC%
%SOURCESEG%
%TARGETCOMPUTERNAME%
%TARGETIP%
%TARGETMAC%
%TASKID%
%TASKNAME%
%TRAPID%
%TSCLIENTID%
%URL%
%USERNAME%
%VIRUSNAME%
%VIRUSTYPE%
Product Guide 55

Configuring Alerts
56 Alert Manager™ software version 4.7.1

A
TroubleshootingThis section contains troubleshooting solutions to common issues faced by users of Alert Manager.
These topics are included in this section:
Frequently Asked Questions (FAQ)
Troubleshooting common problems
Frequently Asked Questions (FAQ)The following are answers to common questions about Alert Manager.
These questions are included in this section:
General questions
Active Directory questions
General questionsThese questions apply to several different areas:
If we are moving to an ePolicy Orchestrator based system, do we have any need for Alert Manager?
Yes, if you want near real-time alerting when viruses are detected on your network. ePolicy Orchestrator only records virus detection and other alerts in the log. Only Alert Manager can be configured to notify key people immediately when viruses are detected on your network.
Does Alert Manager require that I configure special network permissions to send alerts?
When Alert Manager is installed on a system, it automatically receives the administrator permissions necessary for it to send most alerts. Usually, you do not need to set any additional permissions.
Product Guide 57

Troubleshooting
However, if you are using alerting features that require accessing another computer on your network, you need administrator rights on that computer as well. Examples of this include the Logging feature that you can configure to write alerts to another computer’s event log, or the Program feature that allows you to launch an executable program on another computer. In both of these cases, you must have administrator rights on the recipient computers to perform these alerting methods.
Do I need to type a login name when I configure my SMTP mail settings for e-mail alerting?
Generally, you do not need to type a login name when configuring Alert Manager to perform e-mail alerting.
However, your SMTP server may require it for authentication purposes. Review your SMTP server configuration to see if it requires you to type a login name in the Alert Manager Mail Settings dialog box.
As a convenience, you can use the Login field on the Mail Settings dialog box to set a default value to display in the From field of e-mail alert notifications. If you set this value here, you may leave the From field blank when adding an e-mail address in the E-mail Properties dialog box. If you do type a value in the From field, that value overrides the default typed in the Login field and is displayed in the e-mail alert.
To access the Mail Settings dialog box from the Alert Manager Properties dialog box, click the E-Mail tab and select Add | Mail Settings. See Sending alert messages to e-mail addresses on page 33 for more information about configuring e-mail alerting.
Active Directory questionsThese questions apply to Active Directory:
Why should I publish Alert Manager to the Active Directory?
Active Directory is a new service available on newer versions of the Microsoft Windows operating system, such as Windows 2000 and Windows XP. Publishing Alert Manager to Active Directory adds a Service Connection Point as a child of the local server object. This Service Connection Point can be used to search in Active Directory for the server on which Alert Manager is running, so that alerts can be forwarded to that server for processing without manual configuration.
58 Alert Manager™ software version 4.7.1
Frequently Asked Questions (FAQ)
How many Alert Managers can I publish to the Active Directory?
Alert Manager allows you to publish multiple instances to the Active Directory. This allows you to configure your anti-virus software, such as VirusScan Enterprise, to send alerts to any Alert Manager published in the Active Directory, rather than only publishing to an Alert Manager located on a server in the local network domain.
Each Alert Manager published in Active Directory must have a unique name. You specify this unique name when installing Alert Manager and selecting the Publish Alert Manager to the Active Directory installation option.
You can also specify one Alert Manager in the Active Directory to be the default. Client computers that use Alert Manager and Active Directory and that are running anti-virus software, such as VirusScan Enterprise, automatically send alerts to the default unless specifically configured to use a different Alert Manager.
NOTEOnly one Alert Manager in the Active Directory domain can be the default. If an instance of Alert Manager listed in the Active Directory is already set as the default and you install another Alert Manager and set it as the default, the second Alert Manager is not published to the Active Directory.
See Active Directory Configuration on page 16 for more information.
When can I publish Alert Manager to the Active Directory?
You can only publish Alert Manager to the Active Directory at installation. You can do this either when running the stand-alone Alert Manager installation or when installing Alert Manager as part of a custom installation of a McAfee Security anti-virus software program, such as VirusScan Enterprise.
To publish Alert Manager to the Active Directory, select the Publish Alert Manager to the Active Directory custom installation option on the Active Directory Configuration dialog box in the McAfee Alert Manager Setup installation program.
See Active Directory Configuration on page 16 for more information.
NOTEIf you did not publish Alert Manager to Active Directory during installation, you cannot do this at a later time. You must remove Alert Manager, then reinstall it selecting the Publish Alert Manager to Active Directory option.
Product Guide 59

Troubleshooting
How are alerts configured when using VirusScan Enterprise and Active Directory?
When Alert Manager is published to the Active Directory, some VirusScan or VirusScan Enterprise client computers in the same active directory will by default be automatically configured to send alerts to the default Alert Manager. The following describes which computers will be configured automatically and which must be configured separately:
A computer with a Windows 2000, Windows 2003, or Windows XP operating system that is in the same active directory as Alert Manager, and is running VirusScan or VirusScan Enterprise, automatically sends alerts to the Alert Manager that is published as the default in the Active Directory.
A computer with a Windows 95, Windows 98, or Windows NT 4 operating system that is in the same active directory as Alert Manager, and is running VirusScan or VirusScan Enterprise, does not automatically send alerts to the Alert Manager that is published as the default in the Active Directory. You must configure the Alert Manager destination manually from the VirusScan Console or by using McAfee Installation Designer or ePolicy Orchestrator.
Any computer running VirusScan or VirusScan Enterprise which is not a member of the Active Directory must be configured manually from the VirusScan Console or by using McAfee Installation Designer or ePolicy Orchestrator to specify the Alert Manager destination.
You can, of course, always override the default configuration of clients in the Active Directory by configuring it manually or using McAfee Installation Designer or ePolicy Orchestrator.
Troubleshooting common problemsThe following are common problems that can occur when configuring and using Alert Manager.
These types of issues are included in this section:
General issues
Active Directory issues
60 Alert Manager™ software version 4.7.1

Troubleshooting common problems
General issuesThese issues apply to several different areas:
E-mail alerting is not working
Did you specify an SMTP server when you configured the mail settings? E-mail alerting does not work unless you remember this often-overlooked step. You must specify an SMTP server name and configure your mail settings. See Sending alert messages to e-mail addresses on page 33 for more information about configuring an SMTP server for e-mail alerting.
E-mail alerting does not function after I move my Microsoft Exchange e-mail server to another domain
Verify that the mail server running Microsoft Exchange or Internet Information Server (IIS) properly configured to allow receiving e-mail from another domain.
To protect against spam, however, this feature is commonly disabled. If this is disabled on your server, you can still have Alert Manager send e-mail alerts using a mail server in another domain. To do this:
1 Install an Alert Manager server to the local domain.
2 Install an SMTP relay agent in the local domain, which can forward alert notification messages to the e-mail server in the separate domain.
Product Guide 61

Troubleshooting
Alert Manager e-mail messages display system variables
Alert Manager messages can contain system variables written in a %VARIABLENAME% format, such as %MYVARIABLE%. Normally, Alert Manager dynamically populates the variable with data when the message is generated. For example, Alert Manager would replace the variable %COMPUTERNAME% with the UNC computer name, such as MyComputer, in the message text.
You may receive alert messages containing unconverted variables in the message text. This could be caused by:
Editing the message text to use unsupported system variables. Alert Manager messages must use only those variables supported by Alert Manager. See Using Alert Manager system variables on page 53 for a complete list of variables that can be used. Unrecognized variables are treated as static text and are displayed in the alert message.
Editing the message text to include a system variable, then typing the name of the variable incorrectly. Alert Manager cannot recognize misspelled variables and treats them as static text. These misspelled variables are then displayed in the alert message.
Also, be sure to only use system variables in message text and not in other text fields in the Alert Manager interface. Do not, for example, use the %COMPUTERNAME% variable in the From field of an e-mail alert. These fields are static text and Alert Manager does not dynamically populate them with variables.
How to edit the registry to increase the character limit for message length
The Alert Message Edit program allows you to edit the alert message text, but limits the message length to 255 characters. However, you can also edit the messages in the Windows registry. If you edit the message text in the Windows registry, the message length can be up to 800 characters.
NOTEFor some alerting methods, such as e-mail messages sent to pagers, 800 characters may be too long.
To edit alert messages in the registry:
1 From the Start menu, select Run.
2 Type Regedit to access the Registry Editor.
3 Navigate to Alert Manager messages located in the following location:
HKEY_LOCAL_MACHINE\SOFTWARE\Network Associates\TVD\Shared
Components\Events\0901
Each alert message is listed by its four digit event number. If you do not know the event number for your alert, you can search for the message text in the Events\0901 registry folder.
62 Alert Manager™ software version 4.7.1

Troubleshooting common problems
4 Double-click the string value you want to edit, probably either LONGDESCRIPT or SHORTDESCRIPT.
5 In the Edit String dialog box, edit the message text as desired. Remember that when editing alert messages this way, the message length can be up to 800 characters.
6 Click OK to close the Edit String dialog box, then close the Registry Editor.
See Editing alert messages on page 50 or Forcing truncation of messages sent to specific e-mail addresses on page 36 for more information about editing alert message length.
Alerting with network messaging does not work
Alert Manager does not require any special configuration to send network messages. In other words, it does not require special network privileges on the recipient computers where the network messages appear. However, the recipient computers that receive the network pop-up messages must have their Microsoft Windows Messenger service enabled. If computers on your network are not receiving pop-up network message alerts, it could be because they do not have the Messenger service enabled. See your operating system documentation for more information on the Messenger service.
See Sending an alert as a network message on page 31 for more information on sending alerts as network messages.
Active Directory issuesThese issues apply to Active Directory:
Error 257 — Active Directory republish unsuccessful
This can occur when Alert Manager is installed on a server running the Microsoft Windows 2000 operating system with Active Directory. It happens when Alert Manager was originally published into Active Directory and that server cannot find its own entry at startup.
In the past, this error was often caused by publishing multiple instances of Alert Manager to the Active Directory, which was not supported in earlier versions. With Alert Manager, you can have multiple instances of Alert Manager installed in the Active Directory.
If you experience this error with Alert Manager, try one of the following:
Review the DNS entry for this server to ensure it is consistent with all of the other entries. Incorrect name resolution could be the cause.
Product Guide 63

Troubleshooting
Remove and reinstall VirusScan Enterprise on your servers using these steps:
How to locate Alert Manager in the Active Directory
Follow these steps to find where the Alert Manager object is in the Active Directory:
1 From the Start menu, select Programs | Administrative Tools | Active Directory Users and Computers.
2 Expand Active Directory Users and Computers.
3 Right-click the appropriate domain name and select Find.
4 In the Find menu, select Custom Search and click Advanced.
5 In the Enter LDAP query field, type the following: cn=alert manager
6 Click Find Now.
A new dialog box appears with Alert Manager displayed.
7 Right-click Alert Manager and select Properties.
8 With the Properties page displayed, select Object.
The fully qualified domain name of the object is displayed and shows you where Alert Manager is located within Active Directory.
See Installing Alert Manager on page 13 for more information about publishing Alert Manager to Active Directory.
1 Completely remove VirusScan Enterprise.
2 Re-install VirusScan Enterprise without publishing to Active Directory.
3 Delete the ADSLokUU.dll file located in the VirusScan installation folder.
4 Re-install Alert Manager. Once reinstalled, Alert Manager no longer looks for its entry in Active Directory.
64 Alert Manager™ software version 4.7.1
Glossary
action takenHow McAfee Security anti-virus or security products responded to detected infections; for example, “cleaned” indicates that the detected infection was successfully removed from the corresponding file.
agentSee Alert Manager agent.
alertA message or notification regarding computer activity such as virus detection. It can be sent automatically according to a predefined configuration, to system administrators and users, via e-mail, pager, or phone.
See also Alert Manager.
Alert ManagerMcAfee alert notification utility that can be configured to use various notification methods when it receives an alert, such as a pager message or e-mail message. The utility allows you to select which events, such as a virus detection, trigger alert messages.
alert notificationA notification that is sent for the purpose of alerting the user that a virus has been detected.
anti-virus policySee policy.
AutoUpdateThe automatic program in the McAfee Security software that updates that software program with the latest virus definition (DAT) files and scanning engine.
AVERTAnti-Virus Emergency Response Team, a division of Network Associates, Inc.; an anti-virus research center that supports the computing public and Network Associates customers by researching the latest threats, and by uncovering threats that may arise in the future.
Centralized AlertingAn alternative to using regular Alert Manager. Alert messages generated by anti-virus software, such as VirusScan Enterprise, are saved to a shared folder on a server. Alert Manager is configured to read alert notifications from that same folder. When the contents of the shared folder change, Alert Manager sends new alert notifications using whatever alerting methods Alert Manager is already configured to use, such as sending e-mail messages to a pager.
See also Alert Manager.
clean, cleaningAn action taken by the scanner when it detects a virus, a Trojan horse or a worm. The cleaning action can include removing the virus from a file and restoring the file to usability; removing references to the virus from system files, system .INI files, and the registry; ending the process generated by the virus; deleting a macro or a Microsoft Visual Basic script that is infecting a file; deleting a file if it is a Trojan horse or a worm; renaming a file that cannot be cleaned.
client computerA computer on the client-side of the program.
Product Guide 65

Glossary
client tasksTasks that are executed on the client-side of the software.
computersThe physical computers on the network.
DAT filesVirus definition files, sometimes referred to as signature files, that allow the anti-virus software to recognize viruses and related potentially unwanted code embedded in files.
See also extra.DAT file, incremental DAT files, and SuperDAT.
deploy, deploymentThe act of distributing and installing Setup programs to client computers from a central location.
download siteThe McAfee Security web site from which you retrieve product or DAT updates.
See also update site.
EICAR test fileEuropean Institute of Computer Anti-Virus Research has developed a file consisting of a string of characters that can be used to test the proper installation and operation of anti-virus software.
error reporting utilityA utility specifically designed to track and log failures in the Network Associates software on your system. The information that is obtained can be used to help analyze problems.
EXTRA.DAT fileSupplemental virus definition file that is created in response to an outbreak of a new virus or a new variant of an existing virus.
See also DAT files, incremental DAT files, and SuperDAT.
HotFix releases (now Patches)Intermediate releases of the product that fix specific issues.
incremental DAT filesNew virus definitions that supplement the virus definitions currently installed. Allows the update utility to download only the newest DAT files rather than the entire DAT file set.
See also DAT files, extra.DAT file and SuperDAT.
incremental virus definition (DAT) filesSee incremental DAT files
log fileA record of the activities of a component of McAfee anti-virus software. Log files record the actions taken during an installation or during the scanning or updating tasks.
See also events.
on-access scanningAn examination of files in use to determine if they contain a virus or other potentially unwanted code. It can take place whenever a file is read from the disk and/or written to the disk.
Compare to on-demand scanning.
66 Alert Manager™ software version 4.7.1

Glossary
on-demand scanningA scheduled examination of selected files to determine if a virus or other potentially unwanted code is present. It can take place immediately, at a future scheduled time, or at regularly scheduled intervals.
Compare to on-access scanning.
Patch releases (previously HotFix release)Intermediate releases of the product that address specific issues.
propertiesAttributes or characteristics of an object used to define its state, appearance, or value.
quarantineEnforced isolation of a file or folder — for example, to prevent infection by a virus or to isolate a spam e-mail message — until action can be taken to clean or remove the item.
scan actionThe action that takes place when an infected file is found.
scan taskA single scan event.
scan, scanningAn examination of files to determine if a virus or other potentially unwanted code is present.
See on-access scanning and on-demand scanning.
signature filesSee DAT files.
silent installationAn installation method that installs a software package onto a computer silently, without need for user intervention.
SuperDATA utility that installs updated virus definition (SDAT*.EXE) files and, when necessary, upgrades the scanning engine.
See also DAT files, extra.DAT file, and incremental DAT files.
SuperDAT (SDAT*.EXE) filesA standard application that you can double-click to start from within Microsoft Windows. The Microsoft version of the Installer includes a wizard that provides instructions in a series of panels.
SuperDAT Package InstallerAn installation program that upgrades McAfee Security software programs. It automatically shuts down any active scans, services, or other memory-resident components that could interfere with the upgrade, then copies new files to their proper locations so that your software can use them immediately.
supplemental virus definition fileSee extra.DAT file.
system scanA scan of the designated system.
task An activity (both one-time such as on-demand scanning, and routine such as updating) that is scheduled to occur at a specific time, or at specified intervals.
Compare to policy.
Product Guide 67

Glossary
update packagePackage files from Network Associates that provide updates to a product. All packages are considered product updates with the exception of the product binary (Setup) files.
update siteThe repository from which you retrieve product or DAT updates.
See also download site.
updatingThe process of installing updates to existing products or upgrading to new versions of products.
verbose log filesOptional files that contain information useful for debugging or support purposes. Sometimes called verbose reports.
virusA program that is capable of replicating with little or no user intervention, and the replicated program(s) also replicate further.
virus definition (DAT) filesSee DAT files.
virus outbreakSee outbreak.
VirusScan Enterprise consoleThe control point for the program’s activities.
virus-scanning engineThe mechanism that drives the scanning process.
warning priorityThe value that you assign each alert message for informational purposes. Alert messages can be assigned a Critical, Major, Minor, Warning, or Informational priority.
wormA virus that spreads by creating duplicates of itself on other drives, systems, or networks.
68 Alert Manager™ software version 4.7.1

Index
AActive Directory, 16
frequently asked questions, 58locating Alert Manager in, 64multiple Alert Managers in, 59publishing Alert Manager to, 17, 58troubleshooting, 63
Alert folder, function, 47Alert Manager
configuratione-mail alert, 33forwarding an alert, 27launching a program, 40network broadcasting, 31printed messages, 37recipients and methods, 22SNMP, 39
installation, 13Summary page, 26system variables, 53uninstalling, 19
alert messagesbroadcasting a network alert, 31Centralized Alerting, 47customizing, 49disabling, 50editing, 53editing in the registry, 62e-mail, 33enabling, 50forwarding, 27launching a program in response to, 40sending to a printer, 37sending via SNMP traps, 39truncating, 36variables in, 54
alert method, configuring recipients for, 22
alert prioritychanging, 51types, 52
audience for this manual, 9AVERT (Anti-Virus Emergency Response Team),
contacting, 12
Bbeta program, contacting, 12broadcasting network messages, 31
CCentralized Alerting, 47clustered resource, 18contacting McAfee Security, 12customer service, contacting, 12
DDAT file
updates, web site, 12definition of terms (See Glossary)documentation for the product, 11download web site, 12
Ee-mail, sending virus alert via, 33ePolicy Orchestrator, 57
Fforwarding alerts
large organization, 27small organization, 29
frequently asked questions (FAQ), 57Active Directory, 58general, 57
Ggetting information, 11
Product Guide 69

Index
glossary, 65 to 68
KKnowledgeBase search, 12
Llicense agreement, 15
Mmail server, configuring for e-mail alerting, 35manuals, 11McAfee Security University, contacting, 12Messenger service, Windows, 63
Nnetwork messaging, troubleshooting, 63new features, 5, 9
Ooperating systems supported, server and
workstation, 14
PPrimeSupport, 12prioritizing messages sent
across the network, 30, 32, 35, 38, 40, 42, 44, 46to another computer, 25
priority level, setting for alerts, 25processor requirements, server and workstation, 14product documentation, 11product training, contacting, 12
RRegistry, using to edit alert messages, 62
Ssecurity headquarters, contacting AVERT, 12service portal, PrimeSupport, 12SETUP.EXE, 15SMTP mail server, configuring for e-mail
alerting, 35SNMP, sending alerts via, 39submitting a sample virus, 12system requirements, 14
system variablesalerting, 53problems, 62
Ttechnical support, 12test alerting configuration, 24training web site, 12troubleshooting, 57
Active Directory, 63general issues, 61
truncating alert message, forced, 36
Uupgrade web site, 12
VVirus Information Library, 12virus, submitting a sample, 12
Wwhat’s new in this release, 9
70 Alert Manager™ software version 4.7.1