make my strawberry jam
TRANSCRIPT

Make My Strawberry Jam
Method 2: Making Jam
Brought to you by theNational Center for Home Food Processing and Preservation, University of Georgia Cooperative Extension and Clemson Cooperative Extension
Name
Making Jam
2
The PUT IT UP! series of lessons in home food preservation includes six different food preservation methods: boiling water canning, making jam, pickling, freezing, drying, and pressure canning. Each method is divided into a beginning hands-on activity and an advanced hands-on activity. Activities may stand alone or be sequenced for cumulative learning. In addition to step-by-step procedures, reflection questions, and ideas for experimentation, each method also includes additional activities: a science-based fill-in-the blank challenge, a history-based word search, a glossary, a resource list, a knowledge test, and more.
PUT IT UP!
On the following pages, PUT IT UP! Make My Strawberry Jam contains:
• Beginning Activity: Make My Strawberry Freezer Jam • Advanced Activity: Make My Strawberry Jam with Regular Pectin • Additional Activities: Make My Jam

Make My Strawberry
Freezer Jam
Method 2: Making Jam BEGINNING Activity
Name Date Teacher
Brought to you by theNational Center for Home Food Processing and Preservation, University of Georgia Cooperative Extension and Clemson Cooperative Extension
Making Jam
Beg.2
Credits and Acknowledgments
Written by: Kasey A. Christian, M.Ed., Project Assistant, National Center for Home Food Processing and Preservation (NCHFP), University of GeorgiaSusan Barefoot, Ph.D., Extension Food Safety and Nutrition Program Team Leader, Clemson University
Edited by: Elizabeth L. Andress, Ph.D., Director, NCHFP and Extension Food Safety Specialist, University of GeorgiaJudy A. Harrison, Ph.D., Extension Foods Specialist, University of Georgia
Designed by: Kasey A. Christian, M.Ed., Project Assistant, NCHFP, University of Georgia
Special thanks to:Pilot Program Leaders (and youth participants!) from Clemson Cooperative Extension & University of Georgia Cooperative Extensionand Advisory Committee members
2014, 2015Slightly revised April 2015
Suggested citation: Christian, K. and Barefoot, S. (2015rev). Put It Up! Food Preservation for Youth. Athens, Georgia: National Center for Home Food Preservation. Retrieved from nchfp.uga.edu.
This material is based upon work supported by the National Institute of Food and Agriculture, U.S. Department of Agriculture, under Agreement No. 2011-51110-30995.
The University of Georgia College of Agriculture & Environmental Sciences and College of Family & Consumer Sciences (working cooperatively with Fort Valley State University, the U.S. Department of Agriculture, and the counties of Georgia) offer their educational programs, assistance, and materials to all people regardless of race, sex, color, ethnicity or national origin, religion, age, disability, genetic information, sexual orientation, or veteran status. The University of Georgia is committed to principles of equal opportunity and affirmative action.
Clemson University Cooperative Extension Service offers its programs to people of all ages, regardless of race, color, sex, religion, national origin, disability, political beliefs, sexual orientation, marital or family status and is an equal opportunity employer.
The use of trade, firm, or corporation names in this curriculum and links to information on outside, commercial websites is for the educational information and convenience of the reader. Such use does not constitute an official endorsement or approval of any product or service to the exclusion of others that may be suitable.

Making Jam
Beg.3
Making Jam: A Preservation Exploration
Preservation means to prevent decay, or in other words to stop a food from breaking down and spoiling. Rotten tomatoes, moldy bread, and stinky old milk are all examples of spoiled foods.
Two very common preservation methods used in modern households to extend the shelf-life of foods are refrigeration and freezing. Other home food preservation methods include canning, pickling, drying, and making jam.
Jam gets its name from the action that makes it - jam is made when fruit and sugar are “jammed”, or mashed, together. The gooey, gel-like texture of jam comes from a balance of fruit and sugar along with acid and pectin.
Some fruits have enough natural acid and pectin to gel on their own once sugar is added, but other fruits need lemon juice and/or packaged pectin to be added. Most citrus fruits and apples have a lot of pectin in the white layer under their skin (called the rind or peel).
Freezer jam, as it sounds, is jam that is frozen so that you can use it for a longer time. Shelf-stable jam stored at room temperature is cooked then canned in a boiling water canner in order to be preserved.
Jam’s high acidity, large amount of sugar, and lack of available water slow the growth rate of microorganisms like mold, but freezing or boiling water canning is needed to fully stop spoilage.
Is it a Jam or a Jelly?
Jam has pieces of crushed fruit, and jelly is made
from fruit juice!
How many times have you eaten a peanut butter and jelly sandwich? Maybe you prefer toast with jam? Have you tried thumbprint cookies, or maybe a crêpe filled with a yummy fruit spread?
In this food science exploration, you’ll get to learn how to preserve your own jam at home.
Let’s start with some basics of food science and preservation:

Making Jam
Beg.4
Ingredients: For about 2 half-pint (8-ounce) jars Multiply as needed, but only up to 6 half-pints at a time
1 quart strawberries (1-2/3 cups crushed) * 2/3 cup sugar 2 tablespoons Ball® Instant Pectin (1.75 ounces) * Any additional ingredients from ‘Want to Experiment?’ (optional)
Equipment needed: Refrigerator or freezer Half-pint (8-ounce) plastic freezer containers Labels and pens (optional) Permanent marker Soap Colander for washing strawberries Very sturdy drinking straws Small paring knife (s) Cutting board Baking pan or cookie sheet with raised edges Dish towel or slip-proof mat Potato masher Liquid and dry measuring cups Measuring spoons Large bowl Large spoon for stirring Kitchen timer Ladle Bubble freer or narrow spatula Headspace tool Spoon for adjusting headspace
Select fully ripe
strawberries that do not have mold
or rot.
Time required: 1 hour procedure + ½ hour additional freezing time
= 1½ hours
Beginning Jam Making Activity: Strawberry Freezer Jam
* Options for other fruit and other pectin:
Strawberry jam is best made with fresh-picked, in-season berries. If you use store-bought berries, be sure to mash them up very well or you will get a lot of floating fruit and trapped air in the final product. If you choose other fresh-picked fruits (such as peaches, cherries, or other berries), then quantities may vary; follow the directions on pectin package labels or inserts.
This recipe is for use with Ball® Instant Pectin; there are other pectin products that can be used. If you use another brand, follow the recipe and directions that come with that pectin product.
Set freezer
temperature at 0°F and refrigerator temperature between
35°F and 40°F .

Making Jam
Beg.5
Part One: Preparing the Jars
1. Wash hands thoroughly with soap under running water for at least 20 seconds, rinse well, and dry.
2. Assemble equipment and ingredients.
3. Examine plastic freezer jars or freezer containers and discard any with cracks.
4. Wash plastic jars and plastic lids thoroughly in warm soapy water, rinse well.
5. Use a permanent marker to label lids with your name, the name of the product and the date.
The Procedure: Just Follow These Steps...
Feeling creative? Make up a company name for
your products.
Fun Facts!
The average
strawberry has
200 seeds. Str
awberries
are a m
ember
of the
rose family.

Making Jam
Beg.6
Part Two: Preparing the Strawberries
6. Rinse strawberries in a colander immediately before using. Do not soak berries. Gently lift them out of water.
8. Remove the caps of the berries by holding a straw straight up against the tip of a strawberry and pushing the straw through the center of the berry until the leafy cap pushes off. Or, carefully use a knife to remove the tops of the berries.
9. Carve out and discard bruised spots with a paring knife if needed.
10. Thoroughly crush berries one layer at a time in a deep baking pan or cookie sheet using a potato masher. It is helpful to place a damp dish towel or slip proof mat under the pan to prevent sliding.
7. Leader demonstration: Basic knife skills. Grip the knife handle with dominant hand, wrapping fingertips behind knuckles for a tight grip. Slice with a rocking motion, not a chopping down action. Always pay attention and keep your fingers out of the path of the blade.
F
un Fact!
= Be Extra Careful!
Jams have only about 48 calories per
tablespoon and no fat.

Making Jam
Beg.7
Part Three: Making the Jam 11. Measure and add sugar and instant pectin to a large bowl. Stir to mix.
12. Use liquid measuring cup to measure and add crushed strawberries to bowl.
13. Stir for 3 minutes. Ladle jam into clean freezer jars leaving ½-inch from the top of the juice to the top of the jar rim. This gap is called headspace. Measure headspace with ruler or headspace tool to ensure headspace is ½-inch. 14. Use bubble freer or spatula to release any large air pockets that are trapped in the jam. Check headspace and add or remove jam if needed.
15. Wipe jar rims with clean, damp paper towel. Anything on the rim might prevent the jar from closing properly.
16. Turn or press lids on freezer containers until tight.
17. Let jam stand 30 minutes.
18. Enjoy now, refrigerate for up to 3 weeks or freeze for up to 1 year.
8 straw
berries
provide 1
40% of your
recommended daily
intake o
f
Vitamin C.
Think About It:Headspace
Have you ever seen what happens to the size of water after it freezes? As water freezes, each molecule of water
expands, getting larger. There is so much water in fruits, and therefore in jams, that
the same thing happens when jam freezes – it gets bigger!
If there is not enough space between the top of the jam and the lid, then as the jam
freezes it may push against the lid and lift it, or push against the sides of the
container so hard that it breaks. Air can also cause color and flavor
changes in the jam (called oxidation), so too much
headspace can lowerquality.
Fun Facts from:
Anderson, J. and Deskins, B. (1995). The Nutrition Bible. New York: William Morrow and Company, Inc.
University of Illinois Extension. (2013). Strawberries and More – Facts. http://urbanext.illinois.edu/strawberries/facts.cfm.
Fun Fact!

Making Jam
Beg.8
Time to Reflect...Write your responses to these questions.
Then, share your reflections with someone else. What was your favorite part of making strawberry jam?
______________________________________________________________________________________________________________
For you, what was the most challenging part of making strawberry jam?
______________________________________________________________________________________________________________
What surprised you most in this activity?
______________________________________________________________________________________________________________
If you could do this activity again, what is one thing you would change? Why?
______________________________________________________________________________________________________________
Do you think that making jam is a useful skill? Why or why not?
______________________________________________________________________________________________________________
How will you use what you have learned about making jam?
______________________________________________________________________________________________________________

Making Jam
Beg.9
Want to Experiment?
Use the jam as a topping for yogurt, ice cream, angel food cake,
biscuits, croissants, toast, or English muffins.
Substitute equal amounts (1-2/3 cups) of crushed raspberries or blackberries or blueberries for the
crushed strawberries to make freezer jam. Or combine these crushed fruits for a total of 1-2/3 cups. Do not
increase the total amount of fruit or you will not have the proper proportions of ingredients.
Substitute 2/3 cup granulated Splenda® no-calorie sweetener
for the 2/3 cup sugar.
Describe the flavor of your jam (sweet, tart, etc.). Compare the flavor, color, and texture of your jam with a store-bought jam.
How do tastes, textures, and appearances differ? Do you prefer one more than the other? Why?
Evaluate the quality of your finished product. Use a scale of excellent to poor for the following categories: appropriate
headspace, color, free of air pockets, clean seal, and labeling.
Did you really like making jam? Brainstorm, research, or just ask your leader about
careers in which you get to play with food, like food science, cooking, or catering.


Make My Strawberry Jam
with Regular Pectin
Brought to you by theNational Center for Home Food Processing and Preservation, University of Georgia Cooperative Extension and Clemson Cooperative Extension
Method 2: Making Jam ADVANCED Activity
Name Date Teacher

Making Jam
Adv.2
Credits and Acknowledgments
Written by: Kasey A. Christian, M.Ed., Project Assistant, National Center for Home Food Processing and Preservation (NCHFP), University of GeorgiaSusan Barefoot, Ph.D., Extension Food Safety and Nutrition Program Team Leader, Clemson University
Edited by: Elizabeth L. Andress, Ph.D., Director, NCHFP and Extension Food Safety Specialist, University of GeorgiaJudy A. Harrison, Ph.D., Extension Foods Specialist, University of Georgia
Designed by: Kasey A. Christian, M.Ed., Project Assistant, NCHFP, University of Georgia
Special thanks to:Pilot Program Leaders (and youth participants!) from Clemson Cooperative Extension & University of Georgia Cooperative Extensionand Advisory Committee members
2014, 2015Slightly revised April 2015
Suggested citation: Christian, K. and Barefoot, S. (2015rev). Put It Up! Food Preservation for Youth. Athens, Georgia: National Center for Home Food Preservation. Retrieved from nchfp.uga.edu.
This material is based upon work supported by the National Institute of Food and Agriculture, U.S. Department of Agriculture, under Agreement No. 2011-51110-30995.
The University of Georgia College of Agriculture & Environmental Sciences and College of Family & Consumer Sciences (working cooperatively with Fort Valley State University, the U.S. Department of Agriculture, and the counties of Georgia) offer their educational programs, assistance, and materials to all people regardless of race, sex, color, ethnicity or national origin, religion, age, disability, genetic information, sexual orientation, or veteran status. The University of Georgia is committed to principles of equal opportunity and affirmative action.
Clemson University Cooperative Extension Service offers its programs to people of all ages, regardless of race, color, sex, religion, national origin, disability, political beliefs, sexual orientation, marital or family status and is an equal opportunity employer.
The use of trade, firm, or corporation names in this curriculum and links to information on outside, commercial websites is for the educational information and convenience of the reader. Such use does not constitute an official endorsement or approval of any product or service to the exclusion of others that may be suitable.

Making Jam
Adv.3
Making Jam: A Preservation Exploration
Preservation means to prevent decay, or in other words to stop a food from breaking down and spoiling. Rotten tomatoes, moldy bread, and stinky old milk are all examples of spoiled foods.
Two very common preservation methods used in modern households to extend the shelf-life of foods are refrigeration and freezing. Other home food preservation methods include canning, pickling, drying, and making jam.
Jam gets its name from the action that makes it - jam is made when fruit and sugar are “jammed”, or mashed, together. The gooey, gel-like texture of jam comes from a balance of fruit and sugar along with acid and pectin.
Some fruits have enough natural acid and pectin to gel on their own once sugar is added, but other fruits need lemon juice and/or packaged pectin to be added. Most citrus fruits and apples have a lot of pectin in the white layer under their skin (called the rind or peel).
Freezer jam, as it sounds, is jam that is frozen so that you can use it for a longer time. Shelf-stable jam stored at room temperature is cooked then canned in a boiling water canner in order to be preserved.
Jam’s high acidity, large amount of sugar, and lack of available water slow the growth rate of microorganisms like mold, but freezing or boiling water canning is needed to fully stop spoilage.
How many times have you eaten a peanut butter and jelly sandwich? Maybe you prefer toast with jam? Have you tried thumbprint cookies, or maybe a crêpe filled with a yummy fruit spread?
In this food science exploration, you’ll get to learn how to preserve your own jam at home.
Let’s start with some basics of food science and preservation:
Is it a Jam or a Jelly?
Jam has pieces of crushed fruit, and jelly is made
from fruit juice!

Making Jam
Adv.4
Equipment needed: Gas or electric stovetop range with four burners Boiling water canner Half-pint canning jars Two-piece metal canning lids and ring bands Permanent marker, or labels and pens Medium saucepan for boiling water to be added to canner Large colander for washing strawberries Very sturdy drinking straws Small paring knife (s) Cutting board (s) Potato masher Baking pan or cookie sheet with raised edges Dish towel or slip-proof mat Liquid and dry measuring cups Large stockpot (6-8 quarts) Long-handled spoon and large ladle Slotted spoon Towel or cake-cooling rack Jar funnel and jar lifter Medium-sized bowl for pre-measuring sugar Headspace tool Spoon for adjusting headspace Paper towels Thermometer Kitchen timer (may be on oven)
Ingredients: For about 8 half-pint jars
5 cups crushed strawberries (about 4 pints strawberries) * 1 package powdered pectin 7 cups sugar
Time required: 1½ hour procedure + ½ hour additional processing time
= 2 hours (+ 12 hour minimum cooling time)
Advanced Jam Making Activity: Strawberry Jam with Regular Pectin
* Options for other fruit and other pectin:
Strawberry jam is best made with fresh-picked, in-season berries. If you use store-bought berries, be sure to mash them up very well or you will get a lot of floating fruit and trapped air in the final product. If you choose other fresh-picked fruits (such as peaches, cherries, or other berries), then quantities may vary; follow the directions on pectin package labels or inserts. This recipe is for use with regular powdered pectin. If you use a brand that provides a different recipe and directions, follow the recipe and directions that come with that pectin product.
Select fully ripe
strawberries that do not have mold
or rot.
If range is a smooth-top,
boiling water canner must have a flat-
bottom.

Making Jam
Adv.5
Feeling creative? Make up a company name
for your products.
The Procedure: Just Follow These Steps...
Part One: Preparing the Canner and Jars1. Wash hands thoroughly with soap under running water for at least 20 seconds, rinse well, and dry.
2. Assemble equipment and ingredients.
3. Examine jars and discard any with cracks or chips. Examine ring bands and discard any with rust or bends.
4. Wash jars thoroughly in warm soapy water, rinse well.
5. Fill the canner about half-full with hot water. Carefully use a jar lifter to lower jars right side up onto the rack in the canner in a single layer. If you are using 4 oz. jars and need to double-stack, then place a second canning rack on top of the first full layer of jars. Continue to place jars in a single layer on top of this second rack.
6. Turn burner on so that the water reaches and stays at 180°F. Leave jars in the canner in hot water until use.
7. Use a permanent marker to label lids with your name, the name of the product and the date. If using labels and pens, then wait until after processing, when jars have cooled.
8. Prepare two-piece lids according to the manufacturer’s instructions.
9. Heat 3-4 cups hot water in a medium saucepan for adding to canner, if needed.
= Be Extra Careful!
Think About It:Vacuum Seals
Vacuum seals form as jars cool, keeping air out of jars so that the food inside is less likely to spoil. Could a vacuum seal
keep air out if there were cracks and chips in the jar?
F
un Facts
!
The average strawberry has 200 seeds.
Strawberries are a member of the
rose family.

Making Jam
Adv.6
Part Two: Preparing the Strawberries10. Rinse strawberries in a colander immediately before using. Do not soak berries. Gently lift them out of water.
11. Remove the caps of the berries by holding a straw straight up against the tip of a strawberry and pushing the straw through the center of the berry until the leafy cap pushes off. Or, carefully use a knife to remove the tops of the berries.
12. Carve out and discard bruised spots with a paring knife if needed.
13. Thoroughly crush berries one layer at a time in a deep baking pan or cookie sheet using a potato masher. It is helpful to place a damp dish towel or slip proof mat under the pan to prevent sliding.
Fun Facts!
Leader demonstration: Basic knife skills. Grip the knife handle with dominant hand, wrapping fingertips behind knuckles for a tight grip. Slice with a rocking motion, not a chopping down action. Always pay attention and keep your fingers out of the path of the blade.
Jams have about 48
calories and no fat per tablespoon.8 strawberries
provide 140% of your
recommended daily
intake of Vitamin C.
Fun Facts!

Making Jam
Adv.7
Part Three: Making the Jam14. Pre-measure 7 c. sugar with dry cups into a bowl and set aside. Measure 5 c. crushed strawberries with liquid cups and add to stockpot.
15. Add package of regular pectin to strawberries and stir well. Turn burner under stockpot to high heat, stir constantly and bring to a full boil (bubbles over the entire surface).
16. Add 7 c. sugar, continue stirring, and heat again to a full bubbling boil. Boil hard for 1 minute, stirring constantly. Do not boil longer. Longer boiling may damage the pectin bond, causing jam to soften.
17. Remove from heat; quickly skim foam from top with a slotted spoon.
18. Remove jars from hot water with jar lifter, emptying any water back into the canner. Place jars upright on a towel-covered countertop or rack.
19. Rest funnel in jar opening and ladle jam into each jar leaving ¼-inch space from the top of the jam to the top of the jar rim. This gap is called headspace.
20. Check that headspace is ¼-inch; use a spoon to add or remove jam as needed.
21. Wipe jar rims with a damp paper towel. Apply lids according to manufacturer’s directions. If using two-piece metal lids, turn bands onto jars until fingertip tight, or until you meet firm resistance using thumb and first two fingers to turn.
22. Use a thermometer to check that the water in the canner is 180°F for the hot pack. Adjust burner, if necessary.
Think About It:Why Fingertip Tight?
Why do you think it is important that lids are tightened just right?
Hint: If a band is too tight, could air escape? If a band is too loose, could
liquid get out?
Don’t let the jam boil over or splatter you.
Hot jam burns, ouch!
Fun Facts!

Making Jam
Adv.8
Altitude Process Time0- 1,000 ft. 10 minutes1,001-6,000 ft. 10 minutes
Above 6,000 ft. 15 minutes
Recommended Process Times for Strawberry Jam in a Boiling Water Canner
Table from: National Center for Home Food Preservation http://nchfp.uga.edu/how/can_07/strawberry_jam_powder.html.
Fun Facts from:Anderson, J. and Deskins, B. (1995). The Nutrition Bible. New York: William Morrow and Company, Inc.University of Illinois Extension. (2013). Strawberries and More Facts. http://urbanext.illinois.edu/strawberries/facts.cfm.
Part Four: Boiling Water Processing
23. Use jar lifter to place jars of jam one at a time in a single layer on the rack in the boiling water canner. Keep jars upright at all times. If more space is needed for 4 oz. jars, then place a rack on top of the lower layer of jars and stack a second single layer on that second rack. Make sure water is 1-2 inches above tops of jars. Add hot water from the saucepan if needed, pouring between jars rather than directly on top of jars.
24. Place lid on canner and turn burner heat to high. Determine your altitude, and once the water comes to a boil, set timer using the time recommended on the table to the left. Maintain a gentle boil throughout the entire timing process.
25. Once water has boiled continuously for the recommended time, turn off heat then remove the canner lid, lifting the underside of the lid away from you to direct the steam away from your face. Wait 5 minutes for contents to settle.
26. Remove jars with jar lifter, being careful not to tilt them. Place at least 1 inch apart on a towel or rack. Place away from drafts of moving air.
27. Let jars cool, undisturbed, for 12 to 24 hours. If jars are taken home before cooling, keep in a refrigerator.
28. Check that each jar has a vacuum seal. Remove ring bands from sealed jars and wipe jars. Store in a cool, dark, dry place. Enjoy with family and friends within one year for best quality. Store unsealed and opened jars in the refrigerator.
How to Test for a Vacuum Seal
Listen for lids to
“pop!” as the vacuum
pulls them down.
What’s my Altitude?
Altitude is the elevation, or distance, above sea level. To find the altitude where you
are, ask your leader or an Extension agent, visit a website about your town or city, or use the U.S. Geological Survey Geographic Names Information System (GNIS) online.

Making Jam
Adv.9
Time to Reflect...Write your responses to these questions.
Then, share your reflections with someone else. What was your favorite part of making strawberry jam?
______________________________________________________________________________________________________________
For you, what was the most challenging part of making strawberry jam?
______________________________________________________________________________________________________________
What surprised you most in this activity?
______________________________________________________________________________________________________________
If you could do this activity again, what is one thing you would change? Why?
______________________________________________________________________________________________________________
Do you think that making jam is a useful skill? Why or why not?
______________________________________________________________________________________________________________
How will you use what you have learned about making jam?
______________________________________________________________________________________________________________

Making Jam
Adv.10
Describe and compare the flavor. color, and texture of your jam with a store-bought jam.
How do tastes, textures, and appearances differ? Do you prefer one more than the other? Why?
Make thumbprint cookies! Roll peanut butter cookie dough or sugar cookie dough into 1-inch balls, place on cookie sheet,
make a small well with your thumb in the center of the ball and put ½ teaspoon of jam in the
thumbprint before baking.
Want to Experiment?
Did you really like making jam? Brainstorm, research, or just ask your leader about careers
in which you get to play with food, like food science, cooking, or catering.
Evaluate the quality of your finished product. Use a scale of excellent to poor for the following categories:
appropriate headspace, color, bubble-free, clean seal, and labeling.
Make jam with different fruits and/or different types of pectin (regular, freezer, low sugar, powdered, liquid). Follow recipes and
directions on product packaging or in So Easy to Preserve.
Use the jam as a topping for yogurt, ice cream, angel food cake,
biscuits, croissants, toast, or English muffins.

Make My Jam
Method 2: Making JamADDITIONAL Activities
Name Date Teacher
Brought to you by theNational Center for Home Food Processing and Preservation, University of Georgia Cooperative Extension and Clemson Cooperative Extension

Making Jam
A.A.2
Credits and Acknowledgments
Written by: Kasey A. Christian, M.Ed., Project Assistant, National Center for Home Food Processing and Preservation (NCHFP), University of GeorgiaSusan Barefoot, Ph.D., Extension Food Safety and Nutrition Program Team Leader, Clemson University
Edited by: Elizabeth L. Andress, Ph.D., Director, NCHFP and Extension Food Safety Specialist, University of GeorgiaJudy A. Harrison, Ph.D., Extension Foods Specialist, University of Georgia
Designed by: Kasey A. Christian, M.Ed., Project Assistant, NCHFP, University of Georgia
Special thanks to:Pilot Program Leaders (and youth participants!) from Clemson Cooperative Extension & University of Georgia Cooperative Extensionand Advisory Committee members
2014, 2015Slightly revised April 2015
Suggested citation: Christian, K. and Barefoot, S. (2015rev). Put It Up! Food Preservation for Youth. Athens, Georgia: National Center for Home Food Preservation. Retrieved from nchfp.uga.edu.
This material is based upon work supported by the National Institute of Food and Agriculture, U.S. Department of Agriculture, under Agreement No. 2011-51110-30995.
The University of Georgia College of Agriculture & Environmental Sciences and College of Family & Consumer Sciences (working cooperatively with Fort Valley State University, the U.S. Department of Agriculture, and the counties of Georgia) offer their educational programs, assistance, and materials to all people regardless of race, sex, color, ethnicity or national origin, religion, age, disability, genetic information, sexual orientation, or veteran status. The University of Georgia is committed to principles of equal opportunity and affirmative action.
Clemson University Cooperative Extension Service offers its programs to people of all ages, regardless of race, color, sex, religion, national origin, disability, political beliefs, sexual orientation, marital or family status and is an equal opportunity employer.
The use of trade, firm, or corporation names in this curriculum and links to information on outside, commercial websites is for the educational information and convenience of the reader. Such use does not constitute an official endorsement or approval of any product or service to the exclusion of others that may be suitable.

Making Jam
A.A.3
All About Jam
FUNdamentals of Making Jam..................................................
Boiling Water Canner and Mason-Style Jar Anatomy.............
What’s the Story of Jam?............................................................
What Makes a Jam a “Jam”?.......................................................
Glossary, Sources, and Resources...............................................
What Do You Know About Making Jam?................................
Pages
A.A. 4
A.A. 5
A.A. 6
A.A. 7
A.A. 8
(A.A. 9)

Making Jam
A.A.4
FUNdamentals of Making Jam
Use the word bank at the bottom of the page to correctly fill in the blanks. (Hint: The answers can be found in the pages of this activity book.)
__________________ is a method of food preservation that uses a low temperature to preserve foods for weeks, months, even up to a year.
_____________________________ is a method of food preservation that raises the temperature so high that spoilage microorganisms like molds and yeasts are destroyed.
Microorganisms (bacteria, mold, and yeast) sometimes cause food to __________. Low temperatures slow the growth of microorganisms; high enough temperatures kill them.
Microorganisms need _______________ to grow.
Water freezes into solid ice crystals. _________________________ cannot use frozen ice crystals to provide them with the water they need to grow.
__________________ is a substance that occurs naturally in fruits. A balanced ratio of pectin, water, sugar, and acid binds up water so that it is not available for
microorganisms to use to grow.
_________, Cooperative Extension, and the National Center for Home Food Preservation have science-based recipes for making jam, like the recommendations in
the books So Easy to Preserve and Complete Guide to Home Canning.
Word bank: PECTIN, USDA, FREEZING, MICROORGANISMS, SPOIL, BOILING WATER CANNING, WATER
Making jam is a science, so there are important facts and concepts at play. These FUNdamentals will help you understand the steps of the jam making procedure.

Making Jam
A.A.5
Boiling Water Canner Anatomy
Mason-Style Jar Anatomy
Illustrations from: USDA. (2009). Complete Guide to Home Canning. Agriculture Information Bulletin No. 539. Washing-ton, DC: USDA National Institute of Food and Agriculture.
Fill in each blank with the term to the right that describes that part of the canner.
Use the labels in the illustration below to correctly fill in the blanks of the descriptions to the left.
A ______ can be used again and again until cracked or chipped.
________ on top of jar allow ring band to twist on tightly.
A _____ _____ secures lid to jar, and can be reused if not bent or rusty.
A __________ has a springy center that dips down when pulled by a vacuum. After jars cool, gently rub the center of the lids with your fingertip; you have evidence that a vacuum has formed if you feel an indent.
_________ ____________ is a soft plastic in the bottom-edge groove of lids that softens when heated and forms an airtight seal around the lid when cooled.
5.
4.
3. 1. 2.
THREADS
JAR
SEALING COMPOUND
RING BAND
LID
AIRSPACE allows room for water to boil.
WATER must cover 1 to 2 inches above jars so that the jars will be completely surrounded by boiling water, even if a small amount evaporates.
LID/COVER of the canner prevents heat from escaping and reduces water loss from evaporation.
CANNER or STOCKPOT contains water so that it can heat to boiling.
RACK prevents jars from cracking due to high heat from the burner and allows water to circulate underneath the jars so that they are heated evenly on all sides.

Making Jam
A.A.6
S B F L A I C R E M M O C R I E H G R H E C P S Z L W E C E V D H Q U G D W E J S K G J P R E R Z K I A A M C C O S W M E J O J R N T M L U T U C I L S M H D R G C B M E G I D M M E V A D O R Y S U A P D N S Y R A E J I E F V R T L A O I C P C P B H D T G T E T V R S C E U R Q U I N C E V R E U G E S U H K J E H A F Y A S R A N K M N E R N S M A T V L Y R E K J X O I T Y L L E J R B W E F J K M T S N U Z L E Y N Y L H L T T I S Z Y I A D O O L G
- Ancient Greeks preserved fruit with honey. They mixed QUINCE (a fruit related to apples, pears and plums) with honey, partially dried the mixture, and packed it into jars. Ancient Romans cooked quince with honey to make a more jam-like product.
- The process of making jam with SUGAR began in Middle Eastern countries where sugar grew.
- Jams and jellies became popular in Europe in the Middle Ages, after Crusaders returned from countries in the MIDDLE EAST.
- In the U.S., early New England settlers preserved with molasses and maple syrup. They extracted PECTIN from apple peels and used it to thicken sweetened fruit mixtures into jellies.
- In the late 1890s, Jerome SMUCKER prepared apple butter and sold it in ceramic pots.
- In 1917, Paul Welch secured a patent for a grape jam product called “GRAPELADE.” The U.S. Army purchased the entire product made by Welch for American troops in France during World War I. Troops returning after the war demanded more “Grapelade” so he began to produce it in mass quantity.
- The 1920s saw a major technological innovation in jam making — the widespread adoption of the VACUUM pan cooker for cooking jams and jellies under a vacuum. This was a significant step in improving jam quality because it allowed for boiling at a lower temperature.
- In 1940 the U.S. Food and Drug Administration (FDA) established Standards of Identity to legally define the labels “JAM”, “JELLY”, “PRESERVES” and “FRUIT BUTTER”.
- The most popular COMMERCIAL jam in the U.S. is strawberry jam, although there are over 35 varieties of commonly produced jams and jellies, including some with more unique INGREDIENTS, like chocolate jam!
Search the puzzle for the 13 UPPERCASE,
underlined words from the history
notes below and circle them!
What’s the
Story of Jam?

Making Jam
A.A.7
The answer is in the name: a jam is pieces of fruit and sugar “jammed” together. The texture of jam is thick and sticky. Similar but different, jellies are “jelled” fruit juice and sugar. The texture of jelly is firm enough to hold its shape, but still jiggles if moved. Preserves, conserves, and marmalades are other types of jellied fruit spreads. It takes the right balance of fruit or fruit juice, sugar, acid and pectin to form the gel in any jellied product.
Have you heard about microorganisms? Sometimes called “germs”, they are tiny creatures that cannot be seen with human eyes unless aided by a microscope. Most microorganisms are helpful and even neccessary for life, but some can spoil foods or even make us sick. The three types of microorganisms that spoil food most often are molds, yeasts and bacteria. You may have seen masses of mold as fuzzy spots on spoiled bread; pink shiny spots on spoiled cream cheese may be thousands of yeasts; slime on spoiled ground beef is caused by millions of bacteria.
Bacteria do not grow well in jams and jellies because they are made of acid foods (think of all those fruits that make your mouth pucker) and they contain a large amount of sugar. Bacteria may survive in acidic conditions (pH 4.6 or less) and without much water, but they cannot actually grow. Bacteria need water to grow, but the sugar in jams and jellies binds with water, making that water unavailable to bacteria so they cannot grow.
Molds and yeasts are the major cause of spoilage of jams and jellies. At room temperature, molds and yeasts are able to grow in acidic, high-sugar foods like jams and jellies. They typically grow at the top of jars, where oxygen contacts the food.
These microorganisms are killed by the high temperature of boiling, so spoilage of cooked jams and jellies can be prevented by the heat from a boiling water process. Cold temperatures do not kill mold or yeast like heat does, but cold does cause microorganisms to grow very slowly in the refrigerator (32°F to 40°F) and to grow little or not at all at freezer temperatures (0°F to -10°F). Jams made without boiling water canning rely on refrigeration to delay spoilage or on freezing to prevent it.
What Makes a Jam a “Jam”?
Why Preserve Jam?

Making Jam
A.A.8
GlossaryAcid is a substance measuring below 7.0 on the pH scale; it tastes sharply sour.
Acid foods are foods with a pH value at or below 4.6; they taste sour.
Bacteria are a type of microorganism that grow on food and can cause spoilage or sickness.
Boiling water canning is the process of filling jars with food then covering the closed jars with boiling water for a long enough time to heat the product and destroy microorganisms.
Food preservation protects food from spoilage by microorganisms and enzymes.
Microorganisms are creatures so small they cannot be seen except with a microscope.
Mold and Yeast are types of microorganisms that grow on food and can cause spoilage.
Oxidation is chemical and physical changes caused by oxygen interacting with a substance.
Pectin is a natural complex sugar found in all fruits that helps give structure to plant cells.
pH is a measure of acidity, on a scale from 0 to 14.
USDA is the acronym for the United States Department of Agriculture; a reliable source for scientifically tested home food preservation recommendations, including making jam.
Vacuum is empty space created when air is pushed out of a container and is unable to re-enter.
Sources and ResourcesAndress, E.L., Harrison, J.A., eds. (2014). So Easy to Preserve, 6th ed. Athens, GA: University of Georgia Cooperative Extension.
Braman, T.F. (1922). Use of vacuum pan for fruit products. American Food Journal 17:9-10, 26. Retrieved from http://hearth.library.cornell.edu
Clemson University Home and Garden Information Center factsheets about preserving jams and jellies. See HGIC 3180, HGIC 3200, HGIC 3224. http://www.clemson.edu/extension/hgic/food/food_safety/preservation/.
International Jelly and Preserve Association. (2010). Jam and Jelly Lore: Yesterday and Today. Accessed July 2014. http://www.jelly.org/lore.html.
Kingry, J., Devine, L. (2006). Ball Complete book of home preserving. Toronto, Ontario: Robert Rose, Inc.
National Center for Home Food Preservation, University of Georgia. http://nchfp.uga.edu/.
Nummer, B.A. (2002). Historical Origins of Food Preservation. Athens, GA. Athens, GA: University of Georgia, National Center for Home Food Processing and Preservation.
USDA. (2009). Complete Guide to Home Canning. Agriculture Information Bulletin No. 539. Washington, DC: USDA National Institute of Food and Agriculture.
Name: ______________________________
Date: _____________________
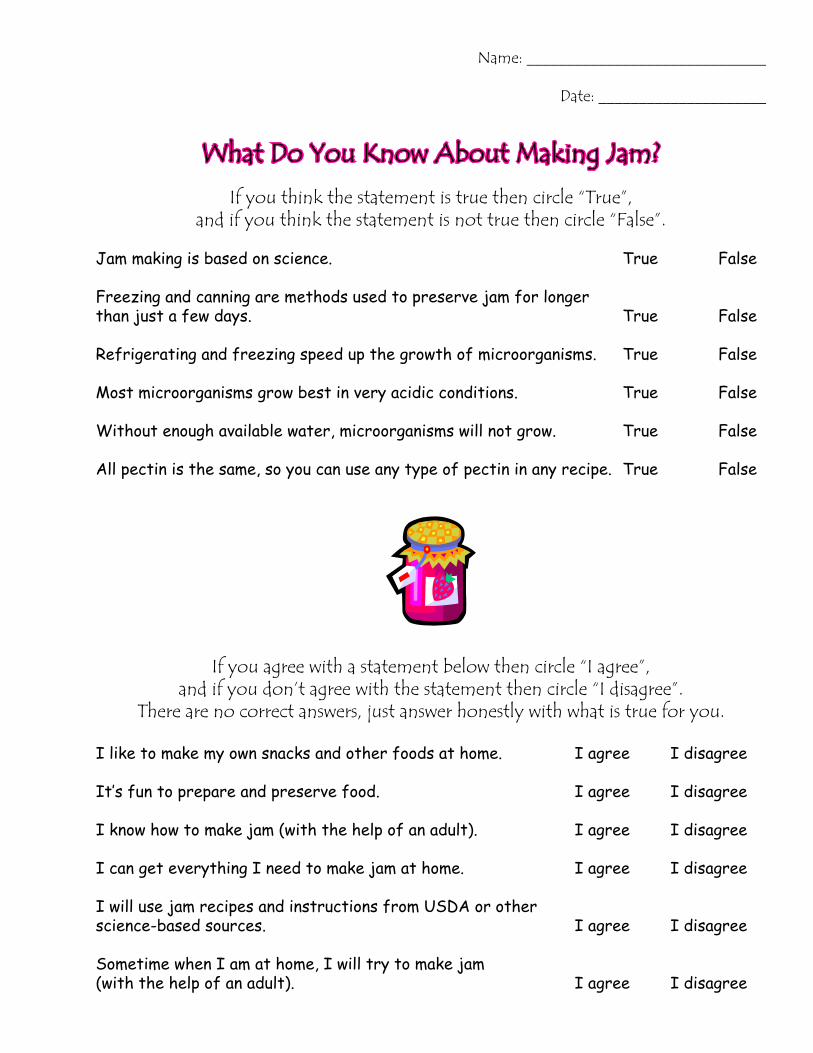
What Do You Know About Making Jam?If you think the statement is true then circle “True”,
and if you think the statement is not true then circle “False”. Jam making is based on science. True False
Freezing and canning are methods used to preserve jam for longer than just a few days. True False
Refrigerating and freezing speed up the growth of microorganisms. True False
Most microorganisms grow best in very acidic conditions. True False
Without enough available water, microorganisms will not grow. True False
All pectin is the same, so you can use any type of pectin in any recipe. True False
If you agree with a statement below then circle “I agree”,and if you don’t agree with the statement then circle “I disagree”.
There are no correct answers, just answer honestly with what is true for you.
I like to make my own snacks and other foods at home. I agree I disagree
It’s fun to prepare and preserve food. I agree I disagree
I know how to make jam (with the help of an adult). I agree I disagree
I can get everything I need to make jam at home. I agree I disagree
I will use jam recipes and instructions from USDA or other science-based sources. I agree I disagree Sometime when I am at home, I will try to make jam (with the help of an adult). I agree I disagree