machete installation manual - github...
TRANSCRIPT

Machete Installation ManualRelease 1.7.0
Savage Learning LLC
June 26, 2013


CONTENTS
1 Introduction 11.1 System Pre-Requisites . . . . . . . . . . . . . . . . . . . . . . . . . . . . . . . . . . . . . . . . . . 1
2 Windows 7 Installation 32.1 Install Internet Information Server . . . . . . . . . . . . . . . . . . . . . . . . . . . . . . . . . . . . 32.2 Check the IIS installation . . . . . . . . . . . . . . . . . . . . . . . . . . . . . . . . . . . . . . . . 42.3 Configure Machete name resolution . . . . . . . . . . . . . . . . . . . . . . . . . . . . . . . . . . . 52.4 Install Web Platform Installer . . . . . . . . . . . . . . . . . . . . . . . . . . . . . . . . . . . . . . 72.5 Configure IIS Application Pool and Machete Web Site . . . . . . . . . . . . . . . . . . . . . . . . . 112.6 Install SQL Server Express . . . . . . . . . . . . . . . . . . . . . . . . . . . . . . . . . . . . . . . 152.7 Add Machete User and Log database to Machete . . . . . . . . . . . . . . . . . . . . . . . . . . . . 232.8 Install the Machete Web Application binaries . . . . . . . . . . . . . . . . . . . . . . . . . . . . . . 302.9 Install Google Chrome and Internet Explorer 9 . . . . . . . . . . . . . . . . . . . . . . . . . . . . . 33
3 Maintenance Tasks 353.1 Machete database backup . . . . . . . . . . . . . . . . . . . . . . . . . . . . . . . . . . . . . . . . 353.2 Weekly class creation . . . . . . . . . . . . . . . . . . . . . . . . . . . . . . . . . . . . . . . . . . 35
4 Online Order Forms 394.1 Overview . . . . . . . . . . . . . . . . . . . . . . . . . . . . . . . . . . . . . . . . . . . . . . . . . 394.2 Drupal 7 Add-On . . . . . . . . . . . . . . . . . . . . . . . . . . . . . . . . . . . . . . . . . . . . . 39
i

ii

CHAPTER
ONE
INTRODUCTION
Machete is a web application built on Microsoft Internet Information Server (IIS) using the ASP.NET/MVC Frame-work. As such, the server components of Machete can be installed on a wide variety of Windows operating systemsand underlying hardware. Machete works with most major web browsers, such as Chrome, Firefox, Internet Explorer(IE9+), and Safari.
This installation targets an installation for a single computer environment; presumably, the most common for a smallday labor organization. This chapter assumes only that the user has basic experience with Windows an internet con-cepts such as DNS. This chapter should be sufficient for a skilled system administrator to install Machete to otherenvironments.
1.1 System Pre-Requisites
Hardware
Machete was developed on an Intel Core 2 Duo processor purchased in 2008. Many Windows compatible machinewith 2 gigabytes of memory should be able to function as a Machete server. As with any system, more memory willimprove some performance issues. However, since Machete is a client/server application that operates over a network,any issues that affect network performance will also affect Machete.
Software
Machete is an ASP.NET/MVC Application. It has been tested on IIS 7 with Windows 7 Professional, Windows 7Home Premium, and Windows Server 2008r2. Presumably, any Windows OS that can run IIS 7 and SQL ServerExpress will work.
Note: The screenshots and instructions are for Windows 7. If you’re using Server 2008, it’s assumed that you canfigure out the slight differences from those contained herein.
1

Machete Installation Manual, Release 1.7.0
2 Chapter 1. Introduction

CHAPTER
TWO
WINDOWS 7 INSTALLATION
This chapter walks through the installation of Machete and its dependencies. It captures each step either as a screen-shot, or narrative text, guiding the reader through the installation.
2.1 Install Internet Information Server
Windows 7 comes with IIS installed, but it is not enabled by default. To enable IIS, execute the following:
Click: Start -> All Programs -> Control Panel -> Programs and Features
Figure 2.1: Click “Turn Windows features on or off”
3

Machete Installation Manual, Release 1.7.0
Figure 2.2: Select “Internet Information services” and select “OK”
2.2 Check the IIS installation
Start -> All Programs -> Internet Explorer (Or Chrome, or Firefox)
Go to address: http://localhost/
Figure 2.3: IIS default page
If IIS is running correctly, it will display the default IIS page (seen above).
4 Chapter 2. Windows 7 Installation

Machete Installation Manual, Release 1.7.0
2.3 Configure Machete name resolution
Machete is implemented using standard web and internet technologies, and as such it is dependent on domain nameresolution and the domain name services (DNS) of your environment. Specifically, the URL used to access Machetewill be dependent on the naming of your environment. Contact your system administrator to resolve what the domainname for Machete should be and to request changes to your environment for the Machete name.
This document assumes that Machete is being setup on a single system, and configures the domain name to resolveto the localhost. If your network environment is different, contact to your system administrator to configure Machetename resolution.
2.3.1 Configuring Machete for localhost
Click on the following items on the Windows Taskbar:
• Start -> All Programs -> Accessories
• Right-click on Notepad
• Click on Run As Administrator
• Click yes on the security authorization
• Using notepad, open the file C:\Windows\System32\drivers\etc\hosts
Figure 2.4: Loading the hosts file in Notepad
• Put “*.*” in the File name to see all the files
• Select “hosts”
2.3. Configure Machete name resolution 5

Machete Installation Manual, Release 1.7.0
Figure 2.5: Adding the Machete entry to the hosts file
• Add “127.0.0.1 machete” to the hosts file
• Save the file
Note: If the file will not save because of permissions, you need to use the Run As Administrator feature to runNotepad with elevated privileges.
Figure 2.6: Verify the Machete host name functions
6 Chapter 2. Windows 7 Installation

Machete Installation Manual, Release 1.7.0
Use Internet Explorer (or Chrome, or firefox). Check that http://machete/ works. You should see the default IIS website page.
2.4 Install Web Platform Installer
2.4.1 Download the Web Platform Installer from Microsoft
http://www.microsoft.com/download/en/details.aspx?id=6164
Click Download for either x86 / x64, depending on the platform
Click Run on the Download page
Click Run on the Security warning
Click “I accept the terms in the License Agreement”
Click “Install”
Click “Yes” on the User Account Control (another security warning)
Click “Finish”
Start -> Microsoft Web Platform Installer
Click “Yes” on the User Account Control (the security dialog)
2.4. Install Web Platform Installer 7

Machete Installation Manual, Release 1.7.0
Click “Products”
Find and Click Add next to “Microsoft .NET Framework 4”
Click “Install”
8 Chapter 2. Windows 7 Installation

Machete Installation Manual, Release 1.7.0
Click “I Accept”
Click “Yes” and reboot.
2.4. Install Web Platform Installer 9

Machete Installation Manual, Release 1.7.0
When your computer restarts, reopen the Web Platform Installer 4.5 (WebPI). Type “MVC” in the search bar and pressenter. Select the option that reads “ASP.NET MVC 3 (Visual Studio 2010)” and install it. Complete the installation.
10 Chapter 2. Windows 7 Installation

Machete Installation Manual, Release 1.7.0
Click “Finish”
Click Exit
2.5 Configure IIS Application Pool and Machete Web Site
Start -> Control Panel -> Administrative Tools
2.5. Configure IIS Application Pool and Machete Web Site 11

Machete Installation Manual, Release 1.7.0
double click “Internet Information Services (IIS) Manager”
Double-Click on the Web Server (The name will be different than in the image)
Double-Click on “Application Pools”
Double-Click on the “DefaultAppPool”
12 Chapter 2. Windows 7 Installation

Machete Installation Manual, Release 1.7.0
Change the ”.NET Framework version” to “v4.0.30319”
Click “OK”
Right-click on “DefaultAppPool”, click “Advanced settings...”
Click the ”...” in the Identity field
2.5. Configure IIS Application Pool and Machete Web Site 13

Machete Installation Manual, Release 1.7.0
Change the “Built-in account” to “NetworkService”, then click “OK”
Click “OK” to the “Advanced Settings” to close the window.
Click “Stop” and wait for the Application Pool to stop.
Click “Start” and wait for the Application Pool to start.
14 Chapter 2. Windows 7 Installation

Machete Installation Manual, Release 1.7.0
2.6 Install SQL Server Express
Down SQL Server Express with Management Tools (choose x86 or x64, based on theOS)http://www.microsoft.com/download/en/details.aspx?displaylang=en&id=23650
Run the downloaded program
Click on “New installation ... “
Click “I accept the terms”
Click “Next” -> (several screens will pop up and go away...wait)
2.6. Install SQL Server Express 15

Machete Installation Manual, Release 1.7.0
Uncheck “SQL Server Replication” and uncheck “SQL Client Connectivity SDK”
Click “Next”
16 Chapter 2. Windows 7 Installation

Machete Installation Manual, Release 1.7.0
Click “Next” (DO NOT CHANGE the names. Machete is configured to use these names.)
Click “Next” thru the Server Configuration page
Click “Next” thru the Database Engine Configuration page
Click “Next” thru the Error Reporting page. The installation will start.
2.6. Install SQL Server Express 17

Machete Installation Manual, Release 1.7.0
Click Close
Click the “Red X” in the upper right-hand of the box.
Configure “Network Service” account to access SQL Server
Start -> All Programs -> Microsoft SQL Server 2008 R2 -> SQL Server Management Studio (SSMS)
18 Chapter 2. Windows 7 Installation

Machete Installation Manual, Release 1.7.0
Set server name to “localhost\SQLEXPRESS”
Click “Connect”
Right-click on Logins, then click “New Login...”
2.6. Install SQL Server Express 19

Machete Installation Manual, Release 1.7.0
Click “Search...”
20 Chapter 2. Windows 7 Installation

Machete Installation Manual, Release 1.7.0
Type “network service” into the test box, then click “Check Names”. You should see the name change and the namebecome underlined.
Click “OK”
2.6. Install SQL Server Express 21

Machete Installation Manual, Release 1.7.0
Click “Server Roles”
22 Chapter 2. Windows 7 Installation

Machete Installation Manual, Release 1.7.0
Click the checkbox next to “sysadmin”
Click “OK”
2.7 Add Machete User and Log database to Machete
Machete requires three databases to function. Each database contains data for a core function. They are:
• User accounts (aspnetpub.mdf)
• Log information (ELMAHlog.mdf)
• Application information (machete.mdf)
Machete.mdf is created by the application when it first runs. The other two databases must be copied into the correctSQL Server directly and attached to the database server.
2.7. Add Machete User and Log database to Machete 23

Machete Installation Manual, Release 1.7.0
Use Windows Explorer to “Extract All” from the “machete_User_log_databases.zip” file.
Click “continue” on the security confirmation
24 Chapter 2. Windows 7 Installation

Machete Installation Manual, Release 1.7.0
Use windows explorer to verify the files are in the correct location. You will need to “confirm” permission to view thedirectory:
Use SQL Server Management Studio (SSMS) to attach the two databases.
(See steps at the beginning of this section for instructions on logging into SSMS)
2.7. Add Machete User and Log database to Machete 25

Machete Installation Manual, Release 1.7.0
Right-click on “Databases”, click on “Attach...”
Click “Add...”
26 Chapter 2. Windows 7 Installation

Machete Installation Manual, Release 1.7.0
Select “ASPNETDB.MDF” and click “OK”
2.7. Add Machete User and Log database to Machete 27

Machete Installation Manual, Release 1.7.0
Make no changes. Click “OK”
28 Chapter 2. Windows 7 Installation

Machete Installation Manual, Release 1.7.0
Verify that the aspnetdb is visible in the “Databases” branch of the Object Explorer
Repeat the same steps for the ELMAHlog.mdf file.
Right-click on “Databases”, click on “Attach...”
Click “Add...”
Select “ELMAHlog.MDF” and click “OK”
Make no changes. Click “OK”
Verify that the machetelog is visible in the “Databases” branch of the Object Explorer
2.7. Add Machete User and Log database to Machete 29

Machete Installation Manual, Release 1.7.0
2.8 Install the Machete Web Application binaries
Get a current copy of the Machete web binaries
30 Chapter 2. Windows 7 Installation

Machete Installation Manual, Release 1.7.0
Extract the Machete binaries from the supplied ZIP file (machete-2012.xx.xx.zip)
Confirm security permission
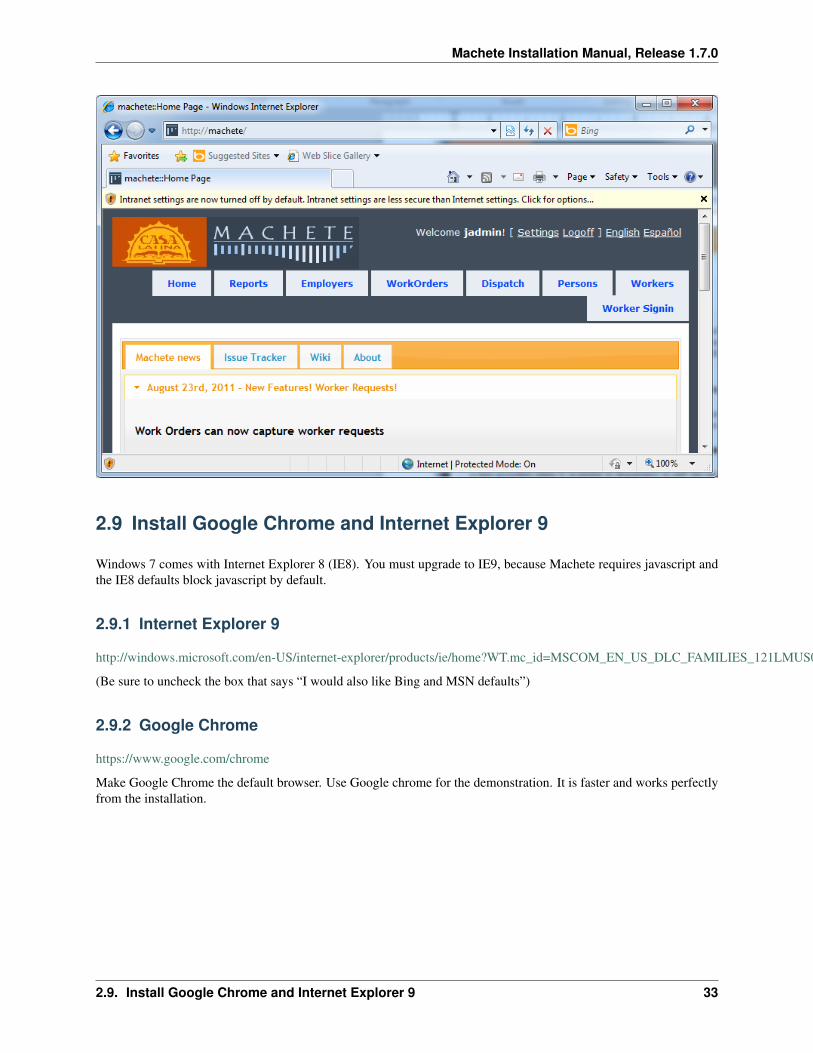
Use Internet Explorer (or Firefox, or Chrome) to verify that Machete works
2.8. Install the Machete Web Application binaries 31

Machete Installation Manual, Release 1.7.0
http://machete/
Verify that users can login successfully
click “Logon” in the upper right corner
use jadmin for the account and machete for the password
If you successfully logon, then everything is configured correctly
32 Chapter 2. Windows 7 Installation
Machete Installation Manual, Release 1.7.0
2.9 Install Google Chrome and Internet Explorer 9
Windows 7 comes with Internet Explorer 8 (IE8). You must upgrade to IE9, because Machete requires javascript andthe IE8 defaults block javascript by default.
2.9.1 Internet Explorer 9
http://windows.microsoft.com/en-US/internet-explorer/products/ie/home?WT.mc_id=MSCOM_EN_US_DLC_FAMILIES_121LMUS007473
(Be sure to uncheck the box that says “I would also like Bing and MSN defaults”)
2.9.2 Google Chrome
https://www.google.com/chrome
Make Google Chrome the default browser. Use Google chrome for the demonstration. It is faster and works perfectlyfrom the installation.
2.9. Install Google Chrome and Internet Explorer 9 33
Machete Installation Manual, Release 1.7.0
34 Chapter 2. Windows 7 Installation

CHAPTER
THREE
MAINTENANCE TASKS
3.1 Machete database backup
3.2 Weekly class creation
To support collecting attendance for regularly scheduled activities, such as language classes, Machete needs to createActivity Records automatically. At this time, Machete uses the Windows Server’s Task Scheduler to read a comma-separated-value file (CSV) of default classes and creates them automatically. The Task Scheduler executes a power-shell script, which parses the CSV file and and creates new Activities directly in the Machete database using T-SQLcommands. The powershell script, addWeeklyScheduledClasses.ps1 , is designed to execute every Sunday. It relieson permissions of the executing process to authenticate it to Machete’s database, and assumes they are on the sameserver.
3.2.1 Creating the Task Scheduler job
The system administrator of the Machete server will need to copy the powershell script and the default classes CSVfile to an appropriate directory on the Machete server and schedule its execution in the Task Scheduler.
35

Machete Installation Manual, Release 1.7.0
Figure 3.1: Windows Server Task Scheduler
Scheduling the task is a common system administrator task and will not be covered in detail here. It is important toknow that using complete paths when referencing the powershell script and the CSV file will solve most executionproblems. The following is an example of the action parameters of a task that executes the powershell script:
Actions -> Edit Action
Program/Script:
%SystemRoot%\system32\WindowsPowerShell\v1.0\powershell.exe
Optional Arguments:
-file “c:\archives\powershell_scripts\addWeeklyScheduledClasses.ps1”“c:\archives\powershell_scripts\defaultClasses.csv”
3.2.2 Creating the CSV file
Creating or modifying the CSV file is fairly simple, but there are some dependencies that must be understood. Thereare 5 columns in CSV file. The first row must be a header row, and the powershell script is case-sensitive, so the namesin the header must match the following list exactly:
• name
• type
• day
36 Chapter 3. Maintenance Tasks

Machete Installation Manual, Release 1.7.0
• startTime
• endTime
Figure 3.2: default classes CSV file (in Google Drive)
name
The name field is the name of the Activity in Machete. The script looks for an ActivityName configuration recordbased on the value in this field.
type
The type field is the name of the Activity Type in Machete. The script looks for an ActivityType configuration recordbased on the value in this field.
day
The day of the week (in English) that the default activity is to be created. Values here should be Monday, Tuesday,Wednesday, Thursday, Friday, Saturday, or Sunday.
startTime
This is the time that the default activity will start. It is in 24-hour military time.
endTime This is the time that the default activity will end. It is in 24-hour military time.
3.2. Weekly class creation 37

Machete Installation Manual, Release 1.7.0
38 Chapter 3. Maintenance Tasks

CHAPTER
FOUR
ONLINE ORDER FORMS
4.1 Overview
Machete offers the ability to receive work orders from other systems, such as public web sites. Orders from onlinesystems are flagged as originating from an on-line system, then added to the Machete database like any other orderoriginating from the user interface. This allows organizations to use an existing web site to capture work requests andforward them directly to Machete, or to integrate Machete into an existing Service Oriented Architecture (SOA) usingHTTPS requests.
4.1.1 Security Concerns
Due to the nature of computer networks, when creating applications that receive business data from the Internet,precautions must be taken to protect against unwanted spamming or malicious hacking. To address this, Machete usespublic key certificates (certs) to ensure that only authorized systems can create orders automatically. In simple terms,a cert is created for an external system, then installed in Machete’s web server configuration. When a client attemptsto connect, it must offer a cert that Machete knows to trust, or the connection will be ignored.
Any 3rd-party system can be configured to forward orders to Machete, provided that the system can offer the certto Machete when it initiates the communication. Such functionality is common for modern web browsers and webautomation languages (Python, Perl, C#).
4.1.2 Order Form Design
Most modern websites use a web framework such as WordPress or Drupal. These frameworks offer a large varietyof plug-ins that provide common functionality to a web site developer, such as forms, blogs, and RSS feeds, andMachete takes advantage of these functions. Machete relies on the website’s framework to create a form that capturesthe necessary information for the work order, and to store the order in the website’s database. Once recorded, Machetewill find the order through the use of scripts installed on the website’s server, and forward order to Machete.
Machete also leverages the website framework for email notification. Most frameworks allow for email verificationwhen a form is submitted. Machete uses this feature to confirm the order with the employer submitting the request bysending the employer an electronic receipt of the submission. The Machete scripts are then responsible for getting theorder to the Machete system. if the script encounters a problem sending the order to Machete, it emails an alert to theadministrator, which is defined in script configuration file.
4.2 Drupal 7 Add-On
The Machete add-on for Drupal consists of a series of scripts and scheduled tasks that interact with standard Drupalmodules. The setup and maintenance of Drupal itself is beyond the scope of this document, which assumes that Drupal
39

Machete Installation Manual, Release 1.7.0
is installed and configured properly.
4.2.1 System Pre-requisites
A Mail Server
The Machete script saves errors to a log file and sends email notifications when an error occurs. The script assumesthat an email service exists on the web server and is available for the script to use. Configuring the email server isbeyond the script of this document.
The Machete script uses the Python smtplib to interact with the mail server. It has been tested using a local postfixmail server, but should also work other SMTP servers, such as Gmail. Documentation on smtplib can be found here:http://docs.python.org/2/library/smtplib.html
Python Interpreter & Modules
Python is the scripting language used for the Machete scripts on the website’s server. Python 2.x will need to beinstalled on the web server and available to the user account executing the Machete scripts. Additionally, the scriptswill need the following Python modules:
PIP Installer
PIP is a utility for installing Python packages automatically. You will need administrator privileges on the web serverto install it. To do so, execute the following from a terminal window:
sudo apt-get install python-pip python-dev build-essential
If apt-get is not available, PIP can be found here: http://www.pip-installer.org/en/latest/
Once PIP is installed, use it to upgrade itself to the latest version:
sudo pip install –upgrade pip
Virtualenv Module
The Virtualenv module for Python allows scripts to create a virtual execution environment for the script, so that it doesnot interfere with other python installations.
sudo pip install –upgrade virtualenv
Requests Module
The Python Requests module handles the communication between the script and Machete using HTTPS. It is requiredfor the script to function. To install it, execute the following on the web server:
pip install requests
Information on the Requests module can be found at the following link: http://docs.python-requests.org/en/latest/user/install/
Python mysqldb Module
The Python Mysqldb Module allows the script to query Drupal’s database (mysql). This module is required for thescript to function. To install it, execute the following on the web server:
sudo apt-get build-dep python-mysqldb pip install MySQL-python
For more information on Python integration with Mysql, see the following link: http://sourceforge.net/projects/mysql-python/
40 Chapter 4. Online Order Forms

Machete Installation Manual, Release 1.7.0
4.2.2 Drupal Pre-requisites
An existing Drupal installation
See http://drupal.org for more information on Drupal. Many shared hosting sites offer Drupal support.
Drupal Modules
• Webform: http://drupal.org/project/webform
Webform is a module that aids in making various one-off forms such as contact forms, surveys, order forms,reservations, CRM requests, and more.
• webform_validation: http://drupal.org/project/webform_validation
Webform Validation adds an extra tab to each webform node, allowing you to specify validation rules for yourwebform components.
4.2.3 Installation
Create Drupal form
Use the Drupal framework to create a webform. See the following link for documentation pertaining to creating aDrupal webform: http://drupal.org/documentation/modules/webform
Figure 4.1: The Drupal WebForm configuration page
Machete has a set number of fields for creating an Employer record and a Work Order record, and the webform mustprovide values for all required fields. A few fields are not required, and can be provided or left blank by the webform.Therefore, when creating the webform, the following fields must be created. Using the fields names below in thewebform will also simply subsequent steps.
The following is a list of the fields expected by the Machete script:
Field Name Data type Required? Descriptionbusiness boolean yes
Continued on next page
4.2. Drupal 7 Add-On 41

Machete Installation Manual, Release 1.7.0
Table 4.1 – continued from previous pageField Name Data type Required? Descriptionname string yesaddress1 string yesaddress2 stringcity string yesstate string yeszipcode string yesphone string yes Primary phonecellphone string Secondary phoneemail stringreferredBy int The integer values are configured in Machete. The webform must use the same integer values as machete. See the Configuration Page. If an empty string is passed, Machete will store a NULL value.referredbyOther stringblogparticipate boolean yesreturnCustomer boolean yesnotes string Free form text related to the employercontactName string yesworkSiteAddress1 string yesworkSiteAddress2 stringwo_city string yeswo_state string yeswo_zipcode string yeswo_phone string yestypeOfWorkID int yes The integer values are configured in Machete. The webform must use the same integer values as machete. See the Configuration Page.englishRequired boolean yesenglishRequiredNote string Free form text about language requirementslunchSupplied boolean yesdescription string Free form text related to the work orderdate_needed string yestime_needed string yestimeFlexible boolean yestransportMethodID int yes The integer values are configured in Machete. The webform must use the same integer values as machete. See the Configuration Page.
Map webform IDs to Machete fields
Once the webform is created, you will need to interrogate the webform and find the webform’s internal IDs for thecreated form, and each field within the form. These IDs will be used by the Machete script to find the online ordersinside the Drupal database and forward the order to Machete.
The simplest way to get the IDs is to export the form using the Export feature on the webform configuration page.Clicking the Export button on the upper-right side of the page will prompt to save a text file. The file is a (serialized)export of the webform, and contains all the internal IDs necessary.
you will need to customize the Machete scripts to match the IDs in your webform. The Machete script uses the IDsto extract values from Drupal’s webforms database. Once it has the values, it sends them to Machete using the certsconfigured in subsequent sections. Using a text editor, do the following:
1. Edit the employer_form.ini file. Replace the number under the [webform] tag with the number em-bedded in the Export file’s name. This is the Drupal nid ID for the webform.
2. Edit the employer_combined.py script. This is the script that reads the Drupal database, finds the webformentries, and processes them. At the top of the script, there is a fields array, which maps ID numbers to theMachete fields. You will need to search the Export file for the cid ID of each field, and replace the number in
42 Chapter 4. Online Order Forms

Machete Installation Manual, Release 1.7.0
the script with the number from the file. The numbers are assigned by Drupal–you must complete the mappingso that the Machete script knows which cid fields go with which Machete field.
Figure 4.2: Mapping cids from the export file
Add tracking table to database
To track which webform entries have been sent to Machete, a new table must be added to the Drupal database. Thetable tracks the internal sid ID of webform order, whether it was successfully transmitted, how many attempts it tookto transmit the order, and the date of the last attempt.
Execute the following statement from the mysql CLI:
create table webform_machete (sid int not null primary key, success boolean not null default 0, tries int,last_attempt datetime)
This SQL statement will create the table and its four fields with the proper settings. To verify that the table is createdproperly, execute the following from the mysql CLI:
show columns from webform_machete;
The show columns command will give a simple text-based display of the table, its four fields, and their properties.
Figure 4.3: Verifying webform_machete table creation
4.2. Drupal 7 Add-On 43

Machete Installation Manual, Release 1.7.0
Schedule Machete script execution
The Machete script needs to be scheduled to run in order to execute, find new orders, and process them. On UX-typesystems, a cron entry will execute the script periodically. To add the entry, execute the following command with rootprivileges:
crontab -e
On most systems, this will load the cron settings (crontab) in a text editor. Add the following line at the bottom of thecrontab.
\*/5 * * * * bash -c "cd /home/user/pymachete;/usr/bin/python/home/user/pymachete/employer_combined.py"
Save the crontab. The script will execute based on the cron entry.
Certificate configuration
A x509 certificate is used to secure communications between the website and Machete. The following steps must becompleted for the communication to work safely and successfully:
1. Create the x509 certificate on the website
2. Make the certificate available to the Machete script
3. Create a secure IIS web site instance on Machete
4. Add the certificate’s public key to the secure site’s configuration
5. Verify proper configuration by running the Machete script
Create x509 certificate
Creating certificates is a non-trivial task. Certificates incorporate complex cryptography and are somewhat tedious.For a more thurough treatment of how to make a certificate and what each step does, see the following link:
https://help.ubuntu.com/10.04/serverguide/certificates-and-security.html
For Machete, the following steps have been used successfully, and were taken from the above link. If you encounterproblems creating the certificate, refer to the link first and identify what, if anything, you did differently.
• openssl genrsa -des3 -out example.key 1024
• openssl rsa -in example.key -out example.key.insecure
• mv example.key example.key.secure
• mv example.key.insecure example.key
• openssl req -new -key example.key -out example.csr
• openssl x509 -req -days 365 -in example.csr -signkey example.key -out example.crt
Make certificate available to script
Once the example.crt cert and the example.key exist, copy them to the website server. Or, if you executed the abovesteps on the server, move the cert file to the location of the Machete scripts. You cancdefhrstuvwxz, and probablyshould, rename the files to be a little more descriptive too.
44 Chapter 4. Online Order Forms

Machete Installation Manual, Release 1.7.0
The Machete script’s ini file has a config entry for the script, so you can store the files wherever you wish, but it makessense to keep all the components of the Machete script in the same location. Edit the employer_form.ini fileand update the cert entry and the key entry to the locations of the files.
Figure 4.4: Editing employer_form.ini file, adding certificate information
Create secure IIS site instance
The main Machete web site uses HTTP, which is unencrypted as it’s transferred over the network. The Online OrderForm uses HTTPS, which is encrypted, and requires a separate web site instance in Microsoft’s web server (IIS).
Figure 4.5: Creating the secure Machete IIS instance
To setup the secure instance, create a new website in the Server Explorer. In the site’s settings, use the same path asthe main Machete instance. The files are identical; the only difference is the IIS configuration.
Figure 4.6: Setting the site’s port and certificate
Next, edit the site’s bindings. Set a certificate for the site. It’s acceptable to use the IIS Self-Signed certificate feature
4.2. Drupal 7 Add-On 45

Machete Installation Manual, Release 1.7.0
to create a cert, but a cert is required for the HTTPS protocol to function. Also be sure to set a port for the binding.If you’re behind a firewall, a non-standard port supported. The employer_form.ini just needs to be updated to use thecorrect port in the URL for the Machete server.
Figure 4.7: Setting the site’s SSL settings
Finally, set the site to require client certificates. In the secure site’s configuration, type cert into the filter (see 1).This will display only the SSL Settings option (see 2) in main dialog. Double on it. When the SSL Settings pageopens, click the checkbox to require SSL, then also click the radio button to require SSL. Then Save and close.
Add certificate to site
The previous section created an IIS website and configured it to only accept connections from clients using SSL.However, in order for this to work, the Machete server will need the public key component of the certificate made inthe previous section.
Copy the example.crt from the certificate creation section to the Machete server. Use the Microsoft ManagementConsole (mmc.exe) to add the certificate. Be sure to add it to the local computer’s store, not the user’s store. Once thecertificate is installed, Machete will trust any client using the certificate (and a valid Machete account) to create onlineorders. It’s actually possible for a web browser to connect using the same certificate, which is a good way to verifythat everything works. See the following section for details on connecting with a browser using a cert.
Verify Configuration
Adding client-side certificates varies by web browser. Below are notes and links to current instructions as of thiswriting. Search the internet for “add a certificate for client side IIS” or something similar.
Add to Internet Explorer http://kingsleyhauaiimi.wordpress.com/2012/08/03/iis-7-ssl-and-two-factor-authentication-installing-client-side-certificate-for-ssl-authentication/
Add to Firefox Allows you to access the Machete interface using the certificate
• create a pkcs12 file from the x.509 public cert and private key
• openssl pkcs12 -export -in example.crt -inkey example.key -out example.p12
In Firefox, import
• Edit > Preferences > Advanced > Encryption > View Certificates > Your Certificates > Import the p12 file
46 Chapter 4. Online Order Forms