loader pallet forks - gearmore, inc. introduction congratulations on your choice of loader pallet...
TRANSCRIPT
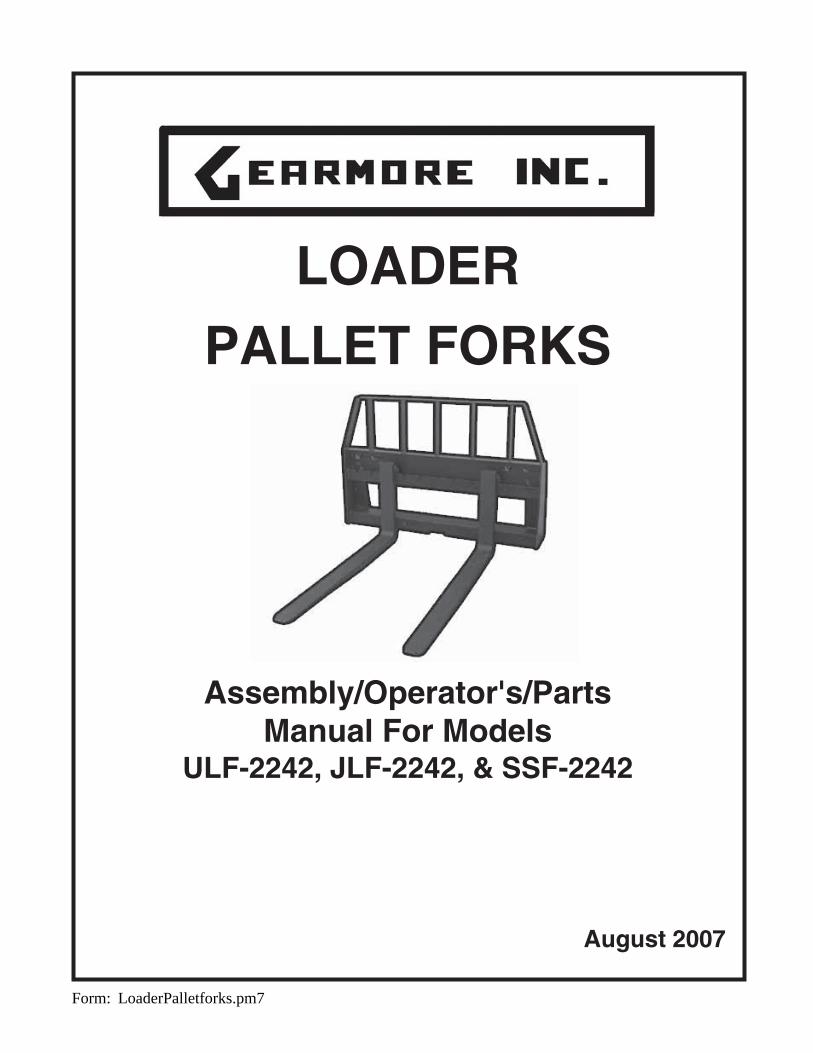
LOADER
PALLET FORKS
Assembly/Operator's/PartsManual For Models
ULF-2242, JLF-2242, & SSF-2242
August 2007
Form: LoaderPalletforks.pm7

TABLE OF CONTENTS
SECTION DESCRIPTION PAGE
1 Introduction .............................................................. 11.1 Serial Number Location ......................................... 1
2 Safety .......................................................................... 22.1 General Safety ........................................................ 32.2 Equipment Safety Guidelines ................................ 42.3 Safety Training ....................................................... 52.4 Safety Signs ............................................................ 52.5 Preparation ............................................................. 62.6 Operating Safety ..................................................... 72.7 Transport Safety ..................................................... 82.8 Maintenance Safety ................................................ 82.9 Hydraulic Safety ..................................................... 92.10 Storage Safety ......................................................... 9
3 Safety Sign Locations ............................................ 10
4 Operation ................................................................. 11 4.1 To the New Operator or Owner ............................ 11 4.2 Machine Components ........................................... 12 4.3 Machine Break-In ................................................. 12 4.4 Pre-Operation Checklist ....................................... 12 4.5 Mounting Configurations ................................ 13-15 4.6 Transporting ......................................................... 16 4.7 Storage .................................................................. 16
5 Trouble Shooting .................................................... 17
6 Assembly ................................................................... 18
7 Specifications .......................................................... 19 7.1 Mechanical ............................................................ 19 7.2 Bolt Torque............................................................ 20
8 Parts Diagrams ....................................................... 21 8.1 ULF-2242 Pallet Fork Assy .................................. 21 8.2 JLF-2242 Pallet Fork Assy ................................... 22 8.3 SSF-2242 Pallet Fork Assy................................... 23
9 Limited Warranty ................................................... 24

1 INTRODUCTION
Congratulations on your choice of Loader Pallet Forks to complement your pallet moving and storageoperation. This equipment has been designed and manufactured to meet the needs of a discriminating buyerfor the efficient lifting and moving of pallets.
Safe, efficient and trouble free operation of your Loader Pallet Forks requires that you and anyone else whowill be operating or maintaining the machine, read and understand the Safety, Operation, Maintenance andTroubleshooting information contained within the Operator's Manual.
This manual covers the Loader Pallet Forks Models ULF-2242, JLF-2242, & SSF-2242. Differences areexplained where appropriate. Use the Table of Contents as a guide to locate required information.
Keep this manual handy for frequent reference and to pass on to new operators or owners. Call yourGearmore dealer or distributor if you need assistance, information or additional copies of the manuals.
OPERATOR ORIENTATION - The directions left, right, front and rear, as mentioned throughout thismanual, are as seen from the driver's seat and facing in the direction of travel.
1
1.1 SERIAL NUMBER LOCATION
Always give your dealer the serial number of your Loader Pallet Forks when ordering parts or requestingservice or other information.
The serial number plate is located where indicated. Please mark the number in the space provided for easy
reference.
DATE OF PURCHASE:___________________________
MODEL NUMBER:______________________________
SERIAL NUMBER: ______________________________

2 SAFETYSAFETY ALERT SYMBOL
Why is SAFETY important to you?
The Safety Alert symbol identifiesimportant safety messages on theLoader Pallet Forks and in themanual. When you see thissymbol, be alert to the possibility ofpersonal injury or death. Followthe instructions in the safetymessage.
This Safety Alert symbol meansATTENTION! BECOMEALERT! YOUR SAFETY ISINVOLVED!
Accidents Disable and KillAccidents CostAccidents Can Be Avoided
3 Big Reasons
DANGER - Indicates an imminently hazardoussituation that, if not avoided, will resultin death or serious injury. This signalword is to be limited to the mostextreme situations typically formachine components which, forfunctional purposes, cannot be guarded.
WARNING - Indicates a potentially hazardoussituation that, if not avoided, couldresult in death or serious injury, andincludes hazards that are exposedwhen guards are removed. It mayalso be used to alert against unsafepractices.
CAUTION - Indicates a potentially hazardoussituation that, if not avoided, mayresult in minor or moderate injury.It may also be used to alert againstunsafe practices.
SIGNAL WORDS:
Note the use of the signal words DANGER,WARNING and CAUTION with the safetymessages. The appropriate signal word foreach message has been selected using thefollowing guide-lines:
SI NO LEE INGLES, PIDA AYUDAA AIGUIEN QUE SI LO LEA PARAQUE LE TRADUZCA LASMIDIDAS DE SEGURIDAD.
If you have any questions not answered in this manual or require additional copies or the manual isdamaged, please contact your dealer.
2

3
2.1 GENERAL SAFETY
YOU are responsible for the SAFE operation andmaintenance of your Loader Pallet Forks. YOU mustensure that you and anyone else who is going to oper-ate, maintain or work around the Forks be familiarwith the operating and maintenance procedures andrelated SAFETY information contained in thismanual. This manual will take you step-by-stepthrough your working day and alerts you to all goodsafety practices that should be adhered to while op-erating the Forks.
Remember, YOU are the key to safety. Good safetypractices not only protect you, but also the peoplearound you. Make these practices a working part ofyour safety program. Be certain that EVERYONEoperating this equipment is familiar with the recom-mended operating and maintenance procedures andfollows all the safety precautions. Most accidents canbe prevented. Do not risk injury or death by ignoringgood safety practices.
• Loader Pallet Forks attachment isdesigned to engage and load palletedmaterials. Do not use forks to handlelarge loads such as bales, posts, etc.and avoid carrying loose or shiftableloads.
• Fork owners must give operatinginstructions to operators or employeesbefore allowing them to operate themachine, and at least annually thereafter per OSHA (Occupational Safety andHealth Administration) regulation1928.57.
• The most important safety feature onthis equipment is a SAFE operator. It isthe operator's responsibility to read andunderstand ALL Safety and Operatinginstructions in the manual and to followthese. Most accidents can be avoided.
• A person who has not read and under-stood all operating and safety instructionsis not qualified to operate the machine.An untrained operator exposes himselfand bystanders to possible serious injuryor death.
• DO NOT modify the equipment in anyway. Unauthorized modification may im-pair the function and/or safety and couldaffect the life of the equipment.
1. Read and understand theOperator's Manual and allsafety signs before operating,maintaining or adjusting theLoader Pallet Forks.
2. Have a first-aid kit availablefor use should the need ariseand know how to use it.
3. Have a fire extinguisheravailable for use shouldthe need arise and knowhow to use it.
4. Wear appropriate protectivegear. This list includes but isnot limited to:
- A hard hat- Protective shoes
with slip resistantsoles
- Protective goggles,glasses or faceshield
- Heavy gloves- Protective clothing
5. Install and secure all guardsbefore starting.
6. DO NOT allow riders.
7. Wear suitable ear protectionfor prolonged exposure to ex-cessive noise.
8. Lower bucket/forks to the ground, setpark brake, remove ignition key and waitfor all moving parts to stop before servicing,adjusting and repairing.
9. Clear the area of people, especially smallchildren, before starting.
10. Review safety related items annuallywith all personnel who will be operatingor maintaining the Loader Pallet Forks.

2.2 EQUIPMENT SAFETY GUIDELINES
4
Safety of the operator and bystanders is one of themain concerns in designing and developing amachine. However, every year many accidentsoccur which could have been avoided by a fewseconds of thought and a more careful approach tohandling equipment. You, the operator, can avoidmany accidents by observing the followingprecautions in this section. To avoid personal injuryor death, study the following precautions and insistthose working with you, or for you, follow them.
• In order to provide a better view, certainphotographs or illustrations in this manualmay show an assembly with a safety shieldremoved. However, equipment should neverbe operated in this condition. Keep all shieldsin place. If shield removal becomes necessaryfor repairs, replace the shield prior to use.
• Replace any safety sign or instruction signthat is not readable or is missing. Location ofsuch safety signs is indicated in this manual.
• NEVER use alcoholic beverages or drugswhich can hinder alertness or coordinationwhile operating this equipment. Consult yourdoctor about operating this machine whiletaking prescription medications.
• Under no circumstances should youngchildren be allowed to work with thisequipment. Do not allow persons tooperate or assemble this unit until theyhave read this manual and havedeveloped a thorough understanding ofthe safety precautions and of how itworks. Review the safety instructions withall users annually.
• This equipment is dangerous to children andpersons unfamiliar with its operation. Theoperator should be a responsible, properlytrained and physically able person familiarwith farm machinery and trained in thisequipment's operations. If the elderly areassisting with farm work, their physicallimitations need to be recognized andaccommodated.
• Use a tractor equipped with a Roll OverProtective Structure (ROPS) and a seat belt.
• NEVER exceed the limits of a piece ofmachinery. If its ability to do a job, or to do sosafely, is in question - DON'T TRY IT.
• Do not modify the equipment in any way.Unauthorized modification may impair thefunction and/or safety and could affect the lifeof the equipment.
In addition to the design and configuration of thisimplement, including Safety Signs and SafetyEquipment, hazard control and accident preventionare dependent upon the awareness, concern,prudence and proper training of personnel involved inthe operation, transport, maintenance and storage ofthe machine. Refer also to Safety Messages andoperation instruction in each of the appropriatesections of the tractor and machine manuals. Payclose attention to the Safety Signs affixed to thetractor and the machine.
Think SAFETY! Work SAFELY!

2.3 SAFETY TRAINING
Safety is a primary concern in the design andmanufacture of our products. Unfortunately, ourefforts to provide safe equipment can be wiped out bya single careless act of an operator or bystander.
In addition to the design and configuration ofequipment, hazard control and accident preventionare dependent upon the awareness, concern,prudence and proper training of personnel involvedin the operation, transport, maintenance andstorage of this equipment.
It has been said, "The best safety feature is aninformed, careful operator." We ask you to bethat kind of an operator. It isthe operator's responsibility toread and understand ALLSafety and Operating instructionsin the manual and to follow these. Accidents can beavoided.
Working with unfamiliar equipment can lead tocareless injuries. Read this manual, and the manualfor your tractor, before assembly or operating, toacquaint yourself with the machines. If this machineis used by any person other than yourself, or isloaned or rented, it is the machine owner'sresponsibility to make certain that the operator,prior to operating:
a. Reads and understands the operator'smanuals.
b. Is instructed in safe and proper use.
Know your controls and how to stop tractor, engineand machine quickly in an emergency. Read thismanual and the one provided with your tractor.
Train all new personnel and review instructionsfrequently with existing workers. Be certain only aproperly trained and physically able person willoperate the machinery. A person who has not readand understood all operating and safety instructionsis not qualified to operate the machine. Anuntrained operator exposes himself and bystandersto possible serious injury or death. If the elderly areassisting with farm work, their physical limitationsneed to be recognized and accommodated.
2.4 SAFETY SIGNS
1. Keep safety signs clean and legible at all times.
2. Replace safety signs that are missing or havebecome illegible.
3. Replaced parts that displayed a safety signshould also display the current sign.
4. Safety signs are available from your authorizeddealer or from Gearmore.
How To Install Safety Signs:
• Be sure that the installation area is cleanand dry.
• Be sure temperature is above 50º F (10º C).
• Determine exact position before you removethe backing paper. (See Section 3)
• Remove the smallest portion of the splitbacking paper.
• Align the sign over the specified area andcarefully press the small portion with theexposed sticky backing in place.
• Slowly peel back the remaining paper andcarefully smooth the remaining portion of thesign in place.
• Small air pockets can be pierced with a pin andsmoothed out using the piece of sign backingpaper.
5

2.5 PREPARATION
6
1. Never operate the tractor and machine untilyou have read and completely understandthis manual, the Tractor Operator's Manualand each of the Safety Messages found onthe safety signs on the tractor and machine.
2. Personalprotectionequipment,including hardhat, safetyglasses, safetyshoes and glovesare recommendedduring assembly,installation, operation, adjustment,maintaining, repairing, removal or movingthe implement. DO NOT allow long hair,loose fitting clothing or jewelry to be aroundequipment.
3. PROLONGED EXPOSURETO LOUD NOISE MAYCAUSE PERMANENTHEARING LOSS!Tractors with or withoutequipment attached canoften be noisy enough to cause permanent,partial hearing loss. We recommend thatyou wear hearing protection on a full-timebasis if the noise in the Operator's positionexceeds 80db. Noise over 85db on a long-term basis can cause severe hearing loss.Noise over 90db adjacent to the Operatorover a long-term basis may cause perma-nent, total hearing loss. NOTE: Hearingloss from loud noise (from tractors, chainsaws, radios, and other such sources closeto the ear) is cumulative over a lifetimewithout hope of natural recovery.
4. Operate the machine onlywith a tractor equippedwith an approved Roll-OverProtective Structure (ROPS).Always wear your seat belt.Serious injury or even deathcould result from falling offthe tractor --- particularly during a turn-over when the operator could be pinnedunder the ROPS or the tractor.
5. Clear working area of stones, branchesor hidden obstacles that might be hookedor snagged, causing injury or damage.
6. Keep bucket/forks away from overheadpower lines. Electrocution can occurwithout direct contact with an overheadpower line.
7. Operate only in daylight or good artificiallight.
8. Be sure machine is properly mounted,adjusted and in good operating condition.
9. Before starting, give the machine a "onceover" for any loose bolts, worn parts,cracks, leaks, frayed hoses and makenecessary repairs. Always followmaintenance instructions.
10. Ensure that all safety shielding andsafety signs are properly installed and ingood condition.
11. Check that mounting pins are in goodcondition and all locking pins areinstalled.
12. Move wheels or tires to their widestposition for maximum stability.
13. Add wheel ballast or rear weight formaximum stability.
14. Do not use on tractors with narrow frontends. Use wide front axle only.

2.6 OPERATING SAFETY
7
Please remember it is important that you read andheed the safety signs on the Loader and Forks. Cleanor replace all safety signs if they cannot be clearlyread and understood. They are there for your safety,as well as the safety of others. The safe use of thismachine is strictly up to you, the operator.
All things with moving parts are potentiallyhazardous. There is no substitute for a cautious,safe-minded operator who recognizes potentialhazards and follows reasonable safety practices. Themanufacturer has designed these Forks to be usedwith all its safety equipment properly attached tominimize the chance of accidents. Study this manualto make sure you have all safety equipmentattached.
Fork attachments are designed to engage and loadpalleted material. Do not use Forks to handle largeloads such as bales, posts, etc. and avoid carryingloose or shiftable loads.
Practice raising, lowering and tilting unit and itsload when learning to operate Loader and Forks.Become familiar with controls before operating.
If a safety shield or guard is removed for any reason,it must be replaced before the machine is againoperated.
Keep the Loader arms and Forks at a low positionwhen moving and when working on inclines.
Do not operate near the edge of drop-offs or banks.
Do not operate at an angle on steep slopes. Drive upor down but not across. Keep bucket, forks and armslow.
Make allowances for increased length and weight oftractor during operation and moving.
Remove all sticks, stones, roots and wires fromworking area before starting. Take care not tocontact overhead obstructions during operation.
Never operate controls from the ground. Operateonly from the operators seat to prevent unexpectedloader and fork movement that can lead to crushingbetween frame members.
Use extra care when handling large round loads orother shiftable objects unless loader and forks areequipped with an attachment designed to secureobjects. A grapple fork anchor device isrecommended.
Large round loads or loose objects can roll back downloader arms. Secure objects before raising arms.Keep arms low.
Keep bucket/forks away from overhead power lines.Electrocution can occur without direct contact withan overhead power line.
Do not exceed machine lift capacity. Overloadingcan cause structural damage and lead to unsafeoperating conditions.
Never carry, lift or move people on arms, forks orbucket. Do not use machine as a work platform.
Always use two people to handle heavy, unwieldycomponents during assembly, installation, removalor moving.
Never place any part of your body where it would bein danger if movement should occur duringassembly, installation, operation, maintaining,repairing, removal or moving.
Do not walk or work under a raised machine orattachment unless it is securely blocked or held inposition. Do not depend on the tractor hydraulicsystem to hold the machine or attachment in place.
Never use alcoholic beverages or drugs, which canhinder alertness or coordination, while operatingthis equipment. Consult your doctor aboutoperating this machine while taking prescriptionmedications.
Do not allow riders on the machine or tractor at anytime. There is no safe place for any riders.
Do not go under raised loader or forks. Keep othersaway.
Before you operate the machine, check over all pins,bolts and connections to be sure all are securely inplace. Replace any damaged or worn partsimmediately.
Review safety instructions annually.

8
2.7 TRANSPORT SAFETY1. Comply with state and local laws governing
highway safety and movement of farmmachinery on public roads.
2. The use of flashing amber lights isacceptable in most localities. However,some localities prohibit their use. Locallaws should be checked for all highwaylighting and marking requirements.
3. At all times, when driving the tractor andequipment on the road or highway under20 mph (32 kph) use flashing amberwarning lights and a slow moving vehicle(SMV) identification emblem. Do not exceed20 mph (32 kph). Reduce speed on roughroads and surfaces.
4. Keep tractor in gear to provide enginebraking when going downhill. Do not coast.
5. Plan your route to avoid heavy traffic.
6. Keep brake pedals latched together at alltimes.
7. Do not drink and drive.
8. Be a safe and courteous driver. Always yieldto oncoming traffic in all situations,including narrow bridges, intersections, etc.Watch for traffic when operating near orcrossing roadways.
9. Turn into curves or go up or down hills onlyat a low speed and at a gradual steeringangle. Make certain that at least 20% of thetractor's weight is on the front wheels tomaintain safe steerage. Slow down on roughor uneven surfaces.
10. Keep loader in a low position whentraveling. Remember, the higher the loader,the higher the center of gravity withincreased risk of the unit upset.
11. Never allow riders on either tractor ormachine.
2.8 MAINTENANCE SAFETY1. Good maintenance is your responsibility.
Poor maintenance is an invitation totrouble.
2. Follow good shop practices.- Keep service
area cleanand dry.
- Be sure electricaloutlets and toolsare properlygrounded.
- Use adequate lightfor the job at hand.
3. Make sure there is plenty of ventilation.Never operate the engine in a closedbuilding. The exhaust fumes may causeasphyxiation.
4. Before working on this machine, lowerloader arms and forks to the ground, shutoff the engine, set the brakes and removethe ignition key.
5. Never work under equipment unless it isblocked securely.
6. Use personal protection devices such as eye,hand and hearing protectors, whenperforming any service or maintenancework.
7. Where replacement parts are necessary forperiodic maintenance and servicing,genuine factory replacement parts must beused to restore your equipment to originalspecifications. The manufacturer will not beresponsible for injuries or damages causedby use of unapproved parts and/oraccessories.
8. A fire extinguisherand first aid kitshould be keptreadily accessiblewhile performingmaintenance onthis equipment
9. Periodically tighten all bolts, nuts andscrews and check that all cotter pins areproperly installed to ensure unit is in a safecondition.
10. When completing a maintenance or servicefunction, make sure all safety shields anddevices are installed before placing unit inservice.

2.9 HYDRAULIC SAFETY
9
2.10 STORAGE SAFETY
Make sure that all the components in thehydraulic system are kept in good conditionand are clean.
Replace any worn, cut, abraded, flattened orcrimped hoses and metal lines.
Relieve pressure before working onhydraulic system.
Do not attempt any makeshift repairs to thehydraulic lines, fittings or hoses by usingtapes, clamps or cements. The hydraulicsystem operates under extremely highpressure. Such repairs will fail suddenlyand create a hazardous and unsafecondition.
Wear proper hand andeye protection whensearching for a highpressure hydraulicleak. Use a piece of woodor cardboard as abackstop instead of handsto isolate and identifya leak.
If injured by a concentrated high pressurestream of hydraulic fluid, seek medicalattention immediately. Serious infection ortoxic reaction can develop from hydraulicfluid piercing the skin surface.
Before applying pressure to the system,make sure all components are tight andthat lines, hoses and couplings are notdamaged.
When disconnecting hydraulic lines, shut offhydraulic supply and relieve hydraulicpressure.
1. Store the unit in an area away from humanactivity
2. Do not permit children to play on or aroundthe stored machine.
3. Store the unit in a dry, level area. Supportthe frame with planks if required.
SAFETY RECAP
The manufacturer follows the general SafetyStandards specified by the American Society ofAgricultural Engineers (ASAE) and theOccupational Safety and Health Administration(OSHA). Anyone who will be operating and/ormaintaining the Loader Pallet Forks must read andclearly understand ALL Safety, Operating andMaintenance information presented in this manual.
Do not operate or allow anyone else to operate thisequipment until such information has been reviewed.Annually review this information before the seasonstart-up.
Make these periodic reviews of SAFETY andOPERATION a standard practice for all of yourequipment. We feel that an untrained operator isunqualified to operate this machine.
Think SAFETY! Work SAFELY!

10
3 SAFETY SIGN LOCATIONThe types of safety signs and locations on the equipment are shown in the illustration below. Good safetyrequires that you familiarize yourself with the various safety signs, the type of warning and the area, orparticular function related to that area, that requires your SAFETY AWARENESS.
REMEMBER - If safety signs have been damaged, removed, become illegible or parts replaced withoutsigns, new signs must be applied. New signs are available from your authorized dealer.
B
A
CAUTION • Read Operator's Manual.• Lower bucket/forks to the
ground, stop engine, set parkbrake, remove ignition key andwait for all moving parts to stopbefore servicing, adjusting andrepairing.
• Do not carry people in bucketor on frame.
• Add weight to rear of frame tobalance bucket load.
• Stay away from overheadpower lines. Electrocution canoccur without direct contact.
• Widen wheels or tires toprevent tipping.
• Use only with a unit withROPS and a seat belt.
• Secure load in bucket toprevent roll-back down loaderarms.
• Carry load close to theground when moving.
• Do not go under raisedbucket. Keep others away.
• Review safety instructions.
Fork attachments are designedto engage and load palletedmaterials. Do not use forks tohandle large loads such asbales, posts, etc. and avoidcarrying loose or shiftable loads.
DANGER
CAUT002
DANG001

4 OPERATION
11
4.1 TO THE NEW OPERATOROR OWNER
Loader Pallet Forks are designed as light tomedium duty forks to engage and load palletedmaterials. Do not use forks to handle large loadssuch as bales, posts, etc. and avoid carrying looseor shiftable loads. Be familiar with the machinebefore starting.
It is the responsibility of the owner oroperator to read this manual and to train allother operators before they start workingwith the machine. Follow all safetyinstructions exactly. Safety is everyone'sbusiness. By following recommendedprocedures, a safe working environment isprovided for the operator, bystanders andthe area around the worksite. Untrainedoperators are not qualified to operate themachine.
Many features incorporated into this machine arethe result of suggestions made by customers likeyou. Read this manual carefully to learn how tooperate the machine safely and how to set it toprovide maximum field efficiency. By followingthe operating instructions in conjunction with agood maintenance program, your Loader PalletForks will provide many years of trouble freeservice.
OPERATING SAFETY1. Read Operator's Manual.
2. Lower bucket/forks to the ground, stopengine, set park brake, remove ignition keyand wait for all moving parts to stop beforeservicing, adjusting and repairing.
3. Do not carry people in bucket or on frame.
4. Add weight to rear of frame to balancebucket load.
5. Stay away from overhead power lines.Electrocution can occur without directcontact.
6. Widen wheels or tires to prevent tipping.
7. Use only with a unit with ROPS and a seatbelt.
8. Secure load in bucket to prevent roll-backdown loader arms.
9. Carry load close to the ground whenmoving.
10. Do not go under raised bucket. Keepothers away.
11. Review safety instructions.

12
Loader Pallet Forks are attachedto a frame that mounts in the placeof the loader bucket and is used tolift, move and transport pallets.
A FORKS
B FRAME
C Mounting Attachment
4.2 MACHINE COMPONENTS
4.3 MACHINE BREAK-IN 4.4 PRE-OPERATION CHECKLIST
Although there are no operational restrictions onthe Loader Pallet Forks when used for the firsttime, it is recommended that the followingmechanical items be checked:
A. After Operating For 1 and 5 Hours:
1. Check all nuts, bolts and other fasteners.Tighten to their specified torque level.
2. Check that the forks are in goodcondition.
Efficient and safe operation of the Loader PalletForks requires that each operator reads andunderstands the operating procedures and allrelated safety precautions outlined in thissection. A pre-operation checklist is provided forthe operator. It is important for both the personalsafety and maintaining the good mechanicalcondition of the Loader Pallet Forks that thischecklist is followed.
Before operating the machine and each timethereafter, the following areas should bechecked off:
√ Use only an Agricultural tractor of theappropriate horsepower on the machine.
√ Check that the forks are properly attachedto the bucket and loader. Be sure retainersare used on the mounting pins.
√ Be sure extra weights are mounted on therear of the tractor if required to balancethe load.
√ Check the forks. Be sure they are notdamaged or broken and are not badlyworn. Repair or replace as required.
√ Check for entangled material. Remove thismaterial.
Fig. 1 Machine Components

13
4.5 MOUNTING CONFIGURATIONS
OPERATING SAFETY
Loader Pallet Forks are designed as a light tomoderate duty set of forks that replaces thebucket on a loader. The forks are designedspecifically for handling pallets. However theoperator has the responsibility of being familiarwith all operating and safety procedures andfollowing them.
OPERATING SAFETY1. Read Operator's Manual.
2. Lower bucket/forks to the ground, stopengine, set park brake, remove ignition keyand wait for all moving parts to stop beforeservicing, adjusting and repairing.
3. Do not carry people in bucket or on frame.
4. Add weight to rear of frame to balancebucket load.
5. Stay away from overhead power lines.Electrocution can occur without directcontact.
6. Widen wheels or tires to prevent tipping.
7. Use only with a unit with ROPS and a seatbelt.
8. Secure load in bucket to prevent roll-backdown loader arms.
9. Carry load close to the ground when moving.
10. Do not go under raised bucket. Keep othersaway.
11. Review safety instructions.
Each operator should review this section of themanual at the start of the season and as oftenas required to be familiar with the machine.When using, follow this procedure:
1. Review and follow the Pre-Operation Check-list.
2. Attaching to loader with pin on bucket:
a. Remove loader bucket.
b. Align the loader arms with the framemount pins.
c. Mount lower pins and install theirretainers.
d. Tilt the loader if required to align thetop pin holes.
e. Mount the upper pins and install theirretainers
.IMPORTANT
Some loader arms are equipped with dumpangle stops that extend beyond the width of theloader arms. In these cases, it may be necessaryto shim the mounting pins to ensure properclearance from the dump angle stops whenoperating the loader mounted fork assembly.Shimming material is available from your localdealer. Specify pin diameter and length requiredwhen ordering.
Fig. 2 Mounting with Pin System
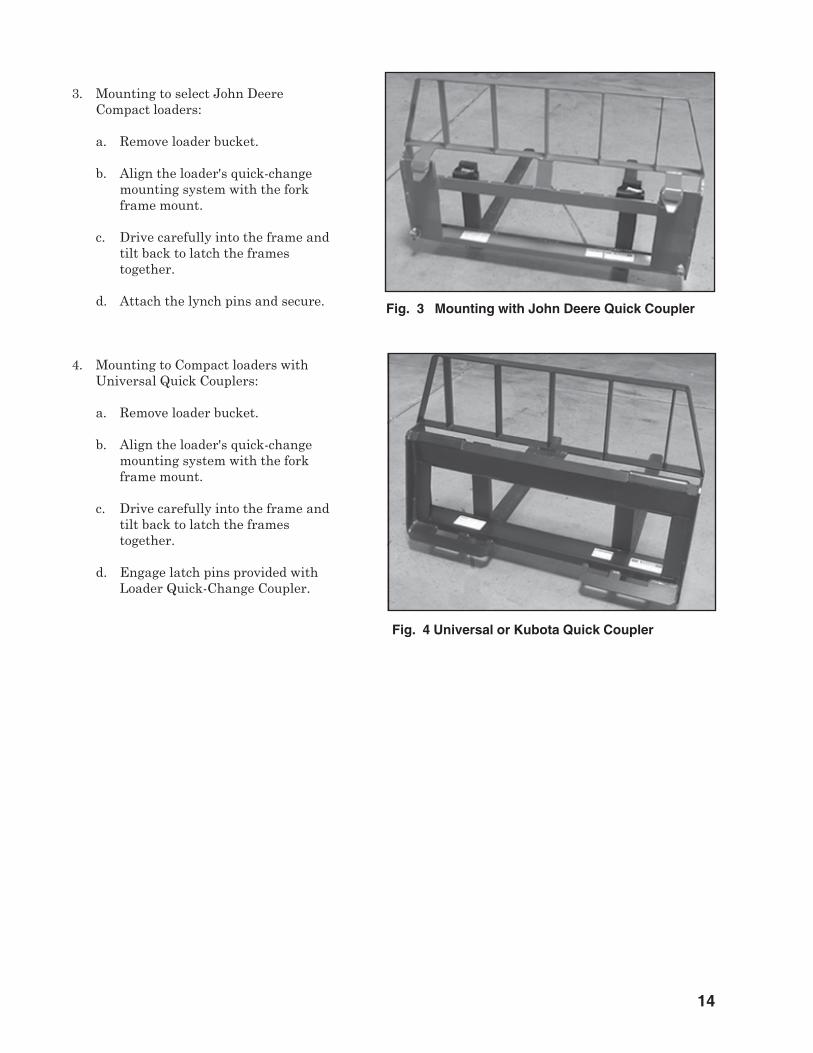
Fig. 3 Mounting with John Deere Quick Coupler
14
Fig. 4 Universal or Kubota Quick Coupler
3. Mounting to select John DeereCompact loaders:
a. Remove loader bucket.
b. Align the loader's quick-changemounting system with the forkframe mount.
c. Drive carefully into the frame andtilt back to latch the framestogether.
d. Attach the lynch pins and secure.
4. Mounting to Compact loaders withUniversal Quick Couplers:
a. Remove loader bucket.
b. Align the loader's quick-changemounting system with the forkframe mount.
c. Drive carefully into the frame andtilt back to latch the framestogether.
d. Engage latch pins provided withLoader Quick-Change Coupler.

15
5. Before going to the working area,review Section 4.6 Transporting.
6. Drive to the working area and stopin a level area.
7. Align with the pallet and lower intoworking position.
8. Drive slowly into the pallet whileadjusting the fork angle if requied.
9. Raise the pallet.
Fig. 5 Driving In
DANGER
DANG001
g. Stay away from overhead power lines.Electrocution can occur without directcontact.
h. Use only with a tractor equipped with aROPS and seat belt.
i. Do not drive across slopes. Go straightup or down. Carry arms low.
j. Do not carry people on forks or onframe.
k. Use only to handle, lift or move palletedmaterial. Do not use with loose ormovable loads.
10. Operating Hints:
a. Always center the load on the pallet betweenthe forks to provide maximum stability.
b. Drive into the pallet as far as you can tobring the pallet center-of-gravity as close tothe tractor as possible to improve stability.
c. Move wheels/tires to their widest position.
d. Add ballast to the rear of the tractor toimprove stability.
e. Keep loader arms low when moving.
f. Do not go under raised forks. Keep othersaway.

16
4.6 TRANSPORTING
TRANSPORT SAFETY
4.7 STORAGE
1. Make sure you are in compliance with alllocal regulations regarding transportingequipment on public roads and highwaysincluding lights, reflectors and the SMV.
2. Carry forks low when moving or transport-ing.
3. Do not allow anyone to ride on the Forks ortractor during transport.
4. Do not exceed 20 mph (32 kph). Reducespeed on rough roads and surfaces.
5. Tighten clamping hardware to its specifiedtorque.
6. Always use hazard flashers on the tractorwhen transporting unless prohibited by law.
1. Store the unit in an area away from humanactivity.
2. Do not permit children to play on or aroundthe stored machine.
3. Store the unit in a dry, level area. Supportthe frame with planks if required.
STORAGE SAFETY
When transporting the machine, review andfollow these instructions:
1. Be sure all bystanders are clear of themachine.
2. Be sure that the machine is securelyattached to the tractor and all retainer pinsare installed.
3. Be sure you have installed extra weights onthe rear of the tractor if required.
4. Clean the SMV emblem, lights andreflectors and be sure they are working.Comply with all local regulations.
5. Carry forks low when moving ortransporting.
6. Stay away from overhead power lines.Electrocution can occur without directcontact.
7. Be sure your machine can clearly be seen byovertaking and oncoming traffic.
8. Do not allow riders.
9. Always use hazard flashers on the tractorwhen transporting unless prohibited bylaw.
After the season's use, the machine should bethoroughly inspected and prepared for storage.Repair or replace any worn or damaged compo-nents to prevent any unnecessary down time atthe start of next season. To insure a long,trouble free life, this procedure should befollowed when preparing the unit for storage:
1. Clear the area of bystanders, especiallysmall children.
2. Thoroughly wash the machine using apressure washer to remove all dirt, mud,debris and residue.
3. Inspect the forks and frame for damage orentangled material. Repair or replacedamaged parts. Remove all entangledmaterial.
4. Touch up all paint nicks and scratches toprevent rusting.
5. Move to storage area.
6. Select an area that is dry, level and free ofdebris.
7. Unhook from tractor.
8. If the machine cannot be placed inside,cover with a waterproof tarpaulin and tiesecurely in place.
9. Store the machine in an area away fromhuman activity.
10. Do not allow children to play on or aroundthe stored machine.

17
5 TROUBLE SHOOTING
Loader Pallet Forks consist of a set of forks that mount on a loader in place of the bucket for handling palletsand palleted materials. It is a simple and reliable system that requires minimal maintenance.
In the following section we have listed many of the problems, causes and solutions to the problems that youmay encounter.
If you encounter a problem that is difficult to solve, even after having read through this trouble shootingsection, please call your local dealer or distributor. Before you call, please have this Operator's Manual andthe serial number from your Loader Pallet Forks ready.
PROBLEM CAUSE SOLUTION
Cannot lift pallet. Insufficient lift capacity. Reduce load on pallet.
Use larger capacityloader.

18
6 ASSEMBLYThe machine is shipped from thefactory in a partially disassembledform that allows for easy andconvenient shipping.
When preparing for the customer,follow this procedure:
1. Clear the area of bystanders,especially small children.
2. Use 2 men to guide or direct andhandle the heavy and bulkycomponents.
3. Use a crane, hoist or forklift ofsufficient capacity and stability tohandle the components.
Fig. 7 Fork Assembled
Fig. 6 Shipping Configuration4. Attach to the liftingdevice, remove tie-downs,lift from the truck andmove to the assemblyarea. Drive slow and keepthe machine close to theground.
5. Remove tie-downs.
6. Remove pallet.

7 SPECIFICATIONS
7.1 MECHANICAL
19
UNIVERSAL FORKS JOHN DEERE
MODELS ULF-2242 SSF-2242 JLF-2242
LIFT CAPACITY: 2250 LBS. 2250 LBS. 2250 LBS.
FORK LENGTH: 42" 42" 42"
TINE SIZE: 1-1/4" X 3" SOLID 1 1/4" X 3" SOLID 1 1/4" x 3" SOLID
ADJ. FORK FEATURE: STANDARD STANDARD STANDARD
LOADER FRAME DIMENSIONS: FITS MANY FITS COMPACT FITS JOHN DEERECOMPACT LOADERS LOADERS WITH COMPACT LOADERSTHAT MEASURE SKID STEER STYLE WITH QUICK-CHANGEBETWEEN 28 1/4" & QUICK COUPLERS ATTACHMENT47 1/4" OD WITH 3/4" CARRIERor 1" PINS
FITS LOADERS PIN SIZES: 3/4" OR 1" FITS SKID STEER JOHN DEERESTYLE QUICK QUICK ATTACHCOUPLERS
FORK STYLE: RAIL RAIL RAIL
WEIGHT: 280 LBS. 280 LBS. 280 LBS.
SPECIFICATIONS ARE SUBJECT TO CHANGE WITHOUT NOTICE

20
BoltDiameter"A"
1/4"5/16"3/8"
7/16"1/2"
9/16"5/8"3/4"7/8"1"
(6)(10)(20)(30)(45)(70)(95)
(165)(170)(225)
SAE 2N.m (lb-ft)
SAE 5N.m (lb-ft)
SAE 8N.m (lb-ft)
81327416195
128225230345
12254572110155215390570850
(9)(19)(33)(53)(80)
(115)(160)(290)(420)(630)
173663100155220305540880
1320
(12)(27)(45)(75)
(115)(165)(220)(400)(650)(970)
Bolt Torque *
CHECKING BOLT TORQUE
The tables shown below give correct torque values for various bolts and capscrews. Tighten all bolts tothe torques specified in chart unless otherwise noted. Check tightness of bolts periodically, using bolttorque chart as a guide. Replace hardware with the same strength bolt.
ENGLISH TORQUE SPECIFICATIONS
7.2 BOLT TORQUE
Torque figures indicated above are valid for non-greased or non-oiled threads and heads unless other-wise specified. Therefore, do not grease or oil bolts or capscrews unless otherwise specified in thismanual. When using locking elements, increase torque values by 5%.
* Torque value for bolts and capscrews are identified by their head markings.

8 PARTS DIAGRAMS
21
REF. QTY. PART NO. DESCRIPTION
1 1 ULF-2250 Frame Weldment for Loader2 2 1-125342ST 1.25" x 3" x 42" ITA Class 1 Pallet Fork3 2 ULF-2250-20 Mounting Bracket for ULF-22424 4 FLA-1204 Small Mount Pin for ULF-2242 Pallet Fork5 4 FLA-2006 Large Mount Pin for ULF-2242 Pallet Fork6 8 P7919 Lynch Pin - 3/16"7 4 Obtain Locally Hex Bolt, 5/8" - 11 x 2" Gr. 88 8 Obtain Locally Flat Washer, 5/8" SAE9 4 Obtain Locally Lock Washer, 5/8"10 2 Obtain Locally Hex Nut 5/8" - 1111 4 Obtain Locally Hex Nut, 1/2" - 13 x 2, Gr. 512 8 Obtain Locally FlatWasher, 1/2" USS13 4 Obtain Locally Lock Washer, 1/2"14 4 Obtain Locally Hex Nut, 1/2" - 13
8.1 ULF-2242 PALLET FORK ASSEMBLY

22
REF. QTY. PART NO. DESCRIPTION
1 1 JLF-2250 Frame Weldment for JLF Skid Loader2 2 1-125342ST 1.25" x 3" x 42" ITA Class 1 Pallet Fork3 2 P791 Lynch Pin - 7/16"
8.2 JLF-2242 PALLET FORK ASSEMBLY

23
REF. QTY. PART NO. DESCRIPTION
1 1 SSF-2250 Frame Weldment for Loader2 2 1-125342ST 1.25" x 3" x 42" ITA Class 1 Pallet Fork
8.3 SSF-2242 PALLET FORK ASSEMBLY
GEARMORE, INC., warrants each new Gearmore product to be free from defects in material andworkmanship for a period of twelve (12) months from date of purchase to the original purchaser.This warranty shall not apply to implements or parts that have been subject to misuse, negli-gence, accident, or that have been altered in any way.
Our obligation shall be limited to repairing or replacement of any part, provided that such part isreturned within thirty (30) days from date of failure to Gearmore through the dealer from whomthe purchase was made, transportation charges prepaid.
This warranty shall not be interpreted to render us liable for injury or damages of any kind ornature, direct, consequential or contingent, to person or property. This warranty does not extendto loss of crops, loss because of delay in harvesting or any other expenses, for any other rea-sons.
Gearmore in no way warranties engines, tires, or other trade accessories, since these items arewarranted separately by these respective manufacturers.
Gearmore reserves the right to make improvements in design or changes in specification at anytime, without incurring any obligations to owners or units previously sold.
GEARMORE, INC.13477 Benson Ave.
Chino, CA 91710Always refer to and heed machine operating warning decals on machine.
9 LIMITED WARRANTY
The serial number of this product is stored in our computer database, thussubmitting a warranty registration card is not required.
24