light dome pro – r - daz 3d
TRANSCRIPT
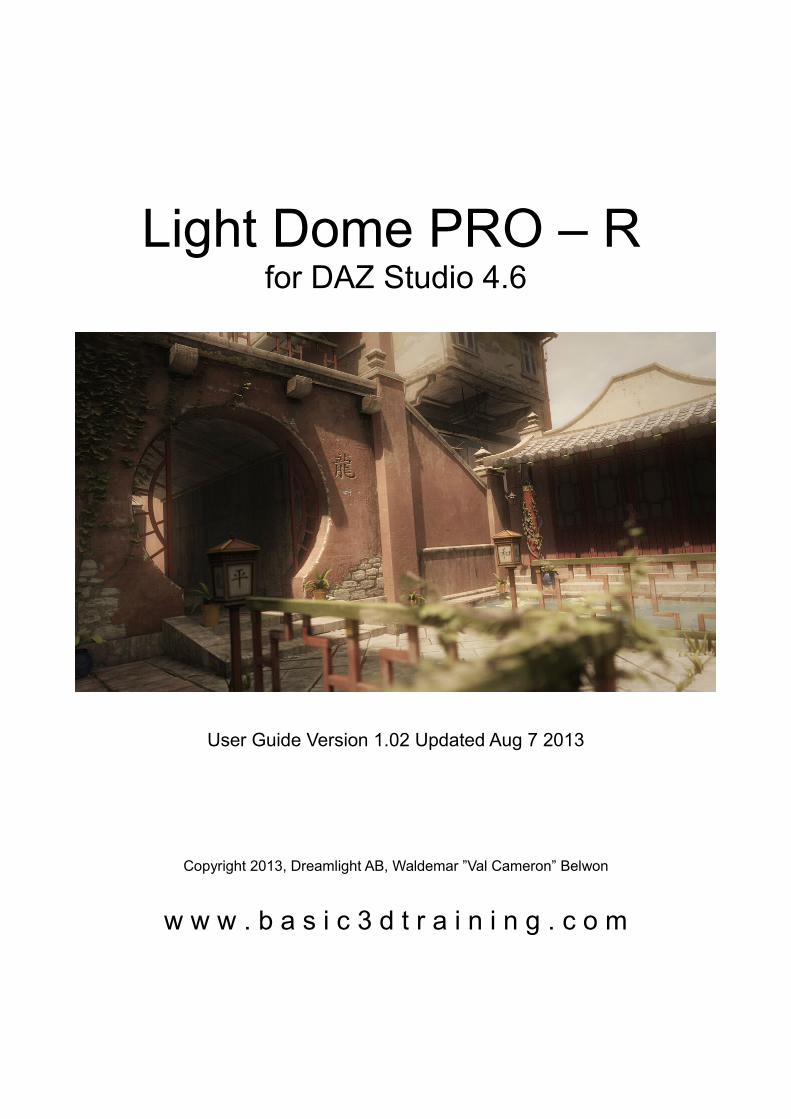
Light Dome PRO – R for DAZ Studio 4.6
User Guide Version 1.02 Updated Aug 7 2013
Copyright 2013, Dreamlight AB, Waldemar ”Val Cameron” Belwon
w w w . b a s i c 3 d t r a i n i n g . c o m
InstallationThere are 3 parts to installing LDP-R. Step 1 must be done manually, while steps 2 and 3 are done automatically with your DAZ 3D installer.
1. Open Photoshop, locate the Actions Window (if it's closed, open it with Windows → Show Actions). Click on the small arrow at top right of the Actions Window and choose Load Action. Choose the Dreamlight LDP-R.atn file and click on Load.
2. Place the LDP-R_MenuChange.dse file inside DAZStudio4 / resources / RunOnce folder
3. Add all remaining files and folders in their respective folder in My Documents / DAZ 3D / Studio / My Library
You're good to go!
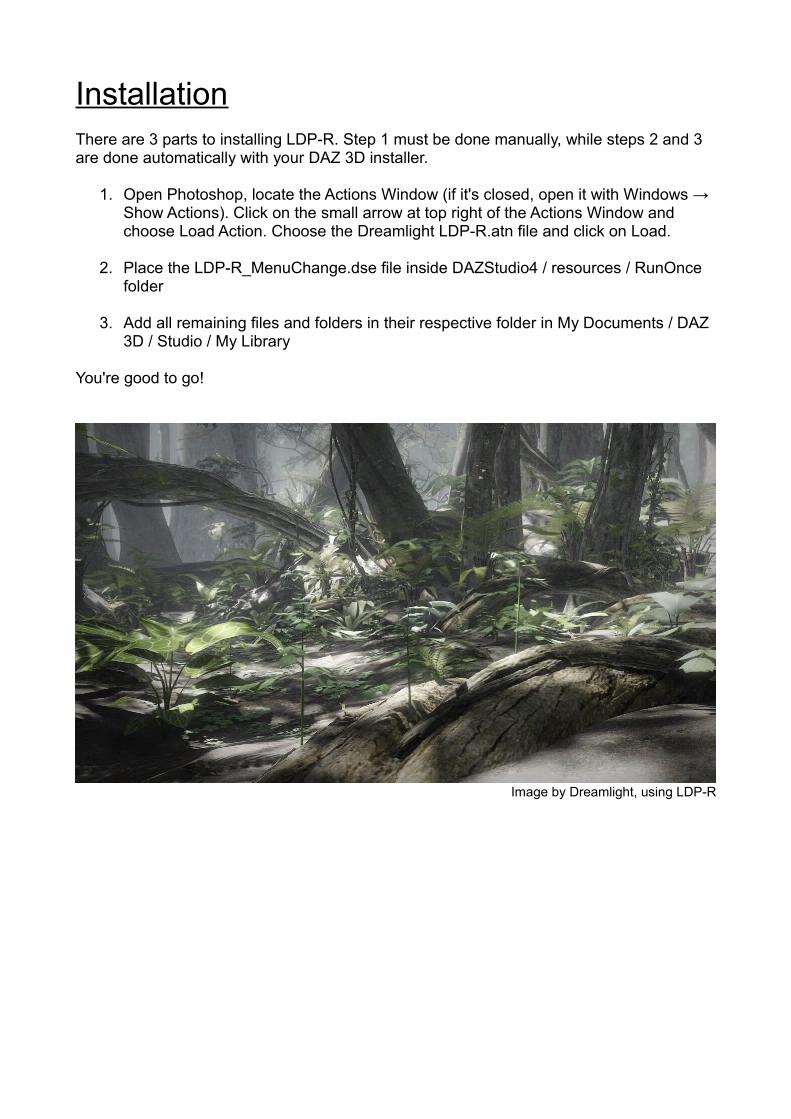
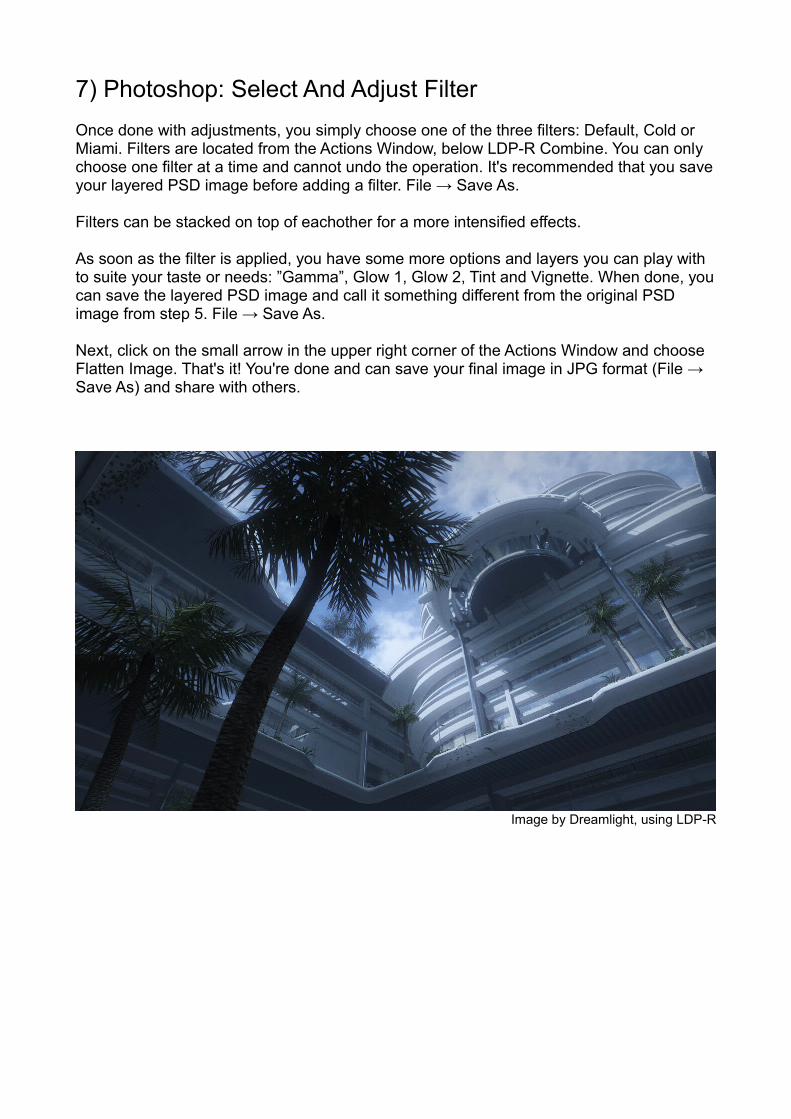
Image by Dreamlight, using LDP-R

Image by Dreamlight, using LDP-R
CompatibilityLDP-R is designed for DAZ Studio 4.6 and will not work in previous versions.LDP-R Photoshop Actions are designed to work with any Enlglish Photoshop version, and was tested in Photoshop 6.0, Photoshop CS2 and the latest Photoshop CC.
Using a non english version is not recommended, since LDP-R works with layers and may produce errors during its operations. The DAZ 3D community have posted a workaround that makes the LDP-R Actions work with Photoshop Elements. Read more on page 17.
OverviewLDP-R is an outdoor lighting solution for DAZ Studio 4.6., based on the original bestselling Light Dome PRO and Light Dome PRO 2 for DAZ Studio. R stands for Revolution and it's truly a totally new concept in lighting giving you:
– Extreme Rendering Speed– Instant Live Adjustments With Unpresedented Control– Superior Quality And Realistic Images– Minimum Amount Of Options– 95 Panoramic 360 Degree Backgrounds– Easy To Use– Depth Fog / Haze Effects– Glow Effects– Vignette Effect
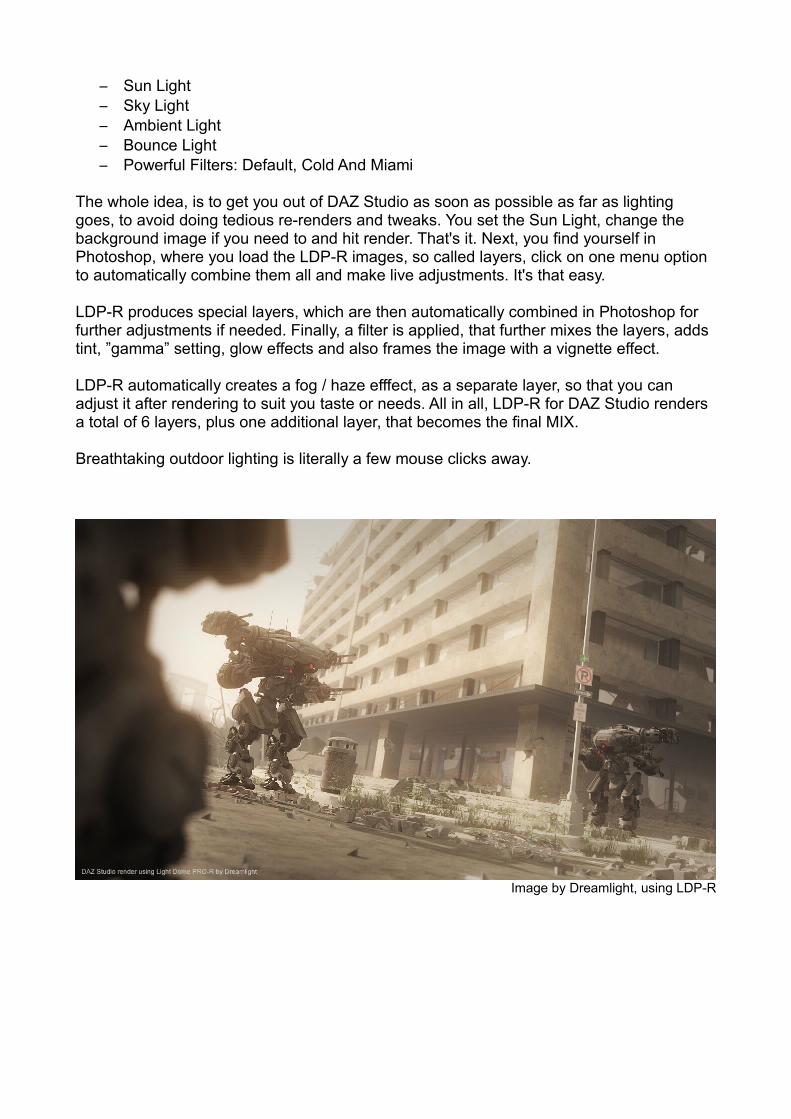
– Sun Light– Sky Light– Ambient Light– Bounce Light– Powerful Filters: Default, Cold And Miami
The whole idea, is to get you out of DAZ Studio as soon as possible as far as lighting goes, to avoid doing tedious re-renders and tweaks. You set the Sun Light, change the background image if you need to and hit render. That's it. Next, you find yourself in Photoshop, where you load the LDP-R images, so called layers, click on one menu option to automatically combine them all and make live adjustments. It's that easy.
LDP-R produces special layers, which are then automatically combined in Photoshop for further adjustments if needed. Finally, a filter is applied, that further mixes the layers, adds tint, ”gamma” setting, glow effects and also frames the image with a vignette effect.
LDP-R automatically creates a fog / haze efffect, as a separate layer, so that you can adjust it after rendering to suit you taste or needs. All in all, LDP-R for DAZ Studio renders a total of 6 layers, plus one additional layer, that becomes the final MIX.
Breathtaking outdoor lighting is literally a few mouse clicks away.
Image by Dreamlight, using LDP-R
Quick StartLDP-R is ready to render the moment you add it to your scene. It has a few options, which we'll cover later in detail. For now, we'll move quickly through the nessesary steps to your get first LDP-R image done really fast.
The procedure is divided into 7 easy steps:
1. DAZ Studio: Load LDP-R2. DAZ Studio: Adjust Sun Light Rotation3. DAZ Studio: Render Layers4. Photoshop: Load Layers5. Photoshop: Combine Layers6. Photoshop: Adjust Layers7. Photoshop: Apply And Adjust Filter
As you can see, you spend minimal time inside DAZ Studio, and do all the tweaks in Photoshop, which gives you instant feedback and 100% control, thus saving you amazing amount of time. At the same time, your renders will have a professional and unique look and feel, not found in any other light sets, lighting plug ins or render engines.
Wel'll now quickly go over each and one of the steps.
1) DAZ Studio: Load LDP-R
If you already have your scene loaded / created, then head into your DAZ Studio Content Tab → My Library → Dreamlight → LDP-R, and right click and choose Merge Into Scene on the LOAD LDP-R Icon.
If you plan to create your scene after loading LDP-R, then simply either double click on the LOAD LDP-R icon or right click and choose Open As New.
It's important to remove any other skydomes that may already be present in your scene, prior to rendering with LDP-R, since it will otherwice not function correctly. Locate such skydome or background obejects in your Scene Tab, prior to rendering with LDP-R. You can then remove them by Right Clicking and selecting Remove Item From Scene or simply hiding them with the Eye Icon.
In the Camera Selector Menu, select the LDP-R Camera. This is the camera you'll render through, and you can now go ahead and frame your image, if you haven't already.
2) DAZ Studio: Adjust the Sun Light Rotation
In the Camera Selector menu, switch from LDP-R Camera to Sun Light to see what the light ”sees”. Left click and hold the top Camera Icon that looks like a dot with an arrow surrounding it. This will ”orbit” the Sun Light around your scene. When you're done, switch back to LDP-R Camera from the Camera Selection menu.
3) Render
Go to Render → Render Settings → Advanced Tab and select the following default settings: X,Y Pixel Samples 3, Shadow Samples 16, Gain 1.00, Gamma 1.00, Shading Rate 1.00, Pixel Filter Since, Pixel Filter Width X,Y 6.00.
Make sure LDP-R Camera is selected in the Camera Selector menu. At the top Render menu, select Render → Render LDP-R. You're now presented with a dialogue box, where you can either choose the default folder location or choose one on your own. Click on OK and watch the layers being rendered. Now, you're done inside DAZ Studio.
4) Photosop: Load layers
Open Photoshop. Go to File → Open and browse to the location of the saved images. My Documents / DAZ 3D / Studio / Render Library (or your user selected location). There will be a separate folder for each of your renders, holding all the layers. Make sure you're viewing in ascending order, so that 0_Fog.bmp shows first and 7_Mix.bmp shows last.
Click on 0_Fog.bmp. Next, hold down SHIFT and click on 7_mix.bmp. This will select all the layers. Click on Open. Once loaded, do not move or select the images.
5) Photoshop: Combine Layers
Combining is done by clicking on a single menu option. First, make sure you can view the Actions Window. If not, head to Windows → View Actions. In the Actions Window, locate Dreamlight LDP-R. Expand it with the arrow next to it and click on LDP-R Combine. Click on the Play Button at the bottom of the Actions Window. Photoshop will now auto blend all the layers and produce a single layered image.
6) Photoshop: Adjust Layers To Your Taste
Make sure you can view the Layers Window. If not, head to Windows → Show Layers. Make any adjustments to the layers to suit your taste. Some layers are duplicated for more intensity. You can copy layers for even more intensity by going to the Layers Window and clicking on the small arrow to the right, and then selecting Duplicate Layer.
You can adjust each layers intensity by selecting the layer (by clicking on its icon), and then adjusting the Opacity Value at the top of the Layers Window. You can adjust Fog, Sun, Sun Bounce, Sky, Sky Bounce, Ambient and Background (which is the Sky Background from DAZ Studio).
Do not alter the Mask Layers that are used for Sun Bounce and Sky Bounce or this effect will not work properly.
Once done, save your layered image in PSD format for future feference. File → Save As.
7) Photoshop: Select And Adjust Filter
Once done with adjustments, you simply choose one of the three filters: Default, Cold or Miami. Filters are located from the Actions Window, below LDP-R Combine. You can only choose one filter at a time and cannot undo the operation. It's recommended that you save your layered PSD image before adding a filter. File → Save As.
Filters can be stacked on top of eachother for a more intensified effects.
As soon as the filter is applied, you have some more options and layers you can play with to suite your taste or needs: ”Gamma”, Glow 1, Glow 2, Tint and Vignette. When done, you can save the layered PSD image and call it something different from the original PSD image from step 5. File → Save As.
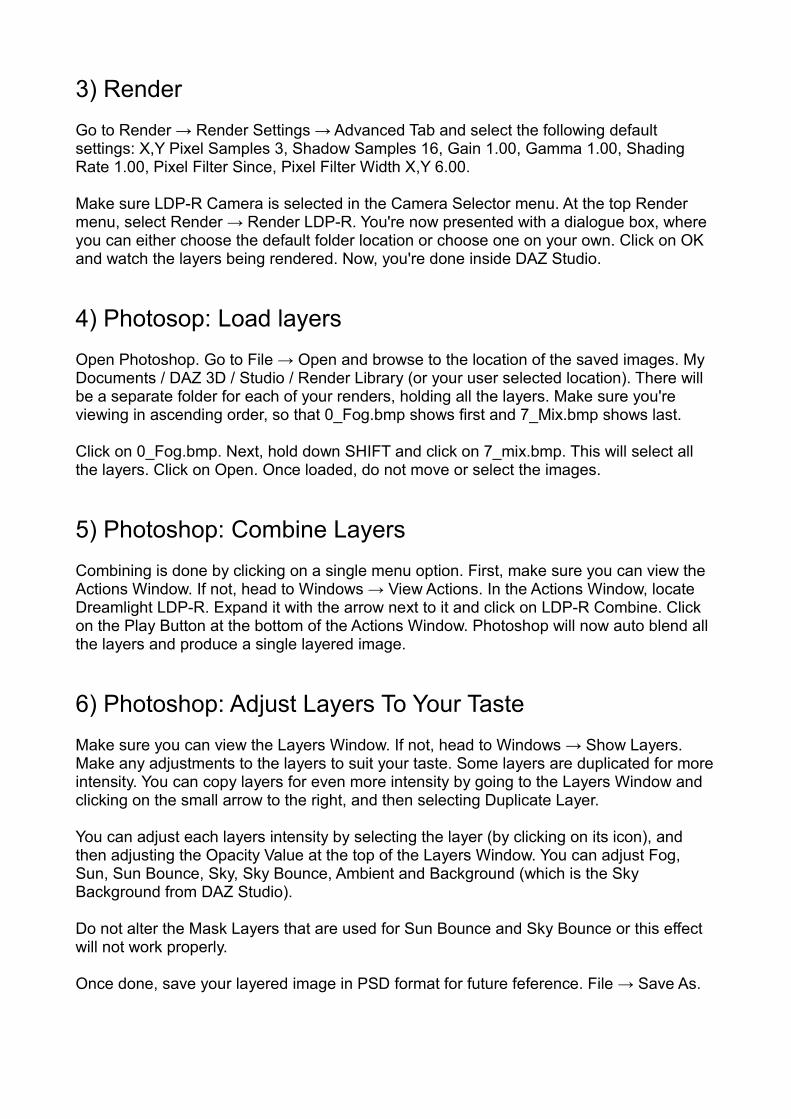
Next, click on the small arrow in the upper right corner of the Actions Window and choose Flatten Image. That's it! You're done and can save your final image in JPG format (File → Save As) and share with others.
Image by Dreamlight, using LDP-R
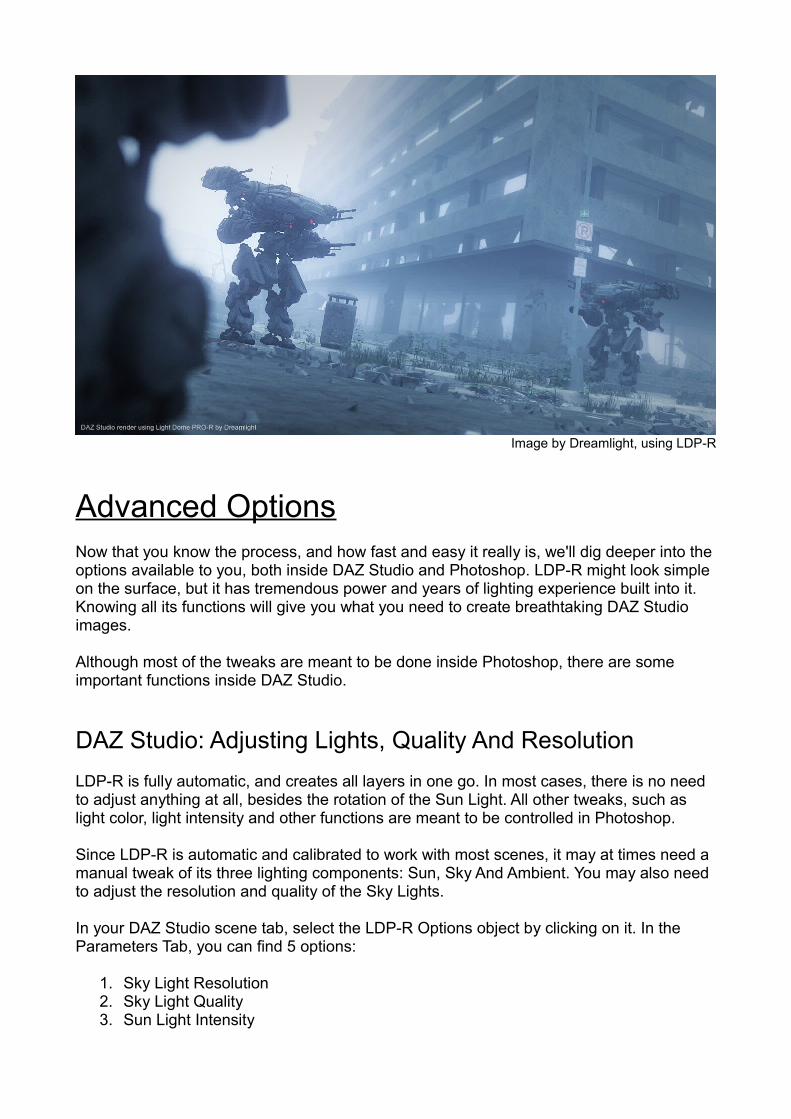
Image by Dreamlight, using LDP-R
Advanced OptionsNow that you know the process, and how fast and easy it really is, we'll dig deeper into the options available to you, both inside DAZ Studio and Photoshop. LDP-R might look simple on the surface, but it has tremendous power and years of lighting experience built into it. Knowing all its functions will give you what you need to create breathtaking DAZ Studio images.
Although most of the tweaks are meant to be done inside Photoshop, there are some important functions inside DAZ Studio.
DAZ Studio: Adjusting Lights, Quality And Resolution
LDP-R is fully automatic, and creates all layers in one go. In most cases, there is no need to adjust anything at all, besides the rotation of the Sun Light. All other tweaks, such as light color, light intensity and other functions are meant to be controlled in Photoshop.
Since LDP-R is automatic and calibrated to work with most scenes, it may at times need a manual tweak of its three lighting components: Sun, Sky And Ambient. You may also need to adjust the resolution and quality of the Sky Lights.
In your DAZ Studio scene tab, select the LDP-R Options object by clicking on it. In the Parameters Tab, you can find 5 options:
1. Sky Light Resolution 2. Sky Light Quality 3. Sun Light Intensity
4. Sky Light Intensity5. Ambient Light Intensity
1) Sky Light Resolution
There are three resolutions:
4 (Low) = DEFAULT8 (Medium)16 (High)
This simply states how many lights that are used when creating the Sky Light. The more lights, the better and smoother it will look, and the longer it will take to render. You'll be surprised how often 4 (Low) will be more than enough to give you the result you're after.
2) Sky Light Quality
This setting states how DAZ Studio renders the Sky Light shadows. There are three settings:
Speed (Open GL)Default (Shadow Map)Quality (Raytracing) = DEFAULT
Speed (Open GL) will render really fast, but sacrifice quality, resulting in pixelated shadows here and there. The pixelated look and feel can be hidden by using more lights.
In some cases, if your scene uses advanced textures, such as semi-transparent leaves, ivy's, grass, plants, hair or fences, it might actually take longer than the second option. Open GL will not create perfect shadows, and they might at times look slightly disconnected from the objects that cast them.
Default (Shadow Map) will first calculate a Shadow Map for each of the Sky Lights, and the render very quickly. The pro of this method, is that it renders quickly once it actually starts to render. Useful when you have lots of semi-transparent surfaces, such as leaves, ivy's, plants, hair or fences. The downside, is that it usually looks very soft and lacks detail (often very small items completely lack shadow).
Another downside, is that it needs to calculate a Shadow Map for each of the lights, which might take some time, depending on your scene.
Quality (Raytracing) is the default setting, since it produces the quality Light Dome PRO is known for. The downside is that it might take a little longer to finish, and you may experience much longer render times when using lots of transmaps, which are objects mapped with Transparency Maps or Alpha Masks, such as grass, plants, hair and sometimes fences and other details.
You can, if possible, remove such items from your Scene Tab, in case they are separated. Or, you can make them invisible with the eye icon next to each of the objects in the Scene
Tab. If that's not possible, then you might want to lower the resolution of the Sky Light to gain speed that way.
3) Sun Light Intensity
Since LDP-R is fully automatic, and all adjustments are meant to be made in Photoshop post rendering, there is no need for adjusting its intensity. However, if you have a very bright or plain looking scene, you might want to lower the Sun Light Intensity to a lower value such as 70 or 80. The default value is 100.
4) Sky Light Intensity
Same as Sun Light, but for the Sky Light component of LDP-R. Default intensity is set to 100.
5) Ambient Light Intensty
Same as Sun Light, but for the Ambient Light (overall brightness) component of LDP-R. Default intensity is set to 100.
DAZ Studio: Adjusting Sun Light Rotation
Adjusting Sun Light Rotation is really the single most important factor when it comes to producing great results with LDP-R. Also, in most cases, it's the single adjustment needed, since everything else is fully automatic.
There are two ways of adjusting the Sun Light's rotation:
1. Switch to Sun Light Camera from the Camera Selection Menu. Click and hold the top Camera Adjusting Icon to orbit the camera around the scene. When done, switch back to the LDP-R Camera.
2. The other way, let's you rotate the Sun Light while looking through the LDP-R Camera. In the DAZ Studio Scene Tab, expand LDP-R Lights and select Sun Light.
Next, in the Parameters Tab, adjust it's rotation by sliding the X and Y rotations. Z can also be adjusted, but has very little impact. Instead, while using this method, you should zero the Z axis, by setting it to 0 and then just play with the X and Y axis.
This works best when LDP-R Camera is selected, since it lets you see how the Sun Light will impact your scene. However, you can also use any other camera, such as Perspective Camera or any other camera, including the Sun Light Camera. When done, switch back to LDP-R Camera.
DAZ Studio: Adjusting Fog
The Fog / Haze effect is preset to work with most outdoor scenes. To adjust the Fog, select the LDP-R Camera in the Scene Tab. In Parameters Tab, you'll then have two options:
1. Background (Color)2. Fog Start Distance
While LDP-R is designed to get you out of DAZ Studio as quickly as possible, and play with adjustments live in Photoshop, you can adjust Fog Background Color as well as Fog Start Distance.
The latter states how quickly the Fog Effect will be visible in your renders, or how close it starts related to the LDP-R Camera. The Fog Start Distance is what you will want to adjust inside Daz Studio, while you can play with the color later inside Photoshop.
DAZ Studio: Changing Skydome / Background Image
LDP-R features a Skydome Object, that surrounds your scene. You can select between 95 pre-designed 360 degree panoramic images.
In the Scene Tab, select the LDP-R Background Object. In the Content Tab, locate the following folder:
My Library → DAZ Studio Formats → Dreamlight → LDP-R → Backgrounds
Simply double click on one of the icons to switch to that background. LDP-R backgrounds range from simple gradients, to more sophisticated clouds patterns in various weather conditions, such as cloudy, night, day and sunset. In addition, it taps into complete backgrounds, with mountains, deserts, water, city scapes, surreal landscapes, sci-fi and even space.
DAZ Studio: Adjusting Skydome Size, Position And Rotation
In most cases, adjusting the Sky Domes position and size is not nessesary. The most common adjustment you'll make is Skydome Rotation, that simply rotates the Skydome around your scene. This effect is used to make sure that the background matches the sun light rotation. (If the sun comes from the left, you want to background to reflect that)
In rare cases, if your scene is completely off center, you can move the LDP-R Background Object and keep it centered around your scene.
Due to its size, it will work for the majority of your scenes. In case when your scene is larger than the LDP-R Background Object, you may need to reszie it, to keep your scene within.
In the Scene Tab, select the LDP-R Background Object. In the Parameters Tab, select Transform to the left, and then adjust it's X,Y and Z position as well as Y rotation and Scale on the right.
DAZ Studio: Removing Other Skydomes
It's important to remove any other skydomes that may already be present in your scene, prior to rendering with LDP-R, since it will otherwice not function corrently. Locate such skydome or background obejects in your Scene Tab, prior to loading or using LDP-R. You can then remove them by Right Clicking and selecting Remove Item From Scene.
DAZ Studio: Selecting Black Background
LDP-R requires the default black background color to be selected. When you just start a new scene from scratch, you don't need to worry about this setting. However, when loading other scenes, they might come preconfigured with another background color.
To switch to black background color, next to the Ball Icon (Next to the Camera Selector), click on the List Icon that will display some options. Choose Change Background Color. Select black color and click on OK.
DAZ Studio: Making A Preview Render
There is no good way to preview the final result, since LDP-R relies on layering techniques and Photoshop filters. However, you can use its Render Preview Function by simply going to DAZ Studio menu Render → Render. That is, NOT using the LDP-R Render option.
This will make a quick render with 1 Sun Light and 4 shadowless Sky Lights. It's mainly used to see how the Sun Light Shadow falls, and nothing more, since all adjustements are meant to be made inside Photoshop.
DAZ Studio: Adding Your Own Lights
You can add you own lights to match the LDP-R layers. To do so, here's the nessesary steps:
1. Make your LDP-R render as usual, following the Fast Start Section in this guide, including getting all layers into Photoshop and mixing them but NOT adding any filters just yet, leaving all layers inctact.
2. Go back to DAZ Studio and remove all LDP-R folders / objects in the Scene Tab EXCEPT for the LDP-R Camera. You MUST keep the camera static. It needs to match your previous renders.
3. Select the LDP-R Camera, and in the Parameters Tab, select Fog in the left list. In the right list, click on the colored bar (Background / Color) and select black.
4. Add your own lights, you can even add Uber Environment 25. Make a render using the DAZ Studio render option Render → Render6. Save it in a different location than the LDP-R layers. Prefferably inside a new folder
within the LDP-R layers folder.7. In Photoshop, load your new DAZ Studio render, while having the LDP-R mix in
front of you. Select your DS render, hit CTRL + A to select all, then CTRL + C to copy. (Use Command instead of CTRL on a MAC).
8. Next, switch to the LDP-R mix, select the top layer and hit CTRL + V. This will add your DS render as a top layer to the MIX.
9. Now, select Screen Blending Mode for that layer and adjust opacity to match the rest.
10.You can repeat this for as many layers as you need.11. When done, save your work and apply final LDP-R filter of your choice.
DAZ Studio: Adding DOF To Camera
DOF stands for Depth Of Field, and is best described as a blurred background and foreground around a fixed point (distance) related to the LDP-R Camera.
To enable this function, select the LDP-R Camera in the Scene Tab. In the Parameters Tab, go to Camera → Depth Of Field and turn it on. Next, you have two values to adjust:
1. Focal Distance, which is the point in your scene that will be 100% in focus. Areas around this point will be more or less out of focus (blurred), depending on the distance from the focal point and the F/Stop value.
2. F/Stop – this determines how much blurred effect you want to have and the area of focus around the focus point (Focal Distance). A lower value means a lower area, and a greater blurred effect. A higher value means a larger area, and a lower blurred effect.
When using DOF, it is adviced to use a higer X / Y Samples setting (4-12) in the Render → Render Options → Advanced menu, to avoid a grainy look. A higher value will increase render time.
DAZ Studio: Optimal Render Settings
LDP-R already comes preset with optimized settings, and you don't need to change them. However, some cases require additonal tweaks.
Open DAZ Studio top menu Render → Render Options → Advanced Options.
Bucket Size: 8
Max Ray Trace Depth: 1 (this can be set to 0 to render without reflections, or to a higher number, 2-3, so include more advanced reflections. A higher number will increase render time)
Pixel Sames (X): 3 (can be set to a higher number, 4-12, when using DOF effect, for smoother render results. A higher number will increase render times)
Pixel Samples (Y): 3 (can be set to a higher number, 4-12, when using DOF effect, for smoother render results. A higer number will increase render times.)
Shadow Samples: 16
Gain: 1.00
Gamma Correction: Off (Do not alter)
Gamma: 1.00 (Do not alter)
Shading Rate: 1.00 (can be set to a lower value, for more scrisp and sharp renders, at the expense of longer render times. Going below 0.2 is not adviced. In most cases, a value between 0.4-0.8 will give very good results.
If you encounter very long render times, especially with Ray Tracing quality, you can increase the Shading Rate to a higher number, with increased rendering speed as a result (and a more fuzzy / grainy look as a downside).
Pixel Filter: Sinc (Do not alter)
Pixel Filter Width (X): 6.00 (Do not alter)
Pixel Filter Width (Y): 6.00 (Do not alter)
Motion Blur is optional, and can be used with LDP-R for further motion speed effects.
DAZ Studio: Remove Ambient
Some items, such as figures or buildings include a surface effect called ambient. This adds an overall light to the entire object. Some objects, such as figures, use it for faked skin radiance, also called Sub Surface Scattering. These extra glowing effects might interfere with your LDP-R render and affect the final layer intensities.
LDP-R has an icon for clearing all such effects in your scene, located in the main LDP-R folder. To use it, simply double lick on it. Bear in mind, it will also clear any ”light surfaces” in your scene, making them dark instead of glowing. Such surfaces include lamps and light fixtures.
If you don't want to remove all such effects, you can manually lower the ambient level for any object in your scene. For manual control, select a object in the Scene Tab. In The Surfaces Tab, select the object again on the left side. Then, on the right side, scroll down to Ambient and turn it down to 0.
If you're unsure how this icon will affect your scene, make a render without adjusting anything first. If you only have a single glowing surface you want to keep, but 50 surfaces that you want to lower, it might be a good idea to use the LDP-R icon first, and then manually increase and ambient level of that single surface you want to glow.
DAZ Studio: Working With Reflections
LDP-R is designed to work with reflections, and they will render in all layers. If you want to render without reflections, simply go to DAZ Studio top menu Render → Render Options
→ Advanced Options and choose Max Raytrace Depth 0.
If you want more advanved relfections, where light scatters several times, you can use a higher setting, such as 2 or 3. That will also increase rendering time.
DAZ Studio: Optimizing Render Speed
If you want to get maximum speed from your LDP-R, try some of the following:
1. Lower Sky Light resolution2. Use Deep Shadow Map or even Open GL instead of Raytracing (Sky Light Quality)3. Use smaller rendering screen size (Render → Render Options, and adjust Pixels)4. Use higher Shading Rate value (Render → Render Options → Advanced Options)5. Use lower X / Y Pixel Samples (Render → Render Options → Advaned Options)6. Consider removing (if possible), or adjusting shadow casting for semi-transparent
objects, such as hair, grass, some fences or bushes / ivy's.
Select object in Scene Tab, if possible, right click and choose Remove Item From Scene. Or, click on the Eye Icon next to it (to make it invisible). Or, you can select an object in the Scene Tab. Then, in Parameters Tab, select Rendering on the left side, and then Cast Shadows Off on the right side.
7. Render without relfections (Render → Render Options → Advanced Options, Max Raytrace Depth 0)
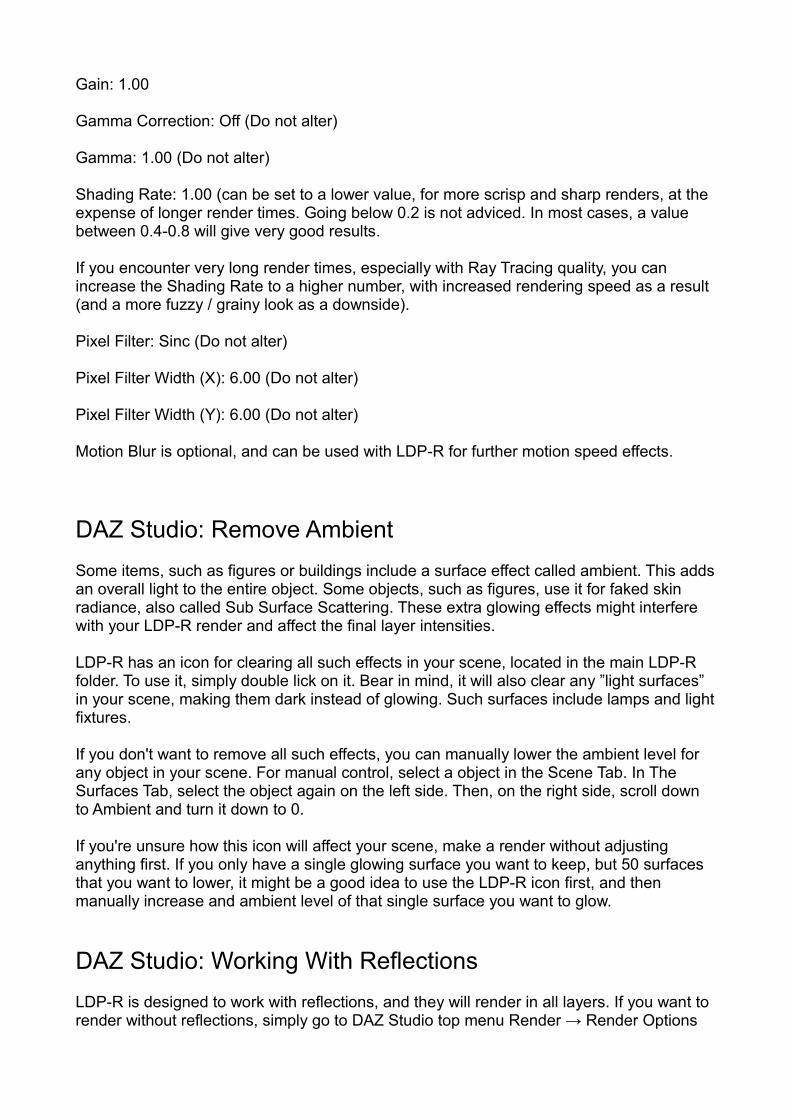
Image by Dreamlight, using LDP-R
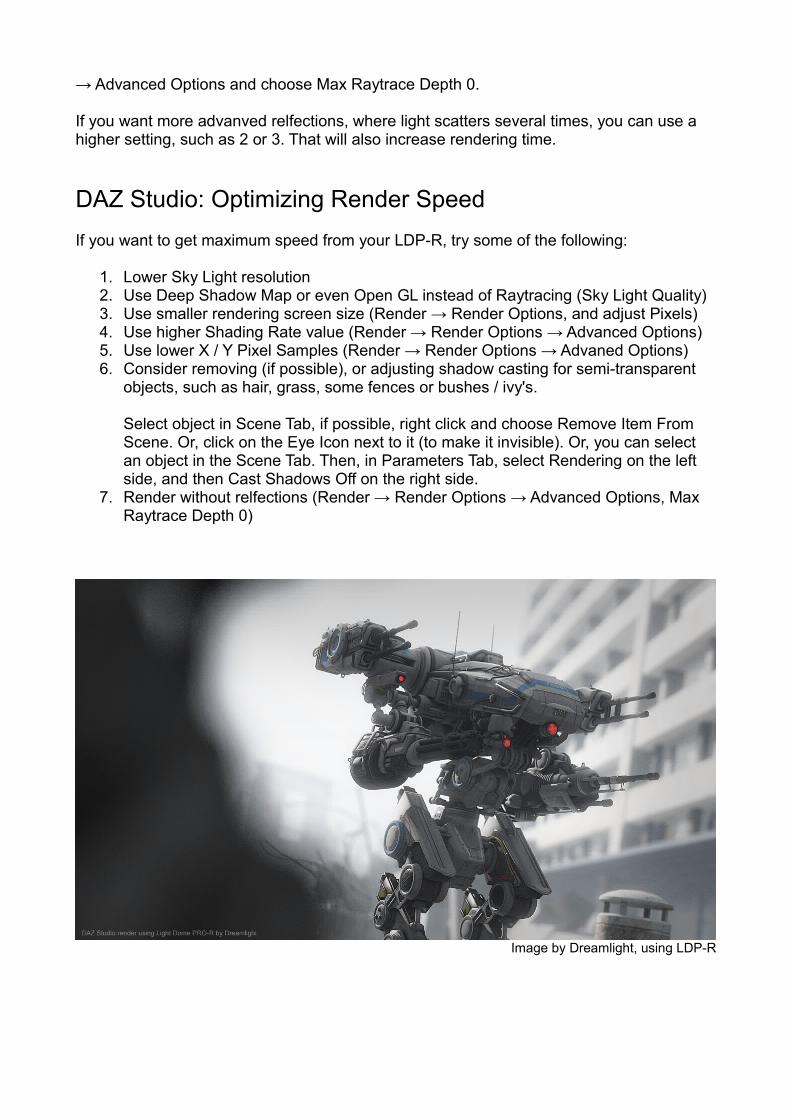
DAZ Studio: Rendering Indoors
Although LDP-R is designed for exterior renders only, it will work indoors, when sufficent light is coming in.
The following render is an indoor render, done using LDP-R:
Image by Dreamlight, using LDP-R
If possible, remove any ceiling / roof objects or any other objects obsctructing the lights from coming in. Bear in mind, although this will work, the results are not guaranteed. LDP-R uses lights to function. If lights cannot enter your scene from the outside, there will not be anything to light.
Fog / Haze will work indoors. You many want to adjust the Fog Start Distance. A lower value is more suitable indoors. For instance 5,000 - 10,000.
Photoshop: The Principle Of Working With Layers
Why layers?
I've been teaching and mentoring over 5,000 3D artists since 2006, and while working with them all, I've discovered that layering is a fantastic technique for:
– Gaining superior rendering speed, since you don't do any re-renders inside your 3D software. Instead, you do live post rendering adjustments in Photoshop.
– Individual layer tweaks, giving you per light / per layer control with instant results
A layer is simply a render with only a fraction of the data. Typically, a layer only holds one or a few lights, instead of all lights at once.
What you need to know about layers, is that you cannot see the final image until it's mixed inside Photoshop. Instead, you need to rely on the automation that LDP-R provides, letting you do all the nessesary tweaks inside Photoshop.
Layering is widely used in Hollywood, both when it comes to making still images, as well as 3D animation.
Photoshop: Duplicating A Layer
Any of the layers can be easily duplicated, if you want a stronger effect (when the Opacity slider set to 100 doesn't do the trick). Simply select the layer, and click on the small arrow at the top right corner of the Layer Window. Select Duplicate Layer. You now have two identical layers, and can adjust both of them individually.
Often, what will give you very realistic results, is duplicating and really making the Sun layer very strong.
Photoshop: Adjusting Layer Opacity
Once you use the LDP-R Combine action inside Photoshop, you'll have plenty of layers to play with. All of them can be adjusted by sliding the Opacity Slider. Select the layer you want to adjust, then adjust its intensity with the Opacity Slider.
While LDP-R is designed to automatically produce great results in most cases, there are times where you want to lower some of the effects, such as Sun Bounce or Sky Bounce. Especially when you have a very low camera angle, deep below ground level, where the Sky Light will not hit as hard, you may lneed to ower Sky Bounce.
Photoshop: Adjusting Layer Color
You don't need to adjust any colors, since everything is automatic. In case you want to re-color the layers, you can simple select the layer and then choose any of the following methods:
1. Choose Image → Adjust → Variations2. Choose Image –> Adjust → Curves
Such operations can be done prior or after adding a LDP-R filter.
Photoshop: Adjusting Layers With Additional Masks
There is more to layeres than what meets the eyes. For instance, you can add additional masks to the Sky, Sky, Ambient or Fog layers, to further control of their impact.
For instace, if you have an outdoor scene where the Fog Effect works great on the ground, but simply overpowers the background / sky, you can add a mask to the Fog Layer, and
then use a Gradient Tool to control how the Fog Effects fades off.
Similar effects can be used to control / reshape how a particular light affects your scene. Maybe you want to resculpt how the Sun Light affects your scene. By adding a mask, and then a gradient to it, you can control where the Sun Light hits and where it doesn't.
To add a mask:
1. select a layer (do not select the Sky Bounce or Sun Bounce layers, since they already use masks)
2. Click on the round mask icon at the lower part of the Layer Palette. You should now see an additional frame next to that layer
3. Select the mask layer by clicking on it
4. Chose the Gradient Tool and use black / white to draw a gradient that controls how the layer falls and affects your scene
Photoshop: Making Night Images
To make a night image, simply tone down the layers to a darker state. During night, you can use the Sun and Sun Bounce to act like the moon. Once done, use the Cold Filter. There might be an automatic preset for night images in future version of LDP-R.
Making LDP-R Actions Work In Photoshop Elements 10
There are very active members on the DAZ 3D forums, that have posted a detailed workaround to get the LDP-R Photoshop Actions to work with Photoshop Elements 10. This solution is not official, and haven't been tested by Dreamlight. You may find the solution here:
http://www.daz3d.com/forums/viewthread/26593/P15/#394663
Thank you Lindsey!

That's It!
I hope you'll enjoy LDP-R as much as we enjoyed designing it. We're always listening to feedback and aim for producing the very best software and training possible.
Feel free to send in your feedback here:http://dreamlight.kayako.com
Please state that you're sending LDP-R feedback.
Video Tutorials
For a Quick Start, view the following YouTube video:http://www.youtube.com/watch?v=GEOjkr0f6EY
For a more in depth overview, watch the following YouTube video:http://www.youtube.com/watch?v=EIkjDLiHE3M
Technical Support And Feedback
Feel free to post your renders and questions on the DAZ forums:http://www.daz3d.com/forums/viewthread/26593/
For direct contact with Dreamlight, create a support ticket here:http://dreamlight.kayako.com
Credits
Design, graphics, testing, layout and Photoshop actions - Dreamlight AB, Waldemar ”Val Cameron” Belwon. www.basic3dtraining.com
Coding – Mike Crewe
Copyright 2013 Waldemar ”Val Cameron” Belwon, Dreamlight AB