labels - alaska state museummuseums.alaska.gov/documents/bulletin_docs/bulletin… · ·...
TRANSCRIPT
~.'
ALASKA STATE MUSEUM,]UNEAU ALASKA STATE MUSEUMS
Double Issue 7 & 8
BASIC TECHNIQUES FOR MAKING
AND MOUNTING
EXHIBIT
LABELS By Kenneth DeRoux
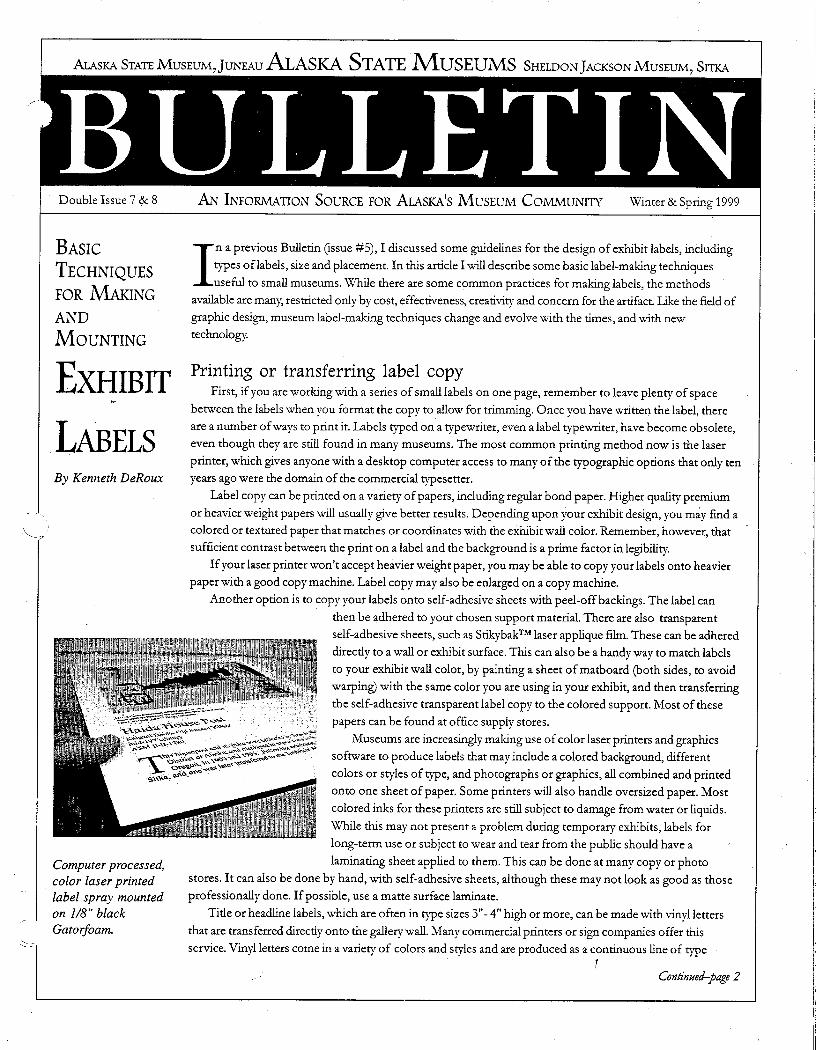
Computer processed, color laser printed label spray mounted on J/8" black Gatorfoam.
AN INFORMATION SOURCE FOR ALASKA'S MUSEUM COMMUNITY Winter & Spring 1999
In a previous Bulletin (issue #5), I discussed some guidelines for the design of exhibit labels, including
types oflabels, size and placement. In this article I will describe some basic label-making techniques
useful to small museums. 'While there are some common practices for making labels, the methods .
available are many, restricted only by cost, effectiveness, creativity and concern for the artifact. Like the field of
graphic design, museum label-making techniques change and evolve with the times, and with new
technology.
Printing or transferring label copy First, if you are working with a series of small labels on one page, remember to leave plenty of space
between the labels when you format the copy to allow for trimming. Once you have written the label, there
are a number of ways to print it. Labels typed on a typewriter, even a label typewriter, have become obsolete,
even though they are still found in many museums. The most common printing method now is the laser
printer, which gives anyone with a desktop computer access to many of the typographic options that only ten
years ago were the domain of the commercial typesetter.
Label copy can be printed on a variety of papers, including regular bond paper. Higher quality premium
or heavier weight papers will usually give better results. Depending upon your exhibit design, you may find a colored or textured paper that matches or coordinates with the exhibit wali color. Remember, however, that
sufficient contrast between the print on a label and the background is a prime factor in legibility.
If your laser printer won't accept heavier weight paper, you may be able to copy your labels onto heavier
paper with a good copy machine. Label copy may also be enlarged on a copy machine.
Another option is to copy your labels onto self-adhesive sheets with peel-off backings. The label can
then be adhered to your chosen support material. There are also transparent
self-adhesive sheets, such as Stikybak™ laser applique film. These can be adhered
directly to a wall or exhibit surface. This can also be a handy way to match labels
to your exhibit wall color, by painting a sheet of matboard (both sides, to avoid
warping) with the same color you are using in your exhibit, and then transferring
the self-adhesive transparent label copy to the colored support. Most of these
papers can be found at office supply stores.
Museums are increasingly making use of color laser printers and graphics
software to produce labels that may include a colored background, different
colors or styles of type, and photographs or graphics, all combined and printed
onto one sheet of paper. Some printers will also handle oversized paper. Most
colored inks for these printers are still subject to damage from water or liquids.
'While this may not present a problem during temporary exhibits, labels for
long-term use or subject to wear and tear from the public should have a
laminating sheet applied to them. This can be done at many copy or photo
stores. It can also be done by hand, with self-adhesive sheets, although these may not look as good as those
professionally done. If possible, use a matte surface laminate.
Title or headline labels, which are often in type sizes 3"- 4" high or more, can be made with vinylletters
that are transferred directly onto the gallery wall. Many commercial printers or sign companies offer this
service. Vinyl letters come in a variety of colors and styles and are produced as a continuous line of type , Continued-page 2

- 2
Some plastic core substrates: 1/8" black Gatorfoam, 3/16" white Fome-Cor; 112" black Gatoroam.
which is peeled from a backing sheet, so there is no problem keeping the letters aligned or spaced. It takes some care to transfer the letters without wrinkling them, but it is not difficult and instructions are provided
by the sign company. If left on a wall for a long time, vinyl letters may require a razor scraper to remove.
Transfer type, the wax-based letters and numbers that you can rub off a sheet, once a mainstay of \
graphic artists, can also be used for special situations. They can be transferred directly onto a gallery wall. This
is useful for situations such as putting a number next to an artwork or for putting numbers next to objects
in a group that might be identified on a key label. One way to do this is to paint the heads of large thumbtacks, transfer the numbers onto the tack heads, and put the tacks next to the objects. A spray coat of
clear lacquer or varnish will keep the numbers from peeling off.
Another method for producing labels, used more by larger museums because of cost and labor, is silk
screen. Text is photographically transferred to a screen and then stenciled with ink directly onto a wall or label
panel. The process is time-consuming and, in many cases, is now being supplanted by digital printing.
Photo-mechanical transfer labels (PMTs) are also going out of style due to digital printing. PMTs are
electronically typeset labels printed out on photographic paper. These allow for fairly large text labels,
depending on the printer's capabilities, but must be done commercially and only come in black and white.
PMTs need to be thoroughly washed to avoid discoloring with time.
Supports Once printed onto paper, most labels need to be mounted onto a more rigid surface, although labels on
heavyweight paper may be adequate for temporary exhibit situations. A mounted label also tends to look
better than an unmounted one. The most common materials for mounting
labels are matboard, foamboards and Masonite®.
Matboard, also called museum board, is probably the most versatile and
easiest to use. It is more suitable to smaller labels because larger sizes will
flex. Be sure to use board with a smooth surface, preferably white with a
white or black core. Non acid-tree boards often have a grayish core w¥ch
gives tb.e edges oflabe!s a lackluster a.ppearance. For permanent labels in closed cases it is advi~able t~ use acid-free matboard.
There is a wide variety of foamboards or similar substrates on the.,
market, some of the most common being FomeCor®, Gatorfoam® and
Sintra®. They have different characteristics and some will be better than
others for various situations. FomeCor, for instance, is a plastic foam sheet
with a smooth, clay-coated paper surface on both sides. It comes in both
regular and acid free and is available in most art supply stores. like matboard,
it can be cut with a knife. Foamboards are manufactured in a variety of
thicknesses and sheet sizes and produce more rigid labels than matboard, so
may be more suitable for larger text labels. One drawback is the white foam
edge that may distract from the label. However, this can be painted over carefully or inked over with a black
marker. Better yet, buy foamboard with a black core if it is available. Another technique is to bevel the edge
of the label toward the back when trimming, so the edge is better hidden.
Masonite®, the common term for hardboard made from compressed wood fibers, is a frequently used
material for labels that need to be on a sturdy backing. Its drawback is that it needs to be cut on a saw and its
weight can present problems for attaching to a wall. It is not acid free, so it should be sealed or painted
before being used in permanent exhibits.
Adhesives A common way to mount label copy and photographs onto a board is with a spray adhesive. 3M
Sprament™ and 3M Super 77™ are two commonly used adhesives. Follow the directions on the can and
use a good dust mask or respirator. If you are doing a lot of mounting, you may want to cover your hair
and arms to keep them from getting gummy. Use old newspapers or sheets of newsprint to lay your
materials on to catch the overspray. Each time you lay down a new label, put it on a fresh piece of paper so
that you don't risk putting a label face down on a tacky surface. After spraying the back of your label copy,
carefully lay it onto the clean backing board, taking care not to get wrinkles or bubbles in it The glue remains

workable for a short time, so if you need to peel the label back up and reposition it, you usually can. Lay a clean sheet of paper over the label and rub over it with the side of your hand or roll over it with a brayer to secure the bond. It's an easy, straightforward method if one is careful and works in an organized fashion.
For larger labels on matboard it is a good idea to mount a piece of paper to cover the backside of the
board to prevent it from cur~ng or bending.
Dry mounting labels and photographs is another common method, but since this requires the use of a
dry mount press, an expensive piece of equipment, I won't cover it here. Wet mounting is a method often used to mount photographs or PMTs. It is not desirable for use with
regular paper since it requires wetting th(: material. To mount a photograph on masonite, for example, the
photograph would be wetted in a tray of water for several minutes. A layer of
white glue or acrylic gel medium is then spread out evenly over the masonite.
The drained or squeegeed photo is placed on the glue and the surface is then
carefully squeegeed again from the center to the edges to adhere the photo.
Excess glue squeezed out from the edges is carefully wiped up. The photograph
can be printed a little larger than the masonite and the edge of the photo
wrapped around the edge of the masonite, for a wrap-around effe'ct. Doing this,
however, takes some practice. To prevent warping, since the photo will shrink as
it drys, another piece of photo paper or kraft paper should be wet mounted to the back of the masonite.
Trimming Once labels are mounted, they usually need to be trimmed to size. For labels
on matboard, FomeCor, or similarly thin materials, a mat knife or utility knife and straightedge are the tools
needed. Use a sharp blade and change it frequently. Blades are cheaper than matboard. You may want to use
a transparent drafting square to pencil in cutting guidelines to keep your label edges square to the text. Make
sure to leave adequate space around all sides of the label, as a label that is trimmed too tight looks constricted and is harder to read.
Thicker foam boards and masonite will need to be cut on a table or band saw. While it is possible to
glue a previously trimmed label onto a pre-cut piece of masonite, the label will likely need to be re-trimmed.
It is helpful to start out by trimming one edge of the label, usually the left side, before gluing so that it can
be glued straight along one edge of the masonite panel. The other edges can then be trimmed square to the
first side. After trimming, the edges of the masonite will need to be sanded with a very fine grade
sandpaper.
Wall mounting The method for attaching a label to a wall varies depending on the size and material of the label, the type
of wall and the length of time the label will be up. Small, lightweight temporary exhibit labels are often
attached with either tape or adhesive putty. Double-sided foam tape is
commonly used, but it should be used carefully because it can be difficult to
remove and shouldn't be used on wall paper or finishes that might peel up
when removing the tape. Use the smallest size pieces you can. For small object
labels this means just snippets of double sided tape. Larger labels will require
larger pieces of tape. If you are unsure how much tape to use, test a disposable
label by putting it up and removing it. When removing the label, use a twisting
motion to lift it off, being careful the tape doesn't pull part of the wall covering
away. Alternatively, a putty knife can be slid behind the label to pop it off the
wall. The residue can Qften be rubbed off the wall with your thumb (make sure
your hands are clean), a gum eraser, or solvent.
A handier way to temporarily attach small labels is with an ATM tape gun, a
type used by commercial picture framers. The gun dispenses a strip of adhesive
,_/ from a tape backing that is easier to remove. The gun and tape need to be
purchased from a frame supply company. r
Another commonly used product is adhesive putty, often sold in art or office supply stores. One trade
Label with Velcro® attachments.
Label in picture frame with hanging wire.
3

4
Wedge bracket glued to the back of a masonite® mounted label.
Wedge on reverse of label locks into wedge attached to wall.
TRIBAL
MUSEUM
DIRECTORY
name is Blue-Tack. To use it, roll a small ball of putty between your thumb
and finger and push it onto the back corners of the label, then press the
label onto the wall. The label can be easily removed and the putty rolled off
and re-used. Putty is not recommended for permanent labels.
Labels can also be tacked up with small brass brads or tacks. Get ones
with attractive heads, since the heads will be visible. Make sure the brads are
uniformly arranged.
Adhesive backed Velcro® tape can be cut into patches and used to
attach labels. This allows you to remove the label and reposition it if
necessary. Velcro can be bought with or without adhesive backing.
Larger, heavier labels require more substantial fasteners. Permanent exhibit labels can be attached to'
walls or supports using hot glue. Hot glue is dispensed from a hot glue gun, available at hardware
stores. Hot glue can also be used to attach wood strips to the back of masonite supported labels. This
will enable the label to be hung using conventional picture hanging hardware and techniques.
Of course, labels can also be hung on a wall by putting them in picture frames and hanging them
with picture wire, or by hanging the upper edge of the frame over the heads of nails. This option
opens up a variety of design possibilities for integrating labels with an exhibit, because of the variety of
framing styles available. Labels can also be set off with mat board within a frame, just as if you were
framing a picture.
A convenient method for hanging larger labels and photographs is with an angle or wedge bracket.
To make one, take a length of wood, such as a lox3, and cut a bevel along the length of one edge. Cut
off a section of this board, long enough to go across the top back of the label, and cut a corresponding
length to go on the wall. One piece is glued to the upper back side of the label, bevel down, facing in
toward the back of the label. The other piece is attached to the wall, bevel up, facing into the wall. Make
sure both strips are exactly horizontal. The strip on the back of the label can now be set down to mesh
against the strip on the wall, holding the label firmly in place. This type of mount allows the label to be
easily removed or adjusted side-to-side. Other materials, including masonite or metal strips, can also be
used to make wedge strips.
Sources for supplies: Many of these materials are available at art supply or hardware stores. If your
local retailer doesn't carry them, you can try: Blaine's Art & Graphic Supply, 2803 Spenard Road, Anchorage,
AI< 99503. Phone (907) 561-5344.
For bulk orders or information on Gatorfoam® and Fome-Cor®, contact: International Paper,
Taylorsville Rd. Statesville, NC 28677 Phone 1-(800) 362-6267.
Next issue: Guidelines for wri ting labels.
The Center for Museum Studies has announced the release of the Tribal Museum Directory, a listing
of over 150 tribal museums in North America providing general information and descriptions.
Also included is a general bibliography and a list of related organizations. The book is 48 pages,
spiral bound and available from the Center or $15. Write: Center for Museum Studies, 900 Jefferson Drive
SW Suite 2235, Smithsonian Institution, Washington, DC 20560. Or call (202) 633-8981.
Note: The American Indian Museum Studies program at the Center also has available several pamphlets
of interest to tribal museums: Traveling Exhibits for Tribal Museums, The Value of Regional and State Museum
Organizations to Tribal Museums and Cultural Centers, and Tribal Collections Management at the Makah Cultural
and Research Center. They may be obtained by writing to the above address.
/
Last summer the Skinner Corporation, the successor to the Alaska Steamship Company, approached the Alaska State Museum indicating it
. would like to donate 31 paintings and drawings by Nina Crumrine and
h~r daughter, Josephine Crumrine Liddell, to the State. The paintings had been
RECENT ACQUISITIONS
acquired by Alaska Steam in the 1930s and 1940s, and some of the husky dog
portraits by Josephine Crumrine were used on steamship menus, which many
people now collect. Nina and Josephine Crumrine have been well-known Alaska artists for more
than 50 years. Nina died in 1959. Josephine still lives part of the year in Homer.
Nina studied at the Art Institute of Chicago and Josephine studied at the Art
Center school in Los Angeles and in Chicago and Colorado. They lived in
Ketchikan and Haines, and both traveled widely in Alaska.
Discussions between the Museum, and the company led to the idea of
distributing some of the artworks to other museums around the state, since
there was some repetition of subject matter and the paintings would likely enjoy
greater public visibility. The Museum agreed to facilitate the donations to other
museums.
The State Museum received 20 pictures and arranged for the donations of 11
others to ten museums around the state. Two pastels of Juneau scenes by Nina
Crumrine went to the Juneau-Douglas City Museum and an oil of Mt.
McKinley 15y Nina went to the Anchorage Museum of History and Art. Husky
dog portraits by Josephine Crumrine went to museums in Ketchikan, Haines,
Wasilla, Fairbanks, Homer, Nome, Valdez, and Skagway. The gifts included
period frames. Decisions on where to send pictures were based on subject
matter and places in Alaska where the Crumrines had lived or worked.
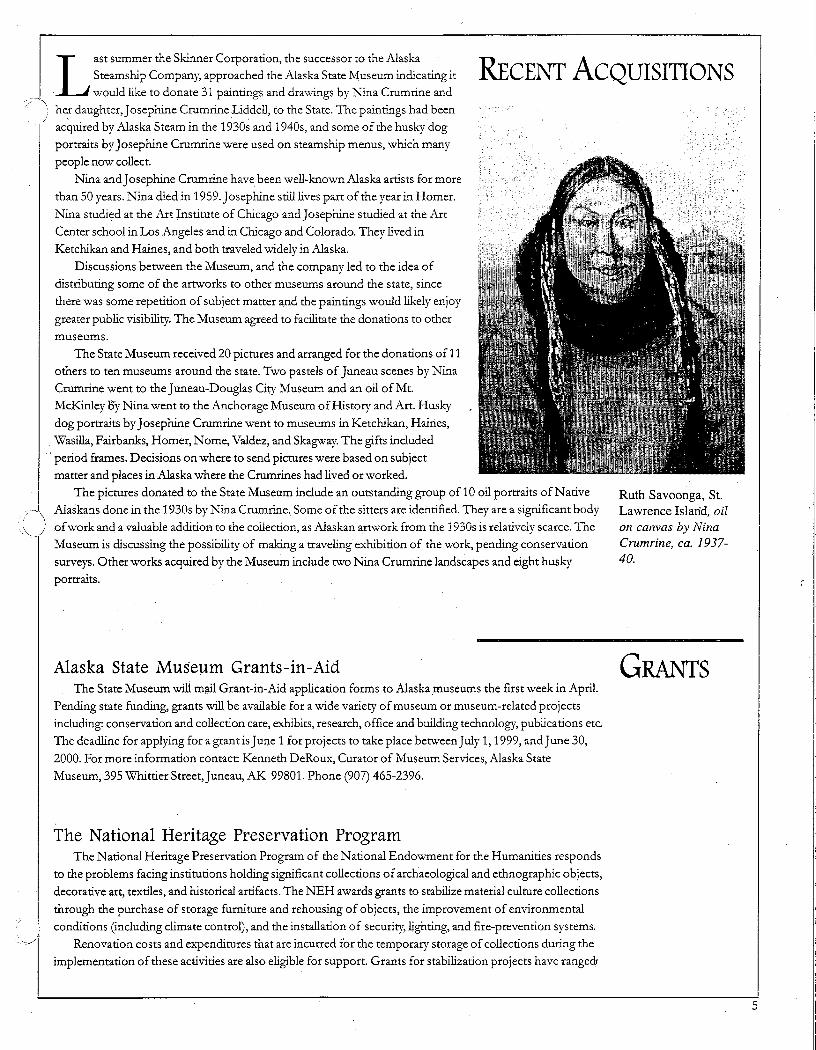
The pictures donated to the State Museum include an outstanding group ofl0 oil portraits of Native
Alaskans done in the 1930s by Nina Crumrine. Some of the sitters are identified. They are a significant body
of work and a valuable addition to the coilection, as Alaskan artwork from the 1930s is relatively scarce. Tne
Museum is discussing the possibility of making a traveling exhibition of the work, pending conservation
surveys. Other works acquired by the Museum include two Nina Crumrine landscapes and eight husky
portraits.
Alaska State Museum Grants-in-Aid The State Museum will m;til Grant-in-Aid application forms to Alaska museums the first week in April.
Pending state funding, grants will be available for a wide variety of museum or museum-related projects
including: conservation and collection care, exhibits, research, office and building technology, publications etc.
The deadline for applying for a grant is June 1 for projects to take place between J u1y 1, 1999, and June 30,
2000. For more information contact: Kenneth DeRoux, Curator of Museum Services, Alaska State
Museum, 395 Whittier Street, Juneau, AK 99801. Phone (907) 465-2396.
The National Heritage Preservation Program The National Heritage Preservation Program of the National Endowment for the Humanities responds
to the problems facing institutions holding significant collections of archaeological and ethnographic objects,
decorative art, textiles, and historical artifacts. The NEH awards grants to stabilize material culture collections
through the purchase of storage furniture and rehousing of objects, the improvement of environmental
conditions (including climate control), and the installation of security, lighting, and fire-prevention systems.
Renovation costs and expenditures that are incurred for the temporary storage of collections during the
implementation of these activities are also eligible for support. Grants for stabilization projects have rangedt
Ruth Savoonga, St. Lawrence Island, oil on canvas by Nina Crumrine, ca. 1937-40.
GRANTS
5
TRAVELING
EXHIBITS
6
in recent years from $48,000 to $700,000 for up to five years of support. Institutions are expected to
contribute at least 50 percent of the project's total cost.
Museums, historical organizations, and other institutions may also request funding to catalog and
provide enhanced descriptions of material culture collections. An NEH documentation grant enables an
institution to establish a level of intellectual control over its holdings that will significantly increase its
availability for research, exhibitions, and other humanities programs.
Awards for documentation projects have ranged from $23,000 to $211,000 for up to a three-year project.
NEH's share of the total cost of the project will not exceed 50 percent.
Deadline for applying for NHP grants is July 1. E-mail: [email protected]
Another NEH category, Public Programs grants, may fund museum exhibits. There are several
application deadlines for Public Programs: Consultation grants are May 17 and Sept. 13, 1999; Planning grants
are Nov. 1,1999; and Implementation grants are Feb. 1,2000.
For further information contact:
National Endowment for the Humanities
Public Information Office, Room 402
1100 Pennsylvania Avenue, NW
Washington, DC 20506
or e-mail your request to: [email protected]
The exhibition Belle oj the BaiL- First Ladies oj Alaska Inaugural Bafl Gowns, took center stage at the
Alaska State Museum during January and February and is now on a tour of the state.
This exhibition of ball gowns worn by Alaska's First Ladies over four decades of inaugural events
offers a fashionable perspective on the state's history. Accompanying the gowns are
photographs and other memorabilia associated with Alaska's inaugural
celebrations.
The garments range from the regal, antique gold satin gown worn by
Neva Egan, wife of Alaska's first governor, Bill Egan, to the elegant
navy blue evening dress worn by Susan Knowles in 1995.
Other First Ladies whose gowns are included are:
Ermalee Hickel, whose husband, Walter, was
governor 1966 to 1968 and 1990 to 1994; Bella
Hammond, whose husband, Jay, served two terms from 1974 to 1982;
and Michael Stewart, who was married to Steve Cowper, governor from
1986 to 1990.
The opening of the show in mid-J anuary coincided with the second
inaugural of Governor Tony Knowles and the start of the legislative
session in Juneau. The show was on display at the Anchorage
Museum of History and Art, March 5-28. Other destinations for
Befle oj the Bafl include the Sheldon Museum and Cultural Center
in Haines, April 4-22; the University of Alaska Museum in
Fairbanks, May 1-28, and the Resurrection Bay Historical
Society in Seward, June 6 to July 6.
The exhibition, organiz~d by the Alaska State
Museum, is sponsored by the General Federation of
Women's Clubs of Alaska and supported in part by
Alaska Airlines and Lynden Transport Inc.

The Alaska State Library recently added 262 images from the Alaska Purchase Centennial Collection of historical photographs, maps, graphics and manuscripts to its growing body of online
, / -" resources, available for viewing on the Internet. The collection was assembled in 1967 to represent I) key people, places and events in the state's history, as well as objects and scenes typical of Alaska. The
collection joins selected gold rush photographs and other historical photographs available on the library'S
web-site. Instructions for ordering photographs can be found there as well. Go to> http:/ / www.educ.state.ak.us/lam/library/hist/cent
Mold growth on baskets is not an uncommon occurrence. Food residue, body oil from frequent
handling and improper storage are all possible causes. High humidity and heat are ideal
environments for mold growth.
If you find mold growing on your basket:
• Place the basket in a sealed plastic bag. • Place the bagged basket in a freezer at 0° F for 48 hours. • Take th$ basket outdoors or to an isolated area (away from other objects), and carefully brush the mold
off into a vacuum cleaner using a soft bristled brush. Wear a paper face.mask to prevent inhalation of
mold spores. Use cotton swabs (with the cotton removed) to loosen hard mold accretions. Cotton
swabs slightly dampened with water will remove some mold residue as well.
• Discard the vacuum bag and any swabs immediately, otherwise mold spores may re-infect your
collection.
• Make sure the basket is completely dry before returning it to its location. If it is being returned to its
previous location, wipe the area down with a disinfectant and allow to dry thoroughly before setting the basket in place. If itis going into storage, place itin a clean plastic bag. DO NOT REUSE MOLD
INFECTED BAGS!
Mold will not grow in clean (dust free), cool, dry areas. Store baskets so that there is some air circulation.
Any substance you put on a basket to prevent mold will potentially damage its flexibility and color. The
best prevention is a dust free environment and periodic inspection.
When displaying baskets in your home, keep them out of direct sunlight or other strong light sources;
away from heat sources (heat vents, radiators or mantels above frequently used fireplaces) and preferably
under cover to prevent dust accumulation.
A symposium on Native carving is being planned for Whitehorse this summer. The symposium is a
joint project of the MacBride Museum, the Society of Yukon Artists of Native Ancestry, the
Friends of the Gallery and the Arts Branch of the Government of the Yukon. The featured carver
will be Dempsey Bob. The symposium is planned to begin June 21 and last for about three weeks. For
more information contact the McBride Museum in Whitehorse at (403) 667-2709.
IMAGE
COILECTIONS
ONLINE
How TO
DEAL WITH
MOLD IN
BASKETS
CARVING
SYl\1fOSIUM
7

NEW
TOLL-FREE
NUMBER
The Alaska State Museum has set up a toll-free number for the use of museu.ms in the state who
wish to contact the Museum Services Curator or Conservator. Since many of Alaska's smaller
museums have limited budgets, the State Museum feels the service will make it easier for these
museums to seek information or consultation when they have questions.
The new number is 1-888-913-MUSE (6873).
r--" ! • I
f----------------,------------------------,-----------J ~-"'\
Alaska State Museums Alaska State Museum 395 Whittier Street, Juneau AK 99801 Phone (907) 465-2901 Fax (907) 465-2976
Sheldon Jackson Museum 104 College Drive, Sitka AK 99835 Phone (907) 747-8981 Fax (907) 747-3004
To contact Museum Services toll-free: 1-888-913-MUSE (6873)
Email [email protected] All staff have email-first name, underscore, last
On the World Wide Web: www.educ.state.ak.us/lam/ museum/ home.html
©1999 Division of Libraries, Archives and Museums Alaska State Department of Education
Alaska State Museums 395 Whittier Street Juneau, AK 99801
/'