iprotect basic installation manual (distributed) · date:-26th aug 2017 powered by:-iprotect basic...
TRANSCRIPT

Date:-26th Aug 2017 Powered By:-
IProtect Basic Installation Manual
(Distributed)
INDEX
1. IIS Enable
2. .Net Installation Procedure
3. SQL server express installation procedure
4. SQL management studio installation procedure
5. SAP crystal reports installation procedure
6. iProtect installation procedure
7. Access service installation procedure
8. Folder privilege procedure
9. Application link

Date:-26th Aug 2017 Powered By:-
Step 1: - IIS Enable
Note: - Please refer http://www.iprotectsoftware.com/Help.aspx
1) IIS Configuration For Other OS 2) IIS Configuration For Server OS
Step 2:- .Net Installation
1. Install the .net set us using administrator
2. First Installation Start window
Date:-26th Aug 2017 Powered By:-
3.
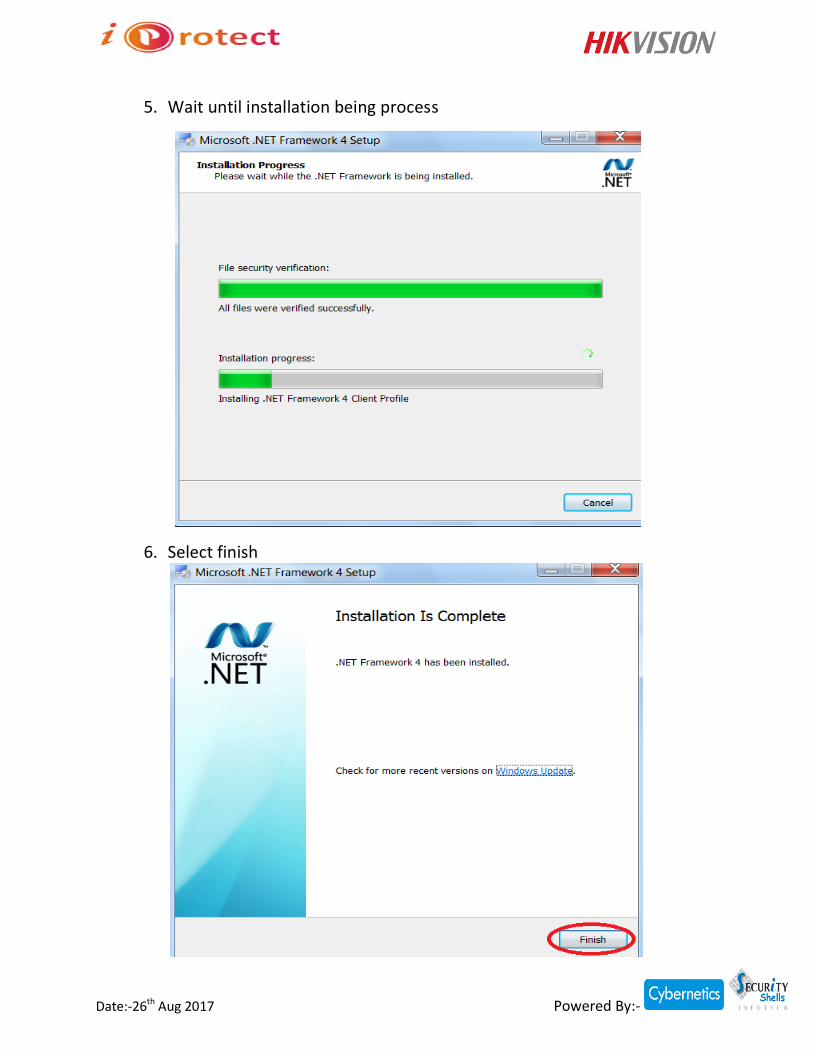
4. Select License terms and install
Date:-26th Aug 2017 Powered By:-
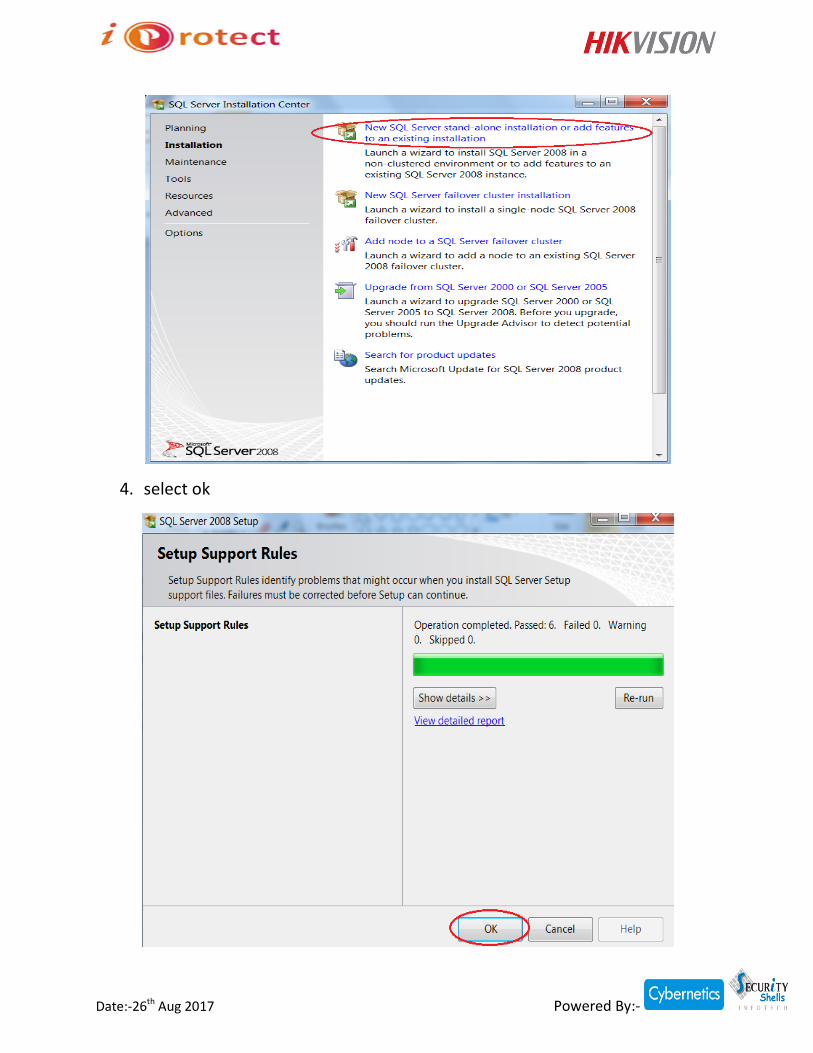
5. Wait until installation being process
6. Select finish

Date:-26th Aug 2017 Powered By:-
Step 3:- SQL Server Express Installation
1. Install SQL Express using administrator
2. After starting the SQL Express , extracting files will be come up
3. Select a. Installation option b. New SQL Server standalone installation or add features to an existing
installation

Date:-26th Aug 2017 Powered By:-
4. Select OK

Date:-26th Aug 2017 Powered By:-
5. Select Next
6. Accept the license terms and select Next
7.

Date:-26th Aug 2017 Powered By:-
7. Select Install
8. Select Next

Date:-26th Aug 2017 Powered By:-
9. Select All , Then Next
10. Select Default Instance, Then Next

Date:-26th Aug 2017 Powered By:-
11. Select Next
12. Select Account name as NT Authority\System and Startup Type for both should be Automatic, Then select Next

Date:-26th Aug 2017 Powered By:-
13. Follow the procedure a. Select the mixed mode b. Enter and confirm the password for SQL server c. Select add current user to get the server(instance) name by default d. Select next and follow the screenshot

Date:-26th Aug 2017 Powered By:-
14. Select next
15. Select next

Date:-26th Aug 2017 Powered By:-
16. Select install
17. Wait until the installation process complete

Date:-26th Aug 2017 Powered By:-
18. Select next
19. Select close

Date:-26th Aug 2017 Powered By:-
Step 4:- SQL Management studio installation manual
1. Select SQL Management studio and install it with using administrator
2. Wait until the SQL server set up being install
3. Select c. Installation option d. New SQL Server standalone installation or add features to an existing
installation
Date:-26th Aug 2017 Powered By:-
4. select ok

Date:-26th Aug 2017 Powered By:-
5. Install
6. Wait until the supporting set up installation complete

Date:-26th Aug 2017 Powered By:-
7. Select next
8. Select perform a new installation of SQL server and click next

Date:-26th Aug 2017 Powered By:-
9. Click next
10. Accept the license term and click next

Date:-26th Aug 2017 Powered By:-
11. Enter select all and click next
12. Select next

Date:-26th Aug 2017 Powered By:-
13. Select next
14. Select next

Date:-26th Aug 2017 Powered By:-
15. Install
16. Wait until installation process complete

Date:-26th Aug 2017 Powered By:-
17. Select next
18. Select close

Date:-26th Aug 2017 Powered By:-
19. After installation of SQL server express and management studio you will get the all database credential while you open SQL management studio. Please refer below screenshot.

Date:-26th Aug 2017 Powered By:-
Step 5:- SAP Crystal Report Install
1. Install Crystal report using administrator
2. Select Next

Date:-26th Aug 2017 Powered By:-
3. Accept the License Agreement and select Next
4. Select Next
Date:-26th Aug 2017 Powered By:-
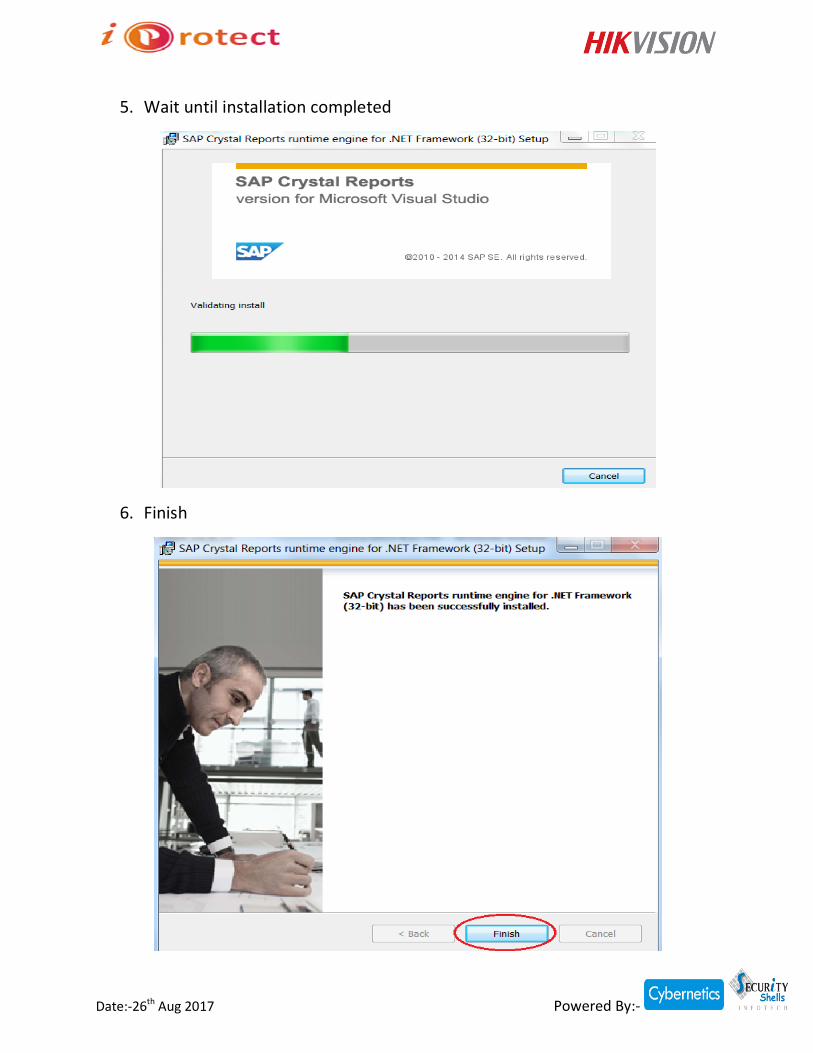
5. Wait until installation completed
6. Finish

Date:-26th Aug 2017 Powered By:-
7. NOTE:-For installing 64 bit SAP crystal report , follow the same above 32 bit SAP crystal report installation procedure
8. NOTE:- a. If operating system is 32 bit, need to install only 32 bit SAP crystal
report. b. If operating system is 64 bit, need to install both 32 bit SAP crystal
report and 64 bit SAP crystal reports.

Date:-26th Aug 2017 Powered By:-
Step 6:- iProtect installation procedure
1. Select the iProtect from the set up files and copy the path as per below screenshot
2. Follow the procedure a. Open CMD as run ad administrator b. Enter command as:- cd\ c. Enter command as:- cd (paste the path where the iprotect file is
located(note:-paste the path after cd then give space then paste)) d. Enter command as:- iprotect.msi

Date:-26th Aug 2017 Powered By:-
3. Select next
4. Enter all the DB credentials in the iProtect connection settings same as in the SQL Server. You can use different database name if you want but need to enter the same database name in the access service connection’s database credential. Refer following screenshot.

Date:-26th Aug 2017 Powered By:-
5. Select next
6. Select next

Date:-26th Aug 2017 Powered By:-
7. Wait until installation being process
8. Select close

Date:-26th Aug 2017 Powered By:-
Step 7:- Access Service installation procedure
1. Select access service and copy the access service path
2. Follow the procedure a. Open CMD as run ad administrator b. Enter command as:- cd\ c. Enter command as:- cd (paste the path where the Accessservice file is
located(note:-paste the path after cd then give space then paste)) d. Enter command as:- Accessservice.msi

Date:-26th Aug 2017 Powered By:-
3. Select next
4. Enter all the DB credentials in the Accessservice connection settings same as in the SQL Server. You can use different database name if you want but need to enter the same database name in the access service connection’s database credential. Refer following screenshot.

Date:-26th Aug 2017 Powered By:-
5. Select Everyone and then select Next
6. Select next

Date:-26th Aug 2017 Powered By:-
7. Select close

Date:-26th Aug 2017 Powered By:-
Step 8:- Folder Right
1. Follow the procedure
a. Go to the path-: C:\inetpub\wwwroot
b. Select iProtect folder and right click
c. Select properties
d. Select security
e. Give full control rights to all groups or user names
f. Apply
g. ok
Date:-26th Aug 2017 Powered By:-
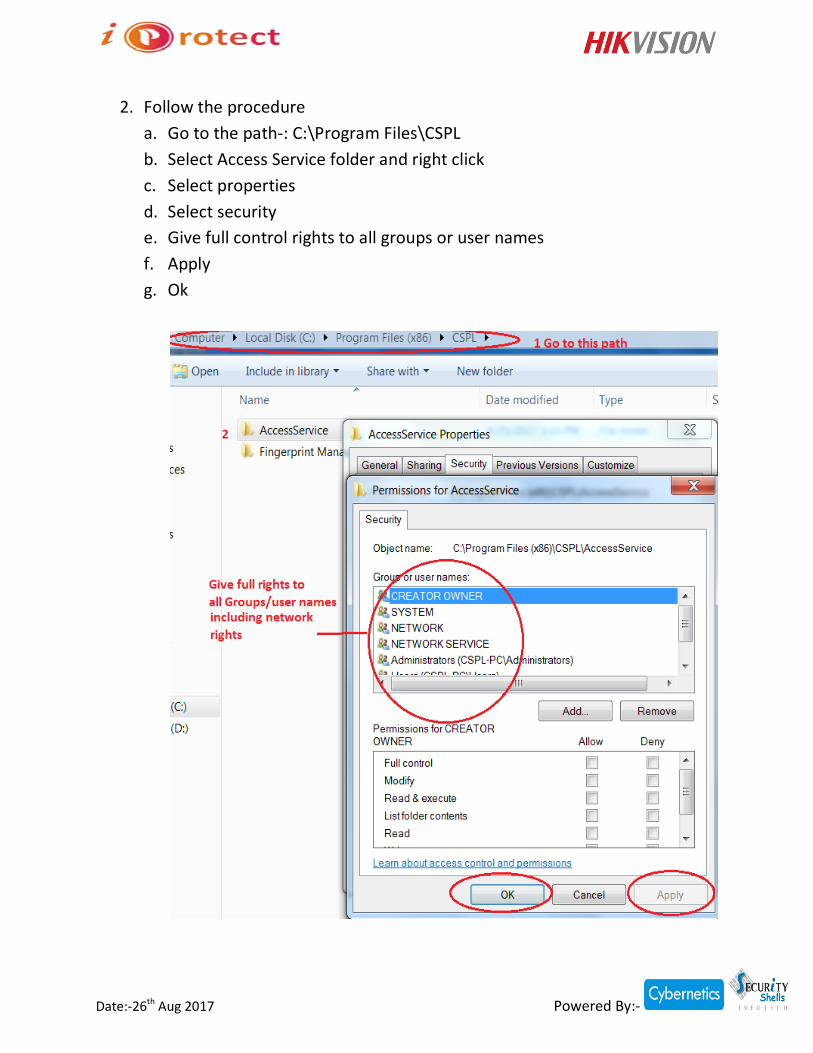
2. Follow the procedure
a. Go to the path-: C:\Program Files\CSPL
b. Select Access Service folder and right click
c. Select properties
d. Select security
e. Give full control rights to all groups or user names
f. Apply
g. Ok

Date:-26th Aug 2017 Powered By:-
Step 9:- Application link
Enter link to the browser: - Localhost/iProtect/login.aspx
Username=admin
Password=admin
------------------------------------EOD-----------------------------------------