installation instructions | betriebsanleitung | notice d ...€¦ · accumulateur interne...
TRANSCRIPT

Installation Instructions | Betriebsanleitung | Notice d’installationIstruzioni per l’installazione | Instrucciones de instalación
Built-in Rechargeable Battery | Option L9Interner Akku | Option L9Accumulateur interne rechargeable | Option L9Batteria ricaricabile interna | Opzione L9Batería recargable interna | Opción L9for Signum | Midrics Modelsfür die Signum | Midrics Modellepour les modèles Signum | Midricsper i modelli Signum | Midricspara los modelos Signum | Midrics
98647-004-20

2
English – page 3
Deutsch – Seite 11
Français – page 19
Italiano – pagina 27
Español – página 35

4 Intended Use
4 Warnings and Safety Precautions
5 Battery Symbol on the Display
5 Charging the Built-in Battery Pack
6 Charge State
7 Operating Time
10 Recycling
The following symbols are used inthese instructions:
§ indicates required steps
$ indicates steps required only under certain conditions
> describes what happens after you haveperformed a particular step
– indicates an item in a list
! indicates a hazard
Contents
3

The internal rechargeable battery pack (Option L9)provides an independent power supply for up to 10 hours of continuous operation of SartoriusSignum and Midrics models.
Warnings and Safety Precautions
§ Use of the battery pack for other than its intendedpurpose may result in personal injury or materialdamage. Read these instructions carefully before putting the equipment into operation and store them in asafe place for future reference. Make sure operating personnel have been instructed in the detection offaulty operating states and can initiate the requiredsafety measures. Please observe the following to ensure safe and reliable operation of your battery pack:
– Operate the equipment only within an ambient temperature range of 20°C to 40°C (68°F to 104°F).
– Handle the equipment with care in accordance withits IP protection rating (see the equipment operatinginstructions).
– Clean the equipment in accordance with the operat-ing instructions.
– Installation, maintenance and repair work should be performed only by service technicians trained andauthorized by Sartorius. Any installation, mainte-nance or repair work that does not conform to theinstructions in this manual will result in forfeiture of all claims under the manufacturer’s warranty.Make sure to observe all national laws and regula-tions governing the use of such equipment.
– Prevent total discharge.– Use only genuine Sartorius spare parts. This applies
in particular to special rechargeable batteries withsealed connections.
– Connect only genuine Sartorius accessories. – Connection of external battery chargers or recharge-
able battery packs is not permitted.
44
Intended Use

The equipment detects the built-in rechargeablebattery when you press the ON/OFF key.
§ The battery symbol is displayed.
Charging the Built-in Battery Pack The built-in rechargeable battery pack is chargedand recharged over the internal PCB.
§ The state of charge is indicated on the display, inincrements of 25% of total battery capacity.
– Charge the battery only in dry conditions at anambient temperature between 15°C and 30°C (59°Fto 86°F).
§ Charge the battery for 8 hours before initial use.25%
50%75%
100%
5
Battery Symbol on the Display

6
25%
50%
Charge State
The built-in rechargeable battery pack is equippedwith an electronic monitor circuit that detects deepdischarge when usage of battery power causes thevoltage to drop below a defined level. When thispoint is reached, plug in the power cord to rechargethe battery. Be sure to allow sufficient time for thebattery to recharge completely before unpluggingthe cord.
If the equipment is unsupervised and no operatortakes steps to initiate recharging, the battery willcontinue to discharge until the electronics detect a second threshold, at which point the equipment is automatically disconnected from the battery.
This prevents the battery from reaching a dischargelevel so low that it cannot be recharged again (deepdischarge threshold).
§ The battery should be recharged any time it hasbeen discharged, including after partial discharge(e.g., 50% discharge as indicated in the illustration).

Operating Time
There are three sets of configuration options in the operating menu that affect the operating time of the built-in rechargeable battery pack:
– Automatic shutoff of the scale (in accordance with timer settings)– Automatic shutoff of display backlighting (in accordance with timer settings)– Timer settings for automatic shutoff of scale or of display backlighting
When automatic shutoff functions are active, the battery goes into energy-saving mode,which extends the battery’s operating time.
Automatic Shutoff: Display Backlighting The settings for automatic shutoff of the display backlighting are configured under“Setup” in the scale operating menu.Configure the setting as follows for “Display backlighting” (menu level 8.8. under“Utilit.”):
– Automatic shutoff acc. to menu item 8.9. (after 2, 4, or 10 minutes without use).– The backlighting is switched off only after the defined period has elapsed without the
scale being used (no change in load; no keys pressed).§ Switch off the scale.§ Switch the scale back on; during the self-test, press the ) key. Open the “Setup”
submenu in the operating menu.
Level 1 Level 2 Level 3 Level 4
appl § Press )SETUP § Press k repeatedly
UTILIT § Press )§ Press k repeatedly
8. § Press )§ Press k repeatedly
8.8. § Press )§ Press k repeatedly
8.8.1 § Press ); Auto on “On” 8.8.2 § Press k; Auto off “Off”
o 8.8.3 § Press k; “Automatic shutoff” § Press ); “o” is displayed, indicating
that this item is set.§ Press and hold ) (> 2 sec) to exit the
menu.
77

Automatic Shutoff: Scale The settings for automatic shutoff of the scale are configured under “Setup” in the scaleoperating menu.
– With the “Automatic shutoff” setting, the scale is shut off after 2, 4 or 10 minutes with-out use, depending on the timer setting.
§ Switch off the scale.§ Switch the scale back on; during the self-test, press the ) key. Open the “Setup”
submenu in the operating menu.
Level 1 Level 2 Level 3 Level 4
SETUP § Press )utilit § Press k repeatedly
8. § Press )8.7.1 (Yes) § Press k repeatedly; “Automatic shutoff”
o 8.7.2 (No) § Press ); “o” is displayed, indicating that this item is set.
§ Press and hold ) (> 2 sec) to exit themenu.
8

Timer Settings for the Scale The timer settings for
– Automatic shutoff of display backlighting, and – Automatic shutoff of the scale
are configured under “Setup” in the scale operating menu.depending on the menu settings, the scale/backlighting shuts off automatically after 2, 4 or 10 minutes without use.
§ Switch off the scale.§ Switch the scale back on; during the self-test, press the ) key. Open the “Setup”
submenu in the operating menu.
Level 1 Level 2 Level 3 Level 4
SETUP § Press )utilit § Press k repeatedly
8. § Press )§ Press k repeatedly
o 8.9.1 § Press ); “Automatic shutoff after 2 minutes”
8.9.2 § Press ); “Automatic shutoff after 4 minutes”
8.9.3 § Press ); “Automatic shutoff after 10 minutes”
§ Press ); “o” is displayed, indicatingthat this item is set.
§ Press and hold ) (> 2 sec) to exit themenu.
When a timer setting is configured, the “weighing” symbol on the display starts flashingwhen the first half of the configured period has elapsed.
9

Recycling
§ The battery contains toxic substancesthat are harmful to the environment. Do not dispose of it in normal house-hold waste.
In Germany and many other countries(see www.sartorius.com, Service Down-load area for details), Sartorius AG orthe organization contracted by us takescare of the return and legally compliantdisposal of its electrical and electronicequipment on its own. In countries thatare not members of the European Eco-nomic Area (EEA) or where no Sartoriussubsidiaries or dealerships are located,please contact your local authorities ora commercial disposal operator.These products may not be placed withthe household waste or brought to col-lection centers run by local public dis-posal operations – not even by smallcommercial operators.
For disposal in Germany and in theother member nations of the EuropeanEconomic Area (EEA), please contactour service technicians on location or our Service Center in Goettingen,Germany:
Sartorius AGService CenterWeender Landstrasse 94-10837075 Goettingen, Germany
Prior to disposal and/or scrapping of the equipment, any batteries shouldbe removed and disposed of in localcollection boxes.
Sartorius AG, its affiliates, subsidiaries,dealers and distributors will not takeback equipment contaminated withhazardous materials (ABC contamina-tion) – either for repair or disposal.
Please refer to the accompanyingleaflet/manual or visit our Internet website (www.sartorius.com) for com-prehensive information that includesour service addresses to contact if youplan to send your equipment in forrepairs.
If you no longer need the packagingafter successful installation of theequipment, you should return it forrecycling. The packaging is made fromenvironmentally friendly materials andis a valuable source of secondary rawmaterial.
The equipment, includingaccessories and batteries,does not belong in your regular household waste.
10

Inhalt
12 Verwendungszweck
12 Sicherheits- und Warnhinweise
13 Akku-Symbol im Display
13 Aufladung des internen Akku-Pack
14 Batteriezustand
15 Betriebszeit
18 Entsorgung
ZeichenerklärungFolgende Symbole werden in dieserAnleitung verwendet:
§ steht vor Handlungsanweisungen
$ steht vor Handlungsanweisungen,die nur unter bestimmten Voraus-setzungen ausgeführt werden sollen
> beschreibt das, was nach einer ausgeführten Handlung geschieht
– steht vor einem Aufzählungspunkt
!weist auf eine Gefahr hin
11

Verwendungszweck
Der internen Akkupack (Option L9) für Signum oderMidrics Modelle ist ein interner wieder aufladbarerBatterie-Pack und dient der netzunabhängigenStromversorgung (bei kontinuierlichem Betrieb: biszu 10 Stunden) von Sartorius-Geräten.
Sicherheits- und Warnhinweise
§ Ein unsachgemäßer Gebrauch kann zu Personenoder Sachschäden führen. Die Anleitung vor derInbetriebnahme aufmerksam durchlesen undsorgfältig aufbewahren. Bedienpersonal einweisen,so dass fehlerhafte Betriebszustände erkannt und dieerforderlichen Sicherheitsmaßnahmen eingeleitetwerden können.Folgende Hinweise sind für einen sicheren und pro-blemlosen Betrieb mit dem Gerät zu beachten:
– Gerät nur in einer Umgebungstemperatur von 20°Cbis +40°C betreiben.
– Das Gerät entsprechend dem IP-Schutz (sieheBetriebsanleitung) sorgfältig behandeln.
– Anweisungen zur Reinigung des Gerätes beachten,siehe Betriebsanleitung des Gerätes.
– Ein Eingriff in das Gerät sollte nur durch Sartoriusgeschultes und autorisiertes Personal erfolgen. Ein unsachgemäßer Eingriff führt zum Verlust derGarantieansprüche. Nationale Gesetze und Vorschriften sind zu beachten.
– Tiefentladung vermeiden.– Nur Originalersatzteile von Sartorius verwenden.
Dazu gehören auch spezielle Akkus mit besondersvergossenen Anschlüssen.
– Nur Originalzubehör verwenden.– Ein Anschluss externer Ladegeräte oder Akku-Packs
ist nicht erlaubt!
12

Akku-Symbol im Display
Das Gerät erkennt den eingebauten internen Akkunach Betätigung der ON/OFF-Taste.
§ Das Akku-Symbol des internen Akku-Pack erscheintim Display.
Aufladung des internenAkku-Pack Die Aufladung und Wiederaufladung des internenAkku-Pack erfolgt von der internen Platine.
§ Die Ladezustände werden im Display angezeigt. DieAnzeige der Aufladung erfolgt in 25% Schritten.
– Laden in trockener Umgebung bei einer Umgebung-stemperatur zwischen 15°C und 30°C.
§ Vor dem ersten Gebrauch 8 h aufladen.
13
25%
50%75%
100%

Batteriezustand
Der interne Akku-Pack verfügt über eine elektroni-sche Überwachungsschaltung. Die Schaltungerkennt einen Entlastungs-Tiefenwert, wenn dieSpannung aufgrund der entnommenen Energie aufeinen festgelegten Wert abgesunken ist. Der Akku-Pack sollte dann vollständig aufgeladen werden,sobald der Netzstecker eingesteckt wird.
Falls das Sartorius-Gerät unbeaufsichtigt bleibt und somit der Benutzer nicht eingreifen kann, wirddie Batterie weiter entladen, bis die Elektronik einezweite Spannungsschwelle erkennt und das ange-schlossene Gerät automatisch von der Batterietrennt.
Dies verhindert, das die Batterie soweit entladenwird, das sie nicht wieder aufgeladen werden kann(Tiefentladeschwelle).
§ Nach jeder Entladung – auch bei Teilentladungen,hier 50% – den Akku-Pack wieder aufladen.
14
25%
50%

Betriebszeit
Die Betriebszeit des internen Akku-Pack kann durch Einstellungen im Waagenbetriebsme-nü beeinflusst werden:
– Abschaltautomatik der Hinterleuchtung des Displays gemäß Timereinstellung – Abschaltautomatik der Waage gemäß Timereinstellung – Timereinstellung für die Abschaltautomatik (für Hinterleuchtung oder Abschaltautomatik)
Durch diese Einstellungen wird der interne Akku-Pack in einem »Stromsparmodus« betrie-ben und so die Betriebszeit der Waage verlängert.
Abschaltautomatik der Hinterleuchtung Die Abschaltautomatik für die Hinterleuchtung erfolgt im »Setup« des Waagenbetriebsme-nüs der Waage.Im Menüpunkt »Hinterleuchtung« wird die Einstellung wie folgt gewählt:
– Die Hinterleuchtung schaltet sich gemäß Timereinstellung (2, 4, 10 Min) automatisch ab.– Die Hinterleuchtung schaltet sich nur dann aus, wenn an dem Gerät nicht gearbeitet und
kein Tastendruck oder Wägewechsel erfolgt.
§ Das Gerät ausschalten.§ Das Gerät einschalten, während des Anzeigechecks die )-Taste drücken.
Im »Setup« die Einstellungen vornehmen.
Ebene 1 Ebene 2 Ebene 3 Ebene 4
appl § )-Taste drücken SETUP § k-Taste mehrmals drücken
UTILIT § )-Taste drücken § k-Taste mehrmals drücken
8. § )-Taste drücken § k-Taste mehrmals drücken
8.8. § )-Taste drücken § k-Taste mehrmals drücken
8.8.1 § )-Taste drücken, Hinterleuchtung »AUTOMATISCH EIN«
8.8.2 § k-Taste, Hinterleuchtung »AUTOMATISCH AUS«
o 8.8.3 § k-Taste, Hinterleuchtung »AUTOMATISCH ABSCHALTEN«
§ )-Taste drücken, »o« erscheint, derneue Menüpunkt ist eingestellt.
§ )-Taste lang drücken, das Menü verlassen.
15

Abschaltautomatik der Waage Die Abschaltautomatik für die Waage erfolgt im »Setup« des Waagenbetriebsmenüs derWaage.
– Nach der Einstellung »AUTO-OFF« wird das Gerät gemäß Timereinstellung (2, 4, 10 Min)abgeschaltet.
§ Das Gerät ausschalten.§ Das Gerät einschalten, »Setup« aufrufen gemäß Betriebsanleitung.
Ebene 1 Ebene 2 Ebene 3 Ebene 4
SETUP § )-Taste drücken utilit § k-Taste mehrmals drücken
8. § )-Taste drücken 8.7.1 (ja) § k-Taste mehrmals drücken
»AUTOMATISCH ABSCHALTEN« 8.7.2 (nein) § )-Taste drücken, »o« erscheint,
der neue Menüpunkt ist eingestellt.§ )-Taste lang drücken, das Menü
verlassen.
16

Timereinstellung der Waage Die Timereinstellung für die Menüpunkte:
– »Abschaltautomatik der Hinterleuchtung« oder – »Abschaltautomatik der Waage« erfolgt im »Setup« des Waagenbetriebsmenüs der Waage.
Je nach der Menüeinstellung »TIMER« wird das Gerät oder die Hinterleuchtung gemäß dervorherigen Einstellungen nach (2, 4, 10 Min) abgeschaltet.
§ Das Gerät ausschalten.§ Das Gerät einschalten, »Setup« aufrufen.
Ebene 1 Ebene 2 Ebene 3 Ebene 4
SETUP § )-Taste drückenutilit § k-Taste mehrmals drücken
8. § )-Taste drücken § k-Taste mehrmals drücken
o 8.9.1 § )-Taste drücken, »AUTOMATISCHAUS« nach 2 Minuten auswählen
8.9.2 § )-Taste drücken, »AUTOMATISCHAUS« nach 4 Minuten auswählen
8.9.3 § )-Taste drücken, »AUTOMATISCHAUS« nach 10 Minuten auswählen
§ )-Taste drücken, »o« erscheint, der neue Menüpunkt ist eingestellt.
§ )-Taste lang drücken, das Menü verlassen.
Ist eine Abschaltzeit im Waagenbetriebsmenü aktiviert, blinkt nach der Hälfte der ablaufenden Zeit das Wägesymbol in der Anzeige.
17

Entsorgung
§ Die Batterie enthält umweltschädlicheStoffe (Blei) und darf somit nicht in dennormalen Müll entsorgt werden.
In Deutschland und einigen anderenLändern, siehe unter:www.sartorius.com Download-BereichService führt die Sartorius AG oder dievon uns beauftragten Organisationendie ordnungsgemäße Rücknahme undgesetzeskonforme Entsorgung Ihrer von der Sartorius AG erworbenen elek-trischen und elektronischen Produkteselbst durch. In Ländern, die keine Mitglieder des Europäischen Wirt-schaftsraumes sind oder in denen eskeine Sartorius-Filialen gibt, sprechenSie bitte die örtlichen Behörden oder Ihr Entsorgungsunternehmen an. DieseProdukte dürfen nicht – auch nicht vonKleingewerbetreibenden– in den Haus-müll oder an Sammelstellen der ört-lichen öffentlichen Entsorgungsbetriebeabgegeben werden. Hinsichtlich derEntsorgung wenden Sie sich daher inDeutschland wie auch in den Mitglieds-staaten des Europäischen Wirtschafts-raumes bitte an unsere Service-Mitarbeiter vor Ort oder an unsere Service-Zentrale in Göttingen:
Sartorius AGServicezentrumWeender Landstrasse 94–10837075 Göttingen
Vor der Entsorgung bzw. Verschrottungdes Gerätes sollten die Batterien ent-fernt werden und einer Sammelstelleübergeben werden.
Mit gefährlichen Stoffen kontaminierteGeräte (ABC-Kontamination) werdenweder zur Reparatur noch zur Entsor-gung zurückgenommen.
Ausführliche Informationen mit Service-Adressen zur Reparaturannahme IhresGerätes können Sie auf unserer Inter-netseite (www.sartorius.com) findenoder über den Sartorius Service anfor-dern.
Wird die Verpackung nicht mehr benö-tigt, diese der örtlichen Müllentsorgungzuführen. Die Verpackung bestehtdurchweg aus umweltverträglichenMaterialien, die als wertvolle Sekundär-rohstoffe dienen.
Das Gerät inklusive Zubehörund Batterien gehört nicht in den Hausmüll.
18

19
Table des matières
20 Description générale
20 Conseils de sécurité
21 Symbole de pile sur l’afficheur
21 Chargement de l’accumulateur interne
22 Etat de la batterie
23 Durée de fonctionnement
26 Recyclage
Signification des symbolesLes symboles suivants sont utilisés dansce mode d’emploi :
§ indique une action qu’il est conseilléd’effectuer,
$ indique une action qu’il est conseilléd’effectuer uniquement sous certaines conditions,
> décrit ce que provoque l’action quevous venez d’effectuer,
– est placé devant une énumération,
! indique un danger.
Description générale
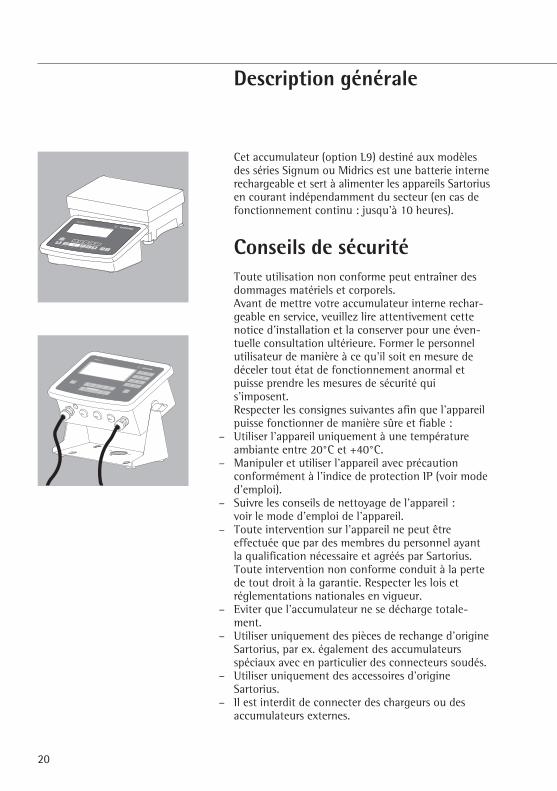
Cet accumulateur (option L9) destiné aux modèlesdes séries Signum ou Midrics est une batterie internerechargeable et sert à alimenter les appareils Sartoriusen courant indépendamment du secteur (en cas defonctionnement continu : jusqu’à 10 heures).
Conseils de sécurité Toute utilisation non conforme peut entraîner desdommages matériels et corporels. Avant de mettre votre accumulateur interne rechar-geable en service, veuillez lire attentivement cettenotice d’installation et la conserver pour une éven-tuelle consultation ultérieure. Former le personnelutilisateur de manière à ce qu’il soit en mesure dedéceler tout état de fonctionnement anormal etpuisse prendre les mesures de sécurité qui s’imposent.Respecter les consignes suivantes afin que l’appareilpuisse fonctionner de manière sûre et fiable :
– Utiliser l’appareil uniquement à une températureambiante entre 20°C et +40°C.
– Manipuler et utiliser l’appareil avec précautionconformément à l’indice de protection IP (voir moded’emploi).
– Suivre les conseils de nettoyage de l’appareil : voir le mode d’emploi de l’appareil.
– Toute intervention sur l’appareil ne peut être effectuée que par des membres du personnel ayantla qualification nécessaire et agréés par Sartorius.Toute intervention non conforme conduit à la pertede tout droit à la garantie. Respecter les lois etréglementations nationales en vigueur.
– Eviter que l’accumulateur ne se décharge totale-ment.
– Utiliser uniquement des pièces de rechange d’origineSartorius, par ex. également des accumulateurs spéciaux avec en particulier des connecteurs soudés.
– Utiliser uniquement des accessoires d’origine Sartorius.
– Il est interdit de connecter des chargeurs ou desaccumulateurs externes.
20

21
Symbole de pile sur l’afficheur
L’appareil reconnaît l’accumulateur interne rechar-geable lorsque l’on appuie sur la touche ON/OFF.
§ Le symbole de pile s’affiche.
Chargement de l’accumulateur interneLe chargement et le rechargement de l’accumulateurinterne s’effectuent à partir de la carte interne decircuits intégrés.
§ L’état de charge est représenté à l’affichage parpaliers de 25%.
– Charger l’accumulateur dans un environnement secà une température ambiante entre 15°C et 30°C.
§ Avant la première utilisation, charger l’accumulateurpendant 8 heures.
25%
50%75%
100%

Etat de la batterie
L’accumulateur interne rechargeable est équipé d’un circuit électronique de surveillance. Le circuit détecte une valeur de décharge profondesi en raison de l’énergie prélevée, la tension est descendue en dessous d’une valeur déterminée.L’accumulateur doit alors être entièrement rechargéen rebranchant le cordon d’alimentation dans laprise secteur.
Si l’appareil Sartorius reste sans surveillance et que l’opérateur ne peut donc pas intervenir, l’accumulateur continue à se décharger jusqu’à ceque l’électronique détecte un second seuil de tension et déconnecte automatiquement l’appareilraccordé de l’accumulateur.
Cela évite que l’accumulateur ne soit déchargé au point de ne plus pouvoir être rechargé (seuil dedécharge totale).
§ Après chaque décharge – même des décharges partielles, ici 50% – recharger l’accumulateur.
22
25%
50%

La durée de fonctionnement de l’accumulateur interne rechargeable peut être réglée dans le menu d’exploitation de la balance :
– Dispositif d’arrêt automatique du rétroéclairage de l’afficheur en fonction du réglage de l’horloge
– Dispositif d’arrêt automatique de la balance en fonction du réglage de l’horloge– Réglage de l’horloge pour le dispositif d’arrêt automatique (du rétroéclairage ou de la
balance)Ces réglages permettent d’utiliser l’accumulateur interne rechargeable en « mode d’économie d’énergie » et donc de prolonger la durée de fonctionnement de la balance.
Dispositif d’arrêt automatique du rétroéclairageLe dispositif d’arrêt automatique du rétroéclairage se règle dans le « Setup » du menud’exploitation de la balance.Sous l’option du menu « Rétroéclairage », effectuer le réglage de la manière suivante :
– Le rétroéclairage s’arrête automatiquement en fonction du réglage de l’horloge (2, 4, 10 min).
– Le rétroéclairage s’arrête uniquement si on ne se sert pas de l’appareil, si on n’appuie suraucune touche et si on ne change pas l’échantillon à peser.
§ Eteindre l’appareil.§ Mettre l’appareil en marche et pendant le test de l’affichage, appuyer sur la touche ).
Effectuer les réglages dans le Setup.
Niveau 1 Niveau 2 Niveau 3 Niveau 4
appl § Appuyer sur la touche )SETUP § Appuyer plusieurs fois sur la touche k
UTILIT § Appuyer sur la touche )§ Appuyer plusieurs fois sur la touche k
8. § Appuyer sur la touche )§ Appuyer plusieurs fois sur la touche k
8.8. § Appuyer sur la touche )§ Appuyer plusieurs fois sur la touche k
8.8.1 § Appuyer sur la touche ), rétroéclairage« EN SERVICE AUTOMATIQUE »
8.8.2 § Appuyer sur la touche k, rétroéclairage« HORS SERVICE AUTOMATIQUE »
o 8.8.3 § Appuyer sur la touche k, rétroéclairage« ARRET AUTOMATIQUE »
§ Appuyer sur la touche ), « o » apparaît ;la nouvelle option du menu est réglée.
§ Appuyer longuement sur la touche ),quitter le menu.
23
Durée de fonctionnement

Dispositif d’arrêt automatique de la balance Le dispositif d’arrêt automatique de la balance se règle dans le « Setup » du menu d’exploitation de la balance.
– Une fois que « AUTOMATIQUE HORS SERVICE » a été réglé, l’appareil s’éteint en fonctiondu réglage de l’horloge (2, 4, 10 min).
§ Eteindre l’appareil.§ Mettre l’appareil en marche et appeler le « Setup » comme indiqué dans le mode d’emploi.
Niveau 1 Niveau 2 Niveau 3 Niveau 4
SETUP § Appuyer sur la touche )utilit § Appuyer plusieurs fois sur la touche k
8. § Appuyer sur la touche )8.7.1 (oui) § Appuyer plusieurs fois sur la touche k
« ARRET AUTOMATIQUE »o 8.7.2 (non) § Appuyer sur la touche ), « o » apparaît ;
la nouvelle option du menu est réglée. § Appuyer longuement sur la touche ),
quitter le menu.
24

Réglage de l’horloge de la balance Le réglage de l’horloge pour les options du menu :
– « Arrêt automatique du rétroéclairage » ou – « Arrêt automatique de la balance »
a lieu dans le « Setup » du menu d’exploitation de la balance.Selon le réglage du menu « HORLOGE », l’appareil ou le rétroéclairage s’arrêtent au boutde 2, 4, 10 minutes en fonction des réglages effectués auparavant.
§ Eteindre l’appareil.§ Mettre l’appareil en marche et appeler le « Setup ».
Niveau 1 Niveau 2 Niveau 3 Niveau 4
SETUP § Appuyer sur la touche )utilit § Appuyer plusieurs fois sur la touche k
8. § Appuyer sur la touche )§ Appuyer plusieurs fois sur la touche k
o 8.9.1 § Appuyer sur la touche ), sélectionner « ARRET AUTOMATIQUE » après 2 minutes
8.9.2 § Appuyer sur la touche ), sélectionner « ARRET AUTOMATIQUE » après 4 minutes
8.9.3 § Appuyer sur la touche ), sélectionner « ARRET AUTOMATIQUE » après 10 minutes
§ Appuyer sur la touche ), « o » apparaît ;la nouvelle option du menu est réglée.
§ Appuyer longuement sur la touche ),quitter le menu.
Si une durée est activée dans le menu d’exploitation de la balance, le symbole de peséeclignote à l’affichage lorsque la moitié de cette durée s’est écoulée.
25
Recyclage
§ L’accumulateur contient des substancespolluantes (plomb) et ne doit donc pasêtre jeté dans les ordures ménagères.
En Allemagne et dans quelques autrespays (voir sous www.sartorius.com, service Download), la société Sartorius AGou les organismes que nous avons chargés de cette tâche se chargent dereprendre et d’éliminer les équipementsélectriques et électroniques d’origineSartorius conformément à la loi. Dans les pays qui ne font pas partie del’Espace Economique Européen ou danslesquels Sartorius n’a ni filiale, ni suc-cursale, ni revendeur, veuillez vousadresser aux autorités locales ou à l’entreprise chargée de l’élimination de vos déchets.
Ces appareils ne doivent pas être jetés(même par de petites entreprises) dansles ordures ménagères ni apportés dansles points de collecte des services locauxd’élimination des déchets.
Pour obtenir de plus amples renseigne-ments sur l’élimination des déchets,veuillez vous adresser en Allemagne,tout comme dans les Etats membres del’Espace Economique Européen, à notreresponsable local du service après-venteou à notre centre de service après-venteà Goettingen en Allemagne :
Sartorius AGService CenterWeender Landstrasse 94-10837075 GoettingenAllemagne
Les piles, batteries et accumulateursrechargeables ou non doivent être enlevés avant de jeter l’appareil ou de lemettre au rebut et ils doivent être jetésdans les boîtes de collecte locales prévues à cet effet.
Les appareils contaminés par des substances dangereuses (contaminationsNBC) ne sont pas repris par SartoriusAG, ses filiales, ses succursales ni par sesrevendeurs pour être réparés ou éliminés.
Veuillez consulter la notice explicativeou visiter notre site Internet (www.sartorius.com) pour obtenirdavantage de renseignements ainsi que les adresses des centres de serviceaprès-vente à contacter si vous envisa-gez le renvoi en réparation, l’éliminationou le recyclage de votre appareil.
Si vous n’avez plus besoin de l’emballagede votre appareil, veuillez l’apporter auservice local de retraitement desdéchets.
Cet emballage se compose entièrementde matériaux écologiques pouvant êtrerecyclés.
L’appareil, y compris lesaccessoires, les piles et lesbatteries, ne doit pas êtrejeté dans les ordures ménagères normales.
26
Indice
28 Uso previsto
28 Avvertenze ed indicazioni per la sicurezza
29 Simbolo della batteria sul display
29 Carica del gruppo batterie interno
30 Stato della batteria
31 Durata di servizio
34 Istruzioni per lo smaltimento
Spiegazione dei simboli:
§ precede le istruzioni operative
$ indica le operazioni da eseguirsi solo incerte condizioni
> descrive cosa accade dopo l’esecuzionedi un’operazione
– precede una voce di elencazione
! indica un pericolo
27

Uso previsto
La batteria ricaricabile interna (opzione L9) per i modelli Signum o Midrics consiste in un gruppobatterie ricaricabile interno che provvede all’alimen-tazione indipendente (in caso di funzionamentoininterrotto: fino a 10 ore) degli apparecchi Sartorius.
Avvertenze ed indicazioniper la sicurezza
§ Un uso inappropriato può causare danni a cose e persone. Leggere attentamente le istruzioni perl’uso prima della messa in servizio e conservarle concura. Istruire il personale addetto in modo da evitareun utilizzo inappropriato e di poter prendere le necessarie misure per la sicurezza.Per un funzionamento sicuro e senza problemi dell’apparecchio osservare le seguenti indicazioni:
– Utilizzare l’apparecchio solo ad una temperaturaambiente di 20°...+40°C.
– Trattare l’apparecchio con cura, in conformità con il grado di protezione IP (vedere le istruzioni perl’uso).
– Osservare le indicazioni per la pulitura dell’apparec-chio, vedere le istruzioni per l’uso dell’apparecchio.
– Ogni intervento sull’apparecchio dovrebbe essereeffettuato solo da personale formato ed autorizzatoda Sartorius. Un intervento non appropriato porta aldecadimento dei diritti di garanzia. Osservare le leggie le normative nazionali in materia.
– Evitare la scarica profonda del gruppo batterie.– Utilizzare solo pezzi di ricambio originali Sartorius
che comprendono anche accumulatori speciali dotatidi attacchi particolari a testa fusa.
– Utilizzare solo accessori originali.– È vietato collegare un carica-batterie o un gruppo di
batterie esterni
28

Simbolo della batteria sul display
L’apparecchio riconosce la batteria ricaricabile interna dopo che è stato premuto il tasto ON/OFF.
§ Il simbolo del gruppo batterie interno viene visualizzato sul display.
Carica del gruppo batterieinternoLa carica e la ricarica del gruppo batterie internoviene effettuata dalla scheda madre interna.
§ I diversi stati di carica vengono visualizzati suldisplay. La carica viene visualizzata in incrementi del25%.
– Procedere alla carica in luogo asciutto e con unatemperatura ambiente tra 15°C–30°C.
§ Caricare per 8 ore prima di utilizzare l’apparecchioper la prima volta.
29
25%
50%75%
100%
Stato della batteria
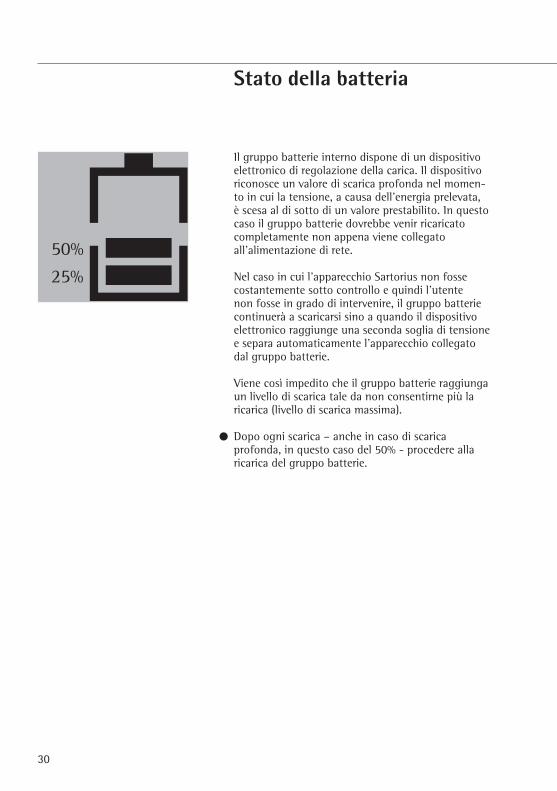
Il gruppo batterie interno dispone di un dispositivoelettronico di regolazione della carica. Il dispositivoriconosce un valore di scarica profonda nel momen-to in cui la tensione, a causa dell’energia prelevata, è scesa al di sotto di un valore prestabilito. In questocaso il gruppo batterie dovrebbe venir ricaricatocompletamente non appena viene collegato all’alimentazione di rete.
Nel caso in cui l’apparecchio Sartorius non fossecostantemente sotto controllo e quindi l’utente non fosse in grado di intervenire, il gruppo batteriecontinuerà a scaricarsi sino a quando il dispositivoelettronico raggiunge una seconda soglia di tensionee separa automaticamente l’apparecchio collegatodal gruppo batterie.
Viene così impedito che il gruppo batterie raggiungaun livello di scarica tale da non consentirne più laricarica (livello di scarica massima).
§ Dopo ogni scarica – anche in caso di scarica profonda, in questo caso del 50% - procedere allaricarica del gruppo batterie.
30
25%
50%

Durata di servizio
La durata di servizio del gruppo batterie interno può essere influenzata attraverso leimpostazioni effettuate nel menu di comando della bilancia, ossia:
– Disattivazione automatica della retroilluminazione del display secondo l’impostazione deltimer
– Spegnimento automatico della bilancia secondo l’impostazione del timer– Impostazione del timer per la disattivazione automatica (per la retroilluminazione o lo
spegnimento automatico)Grazie a queste impostazioni il gruppo batterie interno funziona in “modalità di risparmiocorrente” e in questo modo viene prolungata la durata di servizio della bilancia.
Disattivazione automatica della retroilluminazioneLa disattivazione automatica della retroilluminazione può essere impostata sotto “Configurazione” nel menu operativo della bilancia.Alla voce di menu “Retroilluminazione” effettuare l’impostazione come segue:
– La retroilluminazione viene disattivata automaticamente a seconda dell’impostazione deltimer (2, 4, 10 min.).
– La retroilluminazione viene disattivata solo quando l’apparecchio non viene utilizzato e non viene premuto alcun tasto o non viene effettuata alcuna pesata.
§ Spegnere l’apparecchio.§ Accendere l’apparecchio e premere il tasto ) durante il controllo del display.
Effettuare le impostazioni sotto la voce “Configurazione”.
Livello 1 Livello 2 Livello 3 Livello 4
appl § Premere il tasto )SETUP § Premere ripetutamente il tasto k
UTILIT § Premere il tasto )§ Premere ripetutamente il tasto k
8. § Premere il tasto )§ Premere ripetutamente il tasto k
8.8. § Premere il tasto )§ Premere ripetutamente il tasto k
8.8.1 § Premere il tasto ), retroilluminazione“AUTO ON”
8.8.2 § Premere il tasto k, retroilluminazione“AUTO OFF”
o 8.8.3 § Premere il tasto k, retroilluminazione“DISATTIVAZIONE AUTOMATICA”
§ Premere il tasto ), appare «o», la nuovavoce di menu è ora impostata.
§ Premere a lungo il tasto ) ed uscire dal menu.
31

Spegnimento automatico della bilanciaLo spegnimento automatico della bilancia può essere impostato sotto “Configurazione”nel menu operativo della bilancia.
– Con l’impostazione “AUTO OFF” l’apparecchio viene spento secondo l’impostazione deltimer (2, 4, 10 min.).
§ Spegnere l’apparecchio.§ Accendere l’apparecchio, richiamare la voce “Configurazione” secondo il manuale
d’istruzione.
Livello 1 Livello 2 Livello 3 Livello 4
SETUP § Premere il tasto )UTILIT § Premere ripetutamente il tasto k
8. § Premere il tasto )8.7.1 (sì) § Premere ripetutamente il tasto k,
“SPEGNIMENTO AUTOMATICO”o 8.7.2 (no) § Premere il tasto ), appare «o», la nuova
voce di menu è ora impostata.§ Premere a lungo il tasto ) ed uscire
dal menu.
32

Impostazione del timer della bilanciaL’impostazione del timer per le voci di menu:
– “Disattivazione automatica della retroilluminazione” o– “Spegnimento automatico della bilancia”
può essere effettuata sotto la voce “Configurazione” nel menu operativo della bilancia.A seconda dell’impostazione di menu sotto “TIMER” l’apparecchio o la retroilluminazionevengono disattivati dopo (2,4, 10 min.) in base alle impostazioni effettuate in precedenza.
§ Spegnere l’apparecchio.§ Accendere l’apparecchio, richiamare la voce “Configurazione”.
Livello 1 Livello 2 Livello 3 Livello 4
SETUP § Premere il tasto )utilit § Premere ripetutamente il tasto k
8. § Premere il tasto )§ Premere ripetutamente il tasto k
o 8.9.1 § Premere il tasto ), selezionare “AUTO OFF” dopo 2 minuti
8.9.2 § Premere il tasto ), selezionare “AUTO OFF” dopo 4 minuti
8.9.3 § Premere il tasto ), selezionare “AUTO OFF” dopo 10 minuti
§ Premere il tasto ), appare «o», la nuovavoce di menu è ora impostata.
§ Premere a lungo il tasto ) ed uscire dal menu.
Se nel menu operativo della bilancia è attivato un tempo di spegnimento, sul display lampeggia il simbolo di pesata, una volta trascorsa la metà del tempo impostato.
33

Istruzioni per lo smaltimento
§ Le batterie contengono materiali dannos: per l´ambiente (piombo) e nonpossono essere quindi smaltite con i normali rifiuti.
In Germania e in alcuni altri Paesi, (vedisito: www.sartorius.com, sotto Service,area Download) la Sartorius AG oun´altra impresa da essa incaricata offreun servizio di ritiro e smaltimento delleproprie apparecchiature elettriche edelettroniche nel rispetto delle leggivigenti.
Nei Paesi che non fanno parte delloSpazio economico europeo o in cui noné presente una filiale, una succursale oun rivenditore Sartorius, prego rivolgersialle autorità locali o alle aziende incari-cate dello smaltimento dei rifiuti.
Queste apparecchiature non devonoessere smaltite insieme ai rifiuti dome-stici o non devono essere portate aicentri di raccolta pubblici (nemmeno daipiccoli esercenti).
Per maggiori informazioni sulle possibi-lità di smaltimento, ci si può rivolgere inGermania e negli Stati membri delloSpazio economico europeo ai nostriaddetti del Servizio Assistenza localeoppure al nostro Servizio Assistenza diGoettingen, in Germania:
Sartorius AGService CenterWeender Landstrasse 94–10837075 Goettingen, Germania
Prima dello smaltimento o della rotta-mazione delle apparecchiature, toglierele pile e le batterie ricaricabili e gettarlenegli appositi contenitori di raccolta.
Le apparecchiature contaminate consostanze nocive (contaminazione NBC)non saranno ritirate dalla Sartorius AG,dalle sue filiali, succursali e dai suoirivenditori, né per lavori di riparazionené per lo smaltimento.
Per maggiori informazioni sulle modalitàdi riparazione e smaltimento del proprioapparecchio ed i relativi indirizzi deiCentri di Assistenza, prego visitare nostrosito Internet (www.sartorius.com) oppurerivolgersi al Servizio Assistenza Sartorius.
Se l´imballaggio non dovesse più servire,può essere portato al centro di smalti-mento rifiuti locale. L´imballaggio ècostituito completamente da materialinon inquinanti, riciclabili come materieprime secondarie pregiate.
L’apparecchio, comprensivodi accessori, pile e batterienon deve essere gettatonei rifiuti domestici.
34

Contenido
35
36 Finalidad de uso
36 Indicaciones de seguridad y advertencias
37 Símbolo de batería en la pantalla
37 Carga de la batería interna
38 Estado de la batería
39 Tiempo de funcionamiento
42 Eliminación
Explicación de los símbolosEn estas instrucciones de uso se utilizan los siguientes símbolos:
§ se encuentra antes de las instruccionesde manipulación
$ se encuentra antes de las instruccionesde manipulación, que deben efectuarsesolamente bajo determinadas condicio-nes
> describe lo que ocurre después de efec-tuar una manipulación
– están antes de un punto de enumeración
! señala peligro
Finalidad de uso
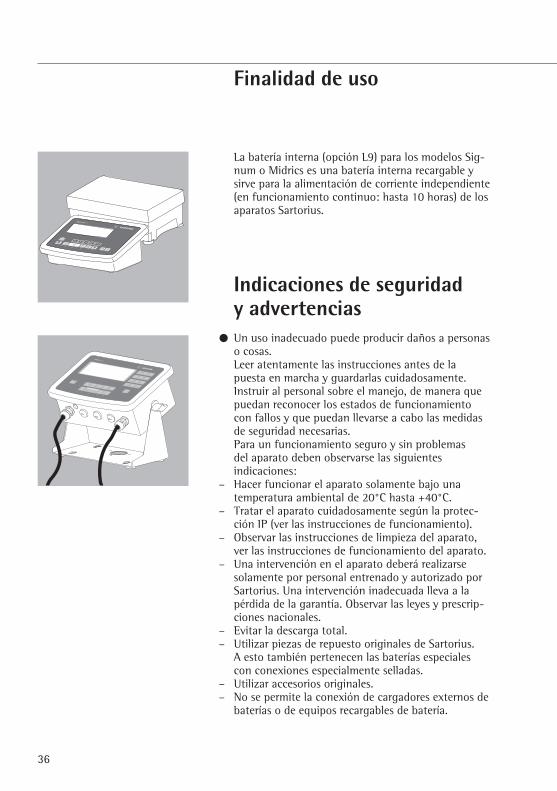
La batería interna (opción L9) para los modelos Sig-num o Midrics es una batería interna recargable ysirve para la alimentación de corriente independiente(en funcionamiento continuo: hasta 10 horas) de losaparatos Sartorius.
Indicaciones de seguridad y advertencias
§ Un uso inadecuado puede producir daños a personaso cosas. Leer atentamente las instrucciones antes de la puesta en marcha y guardarlas cuidadosamente. Instruir al personal sobre el manejo, de manera quepuedan reconocer los estados de funcionamientocon fallos y que puedan llevarse a cabo las medidasde seguridad necesarias. Para un funcionamiento seguro y sin problemas del aparato deben observarse las siguientes indicaciones:
– Hacer funcionar el aparato solamente bajo una temperatura ambiental de 20°C hasta +40°C.
– Tratar el aparato cuidadosamente según la protec-ción IP (ver las instrucciones de funcionamiento).
– Observar las instrucciones de limpieza del aparato,ver las instrucciones de funcionamiento del aparato.
– Una intervención en el aparato deberá realizarsesolamente por personal entrenado y autorizado porSartorius. Una intervención inadecuada lleva a lapérdida de la garantía. Observar las leyes y prescrip-ciones nacionales.
– Evitar la descarga total.– Utilizar piezas de repuesto originales de Sartorius.
A esto también pertenecen las baterías especialescon conexiones especialmente selladas.
– Utilizar accesorios originales.– No se permite la conexión de cargadores externos de
baterías o de equipos recargables de batería.
36

Símbolo de batería en la pantalla
El aparato reconoce la batería interna integrada después de pulsar la tecla ON/OFF.
§ El símbolo batería de la batería interna aparece en la pantalla.
Carga de la batería interna La carga y recarga de la batería interna se realiza apartir del platino interno.
§ El estado de carga se visualiza en la pantalla. La lectura de la carga se representa en intervalos de 25%.
– Cargar en ambientes secos con una temperaturaambiental entre 15°C y 30°C.
§ Antes utilizar por primera vez, recargar durante 8 h.
37
25%
50%75%
100%

Estado de la batería
La batería interna posee un conmutador de controlelectrónico. El conmutador reconoce un valor dedescarga bajo, cuando la tensión a debido a la energía tomada desciende por debajo de un valordeterminado. La batería deberá recargarse totalmente,tan pronto como se haya enchufado el aparato.
Si el aparato Sartorius no está vigilado y el usuariono puede intervenir, entonces la batería continuarádescargándose, hasta que la electrónica reconoceuna segunda barrera de tensión y separa el aparatoconectado automáticamente de la batería.
Esto evita que la batería que tan descargada que nopueda volverse a cargar (barrera de descarga baja).
§ Dependiendo de la descarga – también con descar-gas parciales, aquí 50% - cargar nuevamente labatería.
38
25%
50%

Tiempo de funcionamiento
El tiempo de funcionamiento de la batería interna puede estar influenciado por los ajustesen el menú de funcionamiento de la báscula:
– Desconexión automática de la retroiluminación de la pantalla según el ajuste del timer– Desconexión automática de la báscula según el ajuste del timer – Ajuste del timer para la desconexión automática (para la retroiluminiación o desconexión
automática)Gracias a estos ajustes se hace funcionar la batería en el “modo de economía de corriente”y se alarga así el tiempo de funcionamiento de la báscula.
Desconexión automática de la retroiluminaciónLa desconexión automática para la retroiluminación se realiza en el “Setup” del menú de funcionamiento de la báscula.En el ítem del menú “retroiluminación” se escoge el ajuste como sigue:
– La retroiluminación se desconecta automáticamente según el ajuste del timer (2, 4, 10 min).
– La retroiluminación se desconecta solamente cuando no se trabaja con el aparato y no seha pulsado ninguna tecla o ni se ha realizado un cambio de báscula.
§ Desconectar el aparato.§ Conectar el aparato, pulsar la tecla ) durante el autochequeo. Efectuar los ajustes
en“Setup”.
Nivel 1 Nivel 2 Nivel 3 Nivel 4
appl § Pulsar tecla )SETUP § Pulsar tecla k varias veces
UTILIT § Pulsar tecla )§ Pulsar tecla k varias veces
8. § Pulsar tecla )§ Pulsar tecla k varias veces
8.8. § Pulsar tecla )§ Pulsar tecla k varias veces
8.8.1 § Pulsar tecla ), retroiluminación “ON AUTOMÁTICA”
8.8.2 § Tecla k, retroiluminación “OFF AUTOMÁTICA”
o 8.8.3 § Tecla k, retroiluminación “DESCONEXIÓN AUTOMÁTICA”
§ Pulsar tecla ), aparece »o«, el nuevoítem del menú está ajustado.
§ Pulsar largo la tecla ), abandonar el menú.
39
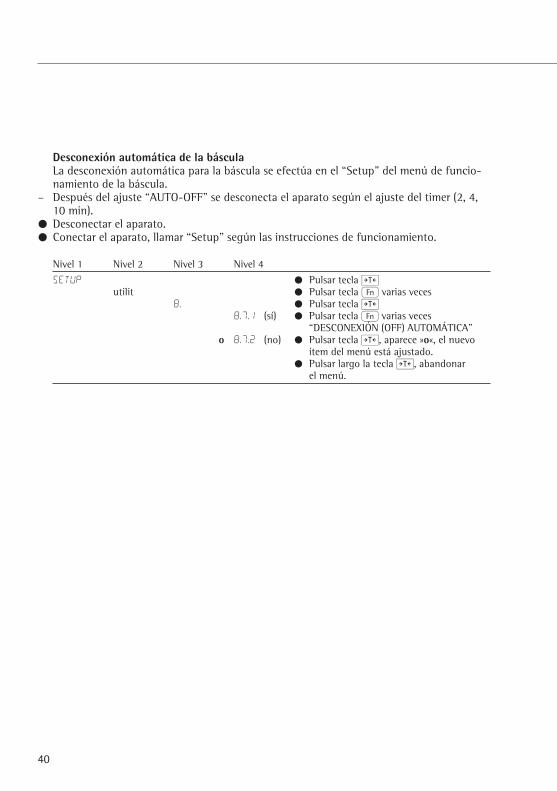
Desconexión automática de la báscula La desconexión automática para la báscula se efectúa en el “Setup” del menú de funcio-namiento de la báscula.
– Después del ajuste “AUTO-OFF” se desconecta el aparato según el ajuste del timer (2, 4,10 min).
§ Desconectar el aparato. § Conectar el aparato, llamar “Setup” según las instrucciones de funcionamiento.
Nivel 1 Nivel 2 Nivel 3 Nivel 4
SETUP § Pulsar tecla )utilit § Pulsar tecla k varias veces
8. § Pulsar tecla )8.7.1 (sí) § Pulsar tecla k varias veces
“DESCONEXIÓN (OFF) AUTOMÁTICA”o 8.7.2 (no) § Pulsar tecla ), aparece »o«, el nuevo
ítem del menú está ajustado.§ Pulsar largo la tecla ), abandonar
el menú.
40

Ajuste del timer de la báscula El ajuste del timer para el ítem del menú:
– la “Desconexión automática de la retroiluminación” o la – “Desconexión automática de la báscula” se realizan en el “Setup” del menú de funciona-
miento de la báscula.Dependiendo del ajuste en el menú del “TIMER” se desconecta el aparato o la retroilumi-nación según los ajustes anteriores después de (2, 4, 10 min).
§ Desconectar el aparato.§ Conectar el aparato, llamar “Setup”.
Nivel 1 Nivel 2 Nivel 3 Nivel 4
SETUP § Pulsar tecla )utilit § Pulsar tecla k varias veces
8. § Pulsar tecla )§ Pulsar tecla k varias veces
o 8.9.1 § Pulsar tecla § ), seleccionar “DESCONEXIÓN (OFF) AUTOMÁTICA”después de 2 minutos
8.9.2 § Pulsar tecla ), seleccionar “DESCONEXIÓN (OFF) AUTOMÁTICA”después de 4 minutos
8.9.3 § Pulsar tecla ), seleccionar “DESCONEXIÓN (OFF) AUTOMÁTICA”después de 10 minutos
§ Pulsar tecla ), aparece »o«, el nuevoítem del menú está ajustado.
§ Pulsar largo la tecla ), abandonar el menú.
Si hay un tiempo de desconexión activado en el menú de funcionamiento de la báscula,parpadea después de haber transcurrido la mitad del tiempo el símbolo pesaje en la pan-talla.
41

42
§ La batería contiene substancias dañinaspara el medio ambiente (plomo) y, poresto, no deben eliminarse en la basuranormal.
En Alemania y en algunos otros países,ver bajo: Download-Bereich Service en www.sartorius.com Sartorius AG propiamente tal, o algunas de las organizaciones encargadas por noso-tros, recibe y elimina conforme a la leylos productos eléctricos y electrónicosque ha adquirido de Sartorius. En lospaíses que no pertenecen al EspacioEconómica Europeo o en los que no haydistribuidores Sartorius, diríjase a lasautoridades locales o a su empresa deeliminación de basuras. Estos productosno deben – tampoco de pequeñoscomerciantes – depositarse junto con la basura doméstica o en los puntos derecogida de las empresas de eliminaciónde basura públicas locales.
Respecto a la eliminación en Alemaniacomo también en los países del EspacioEconómico Europeo, diríjase a nuestroscolaboradores de servicio locales o anuestra central de servicio (Servicezen-trum) en Goettingen, Alemania:
Sartorius AGService CenterWeender Landstrasse 94-10837075 Goettingen, Alemania
Antes de la eliminación o del aprove-chamiento como chatarra deben sacarselas baterías y entregarlas en el punto derecogida correspondiente.
Los aparatos contaminados con sustan-cias peligrosas (contaminación ABC) nose recibirán ni para la reparación ni parala eliminación.
Informaciones detalladas con direccio-nes de servicio para la recepción dereparaciones o eliminación de su apara-to las encuentra en nuestra páginaInternet (www.sartorius.com) o puedesolicitarlas por intermedio del servicioSartorius.
Si no se necesita más el embalaje, este puede ser eliminado en los puntosde recogida locales. El embalaje estácompuesto de materiales que no tieneimpacto ambiental y que pueden servircomo valiosas materias secundarias.
El aparato incluyendo los accesorios y baterías nodeben depositarse en labasura doméstica.
Eliminación

Printed in Germany. Gedruckt auf chlorfrei gebleichtem PapierW1A000 · KTPublication No.: WL96023-p07022
Sartorius AGWeender Landstrasse 94–10837075 Goettingen, GermanyPhone +49.551.308.0Fax +49.551.308.3289www.sartorius.com
Copyright by Sartorius AG, Goettingen, Germany. All rights reserved. No part of this publication may be reprinted or translated in any form or by any means without the prior writtenpermission of Sartorius AG.The status of the information,specifications and illustrations in this manual is indicated by the date given below. Sartorius AG reserves the right to make changes to thetechnology, features,specifications and design of theequipment without notice.
Status: Januar 2007, Sartorius AG, Goettingen, Germany