installation guide -...
TRANSCRIPT

Fedora Core 6
Installation Guide
Suart Ellis
Paul Frields

Installation Guide
Fedora Core 6 Installation Guide Edizione 2.0
Autore Suart Ellis [email protected] Paul Frields [email protected]
Copyright © 2006 Red Hat, Inc. and Others.
The text of and illustrations in this document are licensed by Red Hat under a Creative CommonsAttribution–Share Alike 3.0 Unported license ("CC-BY-SA"). An explanation of CC-BY-SA is availableat http://creativecommons.org/licenses/by-sa/3.0/. The original authors of this document, and Red Hat,designate the Fedora Project as the "Attribution Party" for purposes of CC-BY-SA. In accordance withCC-BY-SA, if you distribute this document or an adaptation of it, you must provide the URL for theoriginal version.
Red Hat, as the licensor of this document, waives the right to enforce, and agrees not to assert,Section 4d of CC-BY-SA to the fullest extent permitted by applicable law.
Red Hat, Red Hat Enterprise Linux, the Shadowman logo, JBoss, MetaMatrix, Fedora, the InfinityLogo, and RHCE are trademarks of Red Hat, Inc., registered in the United States and other countries.
For guidelines on the permitted uses of the Fedora trademarks, refer to https://fedoraproject.org/wiki/Legal:Trademark_guidelines.
Linux® is the registered trademark of Linus Torvalds in the United States and other countries.
Java® is a registered trademark of Oracle and/or its affiliates.
XFS® is a trademark of Silicon Graphics International Corp. or its subsidiaries in the United Statesand/or other countries.
All other trademarks are the property of their respective owners.

iii
Preface vii1. Convenzioni del documento ........................................................................................... vii
1.1. Convenzioni tipografiche ..................................................................................... vii1.2. Convenzioni del documento ................................................................................ viii1.3. Note ed avvertimenti ............................................................................................ ix
2. Inviateci i vostri commenti! .............................................................................................. x
Introduzione xi1. About Fedora Core ......................................................................................................... xi2. Alcune informazioni su questo manuale ........................................................................... xi3. Riconoscimenti ............................................................................................................... xi
1. Background 1
2. Comprendere le architetture i386 e le altre architetture disponibili per computer 3
3. Prima di iniziare 53.1. Capacità disco ............................................................................................................. 53.2. Rete ............................................................................................................................ 53.3. Installare da un server o da un sito web ........................................................................ 53.4. Installing Fedora Core on a Managed Network .............................................................. 6
4. Preparare i supporti 74.1. Preparare i supporti CD o DVD .................................................................................... 74.2. Preparare supporti USB di avvio ................................................................................... 8
5. Iniziare l'installazione 115.1. Avviare da CD, DVD o dispositivo USB ....................................................................... 115.2. Testare i supporti CD e DVD ...................................................................................... 135.3. Avviare dalla rete usando PXE .................................................................................... 15
6. Localizzare il proprio sistema 176.1. Selezione della lingua ................................................................................................. 176.2. Configurazione della tastiera ....................................................................................... 17
7. Metodi di installazione 197.1. Metodo predefinito di installazione ............................................................................... 197.2. Metodi alternativi di installazione ................................................................................. 197.3. Installazione da un disco fisso .................................................................................... 207.4. Installazione della configurazione TCP/IP ..................................................................... 217.5. Installazione via NFS .................................................................................................. 237.6. Installazione via FTP .................................................................................................. 237.7. Installazione via HTTP ................................................................................................ 25
8. Schermata di benvenuto 27
9. Passaggio ad una versione superiore di un sistema esistente 299.1. Esaminare il passaggio ad una versione superiore ....................................................... 299.2. Aggiornamento alla versione superiore del boot loader ................................................. 30
10. Partizionamento del disco 3310.1. Informazioni di carattere generale sulle partizioni ........................................................ 35
10.1.1. Tipi di partizioni ............................................................................................. 3610.1.2. Comprendere LVM ......................................................................................... 3610.1.3. Creare una partizione /home ......................................................................... 37
10.2. Disk Druid ................................................................................................................ 37
11. Boot Loader 41

Installation Guide
iv
11.1. Mantenere la configurazione del proprio boot loader già esistente ................................ 4111.2. Avviare sistemi operativi aggiuntivi ............................................................................. 4211.3. Configurare una password per il boot loader .............................................................. 43
11.3.1. Password di GRUB dimenticate ...................................................................... 4411.4. Opzioni avanzate del boot loader .............................................................................. 44
12. Configurazione della rete 4712.1. Dispositivi di rete ...................................................................................................... 4712.2. Nome del computer (computer hostname) .................................................................. 4812.3. Configurazioni varie .................................................................................................. 48
13. Selezione del fuso orario 4913.1. Selezionare un fuso orario ........................................................................................ 4913.2. Tempo Coordinato Universale (UTC) ......................................................................... 49
14. Impostazione della password di Root 51
15. Selezione del software 5315.1. Installare da repository aggiuntivi ............................................................................... 5315.2. Personalizzare la selezione del software .................................................................... 56
15.2.1. In caso di ripensamenti .................................................................................. 5715.2.2. Supporto a lingue aggiuntive .......................................................................... 5715.2.3. Core Network Services .................................................................................. 57
16. Nota sull'installazione 59
17. Installazione dei pacchetti 61
18. Primo avvio del sistema 6318.1. Accettazione licenza ................................................................................................. 6318.2. Firewall .................................................................................................................... 6418.3. SELinux ................................................................................................................... 6618.4. Data ed ora .............................................................................................................. 6718.5. Utente di sistema ..................................................................................................... 6918.6. Scheda audio ........................................................................................................... 70
19. Passi successivi 7319.1. Aggiornamento del sistema ....................................................................................... 7319.2. Subscribing to Fedora Core Announcements and News .............................................. 7419.3. Reperire documentazione o supporto ......................................................................... 7419.4. Joining the Fedora Core Community .......................................................................... 75
A. Opzioni di avvio 77A.1. Configurare il sistema di installazione al prompt di boot: ............................................ 77
A.1.1. Specificare la lingua ........................................................................................ 77A.1.2. Configurare l'interfaccia grafica ........................................................................ 77A.1.3. Specificare il metodo di installazione ................................................................ 78A.1.4. Configurazione manuale dei parametri di rete ................................................... 78
A.2. Abilitare acceso remoto al sistema di installazione ....................................................... 79A.2.1. Abilitare l'accesso remoto con VNC .................................................................. 79A.2.2. Connettere il sistema di installazione ad un VNC in ascolto (VNC Listener) .......... 80A.2.3. Abilitare accesso remoto con telnet .................................................................. 80
A.3. Inviare i file di log (logging) ad un sistema remoto durante l'installazione ........................ 81A.3.1. Configurare un server per i log ........................................................................ 81
A.4. Automatizzare l'installazione con Kickstart ................................................................... 82A.5. Migliorare il supporto hardware ................................................................................... 83

v
A.5.1. Aggiungere supporto hardware con driver specifici ............................................ 83A.5.2. Annullare il processo automatico di riconoscimento dell'hardware ....................... 84
A.6. Usare le modalità di avvio per manutenzione (Maintenance Boot Modes) ....................... 85A.6.1. Caricare la modalità di test della memoria (RAM) .............................................. 85A.6.2. Avviare un computer in modalità di ripristino (Rescue Mode) .............................. 85
B. Altra documentazione tecnica 87
Indice analitico 89

vi

vii
Preface
1. Convenzioni del documentoQuesto manuale utilizza numerose convenzioni per evidenziare parole e frasi, ponendo attenzione suinformazioni specifiche.
Nelle edizioni PDF e cartacea questo manuale utilizza caratteri presenti nel set Font Liberation1. Il setFont Liberation viene anche utilizzato nelle edizioni HTML se il set stesso è stato installato sul vostrosistema. In caso contrario, verranno mostrati caratteri alternativi ma equivalenti. Da notare: Red HatEnterprise Linux 5 e versioni più recenti, includono per default il set Font Liberation.
1.1. Convenzioni tipograficheVengono utilizzate quattro convenzioni tipografiche per richiamare l'attenzione su parole e frasispecifiche. Queste convenzioni, e le circostanze alle quali vengono applicate, sono le seguenti.
Neretto monospazio
Usato per evidenziare l'input del sistema, incluso i comandi della shell, i nomi dei file ed i percorsi.Utilizzato anche per evidenziare tasti e combinazione di tasti. Per esempio:
Per visualizzare i contenuti del file my_next_bestselling_novelnella vostra directory di lavoro corrente, inserire il comando catmy_next_bestselling_novel al prompt della shell e premere Invio per eseguireil comando.
Quanto sopra riportato include il nome del file, un comando della shell ed un tasto, il tutto riportato inneretto monospazio e distinguibile grazie al contesto.
Le combinazioni di tasti possono essere distinte dai tasti tramite il trattino che collega ogni parte dellacombinazione. Per esempio:
Premere Invio per eseguire il comando.
Premere Ctrl+Alt+F1 per smistarsi sul primo virtual terminal. PremereCtrl+Alt+F7 per ritornare alla sessione X-Windows.
Il primo paragrafo evidenzia il tasto specifico singolo da premere. Il secondo riporta due combinazionidi tasti, (ognuno dei quali è un set di tre tasti premuti contemporaneamente).
Se si discute del codice sorgente, i nomi della classe, i metodi, le funzioni i nomi della variabile ed ivalori ritornati indicati all'interno di un paragrafo, essi verranno indicati come sopra, e cioè in nerettomonospazio. Per esempio:
Le classi relative ad un file includono filesystem per file system, file per file, edir per directory. Ogni classe possiede il proprio set associato di permessi.
Proportional Bold
Ciò denota le parole e le frasi incontrate su di un sistema, incluso i nomi delle applicazioni; il testodelle caselle di dialogo; i pulsanti etichettati; le caselle e le etichette per pulsanti di selezione, titoli delmenu e dei sottomenu. Per esempio:
1 https://fedorahosted.org/liberation-fonts/

Preface
viii
Selezionare Sistema → Preferenze → Mouse dalla barra del menu principale perlanciare Preferenze del Mouse. Nella scheda Pulsanti, fate clic sulla casella didialogo mouse per mancini, e successivamente fate clic su Chiudi per cambiare ilpulsante primario del mouse da sinistra a destra (rendendo così il mouse idoneo perun utilizzo con la mano sinistra).
Per inserire un carattere speciale in un file gedit, selezionare Applicazioni →Accessori → Mappa carattere dalla barra menu principale. Successivamente,
selezionare Cerca → Trova… dalla barra del menu Mappa carattere, inserire il nomedel carattere nel campo Cerca e cliccare Successivo. Il carattere ricercato verràevidenziato nella Tabella caratteri. Fare un doppio clic sul carattere evidenziato perposizionarlo nel campo Testo da copiare, e successivamente fare clic sul pulsante
Copia. Ritornare ora al documento e selezionare Modifica → Incolla dalla barra delmenu di gedit.
Il testo sopra riportato include i nomi delle applicazioni; nomi ed oggetti del menu per l'intero sistema;nomi del menu specifici alle applicazioni; e pulsanti e testo trovati all'interno di una interfaccia GUI,tutti presentati in neretto proporzionale e distinguibili dal contesto.
Corsivo neretto monospazio o Corsivo neretto proporzionale
Sia se si tratta di neretto monospazio o neretto proporzionale, l'aggiunta del carattere corsivo indica untesto variabile o sostituibile . Il carattere corsivo denota un testo che non viene inserito letteralmente, ovisualizzato che varia a seconda delle circostanze. Per esempio:
Per collegarsi ad una macchina remota utilizzando ssh, digitare [email protected] al prompt della shell. Se la macchina remota èexample.com ed il nome utente sulla macchina interessata è john, digitare [email protected].
Il comando mount -o remount file-system rimonta il file system indicato. Peresempio, per rimontare il file system /home, il comando è mount -o remount /home.
Per visualizzare la versione di un pacchetto attualmente installato, utilizzare ilcomando rpm -q package. Esso ritornerà il seguente risultato: package-version-release.
Da notare la parola in Corsivo neretto — nome utente, domain.name, file-system, pacchetto, versionee release. Ogni parola racchiude il testo da voi inserito durante l'emissione di un comando o per iltesto mostrato dal sistema.
Oltre all'utilizzo normale per la presentazione di un titolo, il carattere Corsivo denota il primo utilizzo diun termine nuovo ed importante. Per esempio:
Publican è un sistema di pubblicazione per DocBook.
1.2. Convenzioni del documentoGli elenchi originati dal codice sorgente e l'output del terminale vengono evidenziati rispetto al testocircostante.

Note ed avvertimenti
ix
L'output inviato ad un terminale è impostato su tondo monospazio e così presentato:
books Desktop documentation drafts mss photos stuff svnbooks_tests Desktop1 downloads images notes scripts svgs
Gli elenchi del codice sorgente sono impostati in tondo monospazio ma vengono presentati edevidenziati nel modo seguente:
package org.jboss.book.jca.ex1;
import javax.naming.InitialContext;
public class ExClient{ public static void main(String args[]) throws Exception { InitialContext iniCtx = new InitialContext(); Object ref = iniCtx.lookup("EchoBean"); EchoHome home = (EchoHome) ref; Echo echo = home.create();
System.out.println("Created Echo");
System.out.println("Echo.echo('Hello') = " + echo.echo("Hello")); }}
1.3. Note ed avvertimentiE per finire, tre stili vengono usati per richiamare l'attenzione su informazioni che in caso contrariopotrebbero essere ignorate.
Nota BeneUna nota è un suggerimento o un approccio alternativo per il compito da svolgere. Nondovrebbe verificarsi alcuna conseguenza negativa se la nota viene ignorata, ma al tempostesso potreste non usufruire di qualche trucco in grado di facilitarvi il compito.
ImportanteImportant boxes detail things that are easily missed: configuration changes that onlyapply to the current session, or services that need restarting before an update will apply.Ignoring a box labeled 'Important' won't cause data loss but may cause irritation andfrustration.
AvvertenzaUn Avvertimento non dovrebbe essere ignorato. Se ignorato, potrebbe verificarsi unaperdita di dati.

Preface
x
2. Inviateci i vostri commenti!Se individuate degli errori di battitura in questo manuale, o se pensate di poter contribuire alsuo miglioramento, contattateci subito! Inviate i vostri suggerimenti tramite Bugzilla: http://bugzilla.redhat.com/bugzilla/ sul componente Fedora Documentation.
Quando inviate un bug report, assicuratevi di indicare l'identificatore del manuale: install-guide
Se inviate un suggerimento per contribuire al miglioramento della guida, cercate di essere il piùspecifici possibile. Se avete individuato un errore, indicate il numero della sezione e alcune righe ditesto, in modo da agevolare la ricerca dell'errore.
xi
Introduzione
1. About Fedora CoreFedora Core is a complete desktop and server operating system created entirely with open sourcesoftware.
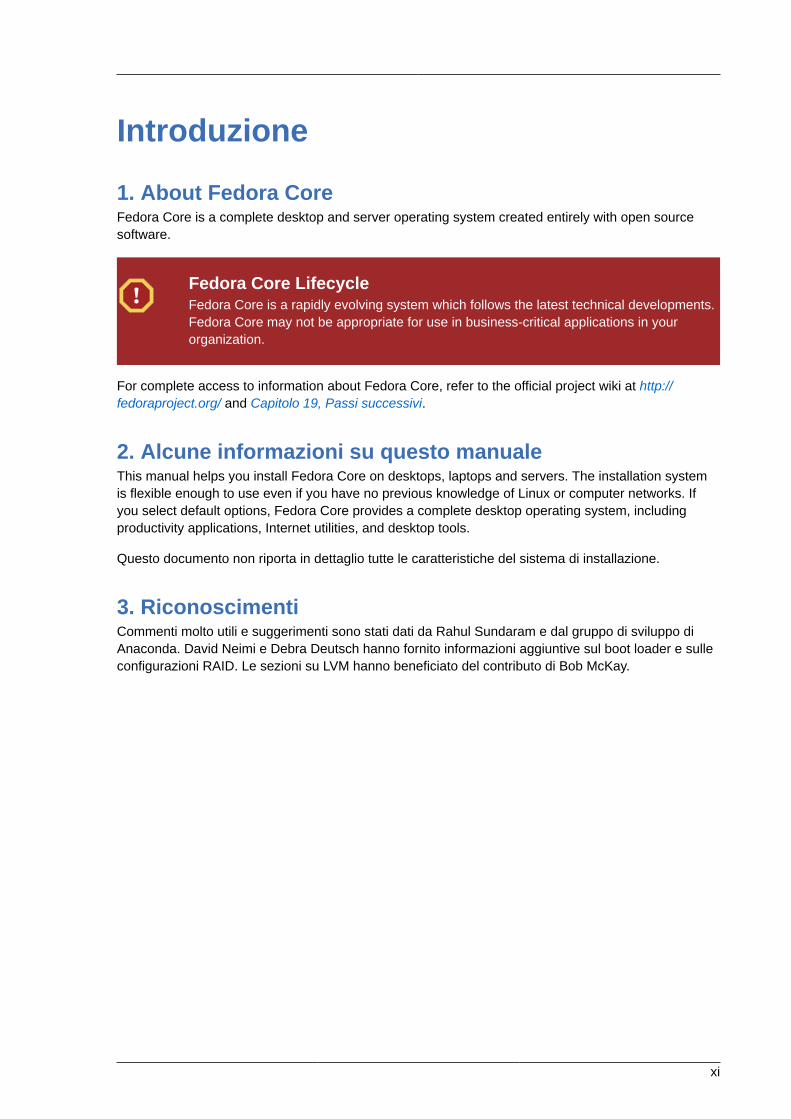
Fedora Core LifecycleFedora Core is a rapidly evolving system which follows the latest technical developments.Fedora Core may not be appropriate for use in business-critical applications in yourorganization.
For complete access to information about Fedora Core, refer to the official project wiki at http://fedoraproject.org/ and Capitolo 19, Passi successivi.
2. Alcune informazioni su questo manualeThis manual helps you install Fedora Core on desktops, laptops and servers. The installation systemis flexible enough to use even if you have no previous knowledge of Linux or computer networks. Ifyou select default options, Fedora Core provides a complete desktop operating system, includingproductivity applications, Internet utilities, and desktop tools.
Questo documento non riporta in dettaglio tutte le caratteristiche del sistema di installazione.
3. RiconoscimentiCommenti molto utili e suggerimenti sono stati dati da Rahul Sundaram e dal gruppo di sviluppo diAnaconda. David Neimi e Debra Deutsch hanno fornito informazioni aggiuntive sul boot loader e sulleconfigurazioni RAID. Le sezioni su LVM hanno beneficiato del contributo di Bob McKay.

xii

Capitolo 1.
1
BackgroundThe Fedora Project, which produces and maintains Fedora Core, is a collaboration between Red Hat,Inc. and thefree and open source software (FOSS) community. The Fedora Project also provides Fedora Extras,additional software packaged for installation on a Fedora Core system.
For more information about the Fedora Project, please visit http://www.fedoraproject.org. Refer tohttp://www.opensource.org/ and http://www.gnu.org/philosophy/free-sw.html for more information aboutopen source software.

2

Capitolo 2.
3
Comprendere le architetture i386 ele altre architetture disponibili percomputerThe Fedora Project provides distributions of Fedora Core for several different types of computersystems. Each distribution of Fedora Core is built for computers based on a specific architecture.The architecture describes the processor on which the computer is built. Most computers come withidentifying marks and literature describing the processor inside the computer. Refer to your computer'smarks or literature and find its architecture in the list below:
i386Processori Intel x86-compatibili, inclusi Intel Pentium e Pentium-MMX, Pentium Pro, Pentium-II, Pentium-III, Celeron, Pentium 4, Xeon, Core Duo, e Centrino/Centrino Duo; VIA C3/C3-m edEden/Eden-N; ed AMD Athlon, AthlonXP, Duron, AthlonMP, Sempron, e Turion
ppcProcessori PowerPC, come quelli che si possono trovare in sistemi Apple Power Macintosh, G3,G4, e G5, e IBM pSeries
x86_64Processori 64-bit AMD come Athlon64/FX/X2, Turion64, Opteron; e processori Intel 64-bit comeEM64T

4

Capitolo 3.
5
Prima di iniziareBefore you install Fedora Core, you need access to:
• boot or installation media (refer to Capitolo 4, Preparare i supporti for more information)
• informazioni sulla propria configurazione di rete
• a copy of this Installation Guide and the Release Notes for this version of Fedora Core
The Release Notes specify the hardware requirements for Fedora Core 6. They also provide advice onany known problems with particular hardware and software configurations.
The Release Notes are available on the first disc in HTML and plain text format. The latest versions ofthis Installation Guide and the Release Notes are available at http://docs.fedoraproject.org/en-US/.
3.1. Capacità discoA Fedora Core system requires a minimum of 700 MB storage for a command-line system. A desktopsystem with the default applications requires at least 3 GB of storage. You may install multiple copiesof Fedora Core on the same computer.
Configure any RAID functions provided by the mainboard of your computer, or attached controllercards, before you begin the installation process. Fedora Core can automatically detect many RAIDdevices and use any storage they provide.
3.2. ReteBy default, Fedora Core systems attempt to discover correct connection settings for the attachednetwork usingDynamic Host Configuration Protocol, or DHCP. Your network may include a DHCP provider whichdelivers settings to other systems on demand. The DHCP provider may be a router or wireless accesspoint for the network, or a server.
In some circumstances you may need to provide information about your network during the installationprocess. Refer to Sezione 3.3, «Installare da un server o da un sito web» and Sezione 3.4, «InstallingFedora Core on a Managed Network» for more information.
Configurazione del modemThe installation system for Fedora Core does not configure modems. If your computer hasa modem, configure the dialing settings after you complete the installation and reboot.
3.3. Installare da un server o da un sito webYou may install Fedora Core using a mirror, a Web site or network server that provide a copy of thenecessary files. To use a mirror, you need to know:
• il nome del server
• il protocollo di rete usato per l'installazione (FTP, HTTP o NFS)

Capitolo 3. Prima di iniziare
6
• il percorso per raggiungere i file di installazione sul server
You may install Fedora Core from your own private mirror, or use one of the public mirrors maintainedby members of the community. To ensure that the connection is as fast and reliable as possible, use aserver that is close to your own geographical location.
The Fedora Project maintains a list of HTTP and FTP public mirrors, sorted by region, at http://fedora.redhat.com/download/mirrors.html. To determine the complete directory path for the installationfiles, add /6/architecture/os/ to the path shown on the web page. If your computer uses theppc architecture, for instance, add /6/ppc/os/ to the path shown.
Realizzare un proprio mirrorRefer to http://fedora.redhat.com/docs/mirror/ for information on how to create your ownFedora Core mirror for either public or private use.
To use a mirror, boot your computer with Fedora Core boot media, and follow the instructions inCapitolo 7, Metodi di installazione. Refer to Capitolo 4, Preparare i supporti for more information oncreating the boot media.
Usare i dischi di installazioneSe si avvia il proprio computer con un DVD di installazione o con il primo CD diinstallazione, digitare linux askmethod al prompt di boot: per accedere alle opzioni diinstallazioni fornite dal server.
If your network includes a server, you may also use PXE (Pre-boot eXecution Environment) to bootyour computer. PXE (also referred to as netboot) is a standard that enables PCs to use files on aserver as a boot device. Fedora Core includes utilities that allow it to function as a PXE server forother computers. You can use this option to install Fedora Core on a PXE-enabled computer entirelyover the network connection, using no physical media at all.
3.4. Installing Fedora Core on a Managed NetworkSome corporate networks include a directory service that manages user accounts for the organization.Fedora Core systems can join a Kerberos, NIS, Hesiod, or Microsoft® Windows® domain as part ofthe installation process. Fedora Core can also use LDAP directories.
Chiedere agli amministratori della reteAlways consult the administrators before you install a Fedora Core system on an existingnetwork owned by someone besides yourself. They can provide correct network andauthentication settings, and guidance on specific organizational policies and requirements.

Capitolo 4.
7
Preparare i supportiTo install Fedora Core from discs, you need five installation CDs, or the installation DVD. There areseparate disc sets for each supported architecture.
For instructions to download and prepare this CD or DVD installation media, refer to http://fedoraproject.org/wiki/Distribution/Download. If you already have the full set of Fedora Core installationmedia, skip to Sezione 5.1, «Avviare da CD, DVD o dispositivo USB».
Architetture specificheTo install Fedora Core, you must use the boot and installation media that is particularto your architecture. Refer to Capitolo 2, Comprendere le architetture i386 e le altrearchitetture disponibili per computer for information on hardware architectures and how todetermine the right one for your computer.
You may use the first CD or DVD installation disc from the complete Fedora Core distribution to bootyour computer. The Fedora Core distribution also includes image files for boot-only CD or DVD mediaand USB media. You can convert these files into bootable media using standard Linux utilities or third-party programs on other operating systems.
You may boot your computer with boot-only media, and load the installation system from anothersource to continue the process. The types of installation source for Fedora Core include:
• installazione da CD o DVD
• installazione da dischi fissi, collegati tramite porta USB, o interni al computer
• installazione da server di rete, usando sia HTTP, che FTP o NFS
You can use this facility to install Fedora Core on machines without using installation discs. Forexample, you may install Fedora Core on a laptop with no CD or DVD drive by booting the machinewith a USB pen drive, and then using a hard drive as an installation source.
The supported boot media for Fedora Core include:
• CD o DVD (entrambi come disco #1 di installazione o disco speciale di solo avvio)
• supporti USB
• interfacce di rete (via PXE)
Installazione da dischettiThere is no option to either boot or install Fedora Core from diskettes.
4.1. Preparare i supporti CD o DVDThe images/boot.iso file on the first Fedora Core installation disc is a boot image designed for CDand DVD media. This file also appears on FTP and Web sites providing Fedora Core. You can alsofind this file on mirror sites in the Fedora Core distribution directory for your particular architecture.

Capitolo 4. Preparare i supporti
8
The Fedora Core distribution is also downloadable as a set of CD-sized ISO image files or a singleDVD-sized ISO image file. You can record these files to CD or DVD using a CD or DVD burningprogram on your current operating system:
Sistemi operativi WindowsBurn an ISO image to disc using your installed CD or DVD burning software. Most software hasan option labeled Burn image file to disc or Make disc from ISO image. If your software offersa choice of image formats, choose "ISO image" as the file type. If several ISO formats are offered,choose the closest match to "Mode 1, 2048-byte blocks."
Apple Mac OS XOpen the Disk Utility application, found in the /Applications/Utilities folder. Select
File → Open Disk Image and select the ISO image. From the list of volumes, select the itemrepresenting the ISO image. Select Burn and follow the instructions.
Sistemi operativi LinuxIf you are using a recent version of the GNOME desktop environment, right-click the ISO imagefile and choose Write to disc. If you are using a recent version of the KDE desktop environment,
use K3B and select Tools → Burn CD Image, or Tools → Burn DVD ISO Image if appropriate.The following command line works for many other environments:
cdrecord --device=cdwriter-device -tao -eject image-file.iso
Istruzioni per specifici sistemiUnfortunately this guide cannot offer specific instructions for every possible combinationof hardware and software. You can find more information at http://fedoraproject.org/wiki/Docs/Drafts/BurningDiscs. Consult your operating system's documentation and onlinesupport services, and Sezione 19.3, «Reperire documentazione o supporto» for additionalhelp if needed.
4.2. Preparare supporti USB di avvio
Perdita dei datiQuesta procedura distrugge tutti i dati presenti sul supporto. Copiare ogni informazioneimportante prima di iniziare. Qualche modello di penna USB usa partizioni aggiuntive osoftware per fornire funzioni specifiche, come la crittografia dei dati. Questa procedurapotrebbe rendere difficile o impossibile l'accesso a tali aree speciali del dispositivo diavvio.
The images/diskboot.img file on the first Fedora Core installation disc is a boot image designedfor USB media. This file also appears on FTP and Web sites providing Fedora Core.
Per Windows e Linux sono disponibili molti software che possono scrivere file immagine in undispositivo. Linux include il comando dd per questi scopi.

Preparare supporti USB di avvio
9
Il comando dd richiede che si specifichi il file del dispositivo che corrisponde al supporto fisico. Il nomedel file del dispositivo corrisponde al nome assegnato al dispositivo dal proprio sistema. Tutti i file didispositivo sono elencati nella directory /dev/. Per esempio, /dev/sda indica il primo dispositivoUSB, SATA o SCSI che è disponibile nel sistema.
Per conoscere il nome che il sistema assegna al dispositivo:
1. Open a terminal window. On a Fedora Core system, choose Applications → Accessories →Terminal to start a terminal.
2. Collegare o inserire il supporto fisico.
3. Nel terminale, digitare il seguente comando:
dmesg
Cercare le righe nell'output di dmesg che denotano il riconoscimento di un nuovo dispositivoSCSI. I sistemi Linux trattano i dispositivi USB come dispositivi SCSI.
Utilizzare il Device MapperOn Fedora Core 5 and later systems, it may be easier to find the right device name byexamining the /dev/disk/ directory. Use the command ls -l /dev/disk/by-id/ to see the disk devices collated by model and device name.
4. Unmount the media. On a Fedora Core system, right-click the icon that corresponds to the media,and select Unmount Volume. Alternatively, enter this command in a terminal window:
umount /dev/<device>
Replace <device> with the name of the correct device file for the media.
To write an image file to boot media with dd on a current version of Fedora Core, carry out thefollowing steps:
1. Individuare il file di immagine.
2. Collegare o inserire il supporto fisico.
3. Il proprio sistema è in grado di individuare automaticamente ed aprire il dispositivo. Se questodovesse accadere, occorre chiudere o smontare il dispositivo prima di continuare.
4. Aprire un terminale.
5. Nel terminale, digitare il seguente comando:
dd if=diskboot.img of=/dev/<device>
Replace <device> with the name of the correct device file for the media.

10

Capitolo 5.
11
Iniziare l'installazioneTo begin installation of Fedora Core, boot the computer from the bootable media. The bootablemedia provides the necessary programs and files to start the installation program. Once you start theinstallation program, you may be able to install from a completely different piece of media. For moreinformation on finding and creating bootable media, refer to Capitolo 4, Preparare i supporti.
If you boot from the first installation disc of the Fedora Core distribution, you may choose a differentsource for installation. The default source is the CDs themselves. To change this behavior, enterlinux askmethod at the boot: prompt. If you boot from other media, the installation programalways asks you to choose the installation source.
TheBIOS (Basic Input/Output System) on your computer must support the type of boot media you select.The BIOS controls access to some hardware devices during boot time. Any computer that meets theminimum recommended specification for Fedora Core can boot from a CD or DVD drive with the firstdisc. USB drives and flash media are newer technologies, but many computers can use them as bootmedia. Some network cards and chipsets include support for network booting withPXE. PXE (pronounced "pixie") allows a computer to load boot files from a network server instead ofdirectly-connected hardware.
Se non si è sicuri sulle caratteristiche possedute dal proprio computer, o su come configurare il BIOS,consultare la documentazione resa disponibile dal produttore dell'hardware. Fornire informazionidettagliate su specifiche hardware e sulla relativa configurazione va oltre lo scopo del presentedocumento.
Annullare l'installazioneTo abort the installation process at any time before the Installing Packages screen, eitherpress Ctrl+Alt+Del or power off the computer with the power switch. Fedora Coremakes no changes to your computer until package installation begins.
5.1. Avviare da CD, DVD o dispositivo USBPer avviare il computer:
1. Accendere il computer.
2. Inserire il primo disco nel lettore CD o DVD, o collegare il dispositivo USB.
3. Una schermata di avvio apparirà, con il prompt boot: in basso.
Ordine di avvio del BIOSThe BIOS contains settings that control the order of boot devices. If your PC boots from adevice other than the Fedora Core boot media, check the BIOS boot configuration.

Capitolo 5. Iniziare l'installazione
12
Figura 5.1. Schermata di avvio
If you hit Enter, the installation runs in default mode. In the default mode, the installation uses agraphical interface if possible. If the installation program runs from the Fedora Core installation CD orDVD media, in default mode it uses these media as the installation source. To change the installationmode, at the boot: prompt, type linux followed by one or more of the following options:
• Per installare da un disco fisso o da un server di rete aggiungere la direttiva askmethod.
• Per usare un'interfaccia in modalità testo, aggiungere la direttiva text.
• Per ritentare l'installazione in seguito ad un primo tentativo fallito, aggiungere la direttiva acpi=off.ACPI è responsabile di molti errori di installazione. Se si disabilita ACPI, si può essere in grado dievitare qualcuno di questi errori.
Refer to the Release Notes for additional options that may help if you encounter problemswith the installation program. A current copy of the Release Notes is always available at http://docs.fedoraproject.org/en-US/Fedora_Core/6/html/Release_Notes/.
Dopo che si sarà fornito un comando al prompt di boot:, si avvierà il primo stadio del programma diinstallazione.

Testare i supporti CD e DVD
13
5.2. Testare i supporti CD e DVD
Figura 5.2. Schermata di test dei supporti CD e DVD
Selezionare OK per testare il disco o selezionare Skip per procedere con l'installazione senza testareil disco.
Testare i dischiTestare ogni disco che non si è precedentemente testato. Un errore del disco durante iprocesso di installazione, può causare un forzato riavvio dell'intera procedura.
Dopo che si sarà testato il primo disco, un'altra schermata apparirà e mostrerà il risultato del test:

Capitolo 5. Iniziare l'installazione
14
Figura 5.3. Risultato del test di verifica del supporto
Selezionare OK. La seguente schermata apparirà:

Avviare dalla rete usando PXE
15
Figura 5.4. Schermata di verifica per il disco successivo
Selezionare Test per testare il disco successivo del set di dischi, o Continue per procedere conl'installazione.
Dopo avere testato i dischi e dopo avere selezionato Continue, o se di è scelto di saltare la fase ditest, verrà caricato il programma principale di installazione grafica.
Ordine di avvio del BIOSThe BIOS contains settings that control the order of boot devices. If your PC boots from adevice other than the Fedora Core boot media, check the BIOS boot configuration.
5.3. Avviare dalla rete usando PXETo boot withPXE, you need a properly configured server, and a network interface in your computer that supportsPXE.
Configure the computer to boot from the network interface. This option is in the BIOS, and may belabeled Network Boot or Boot Services. Once you properly configure PXE booting, the computercan boot the Fedora Core installation system without any other media.
Per avviare un computer da un server PXE:

Capitolo 5. Iniziare l'installazione
16
1. Assicurarsi che il cavo di rete sia inserito. L'indicatore luminoso del connettore di rete dovrebbeessere illuminato, anche se il computer non è acceso.
2. Accendere il computer.
3. Apparirà una schermata di menù. Premere il tasto del numero corrispondente all'opzionedesiderata.
Risoluzione dei problemi di PXESe il vostro PC non si dovesse avviare da un server di rete, assicurarsi che il BIOS siaconfigurato per avviare come prima opzione la corretta interfaccia di rete. Qualche BIOSpotrebbe specificare l'interfaccia di rete come possibile dispositivo di avvio, ma nonsupportare lo standard PXE. Fare riferimento alla documentazione del proprio hardwareper ulteriori informazioni.

Capitolo 6.
17
Localizzare il proprio sistemaSe l'installazione del sistema dovesse fallire nell'identificazione dell'hardware video del computer,verrà mostrato una schermata testuale invece dell'interfaccia grafica predefinita. Le schermate testualiforniscono le stesse funzionalità di quelle standard. Più avanti durante il processo di installazione sipotrà specificare manualmente l'hardware del proprio sistema video.
6.1. Selezione della linguaThe installation program displays a list of languages supported by Fedora Core.
Figura 6.1. Schermata di selezione della lingua
Individuare la lingua corretta nell'elenco e selezionare Avanti.
Installare il supporto per ulteriori lingueTo select support for additional languages, customize the installation at the packageselection stage. For more information, refer to Sezione 15.2.2, «Supporto a lingueaggiuntive».
6.2. Configurazione della tastieraThe installation program display a list of the keyboard layouts supported by Fedora Core:

Capitolo 6. Localizzare il proprio sistema
18
Figura 6.2. Schermata di configurazione della tastiera
Bisogna evidenziare la corretta tipologia della tastiera dalla lista, e selezionare Avanti.

Capitolo 7.
19
Metodi di installazioneYou can install Fedora Core using any of several different methods. You can install from CD or DVDmedia burned from downloaded ISO images, from the ISO images stored on hard disk, or from anetwork using NFS, FTP, or HTTP methods.
If you booted a Fedora Core DVD, or the first installation CD, without the askmethod option, proceedto Sezione 7.1, «Metodo predefinito di installazione». Otherwise, proceed to Sezione 7.2, «Metodialternativi di installazione».
7.1. Metodo predefinito di installazioneA default installation runs directly from CD or DVD installation media. The next stage loadsautomatically from the installation media. Proceed to Capitolo 8, Schermata di benvenuto.
7.2. Metodi alternativi di installazioneLa schermata sui metodi di installazione in basso riportata apparirà se una delle seguenti opzioni saràsoddisfatta:
1. Si è avviata l'installazione con supporti di solo avvio, quali PXE, USB; CD o DVD.
2. Si è selezionata l'opzione askmethod al prompt di boot:.
Figura 7.1. Schermata sui metodi di installazione

Capitolo 7. Metodi di installazione
20
Attività dei CD/DVDIf you booted with Fedora Core installation Disc 1, the installation program loads its nextstage from that disc. This happens regardless of which installation method you choose,unless you eject the disc before you proceed. The installation program still downloadspackage data from the source you choose.
Even if you booted from alternative media, you can still install Fedora Core from CD or DVD media.Alternately, you can install from ISO images stored on your computer's hard disk, or from a networkserver.
• To install from CD or DVD media, insert a Fedora Core DVD or the first installation CD, select LocalCDROM, and proceed to Capitolo 8, Schermata di benvenuto.
• To install from ISO images on a hard disk, select Hard drive and proceed to Sezione 7.3,«Installazione da un disco fisso».
• To install from a network, using NFS, FTP, or HTTP, proceed to Sezione 7.4, «Installazione dellaconfigurazione TCP/IP».
7.3. Installazione da un disco fissoOnce you have booted your computer, you may use ISO image files of the Fedora Core discs tocontinue the installation process. The ISO files must be located on a hard drive that is either internalto the computer, or attached to the machine by USB. You can use this option to install Fedora Core oncomputers that have neither a network connection nor CD or DVD drives.
The partition on the hard drive holding the ISO files must be formatted with theext2,ext3 orvfat file system. In Fedora Core, vfat includes a range of file systems, such as FAT-16 and FAT-32,found on most removable media. External hard drives usually contain vfat (FAT-32) file systems.Some Microsoft Windows systems also use vfat file systems on internal hard disk partitions.
Before you begin installation from a hard drive, check the partition type to ensure that Fedora Corecan read it. To check a partition's file system under Windows, use the Disk Management tool. Tocheck a partition's file system under Linux, use the fdisk utility.
Non si può installare da partizioni LVMNon si può usare un file ISO su partizioni controllate da LVM (Logical VolumeManagement).
Se si è scelta questa opzione, apparirà la seguente schermata:

Installazione della configurazione TCP/IP
21
Figura 7.2. Schermata di scelta della partizione
Selezionare la partizione contenente i file ISO dall'elenco delle partizioni disponibili. I nomi didispositivi interni di tipo IDE cominciano con /dev/hd. I dispositivi SATA, SCSI, e USB hanno nomiche cominciano con /dev/sd. Ogni partizione su un disco fisso è numerata, per esempio /dev/sda1.
Specificare anche la Directory holding images. Digitare il percorso completo della directory dal driveche contiene i file di immagine ISO.
Select OK to continue. Proceed with Capitolo 8, Schermata di benvenuto.
7.4. Installazione della configurazione TCP/IPThe installation program is network-aware and can use network settings for a number of functions. Forinstance, you can install Fedora Core from a network server using FTP, HTTP, orNFS protocols. You can also instruct the installation program to consult additional software repositorieslater in the process.
Come impostazione predefinita, il programma di installazione usa DHCP per settare automaticamentele impostazioni di rete. Nel caso in cui si stia usando una connessione via cavo o un modem DSL,un router, un firewall o altro hardware di rete per comunicare con Internet, DHCP è una opzioneadeguata. In ambienti di produzione, bisogna chiedere al proprio amministratore della rete per leimpostazioni più adeguate. Se la rete non è munita di un server DHCP, bisogna lasciare in bianco lacasella denominata Use dynamic IP configuration (DHCP).

Capitolo 7. Metodi di installazione
22
Il programma di installazione supporta sia IPv4 che IPv6. Se non si è sicuri su quale schemadi indirizzamento venga utilizzato dalla propria rete, si può anche lasciare entrambe le opzioniselezionate.
I responsi DHCP prendono del tempoSe si è selezionato sia IPv4 che IPv6, potrebbe servire del tempo aggiuntivo per riceverele impostazioni della rete dal server DHCP.
Se si è scelta l'installazione basata sulla rete, la seguente schermata apparirà:
Figura 7.3. Finestra di dialogo per la configurazione TCP/IP
Queste impostazioni vengono utilizzate solo durante il processo di installazione. Il programma diinstallazione chiederà di configurare la configurazione finale della rete in un secondo momento.
You can install from a Web, FTP, or NFS server either on your local network or, if you are connected,on the Internet. To use a public server, or mirror website, refer to Sezione 3.3, «Installare da un servero da un sito web» for information on valid server names and directory paths.
Download di file di grande dimensione.If you are not booting from a Fedora Core DVD or installation CD, a network installationdownloads the main installation program from the network. The graphical installationprogram is over 75 MB in size.

Installazione via NFS
23
• If you are installing via NFS, proceed to Sezione 7.5, «Installazione via NFS».
• If you are installing via FTP, proceed to Sezione 7.6, «Installazione via FTP».
• If you are installing via HTTP, proceed to Sezione 7.7, «Installazione via HTTP».
7.5. Installazione via NFSPer installare da un server NFS, selezionare NFS dal menù Installation Method e selezionare OK. Laseguente schermata apparirà:
Figura 7.4. Finestra di dialogo per installazione via NFS
Digitare il nome o l'indirizzo IP del server NFS e la directory dove si trovano i file di installazione.
Disponibilità di mirror NFSPublic NFS mirrors are rare due to security concerns with NFS that do not necessarilyapply to FTP or HTTP servers. The Fedora Project does not maintain a list of public NFSmirrors for Fedora Core.
Select OK to continue. Proceed with Capitolo 8, Schermata di benvenuto.
7.6. Installazione via FTPPer installare da un server FTP, selezionare FTP dal menù Installation Method e selezionare OK.

Capitolo 7. Metodi di installazione
24
Figura 7.5. Finestra di dialogo per installazione via FTP
Enter the name or IP address of the FTP server and the directory where the installation files reside.Refer to Sezione 3.3, «Installare da un server o da un sito web» for information on how to locate aFTP mirror and enter its information here.
La finestra di dialogo per installazione via FTP, ha anche l'opzione Use non-anonymous ftp. Seil server FTP che si sta utilizzando non fornisce accesso anonimo, bisogna selezionare la casellarelativa. Bisogna possedere delle credenziali sul server FTP per utilizzare tale opzione.
Select OK to continue. If you are using the default, anonymous FTP service, continue with Capitolo 8,Schermata di benvenuto.
Se si sta utilizzando un accesso FTP non anonimo, apparirà la seguente finestra di dialogo:

Installazione via HTTP
25
Figura 7.6. Finestra di dialogo per accesso FTP non anonimo
Enter your username and password in the spaces provided. Then select OK to continue. Proceed withCapitolo 8, Schermata di benvenuto.
7.7. Installazione via HTTPPer installare da un server Web (HTTP), selezionare HTTP dal menù Installation Method eselezionare OK. La seguente schermata apparirà:

Capitolo 7. Metodi di installazione
26
Figura 7.7. Finestra di dialogo per installazione via HTTP
Enter the name or IP address of the Web server and the directory where the installation files reside.Refer to Sezione 3.3, «Installare da un server o da un sito web» for information on how to locate aWeb mirror and enter its information here.
Select OK to continue. Proceed with Capitolo 8, Schermata di benvenuto.

Capitolo 8.
27
Schermata di benvenutoDopo che il programma di installazione avrà caricato la pagina successiva, apparirà la seguentefinestra di dialogo:
Figura 8.1. Schermata di benvenuto
Le schermate di installazione potrebbero essere differentiIl programma di installazione potrebbe continuare in modalità testo se:
• il computer ha 128 MB di memoria, o meno
• si è avviato con l'opzione text
Le schermate mostrate nei seguenti capitoli sono basate su di una installazione grafica.Tuttavia, molte funzioni sono simili, senza riferimenti alla modalità di installazione.
Selezionare Next per continuare.

28

Capitolo 9.
29
Passaggio ad una versione superiore diun sistema esistenteThe installation system automatically detects any existing installation of Fedora Core. The upgradeprocess updates the existing system software with new versions, but does not remove any data fromusers' home directories. The existing partition structure on your hard drives does not change. Yoursystem configuration changes only if a package upgrade demands it. Most package upgrades do notchange system configuration, but rather install an additional configuration file for you to examine later.
9.1. Esaminare il passaggio ad una versione superioreIf your system contains a Fedora Core or Red Hat Linux installation, the following screen appears:
Figura 9.1. Schermata per esaminare il passaggio ad una versione superiore
Per effettuare il passaggio alla versione superiore di un sistema esistente, scegliere l'installazioneappropriata dalla lista a cascata e selezionare Avanti.
Software installato manualmenteSoftware which you have installed manually on your existing Fedora Core or Red HatLinux system may behave differently after an upgrade. You may need to manually

Capitolo 9. Passaggio ad una versione superiore di un sistema esistente
30
recompile this software after an upgrade to ensure it performs correctly on the updatedsystem.
9.2. Aggiornamento alla versione superiore del boot loaderYour completed Fedora Core installation must be registered in theboot loader to boot properly. A boot loader is software on your machine that locates and starts theoperating system. Refer to Capitolo 11, Boot Loader for more information about boot loaders.
Figura 9.2. Schermata di aggiornamento alla versione superiore del boot loader
If the existing boot loader was installed by a Linux distribution, the installation system can modify itto load the new Fedora Core system. To update the existing Linux boot loader, select Update bootloader configuration. This is the default behavior when you upgrade an existing Fedora Core or RedHat Linux installation.
GRUB is the standard boot loader for Fedora Core. If your machine uses another boot loader, such asBootMagic™, System Commander™, or the loader installed by Microsoft Windows, then the FedoraCore installation system cannot update it. In this case, select Skip boot loader updating. When theinstallation process completes, refer to the documentation for your product for assistance.
L'installazione di un nuovo boot loader come parte del processo di aggiornamento di un sistemaesistente, va eseguita solo se si è certi di volere sostituire il boot loader esistente. Se si vuoleinstallare un nuovo boot loader, si potrebbe non essere più in grado di avviare altri sistemi operativisulla stessa macchina fino a quando non si sarà configurato il nuovo boot loader. Selezionare Creare

Aggiornamento alla versione superiore del boot loader
31
una nuova configurazione del boot loader per rimuovere il boot loader esistente ed installareGRUB.
Dopo avere fatto le proprie scelte, cliccare Avanti per continuare.

32

Capitolo 10.
33
Partizionamento del discoFedora Core creates and uses several partitions on the available hard drives. You may customizeboth the partitions, and how the drives on your system are managed. Sezione 10.1, «Informazioni dicarattere generale sulle partizioni» explains drive partitions in more detail.
Configurare dispositivi RAIDRAID facilities enable a group, or array, of drives to act as a single device. Configure anyRAID functions provided by the mainboard of your computer, or attached controller cards,before you begin the installation process. Each active RAID array appears as one drivewithin Fedora Core.
On systems with more than one hard drive you may configure Fedora Core to operate several of thedrives as a Linux RAID array without requiring any additional hardware. Linux software RAID arraysare explained in Sezione 10.2, «Disk Druid».
In caso di ripensamentiIl processo di installazione non apporterà alcuna modifica al sistema fino a quandol'installazione dei pacchetti non sarà iniziata. Si può utilizzare Back per ritornare alleschermate precedenti e cambiare le scelte operate in ogni momento.
Figura 10.1. Schermata delle opzioni di partizionamento

Capitolo 10. Partizionamento del disco
34
La finestra sullo schermo elenca i dispositivi disponibili. Come impostazione predefinita, il processodi installazione può interessare tutti i dispositivi del computer. Per assicurarsi che specifici dispositivinon vengano ripartizionati, deselezionare la casella di spunta posta vicino ai all'elenco dei dispositivi inquestione.
The installation process erases any existing Linux partitions on the selected drives, and replacesthem with the default set of partitions for Fedora Core. All other types of partitions remain unchanged.For example, partitions used by Microsoft Windows, and system recovery partitions created by thecomputer manufacturer, are both left intact. You may choose an alternative from the drop-down list:
Remove all partitions on selected drives and create default layoutBisogna evitare questa opzione, a meno che non si desideri cancellare tutti i sistemi operativiesistenti e tutti i dati dai dispositivi selezionati.
Remove linux partitions on selected drives and create default layoutIf the selected drives have any Linux partitions, this option removes them and installs Fedora Coreinto the resulting free space. This option does not modify partitions assigned to other non-Linuxoperating systems. It does not discriminate, however, between partitions assigned to differentLinux distributions, and will remove all of them.
Use free space on selected drives and create default layoutIf the selected drives have free space that has not been assigned to a partition, this option installsFedora Core into the free space. This option ensures that no existing partition is modified by theinstallation process.
Create custom layoutYou manually specify the partitioning on the selected drives. The next screen enables you toconfigure the drives and partitions for your computer. If you choose this option, Fedora Corecreates no partitions by default.
Select Review and modify partitioning layout to customize the set of partitions that Fedora Corecreates, to configure your system to use drives in RAID arrays, or to modify the boot options for yourcomputer. If you choose one of the alternative partitioning options, this is automatically selected.
Use the Advanced storage options option if:• You want to install Fedora Core to a drive connected through the iSCSI protocol. Select Advanced
storage options, then select Add iSCSI target, then select Add drive. Provide an IP address andthe iSCSI initiator name, and select Add drive.
• Se si vuole disabilitare un dispositivo dmraid che è stato riconosciuto all'avvio.
Scegliere un'opzione di partizionamento, e selezionare Avanti per procedere.
La schermata successivaThe next screen is Network Devices, explained Capitolo 12, Configurazione dellarete, unless you select an option to customize the partition layout. If you choose toeither Create custom layout, or Review and modify partitioning layout, proceed toSezione 10.1, «Informazioni di carattere generale sulle partizioni».

Informazioni di carattere generale sulle partizioni
35
10.1. Informazioni di carattere generale sulle partizioniA Fedora Core system has at least three partitions:
• Una partizione per dati montata su /boot
• Una partizione per dati montata su /
• Una partizione di swap
Many systems have more partitions than the minimum listed above. Choose partitions based on yourparticular system needs. For example, consider creating a separate /home partition on systems thatstore user data, for the reasons explained in Sezione 10.1.3, «Creare una partizione /home».
Se non si è sicuri di quale sia il miglior modo di configurare il proprio computer, si dovrebbe accettarelo schema di partizionamento predefinito.
The RAM installed in your computer provides a pool of memory for running systems. Linux systemsuseswap partitions to expand this pool, by automatically moving portions of memory between RAM andswap partitions if insufficient RAM is available. In addition, certain power management features storeall of the memory for a suspended system in the available swap partitions. If you manually specify thepartitions on your system, create one swap partition that has more capacity than the computer RAM.
Data partitions provide storage for files. Each data partition has amount point, to indicate the system directory whose contents reside on that partition. A partition withno mount point is not accessible by users. Data not located on any other partition resides in the / (orroot) partition.
Root e /rootThe / (orroot) partition is the top of the directory structure. The/root (sometimes pronounced "slash-root") directory is the home directory of the useraccount for system administration.
Nella configurazione minima così mostrata:
• Tutti i dati sotto la direcory /boot/ vengono archiviati nella partizione /boot. Per esempio, il file /boot/grub/grub.conf risiede nella partizione /boot.
• Ogni file al di fuori della partizione /boot, come ad esempio /etc/passwd, viene archiviato nellapartizione /.
Sottodirectory possono essere assegnate a partizioni. Qualche amministratore crea sia la partizione/usr che la partizione /usr/local. In questo caso, i file sotto /usr/local, come ad esempio/usr/local/bin/foo, sono sotto la partizione /usr/local. Ogni altro file in /usr/, come adesempio /usr/bin/foo, è nella partizione /usr.
If you create many partitions instead of one large / partition, upgrades become easier. Refer to thedescription of Disk Druid's Edit option for more information.

Capitolo 10. Partizionamento del disco
36
Lasciare la capacità in eccesso come non allocataAssegnare ai dispositivi solo la capacità di immagazzinamento che si intende usareimmediatamente. Si può allocare lo spazio libero quando si vuole, per prevenire eventualinecessità.
10.1.1. Tipi di partizioniEvery partition has apartition type, to indicate the format of thefile system on that partition. The file system enables Linux to organize, search, and retrieve files storedon that partition. Use theext3 file system for data partitions that are not part of LVM, unless you have specific needs thatrequire another type of file system.
10.1.2. Comprendere LVMLVM (Logical Volume Management) partitions provide a number of advantages over standardpartitions. LVM partitions are formatted asphysical volumes. One or more physical volumes are combined to form avolume group. Each volume group's total storage is then divided into one or morelogical volumes. The logical volumes function much like standard partitions. They have a file systemtype, such as ext3, and a mount point.
La partizione /boot ed LVMSolo un sistema Linux attivo può leggere o scrivere volumi LVM. Per questa ragione, lapartizione /boot che ha il compito di inizializzare il sistema deve essere gestita al di fuoridei volumi fisici LVM.
Un amministratore può espandere o ridurre volumi logici senza distruggerne i dati, al contrario diquanto accade con le partizioni standard di dischi. Se i volumi fisici in un gruppo di volumi sono sudischi separati o in un array RAID, allora gli amministratori possono anche distribuire un volume logicosui dispositivi di archiviazione.
Si potrebbero perdere dei dati se si volesse restringere un volume logico in una capacità più piccoladi quella richiesta dai dati presenti nel volume medesimo. Per assicurare la massima flessibilità,è meglio creare volumi logici capaci di soddisfare le attuali esigenze, e lasciare la capacità diimmagazzinamento in eccesso non allocata. Si può espandere senza conseguenze la capacità deivolumi logici per utilizzare spazio non allocato, per come dettato poi dalle proprie esigenze.
LVM e lo schema di partizionamento predefinitoCome impostazione predefinita, il processo di installazione crea partizioni per dati e diswap dentro volumi LVM, con una partizione /boot separata.

Creare una partizione /home
37
10.1.3. Creare una partizione /homeIf you expect that you or other users will store data on the system, create a separate partition for the /home directory within a volume group. With a separate /home partition, you may upgrade or reinstallFedora Core without erasing user data files. LVM provides you with the ability to add more storagecapacity for the user data at a later time.
10.2. Disk DruidDisk Druid is an interactive program for editing disk partitions. Users run it only within the FedoraCore installation system. Disk Druid enables you to configureLinux software RAID andLVM to provide more extensible and reliable data storage.
Modificare lo schema LVM predefinitoThe default layout pools all of the available storage into a single LVM physical volume,with one LVM logical volume for the system. To make capacity available for additionalpartitions, Edit the logical volume with the mount point /, and reduce it's size asnecessary.
Figura 10.2. Schermata di setup del disco
Disk Druid mostra le seguenti possibilità nel programma di installazione:

Capitolo 10. Partizionamento del disco
38
NewSelect this option to add a partitionor LVM physical volume to the disk. In the Add partition dialog, choose a mount point and apartition type. If you have more than one disk on the system, choose which disks the partition mayinhabit. Indicate a size in megabytes for the partition.
Partizioni non permesseThe /bin/, /dev/, /etc/, /lib/, /proc/, /root/, and /sbin/ directories maynot be used for separate partitions in Disk Druid. These directories reside on the/ (root) partition.
La partizione /boot non deve risiedere in un gruppo di volume LVM. Creare lapartizione /boot prima di configurare ogni gruppo di volumi.
Si può anche scegliere fra tre opzioni per dimensionare le proprie partizioni:
Fixed sizeUsare una dimensione fissata da se stessi, se possibile
Fill all space up toEspandere la partizione fino a raggiungere la dimensione massima di propria scelta
Fill to maximum allowable sizeEspandere la partizione fino a farle utilizzare tutto lo spazio rimanente dei dischi selezionati.
Dimensioni delle partizioniLe partizioni presenti su disco potrebbero essere leggermente più piccole o più grandirispetto alla propria scelta. La geometria dei dischi causa questo effetto, non è né unerrore né un bug.
Dopo avere immesso i dettagli per le proprie partizioni, selezionare OK per continuare.
EditSelect this option to edit an existing partition,LVM volume group, or an LVM physical volume that is not yet part of a volume group. To changethe size of a LVM physical volume partition, first remove it from any volume groups.
Rimuovere volumi fisici LVMLa rimozione di un volume fisico LVM da un gruppo di volume, cancellerà tutti i volumilogici che lo stesso gruppo contiene.
Editare una partizione per cambiarne la dimensione, o il tipo di file system. Usare questa funzioneper:
• correggere un errore fatto in fase di definizione delle partizioni
• migrate Linux partitions if you are upgrading or reinstalling Fedora Core
Disk Druid
39
• rendere disponibile un punto di montaggio a partizioni non-Linux quali quelle usate su alcunisistemi operativi di tipo Windows
Partizioni di WindowsYou may not label Windows partitions that use theNTFS file system with a mount point in the Fedora Core installer. You may labelvfat (FAT16 or FAT32) partitions with a mount point.
Se si ha bisogno di apportare drastici cambiamenti alla propria configurazione delle partizioni,si potrebbe volere cancellare le partizioni e ricominciare dal principio. Se il disco contiene deidati che si desidera conservare, effettuarne un backup prima di editare le partizioni. Editare ladimensione di una partizione, può causare la perdita di dati in essa archiviati.
If your system contains many separate partitions for system and user data, it is easier to upgradeyour system. The installation program allows you to erase or retain data on specific partitions. Ifyour user data is on a separate/home partition, you can retain that data while erasing system partitions such as /boot.
DeleteSelect this option to erase an existing partitionor LVM physical volume. To delete an LVM physical volume, first delete any volume groups ofwhich that physical volume is a member.
Se si dovesse commettere degli errori, si può usare l'opzione Reimposta per eliminare ognicambiamento apportato.
ResetSelezionare questa opzione per forzare Disk Druid ad abbandonare ogni cambiamento apportatoalle partizioni del disco.
RAIDSelect this option to set up software RAIDon your Fedora Core system.
Create a software RAID partitionScegliere questa opzione per aggiungere una partizione per software RAID. Tale opzione è lasola scelta disponibile se il disco non contiene alcuna partizione RAID.
Create a RAID deviceScegliere questa opzione per costruire un dispositivo RAID da due o più partizioni RAID giàesistenti. Questa opzione è disponibile se due o più partizioni RAID sono già state configurate.
Clone a drive to create a RAID deviceScegliere questa opzione per configurare un mirror RAID di un disco esistente. Questaopzione è disponibile se due o più dischi sono presenti nel sistema.
LVMSelect this option to set up LVMon your Fedora Core system. First create at least one partition or software RAID device as an LVMphysical volume, using the New dialog.

Capitolo 10. Partizionamento del disco
40
Per assegnare uno o più volumi ad un gruppo di volume, per prima cosa dare un nome al gruppodi volume. Poi selezionare i volumi fisici che devono essere usati nel gruppo di volume. Infine,configurare volumi logici su ogni gruppo di volume usando le opzioni Nuovo, Modifica edElimina.
You may not remove a physical volume from a volume group if doing so would leave insufficientspace for that group's logical volumes. Take for example a volume group made up of two 5 GBLVM physical volume partitions, which contains an 8 GB logical volume. The installer would notallow you to remove either of the component physical volumes, since that would leave only 5GB in the group for an 8 GB logical volume. If you reduce the total size of any logical volumesappropriately, you may then remove a physical volume from the volume group. In the example,reducing the size of the logical volume to 4 GB would allow you to remove one of the 5 GBphysical volumes.
LVM non è disponibile durante installazioni in modalità testoLVM initial set up is not available in a text-mode installation. The installer allows youto edit pre-configured LVM volumes. If you need to create an LVM configuration fromscratch, hit Alt+F2 to use the terminal, and run the lvm command. To return to thetext-mode installation, hit Alt+F1.
Dopo avere finito di configurare e rivedere lo schema di partizionamento, selezionare Avanti percontinuare il processo di installazione.
Capitolo 11.
41
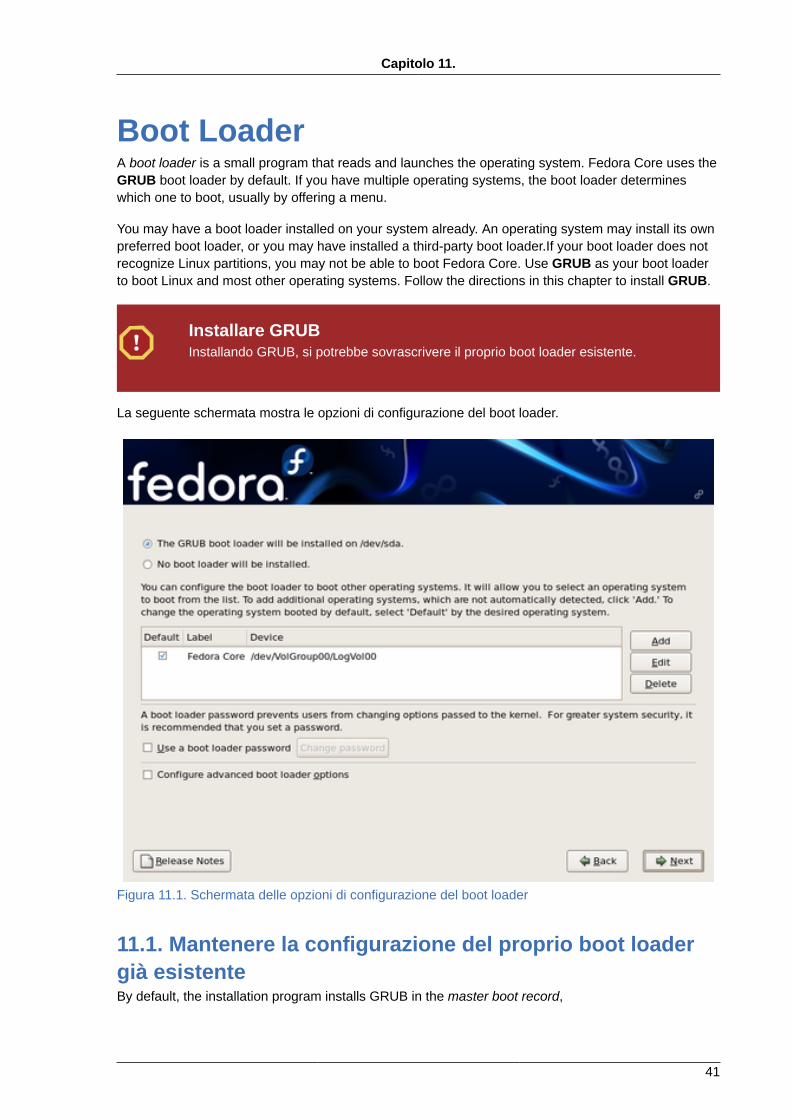
Boot LoaderA boot loader is a small program that reads and launches the operating system. Fedora Core uses theGRUB boot loader by default. If you have multiple operating systems, the boot loader determineswhich one to boot, usually by offering a menu.
You may have a boot loader installed on your system already. An operating system may install its ownpreferred boot loader, or you may have installed a third-party boot loader.If your boot loader does notrecognize Linux partitions, you may not be able to boot Fedora Core. Use GRUB as your boot loaderto boot Linux and most other operating systems. Follow the directions in this chapter to install GRUB.
Installare GRUBInstallando GRUB, si potrebbe sovrascrivere il proprio boot loader esistente.
La seguente schermata mostra le opzioni di configurazione del boot loader.
Figura 11.1. Schermata delle opzioni di configurazione del boot loader
11.1. Mantenere la configurazione del proprio boot loadergià esistenteBy default, the installation program installs GRUB in the master boot record,

Capitolo 11. Boot Loader
42
or MBR, of the device for the root file system. To decline installation of a new boot loader, select Noboot loader will be installed.
Un boot loader è necessarioIl computer deve avere GRUB o un altro boot loader installato per avviarsi, a meno chenon si sia creato un disco separato di avvio da cui effettuare il boot.
You may need to customize the GRUB installation to correctly support some hardware or systemconfigurations. To specify compatibility settings, select Configure advanced boot loader options.This causes a second screen of options to appear when you choose Next. Sezione 11.4, «Opzioniavanzate del boot loader» explains the features of the additional screen.
11.2. Avviare sistemi operativi aggiuntiviIf you have other operating systems already installed, Fedora Core attempts to automatically detectand configure GRUB to boot them. You may manually configure any additional operating systems ifGRUB does not detect them. To add, remove, or change the detected operating system settings, usethe options provided.
AddPress the Add button to include an additional operating system in GRUB. Fedora Core displaysthe dialog shown in Figura 11.2, «Aggiungere sistemi operativi al menù di boot».
Selezionare dal menù a cascata la partizione del disco che contiene il sistema operativo avviabilee digitare l'etichetta desiderata. GRUB mostrerà tale etichetta nel proprio menù di avvio.
EditPer cambiare un'entrata nel menu di avvio di GRUB, selezionare la voce e poi selezionareModifica.
DeletePer rimuovere una voce dal menù di avvio di GRUB, selezionare la voce relativa e poi selezionareElimina.

Configurare una password per il boot loader
43
Figura 11.2. Aggiungere sistemi operativi al menù di boot
11.3. Configurare una password per il boot loaderGRUB è in grado di leggere da molti file system senza l'aiuto di un sistema operativo. Un operatorepuò interrompere la sequenza di avvio per scegliere un differente sistema operativo all'avvio, cambiarele opzioni di avvio, o rimediare ad un errore di sistema. Comunque, queste funzioni possono introdurredei seri rischi di sicurezza in qualche ambiente. Si può aggiungere una password a GRUB così chel'operatore debba digitare una password per interrompere la normale sequenza di avvio.
Quando fare a meno delle password per GRUBYou may not require a GRUB password if your system only has trusted operators, or isphysically secured with controlled console access. However, if an untrusted person canget physical access to your computer's keyboard and monitor, that person can reboot thesystem and access GRUB. A password is helpful in this case.
Per configurare una password di avvio, selezionare la casella relativa alla voceUse a boot loaderpassword. Il pulsante Change password diventerà attivabile. Selezionare Change password perfare comparire la finestra di dialogo mostrata più avanti. Digitare la password che si desidera, e poiconfermarla digitandola nuovamente negli spazi appositi.
Capitolo 11. Boot Loader
44
Scegliere una buona passwordScegliere una buona password che è al contempo facile da ricordare ma difficile daindividuare.
11.3.1. Password di GRUB dimenticateGRUB stores the password in encrypted form, so it cannot be read or recovered. If you forget theboot password, boot the system normally and then change the password entry in the /boot/grub/grub.conf file. If you cannot boot, you may be able to use the "rescue" mode on the first FedoraCore installation disc to reset the GRUB password.
Per cambiare la password di GRUB, usare il programma di utilità grub-md5-crypt. Per maggioriinformazioni a riguardo, va usato il comando man grub-md5-crypt in un terminale, per leggere lepagine del manuale.
11.4. Opzioni avanzate del boot loaderThe default boot options are adequate for most situations. The installation program writes the GRUBboot loader in themaster boot record (MBR), overwriting any existing boot loader.
Si può mantenere attivo il proprio boot loader installato nell'MBR ed installare GRUB come un bootloader secondario. Se si dovesse scegliere tale opzione, il programma di installazione scriverà GRUBnel primo settore della partizione Linux /boot.
GRUB come boot loader secondarioSe si dovesse scegliere di installare GRUB come boot loader secondario, bisognariconfigurare il proprio boot loader primario tutte le volte che verrà installato un nuovokernel con l'intenzione di usarlo per avviare il sistema. Il kernel di un sistema operativocome Microsoft Windows non è tale da avviare il sistema in maniera così amichevole. Perquesto motivo molti utenti usano GRUB come boot loader primario su sistemi con doppiamodalità di avvio (dual-boot).
You may also need the advanced options if your BIOS enumerates your drives or RAID arraysdifferently than Fedora Core expects. If necessary, use the Change Drive Order dialog to set theorder of the devices in Fedora Core to match your BIOS.
On a few systems, Fedora Core may not configure the disk drive geometry for large disks correctlybecause of limitations within the BIOS. To work around this problem, mark the Force LBA32 checkbox.
Il kernel di Linux usualmente riconosce automaticamente il proprio ambiente correttamente, e non ènecessario fornire alcun parametro addizionale. Comunque, si può fornire ogni parametro necessarioal kernel usando le opzioni avanzate del boot loader.

Opzioni avanzate del boot loader
45
Parametri del kernelFor a partial list of the kernel command line parameters, type the following command ina terminal window: man bootparam. For a comprehensive and authoritative list, refer tothe documentation provided in the kernel sources.
To alter any of these settings, mark the Configure advanced boot loader options check box. SelectNext and the menu shown in Figura 11.3, «Opzioni avanzate di avvio» appears.
Menù opzionaleFedora Core displays the following advanced boot options menu only if the advancedconfiguration check box described above has been selected.
Figura 11.3. Opzioni avanzate di avvio

46

Capitolo 12.
47
Configurazione della reteUse this screen to customize the network settings of your Fedora Core system.
Manual network configuration of a Fedora Core system is often not required. Many networks have aDHCP (Dynamic Host Configuration Protocol) service that automatically supplies connected systemswith configuration data. By default, Fedora Core activates all network interfaces on your computer andconfigures them to use DHCP.
Figura 12.1. Schermata di configurazione della rete
12.1. Dispositivi di reteFedora Core displays a list of network interfaces detected on your computer. Each interface must havea unique IP addresson the network to which it is attached. The interface may receive this address from the networkDHCP service.
To manually assign an IP address, highlight the interface on the Network Device list and select Edit.Fedora Core then displays a network configuration dialog. Deselect the Configure using DHCP checkbox, so that it is empty. Enter the IP Address and the appropriate Netmask for the interface. Thenselect OK.
Se il computer deve svolgere il proprio compito come server, non bisogna usare DHCP. Bisogna alcontrario configurare la rete manualmente. La configurazione manuale delle rete abilita il server aconnettersi in rete anche nel caso in cui il servizio DHCP non dovesse essere disponibile.
Capitolo 12. Configurazione della rete
48
Specificare se un interfaccia debba essere attivata automaticamente all'avvio del sistemaspuntando la casella vicino la voce Attiva all'avvio relativa a quel dispositivo. Si può anche attivaremanualmente un'interfaccia di rete in qualunque momento dopo che il sistema è stato avviato.
Configurazione del modemThe Network Configuration screen does not listmodems. Configure these devices after installation with the Network utility. The settingsfor your modem are specific to your particular Internet Service Provider (ISP).
12.2. Nome del computer (computer hostname)On some networks, the DHCP provider also provides the name of the computer, orhostname. To specify the hostname, select Manual and type the complete name in the box. Thecomplete hostname includes both the name of the machine and the name of the domain of whichit is a member, such as machine1.example.com. The machine name (or "short hostname") ismachine1, and thedomain name is example.com.
Hostname validiBisogna assegnare al proprio sistema un nome tale che il completo hostname sia unico.L'hostname può includere lettere, numeri e trattini.
12.3. Configurazioni variePer configurare manualmente un'interfaccia di rete, bisogna anche fornire altre impostazioni di rete alcomputer. Tutte queste impostazioni altro non sono che indirizzi IP di altri sistemi sulla rete.
A gatewayis the device that provides access to other networks. Gateways are also referred to asrouters. If your system connects to other networks through a gateway, enter its IP address in theGateway box.
Most software relies on theDNS (Domain Name Service) provider to locate machines and services on the network. DNS convertshostnames to IP addresses and vice versa. A Fedora Core system may use more than one DNSserver. If the primary DNS server does not respond, the computer sends any query to the secondaryDNS server, and so on. To assign DNS servers, type their IP addresses into the Primary, Secondary,or Tertiary DNS Server boxes.
Cliccare su Avanti dopo che si sono soddisfatte tutte le necessarie impostazioni della rete per iproprio sistema.

Capitolo 13.
49
Selezione del fuso orarioThis screen allows you to specify the correct time zone for the location of your computer. Specify atime zone even if you plan to useNTP (Network Time Protocol) to maintain the accuracy of the system clock.
13.1. Selezionare un fuso orarioFedora Core displays on the screen two methods for selecting the time zone.
Figura 13.1. Schermata per la selezione del fuso orario
Per selezionare un fuso orario servendosi della mappa, bisogna prima posizionare il puntatoredel mouse al di sopra della regione sulla mappa. Cliccare una sola volta per ingrandire la regioneselezionata sulla mappa. Quindi, selezionare il punto giallo che rappresenta la città più vicina allapropria località. Una volta selezionato, il punto diventerà una X rossa, per indicare la selezioneoperata.
Per selezionare un fuso orario usando la lista, selezionare il nome della città più vicina alla proprialocalità. Le città sono elencate in ordine alfabetico.
13.2. Tempo Coordinato Universale (UTC)Universal Co-ordinated Time is also known asGreenwich Mean Time (GMT).

Capitolo 13. Selezione del fuso orario
50
If Fedora Core is the only operating system on your computer, select System clock uses UTC. Thesystem clock is a piece of hardware on your computer system. Fedora Core uses the timezone settingto determine the offset between the local time and UTC on the system clock. This behavior is standardfor UNIX-like operating systems.
Windows e l'orologio di sistemaDo not enable the System clock uses UTC option if your machine also runs MicrosoftWindows. Microsoft operating systems change the BIOS clock to match local time ratherthan UTC. This may cause unexpected behavior under Fedora Core.
Seleziona Avanti per continuare.

Capitolo 14.
51
Impostazione della password di RootFedora Core uses a special account namedroot for system administration. The root account on a Linux system is not subject to most normalaccount restrictions. As the system owner or administrator, you may sometimes require specialprivileges to configure or modify the system. In those cases, use the root account.
Usare l'account dell'utente rootAvoid logging in to Fedora Core as root when possible. Any administration tools whichrequire root privileges will prompt you for the password.
The Fedora Core installation program requires the root password to be at least six characters long.Because the root account may potentially control any part of the system, use the following guidelinesto create a good password:
• Usare una combinazione di lettere maiuscole e minuscole, numeri, segni di interpunzione ed altricaratteri.
• Non usare una parola di senso compiuto o un nome. Oscurare le parole di senso compiuto o i nomicon caratteri sostitutivi non è efficace.
• Non usare la stessa password per più di un sistema.
I seguenti sono esempi di buone password:
• f9*@1Ls99A
• HL8$391%%rb
• Iwtb,10^th
Enter the root password into the Root Password field. Fedora Core displays the characters asasterisks for security. Type the same password into the Confirm field to ensure it is set correctly.

Capitolo 14. Impostazione della password di Root
52
Figura 14.1. Schermata di configurazione della password di root
Dopo avere settato la password di root, selezionare Avanti per continuare.

Capitolo 15.
53
Selezione del softwareBy default, the Fedora Core installation process loads a selection of software that is suitable for adesktop system.
Figura 15.1. Schermata di selezione del software per gruppi
Per aggiungere o rimuovere del software per gruppi specifici, selezionare le voci di interessedall'elenco:
Ufficio e produttivitàQuesta opzione fornisce la suite di produzione OpenOffice.org, l'applicazione per la gestione diprogetti, strumenti per la grafica come the GIMP, ed applicazioni per la multimedialità.
Sviluppo softwareThis option provides the necessary tools to compile software on your Fedora Core system.
Web serverQuesta opzione fornisce il server web Apache.
15.1. Installare da repository aggiuntiviYou can define additional repositories to increase the software available to your system duringinstallation. A repository is a network location that stores software packages along with metadata thatdescribes them. Many of the software packages used in Fedora Core require other software to be

Capitolo 15. Selezione del software
54
installed. The installer uses the metadata to ensure that these requirements are met for every piece ofsoftware you select for installation.
The Fedora Extras software repository contains thousands of additional packages you can add atinstallation time if desired. To add the Fedora Extras software repository to the installation program,select Fedora Extras from the repository listing. Fedora Extras is already defined in the installationprogram and requires no further input. For more information about Fedora Extras, refer to the ReleaseNotes or http://fedoraproject.org/wiki/Extras.
Fedora Extras e connettività di reteLa selezione del repository Fedora Extras sarà disponibile solo se il computer è dotato diuna connessione internet.
To include software from repositories other than Fedora Core and Fedora Extras, select Addadditional software repositories. The following list includes examples of ways you can use thisoption.
• Scaricare l'ultima versione del software per FedoraFornendo al sistema la localizzazione di un repository di aggiornamento per Fedora Core,questi verrà dotato delle più recenti versioni del Core software. Non è necessario effettuareimmediatamente dopo l'installazione un aggiornamento del sistema, per ottenere tali aggiornamenti.Questo uso è l'ideale per installare attraverso Internet o altra rete dove bisogna stare attenti allalarghezza della banda di trasmissione.
Passaggi a versioni superiori ed aggiornamentiPackage updates during the release cycle of a single verison of Fedora Core areintended to upgrade only that version. If you are upgrading a previous version of FedoraCore, you may encounter problems if you include an update repository during this step.Problems are less likely when performing a fresh installation.
• Installare software di terze partiSi possono indicare repository di software di terze parti. In funzione della configurazione di talirepository, si sarà in grado di selezionare durante l'installazione software non fornito con Fedora.
Se si seleziona Aggiungi repositories per software aggiuntivo, appare la seguente finestra didialogo:

Installare da repository aggiuntivi
55
Figura 15.2. Schermata per repository aggiuntivi
Si può fornire il nome di un repository e l'URL per la sua localizzazione. Ecco l'elenco di alcuni URLche fungono da mirror per repository di software specifico per Fedora.
• Aggiornamenti per Fedora Core - http://fedora.redhat.com/download/mirrors/updates-released-fc6
• Fedora Extras - http://fedora.redhat.com/download/mirrors/fedora-extras-6
The URLs above provide a list of actual mirrors. You cannot use them verbatim in the Add repositorydialog. Visit the URL for a list of actual repository locations. If you see the text $ARCH in the URL,substitute your system's architecture. See Capitolo 2, Comprendere le architetture i386 e le altrearchitetture disponibili per computer for more information on architectures.
Once you provide information for an additional repository, the installer reads the package metadataover the network. Software that is specially marked is then included in the package group selectionsystem. See Sezione 15.2, «Personalizzare la selezione del software» for more information onselecting packages.
Il ritorno all'indietro cancella i dati dei repository aggiuntiSe viene scelto Indietro nella schermata di selezione dei pacchetti, tutti i dati surepository aggiuntivi che si è immesso andranno persi. Questo abilita effettivamente acancella re repository extra. Al momento non c'è alcun modo di cancellare un singolorepository una volta che è stato immesso.

Capitolo 15. Selezione del software
56
15.2. Personalizzare la selezione del softwareSelezionare Personalizzare ora per specificare con maggiore dettaglio i pacchetti software per ilproprio sistema finale. Questa opzione farà visualizzare al processo di installazione una schermataaggiuntiva di personalizzazione quando verrà selezionato Avanti.
Installare un supporto per ulteriori lingue.Select Customize now to install support for additional languages. Refer toSezione 15.2.2, «Supporto a lingue aggiuntive» for more information on configuringlanguage support.
Fedora Core divides the included software intopackage groups. For ease of use, the package selection screen displays these groups as sixcategories:
Figura 15.3. Schermata della selezione dei gruppi di pacchetti
Per visualizzare i gruppi di pacchetti per ciascuna categoria, selezionare la categoria nella lista asinistra. La lista sulla destra mostra i gruppi di pacchetti per la categoria selezionata.
Per specificare un gruppo di pacchetti per l'installazione, selezionare la casella vicina al gruppo.Il riquadro posto in basso nella schermata mostra i dettagli del gruppo di pacchetti che èattualmente selezionato. Nessuno dei pacchetti da un gruppo sarà installato fino a quando la casellacorrispondente a quel gruppo non verrà selezionata.

In caso di ripensamenti
57
If you select a package group, Fedora Core automatically installs the base and mandatory packagesfor that group. To change which optional packages within a selected group will be installed, select theOptional Packages button under the description of the group. Then use the check box next to anindividual package name to change its selection.
Figura 15.4. Finestra di dialogo con il dettaglio dei gruppi di pacchetti
After you choose the desired packages, select Next to proceed. Fedora Core checks your selection,and automatically adds any extra packages required to use the software you select.
15.2.1. In caso di ripensamentiThe packages that you select are not permanent. After you boot your system, use the pirut tool toeither install new software or remove installed packages. To run this tool, from the main menu, select
Applications → Add/Remove Software. The Fedora Core software management system downloadsthe latest packages from network servers, rather than using those on the installation discs.
15.2.2. Supporto a lingue aggiuntiveYour Fedora Core system automatically supports the language that you selected at the start of theinstallation process. To include support for additional languages, select the package group for thoselanguages from the Languages category.
15.2.3. Core Network ServicesTutte le installazioni di Fedora Core includono i seguenti servizi di rete:

Capitolo 15. Selezione del software
58
• raccolta centralizzata dei log tramite syslog
• email tramite SMTP (Simple Mail Transfer Protocol)
• condivisione di file nella rete tramite NFS (Network File System)
• accesso remoto tramite SSH (Secure SHell)
• pubblicità (advertising) delle risorse tramite mDNS (multicast DNS)
L'installazione standard anche fornisce:
• trasferimento di file tramite HTTP (HyperText Transfer Protocol)
• stampa tramite CUPS (Common UNIX Printing System)
• accesso remoto a desktop tramite VNC (Virtual Network Computing)
Some automated processes on your Fedora system use the email service to send reports andmessages to the system administrator. By default, the email, logging, and printing services do notaccept connections from other systems. Fedora Core installs the NFS sharing, HTTP, and VNCcomponents without enabling those services.
Si può configurare il sistema Fedora dopo l'installazione per fornire servizi di posta elettronica,condivisione di file, logging, stampa e desktop di accesso remoto. Il servizio SSH è abilitato in manierapredefinita. Si può utilizzare NFS per accedere a file su un altro sistema senza tuttavia abilitare ilservizio NFS di condivisione di file.

Capitolo 16.
59
Nota sull'installazioneNo changes are made to your computer until you click the Next button. If you abort the installationprocess after that point, the Fedora Core system will be incomplete and unusable. To return toprevious screens to make different choices, select Back. To abort the installation, turn off thecomputer.
Interrompere l'installazioneIn certain situations, you may be unable to return to previous screens. Fedora Corenotifies you of this restriction and allows you to abort the installation program. You mayreboot with the installation media to start over.
Figura 16.1. Schermata di avviso
Cliccare Avanti per cominciare l'installazione.

60

Capitolo 17.
61
Installazione dei pacchettiFedora Core reports the installation progress on the screen as it writes the selected packages toyour system. Network and DVD installations require no further action. If you are using CDs to install,Fedora Core prompts you to change discs periodically. After you insert a disc, select OK to resume theinstallation.
Figura 17.1. Schermata di installazione dei pacchetti
After installation completes, select Reboot to restart your computer. Fedora Core ejects any loadeddiscs before the computer reboots.

62

Capitolo 18.
63
Primo avvio del sistemaTheSetup Agent launches the first time that you start a new Fedora Core system. Use Setup Agent toconfigure the system for use before you log in.
Figura 18.1. Schermata di benvenuto
Selezionare Avanti per avviare l'applicazione Setup Agent.
E' richiesta un'interfaccia graficaSetup Agent requires a graphical interface. If you did not install one, or if Fedora Corehas trouble starting it, you may see a slightly different setup screen.
18.1. Accettazione licenzaThis screen displays the overall licensing terms for Fedora Core. Each software package in FedoraCore is covered by its own license which has been approved by theOpen Source Initiative (OSI). For more information about the OSI, refer to http://www.opensource.org/.

Capitolo 18. Primo avvio del sistema
64
Figura 18.2. Schermata di accettazione licenza
Per procedere, selezionare Si, accetto i termini della licenza e poi selezionare Avanti.
18.2. FirewallThefirewall built into Fedora Core checks every incoming and outgoing network connection on yourmachine against a set of rules. These rules specify which types of connections are permitted andwhich are denied.
By default the firewall is enabled, with a simple set of rules that allow connections to be made fromyour system to others, but permit only network browsing andSSH (Secure SHell) connections from other systems. You may make changes on this screen to allowaccess to specific network services on your Fedora Core system.

Firewall
65
Figura 18.3. Schermata del firewall
Per abilitare l'accesso ai servizi elencati in questa schermata, bisogna cliccare sulla casella diselezione accanto al nome del servizio.
SSH fornisce accesso remoto immediatoAll Fedora Core systems automatically run the SSH remote access service, and thedefault firewall configuration allows connections to this service. The default configurationensures that administrators have immediate remote access to new systems through theuser and root accounts.
Per abilitare l'accesso ad altri servizi, selezionare Altre porte, e Aggiungi per i dettagli. Utilizzare ilcampo Porta(e) per specificare o il numero della porta o il nome registrato del servizio. Selezionare ilrelativo Protocollo dal menù a cascata. La maggior parte dei servizi usa il protocollo TCP.
L'elenco dei serviziIl file /etc/services su ogni sistema elenca i numeri delle porte ed i nomi dei serviziche sono registrati dall'Internet Assigned Names Authority (IANA).
Se un servizio dovesse usare più di un numero di porta, bisogna specificare tutte le porte. Peresempio, un servizio IMAP abilita gli utenti ad accedere alla propria posta elettronica da un altrosistema tramite la porta TPC 143. Per consentire connessioni IMAP al proprio sistema, aggiungereimap o il numero di porta port number 143.

Capitolo 18. Primo avvio del sistema
66
Evitare di disabilitare il firewall. Se tuttavia dovesse occorrere farlo, selezionare Disabled.
Cambiare le impostazioni del firewallTo change these settings later, choose System → Administration → Security Level andFirewall.
18.3. SELinux
Figura 18.4. Schermata di SELinux
TheSELinux (Security Enhanced Linux) framework is part of Fedora Core. SELinux limits the actions ofboth users and programs by enforcing security policies throughout the operating system. WithoutSELinux, software bugs or configuration changes may render a system more vulnerable. Therestrictions imposed by SELinux policies provide extra security against unauthorized access.
Inflexible SELinux policies might inhibit many normal activities on a Fedora Core system. For thisreason, Fedora Core uses targeted policies, which only affect specific network services. Theseservices cannot perform actions that are not part of their normal functions. The targeted policiesreduce or eliminate any inconvenience SELinux might cause users. Set the SELinux mode to one ofthe following:
Data ed ora
67
EnforcingSelect this mode to use the targeted SELinux policy on your Fedora Core system. This is thedefault mode for Fedora Core installations.
PermissiveIn questa modalità, il sistema è configurato con SELinux, ma una breccia nella politica di sicurezzadi SELinux causa la notifica di un messaggio di errore. Nessuna attività è proibita quando SELinuxè installato in questa modalità. Si può cambiare tale modalità di SELinux in quella di Enforcing inqualunque momento dopo l'avvio.
DisabledIf you choose this mode for SELinux, Fedora Core does not configure the access control system
at all. To make SELinux active later, select System → Administration → Security Level andFirewall.
Per mettere a punto SELinux, scegliere Modifica la Policy di SELinux. Per esonerare un singoloservizio dalle restrizioni di SELinux, selezionare il servizio dall'elenco, e scegliere l'opzione Disabilitala protezione di SELinux. L'elemento Protezione Servizi SELinux dell'elenco include le opzioni perdisabilitare le restrizioni di SELinux su servizi aggiuntivi.
Cambiare la politica di SELinuxSELinux is unique in that it cannot be bypassed, even by the system administrators. To
change the behavior of SELinux after installation, choose System → Administration →Security Level and Firewall.
For more information about SELinux, refer to the SELinux FAQ at http://fedora.redhat.com/docs/selinux-faq/.
18.4. Data ed oraIf your system does not have Internet access or a network time server, manually set the date and timefor your system on this screen. Otherwise, useNTP (Network Time Protocol) servers to maintain the accuracy of the clock. NTP provides timesynchronization service to computers on the same network. The Internet contains many computersthat offer public NTP services.
La schermata iniziale abilita ad impostare manualmente la data e l'ora per il proprio sistema.

Capitolo 18. Primo avvio del sistema
68
Figura 18.5. Schermata per l'impostazione della data e dell'ora
In alternativa selezionare la tabella Network Time Protocol per configurare il sistema all'uso di serverNTP.
Sistemare l'orologioTo change these settings later, choose System → Administration → Date & Time.
Per configurare il sistema ad usare server di rete per l'ora, selezionare l'opzione Abilitare il NetworkTime Protocol. Tale opzione disabilita le impostazioni della tabella Data e ora e abilita le altreimpostazioni sullo schermo.

Utente di sistema
69
Figura 18.6. Schermata della data e dell'ora, network time
By default, Fedora Core is configured to use three separate groups, or pools, of time servers. Timeserver pools create redundancy, so if one time server is unavailable, your system synchronizes withanother server.
Per usare un server dell'ora aggiuntivo, selezionare Aggiungi, e digitare il nome DNS del server nellacasella. Per rimuovere un server o un pool di server dall'elenco, selezionarne il nome e cliccare suElimina.
Se l'orologio hardware del computer è molto poco preciso, si può disabilitare completamente lasorgente locale dell'ora. Per disabilitare la sorgente locale dell'ora, selezionare Mostra le opzioniavanzate e disabilitare l'opzione Utilizza il Local Time Source. Così facendo, i server NTP avrannola priorità sull'orologio interno.
If you enable the Enable NTP Broadcast advanced option, Fedora Core attempts to automaticallylocate time servers on the network.
18.5. Utente di sistemaCreate a user account for yourself with this screen. Always use this account to log in to your FedoraCore system, rather than using the root account.

Capitolo 18. Primo avvio del sistema
70
Figura 18.7. Schermata per utente di sistema
Enter a user name and your full name, and then enter your chosen password. Type your passwordonce more in the Confirm Password box to ensure that it is correct. Refer to Capitolo 14,Impostazione della password di Root for guidelines on selecting a secure password.
Creare degli account per utenti aggiuntiviTo add additional user accounts to your system after the installation is complete, choose
System → Administration → Users & Groups.
To configure Fedora Core to use network services for authentication or user information, select UseNetwork Login....
18.6. Scheda audioSetup Agent cerca automaticamente di identificare la scheda audio del computer.

Scheda audio
71
Figura 18.8. Schermata di configurazione della scheda audio
Click the play button to check the sound card configuration. If the configuration is correct, Fedora Coreplays a sound sequence. You may adjust the volume with the slidebar. The Repeat option causes thesound to play until the option is unselected, to assist you in tuning your system.
Se la scheda audio è correttamente identificata, ma non viene udito alcun suono, controllare glialtoparlanti e provare ancora. In qualche caso, si potrebbe avere bisogno di configurare impostazioniaggiuntive per ottenere la migliore qualità del suono.
Una scheda audio può supportare diversi ingressi audio e diversi dispositivi in uscita. Per cambiareil Dispositivo PCM predefinito, selezionare una nuova opzione dall'elenco a cascata. Comeimpostazione predefinita, le applicazioni audio si connettono ad un mixer software che gestiscei dispositivi PCM. Per abilitare le applicazioni ad aggirare il mixer software, selezionare l'opzioneDisabilltare il mixing software.
You may manually configure a Fedora Core system to use unsupported sound cards after theinstallation process is complete. Manual sound hardware configuration is beyond the scope of thisdocument.
Cambiare la scheda audioFedora Core automatically attempts to detect a new sound card if you add one to your
system. If you need to launch the detection process manually, choose System →
Administration → Soundcard Detection.

Capitolo 18. Primo avvio del sistema
72
After you configure the sound card, select Finish to proceed to the login screen. Your Fedora Coresystem is now ready for use.
Aggiornare il sistemaTo ensure the security of your system, run a package update after the installationcompletes. Capitolo 19, Passi successivi explains how to update your Fedora Coresystem.
Capitolo 19.
73
Passi successiviFedora Core provides you with a complete operating system with a vast range of capabilities,supported by a large community.
19.1. Aggiornamento del sistemaThe Fedora Project releases updated software packages for Fedora Core throughout the supportperiod of each version. Updated packages add new features, improve reliability, resolve bugs, orremove security vulnerabilities. To ensure the security of your system, update regularly, and as soonas possible after a security announcement is issued. Refer to Sezione 19.2, «Subscribing to FedoraCore Announcements and News» for information on the Fedora Core announcements services.
A new update applet, called puplet, reminds you of updates when they are available. The pupletapplet is installed by default in Fedora Core. It checks for software updates from all configuredrepositories, and runs as a background service. It generates a notification message on the desktop ifupdates are found, and you can click the message to update your system's software.
To update your system with the latest packages manually, use theSoftware Updater:
1. Choose Applications → System Tools → Software Updater.
2. Quando richiesto, digitare la password di root.
3. Passare in rassegna la lista dei pacchetti aggiornati. La lista dei pacchetti mostra una doppiafreccia vicino ad ogni aggiornamento che richiede un riavvio del sistema per sortire effetto.
4. Cliccare su Applica aggiornamenti per cominciare il processo di aggiornamento.
5. Se uno o più aggiornamenti dovessero richiedere un riavvio del sistema, il processo diaggiornamento mostrerà una finestra di avviso con l'opzione Reboot Now. Selezionare taleopzione per riavviare il sistema immediatamente, o Cancel per riavviare il sistema quando lo siritiene più opportuno
To update packages from the command-line, use theyum utility. Type this command to begin a full update of your system with yum:
su -c 'yum update'
Digitare la password di root quando richiesto.
Refer to http://fedora.redhat.com/docs/yum/ for more information on yum.
E' richiesta una connessione di reteBisogna assicurarsi che il proprio sistema abbia una connessione di rete attiva prima dilanciare Software Updater, o il programma yum. Il processo di aggiornamento scaricheràinformazioni e pacchetti da una rete di server.
Capitolo 19. Passi successivi
74
If your Fedora Core system has a permanent network connection, you may choose to enabledaily system updates. To enable automatic updates, follow the instructions on the webpage http://fedora.redhat.com/docs/yum/sn-updating-your-system.html.
19.2. Subscribing to Fedora Core Announcements andNewsPer ricevere informazioni riguardanti gli aggiornamenti di pacchetti, abbonarsi alla mailing list degliannunci, oppure utilizzare feed RSS.
Mailing list degli annunci del Fedora Projecthttps://www.redhat.com/mailman/listinfo/fedora-announce-list
Feed RSS del Fedora Projecthttp://fedoraproject.org/infofeed/
The announcements mailing list also provides you with news on the Fedora Project, and the FedoraCore community.
Annunci sulla sicurezzaAnnunci che riportano la parola identificativa [SECURITY] nel proprio titolo, identificanoaggiornamenti di pacchetti che risolvono vulnerabilità di sicurezza.
19.3. Reperire documentazione o supportoMembers of the Fedora Core community provides support through mailing lists, Web forums and LinuxUser Groups (LUGs) across the world.
The Web site for the formally endorsed forums is http://forums.fedoraforum.org/.
The following resources provide information on many aspects of Fedora Core:
• Le FAQ sul sito web del Fedora Projecthttp://fedoraproject.org/wiki/FAQ/
• I documenti disponibili dal sito Web del Fedora Documentation Projecthttp://fedoraproject.org/wiki/Docs/
• Il Linux Documentation Project (LDP)http://www.tldp.org/
• The Red Hat Enterprise Linux documentation, much of which also applies to Fedora Corehttp://www.redhat.com/docs/manuals/enterprise/
Many other organizations and individuals also provide tutorials and HOWTOs for Fedora Core on theirWeb sites. You can locate information on any topic by using Google's Linux search site, located athttp://www.google.com/linux.

Joining the Fedora Core Community
75
19.4. Joining the Fedora Core CommunityThe Fedora Project is driven by the individuals that contribute to it. Community members providesupport and documentation to other users, help to improve the software included in Fedora Core bytesting, and develop new software alongside the programmers employed by Red Hat. The results ofthis work are available to all.
Per fare la differenza, partite da qui:
http://fedoraproject.org/wiki/HelpWanted

76

77
Appendice A. Opzioni di avvioThe Fedora Core installation system includes a range of functions and options for administrators. Touse boot options, enter linux option at the boot: prompt.
Se si dovesse avere l'esigenza di specificare più di una opzione, occorrerà separarle da un singolospazio. Per esempio:
linux option1 option2 option3
Modalità di rispristino (rescue mode)The Fedora Core installation and rescue discs may either boot with rescue mode, or loadthe installation system. For more information on rescue discs and rescue mode, refer toSezione A.6.2, «Avviare un computer in modalità di ripristino (Rescue Mode)».
A.1. Configurare il sistema di installazione al prompt diboot:Si può usare il prompt di boot: per specificare un certo numero di parametri per il sistema diinstallazione, che includono:
• lingua
• risoluzione video
• tipo di interfaccia
• metodo di installazione
• parametri di rete
A.1.1. Specificare la linguaPer configurare la lingua sia per il processo di installazione che per il sistema finale, specificare ilcodice ISO per la lingua con l'opzione lang. Usare l'opzione keymap per configurare la tastieracorrettamente.
Per esempio, i codici ISO el_GR e gr identificano la lingua greca e la tastiera in uso in quel Paese:
linux lang=el_GR keymap=gr
A.1.2. Configurare l'interfaccia graficaSi può forzare il sistema di installazione all'uso della più bassa risoluzione possibile dello schermo(640x480) tramite l'opzione lowres. Per usare una specifica risoluzione dello schermo, digitareresolution=setting come opzione di avvio. Per esempio, per configurare la risoluzione delmonitor a 1024x768, digitare:

Appendice A. Opzioni di avvio
78
linux resolution=1024x768
To run the installation process intext mode, enter:
linux text
To enable support for aserial console, enter serial as an additional option.
A.1.3. Specificare il metodo di installazioneUsare l'opzione askmethod per visualizzare ulteriori menù che abilitino a specificare il metododi installazione ed i parametri di rete. Si possono anche configurare il metodo di installazione ed iparameri di rete nello stesso prompt di boot:.
To specify the installation method from the boot: prompt, use the method option. Refer toTabella A.1, «Metodi di installazione» for the supported installation methods.
Metodo d'installazione Opzione Format
CD o DVD drive method=cdrom
Disco fisso method=hd://device/
HTTP Server method=http://server.mydomain.com/directory/
FTP Server method=ftp://server.mydomain.com/directory/
NFS Server method=nfs:server.mydomain.com:/directory/
Tabella A.1. Metodi di installazione
A.1.4. Configurazione manuale dei parametri di retePer impostazione predefinita, il sistema usa DHCP per ottenere automaticamente i corretti parametridi rete. Per configurare manualmente i parametri di rete, si possono digitare o nella schermataConfigure TCP/IP, oppure al prompt di boot:. Si possono specificare indirizzo ip, netmask,gateway, e dns server per il sistema di installazione al prompt. Se si dovesse specificare laconfigurazione della rete al prompt di boot:, tali parametri saranno usati per i processo diinstallazione, e la schermata Configure TCP/IP non apparirà.
Il seguente esempio configura i parametri di rete per un sistema di installazione che usa l'indirizzo IP192.168.1.10:
linux ip=192.168.1.10 netmask=255.255.255.0 gateway=192.168.1.1 dns=192.168.1.2,192.168.1.3

Abilitare acceso remoto al sistema di installazione
79
Configurare il sistema installatoUse the Network Configuration screen to specify the network settings for the new system.Refer to Capitolo 12, Configurazione della rete for more information on configuring thenetwork settings for the installed system.
A.2. Abilitare acceso remoto al sistema di installazioneYou may access either graphical or text interfaces for the installation system from any other system.Access to a text mode display requires telnet, which is installed by default on Fedora Core systems.To remotely access the graphical display of an installation system, use client software that supportstheVNC (Virtual Network Computing) display protocol. A number of providers offer VNC clients forMicrosoft Windows and Mac OS, as well as UNIX-based systems.
Installing a VNC Client on Fedora CoreFedora Core includes vncviewer, the client provided by the developers of VNC. To obtainvncviewer, install the vnc package.
Il sistema di installazione supporta due metodi per stabilire una connessione VNC. Si può avviarel'installazione, per poi connettersi manualmente alla schermata grafica con il client VNC di unaltro sistema. Alternativamente, si può configurare il sistema di installazione per connetersiautomaticamente ad un client VNC sulla rete che è avviato in listening mode.
A.2.1. Abilitare l'accesso remoto con VNCTo enable remote graphical access to the installation system, enter two options at the prompt:
linux vnc vncpassword=qwerty
L'opzione vnc abilita il servizio VNC. L'opzione vncpassword setta la password per un accessoremoto. L'esempio prima mostrato setta la password come qwerty.
Password per VNCLa password per VNC deve essere lunga almeno sei caratteri.
Specificare la lingua, la tastiera ed i parametri di rete per il sistema di installazione con la schermatache segue. Si potrà così avere accesso all'interfaccia grafica attraverso un client VNC. Il sistema diinstallazione mostrerà i corretti parametri di connessione per il client VNC:
Starting VNC... The VNC server is now running. Please connect to computer.mydomain.com:1 to begin the install... Starting graphical installation... Press <enter> for a shell

Appendice A. Opzioni di avvio
80
You may then login to the installation system with a VNC client. To run the vncviewer client on Fedora
Core, choose Applications → Accessories → VNC Viewer, or type the command vncviewer in aterminal window. Enter the server and display number in the VNC Server dialog. For the exampleabove, the VNC Server is computer.mydomain.com:1.
A.2.2. Connettere il sistema di installazione ad un VNC in ascolto(VNC Listener)To have the installation system automatically connect to a VNC client, first start the client inlistening mode. On Fedora Core systems, use the -listen option to run vncviewer as a listener. In aterminal window, enter the command:
vncviewer -listen
Riconfigurare il firewallBy default, vncviewer uses TCP port 5500 when in listening mode. To permit connections
to this port from other systems, choose System → Administration → Security Level andFirewall. Select Other ports, and Add. Enter 5500 in the Port(s) field, and specify tcpas the Protocol.
Una volta che il client in ascolto sarà diventato attivo, avviare il sistema di installazione ed impostarele opzioni VNC al prompt di boot:. In aggiunta alle opzioni vnc e vncpassword, usare l'opzionevncconnect per specificare il nome o l'indirizzo IP del sistema che ha il client in ascolto. Perspecificare la porta TCP per il listener, aggiungere due punti (:) ed il numero della porta al nome delsistema.
Per esempio,per connettersi ad un client VNC sul sistema desktop.mydomain.com sulla porta5500, digitare quanto segue al prompt di boot:
linux vnc vncpassword=qwerty vncconnect=desktop.mydomain.com:5500
A.2.3. Abilitare accesso remoto con telnetTo enable remote access to a text mode installation, use thetelnet option at the boot: prompt:
linux text telnet
Ci si può connettere al sistema di installazione con il programma di utilità telnet. Ilcomando telnetrichiede il nome o l'indirizzo IP del sistema di installazione:
telnet computer.mydomain.com

Inviare i file di log (logging) ad un sistema remoto durante l'installazione
81
L'accesso telnet non richiede passwordPer assicurare la sicurezza del processo di installazione, usare l'opzione telnet perinstallare sistemi su reti con accesso limitato.
A.3. Inviare i file di log (logging) ad un sistema remotodurante l'installazioneBy default, the installation process sends log messages to the console as they are generated. Youmay specify that these messages go to a remote system that runs asyslog service.
Per configurare il logging in remoto, aggiungere l'opzione syslog. Specificare l'indirizzo IPdel sistema di logging, ed il numero della porta UDP del servizio di lol su quel sistema. Comeconfigurazione predefinita, i servizi syslog che accettano messaggi remoti rimangono in ascolto sullaporta UDP 514
Per esempio, per connettersi al servizio syslog sul sistema 192.168.1.20, digitare quanto segue alprompt di boot:
linux syslog=192.168.1.20:514
A.3.1. Configurare un server per i logFedora Core uses syslogd to provide a syslog service. The default configuration of syslogd rejectsmessages from remote systems.
Abilitare l'accesso remoto a syslog solo su reti sicureIl servizio syslogd non include misure di sicurezza. Dei cracker possono rallentare omandare in crash sistemi che permettono l'accesso ai servizi di logging, mandando grandiquantità di falsi messaggi di log. In aggiunta, utenti ostili possono intercettare o falsificaremessaggi mandati al servizio di log attraverso la rete.
To configure a Fedora Core system to accept log messages from other systems on the network, editthe file /etc/sysconfig/syslog. You must use root privileges to edit the file /etc/sysconfig/syslog. Add the option -r to the SYSLOGD_OPTIONS:
SYSLOGD_OPTIONS="-m 0 -r"
Riavviare il servizio syslogd per applicare il cambiamento:
su -c '/sbin/service syslog restart'
Digitare la password di root quando richiesto.

Appendice A. Opzioni di avvio
82
Riconfigurare il firewallBy default, the syslog service listens on UDP port 514. To permit connections to this port
from other systems, choose System → Administration → Security Level and Firewall.Select Other ports, and Add. Enter 514 in the Port(s) field, and specify udp as theProtocol.
A.4. Automatizzare l'installazione con KickstartAKickstart file specifies settings for an installation. Once the installation system boots, it can read aKickstart file and carry out the installation process without any further input from a user.
Ogni installazione produce un file KickstartThe Fedora Core installation process automatically writes a Kickstart file that contains thesettings for the installed system. This file is always saved as /root/anaconda-ks.cfg.You may use this file to repeat the installation with identical settings, or modify copies tospecify settings for other systems.
Fedora Core includes a graphical application to create and modify Kickstart files by selecting theoptions that you require. Use the package system-config-kickstart to install this utility. To load
the Fedora Core Kickstart editor, choose Applications → System Tools → Kickstart.
I file Kickstart elencano i parametri di installazione in testo semplice, con una sola opzione perlinea. Tale formato lascia modificare i file Kickstart con un qualunque editor di testo, e scrive piccoliprogrammi o applicazioni che generano file utente di Kickstart per i propri sistemi.
Per automatizzare il processo di installazione con un file Kickstart, utilizzare l'opzione ks perspecificare il nome e la localizzazione del file:
linux ks=location/kickstart-file.cfg
You may use Kickstart files that are held on either removable storage, a hard drive, or a networkserver. Refer to Tabella A.2, «Sorgenti di Kickstart» for the supported Kickstart sources.
Sorgenti di Kickstart Opzione Format
CD o DVD drive ks=cdrom:/directory/ks.cfg
Disco fisso ks=hd:/device/directory/ks.cfg
Altri dispositivi ks=file:/device/directory/ks.cfg
HTTP Server ks=http://server.mydomain.com/directory/ks.cfg
FTP Server ks=ftp://server.mydomain.com/directory/ks.cfg
NFS Server ks=nfs:server.mydomain.com:/directory/ks.cfg
Tabella A.2. Sorgenti di Kickstart

Migliorare il supporto hardware
83
Per ottenere un file Kickstart da uno script o da un'applicazione su un server web, specificare l'URLdell'applicazione con l'opzione ks=. Se si è aggiunta l'opzione kssendmac, la richiesta anchemanderà intestazioni HTTP all'applicazione web. Le applicazioni degli utenti possono usare questeintestazioni per identificare il computer. Queste righe mandano una richiesta con intestazioneall'applicazione http://server.mydomain.com/kickstart.cgi:
linux ks=http://server.mydomain.com/kickstart.cgi kssendmac
A.5. Migliorare il supporto hardwareBy default, Fedora Core attempts to automatically detect and configure support for all of thecomponents of your computer. Fedora Core supports the majority of hardware in common use with thesoftware drivers that are included with the operating system. To support other devices you may supplyadditional drivers during the installation process, or at a later time.
A.5.1. Aggiungere supporto hardware con driver specificiIl sistema di installazione può caricare driver da dischi, pen driver, o da server di rete per configurareil supporto a nuovi dispositivi. Dopo avere completato l'installazione, rimuovere i dischi contenenti idriver e conservarli per ulteriori usi successivi.
Hardware manufacturers may supplydriver disks for Fedora Core with the device, or provide image files to prepare the disks. To obtain thelatest drivers, download the correct file from the website of the manufacturer.
Driver forniti in formato zipDriver disk images may be distributed as compressed archives, or zip files. Foridentification, the names of zip files include the extensions .zip, or .tar.gz. To
extract the contents of a zipped file with a Fedora Core system, choose Applications →
Accessories → Archive Manager.
Per formattare un disco o una pen drive con un file immagine, usare il programma di utilità dd.Per esempio, per prepare un disco floppy con il file immagine drivers.img, digitare il seguentecomando in un terminale:
dd if=drivers.img of=/dev/fd0
Per usare il disco con i driver durante il processo di installazione, specificare l'opzione dd al promptdel boot:
linux dd
Quando richiesto, selezionare Yes per fornire il floppy con i driver. Scegliere il nome del dispositivocapace di gestire il disco contenente i driver dall'elenco Driver Disk Source della schermata testuale.
The installation system can also read drivers from disk images that are held on network servers. Referto Tabella A.3, «Possibili risorse per dischi immagine contenenti driver» for the supported sources ofdriver disk image files.

Appendice A. Opzioni di avvio
84
Sorgente dell'immagine Opzione Format
Selezionare un dispositivo dd
HTTP Server dd=http://server.mydomain.com/directory/drivers.img
FTP Server dd=ftp://server.mydomain.com/directory/drivers.img
NFS Server dd=nfs:server.mydomain.com:/directory/drivers.img
Tabella A.3. Possibili risorse per dischi immagine contenenti driver
A.5.2. Annullare il processo automatico di riconoscimentodell'hardwareLa configurazione automatica dell'hardware di alcuni modelli di dispositivi specifica potrebbe fallire ocausare instabilità al sistema. In questi casi, potrebbe essere necessario disabilitare la configurazioneautomatica per tali dispositivi, e compiere dei passi aggiuntivi per configurare manualmente ildispositivo dopo avere completato il processo di installazione.
Leggete le Release NotesFate riferimento alle Release Notes per informazioni su problemi noti con particolaridispositivi.
Per annullare la procedura di riconoscimento automatico dell'hardware, usare una o più di una tra leseguenti opzioni:
Impostazioni per la compatibilità Opzione
Disabilitare il riconoscimento di tutto l'hardware noprobe
Disabilitare il riconoscimento di schede grafiche,tastiera e mouse
headless
Disabilitare il riconoscimento automatico delmonitor (DCC)
skipddc
Disabilitare l'APIC della scheda madre noapic
Disabilitare la gestione energetica (ACPI) acpi=off
Disabilitare il Direct Memory Access (DMA) perdispositivi IDE
ide=nodma
Disabilitare RAID assistiti dal BIOS nodmraid
Disabilitare il riconoscimento di dispositivifirewire
nofirewire
Disabilitare il riconoscimento di porte parallele noparport
Disabilitare il riconoscimento di dispositivi PCCard (PCMCIA)
nopcmcia
Disabilitare il riconoscimento di dispositivi diarchiviazione USB
nousbstorage

Usare le modalità di avvio per manutenzione (Maintenance Boot Modes)
85
Impostazioni per la compatibilità Opzione
Disabilitare il riconoscimento di tutti i dispositiviUSB
nousb
Forzare il riconoscimento di dispositivi firewire firewire
Fornire un prompt all'utente per la configurazionedi dispositivi ISA
isa
Tabella A.4. Opzioni hardware
Schermate aggiuntiveL'opzione isa fa mostrare al sistema una schermata aggiuntiva all'inizio del processodi installazione. Utilizzare tale schermata per configurare dispositivi ISA sul propriocomputer.
A.6. Usare le modalità di avvio per manutenzione(Maintenance Boot Modes)
A.6.1. Caricare la modalità di test della memoria (RAM)Faults in memory modules may cause your system to freeze or crash unpredictably. In some cases,memory faults may only cause errors with particular combinations of software. For this reason, youshould test the memory of a computer before you install Fedora Core for the first time, even if it haspreviously run other operating systems.
To boot your computer inmemory testing mode, enter memtest86 at the boot: prompt. The first test starts immediately. Bydefault, memtest86 carries out a total of ten tests.
Per fermare i test e riavviare il computer, digitare Esc in qualunque momento.
A.6.2. Avviare un computer in modalità di ripristino (Rescue Mode)You may boot a command-line Linux system from either arescue disc or the first installation disc, without installing Fedora Core on the computer. This enablesyou to use the utilities and functions of a running Linux system to modify or repair systems that arealready installed on your computer.
Il disco di ripristino avvia il computer in modalità di ripristino come impostazione predefinita. Percaricare il sistema di ripristino usando il primo disco di installazione, digitare:
linux rescue
Specificare la lingua, la tastiera ed i parametri di rete per il sistema di ripristino tramite le schermateche seguiranno. La schermata finale del setup passerà a configurare l'accesso al sistema giàinstallato sul computer.
Come impostazione predefinita, la modalità di ripristino monta un sistema operativo esistente alsistema di ripristino sotto la directory /mnt/sysimage/.

86
87
Appendice B. Altra documentazionetecnicaThis document provides a reference for using the Fedora Core installation software, known asanaconda. To learn more aboutanaconda, visit the project Web page: http://www.fedoraproject.org/wiki/Anaconda.
Both anaconda and Fedora Core systems use a common set of software components. For detailedinformation on key technologies, refer to the Web sites listed below:
Boot LoaderFedora Core uses theGRUB boot loader. Refer to http://www.gnu.org/software/grub/ for more information.
Partizionamento del discoFedora Core uses parted to partition disks. Refer to http://www.gnu.org/software/parted/ for moreinformation.
Storage ManagementLogical Volume Management (LVM) provides administrators with a range of facilities to managestorage. By default, the Fedora Core installation process formats drives as LVM volumes. Refer tohttp://www.tldp.org/HOWTO/LVM-HOWTO/ for more information.
Supporto all'audioThe Linux kernel used by Fedora Core incorporatesALSA (Advanced Linux Sound Architecture). For more information about ALSA, refer to the projectWeb site: http://www.alsa-project.org/.
Sistema graficoBoth the installation system and Fedora Core use theXorg suite to provide graphical capabilities. Components of Xorg manage the display, keyboardand mouse for the desktop environments that users interact with. Refer to http://www.x.org/ formore information.
Display remotiFedora Core and anaconda includeVNC (Virtual Network Computing) software to enable remote access to graphical displays.For more information about VNC, refer to the documentation on the RealVNC Web site: http://www.realvnc.com/documentation/.
Interfaccia a linea di comandoBy default, Fedora Core uses the GNU bash shell to provide a command-line interface. The GNUCore Utilities complete the command-line environment. Refer to http://www.gnu.org/software/bash/bash.html for more information on bash. To learn more about the GNU Core Utilities, refer tohttp://www.gnu.org/software/coreutils/.
Accesso remoto al sistemaFedora Core incorporates theOpenSSH suite to provide remote access to the system. The SSH

Appendice B. Altra documentazione tecnica
88
service enables a number of functions, which include access to the command-line from othersystems, remote command execution, and network file transfers. During the installation processanaconda may use the scpfeature of OpenSSH to transfer crash reports to remote systems. Refer to the OpenSSH Web sitefor more information: http://www.openssh.com/.
Controllo degli accessiSELinux provides Mandatory Access Control (MAC) capabilities that supplement the standardLinux security features. Refer to the SELinux FAQ for more information: http://fedora.redhat.com/docs/selinux-faq/.
FirewallThe Linux kernel used by Fedora Core incorporates the netfilter framework to providefirewall features. The Netfilter project website provides documentation for both netfilter, andthe iptables administration facilities: http://netfilter.org/documentation/index.html.
Installazione del softwareFedora Core usesyum to manage the RPM packages that make up the system. Refer to http://fedora.redhat.com/docs/yum/ for more information.
VirtualizzazioneXen provides the capability to simultaneously run multiple operating systems on the samecomputer. Fedora Core also includes tools to install and manage the secondary systems on aFedora Core host. You may select Xen support during the installation process, or at any timethereafter. Refer to http://www.fedoraproject.org/wiki/Tools/Xen for more information.

89
Indice analiticoAALSA (Advanced Linux Sound Architecture), 87Anaconda, 87
BBIOS (Basic Input/Output System), 11boot loader, 30
(vedi anche GRUB)upgrading, 30
DDHCP (Dynamic Host Configuration Protocol), 5,47, 47Disk Druid, 37DNS (Domain Name Service), 48domain name, 48driver disks, 83
Eext2 (vedi file systems)ext3 (vedi file system) (vedi file systems)
Ffeedback
contact information for this manual, xfile system, 36
ext3 , 36NTFS , 39vfat , 39
file systemsext2, 20ext3, 20vfat, 20
firewallconfiguring, 64documentation, 88
FOSS (free and open source software), 1free software (vedi FOSS)
Ggateway, 48GMT (Greenwich Mean Time) (vedi UTC)GRUB
configuring, 41(vedi anche boot loader)
documentation, 87
Hhostname, 48
IIP address, 47
KKickstart, 82
LLVM, 37, 39
documentation, 87logical volume, 36physical volume, 36understanding, 36volume group, 36
Mmaster boot record, 42, 44memory testing mode, 85modem, 48mount point, 35
NNFS (Network File System)
install from, 21NTFS (vedi file system)NTP (Network Time Protocol), 49, 67
Oopen source (vedi FOSS)OpenSSH, 87
(vedi anche SSH)OSI (Open Source Initiative), 63
Ppackage groups, 56partition
/home , 39/root , 35adding, 38deleting, 39editing, 38illegal, 38root, 35, 35, 38type, 36
(vedi anche file system)PXE (Pre-boot eXecution Environment), 11, 15

Indice analitico
90
RRAID, 39
hardware, 33Linux software, 37
rescue discs, 85rescue mode, 85root account, 51router (vedi gateway)
Sscp, 88
(vedi anche SSH)SELinux
configuring, 66documentation, 88
serial console, 78Setup Agent, 63Software Updater, 73SSH (Secure SHell)
documentation, 88firewall configuration, 64
swap partitions, 35syslog, 81
TTelnet, 80text interface, 78
UUTC (Universal Co-ordinated time), 49
Vvfat (vedi file system) (vedi file systems)VNC (Virtual Network Computing), 79
documentation, 87enabling, 79installing client, 79listening mode, 80
XXen
documentation, 88Xorg, 87
Yyum, 73
documentation, 88