how to build a happy home - radford.edu to build a happy home.pdf · unit: how to build a happy...
TRANSCRIPT

Unit: How to Build a Happy Home
I. UNIT OVERVIEW & PURPOSE: The unit will couple a real-world application of designing a home and exterior landscape with the use of trigonometry including the Pythagorean Theorem and its converse. Students will use mathematical modeling and right triangle trigonometry to solve problems regarding this topic.
II. UNIT AUTHORS: Kelly Day, Douglas Freeman High School, Henrico County, VA Scott Larimer, Radford High School, Radford, VA Christina Perdue, Smith Mountain Lake Christian Academy, Wirtz, VA
III. COURSE: Mathematical Modeling: Capstone Course
IV. CONTENT STRAND: Geometry Algebra Measurement
V. OBJECTIVES: The students will:
Use the Pythagorean Theorem and its converse to solve problems involving side lengths of right triangles. Use Right Triangle Trigonometry to find unknown sides of right triangles. Use Right Triangle Trigonometry to find missing angles in right triangles. Apply Area and Perimeter Formulas of Polygons
VI. MATHEMATICS PERFORMANCE EXPECTATION(s): MPE.5 The student will solve real-world problems involving right triangles by using the Pythagorean Theorem and its converse, properties of special right triangles, and right triangle trigonometry.
VII. CONTENT: A basic knowledge of home design and construction is necessary to complete this unit. It will also incorporate aesthetics of exterior landscape and the estimation of materials needed.
VIII. REFERENCE/RESOURCE MATERIALS: Graph Paper Colored Pencils TI-84 calculators GeoGebra software Access to computer lab or laptops for student use Geometer’s Sketchpad software Clinometer

IX. PRIMARY ASSESSMENT STRATEGIES: Assessments will be made through portfolio and presentation. Each lesson may have closure assessments for content.
X. EVALUATION CRITERIA: Each group will have to present their home and landscape design. Portfolio pieces will be judged based on the attached rubric.
XI. INSTRUCTIONAL TIME: 7-90 minute blocks
Lesson 1: Flooring Floor Plans
Strands Geometry and Measurement Mathematical Objectives Pythagorean Theorem and its converse Area of Polygons (rectangles, triangles, trapezoids, etc) Perimeter Mathematics Performance Expectations MPE.5 The student will solve real-world problems involving right triangles by using the Pythagorean Theorem and its converse, properties of special right triangles, and right triangle trigonometry. Related SOLs G.8 The student will solve real-world problems involving right triangles by using the Pythagorean Theorem and its converse, properties of special right triangles, and right triangle trigonometry. G.9 The student will verify characteristics of quadrilaterals and use properties of quadrilaterals to solve real-world problems. NCTM Standards The following are all applicable NCTM standards related to the lesson:
● Apply and adapt a variety of appropriate strategies to solve problems ● Communicate mathematical thinking coherently and clearly to peers, teachers, and
others ● Use trigonometric relationships to determine lengths and angle measures.

● Use geometric ideas to solve problems in, and gain insights into, other disciplines and other areas of interest such as art and architecture
Additional Objectives for Student Learning: Students will be able to draw a scale drawing of a two-story house floor plan. Materials/Resources Graph Paper Ruler Pencil TI-84 Calculator Assumption of Prior Knowledge
○ Students should have completed Geometry ○ Students should be able to create a scale drawing ○ Basic understanding of triangles’ sides and angles ○ Knowledge of Pythagorean Theorem and right triangle trigonometry ○ Basic knowledge of properties of polygons including formulas for calculating
area and perimeter
Introduction: Setting Up the Mathematical Task
In this lesson, the student will create a floor plan for a two story house. They will be required to include a variety of physical features into their floor plan that will require the use of the right triangle strategies, including Pythagorean Theorem, and area formulas for quadrilaterals and triangles.
● One 90 minute class: ○ The teacher will spend 5 minutes discussing the idea behind the lesson ○ Students will spend 30 minutes designing the first and second floor plans. ○ Students spend the 10 minutes verifying maximum and minimum areas and
perimeters of individual rooms. ○ After choosing a group floor plan, students will spend 20 minutes modifying
their group floor plans ○ Students will spend 10 minutes verifying their modifications still meet
minimum and maximum perimeter and area requirements ■ During this time, they should also ensure all the minimum
requirements for included objects are met ○ Students will spend 10 minutes constructing a finalized floor plan ○ Students will spend 5 minutes writing a reflection on the project
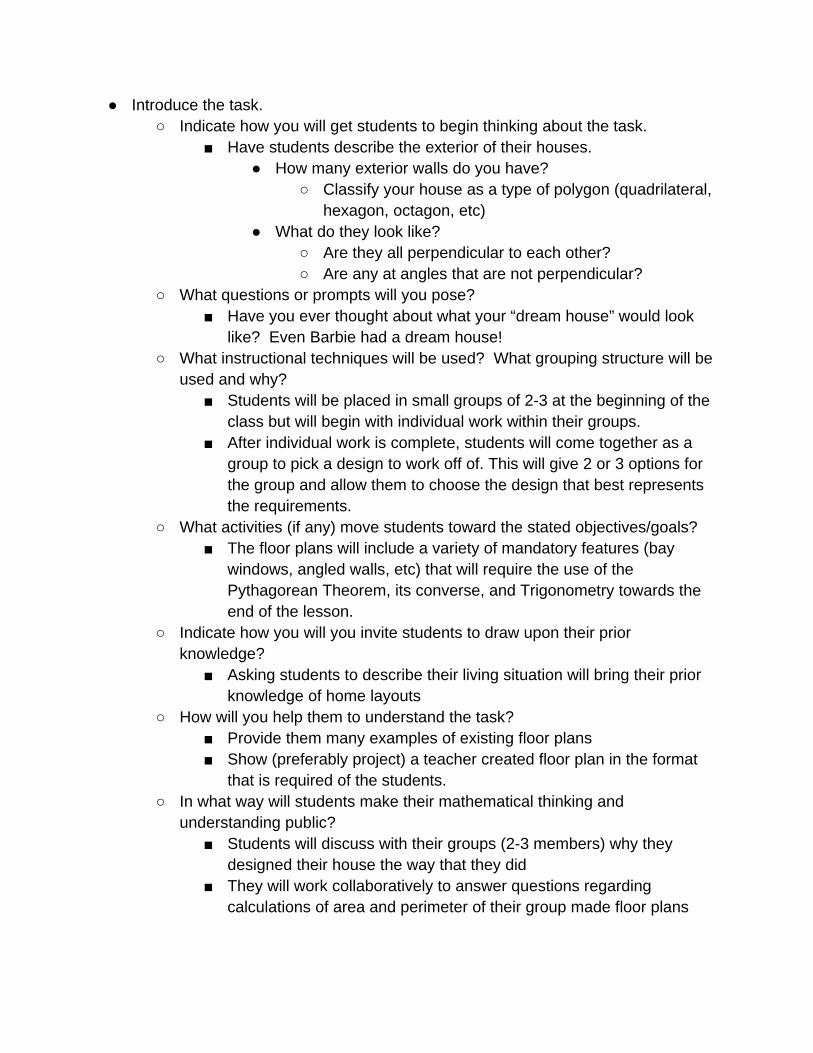
● Introduce the task. ○ Indicate how you will get students to begin thinking about the task.
■ Have students describe the exterior of their houses. ● How many exterior walls do you have?
○ Classify your house as a type of polygon (quadrilateral, hexagon, octagon, etc)
● What do they look like? ○ Are they all perpendicular to each other? ○ Are any at angles that are not perpendicular?
○ What questions or prompts will you pose? ■ Have you ever thought about what your “dream house” would look
like? Even Barbie had a dream house! ○ What instructional techniques will be used? What grouping structure will be
used and why? ■ Students will be placed in small groups of 2-3 at the beginning of the
class but will begin with individual work within their groups. ■ After individual work is complete, students will come together as a
group to pick a design to work off of. This will give 2 or 3 options for the group and allow them to choose the design that best represents the requirements.
○ What activities (if any) move students toward the stated objectives/goals? ■ The floor plans will include a variety of mandatory features (bay
windows, angled walls, etc) that will require the use of the Pythagorean Theorem, its converse, and Trigonometry towards the end of the lesson.
○ Indicate how you will you invite students to draw upon their prior knowledge?
■ Asking students to describe their living situation will bring their prior knowledge of home layouts
○ How will you help them to understand the task? ■ Provide them many examples of existing floor plans ■ Show (preferably project) a teacher created floor plan in the format
that is required of the students. ○ In what way will students make their mathematical thinking and
understanding public? ■ Students will discuss with their groups (2-3 members) why they
designed their house the way that they did ■ They will work collaboratively to answer questions regarding
calculations of area and perimeter of their group made floor plans

Exploration: Creating the Floor Plan Students will be asked to decide on and create a design of their dream house. They will be drawing ideas from existing floor plans and using the ideas to create a 2 story dream house that meets certain size requirements. Students will discuss each of their designs and choose one per group to continue with during the remainder of the project. Students should discuss the importance of reasonable size, materials, any angles or design issues that could pose problems during construction. Individual Work
● Hand out a piece of graph paper and ruler to each student ● Hand out sample floor plans to each group as needed
○ These floor plans are to be used as examples for students who are not familiar with the way floor plans look, not to be copied
● Provide students with the list of construction requirements ○ Teacher should describe what is necessary (ex: Bay Windows must have
angled walls) and show examples of requirements on a teacher created floor plan.
● Tell students to begin drawing a large polygon to represent the exterior walls of their dream house
● Students will fill in the interior space with various rooms to their house ○ ex: Living Room, Kitchen, Bathrooms, Bedrooms, Game Rooms, Office, etc.
Small Group Work
● Discuss and decide which dream house is the favorite among group members. ● Make modifications to chosen floor plan among your group ● Create a neat final copy of the finished floor plan
Whole Class Sharing/Discussion
● Student/Teacher Actions: ○ Students will work individually to draw their own dream house, then share
with their group while discussing which plan will be used for the rest of the project. .
○ The teacher should be walking around helping students that are unfamiliar with creating a floor plan as well as keeping groups active in discussion while trying to choose a floor plan that will work well for the entire project.
■ Possible solutions to the exploration of floor plans would be to have either websites available for students to explore different floor plans (ex: floorplans.com, eplans.com) or magazines (Better Homes and Garden Magazine, Southern Living) with sample blueprints. Possible

questions to pose to promote student thinking would be to remind students that doors and windows are necessary within their plan and to make sure they are able to visualize the correct measurements needed for room size. Be sure to remind students that in order to be considered a bedroom, it must contain at least 1 window and a closet.
○ Ideas for technology integration or cooperative/collaborative learning: ■ Students may use of online research in order to find and print their
own example floor plans ■ The students could potentially work in groups to create a digital copy
of their floor plans using software as simple as MS Paint, MS PowerPoint, or a Google Docs Presentation , GeoGebra, or as Complicated as Chief Architect Home Design (http://www.chiefarchitect.com/products/trial.html) or similar software
Monitoring Student Responses
● Ways students are expected to communicate their thinking and their new knowledge:
○ students will describe their thinking orally to group members during discussion
○ students will describe their thinking visually by creating their own floor plan ○ students will describe their thinking verbally during a reflection exit slip
● Ways students are expected to communicate with each other: ○ Students should collaboratively decide on which floor plan they want to use
and why ○ Students should help each other modify the existing floor plan to include
suggestions from all group members ○ Students should discuss potential negatives to designs and correct them
● Ways teacher and/or students will highlight and clarify the ideas being grappled: ○ Teacher will highlight/clarify ideas being grappled with by doing a whole
class discussion at the beginning of class ○ Students should highlight ideas by discussing them with their groups and
asking teacher questions ● Ways teacher will assist students who have difficulties:
○ Students should be placed in groups of similar ability level ○ Teachers can assist by showing them pre made designs (either by teacher
or by students from other classes/years) ○ Teachers can assist by reassigning students who are finished with their
design to help struggling students with their individual design ○ Teachers can assist by asking leading questions about how students’
current house is laid out, how big the rooms in their house are, etc.

● Ways teacher will extend the material for students that are ready to move forward: ○ Students who have completed the 2-story house can then begin work on
either a 3rd floor living space, or design a finished basement, and/or an outside patio.
● How the teacher plans to summarize the lesson: ○ Explain to the students that this is just the first step in designing their dream
home. Future lessons will continue with the planning/development of the exterior of the house as well as the grounds.
○ This lesson will be continued in future days so formal closure will not occur yet.
○ Student groups should have time to discuss their designs and choose one to continue to use in future days.
● Ways of collecting evidence of students’ knowledge of the content described: ○ The teacher should visit each group and ask follow up questions on each
design and why the group design chosen will fit well with the project. ○ The teacher should collect reflections from each group about the
construction process for the two-story plans.
Assessment ● Student Created Floor Plan
○ Students will be creating a floor plan that meets the defined requirements ○ Students will be assessed using the attached rubric
● Accommodations ○ Teacher assistance will be provided throughout the individual and group
work time. ○ Standard accommodations for IEPs and 504s will be made. ○ Written instructions will be given as needed. ○ Large printouts of given floor plans will be provided.
Extensions and Connections ● Possible extensions include
○ Modification of existing floor plans to meet client needs ○ Construction cost analysis ○ Surface area and Volume of 3D objects
● Connections to other mathematics content within and among grade levels ○ Content is designed to be connected with the Geometry course content
● Connections to content in other subject areas

○ This project connects directly with content from Drafting courses and may be adapted to work with Building Trades courses.
Strategies for Differentiation ● Ideas for addressing needs of a diverse population of students such as:
○ kinesthetic, auditory, or visual learners; ■ This lesson has aspects for all types of learners. Visual learners will
benefit from seeing the examples presented, auditory learners will benefit from the conversation among group members, and kinesthetic learners will benefit from actually creating the plans.
○ kids with processing, memory, motor issues ■ Students with special needs such as these will be allowed to design
their home on the computer if that will accommodate their specific needs.
○ English language learners (ELLs); ■ The use of magazines and other examples should assist ELLs in
understanding the idea of the assignment. ○ high-ability students (Ideas for providing depth “deep” doesn’t mean “more”)
■ Advanced students will have the opportunity if they choose, to add another floor or model a basement. Another option they will have is to add more walls, perhaps at different angles. For example, they can create the dining room in the shape of an octagon and then consider how that shape would affect adjacent rooms and exterior walls.
● Student organization ideas helpful to particular groups of learners. ○ Students should use graph paper and rulers to draw lines. ○ Patty Paper (tracing paper) may be used to duplicate exterior wall
construction and areas in common in the first and second floor plans (stairs, open foyers, window alignment, etc).
○ Work should be done in pencil ○ Teacher should provide good pencil top erasers or white stick erasers to aid
in neatness. ○ Make Portfolio Pockets with posterboard to keep all plans in for the project

Name: __________________________________________ Date: _________ Period: ______
Flooring Floor Plans You will be creating your own floor plan for your dream house. Each square on your graph paper represents 1 square foot. You can design your house in any way that you would like, but it will have to meet the following requirements: 1st floor:
1 One floor will be a minimum of 800 square feet. 2 You must have one interior wall that runs the entire length (or width) of the house (load
bearing wall) 3 You will need to include at least 1 bay window.
a Each bay window must have at least 2 angled walls. 4 You must include a minimum of 2 exterior doors (one front door, one back door).
a Exterior doors must be at least 3 ft wide. 5 Room for stairs to the second floor must be included. 6 You must have a Kitchen and Living Room and Bathroom.
a Fixtures in the kitchen (cabinets, sink, appliances) and bathroom (toilet sink and potentially shower/bath) must be defined.
7 Every room must have a defined doorway or opening to enter a Interior doors must be at least 2.5 ft wide
2nd floor:
1 Exterior walls must match up with downstairs exterior walls exactly. 2 Load bearing wall must line up exactly with the first floor wall. 3 Stairwell(s) must line up with downstairs exactly. 4 Must include at least one bedroom.
a Each bedroom must have a closet b Each bedroom must have a window.
5 Must include one full bathroom a Must have a tub/shower, sink, and toilet)

Sample Floor Plan 1
Sample Floor Plan 2

Teacher-Created Sample Floor Plan:

Flooring Floor Plans Rubric
Requirement Not Met (0 Pts) Partially Met (1 pts) Met (2 pts)
1
2
3
4
5
6
7
8
9
10
Score: ____/20 1st Floor
1 One floor will be a minimum of 800 square feet. (Area calculation must be done) 2 You must have one interior wall that runs the entire length (or width) of the house (load
bearing wall) 3 You will need to include at least 1 bay window.
b Each bay window must have at least 2 angled walls. 4 You must include a minimum of 2 exterior doors (one front door, one back door).
c Exterior doors must be at least 3 ft wide. 5 Room for stairs to the second floor must be included. 6 You must have a Kitchen and Living Room and Bathroom.
d Fixtures in the kitchen (cabinets, sink, appliances) and bathroom (toilet sink and potentially shower/bath) must be defined.
7 Every room must have a defined doorway or opening to enter e Interior doors must be at least 2.5 ft wide
2nd Floor: 6 Exterior walls must match up with downstairs exterior walls exactly. 7 Load bearing wall must line up exactly with the first floor wall. 8 Stairwell(s) must line up with downstairs exactly. 9 Must include at least one bedroom.
a Each bedroom must have a closet b Each bedroom must have a window.
10 Must include one full bathroom a Must have a tub/shower, sink, and toilet)

Lesson 2: Ramping It Up
Strands Geometry and Measurement Mathematical Objectives Pythagorean Theorem and its converse Area of Polygons (rectangles, triangles, trapezoids, etc) Perimeter Mathematics Performance Expectations MPE.5 The student will solve real-world problems involving right triangles by using the Pythagorean Theorem and its converse, properties of special right triangles, and right triangle trigonometry. Related SOLs G.8 The student will solve real-world problems involving right triangles by using the Pythagorean Theorem and its converse, properties of special right triangles, and right triangle trigonometry. G.9 The student will verify characteristics of quadrilaterals and use properties of quadrilaterals to solve real-world problems. NCTM Standards The following are all applicable NCTM standards related to the lesson:
● Apply and adapt a variety of appropriate strategies to solve problems ● Communicate mathematical thinking coherently and clearly to peers, teachers, and
others ● Use trigonometric relationships to determine lengths and angle measures. ● Use geometric ideas to solve problems in, and gain insights into, other disciplines
and other areas of interest such as art and architecture Additional Objectives for Student Learning: Student research and understanding of certain aspects of the American Disabilities Act Materials/Resources Group’s Floor Plans Ruler Protractor Pencil Scrap Paper TI-84 Calculator

Computer with internet access Assumption of Prior Knowledge
● Students should have completed Geometry ● Basic understanding of triangles’ sides and angles ● Knowledge of Pythagorean Theorem and right triangle trigonometry ● Basic knowledge of properties of polygons including formulas for calculating area
and perimeter
Introduction: Setting Up the Mathematical Task
In this lesson, the student will modify their group’s floor plan for a two story house to include either steps or a handicap access ramp. They will be required to create an additional plan that shows the detailed dimensions and include the position on the original floor plans. Both stairs and ramp access use a variety of physical features that will require the use of the Pythagorean Theorem and angle measurements for quadrilaterals and triangles.
● One 90 minute class ● Introduce the task.
○ Indicate how you will get students to begin thinking about the task. ■ Today, your group will continue working on your Happy Home by
adding a new feature. ○ What questions or prompts will you pose?
■ How will you access your home from the outside? ■ Now that you have your two story plan, how will you get from one
floor to another? ■ Did you know that there are legal specifications for stairs and
handicap access ramps? ○ What instructional techniques will be used? What grouping structure will be
used and why? ■ The teacher will introduce the activity. ■ After questions have been answered, the students will be placed in
their groups from the previous lesson. ■ Groups will be used to provide students with the opportunity to
discuss ideas with their peers ○ What activities (if any) move students toward the stated objectives/goals?
■ Each group will need to research the legal specifications for stairs/access ramps.

■ Having sample drawings will be helpful for students to study. ○ Indicate how you will you invite students to draw upon their prior
knowledge? ■ Teacher questioning of the whole class and individual groups (see
questions in “how will you help them understand the task”) ○ How will you help them to understand the task?
■ The teacher will introduce the instructional task and ask students initial questions to get them thinking in the right direction:
● When you look at the side of a stair case, what observations do you make?
● How steep are stairs (typically)? ● How about wheelchair access ramps? Do any of you have
access ramps where you live? ● What are the slopes of the ramps? Is there a reason for this? ● etc.
○ In what way will students make their mathematical thinking and understanding public?
■ Students will discuss their thinking with their peers. ■ Students will be asked questions by the teacher. ■ Students will present the results of this lesson during the final
assessment.
Exploration:
Students will get to decide which feature to add to their dream house: stairs or a handicapped access ramp. Based on the decision of the group, the students will then begin to research the legal requirements and specifications of their choice. They may need to alter their original floor plans to accommodate the addition of the stairs/ramp. Small Group Work
● discuss and decide which feature to add, either stairs or a ramp. ● research the requirements and specifications of the feature they chose. ● create the design of the stairs or ramp including angles and measurements. ● alter (if necessary) the original floor plans to accommodate the additional feature.
Whole Class Sharing/Discussion
● Student/Teacher Actions: ○ Ideas for technology integration or cooperative/collaborative learning:

■ The students will integrate technology by using the internet to research the laws and specifications relevant to installation of stairs or a ramp.
■ The teacher will ask the students to describe their current residence and whether there are any stairs or if the entire building is handicapped accessible with ramps and elevators.
Monitoring Student Responses
● Ways students are expected to communicate their thinking and their new knowledge:
○ students will describe their thinking orally to group members during discussion.
○ students will describe their thinking visually by creating and designing either stairs or a ramp.
○ students will also describe their thinking verbally during their final presentation at the end of the unit.
● Ways students are expected to communicate with each other: ○ students will communicate with each other verbally within their groups.
● Ways teacher and/or students will highlight and clarify the ideas being grappled: ○ students will highlight and clarify ideas by collaborating suggestions and
ideas about the stair or ramp design ● Ways teacher and/or students will highlight and clarify the ideas being grappled:
○ Students should be placed in groups of similar ability level ○ Teachers can assist by showing them pre-made stair/ramp designs (either
by teacher or by students from other classes/years) ○ Teachers can assist by asking leading questions about how students’
current houses are laid out. ● Ways teacher will extend the material for students that are ready to move forward:
○ Students who have completed one set of stairs (or a ramp) can choose to put another set of stairs in a different part of the house. Other options would be for them to create access to the basement or the entrance to the front door.
● How the teacher plans to summarize the lesson: ○ The purpose of this lesson was to illustrate just a few real-life applications of
geometry. Hopefully the students will gain a new sense of appreciation of all goes into to building stairs the next time they climb a set.
○ This lesson will be continued in future days so formal closure will not occur yet.
● Ways of collecting evidence of students’ knowledge of the content described:

○ The teacher should visit each group and observe what area of the house the stairs/ramp are placed and determine if they are constructed properly and there is enough space allocated for the staircase/ramp.
Assessment
● Student Created Floor Plan with details for stairs/ramp ○ Students will be creating either a set of stairs or ramp that meet the defined
requirements ○ Students will be assessed using the attached rubric ○ All lessons will be turned in as a portfolio and presented to the class.
● Accommodations ○ Teacher assistance will be provided throughout the individual and group
work time. ○ Standard accommodations for IEPs and 504s will be made. ○ Written instructions will be given as needed. ○ Large printouts of given floor plans will be provided.
Extensions and Connections ● Possible extensions include:
○ modification of existing floor plans to meet client needs ○ construction cost analysis ○ investigate different designs to meet space requirements ○ surface area and Volume of 3D objects
● Connections to other mathematics content within and among grade levels ○ Content is designed to be connected with the Geometry course content
● Connections to content in other subject areas ○ This project connects directly with content from Drafting courses and may
be adapted to work with Building Trades courses. There is also direct relevance to engineering.
Strategies for Differentiation
● Ideas for addressing needs of a diverse population of students such as: ○ kinesthetic, auditory, or visual learners;
■ This lesson has aspects for all types of learners. Visual learners will benefit from seeing the examples presented, auditory learners will benefit from the conversation among group members, and kinesthetic learners will benefit from modification of the plans.

○ kids with processing, memory, motor issues; ■ Students with special needs such as these will be allowed to design
their home on the computer if that will accommodate their specific needs.
○ English language learners (ELLs); ■ The use of magazines and other examples should assist ELLs in
understanding the idea of the assignment. ○ high-ability students (Ideas for providing depth “deep” doesn’t mean “more”).
■ These students can explore different configurations of stairs/ramps such as combinations with landings and turns.
● Student organization ideas helpful to particular groups of learners. ○ Use grid paper to assist students in creating plans ○ Have White Erasers and soft lead pencils as they will erase cleanly ○ Make Portfolio Pockets with posterboard to keep all plans in for the project

Name: _________________________________________ Date: _________ Period: ________
Ramping It Up
While building your house, you realize that your house is not handicap accessible. You want to make sure that your friends and neighbors can get into your house without having to carry them up the stairs. Also, you think that a ramp would make a killer slide in the winter time. 1. Using your computer research the official maximum slope of a wheel chair access ramp for a residence (house) specified by the Americans with Disabilities Act. Use the slope to calculate the angle of elevation for the ramp. Maximum slope of ramp: ________ Maximum angle of elevation: ________ 2. You will need to add the handicap access ramp to the front of your house. Assuming your front door landing sits 3.5 ft above the ground, how much horizontal distance would be necessary to add a straight ramp in front of the house? 3. Would it be feasible to add a ramp of this length the front of your house and stay on your property (piece of graph paper)? Why or why not? 4. What accommodations could be made to make the ramp fit? 5. Modify your floor plan to accommodate a handicap access ramp that meets the requirements of the Americans with Disabilities Act. 6. Stairs also have a maximum angle of elevation. Research the maximum slope for a flight of stairs. Use this to calculate the maximum angle of elevation. Maximum Slope: _______ Maximum Angle of Elevation: ______
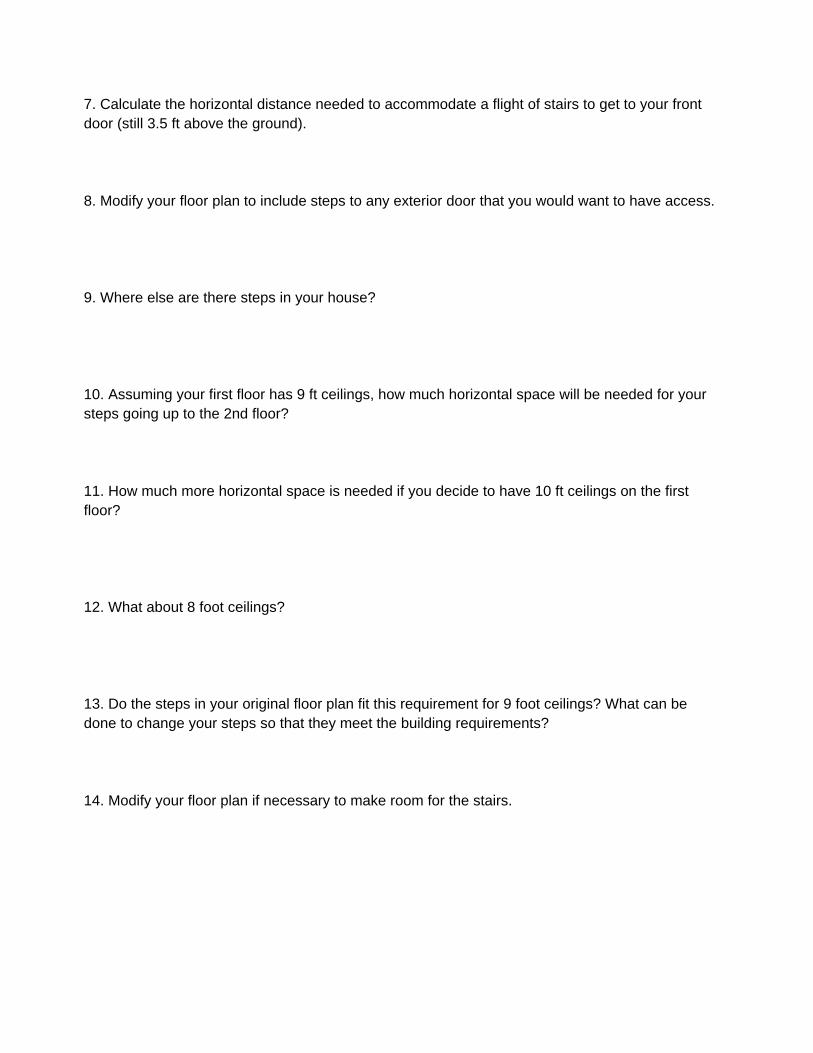
7. Calculate the horizontal distance needed to accommodate a flight of stairs to get to your front door (still 3.5 ft above the ground). 8. Modify your floor plan to include steps to any exterior door that you would want to have access. 9. Where else are there steps in your house? 10. Assuming your first floor has 9 ft ceilings, how much horizontal space will be needed for your steps going up to the 2nd floor? 11. How much more horizontal space is needed if you decide to have 10 ft ceilings on the first floor? 12. What about 8 foot ceilings? 13. Do the steps in your original floor plan fit this requirement for 9 foot ceilings? What can be done to change your steps so that they meet the building requirements? 14. Modify your floor plan if necessary to make room for the stairs.

Ramping it Up Rubric
Category Not Met (0 pts) Partially Met (2 pts)
Met (4 pts)
Researched and recorded ADA requirements for Residential Construction of Ramps
Thoughtfully and completely answered questions on worksheet.
Made appropriate modifications to floor plan to include ramp.
Researched and recorded standard stair slope
Made appropriate modifications to floor plan to include space for stairs.
Score: _____/20
Lesson 3: Raising the Roof
Strands Geometry and Measurement Mathematical Objectives Pythagorean Theorem and its converse Area of Polygons (rectangles, triangles, trapezoids, etc) Perimeter Mathematics Performance Expectations MPE.5 The student will solve real-world problems involving right triangles by using the Pythagorean Theorem and its converse, properties of special right triangles, and right triangle trigonometry. Related SOLs G.8 The student will solve real-world problems involving right triangles by using the Pythagorean Theorem and its converse, properties of special right triangles, and right triangle trigonometry. G.9 The student will verify characteristics of quadrilaterals and use properties of quadrilaterals to solve real-world problems. NCTM Standards The following are all applicable NCTM standards related to the lesson:
● Apply and adapt a variety of appropriate strategies to solve problems ● Communicate mathematical thinking coherently and clearly to peers, teachers, and
others ● Use trigonometric relationships to determine lengths and angle measures. ● Use geometric ideas to solve problems in, and gain insights into, other disciplines
and other areas of interest such as art and architecture Additional Objectives for Student Learning: Students will understand the fundamentals of roof and truss construction providing the pitch that will define the exterior look and the proper weight bearing load. Materials/Resources Group’s Floor Plans Ruler Protractor Pencil Scrap Paper

TI-84 Calculator Assumption of Prior Knowledge
● Students should have completed Geometry ● Basic understanding of triangles’ sides and angles ● Knowledge of Pythagorean Theorem and right triangle trigonometry ● Basic knowledge of properties of polygons including formulas for calculating area
and perimeter
Introduction: Setting Up the Mathematical Task
In this lesson, the student will create a plan for the roof of their group’s two story house. They will be required to include a variety of physical features into their roof plan that will require the use of the Pythagorean Theorem and area formulas for quadrilaterals and triangles.
● One 90 minute class: ● Introduce the task.
○ Indicate how you will get students to begin thinking about the task. ■ Each group needs to complete the construction plan of the house by
putting it under a roof. ■ Each group will need to decide the design of the roof based on
exterior aesthetics and pitch (angle of elevation) requirements necessary for climate and construction needs. Example: You do not want to have a flat roof in a place that gets a lot of snow- It may collapse.
○ What questions or prompts will you pose? ■ What do you want your home to look like? Are there restrictions
based on the climate? Do you want different roof alignments? ○ What instructional techniques will be used? What grouping structure will be
used and why? ■ This lesson is intended to be completed as part of the group structure
of the entire unit in order to create a complete building project and presentation.
○ What activities (if any) move students toward the stated objectives/goals? ■ Allowing students to choose roof design, calculate pitch, and spatial
requirements for proper load bearing capacity. ○ Indicate how you will you invite students to draw upon their prior
knowledge?
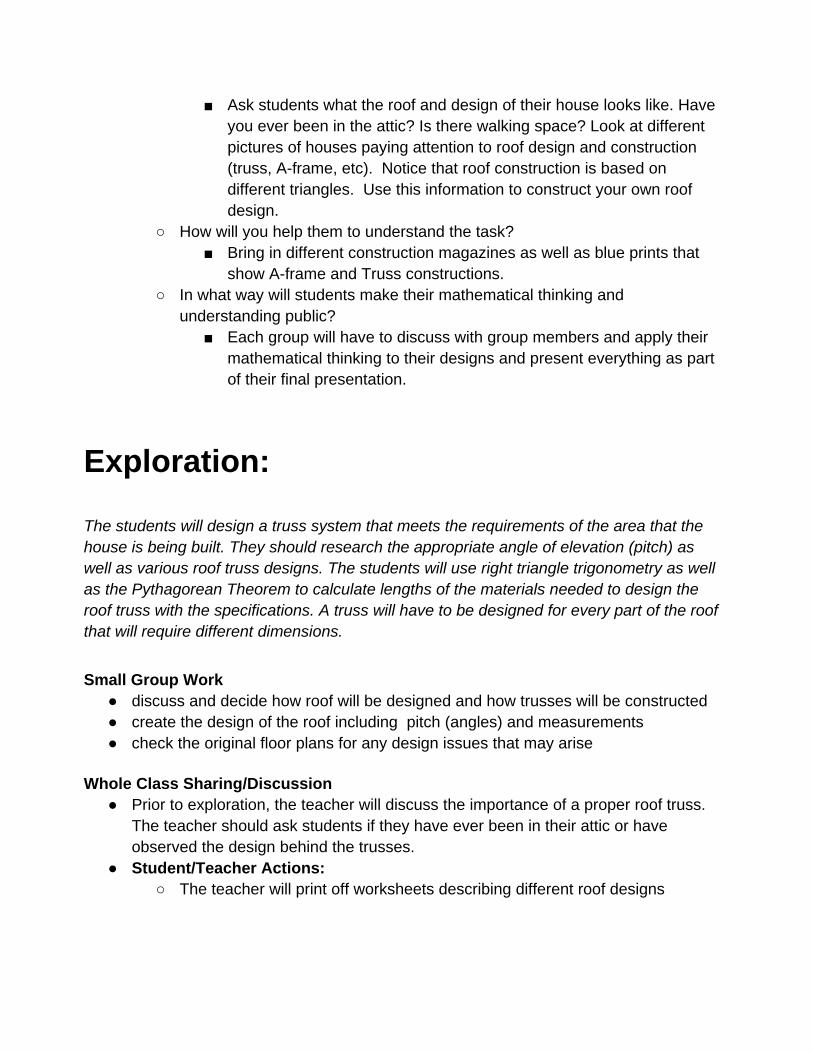
■ Ask students what the roof and design of their house looks like. Have you ever been in the attic? Is there walking space? Look at different pictures of houses paying attention to roof design and construction (truss, A-frame, etc). Notice that roof construction is based on different triangles. Use this information to construct your own roof design.
○ How will you help them to understand the task? ■ Bring in different construction magazines as well as blue prints that
show A-frame and Truss constructions. ○ In what way will students make their mathematical thinking and
understanding public? ■ Each group will have to discuss with group members and apply their
mathematical thinking to their designs and present everything as part of their final presentation.
Exploration:
The students will design a truss system that meets the requirements of the area that the house is being built. They should research the appropriate angle of elevation (pitch) as well as various roof truss designs. The students will use right triangle trigonometry as well as the Pythagorean Theorem to calculate lengths of the materials needed to design the roof truss with the specifications. A truss will have to be designed for every part of the roof that will require different dimensions. Small Group Work
● discuss and decide how roof will be designed and how trusses will be constructed ● create the design of the roof including pitch (angles) and measurements ● check the original floor plans for any design issues that may arise
Whole Class Sharing/Discussion
● Prior to exploration, the teacher will discuss the importance of a proper roof truss. The teacher should ask students if they have ever been in their attic or have observed the design behind the trusses.
● Student/Teacher Actions: ○ The teacher will print off worksheets describing different roof designs

○ The teacher may allow students to look up roof designs on the internet and should provide links to helpful websites (such as http://www.schmidbauerhomectr.com/truss.htm)
Monitoring Student Responses ● Ways students are expected to communicate their thinking and their new
knowledge: ○ the students should communicate their thinking by asking questions to
group members and/or the teacher ● Ways students are expected to communicate with each other:
○ The students will discuss the construction of the roof truss as well as the Pythagorean Theorem and trigonometry involved in the design amongst group members.
● Ways teacher and/or students will highlight and clarify the ideas being grappled: ○ The students will highlight their ideas by creating their own roof plans and
writing a journal entry describing the difficulties in creating a roof truss design.
○ Students should be placed in groups of similar ability level ○ Teachers can assist by showing them pre made designs (either by teacher
or by students from other classes/years) ○ Teachers can assist by reassigning students who are finished with their
design to help struggling students with their individual design ○ Teachers can assist by asking leading questions about how students’
current house is laid out, how big the rooms in their house are, etc. ● Ways teacher will extend the material for students that are ready to move forward:
○ If students have finished creating a simple roof the teacher should challenge them to get more creative, perhaps designing a roof with multiple peaks.
● How the teacher plans to summarize the lesson: ○ The teacher will explain that every house needs a roof therefore designing
one is an essential part of the dream home construction process. ● Is there time built in for a closure of the lesson?
○ At the end of the class period, students will add their final truss design and calculations to their final project. The teacher will bring the whole class together for a final discussion of what mathematical concepts they used in the design of their roof truss.
● Ways of collecting evidence of students’ knowledge of the content described: ○ Students will incorporate their roof truss design into their final project
Assessment
● Student Created Roof Truss Design

○ Students will be creating a roof truss design that meets the defined requirements
○ Students will be assessed using the attached rubric ○ Presentation of entire group project
● Accommodations ○ Teacher assistance will be provided throughout the individual and group
work time. ○ Standard accommodations for IEPs and 504s will be made. ○ Written instructions will be given as needed. ○ Large printouts of given floor plans will be provided.
Extensions and Connections ● Possible extensions include:
○ Creating a materials list for construction of the roof trusses for their house. Thought should be put in to how much wood would be necessary as well as how they would attach each piece of wood to another.
○ Calculation of surface area of the roof in order to estimate materials needed for plywood, tar paper, and shingles, etc.
● Connections to other mathematics content within and among grade levels ○ This lesson will make connections to other geometric units within different
grade levels as the students deal with triangles and also leads into Trigonometry for higher grade levels.
● Connections to content in other subject areas ○ Students will understand the fundamentals of roof and truss construction
providing the pitch that will define the exterior look and the proper weight bearing load.
Strategies for Differentiation
● Ideas for addressing needs of a diverse population of students such as: ○ kinesthetic, auditory, or visual learners;
■ This lesson has aspects for all types of learners. Visual learners will benefit from seeing the examples presented, auditory learners will benefit from the conversation among group members, and kinesthetic learners will benefit from modification of the plans.
○ kids with processing, memory, motor issues; ■ Students with special needs such as these will be allowed to design
their home on the computer if that will accommodate their specific needs.

○ English language learners (ELLs); ■ The use of magazines and other examples should assist ELLs in
understanding the idea of the assignment. ○ high-ability students (Ideas for providing depth “deep” doesn’t mean “more”).
■ These students can study different pitch roof sets to change exterior look or have two different roof pitches or alignments to create different looks.
● Student organization ideas helpful to particular groups of learners. ○ Use grid paper to assist students in creating plans ○ Have White Erasers and soft lead pencils as they will erase cleanly ○ Make Portfolio Pockets with posterboard to keep all plans in for the project

Name: ________________________________________ Date: ________ Period: _____
Raising the Roof
Roof design is key to the construction of the house. There are several factors to consider. What is the pitch of the roof? How much material will that use? Will there be space to walk in the attic? Could it be converted into a livable space? Will it be structurally sound? Here are several roof truss designs:
You are going back and forth between 2 roof truss designs. You think you may want to have an open attic that could be converted into living space in the future. You want your builder’s opinion between the attic truss design and one other design. Select another design to compare to the attic. Typically, the roof trusses of the main roof go perpendicular to the longest wall of the house. Look at the picture below
.
1. How wide will your truss have to be to stretch over the width of your house?

2. Design your own truss below
3. Draw the Attic roof truss that can fit over your house. Roof must go at a 45 degree angle of elevation.

4. Using the your designs, calculate the length of every board to the nearest tenth of a foot. Label each distance on your design above. Show your work on a separate paper. 5. How many total ft of wood would be necessary to build one truss of each design? Design 1: ______ Attic: ______ 6. A roof is formed by placing several of these trusses equally spaced apart. The typical spacing is every 18 inches. How many trusses will need to be placed? There needs to be some overhang on either side. 7. How many linear feet of wood would be necessary to build all the roof trusses for the main roof for each design? Design 1: _______ Attic: ________ 8. A standard 2x4 is 8 ft long, assuming you can somehow use all your scraps, approximately how many 2x4s would be necessary to construct your roof? Design 1: ________ Attic: ________ 9. A standard 2x4 at The Home Depot is $3.97. How much would it cost to build all the trusses in your roof? Design 1: ________ Attic: ________ 10. Is there a significant cost difference between the 2 designs? Which design would you choose and why? When going to build the house in your neighborhood, your home owners association has a few rules in regards to your house. One requires that your roof angle of elevation be between 30 degrees and 50 degrees because they think it will look too weird if it were outside this range. Below 30 degrees would be too shallow, above 50 degrees would be too steep. 11. Verify the angle of elevation in your design would meet the requirements set forth by the homeowners association.

Raising the Roof Rubric
Category Not Met (0 pts) Partially Met (2 pts)
Met(4 pts)
Chose and Designed a roof truss
Created an Attic Roof truss
Found all measurements of designed roof truss
Found all measurements of Attic Roof truss
Answered all questions completely and thoughtfully
Score: _____/20

Lesson 4: Hit the Deck
Strands Geometry and Measurement Mathematical Objectives Pythagorean Theorem and its converse Area of Polygons (rectangles, triangles, trapezoids, etc) Perimeter Mathematics Performance Expectations MPE.5 The student will solve real-world problems involving right triangles by using the Pythagorean Theorem and its converse, properties of special right triangles, and right triangle trigonometry. Related SOLs G.8 The student will solve real-world problems involving right triangles by using the Pythagorean Theorem and its converse, properties of special right triangles, and right triangle trigonometry. G.9 The student will verify characteristics of quadrilaterals and use properties of quadrilaterals to solve real-world problems. NCTM Standards The following are all applicable NCTM standards related to the lesson:
● Apply and adapt a variety of appropriate strategies to solve problems ● Communicate mathematical thinking coherently and clearly to peers, teachers, and
others ● Use trigonometric relationships to determine lengths and angle measures. ● Use geometric ideas to solve problems in, and gain insights into, other disciplines
and other areas of interest such as art and architecture Materials/Resources Group’s Floor Plans Ruler Pencil Scrap Paper TI-84 Calculator Assumption of Prior Knowledge Students should have:
● completed Geometry ● a basic understanding of triangles’ sides and angles ● a basic knowledge of Pythagorean Theorem and right triangle trigonometry ● a basic knowledge of properties of polygons including formulas for calculating area
and perimeter
Introduction: Setting Up the Mathematical Task
In this lesson, you will design a deck to be attached to your house. It can be a one level or 2 level deck. You will be taking into consideration the amount of materials you need and the construction of stairs and gates
● One 90 minute class: ● Introduce the task.
○ You will be adding a deck to your existing floor plan. The deck will have to be large enough to hold a table, chairs and a grill. The deck will have at least one flight of stairs to get up from the ground as well as a gate at the top of the stairs.
○ What questions or prompts will you pose? ■ Ask the students if any of their houses have decks on the back.
● Do any of you have a deck on your house? ■ What is the general shape and size? ■ What do you have on your deck? ■ Is there a way to get onto your deck besides from the house? ■ Is your deck level with the ground or above the ground?
○ What instructional techniques will be used? What grouping structure will be used and why?
■ Students will be working with the groups they were placed in during their lesson. This will help students communicate their ideas as well as develop their thinking for solutions to the problems proposed.
○ What activities (if any) move students toward the stated objectives/goals? ■ Students will be completing a deck design worksheet. They will
questions are formatted to move students toward the stated objectives.
○ Indicate how you will you invite students to draw upon their prior knowledge?
■ Students will be asked about their knowledge of deck design. They will be asked to use the Pythagorean Theorem and trigonometry to find various measurements involved with the design of their deck.

○ How will you help them to understand the task? ■ The teacher will explain what they are going to do at the beginning of
the class as well as answer any student questions. The teacher will be walking around assisting groups as they work through the unit. The students will also be shown examples of previously completed assignments.
○ In what way will students make their mathematical thinking and understanding public?
■ The students will be working in groups and making communicating their mathematical thinking to group members. Students will be incorporating their design into their final project presentation.
Exploration:
The students will design a deck to be attached to their house. The deck has size requirements and must include at least one flight of stairs. Students will have to consider the angle of elevation for a roof as well as the slope of the ground and a flight of stairs. Individual Work
● Individually students will think about the design of the porch that is on their own house.
Small Group Work
● After the individual brainstorming, the groups will come together to discuss deck designs they are familiar with.
● Together they will design a deck for the dream house they are planning. Whole Class Sharing/Discussion
● Student/Teacher Actions: ○ Ideas for technology integration or cooperative/collaborative learning:
■ Teacher may include a period of time where students can look up sample deck designs on computers. Sample website: http://www.decks.com/deckdesign
Monitoring Student Responses
● Ways students are expected to communicate their thinking and their new knowledge:

○ students will communicate verbally and ask questions of the teacher or other students to clarify if they are confused.
● Ways students are expected to communicate with each other: ○ students can speak with each other and perhaps use sketches to brainstorm
ideas. ● Ways teacher and/or students will highlight and clarify the ideas being grappled:
○ The teacher will highlight the ideas being grappled by doing the pre-made deck design with them.
● Ways teacher and/or students will highlight and clarify the ideas being grappled: ○ The student will highlight the idea being grappled by completing the
worksheets with their own deck design and incorporating their final design into their final presentation (Presenting the Palace).
● Ways for teacher to assist students who have difficulties; ○ Students should be placed in groups of similar ability level ○ Teachers can assist by showing them pre made designs (either by teacher
or by students from other classes/years) ○ Teachers can assist by asking leading questions about how students’
current house is laid out, how big their own deck is, etc. ● Ways teacher will extend the material for students that are ready to move forward:
○ The teacher should encourage students who are finished to create a more challenging deck, perhaps one that is two stories tall.
● Ways teacher will extend the material for students that are ready to move forward: ○ The teacher will explain that although having a deck is not something every
house needs, it certainly adds to the desirability of the property. ● Is there time built in for a closure of the lesson? (Time to pull the information
together, provide feedback and reinforce the lesson). ○ At the end of class students will add their deck design to their final project.
The teacher will bring the whole class together for a final discussion of what mathematical concepts they used in the design of their deck.
● Ways of collecting evidence of students’ knowledge of the content described: ○ Evidence of students’ knowledge will come through teacher observation of
the students. Also, final deck design will be included in the students’ final project.
Assessment
● Student Created Floor Plan with details for stairs/ramp ○ Students will be creating a deck design plan that meets the defined
requirements ○ The students will be assessed using the attached rubric
● Accommodations

○ Teacher assistance will be provided throughout the individual and group work time.
○ Standard accommodations for IEPs and 504s will be made. ○ Written instructions will be given as needed. ○ Large printouts of given floor plans will be provided.
Extensions and Connections ● Possible extensions include:
○ Teacher may extend the lesson by asking students to place the stairs on the side of the deck perpendicular to the house. Finding the height and length of the stairs will be complicated by the slope of the hill.
○ Teacher could include a multi-level deck design ○ Teacher could include a materials list calculation
● Connections to other mathematics content within and among grade levels ○ Content is designed to be connected with the Geometry course content
● Connections to content in other subject areas ○ Could be connected architecture, drafting, and building trades courses
Strategies for Differentiation
● Ideas for addressing needs of a diverse population of students such as: ○ kinesthetic, auditory, or visual learners;
■ This lesson has aspects for all types of learners. Visual learners will benefit from seeing the examples presented, auditory learners will benefit from the conversation among group members, and kinesthetic learners will benefit from modification of the plans.
○ kids with processing, memory, motor issues; ■ Students with special needs such as these will be allowed to design
their deck on the computer using design software such as Chief Architect if that will accommodate their specific needs.
■ Students with processing issues will be given guidance by the teacher and students within their groups.
■ Teacher generated samples will be provided for students who are having trouble getting started.
○ English language learners (ELLs); ■ The use of magazines and other examples should assist ELLs in
understanding the idea of the assignment. ■ Worksheet questions can be translated into the native language of
the student using translation software (http://translate.google.com)

○ high-ability students (Ideas for providing depth “deep” doesn’t mean “more”). ■ Elevations from the left, right, back and top can be created to extend
the lesson ● Student organization ideas helpful to particular groups of learners.
○ Students will design their deck on the grid provided ○ Students will be given access to rulers to draw straight lines ○ Students will be given access to computers with architecture software (or
demo versions).

Name: _____________________________________________ Date: ________ Period: ____
Hit the Deck You want to add a deck to the back of the house. You can create your deck in any way that you want. But it must have a gate and stairs to get to the deck from the ground. 1. Draw the back wall of your house (with doorways and windows) and design a deck “floor plan.”
2. You will need to install a railing to prevent your kids from falling off around the perimeter of the deck (not including the wall of the house). Find the lengths of all the sides of the deck. 3. You will need to find how much wood will be needed to make the deck surface, calculate the area of the deck to the nearest square foot.

4. You decide that you want to change it to be a covered porch. You will need to add a roof to your deck that slopes away from the house. Take the following image for example:
5. How far from the back of the house does this deck extend? 6. You have a maximum of 3 ft clearance due to a window above your deck. Calculate the maximum angle of elevation for the roof for the deck shown above. 7. How far from the back of your house does YOUR deck extend? 8. Assuming you have the same amount of clearance (3 ft), will this make your angle of elevation increase, decrease, or stay the same?

9. At the back of the house, the deck is 3.5 ft above the ground. The backyard slopes down away from the house at a constant angle of depression. Draw the side profile of the back of your house, the ground, and your deck. Be sure to include known measurements.
10. Use your measurements to calculate the angle of elevation of the deck roof. 11. Remember, that pesky homeowners association says that the roof pitch for a house must be between 30 degrees and 50 degrees. Does the deck roof meet those requirements? 12. What are some things we could do to allow us to make a deck roof work. You should come up with 3 options.

13. The ground is sloping away from the house at a constant angle of depression. Find the slope of the ground. 14. What is the angle of depression for the ground? 15. Using your measurements, how far above the ground is the far edge of the deck? 16. What about stairs? What are some obstacles that could make putting stairs from the ground to the deck difficult? 17. You want to put the stairs coming off the back of the deck to the ground. Recall from Lesson 2: Ramping It Up that stairs have a maximum angle of elevation. Put in any measurements that you know.
18. Use trigonometry to find the height of the steps as well as the horizontal distance necessary to fit them. 19. Draw some steps on your picture (#9) and use trigonometry to find the height of your steps and horizontal distance.

Hit the Deck Rubric
Category Not Met (0 pts) Partially Met (2 pts)
Met(4 pts)
Designed an appropriate deck “floor plan”
Successfully completed the roof calculations for provided deck
Created a side profile for their deck including measurements
Completed calculations for slope and angle of depression for ground
Completed calculations for both step problems
Answered all questions completely and thoughtfully.
Score: ____/24

Lesson 5: Lovely Landscaping
Strands Geometry and Measurement Mathematical Objectives Pythagorean Theorem and its converse Area of Polygons (rectangles, triangles, trapezoids, etc) Perimeter Mathematics Performance Expectations MPE.5 The student will solve real-world problems involving right triangles by using the Pythagorean Theorem and its converse, properties of special right triangles, and right triangle trigonometry. Related SOLs G.8 The student will solve real-world problems involving right triangles by using the Pythagorean Theorem and its converse, properties of special right triangles, and right triangle trigonometry. G.9 The student will verify characteristics of quadrilaterals and use properties of quadrilaterals to solve real-world problems. NCTM Standards The following are all applicable NCTM standards related to the lesson:
● Apply and adapt a variety of appropriate strategies to solve problems ● Communicate mathematical thinking coherently and clearly to peers, teachers, and
others ● Use trigonometric relationships to determine lengths and angle measures. ● Use geometric ideas to solve problems in, and gain insights into, other disciplines
and other areas of interest such as art and architecture Materials/Resources Group’s Floor Plans Ruler compass Pencil Scrap Paper TI-84 Calculator Colored pencils

Assumption of Prior Knowledge
● Students should have completed Geometry ● Basic understanding of triangles’ sides and angles ● Knowledge of Pythagorean Theorem and right triangle trigonometry ● Basic knowledge of properties of polygons including formulas for calculating area
and perimeter
Introduction: Setting Up the Mathematical Task
In this lesson, you will develop a landscaping plan to beautify your home and create curb value. You will be required to include a variety of physical features into your landscaping plan that will require the use of the Pythagorean Theorem and Area formulas for quadrilaterals and triangles.
● One 90 minute class ● Introduce the task.
○ Indicate how you will get students to begin thinking about the task. ■ “Now that you have completed your home design, you need to
consider that exterior. Landscaping is the process of planning flowers, trees, and shrubs around the exterior of the home in order to create beauty and curb appeal for not only your home, but the neighborhood.”
■ Have several magazines available for students to view landscaping ideas such as Better Homes and Gardens and other Landscaping magazines. (Some pictures have been provided below as examples)
○ What questions or prompts will you pose? ■ What do you think makes a home appealing from the outside? ■ Do you like more color or more bushes? ■ How will you incorporate color all year? ■ Do you like a lot of maintenance? Choose flowers and shrubs
carefully based on work. ■ What climate will your choices withstand? ■ Think about areas to mulch and have flower or tree beds. ■ What about walkways or other structures? ■ Would you like lighting in your yard or a pond or fountain? These
need electricity run. ○ What instructional techniques will be used? What grouping structure will be
used and why? ■ Students will continue working in their project groups.
■ Students will use the worksheet below to move through the landscaping design process and create their own plan for their project.
○ What activities (if any) move students toward the stated objectives/goals? ■ Students will work together in groups to calculate materials needed,
and include within their portfolio to present to class and the teacher. ○ Indicate how you will you invite students to draw upon their prior
knowledge? ■ Students will use prior knowledge of circles, polygons, and right
triangles to complete the task. ○ How will you help them to understand the task?
■ The teacher should have a final project to show students what is expected.
Exploration:
Students will complete landscaping worksheet in order to review the process needed to design a landscaping plan for their home. Then , each group will complete a landscaping plan with an overhead perspective. to complete their project portfolio. Individual Work
● Individual students will describe their own homes landscaping or as a homework assignment, each student can bring in a picture of the front of their homes.
Small Group Work
● Groups will work together to complete the provided worksheet on landscaping and make a landscaping plan for their dream home, creating an overhead perspective plan .
Whole Class Sharing/Discussion
● Student/Teacher Actions: ○ Groups will present their plans during the final assessment. ○ The teacher will print off worksheets describing different landscape designs ○ The teacher may allow students to look up landscape designs on the
internet and should provide links to helpful websites (such as http://www.landscape-design-advisor.com/planning/virtual-design/virtual-sample-plans


Monitoring Student Responses ● Ways students are expected to communicate their thinking and their new
knowledge: ○ students will communicate verbally and ask questions of the teacher or
other students to clarify if they are confused. ● Ways students are expected to communicate with each other:
○ students can speak with each other and perhaps use sketches to brainstorm ideas.
● Ways teacher will assist students who have difficulties: ○ Students should be placed in groups of similar ability level ○ Showing them pre made designs (either by teacher or by students from
other classes/years) ○ Asking leading questions about how students’ current house is laid out, how
big their own deck is, etc. ● Ways teacher will extend the material for students that are ready to move forward:
○ The teacher should encourage students who are finished to incorporate different landscaping structures such as ponds, fountains, or raised beds.
● How the teacher plans to summarize the lesson: ○ The teacher will explain that landscaping can be simple or highly complex.
It can change through the life of a home, but adds character and value to any home-even apartments.
● Closure of the lesson: ○ At the end of class students will add their landscape design to their final
project. The teacher will bring the whole class together for a final discussion of what mathematical concepts they used in the design of their landscape plan.
● Ways of collecting evidence of students’ knowledge of the content described: ○ Evidence of students’ knowledge will come through teacher observation of
the students as well as the completed worksheet. Also, final landscape design will be included in the students’ final project.
Assessment
● Student Created Landscape Plan ○ Students will be creating a landscape design plan that meets the defined
requirements ○ Students will be assessed using the attached rubric
● Accommodations ○ Teacher assistance will be provided throughout the individual and group
work time. ○ Standard accommodations for IEPs and 504s will be made.
○ Written instructions will be given as needed. ○ Large printouts of given landscape plans will be provided.
Extensions and Connections ● Possible extensions include:
○ This lesson incorporates circles and curved lines through landscaping design.
● Connections to other mathematics content within and among grade levels ○ tessellations can be used if students do detailed walkways.
● Connections to content in other subject areas ○ This lesson incorporates other subject areas through the use of art and
agriculture.
Strategies for Differentiation
● List ideas for addressing needs of a diverse population of students such as: ○ kinesthetic, auditory, or visual learners;
■ This lesson has aspects for all types of learners. Visual learners will benefit from seeing the examples presented, auditory learners will benefit from the conversation among group members, and kinesthetic learners will benefit from modification of the plans.
○ kids with processing, memory, motor issues; ■ Students with special needs such as these will be allowed to design
their plan on the computer if that will accommodate their specific needs.
○ English language learners (ELLs); ■ The use of magazines and other examples should assist ELLs in
understanding the idea of the assignment. ○ high-ability students
■ High-ability students will be encouraged to research and design complex landscaping plans to incorporate water features and/or winding walkways and/or raised beds, etc.
● Student organization ideas helpful to particular groups of learners. ○ If an agriculture trade group exists in your school, it would be beneficial for
these two classes to visit to utilize each group’s expertise.

Name: ________________________________________ Date: ________ Period: ____
Lovely Landscaping Today you will complete your home plan by adding a landscape design. You will create an overhead view of the exterior of your home and create walkways, flower and shrub plans, lighting, and other features you would like to add. You must include at least one tree/shrub area, flower bed, and walkway or patio to be lighted. Visit www.landscape-design-advisor.com/planning/virtual-design/virtual-sample-plans to see different types of designs. 1. Draw the overhead view of your dream house perimeter and create the boundaries of your property.
2. Use a compass to outline trees and/or round flower/shrub areas. Use colored pencils to add color. 3. Use polygons to indicate flower beds, outline walkways and patios. 4. Outline and any ponds, fountains, or other optional features you may want to add.

5. Use the area formulas for circles and different polygons to calculate the area of each landscape section in your plan. Also include the material needed for each feature such as mulch, gravel, brick, etc. Trees/Shrubs : area _____________________ material needed ________________ Flower Beds: area_______________________ material needed _______________ Walkway/Patio: area____________________ material needed ________________ Other feature(s): _______________ area ___________ material needed ___________ 6. Decide where you would like to add lighting, such as the walkway, patio, or water feature. Use the most direct routes by using right triangles.
Electric line for pool pump, filter, and lights.
7. Estimate the wire needed to complete the lighting/electrical by calculating the perimeter of the triangles you created by using the Pythagorean Theorem. Amount of wire needed ____________________________ 8. What affected your landscaping decisions? 9. What mathematical concepts did you use to complete your landscaping plan? 10. Why would a landscaping design be important to your overall dream house plan?

Lovely Landscaping Rubric
Category Not Met (0 pts)
Partially Met (2 pts)
Met(4 pts)
Designed an appropriate landscape design plan including all requirements.
Successfully completed the area calculations
Created a wiring plan for lighting/electrical using right triangles
Completed calculations for wire needed
Answered all questions completely and thoughtfully.
Score: ____/20

Final Assessment: Presenting the Palace
Strands Geometry and Measurement Mathematical Objectives Pythagorean Theorem and its converse Area of Polygons (rectangles, triangles, trapezoids, etc) Perimeter Mathematics Performance Expectations MPE.5 The student will solve real-world problems involving right triangles by using the Pythagorean Theorem and its converse, properties of special right triangles, and right triangle trigonometry. Related SOLs G.8 The student will solve real-world problems involving right triangles by using the Pythagorean Theorem and its converse, properties of special right triangles, and right triangle trigonometry. G.9 The student will verify characteristics of quadrilaterals and use properties of quadrilaterals to solve real-world problems. NCTM Standards The following are all applicable NCTM standards related to the lesson;
● Apply and adapt a variety of appropriate strategies to solve problems ● Communicate mathematical thinking coherently and clearly to peers, teachers, and
others ● Use trigonometric relationships to determine lengths and angle measures. ● Use geometric ideas to solve problems in, and gain insights into, other disciplines
and other areas of interest such as art and architecture Materials/Resources Graph Paper Rulers Poster Board for each group Poster making supplies: Colored Pencils, Fine Tip Sharpie Markers, Glue Sticks Computers with printer connection

Introduction: Setting Up the Mathematical Task
Students will work together to create a poster presentation of their final project. ● Timeframe:
○ Two 90-minute classes ● Poster board presentation should include a neatly done final draft of the following:
○ Floor Plans ○ Ramp and stair design ○ Roof Truss Design ○ Deck Design and Side Elevation ○ Landscaping Design
● Introduce the task. ○ Students will be shown previously completed final presentations made by
the teacher and/or previous students. ■ Teacher will address the expectations for what the final project
should look like and indicate examples of those expectations on the already completed presentations.
○ Indicate how you will get students to begin thinking about the task. ■ Students will be shown examples by the teacher
○ What instructional techniques will be used? What grouping structure will be used and why?
■ Students will be grouped in the same groups they have been assigned for the duration of the project.
○ In what way will students make their mathematical thinking and understanding public?
■ Students will give a verbal presentation before the class ■ Every group member should be present at least one aspect of the
project ■ Some group members may have to present more than one aspect of
the project ■ Students should be prepared to answer questions about their project
from other students and the teacher.

Name: ___________________________________ Date: __________ Period: _______
Presenting the Palace
You and your group will be creating a final poster board presentation containing final drafts of your each of your individual lessons in this project. The poster should contain final drafts of all of the following:
● Floor Plans ● Ramp and stair design ● Roof Truss Design (both the student selected design and the Attic truss design) ● Deck Design and Side Elevation ● Landscaping Design
Each group member will be responsible for presenting at least one of the sections to the class. The student should present the design, state why they chose that design, any mathematical calculations they had to use to get measurements for the design, and any challenges that arose during the lesson. Be sure to focus on making your drawings neat and keeping your board organized. Use measurements that are as accurate as possible. Here is a sample of what your final poster board should look like:

In order to promote good collaboration, you will be giving yourself and each of your group members their own rating for each of the following categories. Please rate your group members honestly. Your ratings will be kept confidential. Please rate your members on a scale of 0 - 5. 0 means they did no work, 5 means they worked very hard.
My Name:
Group Member Name:
Group Member Name:
Group Member Name:
Lesson 1: Flooring Floor Plans
Lessing 2: Ramping it Up
Lesson 3: Raising the Roof
Lesson 4: Hit the Deck
Lesson 5: Lovely Landscaping
Final Project Poster Construction
Final Poster Presentation
(Total)/35
_____/35
_____/35
_____/35
_____/35
Average Score
______ out of 5
______ out of 5
______ out of 5
______ out of 5

Project Grade Rubric Final Project Rubric
Category Not Met (0 pts) Partially met (2 pts) Met (4 pts)
Floor Plans Draw and Placed Neatly
Ramp and Stair Design Drawn and Placed Neatly
Both roof trusses Drawn and Placed Neatly
Deck Design and Side Elevation Drawn and Placed Neatly
Landscape Design Drawn and Placed Neatly
Member presented at least one part of the project
Presentation was thorough and clearly thought out
Final Project Score : ______/28
Student’s own rating (out of 5)
Group Member 1’s Rating (out of 5)
Group Member 2’s rating (out of 5)
Group Member 3’s Rating (out of 5)
Group Member Ratings
_____
_____
_____
_____
Group Member Ratings total: ______ / ______

Category Score
Lesson 1: Flooring Floor Plans Score ______/20
Lesson 2: Ramping it Up Score ______/20
Lesson 3: Raising the Roof Score ______/20
Lesson 4: Hit the Deck Score ______/24
Lesson 5: Lovely Landscapes Score ______/20
Final Project Score ______/28
Group Member Score ______/______
TOTAL PROJECT score
______/_______