hipath 4000 - web swot team€¦ · about these operating instructions 7 about these operating...
TRANSCRIPT

s
HiPath 4000Operating InstructionsAttendant Console AC4

2
Safety precautions
7Please remember!Use only AC/DC adapter S30122-X7311-X or C39280-Z4-C58.For UK onlyUse AC/DC adapter S30122-X7311-X100 or C39280-Z4-C66.For U.S. onlyUse AC/DC adapter S30122-X7311-X200 or C39280-Z4-C70.
Bitte beachten!Nur Steckernetzteil S30122-X7311-X bzw. C39280-Z4-C58 verwenden.In GroßbritannienNur Steckernetzteil S30122-X7311-X100 bzw. C39280-Z4-C66 ver-wenden.In U.S.A.Nur Steckernetzteil S30122-X7311-X200 bzw. C39280-Z4-C70 ver-wenden.
Veuillez suivre les indications suivantes !Utiliser exclusivement l’alimentation électrique prévue S30122-X7311-X respectivement C39280-Z4-C58.Au Royaume UniUtiliser exclusivement l’alimentation électrique prévue S30122-X7311-X100 respectivement C39280-Z4-C66 Aux Etats UnisUtiliser exclusivement l’alimentation électrique prévue S30122-X7311-X200 respectivement C39280-Z4-C200.

Contents
3
About these operating instructions . . . . . . . . . . . . . . 7Quick-check instructions . . . . . . . . . . . . . . . . . . . . . . . . . . . . . . . . . . . . . 7Date and time . . . . . . . . . . . . . . . . . . . . . . . . . . . . . . . . . . . . . . . . . . . . . 7Overflow position for text communication . . . . . . . . . . . . . . . . . . . . . . . 7
Key panel and user interface. . . . . . . . . . . . . . . . . . . . 8AC4 key panel . . . . . . . . . . . . . . . . . . . . . . . . . . . . . . . . . . . . . . . . . . . . . 8Function and feature keys . . . . . . . . . . . . . . . . . . . . . . . . . . . . . . . . . . . 9Dialing keypad . . . . . . . . . . . . . . . . . . . . . . . . . . . . . . . . . . . . . . . . . . . . 11Display and volume keys . . . . . . . . . . . . . . . . . . . . . . . . . . . . . . . . . . . . 11User interface . . . . . . . . . . . . . . . . . . . . . . . . . . . . . . . . . . . . . . . . . . . . 12Call processing layout . . . . . . . . . . . . . . . . . . . . . . . . . . . . . . . . . . . . . . 12Call and traffic displays . . . . . . . . . . . . . . . . . . . . . . . . . . . . . . . . . . . . . 14Memory layout . . . . . . . . . . . . . . . . . . . . . . . . . . . . . . . . . . . . . . . . . . . 16
Answering calls . . . . . . . . . . . . . . . . . . . . . . . . . . . . . . 17
Extending a call . . . . . . . . . . . . . . . . . . . . . . . . . . . . . . 19Speed servicing (to free station) . . . . . . . . . . . . . . . . . . . . . . . . . . . . . . 19Normal extending (to free station). . . . . . . . . . . . . . . . . . . . . . . . . . . . . 20Extending to the user on hold . . . . . . . . . . . . . . . . . . . . . . . . . . . . . . . . 21Extending to an alternative destination . . . . . . . . . . . . . . . . . . . . . . . . . 21Override. . . . . . . . . . . . . . . . . . . . . . . . . . . . . . . . . . . . . . . . . . . . . . . . . 22Releasing a connection . . . . . . . . . . . . . . . . . . . . . . . . . . . . . . . . . . . . . 22
Serial call . . . . . . . . . . . . . . . . . . . . . . . . . . . . . . . . . . . 23
Toggling (alternating) . . . . . . . . . . . . . . . . . . . . . . . . . 24Toggling between two calls. . . . . . . . . . . . . . . . . . . . . . . . . . . . . . . . . . 24Toggling between a caller and a destination user . . . . . . . . . . . . . . . . . 25
Joining . . . . . . . . . . . . . . . . . . . . . . . . . . . . . . . . . . . . . . 26
Call parking. . . . . . . . . . . . . . . . . . . . . . . . . . . . . . . . . . 27Parking a call . . . . . . . . . . . . . . . . . . . . . . . . . . . . . . . . . . . . . . . . . . . . . 27
Dialing . . . . . . . . . . . . . . . . . . . . . . . . . . . . . . . . . . . . . . 29Dialing with manual call number input. . . . . . . . . . . . . . . . . . . . . . . . . . 29Dialing with number redial. . . . . . . . . . . . . . . . . . . . . . . . . . . . . . . . . . . 29

Contents
4
Dialing with speed dialing numbers. . . . . . . . . . . . . . . . . . . . . . . . . . . . 30Dialing with the trunk group keys . . . . . . . . . . . . . . . . . . . . . . . . . . . . . 30Dialing with the notebook . . . . . . . . . . . . . . . . . . . . . . . . . . . . . . . . . . . 31
Settings/interrogating the memory. . . . . . . . . . . . . .33Calling up the Program menu . . . . . . . . . . . . . . . . . . . . . . . . . . . . . . . . 33Interrogating a memory directly . . . . . . . . . . . . . . . . . . . . . . . . . . . . . . 35
Programming repertory keysor trunk group keys . . . . . . . . . . . . . . . . . . . . . . . . . . .37Interrogating all stored destinations . . . . . . . . . . . . . . . . . . . . . . . . . . . 37Interrogating a specific repertory or trunk group key . . . . . . . . . . . . . . 38Changing a destination number. . . . . . . . . . . . . . . . . . . . . . . . . . . . . . . 38Terminating repertory or trunk group key interrogation. . . . . . . . . . . . . 39
Number redial/notebook . . . . . . . . . . . . . . . . . . . . . .40Storing a call number for number redial . . . . . . . . . . . . . . . . . . . . . . . . 40Storing a caller’s number in the notebook. . . . . . . . . . . . . . . . . . . . . . . 40Storing a call number and required station in the notebook . . . . . . . . . . . . . . . . . . . . . . . . . . . . . . . . . . . . . . . . . . . . . . . . 41Checking stored call numbers . . . . . . . . . . . . . . . . . . . . . . . . . . . . . . . . 42Deleting call numbers in the notebook . . . . . . . . . . . . . . . . . . . . . . . . . 42Terminating notebook interrogation . . . . . . . . . . . . . . . . . . . . . . . . . . . 42
EXCH/TIE trunk reservation . . . . . . . . . . . . . . . . . . . .43Reserving external trunks . . . . . . . . . . . . . . . . . . . . . . . . . . . . . . . . . . . 43Canceling external trunk reservation . . . . . . . . . . . . . . . . . . . . . . . . . . . 43
Charge registration at the attendant console. . . . .44
Night service. . . . . . . . . . . . . . . . . . . . . . . . . . . . . . . . .45Activating night service . . . . . . . . . . . . . . . . . . . . . . . . . . . . . . . . . . . . . 45Canceling night service . . . . . . . . . . . . . . . . . . . . . . . . . . . . . . . . . . . . . 46Night service options. . . . . . . . . . . . . . . . . . . . . . . . . . . . . . . . . . . . . . . 46
Alarm . . . . . . . . . . . . . . . . . . . . . . . . . . . . . . . . . . . . . . .49Interrogating alarm display(s). . . . . . . . . . . . . . . . . . . . . . . . . . . . . . . . . 49Canceling alarm display(s) . . . . . . . . . . . . . . . . . . . . . . . . . . . . . . . . . . . 49

Contents
5
Checking trunk numbers . . . . . . . . . . . . . . . . . . . . . . 50
Station-to-station restriction for station groups . . 51Interrogating the internal station-to-station restriction. . . . . . . . . . . . . . 51Changing the internal station-to-station restriction state (on/off). . . . . . 52Terminating internal station-to-station restriction interrogation . . . . . . . 52
Class-of-service changeover for station groups . . 53Interrogating a class of service . . . . . . . . . . . . . . . . . . . . . . . . . . . . . . . 53Changing the class-of-service state in multiple station groups . . . . . . . 54Changing the class-of-service state in an individual station group. . . . . 54Terminating class-of-service interrogation . . . . . . . . . . . . . . . . . . . . . . . 54
Do-not-disturb group. . . . . . . . . . . . . . . . . . . . . . . . . . 55Interrogating do-not-disturb . . . . . . . . . . . . . . . . . . . . . . . . . . . . . . . . . . 55Terminating do-no-disturb interrogation . . . . . . . . . . . . . . . . . . . . . . . . 56
Searching for a party (paging) . . . . . . . . . . . . . . . . . 57
Malicious call identification . . . . . . . . . . . . . . . . . . . 58
Tape recorder. . . . . . . . . . . . . . . . . . . . . . . . . . . . . . . . 59Activating/deactivating a tape recorder during a call . . . . . . . . . . . . . . . 59Automatic tape recorder activation when answering trunk call. . . . . . . 59Activating automatic tape recorder start . . . . . . . . . . . . . . . . . . . . . . . . 59Deactivating automatic tape recorder start . . . . . . . . . . . . . . . . . . . . . . 60
Audible and visual operating aids . . . . . . . . . . . . . . 61Audible signals and user prompting . . . . . . . . . . . . . . . . . . . . . . . . . . . 61Ringing tones for call signaling . . . . . . . . . . . . . . . . . . . . . . . . . . . . . . . 61LEDs above keys. . . . . . . . . . . . . . . . . . . . . . . . . . . . . . . . . . . . . . . . . . 61
Index . . . . . . . . . . . . . . . . . . . . . . . . . . . . . . . . . . . . . . . 62

Contents
6

About these operating instructions
7
About these operating instructionsThese instructions cover all attendant facilities. The facilities available to you depend on the capacity and configuration of your PABX.
Quick-check instructionsAt the back of these instructions you will find a detachable set of "quick-check instructions" for the most frequently used call processing opera-tions. Instructions in braille for blind attendants can also be ordered (order number: A19100-K3161-G276-*-7619).
Date and timeThe date and time are shown continuously. The date and time display is provided automatically by the system and cannot be altered at the atten-dant console.
Overflow position for text communicationIf text/fax services have been set up, you will find near your attendant po-sition an overflow position (consisting, for example, of a telephone and fax and teletex terminals) at which text messages which could not be deliv-ered are stored temporarily or output directly. The relevant operating in-structions located at the overflow position terminals describe how to for-ward the texts to addressees (or their infoboxes).

Key panel and user interface
8
Key panel and user interfaceThe display is illuminated for optimum visibility and can adjusted to suit the lighting in your individual environment.
A key panel and user interface consisting of two basic displays (call pro-cessing layout and memory layout) are provided for attendant console op-eration.
AC4 key panelThe key panel is equipped with keys for performing the telephone func-tions. The LEDs indicate which keys or functions are currently active.
Priority lamps(indicate waiting calls)
Internal call indicator
External call indicator
Dialing keypad
Ringer sig-nal/handsetvolumehigh/low
Repertory keysNo function
Adjust the displaycontrast

Key panel and user interface
9
Function and feature keys Output call data
Connect the current call to another on-hold connection
Tape recorder activation/deactivation
Trunk no. identification (test)
Serial call
Park call
Release connection
Alarm inquiry
Charge inquiry
Night service
Trunk reservation
Class-of-service changeover
Trunk call with charge registration at attendant console
External route 1 (trunk group key)
External route 2 (trunk group key)
MCID
JOIN
TAPE
TRACE
SERIAL
PARK
RLS
ALARM
ACCT
NIGHT
RSV
COS
SMDR
R1
R2

Key panel and user interface
10
Internal or external call setup
Answer or set up a personal call
Answer call on line 1
Answer call on line 2
Paging
- no function -
Open Program menu
Memory input
Override
Number redial/notebook (store/redial)
- no function -
Call transfer
Clear
Call extension (consultation) with announcement
DIAL
PER
LINE 1
LINE 2
PAGE
PROG
ENTER
OVER
REDIAL
EXTEND
CLEAR
DEST

Key panel and user interface
11
Dialing keypadKeys in the dialing keypad:
to• dial a call number• suffix-dialing possible as DTMF signaling (system-specific)
Display and volume keysRinger high/low and handset volume high/low
The ringer signal can be decreased (by pressing "–") or increased (by pressing "+") when tone ringing is activated.
In call state, these keys can be used to increase or decrease the handset volume to one of six levels.
Adjusting the display contrast
The brightness of the background illumination cannot be adjusted. To save energy, the background illumination is deactivated when the attendant con-sole is not in use.
If both keys are pressed, the display is shown in reverse video (white on black).
Setting the ringer
You can activate/deactivate the ringer and modify the pitch.
Lift the handset or activate the headset.
Press Program menu to activate check mode.
The following options are available:
Activate/deactivate the ringer,
Modify the pitch,
Quit the Program menu, the settings are saved.
RINGER
CONTRAST
PROG

Key panel and user interface
12
User interfaceThe user interface consists of two display areas, the call processing layout and the memory layout.
In the default setting, up to 26 characters per line are displayed. The dis-play switches to a smaller script if up to 40 lines are required.
Call processing layoutCall processing layout provides an overview of queued calls and the current call processing state.
1) Also "To" in the case of tenant service.2) Answered calls appear here.3) Attendant console destinations appear here.
Line
1 L No. Call Traffic From 1)
2 L No. Call Traffic From
3 P Call Traffic From
4 Toll call destination Charged station and charges
5 2) Origin (answered/dialed) 3) Destination (desired)
6 Name Name
7 Station e.g. from/to whom calls are forwarded
Station e.g. to whom calls are forwarded
8 Name Name
9 Status Status
10 Information
11 Information
12 Acknowledgment Day Date Time

Key panel and user interface
13
Lines 1 to 3:
Calls waiting to be answered (Æ page 17) are displayed in the first 3 lines starting with L, L and P. The figure after L indicates the number of waiting calls.
Line 4:
The charges appear in line 4 if you have activated and requested charge registration (Æ page 44).
In addition, trunk line numbers can be displayed in line 4 if you activated line number identification (Æ page 50).
Lines 5–9:
Calls answered or set up by you appear on the left (Origin) in lines 5 to 9.
The station you dialed during speed servicing or normal extending appears on the right (Destination) in lines 5 to 9.
Lines 7–8:
If a dialed station is shown after the arrows in lines 7 and 8, the call has been forwarded (for example).
Lines 10–12:
Lines 10 to 12 contain further information and acknowledgments in addi-tion to the date and time.
L = Line 1 (LINE 1)
L = Line 2 (LINE 2)
P = Personal calls (PER)

Key panel and user interface
14
Call and traffic displaysThe type and origin of a call are displayed in the Call and Traffic fields in lines 1 to 3 of the call processing layout.
The following call types are displayed in the Call field:
Line 1 L No. Call Traffic From
2 L No. Call Traffic From
3 P Call Traffic From
4 Toll call destination Charged station and charges
• FIRST CALL Caller waiting to be answered.
• RECALL Call was not answered and is now returned to your terminal.
• CONSULTATION Station user is calling you in the consultation mode to request you to take call.
• ON-HOOK XFER Caller has transferred call to you by going on-hook during consultation mode.
• SERIAL CALL Serial call. External party (trunk/tie line) waiting to be answered again for further connections.
• ABANDONED External caller (trunk/tie line) has not reached di-rect-dialed station.
• HOTLINE Call set up automatically.
• OPR XFER Another attendant wishes to transfer a call to you.
• PAGED PARTY Paged party is calling back.
• FREE Callback waiting to be answered. Previously busy station or trunk/tie line is now available.
Call Traffic From

Key panel and user interface
15
The following traffic types are displayed in the Traffic field:
Personal calls – EXCH, INT, TIE
The following calls are received under your personal console number:• Call directed to you personally from an external user by direct inward
dialing or from an internal user,• Interposition call (call from another attendant),• Callback (call from the system when an EXCH/TIE line "booked" by you
is free),• Attendant call from party paged by you (PAGED PARTY).
• EXCH Trunk call from public network.
• TIE Tie line from another PABX.
• INT Internal call from own PABX or from a PABX with the same status as yours.
When incoming calls are signaled on the charge inquiry or alarm inquiry keys, there is no display prior to answering.
Call Traffic From

Key panel and user interface
16
Memory layoutYou can configure the attendant console in memory layout and obtain infor-mation about the current assignment of memory contents.
Every page in memory layout consists of 12 lines.• Line 1 (unnumbered) contains the name of the memory page
(e.g. PROGRAMMABLE OPTIONS, or NOTEBOOKS). • The current memory contents appear in lines 1 to 0 (numbered). • Line 12 contains the acknowledgments and date and time displays.
The cursor marks the selected memory line. You can check, edit or delete the contents of the memory line.
If more than one page is available for a feature, this is indicated by a "+" be-side the page number. You can scroll from one page to another with the "*" and "#" keys.
Line
1 Feature 1+2 1 Memory contents / data entered3 24 35 46 57 68 79 810 911 012 Acknowledgment Day Date Time
Cursor (pointer)

Answering calls
17
Step by Step
Answering callsYou must answer a call before you can extend it.
Press Personal call.The next call on the private line is answered.
or
Press LINE 1.The next call on line 1 is answered.
or
Press LINE 2.The next call on line 2 is answered.
The ringing tone is disconnected, the LED lights up. The trunk call an-swered appears in lines 5/6 of the call processing display. If a call is successful, CONNECTED appears in line 9 of the call processing lay-out. You can speak to the caller.
In the case of a forwarded call, the forwarding station is indicated in line 7/8 (identified by an arrow).
If a station appears on the right-hand side, this user had the trunk call previously.
PER
LINE 1
LINE 2
Line 5 No. (caller)6 Name or EXCH
...9 CONNECTED
7 ➝ 254 (forwarding station)8 ➝ MEY (name of forwarding user)9 CONNECTED
223 (station not obtained or transferring station)MAX (name)NO ANSWER or BUSY or ON-HOOK XFER.

Answering calls
18
Step by Step
The right-hand side of line 9 may also indicate reasons for unsuccess-ful call attempts:
If NO CONNECTION POSSIBLE appears in line 11 and if you have answered a recall, a transferred call, or an intercept call, any further transfer attempt to contact this number will be un-successful. You can delete the unavailable destination station or select an alternative station before deleting the initial station.
NOT AVAILABLENOT POSSIBLE/NO NUMBER STOREDNOT AUTHORIZEDINDIAL RESTRICTIONDO NOT DISTURBCURRENTLY BLOCKED

Extending a call
19
Step by Step
Extending a callAn answered call can be extended to a station or an attendant in two ways: • with speed servicing if you do not want to announce the call prior
to extending it to the destination station, or• with normal extending if you want to announce the call prior to ex-
tending it to the destination station.
Speed servicing (to free station)Speed servicing can be used for • calls on line 1, • calls on line 2 or • parked and resumed calls.
Prerequisite: a call is answered.
Enter the destination call number. The caller is automatically connected to free the destination.
If the call is not extended to the call processing destination, you re-main connected to the caller. You can then • extend the call to an alternative destination Æ page 21, • terminate the call Æ page 22 or, • use the override function to break in on the required user
Æ page 22 or• save the number of the caller and the call processing destination
in the notebook for callback at a later stage Æ page 40.
Line 5 No. (caller)6 Name or EXCH
...9 CONNECTED

Extending a call
20
Step by Step
Normal extending (to free station)You can use the normal extending procedure in the case of • personal calls (P displayed) or • calls that you set up yourself.
Prerequisite: a call is answered.
Press Call extension. You hear the dial tone. The message ON HOLD appears in line 9.
Enter the destination call number.
Press Call transfer.The connection is set up.
If you are unable to extend the call to the call processing destination, you can• switch back to the caller on hold Æ page 21• extend to an alternative destination Æ page 21, • terminate the call Æ page 22 or, • use the override function to break in on the required user
Æ page 22 or• save the number of the caller and the call processing destination
in the notebook for callback at a later stage Æ page 40.
Line 5 No. (caller)6 Name or EXCH
...9 CONNECTED
DEST
EXTEND

Extending a call
21
Step by Step
Extending to the user on holdIf you were unable to contact the extension destination with normal extending, you can switch back to the user on hold.
Press Call setup.
or
Press Personal call.
or
Press LINE 1.
or
Press LINE 2.
You are now reconnected to the held party.
Extending to an alternative destinationIf you were unable to contact the extension destination, you can switch the user to a different destination after consultation.
Press Call extension. You hear the dial tone.
Press Clear.
Enter a different call numberand wait for a response.
Press Call transfer.The two users are connected.
DIAL
PER
LINE 1
LINE 2
DEST
CLEAR
EXTEND

Extending a call
22
Step by Step
OverrideIf BUSY, NOT AUTHORIZED or DO NOT DISTURB is displayed when extending a call to a destination user, you can still reach this user with the override function.
ON HOLD appears on the left and FREE on the right in line 9 when the busy party hangs up.
Press Call transfer if neither NO CONNECTION POSSIBLE nor PROTECTED are displayed.You are now connected to the destination station. Both caller and destination user can hear your announcement.
If call forwarding to Voice Mail Service is active, the message AN-SWERED is displayed.
The displays in lines 5, 6 and 9 are cleared after the call is extended. If the call is unsuccessful, the reason is displayed:
* A call cannot be extended if another caller is waiting for the station user to hang up.
If a speed calling code is not stored, the message NO NUMBER STORED appears in line 9.
Releasing a connectionIf you are unable to extend a caller, clear down the call.
Press Connection release. The connection is cleared down, the call is terminated.
EXTEND
e.g. 223 (destination dialed)
Line 9 BUSY EXTERNAL or INTERNALNOT AVAILABLENOT POSSIBLE/NO NUMBER STOREDNOT AUTHORIZEDDO NOT DISTURB
Line 10 CALL WAITING*Line 11 NO CONNECTION POSSIBLE
RLS

Serial call
23
Step by Step
Serial callIf a caller (LINE 1/LINE 2) wishes to be connected to several parties in turn, the call is handled as a serial call.
Prerequisite: a call answered.
Press Serial call.
The LED above the key lights up.The serial call function is active.
Then perform speed servicing or normal extending Æ page 19. LED goes out after caller is connected.
The extended call is returned to the attendant terminal as soon as the internal party hangs up. This automatically cancels the serial mode. The serial call key must be pressed each time before the call is re-ex-tended if another recall is wanted.
A serial call is displayed in line 1 with the message SERIAL CALL EXCH or line 2 with SERIAL CALL TIE. If the "serial call" feature is not installed in the PABX, the message NOT POSSIBLE appears in line 12 after the serial call key is pressed.
SERIAL

Toggling (alternating)
24
Step by Step
Toggling (alternating)You can speak alternately to a caller and a destination station without the other party listening in or you can interrupt an ongoing call, e.g. a personal call, in order to answer another (urgent) call, e.g. a call on line 2.
Toggling between two callsYou can speak to a number of callers (toggle) by pressing the answer-ing keys alternately.
Prerequisite: you answered a call. Additional calls are displayed.
Press Personal call.
or
Press LINE 1.
or
Press LINE 2.You are connected to the second user. The first user is parked.
PER
LINE 1
LINE 2

Toggling (alternating)
25
Step by Step
Toggling between a caller and a destination userYou can speak to both users in turn by alternately pressing Personal call and the answering key you used to answer the call (toggle).
Prerequisite: you answered a call and reached a destination user by means of normal extending.
The destination user can hear you (the message CONNECTED is on the right in line 9).
ON-HOOK XFER is displayed instead of ON HOLD when the held par-ty hangs up.
To toggle to the party on hold, press the answering key that you used to answer the call:
Press Personal call.
or
Press LINE 1.
or
Press LINE 2.You are now reconnected to the held party.
The caller can hear you (message CONNECTED is on the left in line 9).
Press Call extension. You can now speak to the destination user. The caller is placed on hold.
You can toggle between both parties.
Line 9 ON HOLD CONNECTED
PER
LINE 1
LINE 2
Line 9 CONNECTED ON HOLD
DEST

Joining
26
Step by Step
JoiningYou can connect a parked user with the current calling party.
Prerequisite: you parked at least one call Æ page 27.
Press Join calls.The LED lights up.
Press Call Park.The list of parked calls appears in memory layout.
Enter memory line (1–0) of the wanted call.
The users are connected.
JOIN
PARK
Memory lines
PARK1 3112 MEYER2 971817 PERLACH
** TRUNK CALL

Call parking
27
Step by Step
Call parkingYou can park up to 10 calls, whether answered or set up by you in or-der to continue or extend them later.
Parking a callPrerequisite: you answered a call.
Press Call Park.The call is parked in a free parking location.
The acknowledgment STORED is displayed in line 12: STORED
1 = Location number (memory line 1–0)
You can now answer the next call.
PARK
There is no park location free if NOT POSSIBLE is displayed in-stead of STORED.
Line 12 STORED 1

Call parking
28
Step by Step
Activating a parked callPrerequisite: you parked a call and apart from the permanent dis-plays, nothing is displayed (idle state).
Press Call Park.The list of parked calls appears in memory layout.
Enter memory line (1–0) of the wanted parked call.
The call is displayed in call processing layout.
You are connected to the parked user.
PARK
Memory lines
PARK1 3112 MEYER2 971817 PERLACH
** TRUNK CALL
The acknowledgment NOT POSSIBLE appears in line 12 if there is no entry in the selected line.
You can connect (join) a parked call to the currently answered call, Æ page 26.
Line 5/6 TIE...
Line 9 CONNECTED

Dialing
29
Step by Step
Dialing
Dialing with manual call number inputPress Call setup (optional).
and
Enter the call number.The LED above Call setup lights up. The call number is dialed.
or
Enter the call number.The LED above Call setup lights up. The call number is dialed.
If you enter the wrong number: Press Clear.The extension destination is deleted.
Wait for dial tone and dial again.
Dialing with number redialPrerequisite: you stored a call number for number redial Æ page 40.
Press Call setup and
press Number redial. The stored call number is dialed.
DIAL
When extending a call you can also key in the wanted station number directly.
CLEAR
DIAL
REDIAL

Dialing
30
Step by Step
Dialing with repertory keysPrerequisite: you have programmed a call number to a repertory key Æ page 38.
Press Name and, where applicable, enter additional digits via the key-pad.The call number is dialed.
Dialing with speed dialing numbersSpeed dialing numbers are preprogrammed in the system. A list of all available speed dialing numbers is available from your system admin-istrator.
You can also program speed dialing numbers to repertory keys Æ page 38.
Dial the speed dialing number and, where applicable, enter additional digits via the keypad.The call number is dialed.
Dialing with the trunk group keysPrerequisite: you programmed a call number on a trunk group key Æ page 38.
External route 1.
or
External route 2.
Enter the call number without trunk group code.The call number is dialed.
Name
R1
R2

Dialing
31
Step by Step
Dialing with the notebookPrerequisite: you stored a call number in the notebook Æ page 40.
Press Trunk reservation.
or
Press Personal call.
Press Program menu.
Press Number redial/Notebook.
The list of stored notebook numbers appears in memory layout.
Press the digit key for the required memory line (1–0). The selected entry is marked with the cursor .
Press Number redial/Notebook.
The call number(s) appear(s) in call processing layout.
RSV
PER
PROG
REDIAL
Memory lines
NOTEBOOK1 256 (destination)2 266to0 289
1st number
REDIAL
223 User wishing to set up call
2992nd number (if stored)

Dialing
32
Step by Step
Dialing the first call number:
The 1st call number is dialed (here, e.g. 256) (automatic).
Press Call extension.ON HOLD appears in line 9.
Dialing the second call number:
Press Call extension.
and
Press Number redial/Notebook.
The second call number (here, e.g. 223) is dialed.
Line 5 256Line 6 LEO (name if provided)Line 9 FREE/CONNECTED
DEST
DEST
REDIAL
223 REX (name if provided)FREE

Settings/interrogating the memory
33
Step by Step
Settings/interrogating the memoryThere are two ways of calling up the memory layout to perform set-tings or memory interrogations:• Call up the Program menu which provides access to all other sub-
menus and memory inquiries, or • Call up the required memory directly.
Calling up the Program menu
Press Program menu.The memory layout appears with the Program menu. You can make individual attendant console settings here or interrogate the memory.
Press * to switch to the second page of the Program menu.
PROG
Page 1
PROGRAMMABLE OPTIONS 1+
1 NIGHT SERVICE
2 CLASS-OF-SERVICE CHANGEOVER
3 REPERTORY/TRUNK GROUP KEYS
4 DO NOT DISTURB
5 STATION GROUP RESTRICTION
6 OPERATING MODE CHANGEOVER
7 DO NOT DISTURB IN HUNT GROUP
8 Spare
9 Spare
0 LANGUAGE
Acknowledgment Day Date Time12

Settings/interrogating the memory
34
Step by Step
or e.g.
Press the icon key for the required memory inquiry (e.g. PARK). The selected memory is displayed.
or e.g.
Press the digit key for the required memory line (e.g. 3 to park a call). The selected memory is displayed.
Press # to switch to the first page of the Program menu.
Page 2
PROGRAMMABLE OPTIONS 2–
1 CALLBACK (booking)
2 NOTEBOOK
3 PARK
4 ALARM
5 Spare
6 Spare
7 Spare
8 Spare
9 Spare
0 Spare
Acknowledgment Day Date Time
Memory lines
PARK
The acknowledgment NOT POSSIBLE appears in line 12 if the service selected is not provided in the PABX or if you have se-lected an unused line (spare line).

Settings/interrogating the memory
35
Step by Step
Interrogating a memory directlyThe memory layout for a specific memory is displayed automatically if you press one of the following keys when the attendant terminal is free (no call is being answered):
Notebook
or
Call parking
or
Alarm
A selection menu appears with 10 memory lines (1–0).
The cursor indicates the selected memory line.
REDIAL
PARK
ALARM
If 5 seconds have elapsed since an entry was performed, the Program menu is displayed .
Line
1 Feature
2 1 Memory contents / data entered
3 2
4 3
5 4
6 5
7 6
8 7
9 8
10 9
11 0
12 Acknowledg-ment
Day Date Time
Cursor (pointer)

Settings/interrogating the memory
36
Step by Step
Terminating memory inquiriesYou are in the Program menu or a submenu and want to switch back to the call processing layout.
Press Program menu or answer a new call.The memory inquiry is terminated.
PROG

Programming repertory keys or trunk group keys
37
Step by Step
Programming repertory keys or trunk group keysUp to 42 numbers with a maximum of 22 digits (including trunk group code) or individual trunk group codes (tie trunks) can be stored under repertory keys or the trunk group keys
Each repertory key has a memory line on a specific memory page.
The assignment of the repertory and trunk group keys is displayed on five memory pages. Up to 10 destinations are shown on the first four pages and two on the last page.
Interrogating all stored destinationsPrerequisite: the terminal is idle or in call state.
Press Program menu.
Press 3.The repertory numbers stored appear in memory layout.
If there are more than 10 call numbers saved: press * to scroll forwards, orpress # to scroll backwards.
External route 1 or
External route 2 .
Name
Line 1
Name Name Name Name
Line 2 Line 3 Line 4 Line 5
Name Name Name Name Name
Name Name Name Name Name
Name Name Name Name Name
Name
Line 6
Name Name Name Name
Line 7 Line 8 Line 9 Line 0
Name Name Name Name Name
Name Name Name Name Name
Name Name Name Name Name
Page 2 +
Page 3 +Page 4 +
Page 1 +
Page 5 –(last page)Repertory keys
PROG
Memory lines
REPERTORY/TRUNK GROUP KEYS 1+
1 111123 (destination)
2 222123 (destination)
to0 222222 (destination)

Programming repertory keys or trunk group keys
38
Step by Step
Interrogating a specific repertory or trunk group keyPress Program menu.
and
Press Name.
or
External route 1.
or
External route 2.
The key assignment is displayed (cursor).
If a nonexistent memory line was selected, the acknowledgment NOT POSSIBLE appears in line 12.
Changing a destination numberPrerequisite: you interrogated the assignment of a repertory key and marked it with the cursor.
Enter a new call number.
Press Memory input. The new assignment is saved. The acknowledgment STORED appears in line 12.
PROG
Name
R1
R2
Memory lines
REPERTORY/TRUNK GROUP KEYS 1+1 111123 (destination)2 222123 (destination)to0 222222 (destination)
Line 12 NEW NUMBER?
ENTER

Programming repertory keys or trunk group keys
39
Step by Step
Deleting a destination numberPrerequisite: you interrogated the assignment of a repertory key and marked it with the cursor.
Press Clear. The key assignment is deleted.The acknowledgment CLEARED appears in line 12.
Terminating repertory or trunk group key interrogation
Press Program menu or answer a new call.The memory inquiry is terminated.
CLEAR
If 5 seconds have elapsed since an entry was performed, the Program menu is displayed .
You can retrieve the list by pressing 3 or terminate the opera-tion.
PROG
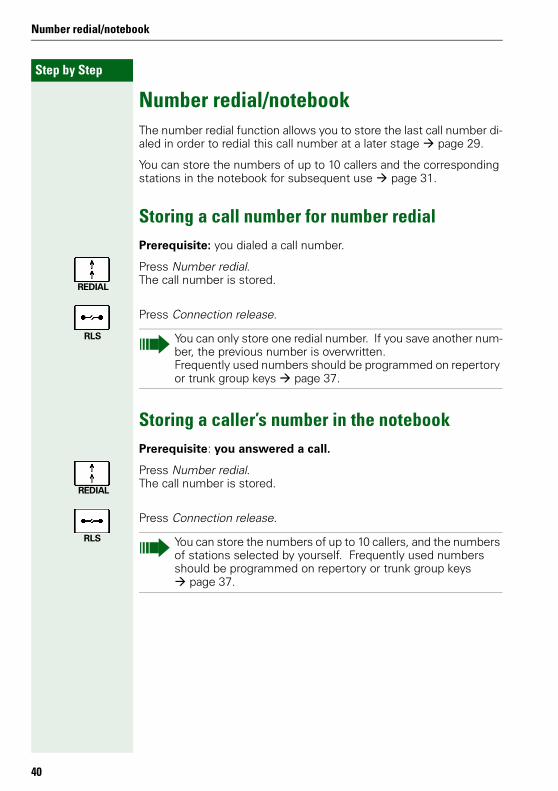
Number redial/notebook
40
Step by Step
Number redial/notebookThe number redial function allows you to store the last call number di-aled in order to redial this call number at a later stage Æ page 29.
You can store the numbers of up to 10 callers and the corresponding stations in the notebook for subsequent use Æ page 31.
Storing a call number for number redialPrerequisite: you dialed a call number.
Press Number redial. The call number is stored.
Press Connection release.
Storing a caller’s number in the notebookPrerequisite: you answered a call.
Press Number redial.The call number is stored.
Press Connection release.
REDIAL
RLS You can only store one redial number. If you save another num-ber, the previous number is overwritten. Frequently used numbers should be programmed on repertory or trunk group keys Æ page 37.
REDIAL
RLS You can store the numbers of up to 10 callers, and the numbers of stations selected by yourself. Frequently used numbers should be programmed on repertory or trunk group keys Æ page 37.

Number redial/notebook
41
Step by Step
Storing a call number and required station in the notebook Storing a number without call extension attempt
Prerequisite: you answered a call.
Press Number redial.The call number is stored.
Dial the call number.
Press Connection release.
Storing a number with call extension attempt
You answered a call and tried unsuccessfully to extend the call by pressing Call extension.
Prerequisite: you retrieved the call Æ page 21 and informed the call-er.
Press Number redial.The call number is stored.
Press Connection release.
REDIAL
RLS
REDIAL
RLS
If CURRENTLY BLOCKED is displayed instead of STORED, then the notebook memory with its 10 memory lines is full. Memory lines must then be deleted Æ page 42, before you can store new numbers.

Number redial/notebook
42
Step by Step
Checking stored call numbersPrerequisite: nothing is displayed in lines 4–11 in the call processing layout (idle state).
Press Number redial/Notebook.The list of stored notebook numbers appears in memory layout.
Deleting call numbers in the notebookPrerequisite: nothing is displayed in lines 4–11 in the call processing layout (idle state).
Press Number redial/Notebook.The list of stored notebook numbers appears in memory layout.
Select memory line (1–0).
The selected entry is marked with .
Press Clear.The entry is deleted. The message CLEARED appears in line 12.You can select and delete additional memory lines.
Terminating notebook interrogation
Press Program menu or answer a new call.The notebook interrogation is terminated.
REDIAL
NOTEBOOKLine 1 256
REDIAL
NOTEBOOKLine 1 256
CLEAR
If 5 seconds have elapsed since an entry was performed, the Program menu is displayed .
You can retrieve the list by pressing Notebook/Number redial or terminate the inquiry operation.
PROG

EXCH/TIE trunk reservation
43
Step by Step
EXCH/TIE trunk reservationIf at times it is necessary for you to have immediate access to free ex-ternal lines (EXCH/TIE), for example during busy hours, selected trunks which have been defined by an administration and mainte-nance procedure can be reserved. These reserved lines are then barred from seizure by internal stations and can only be seized by at-tendants and station users with special privileges.
Reserving external trunksPress Trunk reservation.
The LED above Trunk reservation lights up. The lines are reserved.
Canceling external trunk reservationPress Trunk reservation.
The LED above Trunk reservation goes out. The reservation is canceled.
RSV
RSV

Charge registration at the attendant console
44
Step by Step
Charge registration at the attendant con-solePrerequisite: you dialed an external number.
Press Charge inquiry.Charge registration at the attendant console is activated for the call.
The LED above Charge inquiry flashes when the call is terminated and prompts you to read the charges.
Press Charge inquiry.
Call signaling disconnected. The LED lights up. The charge is displayed in line 4.
Press Charge inquiry.
The LED goes out. The charge display disappears.
ACCT
Charge registration at the attendant console can be provided for all dialed external calls (for specific systems) by pressing Charge inquiry. The next call (e.g.call made by executive) is ex-cluded from charge registration.
ACCT
Line 4 72247489 (external number called)
244 (PABX) 0013 (charge units)or
amount: DM 3.90
ACCT

Night service
45
Step by Step
Night serviceWhen the attendant position is not manned (for example outside working hours) and "night service" is initiated, incoming calls are rout-ed to a night answering service (e.g.porter).
To change from daytime to nighttime service, all the headset/handset plugs must be pulled. Night service is active when the attendant at the last operational console pulls the headset/handset plug or presses Night service.
Night service option 8 also becomes active automatically if calls are left unanswered for a period of time (programmed in the PABX) and no other attendant terminal is operational. Stored automatic callback requests and trunk reservations are canceled when the plug is discon-nected.
For reasons of security, the handset or the headset must be disabled when the working day is over to prevent unauthorized use (e.g.long-distance calls).
Activating night servicePress Night service.
Waiting calls displayed in the call processing layout must be an-swered. New incoming calls are routed to the night station.
Pull the handset/headset plug to take your attendant terminal out of service.
or Pull the handset/headset plug on the last operational console. Waiting calls and new incoming calls are routed to the night station.
If a continuous signal is heard after the headset/handset is discon-nected and the night service LED flashes rapidly, then you have "for-gotten" a held/parked call or a call signaled on the Personal call tab is waiting to be answered. Insert the handset/headset plug immediately and answer the call.
NIGHT

Night service
46
Step by Step
Activation of night service is displayed:
* 2 = Night service option
Screen is cleared after five seconds.
If you wish to use a night service option other than the one displayed, you can select one of up to 8 possible options prior to activation of night service as described below.
Canceling night serviceReinsert headset/handset. Night service is canceled within 15 sec-onds (night service LED above goes out).
Night service optionsOf the possible night service options provided in the PABX, the last one to be selected from any attendant console is the one that is effec-tive. This is indicated by the cursor in the list of night service options.
Line 12 NIGHT SERVICE 2*

Night service
47
Step by Step
Checking/changing night service optionsPress Program menu.
Press Night service.The list of night service options (maximum of 8) appears in memory layout.
1) Last night service option selected.2) If "no night service option" is provided.3) If "centralized attendant service" is provided.
Select memory line (1–8) with different option if change of option is required.
Press Memory input.
Press Program menu. The option indicated by the cursor is then selected.
The message STORED appears in line 12.
The message NOT POSSIBLE is indicated in line 12 if there is no entry in the line selected.
PROG
NIGHT
Memory lines
NIGHT SERVICE1 222 PORTER (example) 1)
2 UNIVERSAL NIGHT ANSWER3 211 NIGHT CONSOLE4 NO NIGHT SERVICE 2)
5 CAS PERLACH 3)
to 8 255 COX (example)
ENTER
PROG

Night service
48
Step by Step
Terminating night service interrogation
Press Program menu or answer a new call.
The memory inquiry is terminated.
If 5 seconds have elapsed since an entry was performed, the Program menu is displayed.
You can retrieve the list by pressing Night service or terminate the interrogation.
PROG

Alarm
49
Step by Step
AlarmFaults are indicated by flashing of the LED above the alarm key. Minor faults are signaled by a slow flashing sequence (general alarm). Faults which must be reported to Customer Service immediately are sig-naled by a rapid flashing sequence (urgent alarm). If the LED does not flash but remains lit, this indicates that another attendant position is currently querying the alarms.
Before you notify Customer Service in the event of a line fault, you should first find out the number of the trunk Æ page 50.
Interrogating alarm display(s)Press Alarm.The cause of alarm with page number (+1) is displayed in memory lay-out.
If there is more than one alarm cause:
press * to scroll forwards to pages 2+, 3+, 4+, to 10-,
press # to scroll backwards.
Canceling alarm display(s)The cause of the alarm with page number is displayed in memory lay-out.
Press Clear.
The alarm display is cleared. The system advances automatically to next display.
ALARM
Line 1 ALARMLine 2 NUMBER OF ALARMSLine 3 ADS OUT OF SERVICE or other alarm display
Alarms are also logged on service terminal.
CLEAR

Checking trunk numbers
50
Step by Step
Terminating alarm interrogation
Press Program menu or answer a new call.
The alarm interrogation is terminated.
Checking trunk numbersBefore you notify Customer Service in the event of a line fault, you should find out the number of the trunk.
Press Trunk no. identification.The number(s) of outside line(s) is(are) visible.
Press Trunk no. identification.The line number display disappears.
The following display appears e.g.:
If 5 seconds have elapsed since an entry was performed, the Program menu is displayed.
You can retrieve the list by pressing Alarm or terminate the in-terrogation.
PROG
TRACE
TRACE
1234567EO001
EXCH
O = outgoing
I = incoming
B = bothway (direction)
Line number
Line 4

Station-to-station restriction for station groups
51
Step by Step
Station-to-station restriction for station groupsStation-to-station calls by certain groups of stations can be prevented temporarily. These calls can then only be made via the attendant (example: hotels).
Interrogating the internal station-to-station re-strictionPrerequisite: the terminal is idle or in call state.
Press Program menu.
Press 5.The list of the first 8 station groups with station-to-station restriction is displayed on page 1 in memory layout.
The message ALL ON or OFF appears in line 11 if all groups are in the same state. If groups are being interrogated by another console, the menu cannot be accessed.
If there are more than 8 groups:scroll forwards with *, scroll backwards with #.
PROG
STATION GROUP RESTRICTION 1+
Group 1 ON or OFF2 ON or OFFto
Group 8 ON or OFF

Station-to-station restriction for station groups
52
Step by Step
Changing the internal station-to-station restriction state (on/off)You have activated the groups with station-to-station restriction.
To change the state of individual groups: press group number 1 to 8. To change the state of all groups together: press 0.
Press Program menu. The ON/OFF or OFF/ON state change is stored.The acknowledgment STORED appears in line 12.
NOT POSSIBLE appears if a nonexistent group was selected.
Terminating internal station-to-station restric-tion interrogation
Press Program menu or answer a new call.
The memory inquiry is terminated.
PROG
If 5 seconds have elapsed since an entry was performed, the Program menu is displayed.
You can retrieve the list by pressing 5 or terminate the interro-gation.
PROG

Class-of-service changeover for station groups
53
Step by Step
Class-of-service changeover for station groupsThe class of service of certain groups of stations can be temporarily changed to another class of service (a predefined alternative class of service). This changeover can be used to prevent toll calls being made after hours, for example.
Interrogating a class of servicePrerequisite: the terminal is idle or in call state.
Press Program menu.
Press Class-of-service changeover.
The list of the first 8 station groups with class of service changeover is displayed on page 1 in memory layout.
The message ALL ON or OFF appears in line 11 if all groups are in the same state.
If groups are being interrogated by another console, the menu cannot be accessed.
If there are more than 8 groups:scroll forwards with *, scroll backwards with #.
PROG
COS
STATION GROUP RESTRICTION 1+Group 1 ON or OFF
2 ON or OFF
toGroup 8 ON or OFF

Class-of-service changeover for station groups
54
Step by Step
Changing the class-of-service state in multiple station groupsYou activated the station groups with class-of-service changeover.
To change groups individually: press group number 1 to 8. To change all groups together: press 0.
Press Memory input. The ON/OFF or OFF/ON state change is stored.
The message STORED appears in line 12. NOT POSSIBLE appears if an unavailable group was selected.
Changing the class-of-service state in an indi-vidual station groupIn the case of a single station group, you can change the class of ser-vice with the Class-of-service changeover key.
Prerequisite: the terminal is idle or in call state.
Press Class-of-service changeover.The class of service is changed (ON/OFF).
Terminating class-of-service interrogation
Press Program menu or answer a new call.The memory inquiry is terminated.
ENTER
COS
If 5 seconds have elapsed since an entry was performed, the Program menu is displayed.
You can retrieve the list by pressing Class-of-service changeo-ver or terminate the interrogation.
PROG

Do-not-disturb group
55
Step by Step
Do-not-disturb groupDo-not-disturb group can be activated temporarily for certain groups of stations if these stations do not wish to be disturbed by incoming calls.
Interrogating do-not-disturbPrerequisite: the terminal is idle or in call state.
Press Program menu.
Press 4.
The list of the first 8 station groups with do-not-disturb are displayed on page 1 in memory layout.
The message ALL ON or OFF appears in line 11 if all groups are in the same state.
If groups are being interrogated by another console, the menu cannot be accessed.
If there are more than 8 groups:scroll forwards with *, scroll backwards with #.
PROG
DO NOT DISTURB 1+Group 1 ON or OFF
2 ON or OFF
toGroup 8 ON or OFF

Do-not-disturb group
56
Step by Step
Activating/deactivating do-not-disturbYou called up a station group with do-not-disturb.
To change groups individually: press group number 1 to 8. To change all groups together: press 0.
Press Memory input. The ON/OFF or OFF/ON state change is stored. The message STORED appears in line 12. NOT POSSIBLE appears if an unavailable group was selected.
Terminating do-no-disturb interrogation
Press Program menu or answer a new call.The memory inquiry is terminated.
ENTER
If 5 seconds have elapsed since an entry was performed, the Program menu is displayed.
You can retrieve the list by pressing 4 or terminate the interro-gation.
PROG

Searching for a party (paging)
57
Step by Step
Searching for a party (paging)You can use the paging system to search for an absent party.
Prerequisite: a paging system is set up in the communications sys-tem.
Call setup.
or
Press Personal call.
Press PAGE.
Dial the station or paging number.The message CONNECTED (paging is initiated) or CURRENTLY BLOCKED (paging busy) or NOT POSSIBLE (paging unavailable) appears on the left in line 9.
Paging commences. Wait for the paged party to report in.
If the paged party does not report in or if the paging system deacti-vates after a predetermined timeout, you can terminate the paging ac-tion by pressing Connection release.
The paging operation ends.
DIAL
PER
PAGE
RLS

Malicious call identification
58
Step by Step
Example:
When a caller wants to speak to a party who is not at his/her desk, the caller can page this party. The paged party calls your attendant con-sole.
Prerequisite: you answered a call.
Press Call Park.The call is parked in a free parking location.
The acknowledgment STORED is displayed in line 12: STORED
Perform paging for the wanted party Æ page 57. The paged party calls your attendant console.
Answer the call to your attendant console.
Press Join calls.The LED lights up.
Press Call Park.The list of parked calls appears in memory layout.
Enter the memory line (1–0) assigned to the parked party.
The parties are joined and deleted from the attendant console.
Malicious call identificationThis function allows you to record call data.
Prerequisite: This feature must be set up in the communications system.
Press the MCID while you are connected to the caller.
The call data (call number, date, time, attendant console number) is output at the communications system’s operating terminal.
PARK
PER
JOIN
PARK
MCID

Tape recorder
59
Step by Step
Tape recorderIf the facility is set up in your communications system, you can make a tape recording during a call or configure automatic tape recorder ac-tivation when answering trunk calls.
Activating/deactivating a tape recorder during a call Prerequisite: you are conducting a call.
Press TAPE.
The tape recorder is activated. The call is recorded.
Press TAPE a second time.
The tape recorder is deactivated. Call recording is terminated.
Automatic tape recorder activation when an-swering trunk callIn general, this function enables you to record trunk calls.
Activating automatic tape recorder startPrerequisite: the handset or the headset is unplugged.
Press Program menu.The test menu appears.
LINE 1
or
Press LINE 2(depending on the configuration of the communications system).
Press TAPE.
TAPE
TAPE
PROG
LINE 1
LINE 2
TAPE

Tape recorder
60
Step by Step
Press 1.The LED test is performed.
Press 0.The test menu disappears.
Plug in the handset or the headset. The tape recorder is automatically activated every time a trunk call is received.
Deactivating automatic tape recorder startPrerequisite: the handset or the headset is unplugged:
Press Program menu.The test menu appears.
LINE 1
or
Press LINE 2(depending on the configuration of the communications system).
Press TAPE.
Press 0.The test menu disappears.
Plug in the handset or the headset. The automatic tape recorder start is deactivated.
PROG
LINE 1
LINE 2
TAPE
The automatic tape recorder start setting is lost and must be reprogrammed if the connection to communications system is interrupted (e.g. power failure at attendant terminal).

Audible and visual operating aids
61
Audible and visual operating aids
Audible signals and user prompting
* optional
Ringing tones for call signaling
LEDs above keys
Tone Cadence Meaning
Dial tone* The tone sequence de-pends on the communi-cations system settings.
Dial number (internal/external).
Ringing tone
Number or service free.
Busy tone Number or service busy.
Override tone
A third party has entered your call.
Hold tone Music or announcement "Please hold the line"
Wait! Other party is making a consultation call.
NUtone
Three-tone sequence( ) with 1s interval
Terminal not connected or call number does not exist.
You can set the pitch and volume of the call signal Æ page 11.
Ringing Cadence Meaning
Standard Continuous ringing The meaning of ringing tones (normal call, urgent call) depends on the communications system setting.
Special Double ringing with 1s in-terval
Symbol Status Meaning
Passive = LED off
No call waiting. Key free(available).
Active = LED flashes rapidly
Call waiting. Press key (assistance requested).
Active = LED is lit
Call answered/key pressed (ac-knowledgment).
Waiting = LEDflashes slowly
Call held until key is pressed again.
62
IndexIndexIndexIndex
Index
AAlarm ............................................................ 49Alarm display(s)
canceling .................................................. 49displaying ................................................. 49
Alternating ................................................... 24Answering ................................................... 17Answering trunk calls, configuring .......... 59Audible signals ........................................... 61
CCall displays ................................................ 14Call parking .................................................. 27Call processing layout ............................... 12Canceling reservation ................................ 43Charge registration .................................... 44Checking trunk numbers .......................... 50Checking/changing options ...................... 47Class-of-service changeover .................... 53Class-of-service changeover for station groups .......................................................... 53
DDestination number
deleting .............................................. 38, 39storing new numbers ...................... 38, 39
Destinations, checking .............................. 37Dialing .......................................................... 29Dialing keypad ........................................ 8, 11Dialing with speed dialing numbers ....... 30Display contrast, setting ........................... 11Displays ....................................................... 11
EEXCH/TIE trunk ........................................... 43External call indicator .................................. 8
FFeature keys ................................................. 9Function keys ............................................... 9
HHandset volume, setting .......................... 11
IInternal call indicator .................................... 8
KKey legend .............................................. 9, 17Keys ................................................................ 8
LLEDs ............................................................. 61
MMessages (text/fax/VMS) ........................... 7
NNight service ............................................... 47
activating .................................................. 45canceling .................................................. 46options ..................................................... 46
Normal extending ....................................... 20Notebook ..................................................... 40Number redial ............................................. 29
OOperating aids ............................................ 61Overflow position ......................................... 7
PPaging .......................................................... 57Party
paging ....................................................... 57Pitch, modifying ......................................... 11Priority lamps ................................................ 8
RRepertory keys ....................................... 8, 37Reverse video displays ............................. 11Ringer signal ................................................. 8Ringer volume, setting .............................. 11

63
IndexIndexIndexIndex
Ringer, activating/deactivating ................. 11Ringing tones .............................................. 61
SSerial call ...................................................... 23Setting the ringer ....................................... 11Speed servicing .......................................... 19Station groups
station-to-station restriction ................. 51Station-to-station restriction ..................... 51
TTape recorder ............................................. 59Text communication .................................... 7Time ............................................................... 7Toggling (alternating) ................................. 24Traffic displays ............................................ 14Trunk group keys ....................................... 37Trunks
reserving .................................................. 43
VVolume keys ............................................... 11

Reference no.: A31003-S3000-B793-3-7619 • Printed in the Federal Republic of Germany • BA 3.8.2000
© Siemens AG 2000 • Information and Communication Networks • Hofmannstr. 51 • D-81359 München •
Sub
ject
to
avai
labi
lity.
Rig
ht o
f m
odifi
catio
n re
serv
ed.
-43$643360663330%:<6060:94<-
1P A31003-S3000-B793-3-7619

s
HiPath 4000Quick-Check InstructionsAttendant Console AC4

Keypad
Keypad
MCID Output call data DIAL Call setup
JOIN Connect a call to another on-hold connection
PER Answer or set up a personal call
TAPE Activate/deactivate LINE 1 Answer call on line 1
TRACE Trunk no. identification (test) LINE 2 Answer call on line 2
SERIAL Serial call PAGE Page a person
PARK Park call - no function -
RLS Release connection PROG Open Program menu
ALARM Alarm inquiry ENTER Memory input
ACCT Charge inquiry OVER Override
NIGHT Night service REDIAL Number redial/notebook(memory/repeat)
RSV Trunk reservation - no function -
COS Class-of-service changeover EXTEND Call transfer
SMDR Mark connection for charge reg-istration at attendant console
CLEAR Clear
R1 Seize external route 1 DEST Call extension with announce-ment
R2 Seize external route 2

Examples of operation
Examples of operation
Dialing
Answering
Extending a call
Dialdestina-tion
Wait for answer Speak Disconnect
or
Extend call (seebelow)
Disconnect
or or
Speak Extend call (see below)
or
SpeakDial desti-nation
Dialed party/caller is automatically extended
Speed servicingonly for answering
with and
or
SpeakDial des-tination
Wait for answer
Dialed party/caller is
Normal extending
or or
Toggle (see next page)

Examples of operation
Toggling (alternating)
Charge registration at the attendant consoleIf a station user requests you to record the charges of a trunk call, mark the extended call with (ACCT) when the called subscriber answers.
Setting up a blocked connection for 2 parties
or
Wait for
Switch back to dialed party/caller
SpeakDialed party/caller is extended
answer or or(desti-nation)
Switch back to destina-tion
SpeakDialed party/caller is extended
or
or
Press once Charge display ap-pears
Read/note Press again
Lamp flashes
Lamp flashes
Dial 1st party
Wait foranswer
Dial 2nd party
Wait for answer
Both parties are con-nected