guitar - smart technologies
TRANSCRIPT

Guitar

Warm Up
Can you name any of the instruments?

Warm Up
Choose 2 instruments from the previous page.
Compare and contrast how they produce music in
the space below.

Mini-lesson
How are stringed instruments designed to produce music?

Keywords

Checks for understanding1. Will the sound be lower or higher with a longer string?
A. Lower
B. Higher
C. Depends on the instrument
2. With a partner, discuss & record one example of how a stringed
instrument is designed to produce a certain kind of music.

Worked Example
Step 1.
Turn on and pair:● Buzzer/Virtual Buzzer block. ● Slider/Virtual Slider block.
Drag a Key Press block onto to the workspace and connect it to the Buzzer.
Step 2.
Drag a Note block onto the workspace. Connect the Slider to the Note block and the Note to the Buzzer block.
Step 3.
Test your system.

Challenge 1
Sketch your plan:
Think about the SAM
system you want to
create and draw it
out.
● Which are your inputs
and outputs?
● How will they be
connected together?
● What settings do you
need to edit?
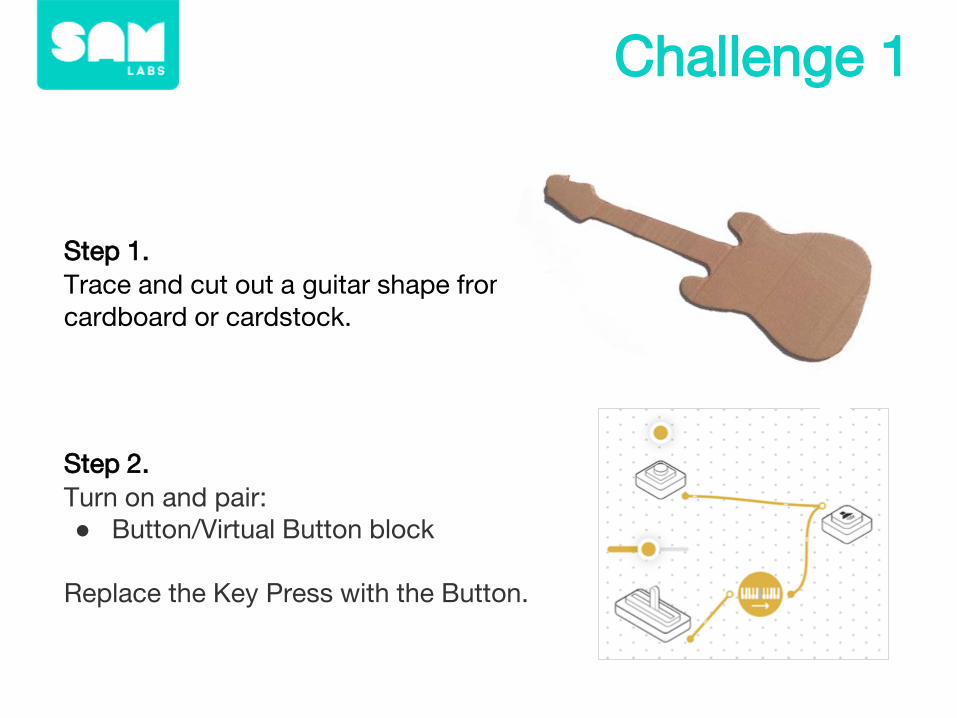
Step 1.
Trace and cut out a guitar shape from cardboard or cardstock.
Step 2.
Turn on and pair:● Button/Virtual Button block
Replace the Key Press with the Button.
Challenge 1

Step 3.
Consider where to place the:● Button● Slider● Buzzer
Blocks should be placed to emulate a real guitar.
Challenge 1
Slider
Buzzer
Button

Checks for understanding
1. How does the Slider emulate how a guitar is actually played?
A. It plays the note
B. It makes the sound louder or softer
C. It makes the sound higher or lower
1. How does the Key Press emulate how a guitar is actually player?
A. It plays the note
B. It makes the sound louder or softer
C. It makes the sound higher or lower

Step 1.
Ensure the Slider block is oriented the correct way.
Challenge 1 - Debug it

Step 1.
Turn on and pair:● RGB LED block
Add a Cycle Color block to the workspace. Connect the Cycle Colors block to the Button and RGB LED.
Step 2.
Secure the RGB LED on the neck of the guitar.
Step 3.
Test your system.
Challenge 2


Checks for understanding
1. What does RGB stand for?
A. Red, Grey, Blue
B. Red, Green, Brown
C. Red, Green, Blue
2. What are the outputs now for the system?
A. Buzzer block
B. RGB LED
C. A and B

✓ Today I learned….
Tidy Up/Exit Ticket