guide to getting arames - capoeira · guide to getting arames an illustrated, step-by-step guide by...
TRANSCRIPT

GUIDE TO GETTING ARAMES
An illustrated, step-by-step guide
By Shayna McHugh
Please read all instructions carefully… undertake at your own risk!
STEP 1: RETRIEVE THE WIRE
First, you need a tire. Pick one up at any auto repair center or
tire shop. My preferred tools are a serrated paring knife, a smooth-edged paring knife, and sandpaper (medium grain):
A steak knife can work instead of a serrated paring knife.
However, I find that they’re less durable, resulting in this:

The arame comes from the inside rim of the tire (left).
Take the serrated knife and cut off the rubber all the way around the inside rim (right):
You are looking for the place where the wire begins coiling around the rim. If you don’t find it, it can be helpful to shift the
angle of your knife to cut the top “corner” of the rubber and go around again:

Once you find the beginning of the coil (there should be 4-5
wires stacked on top of each other), wedge your knife under it:
WAIT!! Before you go any further, mark the place where the coil begins (you’ll thank me for this later):
Okay, now keep cutting along behind the wire until you have enough to grab:

Now, start pulling. The wire should come out easily. If it
doesn’t, there may be some rubber blocking it and you should be able to free it with a little more cutting.
A note: Having the wire coil up like in the photo at left is fine. What you don’t want to do is make a kink. That will give the
arame a weak point at which it is more likely to break.

Now you should have something that looks like this:
(hey, that’s a cool picture)
But wait! You didn’t throw away the tire yet, did you? Take your knife and cut straight into the rim – if you hit
something hard, there’s more wire in there. In my experience, there are usually 4-5 wires per rim. If you’ve missed one or
two, go back to the mark you made at the beginning of the coil, wedge the knife under, and pull it out.

If you can’t find the beginning of the coil, you can also wedge
your knife in back of the wire – cut away as much of the rubber as possible and twist the tip of the knife to work it in.
Once you have enough wire to grab, pull it out. Then try to cut
straight into the tire again. If your knife sinks into the rubber, you’ve gotten all the wire out of that rim.
(But still don’t throw out the tire!)

STEP 2: CLEAN THE WIRE
Now it’s time to separate the wires that are stuck together. I like to step on the wire and cut along the grooves like the
picture on the left. I don’t recommend attempting the picture on the right, unless you want to lose a finger or two!
Once you separate the ends, you should be able to simply peel
the wires apart from each other (left). Each one will still have quite a bit of rubber on it (right).

Loop the end of the wire around something stable (left).
Use the smooth-edged paring knife to strip the rubber (right). Just work your way backwards and get as much off as possible.
If you don’t have room, you can also step on the wire and cut downwards (left). It will still be dirty, but free of big chunks of
rubber (right).
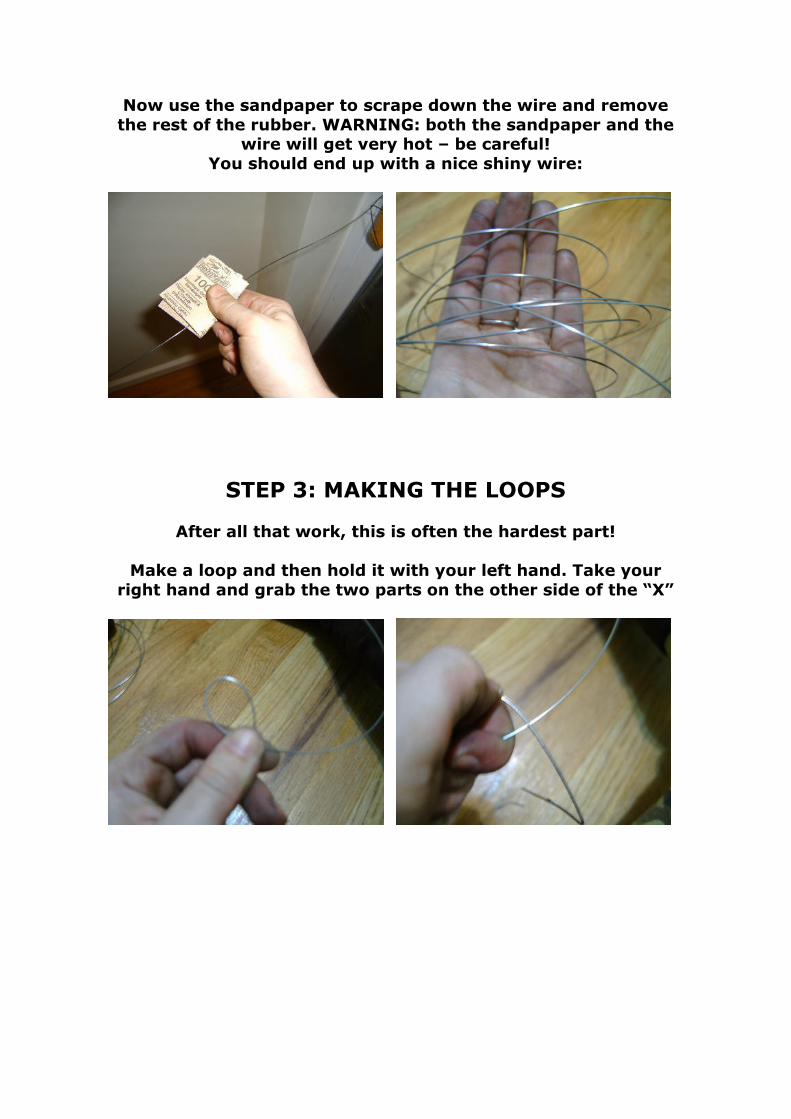
Now use the sandpaper to scrape down the wire and remove
the rest of the rubber. WARNING: both the sandpaper and the wire will get very hot – be careful!
You should end up with a nice shiny wire:
STEP 3: MAKING THE LOOPS
After all that work, this is often the hardest part!
Make a loop and then hold it with your left hand. Take your
right hand and grab the two parts on the other side of the “X”

Twist your hands in opposite directions to make the first bend
(left). Repeat 3-4 times, trying to make the coils tight and close to each other (right).
To break the wire, bend the free end up and down until you feel
it start to weaken and crack. Then, break it “forward” in the
same direction as the coils. This prevents the wire from having a sharp end that can cut your berimbau or your hand.
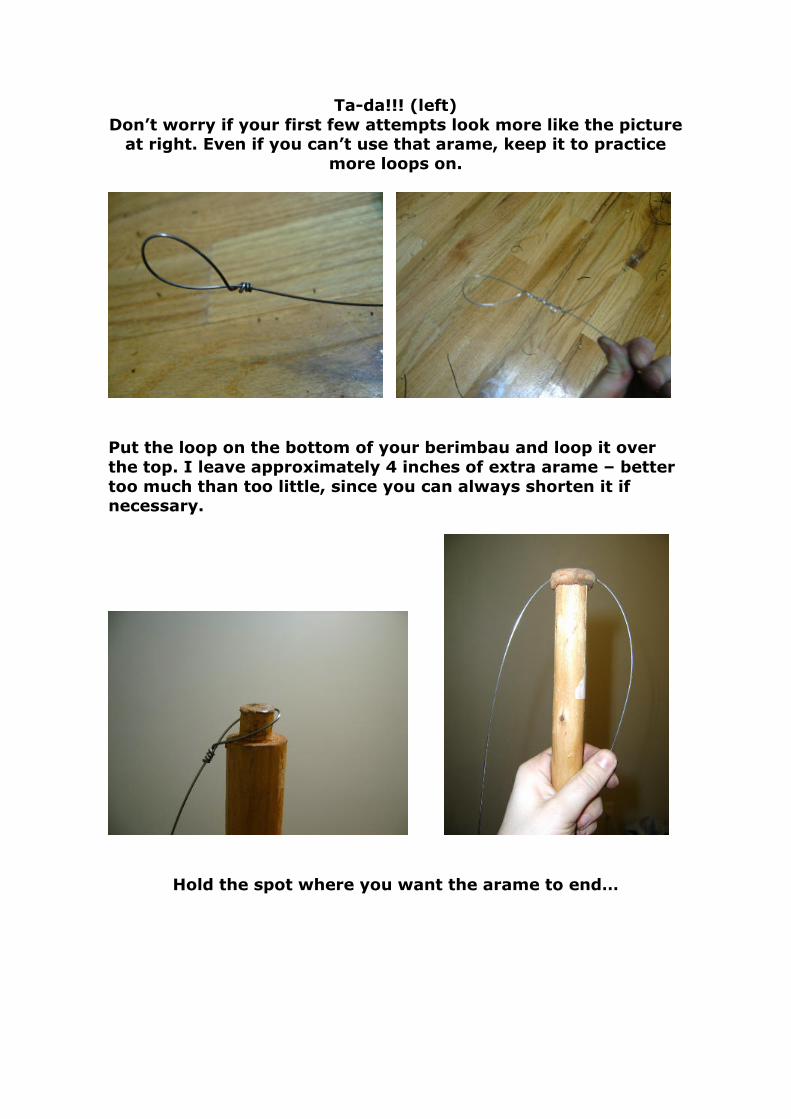
Ta-da!!! (left)
Don’t worry if your first few attempts look more like the picture at right. Even if you can’t use that arame, keep it to practice
more loops on.
Put the loop on the bottom of your berimbau and loop it over
the top. I leave approximately 4 inches of extra arame – better
too much than too little, since you can always shorten it if necessary.
Hold the spot where you want the arame to end…

…and make another loop. Make sure that the side you break off
(on right) is the one where you haven’t yet made a loop.
Woohoo! Arames!
You can get 2-3 arames out of each wire, giving you 10-15 per
rim. Now, flip the tire over and repeat on the other side!