grooming your griffon -...
TRANSCRIPT
Grooming Your Griffon
3. Hand stripping your Rough Griffon
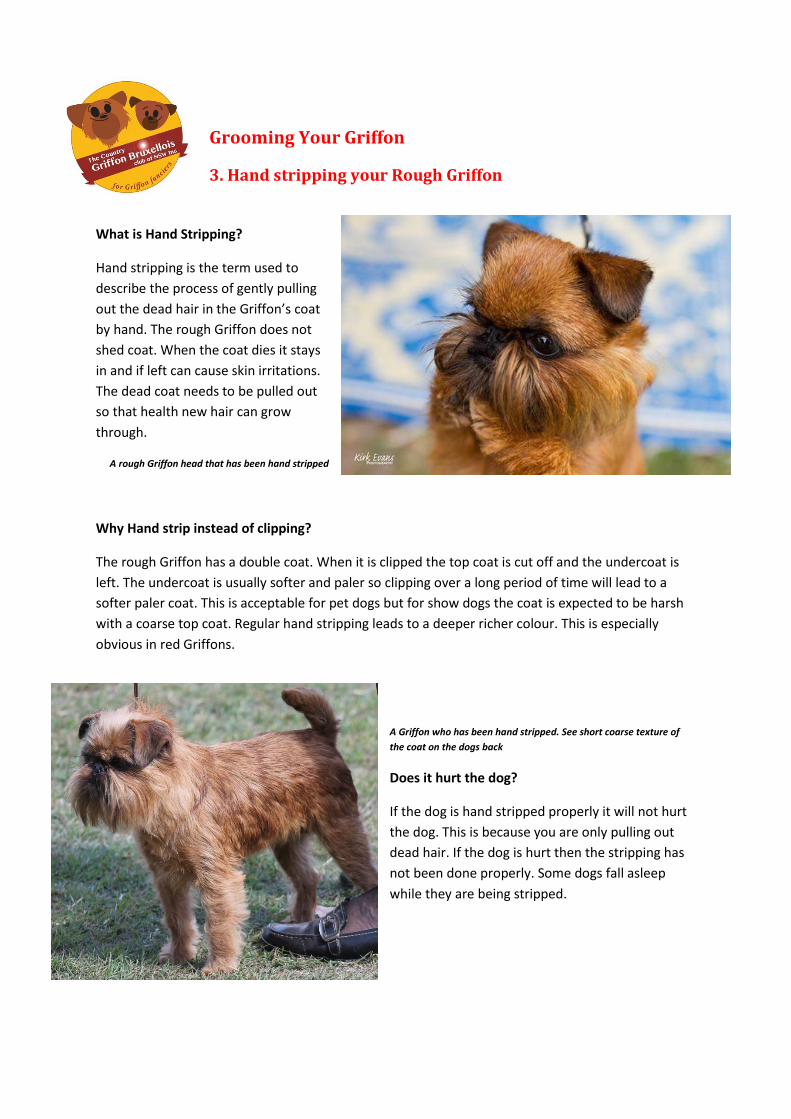
What is Hand Stripping?
Hand stripping is the term used to
describe the process of gently pulling
out the dead hair in the Griffon’s coat
by hand. The rough Griffon does not
shed coat. When the coat dies it stays
in and if left can cause skin irritations.
The dead coat needs to be pulled out
so that health new hair can grow
through.
A rough Griffon head that has been hand stripped
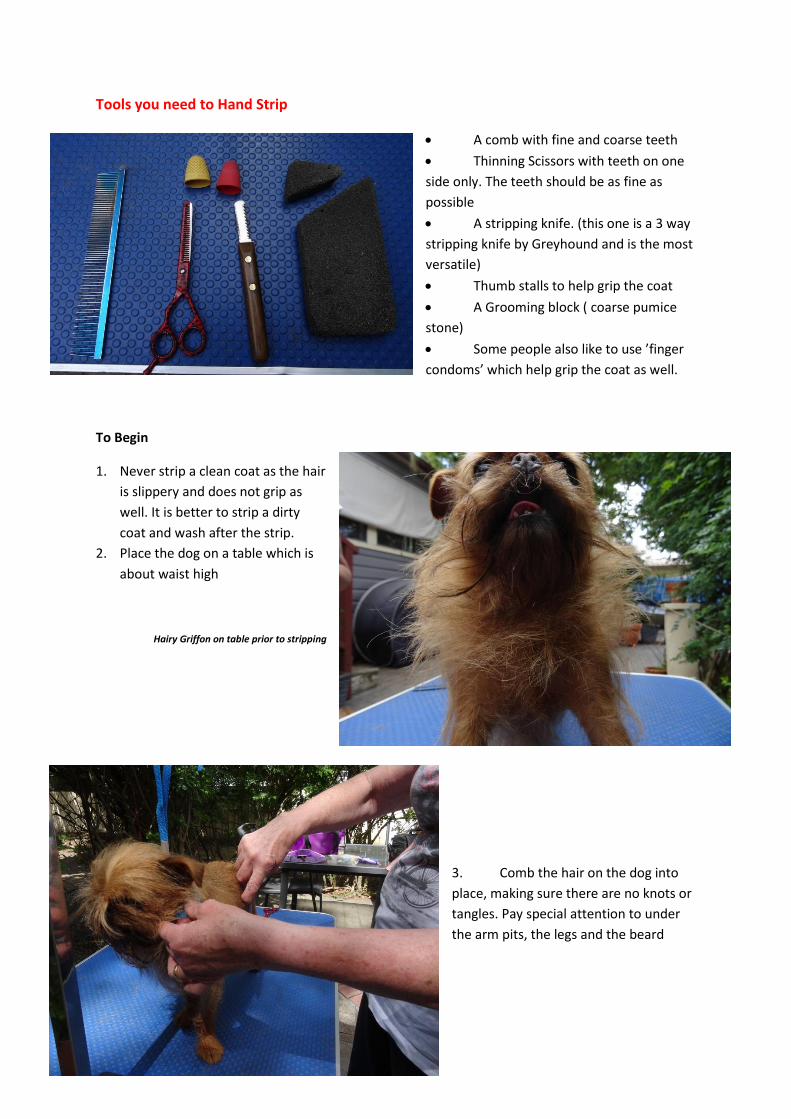
Why Hand strip instead of clipping?
The rough Griffon has a double coat. When it is clipped the top coat is cut off and the undercoat is
left. The undercoat is usually softer and paler so clipping over a long period of time will lead to a
softer paler coat. This is acceptable for pet dogs but for show dogs the coat is expected to be harsh
with a coarse top coat. Regular hand stripping leads to a deeper richer colour. This is especially
obvious in red Griffons.
A Griffon who has been hand stripped. See short coarse texture of
the coat on the dogs back
Does it hurt the dog?
If the dog is hand stripped properly it will not hurt
the dog. This is because you are only pulling out
dead hair. If the dog is hurt then the stripping has
not been done properly. Some dogs fall asleep
while they are being stripped.
Tools you need to Hand Strip
A comb with fine and coarse teeth
Thinning Scissors with teeth on one
side only. The teeth should be as fine as
possible
A stripping knife. (this one is a 3 way
stripping knife by Greyhound and is the most
versatile)
Thumb stalls to help grip the coat
A Grooming block ( coarse pumice
stone)
Some people also like to use ’finger
condoms’ which help grip the coat as well.
To Begin
1. Never strip a clean coat as the hair
is slippery and does not grip as
well. It is better to strip a dirty
coat and wash after the strip.
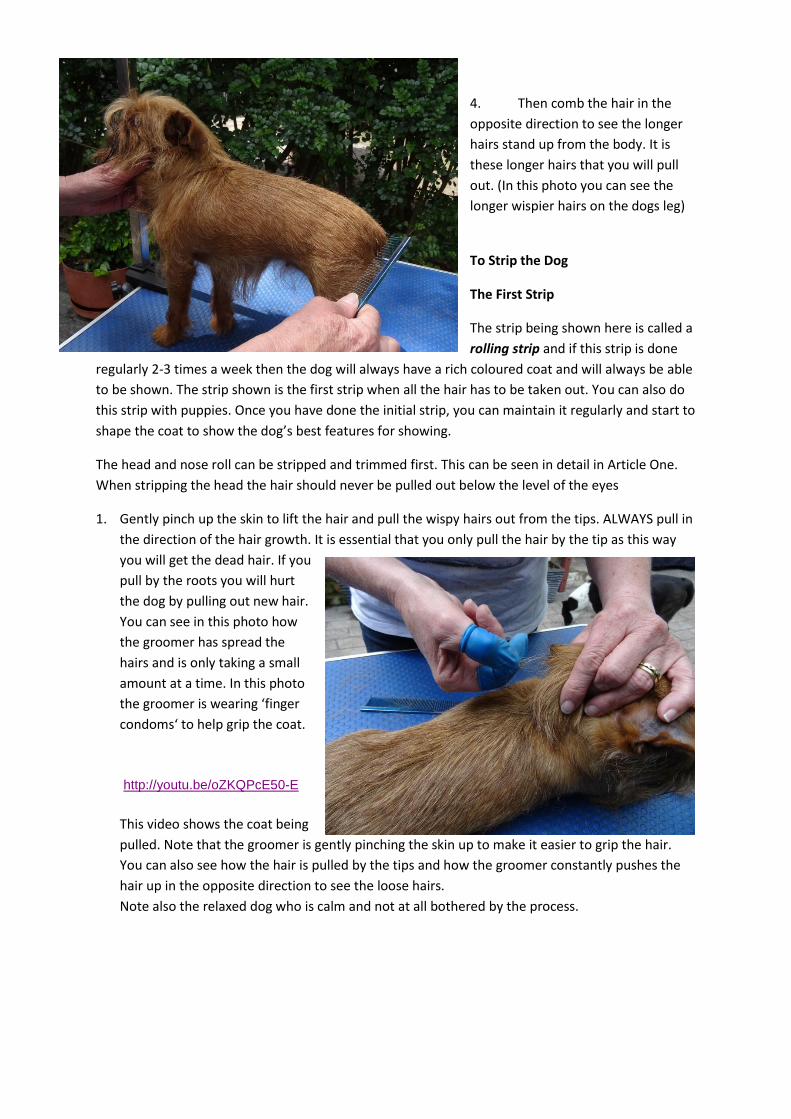
2. Place the dog on a table which is
about waist high
Hairy Griffon on table prior to stripping
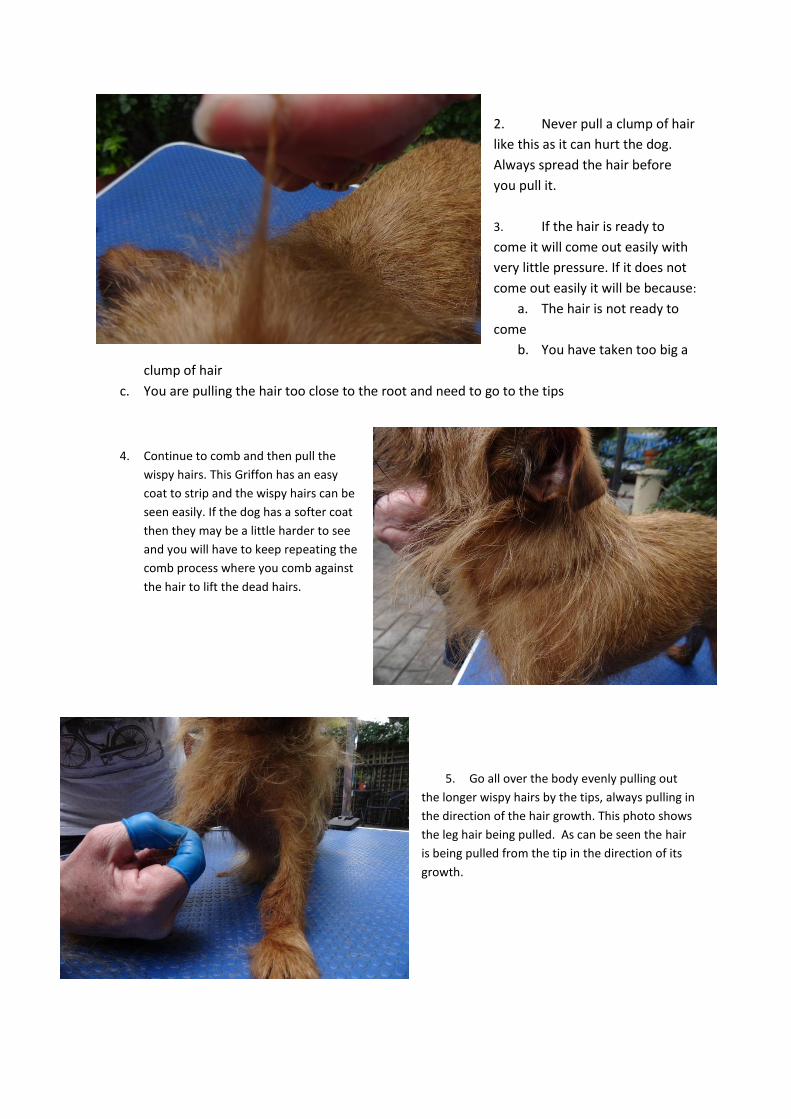
3. Comb the hair on the dog into
place, making sure there are no knots or
tangles. Pay special attention to under
the arm pits, the legs and the beard
4. Then comb the hair in the
opposite direction to see the longer
hairs stand up from the body. It is
these longer hairs that you will pull
out. (In this photo you can see the
longer wispier hairs on the dogs leg)
To Strip the Dog
The First Strip
The strip being shown here is called a
rolling strip and if this strip is done
regularly 2-3 times a week then the dog will always have a rich coloured coat and will always be able
to be shown. The strip shown is the first strip when all the hair has to be taken out. You can also do
this strip with puppies. Once you have done the initial strip, you can maintain it regularly and start to
shape the coat to show the dog’s best features for showing.
The head and nose roll can be stripped and trimmed first. This can be seen in detail in Article One.
When stripping the head the hair should never be pulled out below the level of the eyes
1. Gently pinch up the skin to lift the hair and pull the wispy hairs out from the tips. ALWAYS pull in
the direction of the hair growth. It is essential that you only pull the hair by the tip as this way
you will get the dead hair. If you
pull by the roots you will hurt
the dog by pulling out new hair.
You can see in this photo how
the groomer has spread the
hairs and is only taking a small
amount at a time. In this photo
the groomer is wearing ‘finger
condoms‘ to help grip the coat.
http://youtu.be/oZKQPcE50-E
This video shows the coat being
pulled. Note that the groomer is gently pinching the skin up to make it easier to grip the hair.
You can also see how the hair is pulled by the tips and how the groomer constantly pushes the
hair up in the opposite direction to see the loose hairs.
Note also the relaxed dog who is calm and not at all bothered by the process.
2. Never pull a clump of hair
like this as it can hurt the dog.
Always spread the hair before
you pull it.
3. If the hair is ready to
come it will come out easily with
very little pressure. If it does not
come out easily it will be because:
a. The hair is not ready to
come
b. You have taken too big a
clump of hair
c. You are pulling the hair too close to the root and need to go to the tips
4. Continue to comb and then pull the
wispy hairs. This Griffon has an easy
coat to strip and the wispy hairs can be
seen easily. If the dog has a softer coat
then they may be a little harder to see
and you will have to keep repeating the
comb process where you comb against
the hair to lift the dead hairs.
5. Go all over the body evenly pulling out
the longer wispy hairs by the tips, always pulling in
the direction of the hair growth. This photo shows
the leg hair being pulled. As can be seen the hair
is being pulled from the tip in the direction of its
growth.
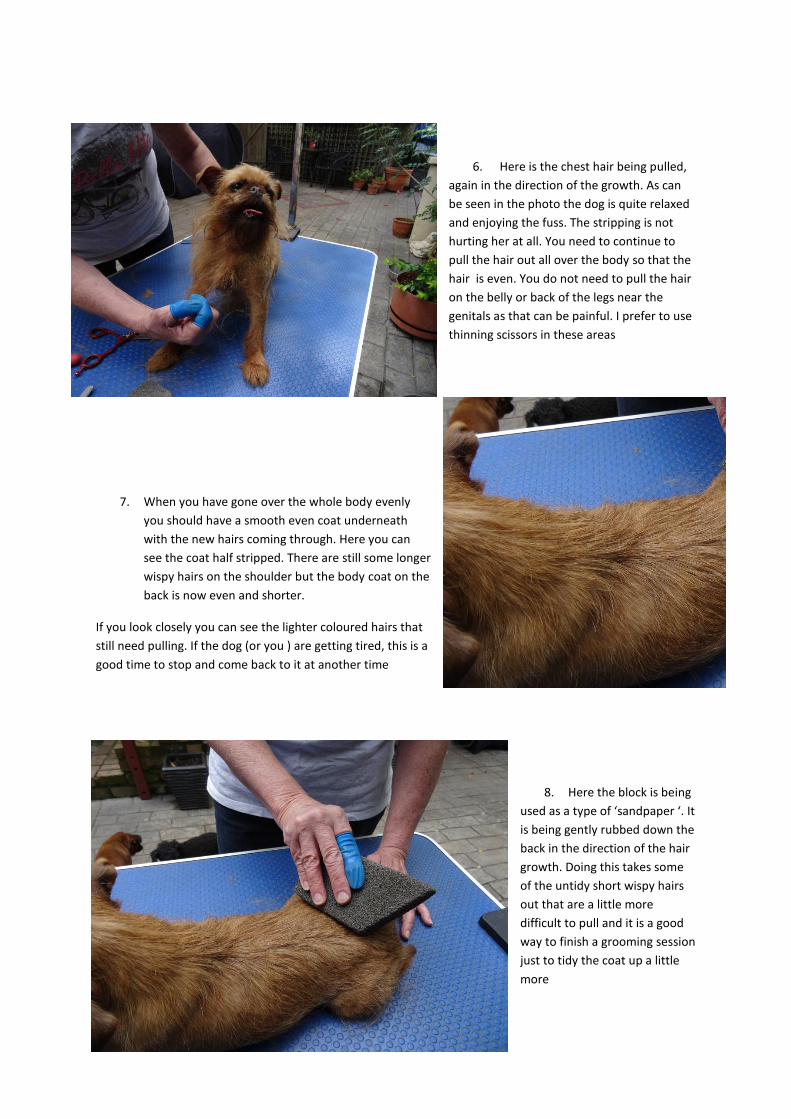
6. Here is the chest hair being pulled,
again in the direction of the growth. As can
be seen in the photo the dog is quite relaxed
and enjoying the fuss. The stripping is not
hurting her at all. You need to continue to
pull the hair out all over the body so that the
hair is even. You do not need to pull the hair
on the belly or back of the legs near the
genitals as that can be painful. I prefer to use
thinning scissors in these areas
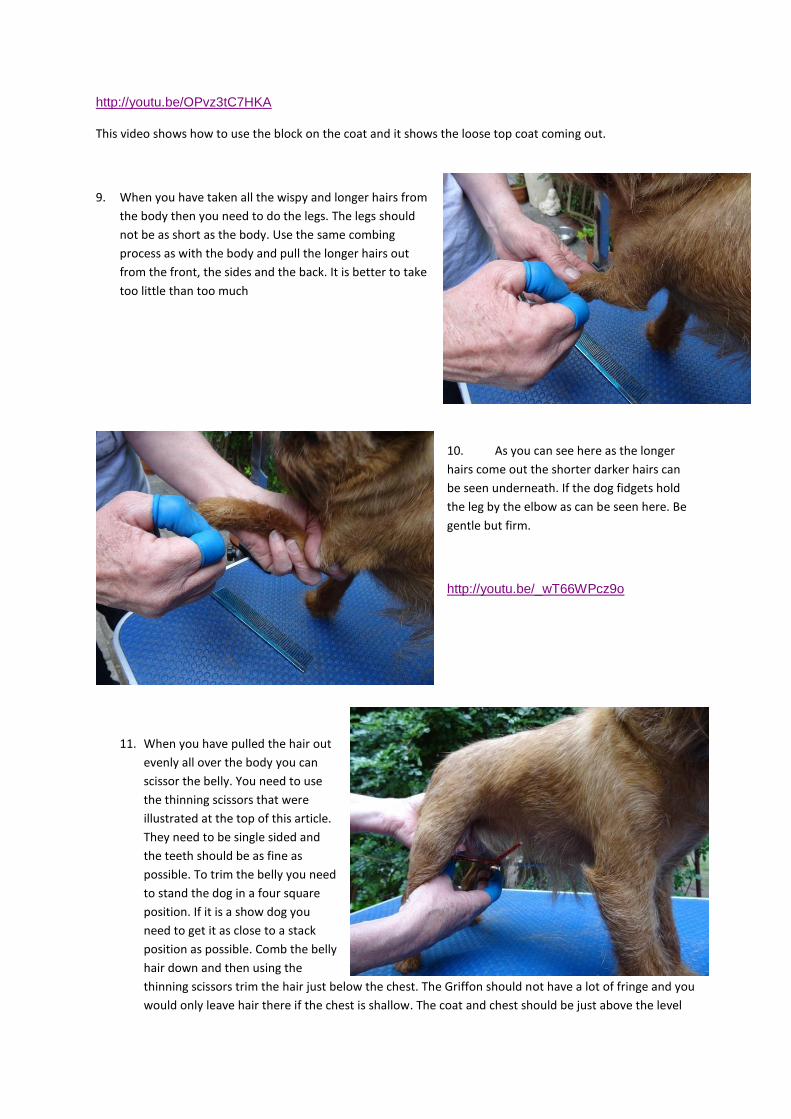
7. When you have gone over the whole body evenly
you should have a smooth even coat underneath
with the new hairs coming through. Here you can
see the coat half stripped. There are still some longer
wispy hairs on the shoulder but the body coat on the
back is now even and shorter.
If you look closely you can see the lighter coloured hairs that
still need pulling. If the dog (or you ) are getting tired, this is a
good time to stop and come back to it at another time
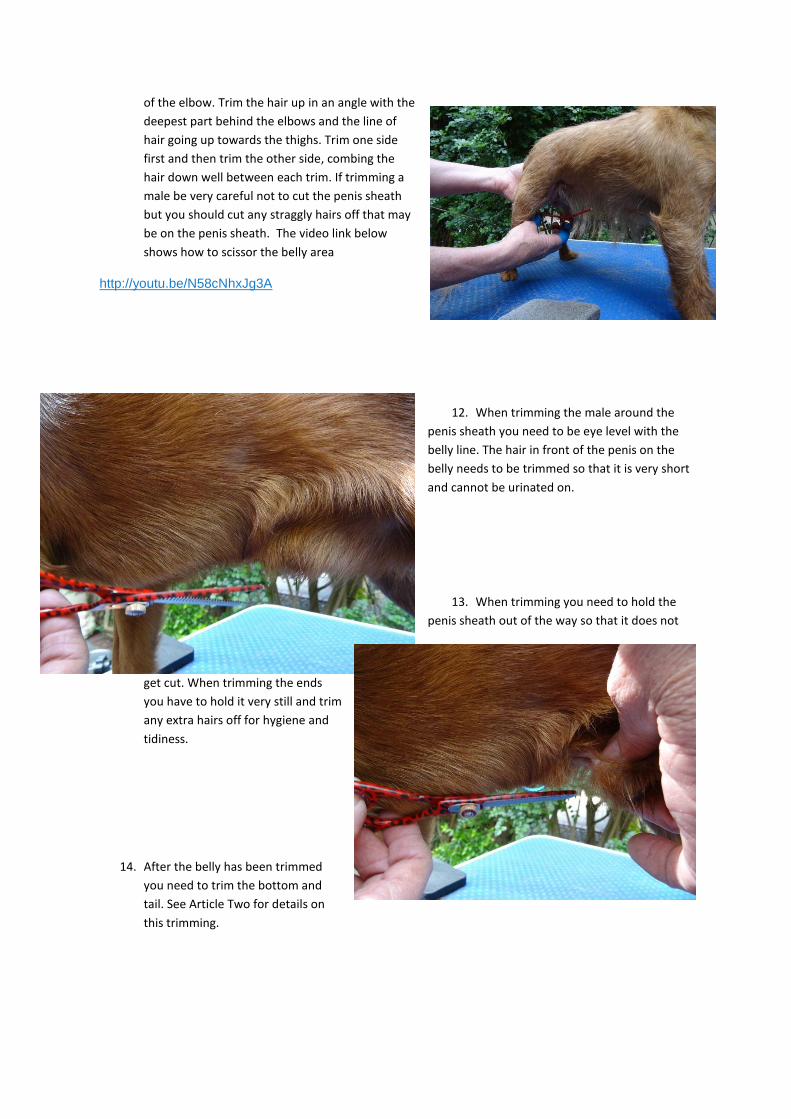
8. Here the block is being
used as a type of ‘sandpaper ‘. It
is being gently rubbed down the
back in the direction of the hair
growth. Doing this takes some
of the untidy short wispy hairs
out that are a little more
difficult to pull and it is a good
way to finish a grooming session
just to tidy the coat up a little
more
http://youtu.be/OPvz3tC7HKA
This video shows how to use the block on the coat and it shows the loose top coat coming out.
9. When you have taken all the wispy and longer hairs from
the body then you need to do the legs. The legs should
not be as short as the body. Use the same combing
process as with the body and pull the longer hairs out
from the front, the sides and the back. It is better to take
too little than too much
10. As you can see here as the longer
hairs come out the shorter darker hairs can
be seen underneath. If the dog fidgets hold
the leg by the elbow as can be seen here. Be
gentle but firm.
http://youtu.be/_wT66WPcz9o
11. When you have pulled the hair out
evenly all over the body you can
scissor the belly. You need to use
the thinning scissors that were
illustrated at the top of this article.
They need to be single sided and
the teeth should be as fine as
possible. To trim the belly you need
to stand the dog in a four square
position. If it is a show dog you
need to get it as close to a stack
position as possible. Comb the belly
hair down and then using the
thinning scissors trim the hair just below the chest. The Griffon should not have a lot of fringe and you
would only leave hair there if the chest is shallow. The coat and chest should be just above the level
of the elbow. Trim the hair up in an angle with the
deepest part behind the elbows and the line of
hair going up towards the thighs. Trim one side
first and then trim the other side, combing the
hair down well between each trim. If trimming a
male be very careful not to cut the penis sheath
but you should cut any straggly hairs off that may
be on the penis sheath. The video link below
shows how to scissor the belly area
http://youtu.be/N58cNhxJg3A
12. When trimming the male around the
penis sheath you need to be eye level with the
belly line. The hair in front of the penis on the
belly needs to be trimmed so that it is very short
and cannot be urinated on.
13. When trimming you need to hold the
penis sheath out of the way so that it does not
get cut. When trimming the ends
you have to hold it very still and trim
any extra hairs off for hygiene and
tidiness.
14. After the belly has been trimmed
you need to trim the bottom and
tail. See Article Two for details on
this trimming.
15. Your next trim is the feet. The feet should look
small and round so there should be no long hairs. For the
feet you need sharp plain bladed scissors- not thinning
scissors. The ones pictured here are blunt tipped which
means they can also be used for the nose area. The two
photos below show the foot being trimmed around the
edge to tidy it up.
16. When you have trimmed
around the edges of the
foot you then need to trim
underneath the foot to cut
any long hair that is
growing between the pads.
The hair should be cut back
level with the pads. This is
not only more comfortable
for the dog but it stops the
dog picking up burrs or grit
or sand between the toes
and also makes it less likely
to walk in mud or wet feet
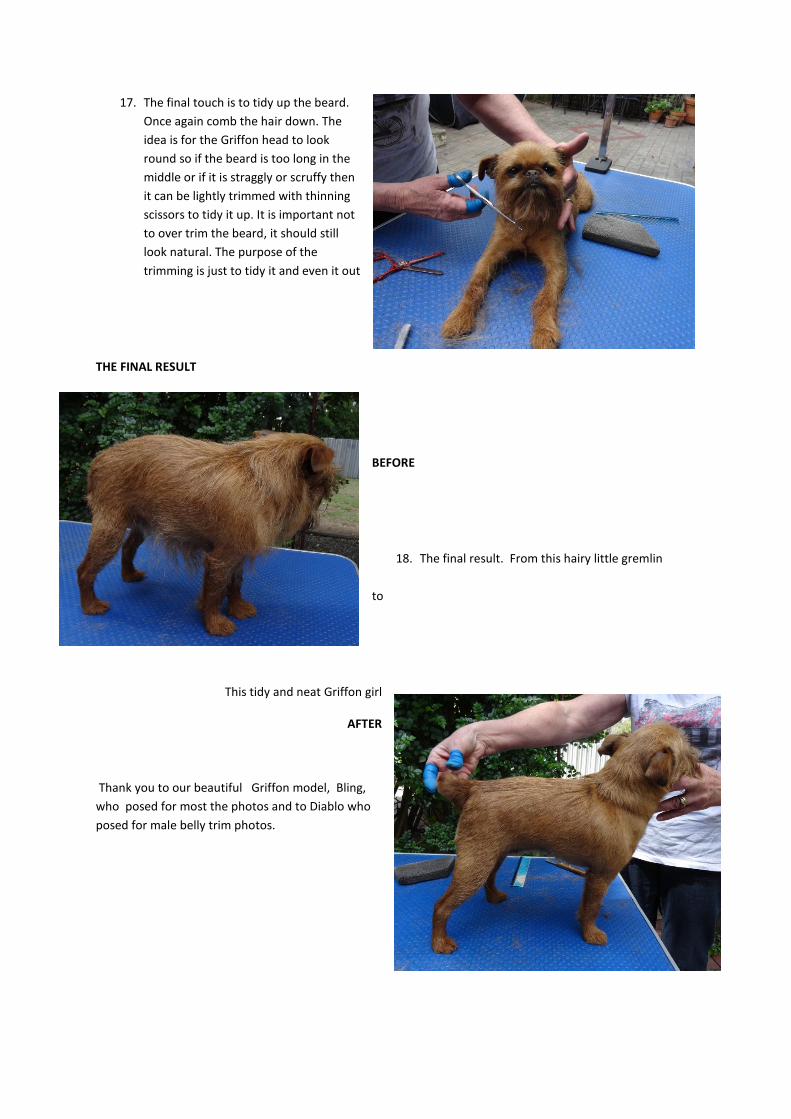
17. The final touch is to tidy up the beard.
Once again comb the hair down. The
idea is for the Griffon head to look
round so if the beard is too long in the
middle or if it is straggly or scruffy then
it can be lightly trimmed with thinning
scissors to tidy it up. It is important not
to over trim the beard, it should still
look natural. The purpose of the
trimming is just to tidy it and even it out
THE FINAL RESULT
BEFORE
18. The final result. From this hairy little gremlin
to
This tidy and neat Griffon girl
AFTER
Thank you to our beautiful Griffon model, Bling,
who posed for most the photos and to Diablo who
posed for male belly trim photos.