grade 6 electric car construction - sparksparklearning.org/spark/science_files/grade 6 electric...
TRANSCRIPT
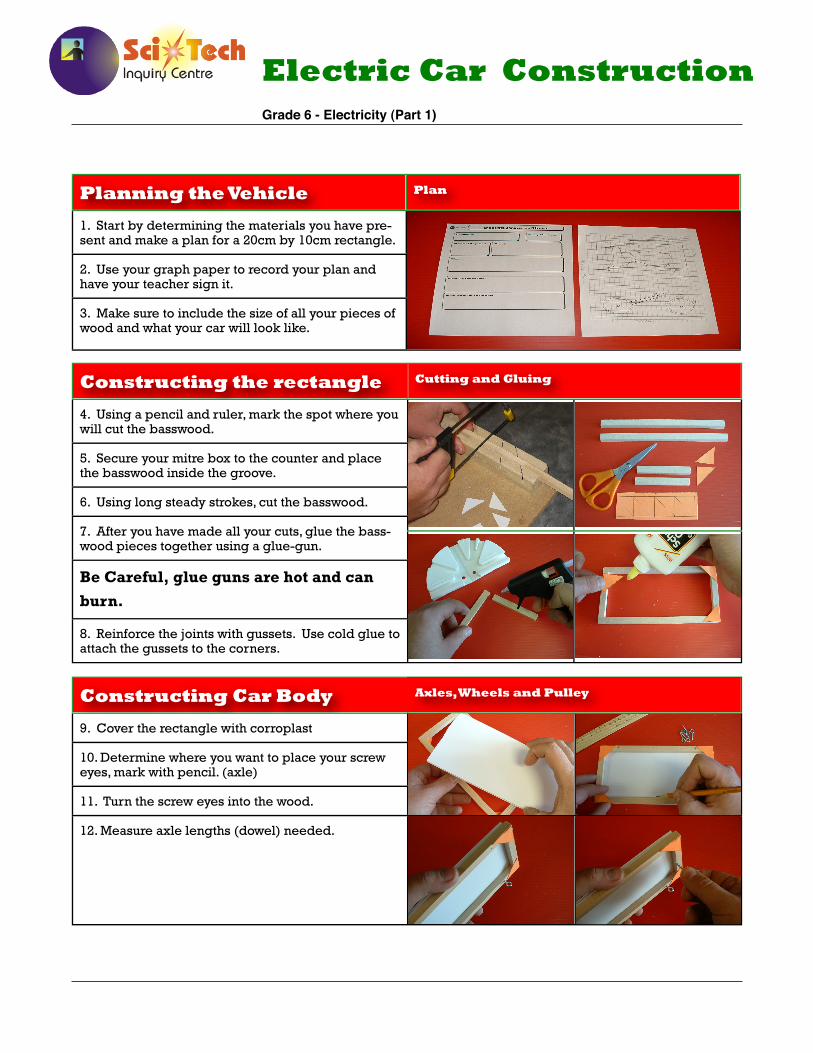
Planning the Vehicle Plan
1. Start by determining the materials you have pre-sent and make a plan for a 20cm by 10cm rectangle.
2. Use your graph paper to record your plan and have your teacher sign it.
3. Make sure to include the size of all your pieces of wood and what your car will look like.
Constructing the rectangle Cutting and Gluing
4. Using a pencil and ruler, mark the spot where you will cut the basswood.
5. Secure your mitre box to the counter and place the basswood inside the groove.
6. Using long steady strokes, cut the basswood.
7. After you have made all your cuts, glue the bass-wood pieces together using a glue-gun.
Be Careful, glue guns are hot and can burn.
8. Reinforce the joints with gussets. Use cold glue to attach the gussets to the corners.
Constructing Car Body Axles, Wheels and Pulley
9. Cover the rectangle with corroplast
10. Determine where you want to place your screw eyes, mark with pencil. (axle)
11. Turn the screw eyes into the wood.
12. Measure axle lengths (dowel) needed.
Electric Car ConstructionGrade 6 - Electricity (Part 1)
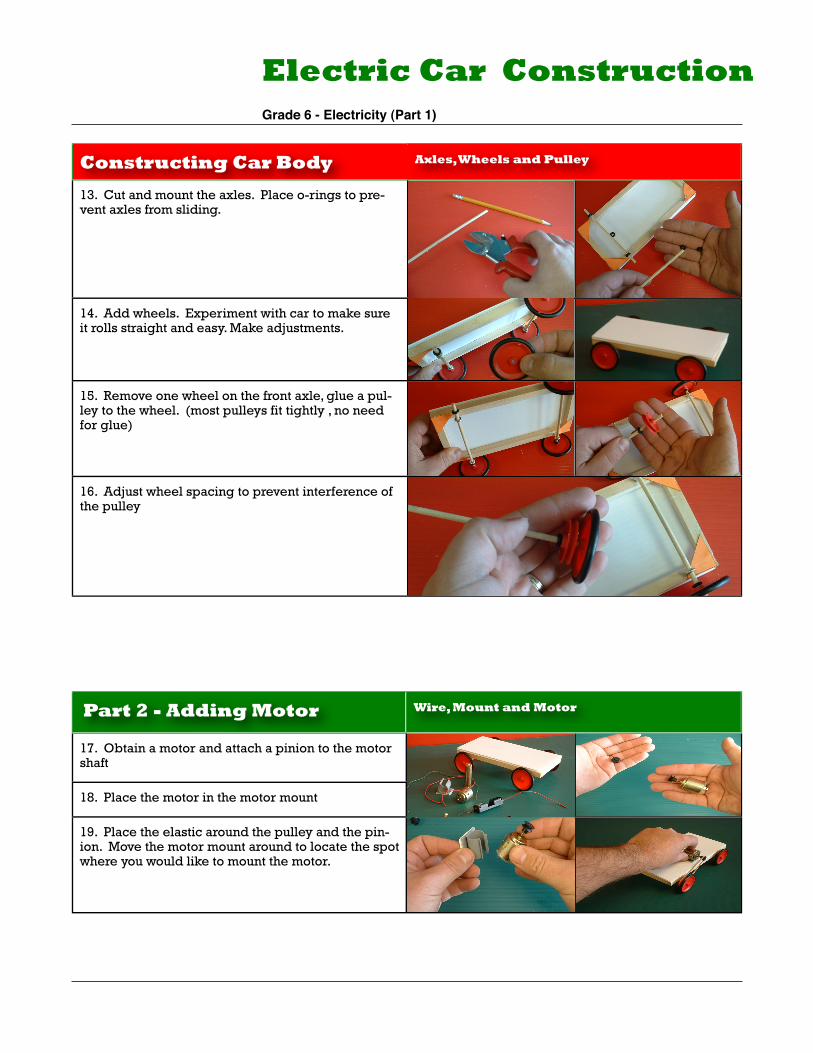
Constructing Car Body Axles, Wheels and Pulley
13. Cut and mount the axles. Place o-rings to pre-vent axles from sliding.
14. Add wheels. Experiment with car to make sure it rolls straight and easy. Make adjustments.
15. Remove one wheel on the front axle, glue a pul-ley to the wheel. (most pulleys fit tightly , no need for glue)
16. Adjust wheel spacing to prevent interference of the pulley
Part 2 - Adding Motor Wire, Mount and Motor
17. Obtain a motor and attach a pinion to the motor shaft
18. Place the motor in the motor mount
19. Place the elastic around the pulley and the pin-ion. Move the motor mount around to locate the spot where you would like to mount the motor.
Electric Car ConstructionGrade 6 - Electricity (Part 1)
Part 2 - Adding Motor Wire, Mount and Motor
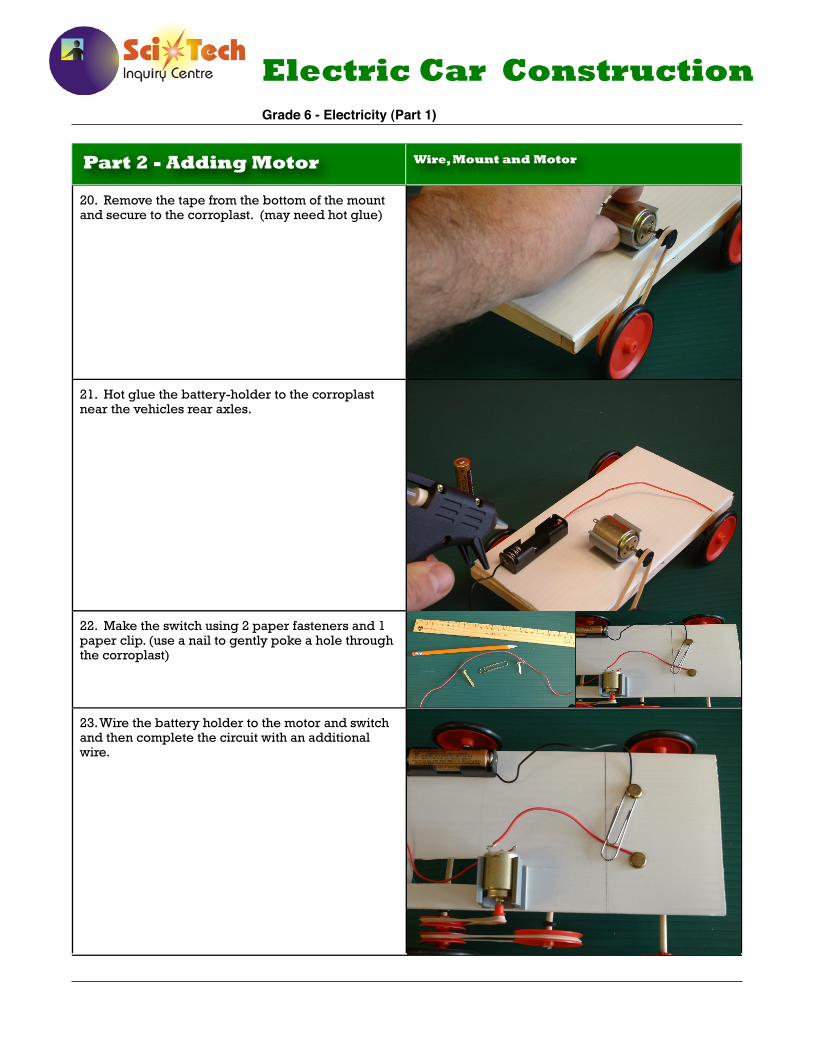
20. Remove the tape from the bottom of the mount and secure to the corroplast. (may need hot glue)
21. Hot glue the battery-holder to the corroplast near the vehicles rear axles.
22. Make the switch using 2 paper fasteners and 1 paper clip. (use a nail to gently poke a hole through the corroplast)
23. Wire the battery holder to the motor and switch and then complete the circuit with an additional wire.
Electric Car ConstructionGrade 6 - Electricity (Part 1)
Part 2 - Adding Motor Wire, Mount and Motor
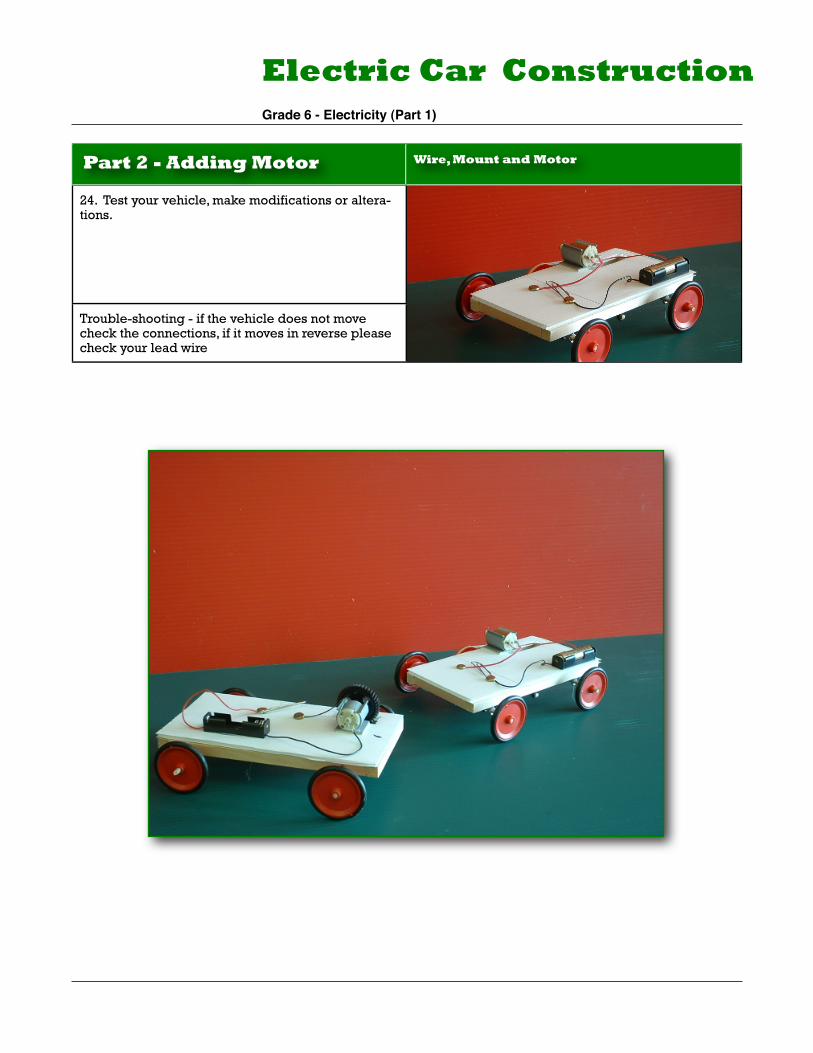
24. Test your vehicle, make modifications or altera-tions.
Trouble-shooting - if the vehicle does not move check the connections, if it moves in reverse please check your lead wire
Electric Car ConstructionGrade 6 - Electricity (Part 1)