general ledger budget report glbr. step 1:double-click on the datatel icon to open
TRANSCRIPT

General Ledger Budget Report
GLBR
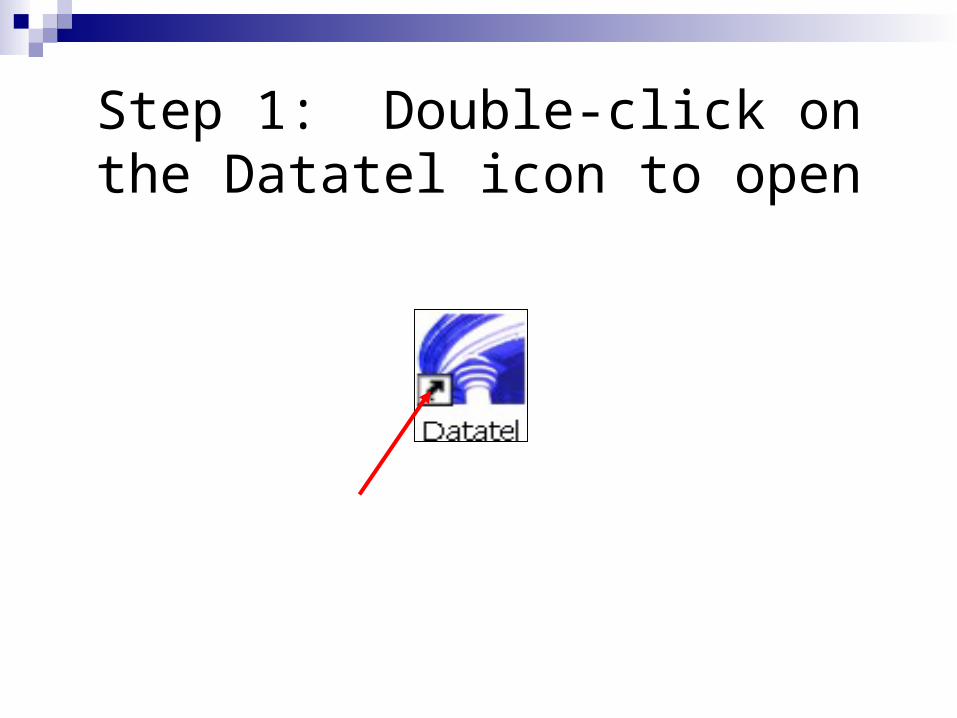
Step 1: Double-click on the Datatel icon to open
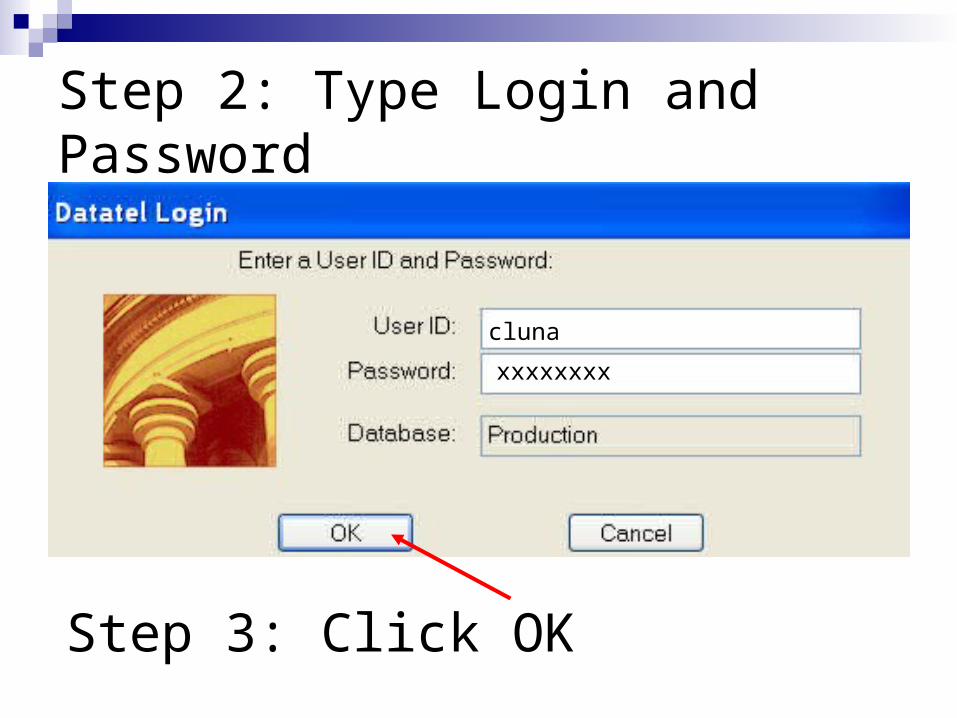
Step 2: Type Login and Password
cluna
xxxxxxxx
Step 3: Click OK
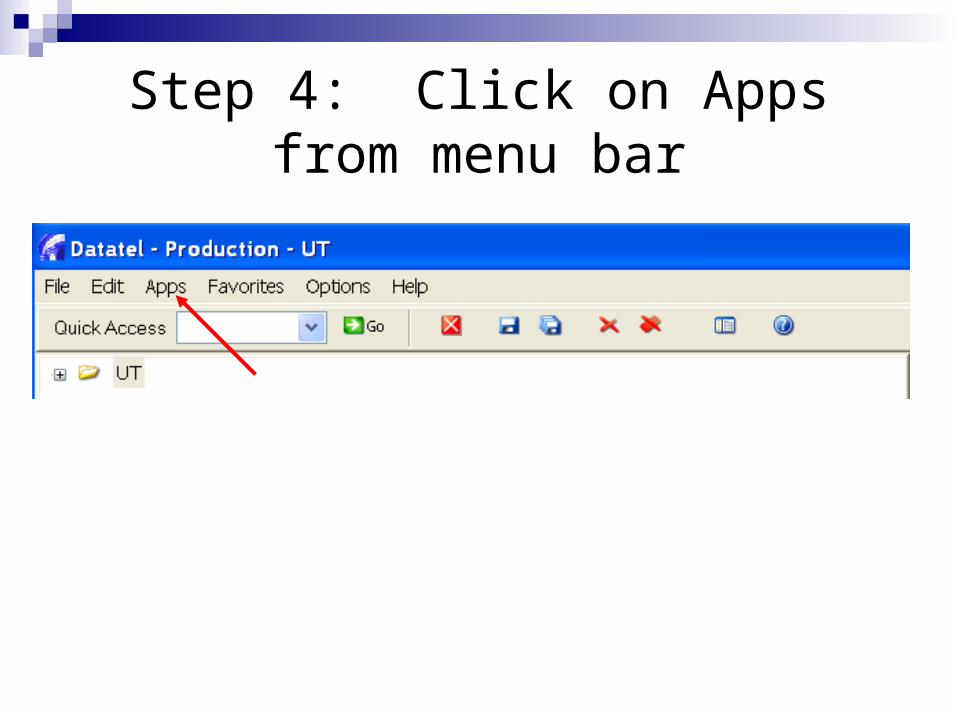
Step 4: Click on Apps from menu bar
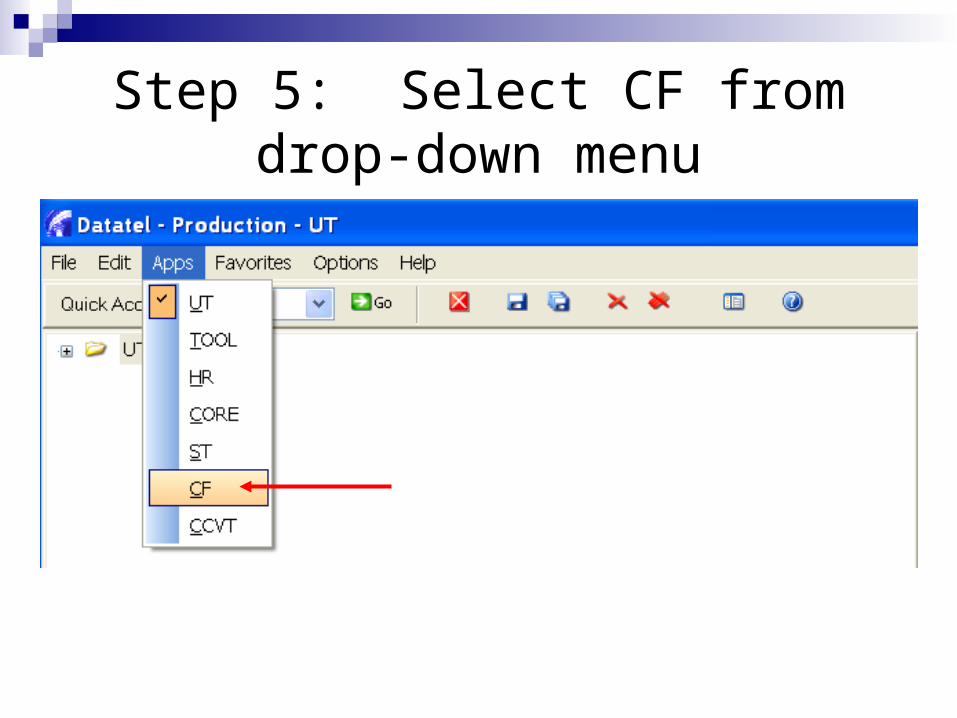
Step 5: Select CF from drop-down menu

Step 6: Next to Quick Access type GLBR
GLBR
Step 7: Click on the “Go” button
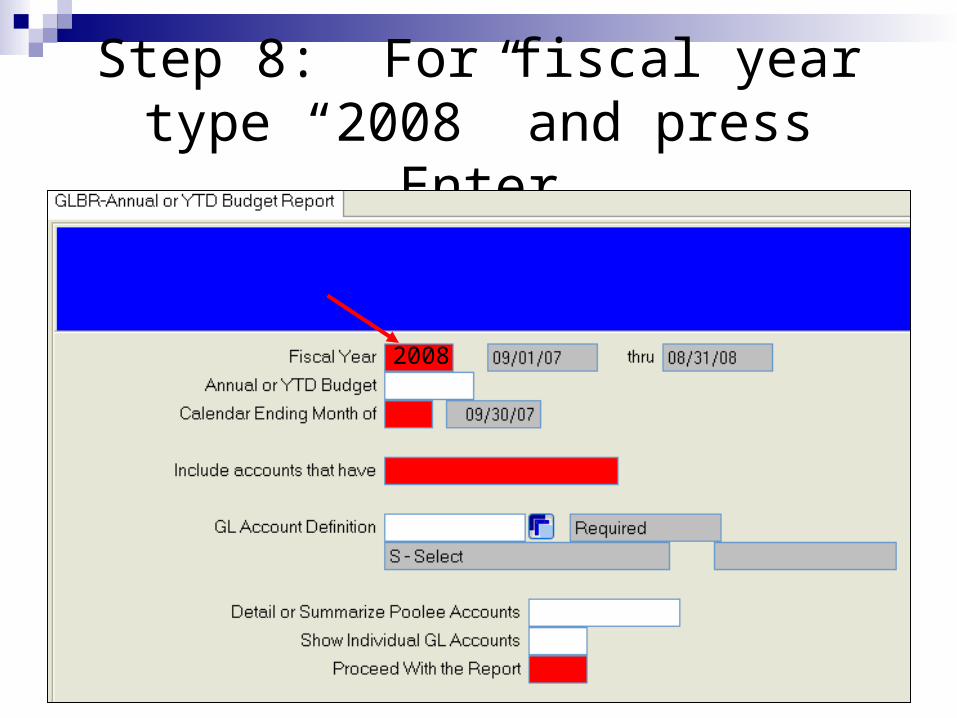
Step 8: For fiscal year type “2008” and press Enter
2008

Step 9: At next prompt type “Y” for Year to Date and press Enter
2008YYTD
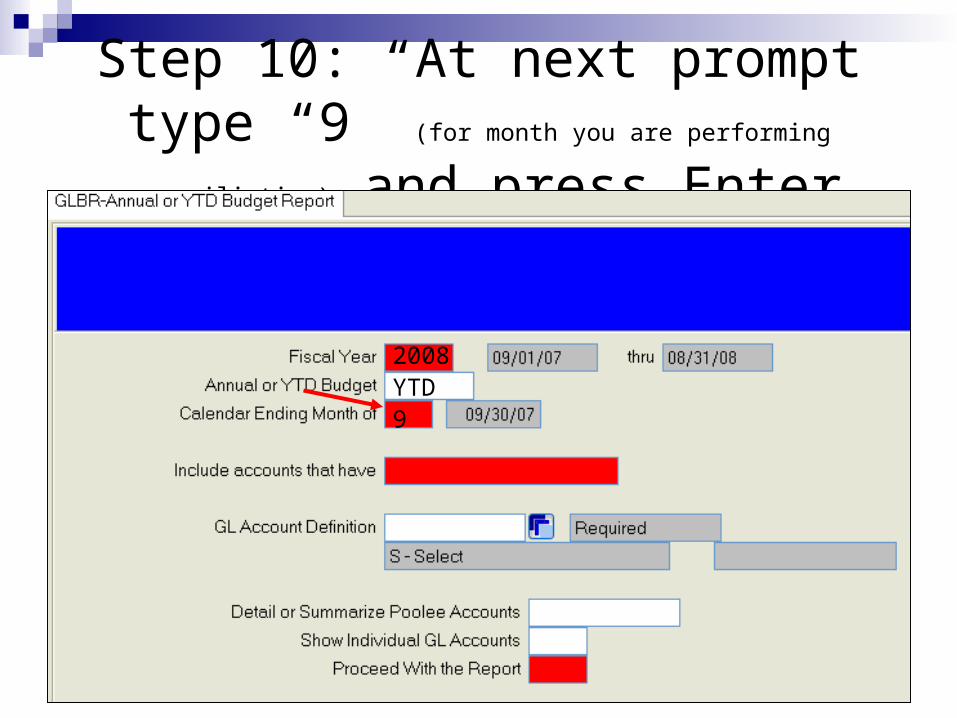
Step 10: At next prompt type “9” (for
month you are performing reconciliation) and press Enter
2008YTD9
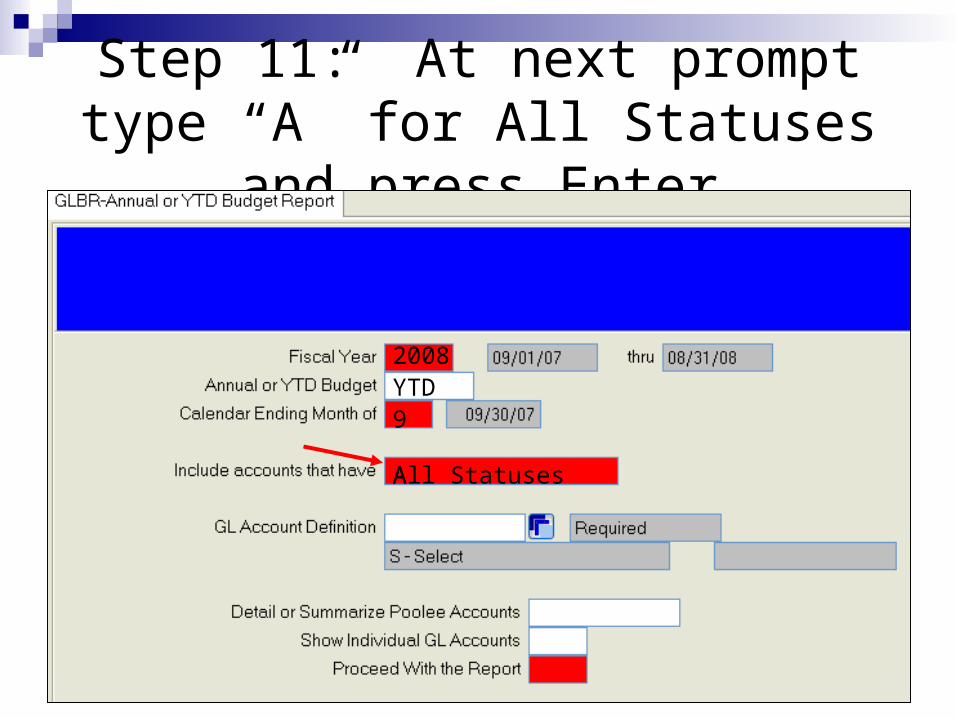
Step 11: At next prompt type “A” for All Statuses and press Enter
2008YTD9
AAll Statuses
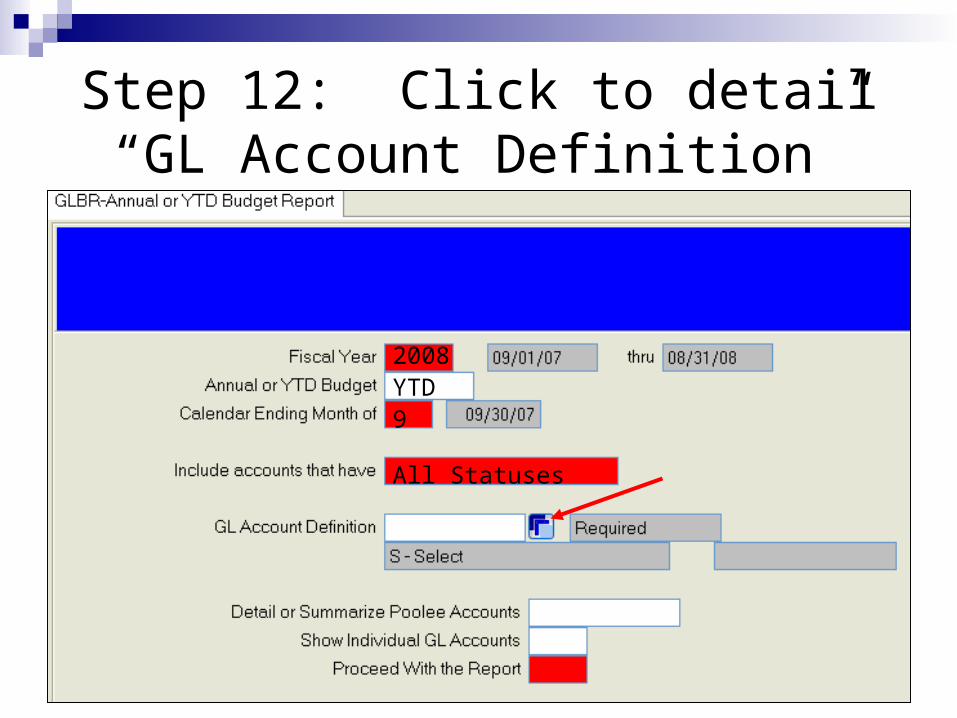
Step 12: Click to detail “GL Account Definition”
2008YTD9
All Statuses

Step 13: Click to detail “Select/List”
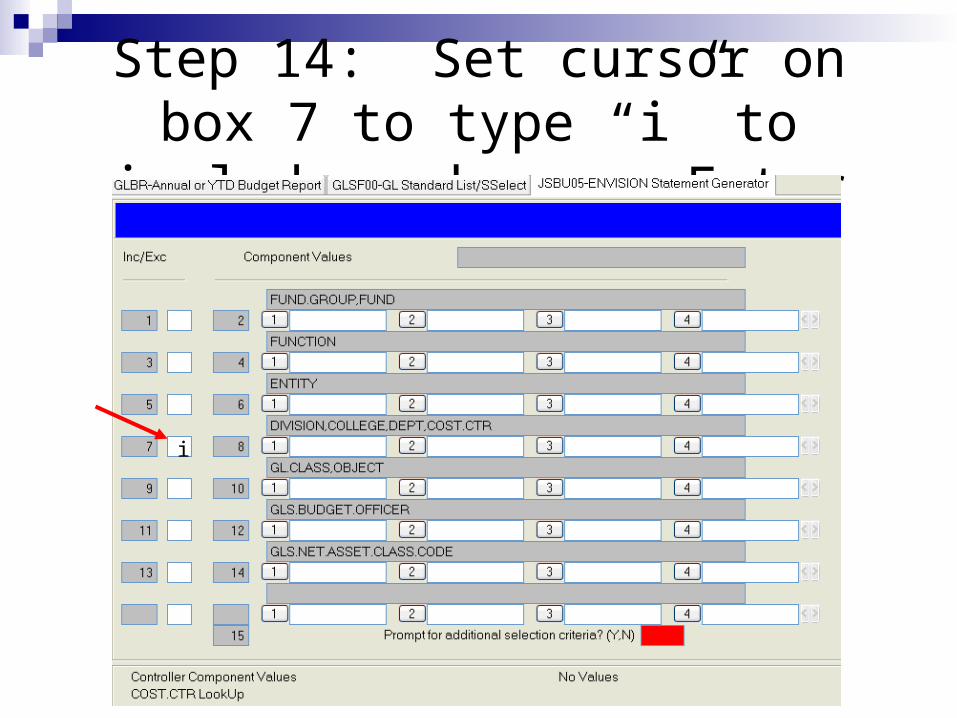
Step 14: Set cursor on box 7 to type “i” to include and press Enter
i
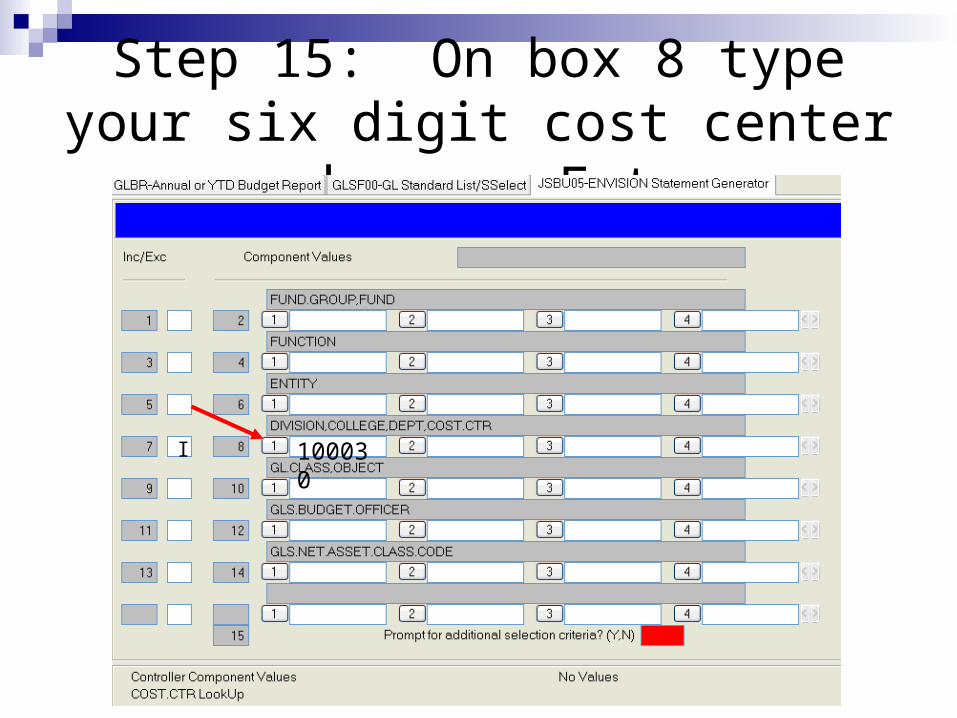
Step 15: On box 8 type your six digit cost center and press Enter
I 100030
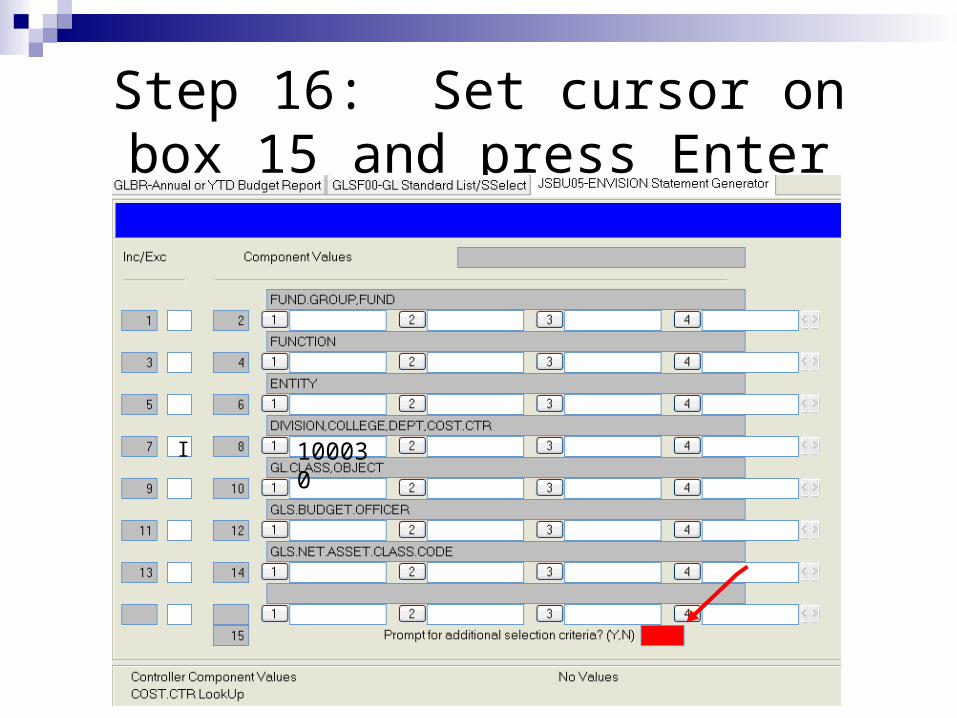
Step 16: Set cursor on box 15 and press Enter
I 100030
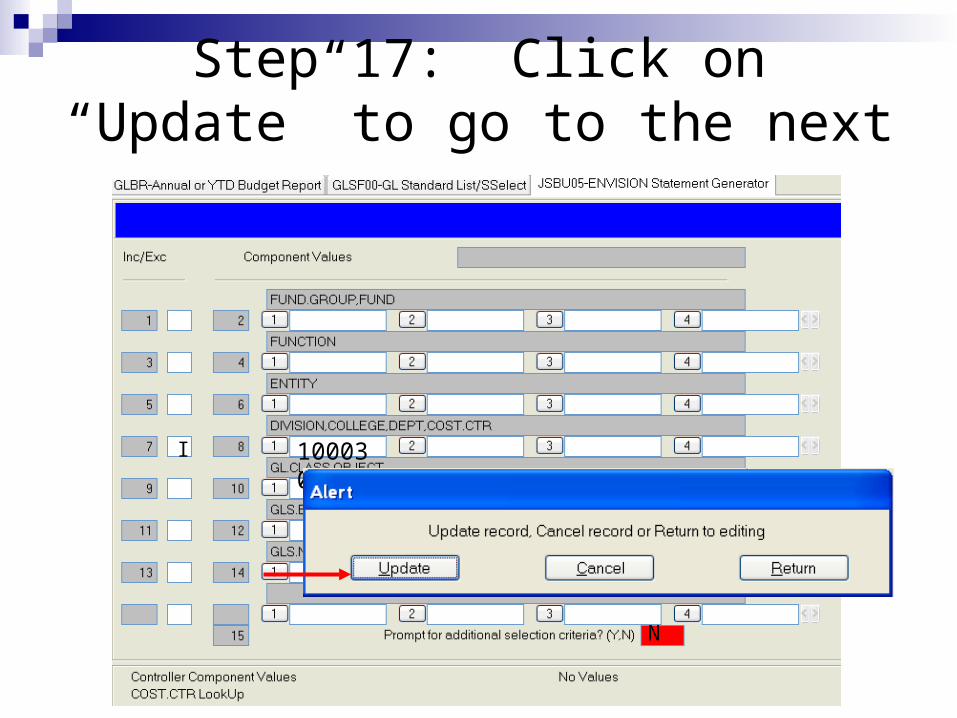
Step 17: Click on “Update” to go to the next screen
I 100030
N
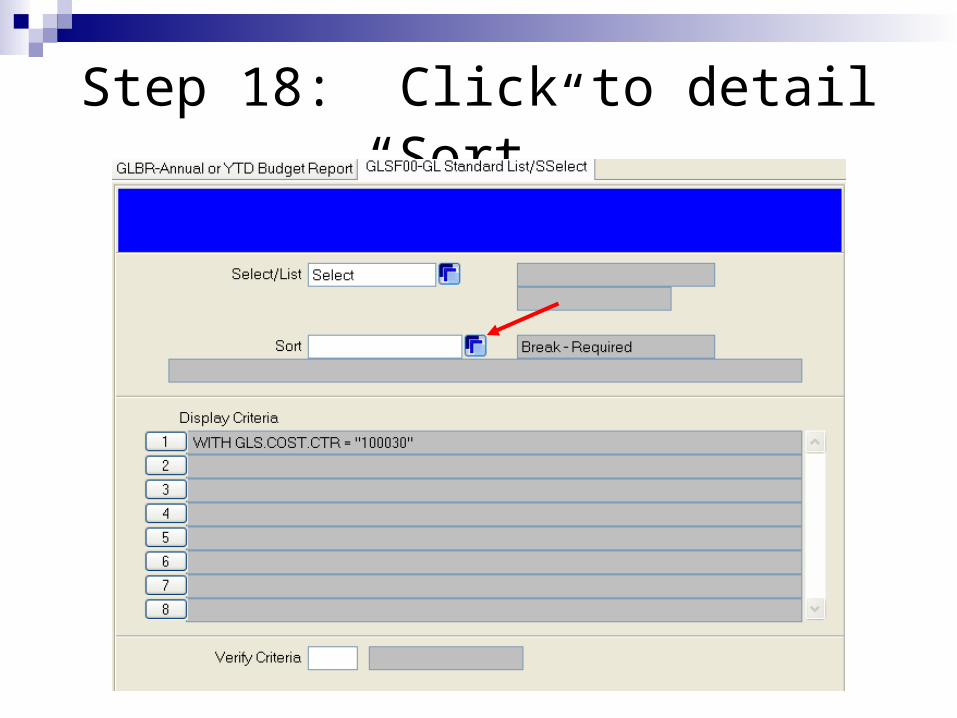
Step 18: Click to detail “Sort”
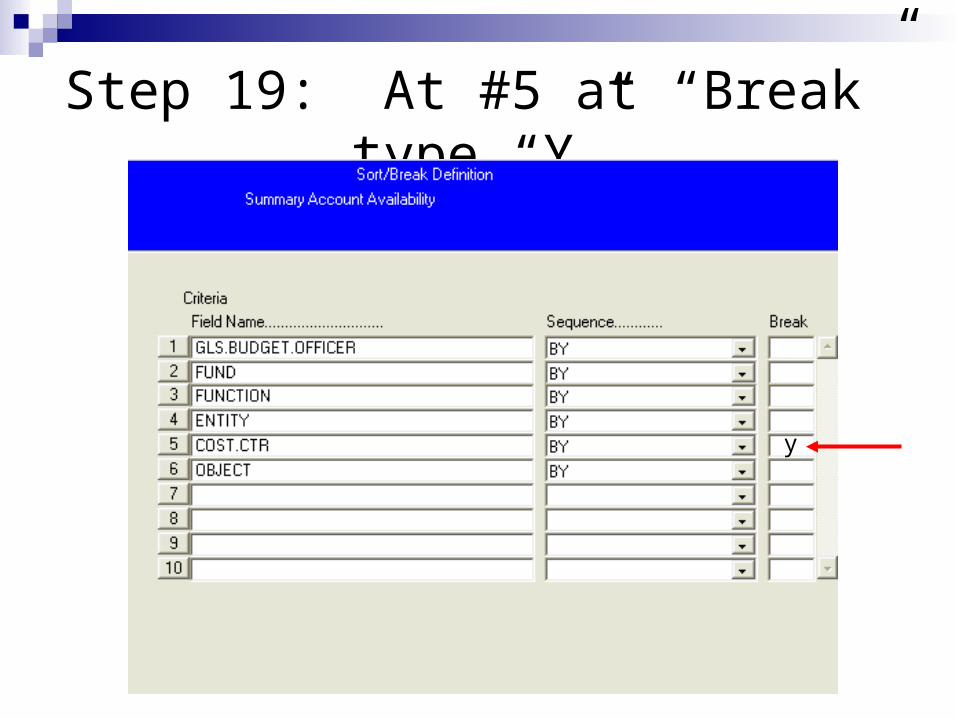
Step 19: At #5 at “Break” type “Y”
y
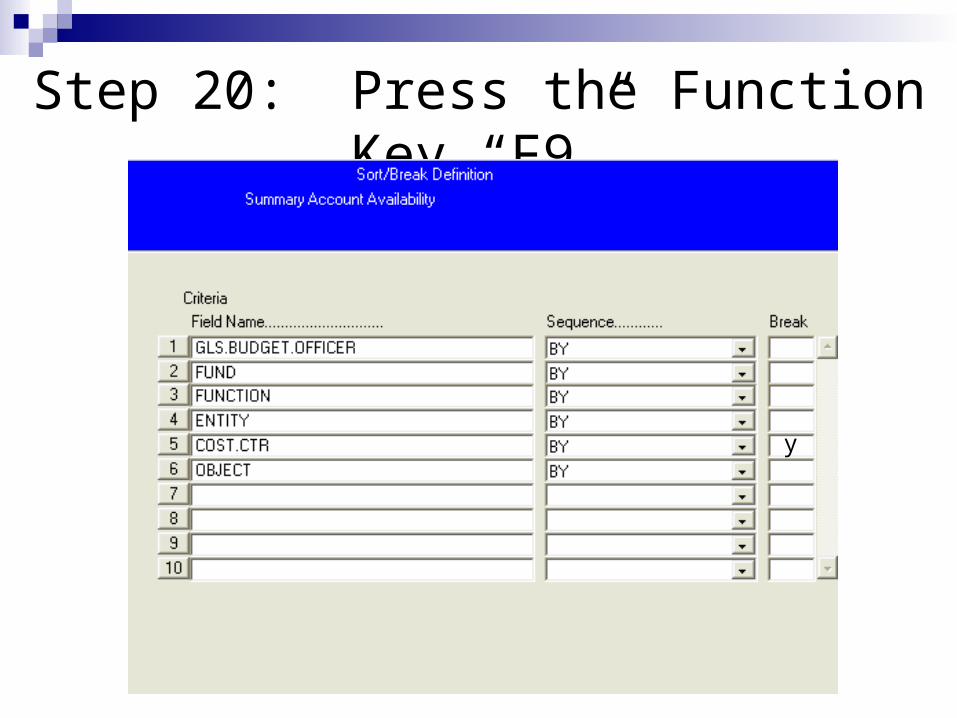
Step 20: Press the Function Key “F9”
y
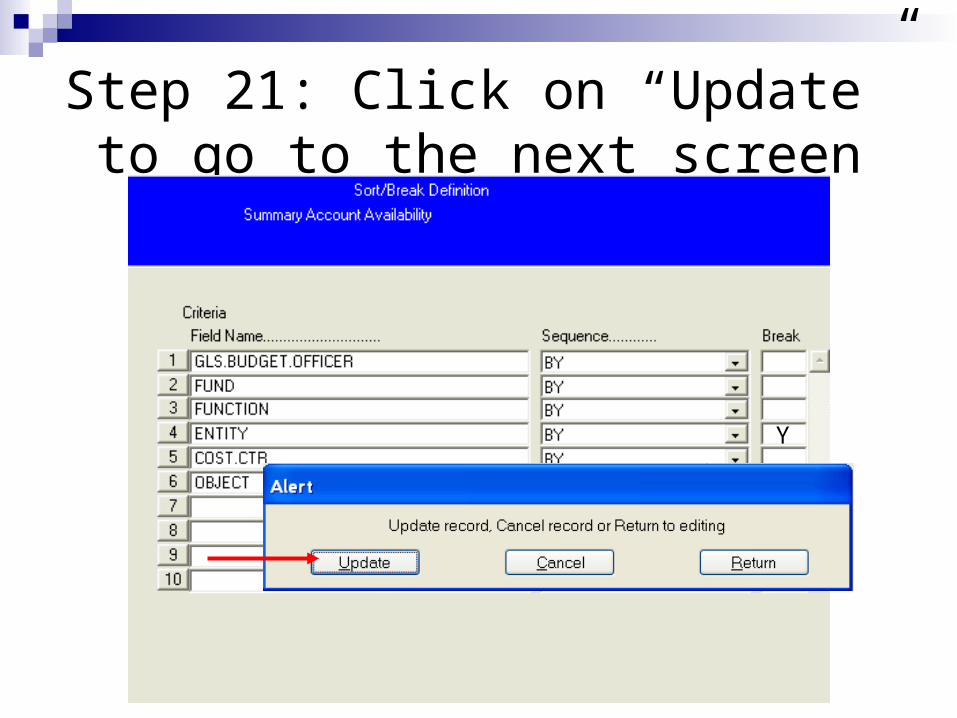
Step 21: Click on “Update” to go to the next screen
Y
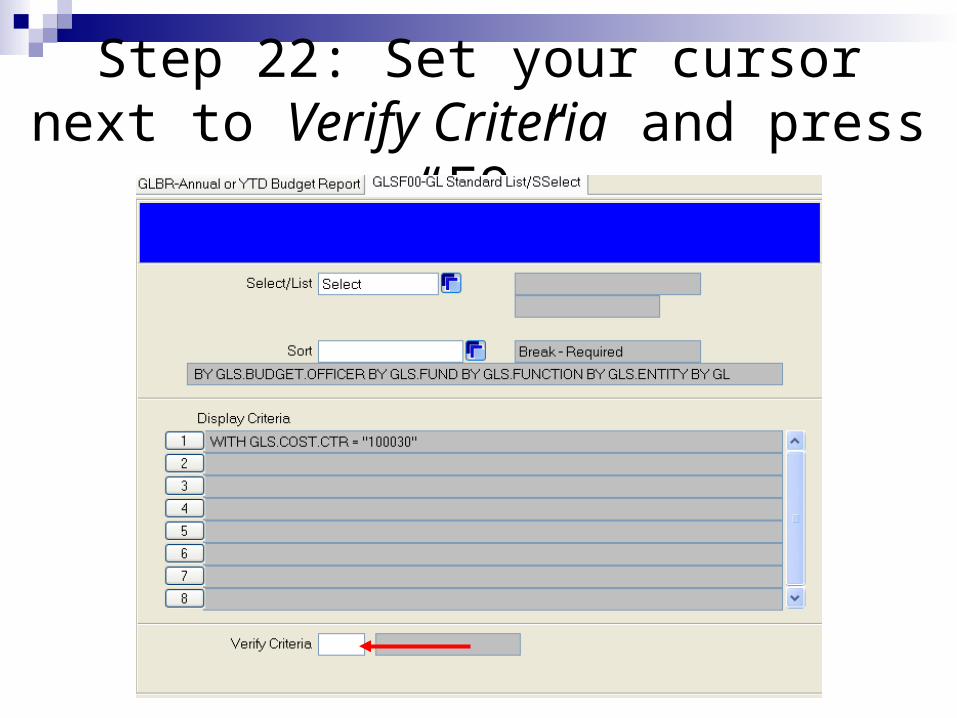
Step 22: Set your cursor next to Verify Criteria and press “F9”

Step 23: Click on “Update” to go to the next screen
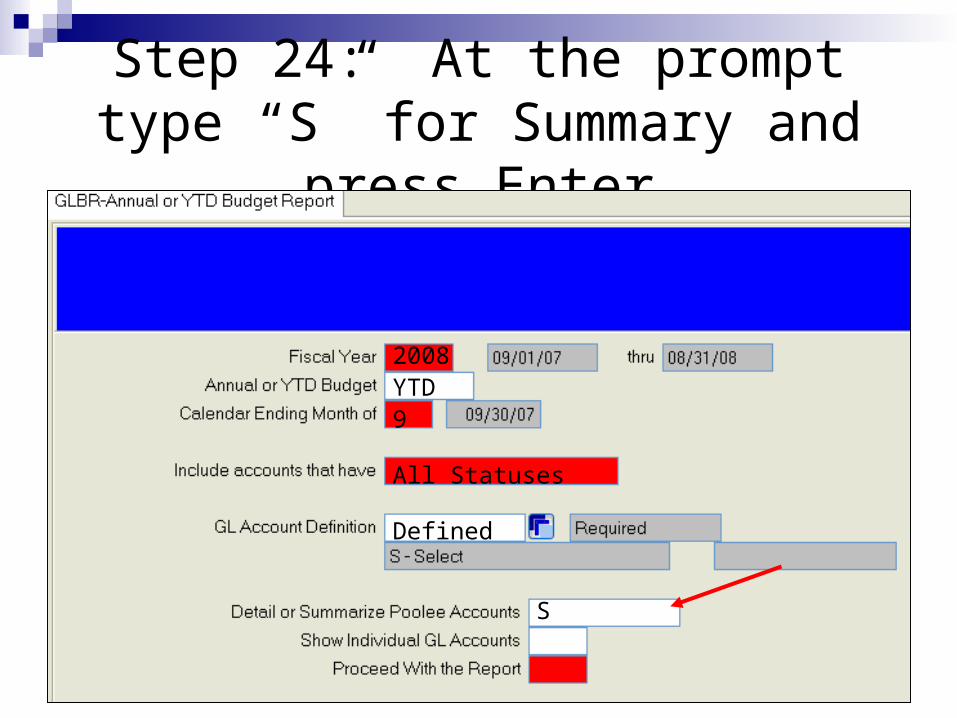
Step 24: At the prompt type “S” for Summary and press Enter
2008YTD9
All Statuses
Defined
S
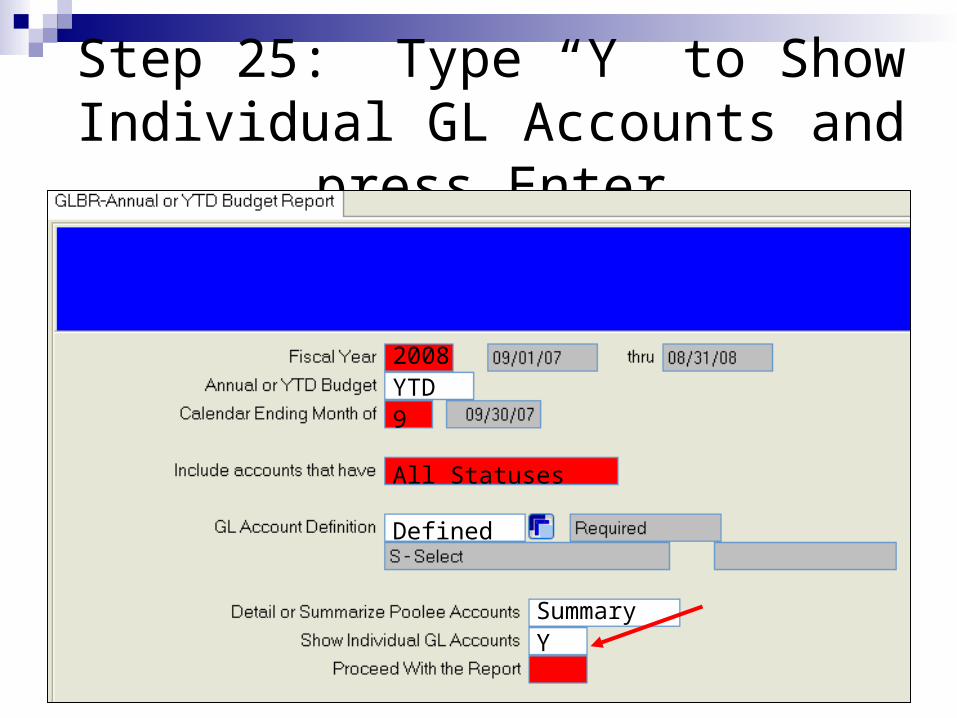
Step 25: Type “Y” to Show Individual GL Accounts and press Enter
2008YTD9
All Statuses
Defined
SummaryY
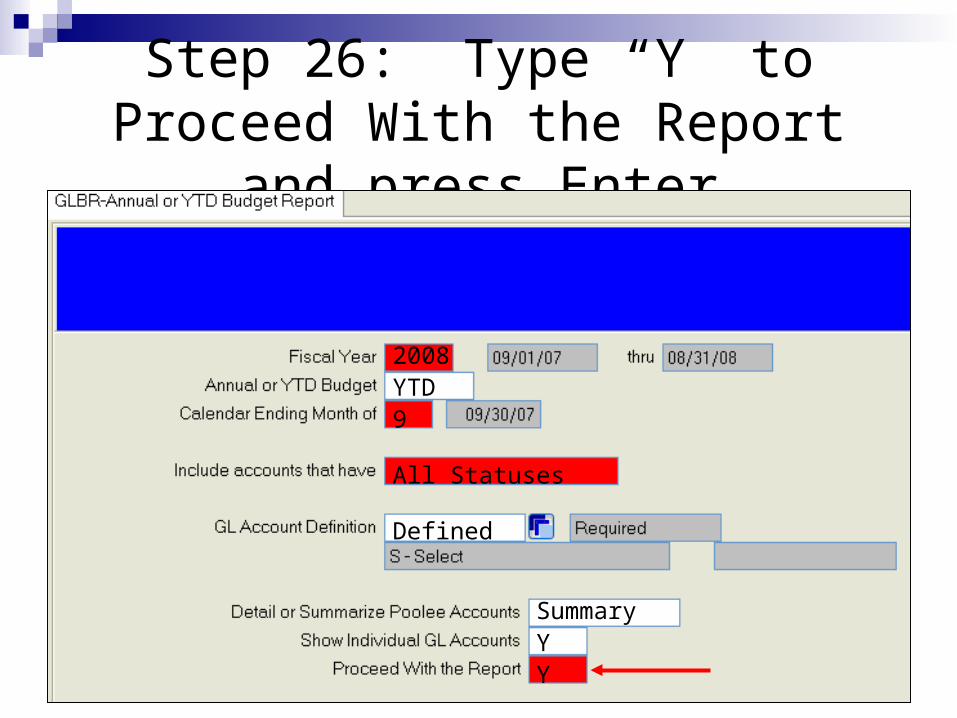
Step 26: Type “Y” to Proceed With the Report and press Enter
2008YTD9
All Statuses
Defined
SummaryYY
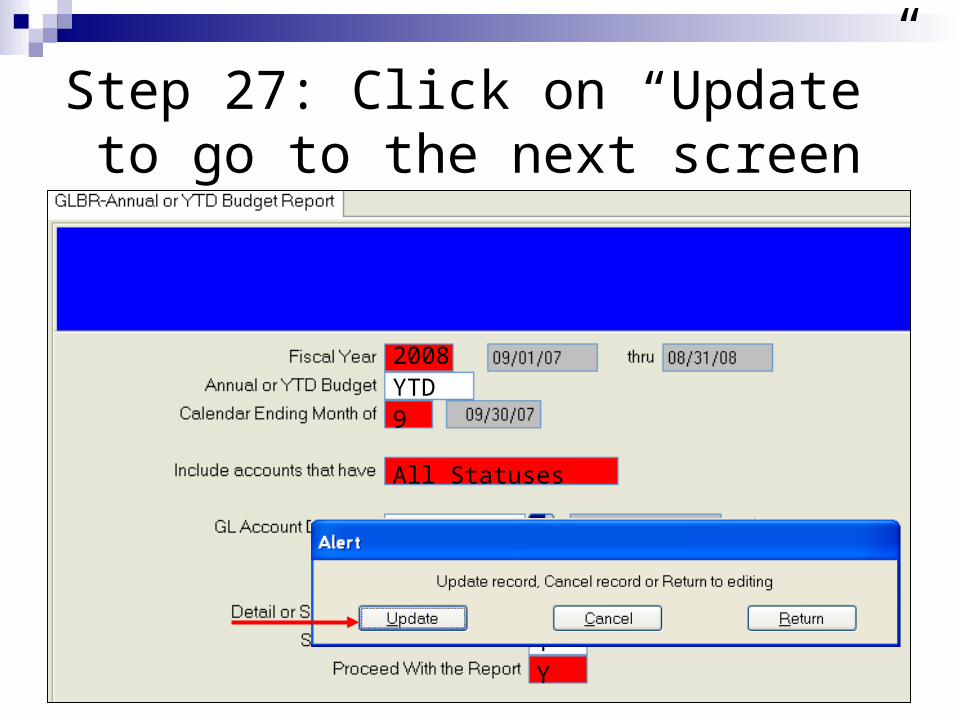
Step 27: Click on “Update” to go to the next screen
2008YTD9
All Statuses
Defined
SummaryYY
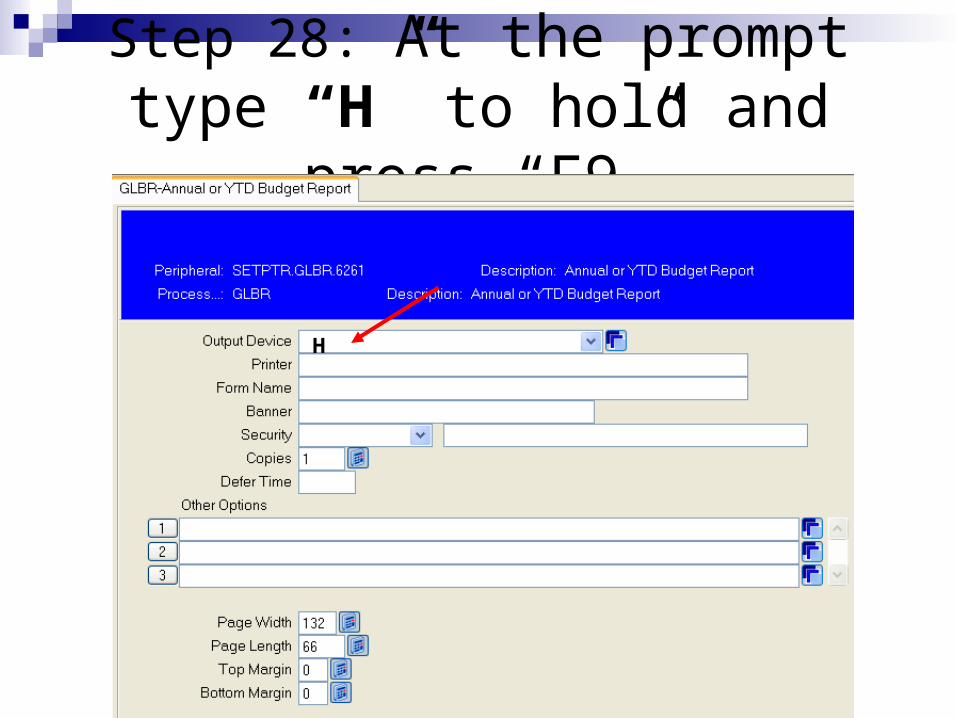
Step 28: At the prompt type “H” to hold and press “F9”
H
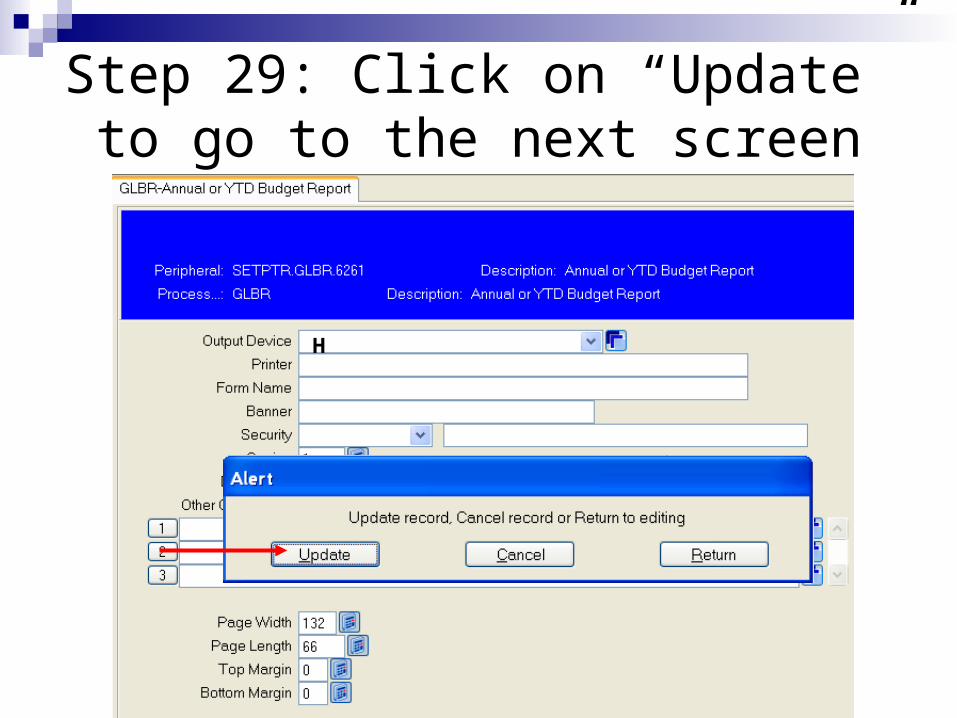
Step 29: Click on “Update” to go to the next screen
H

Step 30: Press “F9”
Step 31: Click on “Update” to go to the next screen
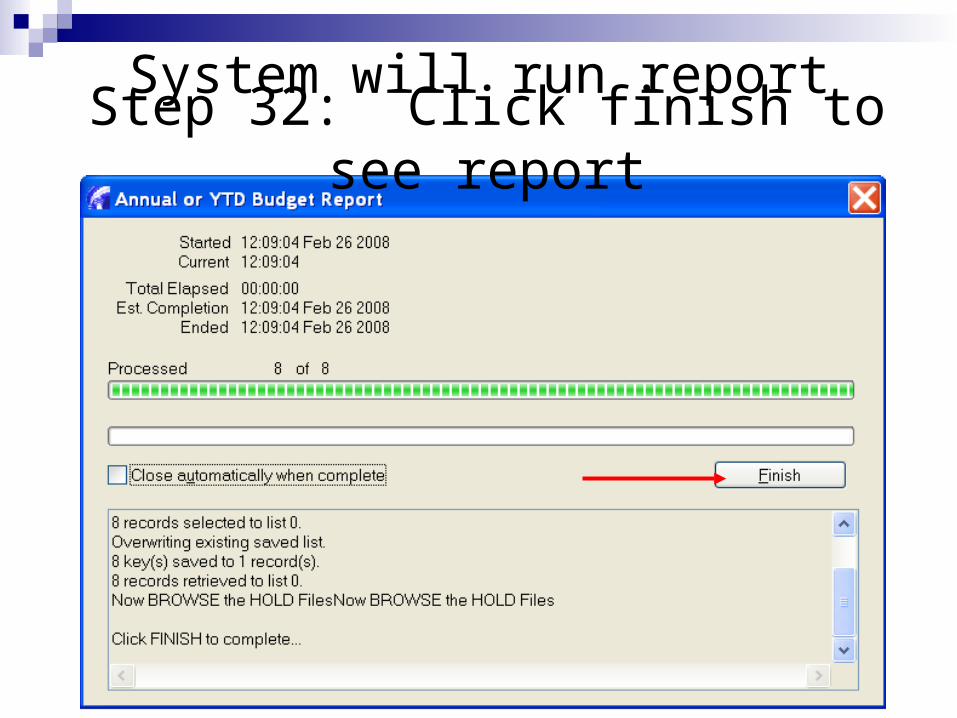
System will run reportStep 32: Click finish to see report

Step 33: To print report select the local printer button
(first printer from left to right)
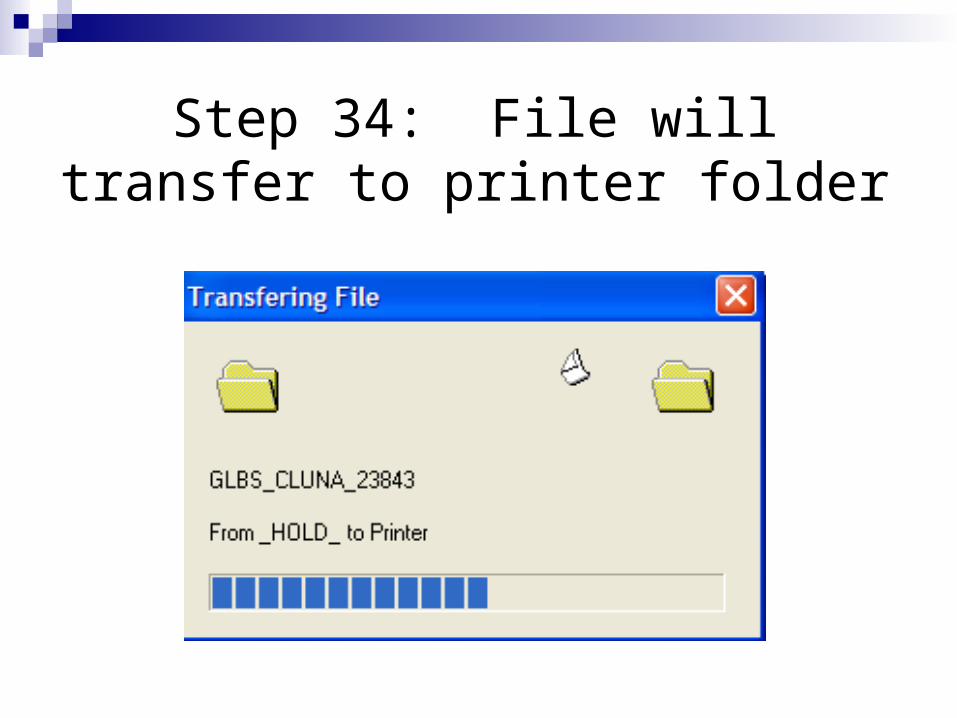
Step 34: File will transfer to printer folder
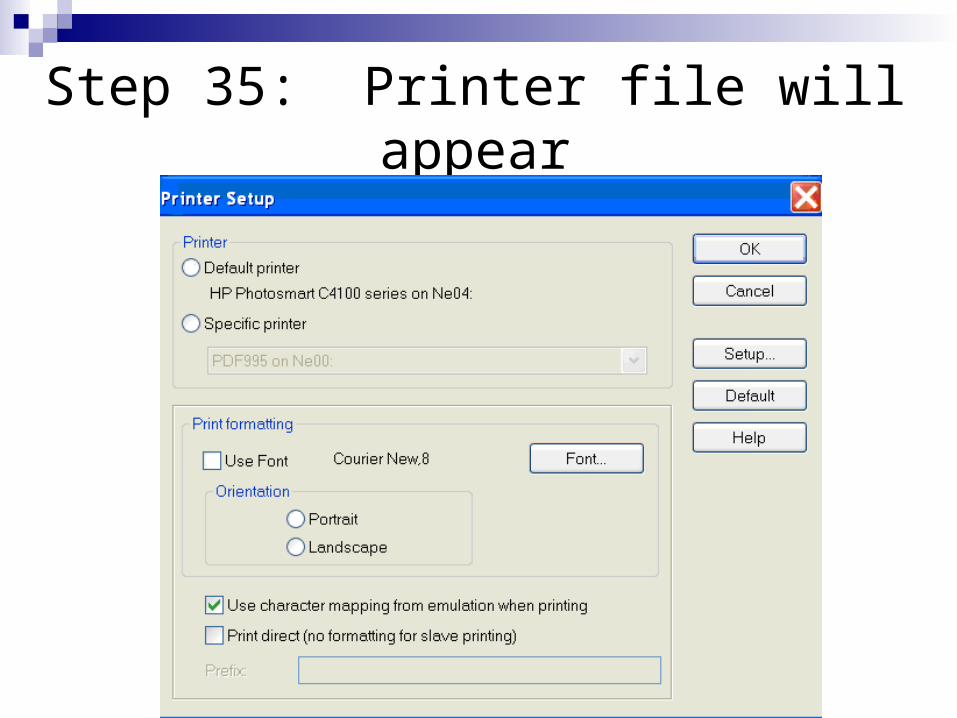
Step 35: Printer file will appear

Step 36: Select “Default Printer”

Step 37: Under print formatting select “Use Font”
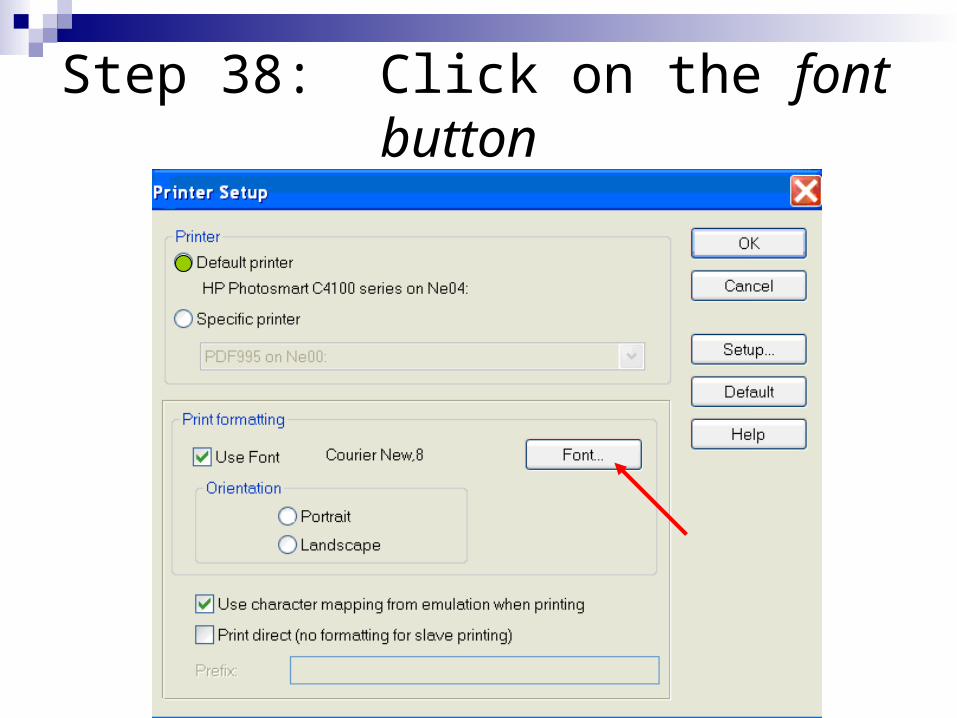
Step 38: Click on the font button
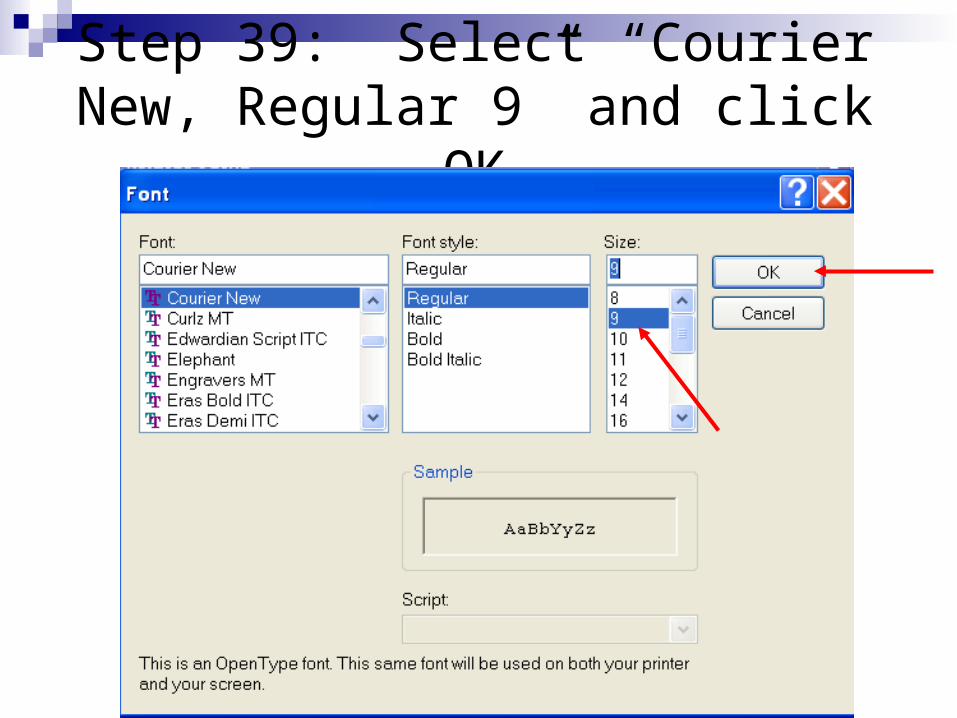
Step 39: Select “Courier New, Regular 9” and click OK
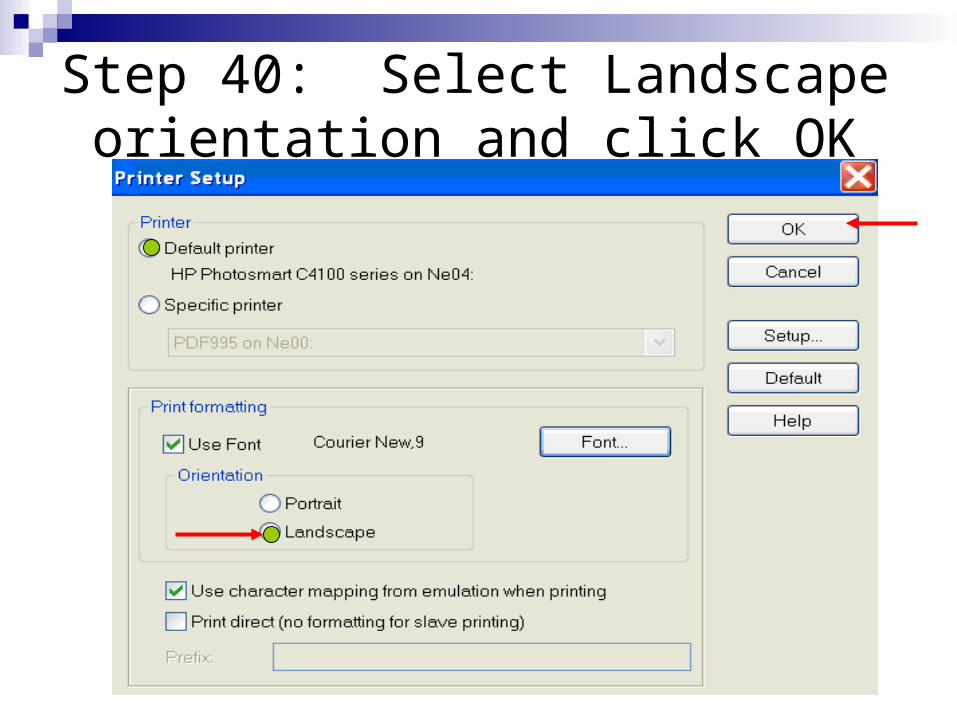
Step 40: Select Landscape orientation and click OK
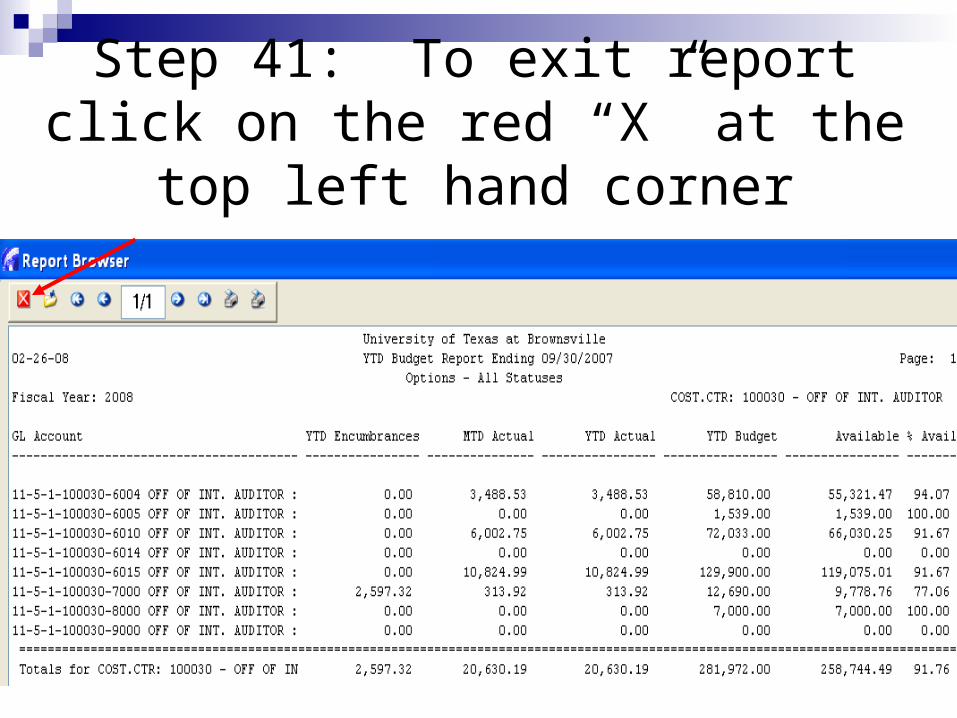
Step 41: To exit report click on the red “X” at the top left hand corner

Step 42: To exit the CF screen click on the red “X” in the middle of
your menu bar
GLBR

Thank you!