fsflyingschool 2018 for x-plane 11 and x-plane 10 · smith can help in x-plane 11 and x-plane 10...
TRANSCRIPT
FSFlyingSchool ____________________________________________________
________________________________________________________ 1
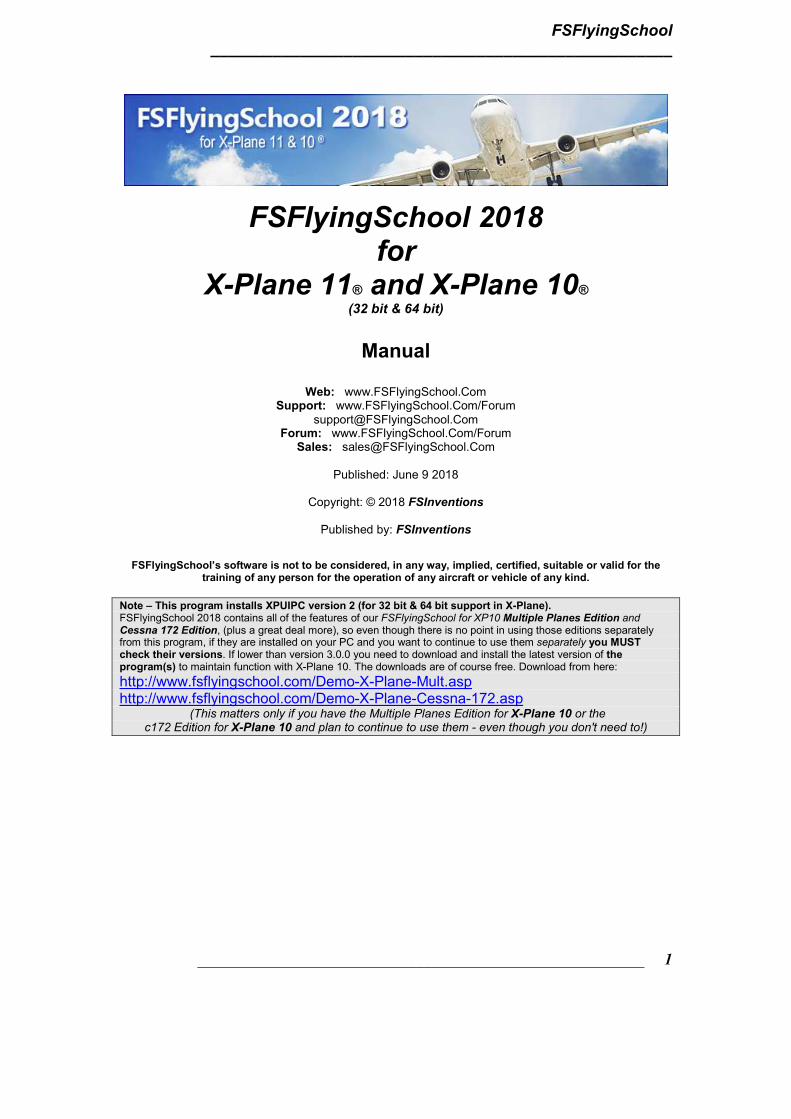
FSFlyingSchool 2018 for
X-Plane 11® and X-Plane 10® (32 bit & 64 bit)
Manual
Web: www.FSFlyingSchool.Com
Support: www.FSFlyingSchool.Com/Forum [email protected]
Forum: www.FSFlyingSchool.Com/Forum Sales: [email protected]
Published: June 9 2018
Copyright: © 2018 FSInventions
Published by: FSInventions
FSFlyingSchool’s software is not to be considered, in any way, implied, certified, suitable or valid for the
training of any person for the operation of any aircraft or vehicle of any kind.
Note – This program installs XPUIPC version 2 (for 32 bit & 64 bit support in X-Plane). FSFlyingSchool 2018 contains all of the features of our FSFlyingSchool for XP10 Multiple Planes Edition and Cessna 172 Edition, (plus a great deal more), so even though there is no point in using those editions separately from this program, if they are installed on your PC and you want to continue to use them separately you MUST check their versions. If lower than version 3.0.0 you need to download and install the latest version of the program(s) to maintain function with X-Plane 10. The downloads are of course free. Download from here:
http://www.fsflyingschool.com/Demo-X-Plane-Mult.asp
http://www.fsflyingschool.com/Demo-X-Plane-Cessna-172.asp
(This matters only if you have the Multiple Planes Edition for X-Plane 10 or the c172 Edition for X-Plane 10 and plan to continue to use them - even though you don't need to!)

FSFlyingSchool ____________________________________________________
2 ________________________________________________________
Note – this software contains a free demo of the FSFlyingSchool for X-Plane Douglas DC-3 Detail Pack
If you fly within the FSFlyingSchool for X-Plane demo area (which runs from KGRB Green Bay to KORD Chicago airports) you will experience a whole new, detailed level of instruction when flying the classic Douglas DC-3! Read the FSFlyingSchool for X-Plane Douglas DC-3 Detail Pack Manual installed on your PC when you installed FSFlyingSchool for X-Plane. Start Menu... Programs... FSFlyingSchool 2018... FSFlyingSchool for X-Plane Douglas DC-3 Detail Pack Manual. If you would like to fly anywhere with this feature, you can purchase the full FSFlyingSchool for X-Plane
Douglas DC-3 Detail Pack from www.FSFlyingSchool.com or from a shop of your choice.
Note – this software contains a free demo of the
FSFlyingSchool for X-Plane Cherokee 140 Detail Pack If you fly within the FSFlyingSchool for X-Plane demo area (which runs from KGRB Green Bay to KORD Chicago airports) you will experience a whole new, detailed level of instruction when flying the beautiful Cherokee 140! Read the FSFlyingSchool for X-Plane Cherokee 140 Detail Pack Manual installed on your PC when you installed FSFlyingSchool for X-Plane. Start Menu... Programs... FSFlyingSchool 2018... FSFlyingSchool for X-Plane Cherokee 140 Detail Pack Manual. If you would like to fly anywhere with this feature, you can purchase the full FSFlyingSchool for X-Plane
Cherokee 140 Detail Pack from www.FSFlyingSchool.com or from a shop of your choice.
Note – this software contains a free demo of the FSFlyingSchool for X-Plane Baron 58 Detail Pack
If you fly within the FSFlyingSchool for X-Plane demo area (which runs from KGRB Green Bay to KORD Chicago airports) you will experience a whole new, detailed level of instruction when flying the beautiful Beechcraft Baron 58! Read the FSFlyingSchool for X-Plane Beechcraft Baron 58 Detail Pack Manual installed on your PC when you installed FSFlyingSchool for X-Plane. Start Menu... Programs... FSFlyingSchool 2018... FSFlyingSchool for X-Plane Beechcraft Baron 58 Detail Pack Manual. If you would like to fly anywhere with this feature, you can purchase the full FSFlyingSchool for X-Plane
Beechcraft Baron 58 Detail Pack from www.FSFlyingSchool.com or from a shop of your choice.
Note – this software contains a free demo of the
FSFlyingSchool for X-Plane Voice Command Pack If you fly within the FSFlyingSchool for X-Plane demo area (which runs from KGRB Green Bay to KORD Chicago airports) you will be able to talk to your instructors! Read the FSFlyingSchool for X-Plane Voice Command Pack Manual installed on your PC when you installed FSFlyingSchool for X-Plane. Start Menu... Programs... FSFlyingSchool 2018... FSFlyingSchool for X-Plane Voice Command Pack Manual. If you would like to fly anywhere with this feature, you can purchase the full FSFlyingSchool for X-Plane Voice
Command Pack from www.FSFlyingSchool.com or from a shop of your choice.
The Voice Command Pack works with ALL of our X-Plane products for Windows!
FSFlyingSchool ____________________________________________________
________________________________________________________ 3
Introduction Welcome to FSFlyingSchool! To get the most out of this product, please read this manual. FSFlyingSchool uses sophisticated logic to analyze your flying technique, to help you refine and demonstrate your flying skills. Several of FSFlyingSchool’s methods will be new, even to veteran simulation pilots, so please read about them in this manual, to discover how FSFlyingSchool works, what it is telling you, and why. This version can be used with lots of different airplanes, small, medium and large, and the list of supported airplanes is growing. All these planes are supported at the same general level of detail which has been so popular with our FSX and Prepar3D add-ons and for which we have won 5 consecutive PC Pilot Magazine Classic Product Awards. In addition, the Cessna 172 and Cessna 208 are supported in a much deeper level of detail. The following airplanes are automatically supported in this version: Beechcraft Baron 58 (Carenado) (Optional detailed treatment!) Beechcraft Baron 58 (Supplied with X-Plane 11 + 10) (Optional detailed treatment!) Beechcraft Bonanza F33A (Carenado) Beechcraft King Air B200 (works with plane called 'KingAirB200_2.acf') Beechcraft King Air B200 (Carenado for X-Plane 11) Beechcraft King Air C90B (Carenado for X-Plane 10) Beechcraft King Air C90 (Carenado for X-Plane 11) Beechcraft King Air C90B (Supplied with X-Plane 11 + 10) Boeing 737-800 (EADT) Boeing 747-400 (Supplied with X-Plane 11 + 10) Boeing 777 Worldliner (VMAX) Boeing 777-200 (Supplied with X-Plane 10) Boeing 787 Dreamliner (VMAX) Cessna 152 II (Carenado) Cessna 172 (Carenado) (Detailed treatment!) Cessna 172 (Supplied with X-Plane 11 + 10) (Detailed treatment!) Cessna 208B Caravan (Carenado) (Detailed treatment!) Cessna 337 Skymaster (Carenado) Cessna 340 II (Carenado) Cessna CT210 Centurion II (Carenado) Cirrus C4 'The Jet' (Supplied with X-Plane 10) Cirrus SF50 (Supplied with X-Plane 11) Cirrus SR20 (vFlyteAir) Columbia 400 (Supplied with X-Plane 11 + 10) Diamond DA40-180 Diamond Star test airplane kindly donated by Shade Tree Micro Aviation Douglas DC-3 (vSkyLabs and others) (Optional detailed treatment!) Eclipse 550 NG (Aerobask) Epic E1000 Skyview (Aerobask) Lisa Airplanes Akoya (Aerobask) (land based operations only) Lockheed C-130 Hercules (Supplied with X-Plane 11 + 10) Lockheed L-1011 TriStar test airplane kindly donated by Wilson Aircraft McDonnell Douglas KC-10 Extender (Supplied with X-Plane 11 + 10) McDonnell Douglas MD 82 (Supplied with X-Plane 11) Mooney M20J (Carenado) Piaggio P180 Avanti Ferrari (Supplied with X-Plane 10) Piper PA-28 Archer II (Carenado) Piper PA-28 Arrow 200 (vFlyteAir) Piper PA-28 Cherokee 140 (vFlyteAir) (Optional detailed treatment!) Piper PA-32 Saratoga (Carenado) Piper PA-34 Seneca II (Carenado) Velocity V-Twin (Aerobask)
...and the list is growing.
IMPORTANT! FSFlyingSchool expects the name of the folder in which an aircraft is installed on
your PC to be the default name used by the aircraft's publisher. If the folder name is changed it will not be supported by FSFlyingSchool 2018 for X-Plane 11 and X-Plane 10. You can add support for as many additional planes as you like - full instructions are provided below in this manual - you only need to provide a little data about the plane and you're all set!

FSFlyingSchool ____________________________________________________
4 ________________________________________________________
Summary of new features in FSFlyingSchool 2018 v 6.3.0
Now includes DEMO of exciting new 'Douglas DC-3 Detail Pack' add-on: Your chief instructor Mr Smith is ready to help you fly this aircraft expertly in X-Plane with this new, optional add-on pack for FSFlyingSchool 2018 for X-Plane 11 and 10. Try it all out for free, for as long as you like, in the FSFlyingSchool demo area (which runs from KGRB Green Bay to KORD Chicago airports). See separate manual on your PC for details.

FSFlyingSchool ____________________________________________________
________________________________________________________ 5
Summary of new features in FSFlyingSchool 2018 v 6.2.0
Now includes DEMO of exciting new 'Cherokee 140 Detail Pack' add-on: Your chief instructor Mr Smith is ready to help you fly this aircraft expertly in X-Plane with this new, optional add-on pack for FSFlyingSchool 2018 for X-Plane 11 and 10. Try it all out for free, for as long as you like, in the FSFlyingSchool demo area (which runs from KGRB Green Bay to KORD Chicago airports). See separate manual on your PC for details.

FSFlyingSchool ____________________________________________________
6 ________________________________________________________
Summary of new features in FSFlyingSchool 2018 v 6.1.2
Now includes DEMO of exciting new 'Baron 58 Detail Pack' add-on: Your chief instructor Mr Smith is ready to help you fly this aircraft expertly in X-Plane with this new, optional add-on pack for FSFlyingSchool 2018 for X-Plane 11 and 10. Try it all out for free, for as long as you like, in the FSFlyingSchool demo area (which runs from KGRB Green Bay to KORD Chicago airports). See separate manual on your PC for details.
FSFlyingSchool ____________________________________________________
________________________________________________________ 7
Summary of new features in FSFlyingSchool 2018 v 6.0.0
Now includes exciting new 'Navigator Pack': Get ready to become an expert at understanding and following flight plans - your chief instructor Mr Smith can help in X-Plane 11 and X-Plane 10 with the new built-in Navigator Pack!
There's more - The Navigator Pack also contains the new Taxiway Tips feature! See below for details. It's time to share your flight plans with your instructor! We all know that a flight is so much more interesting, realistic and challenging when a flight plan is filed and now it's time to load your flight plan into FSFlyingSchool as part of your pre-flight preparation. Your chief instructor Mr Smith will help you master flying flight plans correctly in X-Plane 11 and X-Plane 10. The correct understanding and following of a flight plan can be challenging so it is essential that you read this description of the Navigator Pack, which explains what it does for FSFlyingSchool pilots. - Mr Smith is used with the Navigator Pack
He's your chief instructor and he's the one with navigation expertise, ready to give helpful tips, updates, instrument readings, monitor your flight plan navigation skills and so much more!
- Flight Plan Files The Navigator Pack reads the standard format FMS flight plan files popular with X-Plane pilots. This is the format used by X-Plane GPSs and many other flight planners.
- Interactive Flight Plan Advice is optional
If you want to hear it, turn on the 'Flight Plan Advice' option at the Pilots Screen of FSFlyingSchool. You'll hear your instructor describing the flight plan and giving instruction and advice on it.
- Real Airport Data The new “Real Airport Data” button at the Flight Plan Page will open a browser containing detailed real world information about your destination airport with links to lots of useful resources from the splendid SkyVector website for all airports and also the excellent AirNav website for U.S. airports.
- Flight plan areas where Mr Smith will help
Get all the automatic details and help from your instructor including: Flight plan distance remaining Flight plan time remaining Waypoint radio frequency Course to a VOR Waypoint distance Course to an NDB Time to waypoint Fuel to destination Descent rate to destination Gross weight Visibility and wind NAV1 current NAVAID Ground speed Above ground level. ...and a lot more!
FSFlyingSchool ____________________________________________________
8 ________________________________________________________
- VORs - NDBs - Fixes - Waypoints
Master VOR and NDB navigation by asking chief instructor Mr Smith to give automatic advice on tuning and using these NAVAIDs at flight plan waypoints. Get help navigating waypoints in a flight plan by having your chief instructor Mr Smith announce them before you reach them. He’ll tell you what they are and advise you on the turn you’ll need to make when you get there. You'll become an expert in flying flight plans correctly by having chief instructor Mr Smith advise you along each leg of the plan with information updated in real time as you fly your flight plan.
- Mr Smith is used with Taxiway Tips
As your chief instructor, he's the one who explains signs, markings, lights and more! - Taxiway and runway tutorial advice is optional
If you want to hear this advice, turn on the 'Taxiway Tips' option at the Settings Screen of FSFlyingSchool.
- Get ready to learn - here are some of the taxiway and runway subjects Mr Smith will explain to you
Runway holding positions ILS critical area boundaries Blue taxiway lighting Chevrons on a surface aligned with the end of a runway Red runway lighting Green taxiway lighting Location signs Runway starter extensions Destination signs Yellow runway lighting Direction signs Boundaries between movement and non-movement areas ...and a lot more!
- All Taxiway Tips tutorial advice is in taxi mode and at airports with modern taxiways
You'll get tutorial advice on taxiways, runways, markings, lights and more when you are at an airport with modern taxiways. Our pilots explained to us that they don't want to get this advice when they are bush flying or at a tiny grass strip airport! Furthermore, Mr Smith knows pilots want advice on taxiing when they are taxiing, so you will get this when your flight mode is 'taxiing' and not in any other flight mode. In order to avoid these tips sounding repetitive, they are chosen randomly so you won't keep hearing the same advice as you start each flight.
(For full details of these new features, see the Sound Setup, Flight Plan Page and Settings Page section of this manual).
FSFlyingSchool ____________________________________________________
________________________________________________________ 9
Now includes powerful set of new 'Autopilot Tutor' features: Get ready to learn about the autopilot and its functions - your chief instructor Mr Smith can help in X-Plane 11 and X-Plane 10 with the new built-in Autopilot Tutor Pack!. Autopilot units are common nowadays and can save the pilot a great deal of effort when used correctly. Your chief instructor Mr Smith will help you master the autopilot in X-Plane 11 and X-Plane 10. Correct use of the autopilot can be challenging so it is essential that you read this description of this feature, which explains what it does for FSFlyingSchool pilots. - Mr Smith is used with Autopilot Tutor
As your chief instructor, he's the one with autopilot expertise, ready to give tips, monitor your autopilot skills and so much more!
- Autopilot Units The Autopilot Tutor Pack has been developed using the autopilot units supplied with X-Plane. Other units may also work well with the Autopilot Tutor Pack, but some will not. Simply try out the Autopilot Tutor Pack by flying FSFlyingSchool within the free demo area.
- Interactive Autopilot advice is optional
If you want to hear it, turn on the 'Monitor Autopilot' option at the Pilots Screen of FSFlyingSchool. You'll hear your instructor describing the autopilot and giving instruction and advice on it, including: Autothrottle Speed hold Speed Selection Heading Hold Heading Selection Altitude Hold Altitude Selection Vertical Speed Selection Autopilot Master NAV Hold
- Autopilot areas where Mr Smith will help
Autopilot speed selected too high - above vNE (never exceed speed) for aircraft Advice on having descended to within 1,000 feet of target altitude When autothrottle is on - you can now set a speed to hold Approach hold can only hold approach if speed is appropriate Autopilot speed selected is below landing configuration stall speed - you need to increase it Altitude selected is under 500 feet above destination runway - caution Advice on having climbed within 1,000 feet of target altitude Be sure autopilot altitude value is at or below service ceiling If vertical speed selected is rapid descent - it can be uncomfortable and lead to flying too fast Altitude selected is under 500 feet above surface currently beneath aircraft - caution Autopilot speed selected too high - must be below 250 KIAS below 10,000 feet MSL Autopilot is on so it will control the aircraft - you need to monitor and control the autopilot Altitude selected is very near the elevation of destination runway - caution If vertical speed selected is rapid climb - it can lead to a stall - watch airspeed Autopilot speed selected is below stall speed - caution
FSFlyingSchool ____________________________________________________
10 ________________________________________________________
If vertical speed is very low it can waste fuel and may conflict with ATC requirements Autopilot disengaged - you control the aircraft Descent to altitude selected would make contact with surface currently beneath aircraft - caution Autopilot speed selected is below flaps up stall speed - you will need flaps Advice on having reached target altitude ...and so much more!
- Autopilot tutorial advice is optional
If you want to hear this general advice, turn on the 'Autopilot Tips' option at the Settings Screen of FSFlyingSchool. Chief instructor Mr Smith will give you general instruction on the autopilot unit and more when you are flying during quieter periods. In order to avoid these tips sounding repetitive, they are chosen randomly so you won't keep hearing the same advice each flight.
- Get ready to learn - here are some of the areas Mr Smith will explain to you
Intersecting the ILS glideslope from below How to slow down to a target speed Disengaging autopilot (or not) before landing Speed management required to keep on glideslope Importance of correcting drifting heading indicator Wasted turns through poor use of heading bug Immediate firm control of aircraft after autopilot is disengaged Disengaging autopilot if flight path is not right ...and a lot more!
(For full details of these new features, see the Sound Setup and the Settings Page section of this manual).
Now includes automatic support for 11 more exciting new planes! We've listened to FSFlyingSchool X-Plane pilots and put together automatic support for a thrilling set of additional planes. If you have these planes, FSFlyingSchool will now work with them with no extra configuration from you. We proudly add automatic support for: Beechcraft King Air C90 (Carenado for X-Plane 11) Beechcraft King Air B200 (Carenado for X-Plane 11) Cirrus SF50 (Supplied with X-Plane 11) Cirrus SR20 (vFlyteAir) Eclipse 550 NG (Aerobask) Epic E1000 Skyview (Aerobask) Lisa Airplanes Akoya (Aerobask) (land based operations only) McDonnell Douglas MD 82 (Supplied with X-Plane 11) Piper PA-28 Arrow 200 (vFlyteAir) Piper PA-28 Cherokee 140 (vFlyteAir) Velocity V-Twin (Aerobask) We hope you have some great flights in these planes!
FSFlyingSchool ____________________________________________________
________________________________________________________ 11
Summary of new features in FSFlyingSchool 2017 v 5.0.0
We've listened to X-Plane pilots and included a powerful set of new 'PRO' features: Enhanced Instructor Awareness!
We have made several improvements to FSFlyingSchool, including new areas requiring the pilot's attention. The ever watchful chief instructor Mr Smith is looking at each pilot's performance in even greater detail with the arrival of 'PRO' features for FSFlyingSchool 2017. Here are some of the enhancements:
- If you are about to land but are approaching the runway at excessive speed, Mr Smith will advise that you either do something about slowing down or go around.
- Once you begin your take off run down the runway - get moving! Accelerate! Mr Smith knows the runway behind you is useless.
- If you are coming in to land and you are not heading into the wind, Mr Smith is going to let you know!
- Steering problems on take-off run? Mr Smith will let you know what to do. - Most larger aircraft use flaps for take off and even if Mr Smith is not directly familiar with the
airplane, you'll get a reminder to check its procedures if flaps are not set at take off. - The autopilot is a very useful tool, but you don't need it for taxiing or at take off and Mr Smith
knows this. - If stationary, engines should be started with the parking brake applied. If not, Mr Smith will give
you some advice. - Ready for take off? ATC is expecting you to get going and so is Mr Smith. Don't just sit there on
the runway. - Once you have landed, Mr Smith will expect you to slow down so you can get to a safe taxiing
speed. Do not use up runway you don't need just because you've forgotten to slow down! - Your throttles will reward considerate use and punish harsh treatment. Mr Smith is now
watching and will let you know if you are increasing or decreasing them without care. - Mr Smith is watching to make sure you don't run the throttles too high with the parking brake
on. - No-one wants to land with the parking brake on. Mr Smith will help you do the right thing. - And more...!
Interactive VOR Navigation Help
This new option at the Pilots Screen means Mr Smith will be watching closely when you are navigating using VOR navigation aids. He will let you know the meaning of the different indications and components of your aircraft's VOR Indicator, such as the TO/FROM/OFF flag, the Omni Bearing Selector (OBS), and the Course Deviation Indicator (CDI). You'll get this information as you fly and change settings and of course as the instruments themselves react to your flight path. He'll also describe at length the general aspects of the different elements of VOR navigation as you fly along and what to expect instruments to do as you get close to and cross over a VOR station. You'll soon be a VOR PRO! (For full details of these new features, see the Sound Setup section of this manual).
FSFlyingSchool ____________________________________________________
12 ________________________________________________________
Interactive Aviation Help
This new option means that during flights, chief instructor Mr Smith will share his aviation knowledge with you, covering cockpit instruments, controls, techniques and much more. With Mr Smith's help you will soon be familiar with:
- Flaps - Mixture - PAPI - VORs - Turn technique - VASI - Stall recovery - Autopilot functions (there are a lot of them!) - Transponder use and codes - Crossfeeds - Fuel pumps - Carburetor heat - Anti-ice - Decision height - ...and dozens more aviation subjects.
Includes optional text captions so you can read the advice too. A great way to learn - and all while cruising along! (For full details of these new features, see the Settings Page section of this manual).
Instant Help
This new option lets the pilot get spoken tips from chief instructor Mr Smith on aircraft instruments, switches and controls when they are used during flights.
- Instant spoken help you can use immediately while flying in X-Plane. - The Instant Help option at the Settings Screen of FSFlyingSchool 2017 adds a whole new level
of fun and learning to your flights with X-Plane. - You hear and see help and tips for controls, instruments and switches immediately while you
are flying! - Get ready for help when you use COM radios, NAV radios, autopilot functions like heading
hold, speed hold, altitude hold, spoilers, autobrakes, gear, lights, pitot heat and so much more. - Do you ever think you could use some help up there in the Simulated Skies? FSFlyingSchool
2017 Instant Help is ready to help you get familiar with those switches, dials, buttons etc that seem to fill the cockpit and flight deck.
- Sit back and enjoy as you hear the voice of a friendly instructor who explains the role of the device you operated, immediately, in real time, with optional text captions so you can read the advice too.
- Once you operate a device, you won't hear the explanation again for a while: this is to avoid repetition when, for example, turning a device on and off.
- If you prefer, you can turn off the voice completely and just retain the text captions for reference during your flights. Alternatively, you can turn off the captions and just listen to the voice of the instructor.
- Configure the FSFlyingSchool 2017 Instant Help option the way you want it! (For full details of these new features, see the Settings Page section of this manual).

FSFlyingSchool ____________________________________________________
________________________________________________________ 13
We've also included a powerful set of new 'Weather Tutor' features:
Get ready to learn about the effects of temperature, elevation, dew point, crosswinds and a great deal more. Your chief instructor Mr Smith can help in X-Plane 11 and X-Plane 10. This can be a complex subject and it is essential that you read this full detailed description of this feature, which explains what it does for FSFlyingSchool pilots. IMPORTANT - In order to use the real crosswind techniques described by Mr Smith, you need to make sure that your are able to control the rudder and ailerons separately. While all of the features in the Weather Tutor pack apply to small and medium sized aircraft, some of them will not be heard when the pilot is flying a large aircraft as they are not applicable. - Mr Smith is the man for Weather Tutor
As your chief instructor, he's the one who explains temperature, elevation, dew point, precipitation, crosswind techniques and more!
- Interactive weather advice is optional
If you want to hear it, turn on the 'Monitor Weather' option at the Pilots Screen of FSFlyingSchool 2017. You'll hear your instructor describing the current weather and giving instruction and advice on it.
- Interactive crosswind advice is optional
If you want to hear it, turn on the 'Monitor Crosswinds' option at the Pilots Screen of FSFlyingSchool 2017. You'll hear crosswind take off and landing instruction right when you need it!
- Weather and crosswind tutorial advice is optional
If you want to hear this general advice, turn on the 'Weather Tips' option at the Settings Screen of FSFlyingSchool. Chief instructor Mr Smith will give you general instruction on weather and more when you are flying during quieter periods. In order to avoid these tips sounding repetitive, they are chosen randomly so you won't keep hearing the same advice each flight.
- Get ready to learn - here are some of the areas Mr Smith will explain to you (Note that in addition to weather, the Weather Tutor covers several bonus subjects that are not strictly weather but still essential to safe flight.) Effects of temperature-dew point spread Considerations when flying in low light Considerations when flying in low visibility Considerations when flying in the presence of clouds Considerations when flying in low temperatures Crosswind landing technique Crosswind take-off technique Crosswind take-off roll aileron use Crosswind landing roll aileron use Take-off from a high elevation Landing at a high elevation Take-off at a high temperature Landing at a high temperature Take-off from a wet grass runway Take-off from a dry grass runway Landing at a wet grass runway Landing at a dry grass runway Landing at a wet paved runway ...and a lot more!
- Weather Add-Ons
Weather add-ons are designed using many different methods and we make no claim that Weather Tutor will function as described with all weather add-on products for your simulator. Feel free to try the demo of FSFlyingSchool 2017 first in the demo region between KGRB and KORD.
(For full details of these new features, see the Sound Setup and the Settings Page section of this manual).
FSFlyingSchool ____________________________________________________
14 ________________________________________________________
System Requirements FSFlyingSchool recommends a PC well equipped to run the version of X-Plane you have selected. If the PC can run X-Plane at a good pace, without problems, FSFlyingSchool will run fine with it. If the PC is struggling to run X-Plane, then FSFlyingSchool will be unable to give its best performance.
Installation FSFlyingSchool must always be run 'as an administrator'.
You must do this even if you are the only person who uses the PC and even if you are an administrator. To do this, right click on the FSFlyingSchool icon, shortcut or menu item you use to launch FSFlyingSchool, select 'Properties' from the menu, select the 'Compatibility' tab, and turn ON 'Run this program as an administrator'. To install, simply run the installation EXE program supplied by FSFlyingSchool. If installing from CD, follow the instructions on the inside of the product case. If your PC is struggling to run X-Plane it will not be ideally suited to running any other software at the same time. We have witnessed a noticeable delay in the response from any other software, including FSFlyingSchool, when running on a PC which can barely run X-Plane. The solution of course is to upgrade your PC to run X-Plane smoothly.
FSFlyingSchool ____________________________________________________
________________________________________________________ 15
FSFlyingSchool News Updates FSFlyingSchool will check for news updates for you when FSFlyingSchool is started. This is a great way to stay informed about news headlines in the world of FSFlyingSchool. New products, free updates and more!
If you prefer not to get the latest news, you can turn this off at the Settings Page (see below).
Demo and Registered Versions of FSFlyingSchool The FSFlyingSchool installation program, on your CD, or downloaded from a web site, installs the DEMO version of FSFlyingSchool. It can be unlocked to become a full version when registered with a registration key. Differences between the demo and registered versions:
Demo: Pilot cannot submit scores to web tables Pilot cannot submit flight maps Pilot must fly within area stretching from Chicago to Green Bay The demo area is bounded by:
Top left: N 45 deg 00 min, W 88 deg 30 min
Bottom right: N 41 deg 30 min, W 87 deg 30 min
and if you leave this area you will be disconnected from FSFlyingSchool. Registered: Pilot can submit scores to web tables Pilot can submit flight maps Pilot may fly anywhere in the world
In order to register FSFlyingSchool, you will need to enter the codes which came with your CD or purchase the product if you downloaded it. Download customers are sent a registration key which should be entered at the Credits Screen of FSFlyingSchool 2018 for X-Plane 11 and X-Plane 10. The registration section of this page allows users with a registration key from FSFlyingSchool to register the program and enjoy the benefits. Help for the registration process is available by pressing the Registration Help Movie button.
Free Demo of FSFlyingSchool for X-Plane Voice Command Pack The FSFlyingSchool for X-Plane Voice Command Pack adds a whole new level of realism, atmosphere and fun to your flights with FSFlyingSchool for X-Plane. Not all pilots will want to use voice commands and this product is therefore offered as an optional add-on for FSFlyingSchool for X-Plane.
As with FSFlyingSchool for X-Plane itself, everyone can try out the Voice Command Pack for free by downloading FSFlyingSchool 2018 for X-Plane 11 and X-Plane 10 and flying with X-Plane in the FSFlyingSchool demo area near Chicago. If you like the experience, you may wish to purchase your own license key for the FSFlyingSchool for X-Plane Voice Command Pack so that you can fly anywhere with a team of instructors ready to listen to your voice command requests. The demo area is bounded by: Top left: N 45 deg 00 min, W 88 deg 30 min
Bottom right: N 41 deg 30 min, W 87 deg 30 min
and if you leave this area you will no longer be able to use voice commands. Details of how to register the FSFlyingSchool for X-Plane Voice Command Pack are provided in that product’s manual.
FSFlyingSchool ____________________________________________________
16 ________________________________________________________
Quick Start Please read this manual if you want to get the most out of flying with FSFlyingSchool.
If you would prefer to do this later and want to jump right into the cockpit, here’s what you should do next: - Launch X-Plane. - Create or select a flight in X-Plane using an airplane supported by this product, for example,
the Columbia 400 supplied with X-Plane 11 and X-Plane 10.
- Get that plane ready to fly, either in mid-air or on the ground. Get yourself at the controls of the plane.
- Launch the FSFlyingSchool program. - Press the Connect Button in FSFlyingSchool. - Switch back to X-Plane and enjoy your flight with FSFlyingSchool by your side! - But – you really should read this tooD
It is essential that you and your instructor agree on what stage of your flight you are presently executing. Are you taxiing, taking off, cruising or landing? FSFlyingSchool calls this your Flight Mode.
- FSFlyingSchool will attempt to detect this automatically during flight, but this can also be achieved by advancing (or backing up if you make a mistake) your flight mode using the following shortcut keys (for more information read FSFlyingSchool Flight Modes in this manual):
Shortcut Default
Advance Flight Mode [Ctrl-Shift-Z] Back Up Flight Mode [Ctrl-Shift-X]

FSFlyingSchool ____________________________________________________
________________________________________________________ 17
Getting the most from FSFlyingSchool FSFlyingSchool is an add-on for X-Plane and as such depends on the pilot to operating X-Plane in a sensible manner. Although FSFlyingSchool contains many checks to stop it being misled by the pilot’s actions, it is not impossible for it to be forced into losing track of what is actually happening in X-Plane. This will occur if the pilot makes drastic changes such as changing the aircraft during a flight, moving the aircraft while paused or changing the time of day or map location. If FSFlyingSchool detects an extreme change to the simulated flight, it will disconnect from X-Plane as it cannot support this style of operation. The reason for the disconnection will be described in the FSFlyingSchool Log Book Page.
FSFlyingSchool ____________________________________________________
18 ________________________________________________________
The FSFlyingSchool Interface Under normal circumstances, you will first launch X-Plane, get an aircraft on the ground and ready to fly and then launch FSFlyingSchool. If FSFlyingSchool is correctly configured, it will successfully detect X-Plane. If it does not detect X-Plane, FSFlyingSchool will display the warning “No X-Plane Found” and you will not be able to press FSFlyingSchool’s Connect button to start communications with X-Plane. FSFlyingSchool’s Connect button opens communications between FSFlyingSchool and X-Plane. In addition, FSFlyingSchool has a number of screen pages which control different aspects of configuration and use of FSFlyingSchool: - Information - Pilots - Flight Plan - Aircraft - Log Book - Settings - Credits
Tips of the Day A randomly selected tip is displayed when the user launches FSFlyingSchool. The tips can be examined one by one if the user prefers and this feature can be turned on or off as desired. The tips contain a wealth of information about how to get the most from FSFlyingSchool.
Information Page The Information Page has handy information on how to fly different types of flight with FSFlyingSchool. There is also a button to launch the FSFlyingSchool Manual (this document you are reading) in PDF format.
Discuss FSFlyingSchool
An Information Page button takes you directly to the FSFlyingSchool online forum, where you can ask for help, search a huge storehouse of tips and tricks or just chat with other FSFlyingSchool fans. Twitter FSFlyingSchool
An Information Page button takes you directly to your Twitter home page, from which you can let folks know what you are up to with FSFlyingSchool.
Connect Button The Connect button, when pressed, tells FSFlyingSchool to interact with X-Plane; X-Plane must of course already be loaded for this to occur and in order for a connection to be established, X-Plane must not be paused.
FSFS-Tip Note that X-Plane may pause each time you switch to a different task, such as switching to
FSFlyingSchool itself.
The FSFlyingSchool Connect button will become a Disconnect button after you press it. You will normally leave FSFlyingSchool connected to X-Plane as you fly with your favourite FSFlyingSchool instructor, but if you wish to change key areas of the simulation, such as your X-Plane aircraft or location, you will need to disconnect FSFlyingSchool from X-Plane. You will also need to disconnect should you wish to change any key values in FSFlyingSchool, such as your pilot data. Note that disconnecting FSFlyingSchool will end your current flight with FSFlyingSchool. When you are ready to end your session in FSFlyingSchool, press the Disconnect button to end communications between FSFlyingSchool and X-Plane. As you can see, disconnection can take place because you have told FSFlyingSchool to disconnect, or because FSFlyingSchool has detected a drastic change in the simulated situation and must disconnect. In either case, FSFlyingSchool’s Log Book Page will display the reason for disconnection; this is not part of your flying record and so this information is not saved in your pilot’s log book.
FSFlyingSchool ____________________________________________________
________________________________________________________ 19
FSFS-Tip If, while in X-Plane, you are unsure if FSFlyingSchool is connected, you can request a
“communications check” from your instructor by changing the frequency selected on your COM2 radio. If you wish you can use the COM2 standby switch to toggle the frequency back and forth. Your instructor will not say much, but you’ll hear a lot of throat clearing which tells you that FSFlyingSchool is connected and functioning.
Pilots Page FSFlyingSchool gives you the tools to create a varied team of pilots, each with their own preferences and styles, so you can fly just the way you want. FSFlyingSchool comes with 2 default pilot profiles to get you started. They are ‘HeavyIron’ and ‘LightSpeed’. The former likes to fly big planes and the latter likes them small. Note how their pilot profiles differ. Pilots
- Pilot This is the name of the pilot, either supplied by us or created by you. You may wish to indicate the type of aircraft this pilot prefers such as “Harry Heavies” or “Laura Lights”
- New Pilot Press this button to create a new pilot.
- Load Pilot Press this button to load an existing pilot.
- Save Pilot Press this button to save the current pilot data. You should always do this if you change any of the data on the Pilots Page. Make sure the file name you use follows the usual Windows file naming conventions.
- Select Image If you wish to give your pilot a face or perhaps a colourful logo, place the image you want to use into the PilotRoster\Images folder. The image must be in the GIF, JPG or BMP file format and must be no more than 80 pixels high by 80 pixels wide. Press the Select Image button to select the image file you want. The image will be shown in FSFlyingSchool when that pilot is selected and will also appear in the full pilot log book HTML file.
- Current Pilot File This is the pilot file currently in use.
Sound Setup
- Instructor Select any one of your installed FSFlyingSchool instructor voice sets from the list box.
- Listen to Instructor Press this button to hear the instructor speak.
- Disable sound If you want to fly with an instructor who never speaks, check this box to silence FSFlyingSchool. Remember that your instructor is still watching your every move and will evaluate your performance and record the results in your log book.
- Background chatter Your FSFlyingSchool instructors are a friendly, helpful team. They will offer tips and observations as you fly, but if you would prefer not to listen to these, clear this box to turn them off.
- Background humour Your instructors make the occasional joke, but if you would rather they did not, check this box to keep things humourless and also keep your aircraft free of the mysterious grumpy stowaway child.
- Monitor Weather Interactive help with temperature, dew point, wet surfaces and more from Mr Smith right when you need it.
- Monitor Autopilot Interactive help with the operation of the autopilot from Mr Smith right when you need it.
FSFlyingSchool ____________________________________________________
20 ________________________________________________________
- VOR/NDB Advice Master VOR and NDB navigation by asking chief instructor Mr Smith to give automatic advice on tuning and using these NAVAIDs at flight plan waypoints.
- Display Captions in X-Plane Text captions of most of the instructor's speech can be displayed in X-Plane. Check this box if you want captions shown while you are flying. This can help if you have hearing problems, if English is not your native language, and also just to keep up with the instructor when things get very busy!
- Monitor Use of Lights Flying is more of a challenge if you are trying to use your aircraft lights correctly. Check this box if you want the instructor to monitor the correct use of any lights which you have indicated for the current aircraft at the Aircraft Page
- Monitor NAV1 VOR Mr Smith will be watching closely when you are navigating using VOR navigation aids. He will let you know the meaning of the different indications and components of your aircraft's VOR Indicator, such as the TO/FROM/OFF flag, the Omni Bearing Selector (OBS), and the Course Deviation Indicator (CDI). You'll get this information as you fly and change settings and of course as the instruments themselves react to your flight path. He'll also describe at length the general aspects of the different elements of VOR navigation as you fly along. This information is not given if you have the NAV/GPS switch set to GPS. All information given applies only to NAV1 and to VOR navigation. It does not apply to NAV2 nor to ILS, LOC, NDB or GPS navigation.
- Monitor Crosswinds Interactive help with crosswind take-off and landing from Mr Smith right when you need it.
- Waypoint Advice Get help navigating waypoints in a flight plan by having your chief instructor Mr Smith announce them before you reach them. He’ll tell you what they are and advise you on the turn you’ll need to make when you get there.
- Flight Plan Advice You'll become an expert in flying flight plans correctly by having chief instructor Mr Smith advise you along each leg of the plan with information updated in real time as you fly your flight plan. Get ready for automatic information on the distance remaining, time remaining, waypoint radio frequency, course to VOR, waypoint distance, course to NDB, time to waypoint, fuel to destination, descent rate to destination and more. You'll also get automatic updates on gross weight, visibility and wind, NAV1 current NAVAID, ground speed and above ground level.
Automatic Detection Setup
- Cruise Mode The pilot can indicate if cruise mode is to be automatically detected as the aircraft levels off after takeoff.
- Landing Mode The pilot can indicate if landing mode is to be automatically detected as the aircraft maintains a continuous descent.
FSFS-Tip Automatic detection of these modes is handy, but once you've flown a few flights with us you'll most likely want to turn these two options OFF so that you control the flight mode more precisely as Pilot in Command!
FSFlyingSchool ____________________________________________________
________________________________________________________ 21
Flight Plan Page Almost all of the features of the Navigator Pack for FSFlyingSchool depend on the pilot filing a flight plan with FSFlyingSchool. It only takes a moment and really does lead to a far richer experience when your flight instructor knows where you are going and how you intend to get there! In order to use a flight plan with FSFlyingSchool: 1. Create or load an existing flight plan in X-Plane. This plan must be saved as an .FMS file either earlier or right now, after you have created it. 2. Select the Flight Plan page in FSFlyingSchool. Browse to your X-Plane flight plan folder and press the Load Flight Plan button. (By default in X-Plane 11 this would be similar to: C:\Users\user\Desktop\X-Plane 11\Output\FMS plans) (By default in X-Plane 10 this would be similar to: C:\Users\user\Desktop\X-Plane 10\Output\FMS plans) A dialog window will now list the available flight plans. Select the flight plan you loaded into X-Plane and press the Load Plan button. FSFlyingSchool will list the waypoints of the flight plan. If the plan contains more than 25 waypoints, the list will be abbreviated, but the destination waypoint will always be shown. 3. If you wish you can press the new “Real Airport Data” button at the Flight Plan Page. This will open a browser containing detailed real world information about your destination airport with links to lots of useful resources from the splendid SkyVector website for all airports and also the excellent AirNav website for U.S. airports. 4. Fly your flight as normal, but take care to pass the waypoints within 1 nautical mile in a light aircraft or within 3 nautical miles in a heavy. As you pass within this minimum distance, your instructor will bring this to your attention. When a waypoint in a flight plan is reached, your instructor will announce this, and announce the number, name, distance and heading of the next waypoint. 5. If you choose to cancel the current flight plan, simply press the Clear Flight Plan button in FSFlyingSchool. You can even load a new plan during a flight, but FSFlyingSchool will expect you to start it from the beginning of the plan.
FSFlyingSchool ____________________________________________________
22 ________________________________________________________
The Flight Plan Page allows you to specify V1, Vr and V2 speeds for your flight and these will be called off by your instructor as you reach them. You can also specify a transition altitude, which your instructor will be watching to make sure you use your altimeter correctly. You can change the transition altitude during the flight if this is appropriate. For your convenience, the transition altitude is saved with FSFlyingSchool’s data – it will be the same the next time you launch it. In addition, you may choose to end the flight, after landing, when the aircraft is: - Stopped or Taxiing - Stopped and the parking brake is set - Stopped and the parking brake is set and the engine(s) are off
Aircraft Page
Monitor Engines
- Check this box if you want your instructor to monitor your use of aircraft engines. - As an added convenience, these checkboxes can be turned on and off while flying. There is no
need to disconnect FSFlyingSchool to do this. Monitor Lights
- The checkboxes here allow you to select precisely which lights you want monitored or not for the aircraft in question. You can monitor none, some or all of the lights. You will want to tell FSFlyingSchool to monitor only those lights you can actually control in X-Plane 11 and X-Plane 10. For example, if the aircraft has no switch for taxi lights, do not turn ON
that option as X-Plane may read that the light is on - and you won't be able to turn it off. In addition some lights of some add-on aircraft do not correctly indicate their position to X-Plane and such lights should not be monitored with these options. This is a problem with the add-on aircraft and not with FSFlyingSchool. Note that this is used in conjunction with the Monitor Use of Lights checkbox at the Pilots Page, which if off, will mean that no lights are ever monitored.
- As an added convenience, these checkboxes can be turned on and off while flying. There is no need to disconnect FSFlyingSchool to do this.
Sound Settings for this Aircraft
Configure FSFlyingSchool’s sound the way you want it to work with this particular aircraft. - Instructor Volume
The loudness of your FSFlyingSchool instructor will not need to vary much, but you can fine tune it to suit the background noise of your selected aircraft. This will in turn depend on the volume settings you have chosen within X-Plane. Note that the setting you choose here relates to the specific aircraft you are flying in X-Plane; you may have different settings for each of your favourite aircraft. If the aircraft noise is loud then choose a loud setting for your FSFlyingSchool instructor; if quiet then choose a quieter one.
- Listen to Instructor Press this button to hear the instructor speak at the chosen volume level.
- Disable Instructor Altitude Calls If you are flying an aircraft which has its own built in ground proximity warning system (GPWS) then you may wish to check this box in order to tell your instructor that you don’t need any such information from FSFlyingSchool.
FSFlyingSchool ____________________________________________________
________________________________________________________ 23
Log Book Page As when flying in the real world, your log book becomes an invaluable record of your flights. FSFlyingSchool enhances basic real world log book data by the introduction of a written review of each and every flight you have flown with an FSFlyingSchool instructor. A brief version of this information is shown on the FSFlyingSchool Log Book page – to see more, click on the View Full Pilot Log Book button on the Log Book page. When a flight flown with FSFlyingSchool ends, the FSFlyingSchool log book will display your instructor’s detailed analysis of your flight, containing the following elements: - Summary information on the pilot, visibility, wind, X-Plane version. - Flight duration. - Landing score and evaluation. Any corrective advice that your instructor gave you during your
landing will be listed here and often a lot more besides, including acknowledgement of those things you did correctly.
- Flight score and evaluation. Take note of the items to which your instructor draws your attention. Take credit for those you did well.
- Circuit score and evaluation. If you flew a circuit around one of your favourite airports, your demanding FSFlyingSchool instructors will let you know all about any areas of your circuits you need to improve.
At the end of a flight you will be presented with links to the FSFlyingSchool online score tables. The links shown will depend on what type of flight you have just flown. You must have an open internet connection when you click on the link in order to submit scores. - Submit landing score to the online table
Press this link to submit your best landing scores to the online table. - Submit flight score to the online table
Press this link to submit your hard earned flight scores to the online table. - Submit circuit score to the online table
Press this link to submit your circuit scores to the online table. If you crash the plane... the fictitious National Aeronautical Safety Board will analyze the crash and other data and record this in your log book, plus the pilot also gets a record of how well the flight had proceeded up to that point.. FSFlyingSchool records your log book entries so that you can review your performance over time. To access this information, click on the View Full Pilot Log Book button on the Log Book Screen. Full Log Book Flight Menu
We know that hard working pilots build up a lot of flights quickly and that can be a lot to scroll through in your FSFlyingSchool 'Full Log Book'. To make things that much easier, the Full Log Book has a menu so that you can pick and choose any logged flight you wish to examine. Get all the details from previous flights, from an easy to use drop down menu at the top of your Full Log Book! Note that in order to use the menu you must open the 'Full Log Book' at the Log Book Screen of FSFlyingSchool.
Full Log Book Statistics Charts
Want a powerful summary of your performance with FSFlyingSchool? It's here! Color coded charts give you a powerful insight into your pilot skills as recorded by FSFlyingSchool. Just click the 'Show Statistics' button in the Full Log Book to see a chart of your scores in flights, landings and circuits, graded as poor, fair, good and of course... excellent! Note that in order to view the charts you must open the 'Full Log Book' at the Log Book Screen of FSFlyingSchool.
FSFlyingSchool ____________________________________________________
24 ________________________________________________________
Career Analyzer
For an in depth analysis of the pilot’s flying career with FSFlyingSchool, press the Career Analyzer button (this cannot be done while Connected to X-Plane – so if Connected press the FSFlyingSchool Disconnect button first). At first, FSFlyingSchool will display a graph of the Landing Scores of the currently selected pilot, but this is just the beginningR FSFlyingSchool’s unique Career Analyzer examines over 70 different aspects of the pilot’s performance during landings, circuits and flying in general. The following controls are provided to control the graph: - Aircraft
Use this list box to restrict the pilot’s Career Analyzer to a single aircraft. - Parameter
Use this list box to choose the flight parameter you wish to examine. - Show Values
Check this box to display labels for the points on the graph. At first, the graph shows flight, circuit and landing information gathered from the last 20 landings the pilot performed, but the horizontal scroll bar at the bottom of the graph can be moved to show data all the way back to the start of the pilot’s career. Flight parameters of a true or false nature (such as Wings not Level near Ground) are displayed as single points rather than graphed. The pilot’s career is analyzed only after the pilot has achieved at least two landings. To examine the career of a different pilot, simply select a different pilot at the Pilots Page.
FSFS-Tip Use the Career Analyzer to find areas of your performance which need attention and concentrate on getting them just right. Areas such as Landing Vertical Speed and Rough Turns are good places to start.
When you have finished using the Career Analyzer, close its window to return to FSFlyingSchool. Pilot Briefing
If you’ve ever wondered which areas of your performance you need to concentrate on, the Pilot Briefing will provide the answers you need. Click the Pilot Briefing button (this cannot be done while Connected to X-Plane – so if Connected press the FSFlyingSchool Disconnect button first). Use the drop down to select a pilot’s log book information. Then click the load button and so long as the pilot has saved a few flights in his/her log book, you will be shown the areas which that pilot: - Has no improvement - Is improving - Is mastering - Has mastered In order to keep the information concise and to the point, areas in which the pilot has had no trouble are not listed. You will be looking at aspects of flying that have proven to be problems.
FSFS-Tip Use the Pilot Briefing before a flight to get the low down on which areas of performance you
need to improve in the next flight. Keep practicing and you will soon have them mastered.
When you have finished using the Pilot Briefing, close its window to return to FSFlyingSchool.
FSFlyingSchool ____________________________________________________
________________________________________________________ 25
Traditional Log Book For a traditional pilot log book, showing one line for each flight completed, press the Traditional Log Book button (this cannot be done while Connected to X-Plane – so if Connected press the FSFlyingSchool Disconnect button first). FSFlyingSchool will display a list of all flights flown by the currently selected pilot. The log records multiple columns of data which are traditionally maintained, in real aviation, for each flight. The following controls are provided to control the Traditional Log Book: - Aircraft
Use this list box to restrict the pilot’s Traditional Log Book to a single aircraft. - Previous Page
Press this button to flip back to the previous log book page. - Next Page
Press this button to flip forward to the next log book page. - Print Page
Press this button to print the page currently displayed on the screen. The following columns are shown in the Traditional Log Book: - Date
Date flight began. - Depart
Departure time. - Arrive
Arrival time. - Day
Hours flown during day. - Night
Hours flown during night. - Total Length
Total length of flight. - Distance
Distance of flight. - Block Time
Time of flight from pressing FSFlyingSchool Connect button to end of flight. The vertical scroll bar at the right of the page can be moved to scroll the displayed data up and down the current page. To examine the log book of a different pilot, simply select a different pilot at the Pilots Page.
FSFS-Tip Use the Traditional Log Book to monitor how many hours you’re clocking up, especially on instruments and also to keep track of data for your membership in a Virtual Airline!
When you have finished using the Traditional Log Book, close its window to return to FSFlyingSchool. Save & View Google Map of Flight (displayed after Disconnect pressed)
Wouldn't it be nice to be able to review your flight paths over real world satellite terrain using Google Maps? And... wouldn't it be just great to be able to store them and look back over them at your leisure? How about sharing them with friends? Oh - and how about tracking taxi routes too? Now you can do all of this with FSFlyingSchool's Flight Mapping feature! In order to share a map - just copy the URL in the browser's web address field at the top of the screen and email your friends the address. View all Flight Maps This button will open a browser which lists all the Flight Maps you have logged with FSFlyingSchool. You can review them at your leisure!
FSFlyingSchool ____________________________________________________
26 ________________________________________________________
Settings Page This page displays miscellaneous information about FSFlyingSchool’s connection to X-Plane and XPUIPC, and provides a means to tell FSFlyingSchool where the X-Plane folder is. Spoken Teaching Tips
When turned on will mean that FSFlyingSchool for X-Plane will speak a series of helpful tips when you fly with FSFlyingSchool for X-Plane. These tips are always in the same voice and are clearly different from a normal 'instructor' voice. The idea is that these tips are like training wheels on a bicycle and are telling you how to use FSFlyingSchool for X-Plane and X-Plane itself. Once you have got the basics of these operations down, you may wish to turn these basic tips off. Aviation Tips
These require that the "background chatter" be turned on at the FSFlyingSchool Pilots Screen. If these tips are turned on, then during flights, chief instructor Mr Smith will talk about aviation core subjects, such as cockpit instruments, etc. Instant Help
If turned on the pilot will get spoken tips on aircraft instruments, switches and controls when they are used during flights. Weather Tips
If turned on, you'll get tutorial tips on temperature, runway elevation, dew point, precipitation, cloud cover, low light, crosswinds and much more Autopilot Tips If these are turned on, you'll get tutorial tips on getting the most out of the autopilot, best practices and much more. Taxiway Tips If these are turned on, you'll get tutorial tips on taxiways, runways, markings, lights and more when you are in taxi mode at an airport with modern taxiways. Sound Device Selection
Pilots with multiple sound devices can choose which device is used with FSFlyingSchool. Note that if using the Voice Command Pack, it is likely that only one of the devices will work, so you may need to try each of the devices to find the right one. FSFlyingSchool for X-Plane supports the generation of FSFS data for runways all over the world, which allows the instructor to evaluate approaches without ILS, anywhere. In order to generate the runway data for FSFlyingSchool for X-Plane, simply press the button at the Settings Page. The process will launch an external program in a separate window and will take a few minutes You only need to perform this operation once, unless you update your X-Plane runway data, in which case you should run it again. FSFlyingSchool News Updates
You can click this button to either turn on or turn off (toggle) whether FSFlyingSchool will check for news updates for you when FSFlyingSchool is launched. This is a great way to stay informed about news headlines in the world of FSFlyingSchool. New products, free updates and more!
FSFlyingSchool ____________________________________________________
________________________________________________________ 27
Credits Page This is where we acknowledge those behind the FSFlyingSchool concept and the help we have received from the dedicated team of enthusiasts who have made FSFlyingSchool for X-Plane what it is today and will be tomorrow. The registration section of this page allows users with a registration key from FSFlyingSchool to register the program and enjoy the benefits. Help for the registration process is available by pressing the Registration Help Movie button.
FSFlyingSchool Instructors FSFlyingSchool gives you the unlimited services of several different FSFlyingSchool instructors. The role of the instructor is to praise good work, give you flying tips, tell you immediately whenever you do something wrong, score your performance in several areas, record what you did in your log book and much more. You choose from an eclectic team of male and female instructors, each with their own personality, nationality and style. If you are flying the Cessna 208, Baron 58, Cherokee 140 or Douglas DC-3 choose Mr Smith as he's the one with the expert knowledge of those aircraft. Your actions and the current stage of your flight will determine what your FSFlyingSchool instructor says to you. The instructor knows better than to bother you with mere details when you are just about to land, and will not ask general questions about your flight during crucial periods. In many cases, your instructors will give you tips on what to do next and warn you before you make a mistake that would cost you points.
FSFlyingSchool ____________________________________________________
28 ________________________________________________________
Scoring Points Think you’ve got what it takes to be a great pilot? Prove it! One of FSFlyingSchool’s most exciting and innovative features is its detailed evaluation of your flying skills, where a precise score is assigned to each of several aspects of your flight. FSFlyingSchool invites you to “Put your money where your mouth is.” Points can be earned in these areas of flying: Flight
Your FSFlyingSchool instructor will keep an eye on your performance throughout your flight and give you an overall score. If you want to do well, fly realistically. No aerobatics; no combat manoeuvres. See the information later in this manual which describes what your instructor is watching during each flight. Landing
Because landing is such a crucial, demanding stage of any flight, FSFlyingSchool evaluates it separately. This feature is also a great tool for those pilots who enjoy practising landings repeatedly until they can get them ‘just right’. Once you can get your aircraft down perfectly, move on to something trickier - add in a gusting crosswind and some rotten weather. See the Landing section later in this manual. Circuits
If you would like to try your hand at flying circuits, your FSFlyingSchool instructor is ready to grade you on your performance. You will need to stay within some pretty demanding limits to get your best score. See the Circuits section later in this manual. Airmanship Challenge
For those who are wondering if they have mastered some of the most basic flying skills, the Airmanship Challenge gives you an instant answer. Simply press [Ctrl-Shift-C] while flying (without autopilot) and your FSFlyingSchool instructor will set you an immediate task to perform. Some will be quite simple; others very hard. Still too easy? Add in some heavy weather and see how well you doR See the Airmanship Challenge section later in this manual. Autopilot effect on scoring
If your aircraft has an autopilot and it is used for an appreciable period during your flight, your scores are affected as follows:
Scoring AP Effect
Flight Reduced by 33%
Landing Reduced by 33%
Circuits Reduced by 33%
Airmanship Challenge No points
The exceptions to this rule are when: - In cruise mode in a light aircraft above 1000 feet AGL - In cruise mode in a heavy aircraft above 5000 feet AGL In both these cases, no points are lost by having the autopilot engaged. This gives the pilot a chance to use the autopilot on long flights without losing points, but note that the aircraft must be significantly above the ground and must be in FSFlyingSchool’s Cruise Mode. Scoring is affected by visibility and wind at your destination airfield and by the weight and speed of the aircraft you are flying. In order to get a flight score you must take off and land. If you started in the air, you will still have your flight evaluated when you land, but will not score points for your flight. In addition, you must fly for a minimum of 30 seconds to get your flight evaluated.
You must fly for a minimum of 30 seconds to get your landing evaluated.

FSFlyingSchool ____________________________________________________
________________________________________________________ 29
After your landing, flight or circuit has been evaluated, you may wish to take a look at your FSFlyingSchool log book, either inside FSFlyingSchool or by launching the HTML log book by clicking on the View Full Pilot Log Book button on the Log Book page of FSFlyingSchool. When a flight ends, you may wish to share your performance with other users by submitting your score to the FSFlyingSchool website. For more information see the Log Book Page section of this manual.
FSFlyingSchool ____________________________________________________
30 ________________________________________________________
FSFlyingSchool Flight Modes FSFlyingSchool flight modes reflect the current stage of your flight. They are: - Taxiing - Take Off - Cruise - Landing Your FSFlyingSchool instructor will evaluate certain sections of your flight depending on the current flight mode. It is normally up to you, as pilot in command, to tell the FSFlyingSchool instructor what your intentions are; in other words, which flight mode you are in. FSFlyingSchool’s approach is that the pilot has to think in terms of what stage of the flight he or she is in. We feel that this is not much of a chore, considering a real pilot announces intentions to: - himself/herself - before deciding which checklist to check - the passengers - even in general aviation, so they know what's coming up next - the 1st officer - as part of normal procedures Many simmers often fly a little looser than would be expected in real flight, and the main focus of FSFlyingSchool is to help the pilot behave more like a real one - especially in terms of control of the aircraft. It is essential that you and your instructor agree on what stage of your flight you are presently executing.
FSFlyingSchool will attempt to detect this automatically during flight, but this can also be achieved by advancing (or backing up if you make a mistake) your flight mode using the following shortcut keys.
Shortcut Default
Advance Flight Mode [Ctrl-Shift-Z] Back Up Flight Mode [Ctrl-Shift-X]
FSFS-Tip Our team at FSFlyingSchool like to map these keys to yoke/joystick buttons. You can assign these key combinations to your yoke/joystick using their manufacturer’s keystroke assignment mapping software. The Voice Command Pack allows you to tell your instructor by speaking to him/her!
Flight modes are arranged in the sequence they naturally occur in real flights. You begin in Taxi Mode, advance to Take off Mode, move onto Cruise Mode, then Landing Mode, perform a landing and finally return to Taxi Mode. FSFlyingSchool will automatically change the flight mode for you if it is obvious that this is appropriate: - If you taxi very fast or leave the ground while taxiing, you will go into Take Off Mode. - If you level off at a sensible altitude, you will advance to Cruise Mode. - If you start a steady descent you will go into Landing Mode unless at a high cruising altitude. - If you touch down, you will go into Landing Mode if you are not already in it. - When you stop on the ground during a landing, you automatically advance to Taxi Mode. If FSFlyingSchool suspects that you may have progressed to a new phase of your flight, it will display a hint to suggest that you may wish to change your flight mode. You can always have FSFlyingSchool tell you what flight mode you are in by asking it to display essential data in X-Plane using the Display Data shortcut keys.
Shortcut Default
Display Data [Ctrl-Shift-D]

FSFlyingSchool ____________________________________________________
________________________________________________________ 31
FSFlyingSchool will display the following: - Current Flight Mode - Current Circuit Leg (if you are flying circuits)
Taxiing If you connect to FSFlyingSchool when your aircraft is on the ground you will be automatically placed into Taxi Mode. If you started in the air, once you complete your landing, use [Ctrl-Shift-Z] or a programmed button to advance the flight mode to Taxiing (this will happen automatically if you stop on the ground). While you are taxiing, your FSFlyingSchool instructor will be watching out for: - Dangerous taxiing turns - these cause discomfort and stress - Poor attention to taxi speed - dangerous to yourself and others - Throttle and brakes during taxi - bad for many systems - Harsh braking - taxi gently and brake smoothly - Use of flaps while taxiing - up or down as appropriate If you are piloting a small aircraft, your FSFlyingSchool instructor will also be watching out for: - Poor elevator control during taxi in wind - danger of flipping - Poor aileron control during taxi in wind - danger of flipping
Take Off Before you tell your FSFlyingSchool instructor you are ready to take off, get lined up with the runway centre line. Using Ctrl-Shift-Z or a programmed button, advance the flight mode to Take Off. While you are taking off, your FSFlyingSchool instructor will be watching out for: - Poor steering during takeoff - stay in the centre of the runway - Braking during takeoff - watch those feet - Late rotation - when Vr is reached - take off - Loss of altitude during takeoff - climb smoothly
FSFlyingSchool ____________________________________________________
32 ________________________________________________________
Cruise If you connect to FSFlyingSchool when your aircraft is in the air you will be automatically placed into Cruise Mode. If you started on the ground, once you complete your take off and climb to cruise altitude, FSFlyingSchool will detect this and change to Cruise Mode. If your flying suggests otherwise and this has not occurred, use [Ctrl-Shift-Z] or a programmed button to advance the flight mode to Cruise. If you are using the Navigator Pack and have loaded a flight plan into FSFlyingSchool, then take care to navigate so as to pass the waypoints on the plan within 1 nautical mile in a light aircraft or 3 nautical miles in a heavy, and in the correct sequence, in order to score points with your FSFlyingSchool instructor. If you begin a steady descent, you will be automatically placed into Landing Mode, unless your aircraft is still at a high altitude. If you are not already in Landing Mode, you should advance the flight mode to Landing Mode before you descend below 1000 feet AGL (Above Ground Level), or your FSFlyingSchool instructor may reduce your score due to flying too low at too great a speed.
Landing If you connect to FSFlyingSchool when your aircraft is in the air and below 1000 feet AGL (Above Ground Level), you will be automatically placed into landing mode. In all other cases, when you have finished cruising and are about to begin your approach, FSFlyingSchool will detect a steady descent and advance you to Landing Mode. If the situation has suggested otherwise and this has not occurred, use [Ctrl-Shift-Z] or a programmed button to advance the flight mode to Landing. If the aircraft’s NAV1 radio is tuned to a runway ILS, the instructor will announce this with reference to the NAVAID at the runway and also which specific runway has been selected. This helps the pilot confirm that the correct ILS signal is being received and is a convenient reminder of where to land.
FSFlyingSchool ____________________________________________________
________________________________________________________ 33
While you are landing, your FSFlyingSchool instructor will be watching out for: - Landing too hard – this may damage your aircraft or landing gear - Landing too fast – you may float and you will use a lot of runway - Wings not level – you may clip the ground or damage your gear - Landing away from the centre line - Pitching down hard at touch down – can damage your aircraft - Pitching up hard at touch down – can damage your aircraft - Nose up too high – poor visibility and danger of tail strike - Nose down too low – danger of failing to land on main gear - Poor alignment with the runway – point down the runway centre - Throttle(s) not idle - Poor alignment with runway during approach - Poor tracking of glideslope during approach - Poor steering after landing - Glideslope lost before you flared - Failure to use spoilers correctly - Amphibian plane landing with retractable gear down on water If you are piloting a heavy aircraft, your FSFlyingSchool instructor will also be watching out for: - Failure to use flaps If you are piloting a small aircraft, your FSFlyingSchool instructor will also be watching out for: - Failure to use flaps if no appreciable crosswind In order to get any kind of ILS based glideslope and localizer score, your equipment must detect an ILS signal when you descend through 500 feet AGL (Above Ground Level) during your landing. Your tracking, during your approach, of the ILS glideslope and localizer, or the visual glideslope and runway centre line, affect your landing score to an extent. They are verbally evaluated, separately, upon landing with their own scores, out of a hundred. For example, you might score 80 for the glideslope and 70 for the localizer. This score is used to produce some of the points for your final landing score. In a simple landing, the maximum landing points to be gained from glideslope and localizer performance is 20 points. As an example, in the simplest landing situation, if you tracked the glideslope and localizer perfectly, you would get a - glideslope score of 100 percent and a - localizer score of 100 percent These are read to you by your instructor when you land. This would add a total of 20 points to your final landing score, because your performance on the glideslope and localizer is only part of what makes a good landing. Note that when landing at a runway which is part of add-on scenery, the location of the runway in FSFlyingSchool for X-Plane’s whole world runway data or the signal of the ILS on an ILS approach, may not match the physical position of the runway in the add-on scenery. We have seen ILS signals direct us down into a lovely field next to the runwayR or worseR If such mismatched runways are used for visual approaches with FSFlyingSchool, this may lead to poor scores and confusing instruction, because the runway is not where the data says it is! If such mismatched runways are used for ILS approaches with FSFlyingSchool, this may lead to poor scores and confusing instruction, because the runway is not where the ILS says it is! In the end, you should try an approach to the add-on scenery runway and see how it feels.
FSFlyingSchool ____________________________________________________
34 ________________________________________________________
General aspects of good airmanship While you are out there flying, your FSFlyingSchool instructor will be watching out for: - Airspeed too low - risking stalls - Ballooning during landing - needs practice - Exceeding flap speeds - your flaps may be damaged - Exceeding gear speed - your landing gear may be damaged - Exceeding maximum speed - you may damage the aircraft - Excessive G forces - your passengers will feel rather unwell - Excessive speed at low altitude - may result in loss of licence or worse - Excessive speed during approach - reduce speed earlier - Flaps not down on time - plan your landing next time - Narrowly missed obstacles - plan your safety altitudes - Narrowly missed tail strike - watch your pitch: could be very bad - Nose held too high - spilt drinks and worried expressions - Nose held too low - we’re not on a combat mission - Poorly coordinated turns - use the rudder correctly - Poorly trimmed aircraft - trimmers are there to help: use them - Rapid descent - dangerous and uncomfortable - Rough pitch control – feels like a rollercoaster - Rough turns - your passengers will spill their drinks and have a pain in their necks - Stalls – in a word: dangerous - Steep banking - save your aerobatic flying for some other time - Wings not level near ground - danger of clipping a wing or damaging your gear
Miscellaneous Instructor Checks Your instructor will expect spoilers to be retracted and thrust reversers to be disengaged at the appropriate times.
Factors which affect your score Your FSFlyingSchool instructor will make adjustments to your basic score based on the following criteria: If your score was already good then: - Aircraft weight
FSFlyingSchool generally considers heavier aircraft to be more demanding to fly than smaller machines. As a result, your score is increased in proportion to the weight of your aircraft. Flying the heavies has its rewards.
- Aircraft speed Faster aircraft are considered by FSFlyingSchool to be to be more demanding to fly than slower aircraft and therefore your score is increased in proportion to the speed of your aircraft. If you can handle it, speed matters.
FSFlyingSchool ____________________________________________________
________________________________________________________ 35
- Wind If you have flown in a wind which is greater than 4 knots and which was more than 20 degrees deflected from the runway heading at landing, your score is increased in proportion to the strength of the wind. The nastier the crosswind, the higher your score will be.
- Visibility When flights are flown in less than 1 mile visibility, your score is increased in inverse proportion to the visibility. When visibility gets very low, your score can get very high.
Regardless of your score: - Autopilot
If an autopilot is engaged for a total of more than 10 seconds during the flight, your score is reduced by 33%, unless in cruise mode and in a light aircraft above 1000 feet AGL or a heavy aircraft above 5000 feet AGL. Keep in mind that this can still produce excellent scores if you are flying a challenging aircraft in difficult conditions.
FSFlyingSchool ____________________________________________________
36 ________________________________________________________
Visual Approaches If an aircraft’s NAV1 radio is tuned to the destination runway’s Instrument Landing System (ILS) frequency, FSFlyingSchool uses the ILS to measure the pilot’s adherence to the glideslope (vertical) and localizer (horizontal) signals from the destination runway. This provides an extremely accurate measure of how closely the pilot is following the correct approach to landing. Alternatively, FSFlyingSchool also supports landings at airfields which do not have an ILS, or landing at runways which have ILS, but without using ILS.
FSFS-Tip To get set for a visual approach, you must be lined up with the runway you intend to land at and that runway must be in front of you as you descend through 500 feet above ground level in landing mode on your final approach. If you do not do this, your instructor won't know where you are
going and you should perform a missed approach (climb and circle back to the runway once more) and try it again. Remember: - In FSFlyingSchool's landing mode - Lined up with the runway you intend to land at - Runway in front of you as you descend through 500 feet above ground level
If FSFlyingSchool has information for a visual approach to the destination airport, but an ILS is detected (because NAV1 is tuned to it), it will use the ILS to evaluate the landing and will not use the visual approach information even if you land on another runway which is not the one with the ILS signal. So.. don't do this!
FSFlyingSchool ____________________________________________________
________________________________________________________ 37
Circuits Your FSFlyingSchool instructor is always ready to help you practice flying circuits around your favourite airports. This version of FSFlyingSchool supports left hand circuits only. Circuits are not supported in heavy aircraft. FSFlyingSchool instructors will not evaluate circuits until the pilot has proven basic proficiency at flying and landing the aircraft. A Landing Score above 70 and a Flight Score above 80 must be achieved before circuits can be flown with FSFlyingSchool.
If you wish to fly a circuit, you should get into position, ready for take off on your departure runway, located at the point you intend to land and which will also be used for reference in turning from Downwind onto Base. Make sure you are lined up exactly with the runway centre line. NAV1 OBS should be set to the runway heading. At this point, press [Ctrl-Shift-Space] to let your FSFlyingSchool instructor know you wish to fly circuits. If you have already achieved the required Landing and Flight scores, this will place you into FSFS Circuit Mode which will mean your FSFlyingSchool instructor will treat your flight as a circuit. You can exit this mode at any time by pressing [Ctrl-Shift-Space]. FSFlyingSchool records your exact position on the runway when you enter FSFS Circuit Mode. This is your Circuit Reference Point. FSFlyingSchool compares this to your position when you are flying the Downwind leg in order to determine when you should turn onto Base. This is normally done when this reference point is in the 8 o’clock position (behind you over your left shoulder). If you pass this point, your FSFlyingSchool instructor will remind you to make the turn. Once you lift off, your FSFlyingSchool instructor will announce that you are flying a circuit and give you a general guideline of how to fly each leg of your circuit as you enter it. If you wander from the basic parameters of the circuit, this will cost you points and your FSFlyingSchool instructor will give you tips on how to correct your mistakes. Should you decide you would rather not continue flying a circuit, simply press [Ctrl-Shift-Space] to cancel FSFS Circuit Mode, but think first, because once you cancel your circuit, you cannot start a new one unless you are on the ground in Taxi Mode or Take off Mode. FSFlyingSchool circuit legs reflect the current stage of your circuit; they are: - Upwind - Crosswind - Downwind - Base - Final
FSFlyingSchool ____________________________________________________
38 ________________________________________________________
Your FSFlyingSchool instructor will evaluate your flight depending on the circuit leg you are currently on. Unlike FSFlyingSchool flight modes, you do not need to tell your FSFlyingSchool instructor which leg of your circuit you are on; your instructor will determine that. Circuit legs are arranged in the sequence they naturally occur in real flights. You begin on the runway, take off into the upwind leg, turn onto crosswind, turn onto downwind, turn onto base and ultimately turn onto final. Landing ends your circuit. When flying a circuit you should concentrate on the following points: - Note exactly where you were when you entered FSFS Circuit Mode. This is your Circuit Reference
Point. An effective method of orientation is to switch to an overhead view in X-Plane. Make certain you know exactly where you are on the runway.
- Carefully check that your heading indicator is set to the correct heading. Note that you may need to reset this during flight.
- Note the runway heading. The path of your circuit will be based on this. You may wish to set your autopilot heading bug (if available) to the runway heading as a reminder.
- Note the altitude of the airfield. You must be aware of your Above Airfield Level (AAL) during your circuit. Your instructor will talk to you in terms of your altitude above the airfield during the circuit. This is unlikely to be the same as the altitude above sea level.
- After lifting off, climb smartly to 500 feet AAL while maintaining a track extending from the runway centreline.
- At 500 feet AAL make a climbing turn Crosswind onto a track which is at 90 degrees to the runway heading.
- At 1000 feet AAL make a level turn Downwind onto a track which is parallel to the runway and maintain this altitude.
- When the Circuit Reference Point is in the 8 o’clock position (behind you over your left shoulder), make a descending turn onto Base on a track which is at 90 degrees to the runway heading. Press NumberPad1 key for a quick peek over your left shoulder.
- When ready, make a descending turn onto Final on a track which leads straight down the runway centre line. Plan to arrive on final while still at least 500 feet AAL.
- Land on the runway within 300 feet of your Circuit Reference Point. - You must achieve a landing score of at least 50 in order to get a circuit score. - Circuit legs must be flown within the following limits to qualify as a real circuit:
Leg Minimum Duration Maximum Duration
Upwind 20 seconds 6 minutes
Crosswind 20 seconds 6 minutes
Downwind 30 seconds 6 minutes
Base 05 seconds 6 minutes
Final 10 seconds 6 minutes
- When flying a circuit, keep in mind that your instructor is evaluating how well you are following the correct ground track for the circuit. This can be very difficult to achieve with a good crosswind – can you do it?
Airmanship Challenge A short sharp test of your flying skills is never far away with the FSFlyingSchool Airmanship Challenge. With your autopilot off, simply press [Ctrl-Shift-C] at any time while in Cruise Mode and after a few seconds your FSFlyingSchool instructor will test your ability to maintain a randomly selected combination of:
Maintain
Altitude or Vertical Speed
Heading
Indicated Airspeed
Bank Angle You will quickly learn that this is relatively easy when flying straight and level, but becomes much harder when flying, for example, in a steeply banked climbing turn. Any use of the autopilot during the test will cancel the test and result in a score of zero.

FSFlyingSchool ____________________________________________________
________________________________________________________ 39
Adding Support for Extra Aircraft In order to get the most out of FSFlyingSchool, each aircraft needs its own data, stored in an FSFlyingSchool aircraft data file or internally within FSFlyingSchool. FSFlyingSchool comes with its own data files for several of the X-Plane 11 and X-Plane 10 community’s favourite aircraft. These files all have the extension (file type) of '.FSR' If you wish to fly an aircraft, but have no FSFlyingSchool aircraft data file for it, check the FSFlyingSchool.com website, as the aircraft may have been recently added. If you find the file for the aircraft you want simply download it from the website and follow the instructions in this manual headed “Adding Aircraft by Installing New FSR Files”.
As you explore the skies with FSFlyingSchool, you will occasionally decide to fly an aircraft which currently has no corresponding FSFlyingSchool data file. You can be the first person to create one! All such aircraft have their own FSR file, bearing the aircraft’s X-Plane folder name and preceded by the
prefix 'xp'. For example, the FSFlyingSchool file to match the plane: P180 Avanti Ferrari Team would be xpP180 Avanti Ferrari Team.fsr The aircraft FSR files are all in the FSFlyingSchool Aircraft folder.
In order to add a new aircraft to FSFlyingSchool: 1. Collect all the data you can about the aircraft in question. An obvious place to start is any X-Plane 11
and X-Plane 10 reference file or X-Plane 11 and X-Plane 10 checklist file supplied by the publishers of the simulated aircraft. 2. FSFlyingSchool stores user created data in 'FSU' files and you are about to create one. FSU files contain User Specified Data for aircraft flown in FSFlyingSchool. 3. Go to the FSFlyingSchool Aircraft folder on your PC and make a copy of the file: xpYourPlaneFilenameHere.fsu 4. Change the name of the file to match the name of the X-Plane folder for the airplane you wish to add, for example: If you wanted to add support for a plane in an X-Plane folder called: Spitfire you would need to copy xpYourPlaneFilenameHere.fsu and create a file called: xpSpitfire.fsu Open that file using Windows Notepad.
FSFlyingSchool ____________________________________________________
40 ________________________________________________________
5. Enter all relevant data into the IAS Data, Flap positions, Flap speeds etc. [flaps.0] flaps-position.1=0 (if the plane has flaps put the first setting in degrees here - otherwise zero) flaps-position.2=0 (if the plane has flaps put the second setting in degrees here - otherwise zero) (and you can identify up to 7 more flap settings) [reference speeds] IASTooFastForFlaps0=0 (if the plane has flaps put the first flaps speed here - otherwise zero) IASTooFastForFlaps1=0 (if the plane has flaps put the second flaps speed here - otherwise zero) (and you can identify up to 7 more flap speeds)
IASStallCruise=0 (put the stall speed with flaps up here) IASStallLanding=0 (put the stall speed in landing configuration here) MaxGearExtension=0 (put the maximum gear extension speed here - otherwise zero)
[misc settings] RetractableGear=0 ( put the number 1 here if true - otherwise zero) FlapsDownDuringTaxi=0 ( put the number 1 here if true - otherwise zero) Spoilers=0 ( put the number 1 here if true - otherwise zero) FloatPlane=0 ( put the number 1 here if true - otherwise zero) You should only set values for the fields that are already there - if you add new lines or fields, they will cause the file not to function. Once this has been done, save the FSU file you have created in the FSFlyingSchool Aircraft folder. You are now ready to connect FSFlyingSchool to X-Plane 11 and X-Plane 10 and fly that aircraft with FSFlyingSchool using the User Specified Data. FSFlyingSchool will remember that you want to fly this aircraft with your own User Specified Data. You will not be able to submit your scores to the FSFlyingSchool website when flying with User Specified Data, but you will have your performance scored and evaluated by your FSFlyingSchool instructor as you fly, and the results recorded in your FSFlyingSchool log book. If you want to submit your scores to the FSFlyingSchool website when flying with this aircraft, share your work by posting the FSU file you created to the FSFlyingSchool Forum. We will check it out and from time to time add such files it to the FSFlyingSchool FSR aircraft accessible from our web site and forum. You can then download the FSR file and fly the aircraft using that instead of the FSU file. To install the FSR file, see Adding Aircraft by Installing New FSR Files in this manual.
Sources for more X-Plane 11 and X-Plane 10 Aircraft The following excellent aircraft publishers, with whom we are not associated commercially, kindly donated aircraft during the development of FSFlyingSchool 2018 for X-Plane 11 and X-Plane 10:
Carenado http://www.carenado.com/ Shade Tree Micro Aviation http://shadetreemicro.com/ Wilson Aircraft http://forjets.netfirms.com/
FSFlyingSchool ____________________________________________________
________________________________________________________ 41
Adding Aircraft by Installing New FSR Files New FSFlyingSchool aircraft data (FSR) files are available from time to time from the FSFlyingSchool.com website. These files allow you to add new aircraft data without having to collect and enter it into an FSU file. In order to install new aircraft FSR files into FSFlyingSchool: Place the new FSR file into the FSFlyingSchool Aircraft folder on your PC. Note that the FSR file for the aircraft must bear the same file name as that of the aircraft folder in X-Plane 11 and X-Plane 10, but with the prefix 'xp'.
For example, the FSFlyingSchool file to match the plane: P180 Avanti Ferrari Team would be xpP180 Avanti Ferrari Team.fsr You are now ready to connect to X-Plane 11 and X-Plane 10 and fly that aircraft with FSFlyingSchool. FSFlyingSchool will henceforth use the FSR file, which contains the aircraft data, by default.
FSFlyingSchool ____________________________________________________
42 ________________________________________________________
Location Triggered Sounds FSFlyingSchool enhances your immersion in the simulation by playing files that depend on your location. These files are played when you are within a specific distance of the latitude and longitude coordinates contained in the filename of the associated sound file. For example, the file
“N52_28_46#E13_23_29 [Berlin Tempelhoff].wav” will play when you are close to Berlin Tempelhoff airport. Files with the prefix “LANDED#” will play only when a landing takes place in the specified region, not merely when flying over it. For example the file:
“LANDED#N41_58#W87_54 [Chicago OHare].wav” will play when you land at Chicago O’Hare airport. Files defined in degrees (with no minutes) are triggered within that exact area. Files defined in minutes are triggered if the pilot is within +/- 2 minutes. Files defined in fractions of minutes are triggered if the pilot is within +/- 0.02 minutes. We have included several files which will play as you explore the world with FSFlyingSchool. You can add your own ‘location’ files to be played when you fly over some of your favourite places using these simple steps: 1. Record the file you wish to play at the location you have chosen. Use Windows own Sound Recorder program (often found under the Start Menu-Programs-Accessories-Entertainment menu), or a specialized sound editor if you prefer. Be sure to save the file in the following format:
Microsoft PCM 11.025 kHz, 8 Bit, Mono Make sure you trim off any unnecessary silence at the start and end of the recording. Keep the recording fairly short or it may clash with the other things happening during your flight with FSFlyingSchool. 2. Save your recorded file in your FSFlyingSchool for X-Plane Locations folder. The filename must follow this format:
Note that the latitude and longitude are given in degrees and minutes.
FSFlyingSchool ____________________________________________________
________________________________________________________ 43
Flying FSFlyingSchool – help us build the add-on you want! The most important thing you can do, of course, is take to the skies with FSFlyingSchool! Be sure to start with landings and very short flights first so that you fully understand how FSFlyingSchool behaves before investing your time in long flights or demanding circuits. Why not try out a range of different types of flights and report the results back to us? Try flights with a variety of: weather; times of day; hemispheres; durations; VFR and IFR; ILS and visual approaches. Try flights with unusual parameters such as bad weather and even just plain bad flying! At the end of each session you fly, you can submit your account of your experience with FSFlyingSchool
to the FSFlyingSchool forum at: http://www.fsflyingschool.com/forum/ We’d like to hear: - What you did - you can be brief because your log book (see below) will provide us with a lot of data. - What you liked. - What you did not like. - Your suggestions. - Error messages. - Incorrect behavior or information. - Performance problems. In addition we would like to see any files you may have created yourself for: WAV – Location files WAV – Landing files BMP/GIF/JPG – Pilot image files Thanks – we look forward to hearing about your flights with FSFlyingSchool!
FSFlyingSchool ____________________________________________________
44 ________________________________________________________
Notes from the designer You will get the most out of FSFlyingSchool if you read this manual and you handle your aircraft realistically. By this, we mean that you fly in such a manner that your passengers are neither ill nor terrified at the end of the flight and the aircraft is still in good shape. FSFlyingSchool is about airmanship, the handling of the plane. It is not about checklists or operating the FMC. You can still do this, (we do), but this is not the reason we built this add-on. We want virtual pilots to think about what they are doing to themselves, their passengers, their aircraft, ATC and the traffic they are sharing the virtual skies with. It can be very easy to get reasonable landing, flight, circuit and airmanship challenge scores when flying a simple plane in dead calm weatherR but where’s the challenge in that? Set up a nasty gusting crosswind at your destination, lower the visibility at the airfield. This is where your scores can really get good! One of our guiding principals at FSFlyingSchool is that we create products which can be enhanced and extended by us, by you and by the flight simulation community at large. As a result, FSFlyingSchool allows us, you and them to add: - Location ambience sound files - Landing ambience sound files Rso try creating some of your own – there’s nothing quite so rewarding as creative play! Finally, we thought you might like to hear about some of the enhancements we are considering for FSFlyingSchool. We have a very active forum and these ideas are discussed there passionately. Many ideas suggested by fans have already been added to the software! - Monitoring pilot’s performance based on the changing factors which affect use of flaps, approach speeds, etc, such as current pressure, current temperature and current aircraft weight. - Support for SIDs & STARs - Support for helicopters - Support for gliders - Support for aerobatic and combat flying - Touch and go landings - Right handed circuits - More voice commands to use with your instructors - Interactive help with taxiing safely - More weather tips Good luck with your flights and have fun! - Jeff Preston December 2017
FSFlyingSchool ____________________________________________________
________________________________________________________ 45
Troubleshooting FSFlyingSchool Forum
Check the FSFlyingSchool Forum: [www.FSFlyingSchool.Com/Forum] Whatever difficulty you may experience, others may be able to help. If you got some results into your log book (you didn’t merely fly for a few seconds or wreck or crash the aircraft) you can send us the following files from the
PilotRoster
folder .PLT file (your pilot configuration file) .HTM file (your pilot’s FSFlyingSchool log book file) .CSV file (raw debugging data useful to us at FSFlyingSchool) For example, if you had created a pilot called Sebastian, then we would like you to send us:
PilotRoster\Sebastian.plt PilotRoster\Sebastian.htm PilotRoster\Sebastian.csv
Application Priority Windows applications can have their Priority configured higher than normal. This means they are taking an unusually large amount of the PC’s processing power for themselves, at the expense of other applications running on that PC. FSFlyingSchool should not be used when applications on the same PC have a Windows Priority set other than at normal. The most likely effect of having an application, such as X-Plane, with its priority set higher than normal is that FSFlyingSchool’s instructor’s voice will seem to lag behind the events which are occurring. This can be simply solved by making other applications on the PC run with normal priority. To change the priority of an application back to normal, please consult Microsoft’s technical help literature or their help on the Web. Controllers are Recommended
Flying smooth, realistic flights with splendid landings is a lot easier, in our opinion, with good flight controls. If you can get hold of them, use a joystick or yoke. If you have funding to spare, get a throttle and rudder pedals. These make a huge difference in smooth aircraft control and of course in your own immersion in the simulation.
Footnotes - Note that if FSFlyingSchool’s shortcut keys conflict with your add-on, you will often be able to
change the key assignments in the add-on to something which does not conflict with FSFlyingSchool.
- FSFlyingSchool detects transponder emergency settings and displays them as text. - FSFlyingSchool detects COM1 emergency frequency and displays it as text. - Pressing Ctrl Shift B provides handy data to the pilot who wants to know current: AGL (above
ground level), ground altitude and also displays the count of errors (if any) that the instructor has noted in this flight. To the sharp eyes of these instructors, flying the wrong way for half a second counts as an error so these can add up fast!
- -
FSFlyingSchool ____________________________________________________
46 ________________________________________________________
Some Technical Terms - Transition altitude
Typically, in the USA, a pilot climbing through 18000' should set the altimeter to 29.92" Hg (1013 hPa). Descending through 18000', the pilot will set the local altimeter setting. This altitude is very different in other countries and can vary within the same country.
Aircraft Lights - Beacon
If an engine is on, have the beacon on. - Nav
If an engine is on, have nav lights on. - Taxi
If in taxi mode at night, or in taxi mode in a heavy aircraft, taxi lights on. - Strobe
If not in taxi mode, strobe lights on. - Landing
If not in taxi mode, landing lights on, unless above 10,000 feet MSL in a heavy aircraft or in cruise mode in a light aircraft..
FSFlyingSchool ____________________________________________________
________________________________________________________ 47
END-USER LICENSE AGREEMENT
This End-User License Agreement (“EULA”) is a binding legal agreement between yourself and FSFlyingSchool; when you click to “agree” when installing this software, you indicate your approval of these terms and conditions, at which point this EULA becomes a legally binding agreement between yourself and FSFlyingSchool. FSFlyingSchool disclaims any and all responsibility for the software program and its data or liability connected to the software program and its data. The software program and data are provided by FSFlyingSchool "as is" and "with all faults" and FSFlyingSchool makes no submissions or warranties of any kind concerning the quality, security or suitability of the software, either expressed or implied, including, without limitation, any implied warranties of fitness for a particular purpose or non-infringement. Further, FSFlyingSchool makes no representations or warranties as to the genuineness, accuracy or completeness of any statements, information or materials concerning the software program and data on the FSFlyingSchool website and in no event will FSFlyingSchool be liable for any circuitous, punitive, particular, incidental or consequent damages however they may arise and even if FSFlyingSchool have been previously advised of the possibility of such damages. FSFlyingSchool cautions you to make sure that you completely understand the potential risks before downloading any of the software as you are solely responsible for adequate protection and backup of the data and equipment used in connection with any of the software, and FSFlyingSchool will not be liable for any damages that you may suffer in connection with using, modifying or distributing any of the software even if FSFlyingSchool have been previously advised of the possibility of such damages. Before you purchase from FSFlyingSchool, please download and test any demo of the software you are considering purchasing to make certain you are satisfied with what the product is and does and are satisfied with the way it performs on your own computer. Before buying from FSFlyingSchool, please read the documentation for the product so you can be sure it is what you want to buy and ask questions on our forum if you need further information prior to your purchase. FSInventions makes no representation that any web or internet based service will be available at any time even if this product requires it to function. FSFlyingSchool makes no representation that all navigation aids in the simulator will be located by FSFlyingSchool. FSFlyingSchool disclaims any and all responsibility for charges incurred through the use of its software. FSFlyingSchool’s software is not to be considered, in any way, implied, certified, suitable or valid for the training of any person for the operation of any aircraft or vehicle of any kind. Weather add-ons are designed using many different methods and we make no claim that Weather Tutor will function as described with all weather add-on products for your simulator. Simulated autopilot units are designed using many different methods and we make no claim that Autopilot Tutor will function as described with any autopilot unit except the units supplied with the flight simulator and we make no claim that Autopilot Tutor will function as described with any autopilot's specific features. This program will send usage data to FSFlyingSchool to help improve future versions unless turned off by a registered user. All support is via email and forum. You are given a single non-commercial license to use this software and you must not sell, give, rent or transfer copies or originals of FSFlyingSchool software or its registration keys to any other person or organisation. This license is for personal use and is expressly not for commercial use. You are granted a license to use this software on one PC. You are hereby notified that when you install this program it installs XPUIPC version 2 into X-Plane 11 and X-Plane 10 and makes a backup copy of any existing XPUIPCOffsets.cfg in the user's XPUIPC folder and replaces it with a version of the file required for FSFlyingSchool to function. This software is licensed to be used with X-Plane 11 for Windows and X-Plane 10 for Windows, and is not licensed to be used with any other version of X-Plane or other flight simulator. Last revision – June 9 2018