explorations in physics a - dickinson college … explorations in physics (eip) is a set of...
TRANSCRIPT

EXPLORATIONS IN PHYSICS
AN ACTIVITY-BASED APPROACH TO UNDERSTANDING THE WORLD


EXPLORATIONS IN PHYSICS
DAVID P. JACKSON Dickinson College
PRISCILLA W. LAWS Dickinson College
SCOTT V. FRANKLIN Rochester Institute of Technology
With Contributing Author: KERRY P. BROWNE Dickinson College
John Wiley & Sons, Inc.
AN ACTIVITY-BASED APPROACH TO UNDERSTANDING THE WORLD

ACQUISITIONS EDITOR Stuart Johnson
SENIOR PRODUCTION EDITOR Elizabeth Swain
SENIOR MARKETING MANAGER Bob Smith
COVER DESIGNER Karin Gerdes Kincheloe
ILLUSTRATION EDITOR Anna Melhorn
PHOTO EDITOR Hilary Newman and Elyse Rieder
COVER PHOTO ©Eyewire
This book was typeset by the authors and was printed and bound by Courier Westford. The cover was printed by Phoenix.
This book is printed on acid-free paper.
Copyright 2003 John Wiley & Sons, Inc. All rights reserved.
No part of this publication may be reproduced, stored in a retrieval system or transmitted in any form or by any means, electronic, mechanical, photocopying, recording, scanning or otherwise, except as permitted under Sections 107 or 109 of the 1976 United States Copyright Act, without either the prior written permission of the Publisher, or authorization through payment of the appropriate per-copy fee to the Copyright Clearance Center, 222 Rosewood Drive, Danvers, MA 01923, (978) 750-8400, fax (978) 750-4470. Requests to the Publisher for permission should be addressed to the Permissions Department, John Wiley & Sons, Inc., 605 Third Avenue, New York, NY 10158-0012, (212) 850-6011, fax (212) 850-6008, E-Mail: [email protected]
To order books or for customer service, call 1(800)-CALL-WILEY (225-5945).
ISBN 0-471-32424-8
Printed in the United States of America
10 9 8 7 6 5 4 3 2 1

PREFACE
Explorations in Physics (EiP) is a set of curricular materials developed to help non-science majors acquire an appreciation of science, understand the process of scientific investigation, and master concepts in selected topic areas. Although EiP contains both text and experiments, it is neither a textbook nor a traditional laboratory manual. Rather, it is an Activity Guide—a student workbook that combines text with guided inquiry activities. Each EiP unit covers a specific topic area and has been designed as a stand-alone unit to give instructors maximum flexibility in designing courses. Whenever possible, each student concludes the investigations in a unit by undertaking an extended scientific project designed and carried out with two or three fellow students.
Explorations in Physics represents a philosophical and pedagogical departure from traditional modes of instruction. While courses for non-science majors have typically focused on intrinsically interesting topics to help motivate students, the primary format of these classes remains the lecture. Explorations in Physics attempts to enrich the study of interesting topics with a hands-on approach to learning. Careful attention has been paid to maintaining a focused “story line” that directs students to connect specific activities to real-world phenomena. This provides a framework for students to develop their own scientific investigations which they complete during the project phase of the course.
A major objective of EiP is to help students understand the basis of knowledge in physics as a subtle interplay between experiment and theory. Students spend most of their class time making predictions and observations in order to develop coherent conceptual models of various phenomena. There are two major reasons for emphasizing the process of scientific investigation. First, introductory science students frequently lack the conceptual understanding of physical phenomena necessary to comprehend theories and mathematical derivations presented in lectures. Second, students who are actively involved in scientific investigations show a high level of commitment to the activities and a greater appreciation of the topics they are studying.
In designing EiP, we have taken advantage of the results of physics education research on student learning and attitudes. We have used findings from other researchers as well as our own surveys and student interviews to shape the curricular materials. Our assessments of student learning indicate that students who complete a sequence of EiP activities in supportive learning environments achieve significant improvements in their conceptual understanding of the topics studied.
TOPICS COVERED AND THE MODULAR FORMAT OF THE UNITS Explorations in Physics organizes topics into individual units. The core material in these units is explored through a series of activities that students work through in peer learning groups. These activities consist of predictions, observations, measurements, analysis, and reflections, and are designed to guide the students through the process of scientific inquiry. The core material for a unit takes about 18 class hours to complete and is typically followed by a student-directed project.
These units are designed to be completely independent of one another and can be introduced in any order. This flexibility allows instructors to design a course to match their particular needs and interests. Four Explorations in Physics units are contained in this volume. These include:
• Unit A: Force, Motion, and Scientific Theories
• Unit B: Light, Sight, and Rainbows
• Unit C: Heat, Temperature, and Cloud Formation
• Unit D: Buoyancy, Pressure, and Flight
Additional units are in various stages of development. They include Unit E: Energy, Fuels, and the Environment, Unit F: Patterns, Fractals, and Complexity, and Unit G: Sound, Vibrations, and Musical Tones. These units are available upon request to the authors.

iv EXPLORATIONS IN PHYSICS
USING THE ACTIVITY GUIDE IN VARIOUS INSTRUCTIONAL SETTINGS Explorations in Physics was originally designed to be used with relatively small classes in a Workshop/Studio setting that combines laboratory and computer activities with discussions. The materials were tested and refined over a 7-year period at Dickinson College, Santa Clara University, and Rochester Institute of Technology. The schedule for EiP courses was different at each of these institutions, and the number of topics covered and the balance between guided inquiry and projects had to be adjusted accordingly. Some common implementations are described in Table 1. In most cases, the suggested schedules also allow extra days for exams, review sessions, and oral project presentations.
Academic Calendar Class Schedule Core Material Student Projects
3 hrs/week 1 Unit 1 Full Project Semester
6 hrs/week 2 Units 2 Full Projects
3 hrs/week 1 Unit 1 Shortened Project Quarter
6 hrs/week 2 Units 1 Full Project
Table 1: Common implementation schedules for core materials and projects
We recognize that not all institutions have the resources to provide a Workshop learning environment in which lectures and labs are combined. As outlined below, these materials can also be adapted for use in more traditionally structured classes.
Traditional Lecture Sessions: It is possible to incorporate individual activities into lectures as demonstrations, similar to Interactive Lecture Demonstrations developed by David Sokoloff and Ronald Thornton. In these demonstrations, students record their predictions, discuss them with fellow students, and then watch as the instructor performs an experiment. Questions in the activity guide lead students to reconcile their predictions and observations.
Traditional Lecture Sessions with Laboratory: In cases where a complete unit is introduced into a traditionally scheduled course, the labs and lectures can be coordinated so students can work through the unit in sequence with some activities being done as interactive lecture demonstrations and others as laboratory exercises.
COMPUTER TOOLS AND STUDENT PROJECTS When used properly, computers can greatly enhance student learning. In Explorations in Physics, we use computer-based laboratory tools for the real-time collection and graphing of data. Data is collected through sensors that are connected to a computer via an interface. Available sensors are capable of measuring a variety of physical quantities such as force, motion, temperature, light intensity, and pressure. These sensors, interfaces, and software are available from many vendors including PASCO Scientific and Vernier Software.
Student-directed projects are one of the most exciting elements of EiP. These projects are carried out both during and outside class time and culminate in group oral presentations and individual written reports. These projects enable each group of students to investigate a topic of their own choosing. This helps to reinforce their understanding of the core material while giving them first-hand experience with the process of scientific investigation. For these reasons, we recommend dedicating equal amounts of class time to projects and core materials. While individual circumstances may preclude this, we cannot overemphasize the value of projects. At the end of each unit we have included descriptions of some viable student projects. It should be stressed, however, that these are only suggestions. The most successful projects are often those that students develop for themselves based on personal interests.

PREFACE v
STAYING UP TO DATE The authors have been offering workshops on various aspects of teaching Explorations in Physics including weeklong summer workshop and shorter workshops offered at national AAPT meetings. A schedule of upcoming workshops will be posted on the EiP website. The Explorations in Physics website also contains instructor materials for each unit. These include tips to help instructors with activities and equipment, sample syllabi, homework assignments, examinations, and other course documents. The web address is: http://physics.dickinson.edu/EiP. If you have problems logging on, call the Workshop Physics Project Office at (717) 245-1845 between 8:00am and 5:00pm EST.
ACKNOWLEDGMENTS This project began in the fall of 1994 with a grant from the Charles A. Dana Foundation. Since 1994 the project has benefited from the expert advice and support of numerous individuals. We are especially grateful to Uri Treisman, Senior Advisor to the Dana Foundation’s Education Program, for his creative work in helping us launch this project. Feedback from an Advisory Committee that met during the early stages of this project was of paramount importance. Members of this committee included: Nancy Baxter-Hastings, Robert Boyle, Michael Burns-Kaurin, Michael Chabin, Nancy Devino, Robert Fuller, Gerald Hart, Sandra Melchert, Hans Pfister, Dick Stanley, Carol Stearns, Ronald Thornton, and Sheila Tobias.
In addition, a substantial number of ideas have been derived from casual conversations and published articles. It is not possible to list everyone who has influenced the development of these materials, but some of the more important contributions came from Lillian McDermott and the Physics Education Group at the University of Washington, E.F. “Joe” Redish and the Physics Education Research Group at the University of Maryland, David Sokoloff at the University of Oregon, and Ronald Thornton at Tufts University.
We have received valuable comments from a number of reviewers and Beta Testers. These include Robert Beichner (North Carolina State University), John Carini (Indiana University), John Christopher (University of Kentucky), Jeff Collier (Bismarck State College, ND), Lynn Cominsky (Sonoma State University), Bob Fuller (University of Nebraska), Donald Greenberg (University of Alaska, Southeast), Bob Bogar and Pat Keefe (Clatsop Community College), Gerald Hart (Moorhead State University), Harold Hart (Western Illinois University), Charles Hawkins (Northern Kentucky University), Mark Lattery (University of Wisconsin, Oshkosh), Marie Plumb (Jamestown Community College), Patricia Rankin (University of Colorado), David Lee Smith (LaSalle University), Chuck Stone (Forsyth Technical Community College), Beth Ann Thacker (Texas Tech University), Bob Tyndall (Forsyth Technical Community College), Mark Winslow (Independence Community College), and Gail Wyant (Cecil College).
We have also benefited from the many ideas contributed by our colleagues in the physics and astronomy departments at Dickinson College, Santa Clara University, and Rochester Institute of Technology. In addition, Kerry Browne has made significant administrative, intellectual, and artistic contributions to this project. In designing illustrations and refining storylines he has been instrumental in bringing these materials to their final published form. We are also grateful for the administrative support of Gail Oliver, Maurinda Wingard, and Sara Buchan. We would be remiss if we did not mention the many generations of students whose continual feedback over the years has helped make these materials more student friendly. Specifically, we would like to thank those students whose efforts went above and beyond our expectations and whose genuine interest and creativity have helped us learn new things about physics.
This project would never have been published were it not for the hard work and enthusiasm of our Acquisitions Editor, Stuart Johnson, and the staff at John Wiley and Sons, Inc. We gratefully acknowledge the funding agencies whose support has led to the publication of these materials. These include the Charles A. Dana Foundation, the Fund for the Improvement of Post Secondary Education (FIPSE), and the National Science Foundation, including the NSF PFSMETE program that enabled Scott Franklin to join the project. We have also received generous financial support from Dickinson College, Santa Clara University, and Rochester Institute of Technology. Lastly, we would also like to thank our families for their continued patience and support throughout the life of this project.
David P. Jackson, Dickinson College Priscilla W. Laws, Dickinson College Scott V. Franklin, Rochester Institute of Technology April 2002

vi EXPLORATIONS IN PHYSICS
ABOUT THE AUTHORS
DAVID JACKSON David Jackson received his bachelor’s degree from the University of Washington in 1989 and his Ph.D. from Princeton University. After completing his Ph.D. in magnetic fluid pattern formation in 1994, he joined the faculty at Dickinson College as an assistant professor and became the project director for Workshop Science. In this latter capacity, he collaborated with Priscilla Laws on design of a year-long physical science curriculum for non-science majors and pre-service teachers which forms the basis of the materials contained in this volume. In 1997, he joined the physics faculty at Santa Clara University as an assistant professor. There, he served as a principal investigator for the Workshop Science project and developed a research program to explore how multiple domains affect the pattern formation process. As part of this responsibility, he has developed and adapted the Workshop Science curriculum for use at Santa Clara. In 2001, he returned to Dickinson College where he continues to develop curriculum and investigate pattern formation processes courses as an assistant professor. Professor Jackson is an active member of the American Physical Society and the American Association of Physics Teachers.
PRISCILLA LAWS Priscilla Laws received her bachelor’s degree from Reed College and a Ph.D. from Bryn Mawr College in theoretical nuclear physics. She has been a faculty member at Dickinson College for many years. She is the author of articles and books on the health effects of medical and dental x-rays, the impact of energy use on the environment, and activity-based physics teaching. As part of the Workshop Physics project which she initiated in 1986, she has developed curricular materials, apparatus and computer software and hardware used in introductory physics teaching.
Dr. Laws has received awards for software design and curriculum innovation from EDUCOM/NCRIPTAL, Computers in Physics, the Sears-Roebuck Foundation, and the Merck Foundation. In 1993, she received the Dana Foundation Award for Pioneering Achievement in Education with Ronald K. Thornton and in 1996, the American Association of Physics Teachers bestowed the 1996 Robert A. Millikan Medal to Professor Laws for notable and creative contributions to the teaching of physics. She has been a principal investigator on a number of curriculum development projects funded by FIPSE and NSF. In 1994 she received a seed grant from the Dana Foundation to begin development of these Explorations in Physics units as part of the Workshop Science project.
SCOTT FRANKLIN Scott Franklin received his bachelor’s degree from the University of Chicago in 1991 and his Ph.D. from the University of Texas at Austin in 1997. He is currently on the faculty at Rochester Institute of Technology, where he is adapting EiP for use at a technological institute. Scott joined the Workshop Science project in 1998 with an National Science Foundation Postdoctoral Fellowship in Science, Mathematics, Engineering, and Technology Education (SMETE). Under the mentorship of Priscilla Laws, Scott developed new units, extensively revised existing units, and performed basic educational research on student conceptions and attitudes which were crucial to EiP’s successful development and implementation. Scott remains active in the Physics Education Research community, where he is currently co-editor of the Proceedings of the AAPT Physics Education Research Conference. In addition to curriculum development and physics education research, Scott maintains a lab investigating topics in nonlinear dynamics, including granular materials and dislocation dynamics.

UNIT B
LIGHT, SIGHT, AND RAINBOWS
DETAILED CONTENTS
0 OBJECTIVES. . . . . . . . . . . . . . . . . . . . . . . . . . . . . . . . . . . . . . . . . . . . . . . . . . . . . . . . . . . . . . . . . . B-1 0.1 OVERVIEW . . . . . . . . . . . . . . . . . . . . . . . . . . . . . . . . . . . . . . . . . . . . . . . . . . . . . . . . . . . . . . . . . . . B-2
1 HOW IS INFORMATION TRANSMITTED TO OUR EYES? . . . . . . . . . . . . . . . . . . . . . . . . . B-3 1.1 LIGHT, DARK, AND SIGHT. . . . . . . . . . . . . . . . . . . . . . . . . . . . . . . . . . . . . . . . . . . . . . . . . . . . . . B-3 1.2 HOW DOES LIGHT TRAVEL? . . . . . . . . . . . . . . . . . . . . . . . . . . . . . . . . . . . . . . . . . . . . . . . . . . . B-9 1.3 LIGHT AND OBJECTS: REFLECTION AND SCATTERING . . . . . . . . . . . . . . . . . . . . . . . . . . . B-14
2 FROM LIGHT TO SIGHT. . . . . . . . . . . . . . . . . . . . . . . . . . . . . . . . . . . . . . . . . . . . . . . . . . . . . . B-25 2.1 MODELING THE EYE . . . . . . . . . . . . . . . . . . . . . . . . . . . . . . . . . . . . . . . . . . . . . . . . . . . . . . . . B-25 2.2 CHANGING THE DIRECTION OF LIGHT. . . . . . . . . . . . . . . . . . . . . . . . . . . . . . . . . . . . . . . . . B-34 2.3 A LENS IN ACTION . . . . . . . . . . . . . . . . . . . . . . . . . . . . . . . . . . . . . . . . . . . . . . . . . . . . . . . . . . B-40
3 COLOR: HOW CAN WE SEE IT?. . . . . . . . . . . . . . . . . . . . . . . . . . . . . . . . . . . . . . . . . . . . . . B-47 3.1 COLOR AND LIGHT. . . . . . . . . . . . . . . . . . . . . . . . . . . . . . . . . . . . . . . . . . . . . . . . . . . . . . . . . . B-47 3.2 TRANSMISSION GRAPHS AND THE SPECTRUM OF LIGHT . . . . . . . . . . . . . . . . . . . . . . . . . B-53 3.3 REAL OBJECTS . . . . . . . . . . . . . . . . . . . . . . . . . . . . . . . . . . . . . . . . . . . . . . . . . . . . . . . . . . . . . B-55
4 THE REAL WORLDRAINBOWS, BLUE SKIES, AND SUNSETS . . . . . . . . . . . . . . . . . B-65 4.1 RAINBOWS . . . . . . . . . . . . . . . . . . . . . . . . . . . . . . . . . . . . . . . . . . . . . . . . . . . . . . . . . . . . . . . . . B-65 4.2 THE SUN AND THE SKY . . . . . . . . . . . . . . . . . . . . . . . . . . . . . . . . . . . . . . . . . . . . . . . . . . . . . . B-69
5 PROJECT IDEAS . . . . . . . . . . . . . . . . . . . . . . . . . . . . . . . . . . . . . . . . . . . . . . . . . . . . . . . . . . . . . B-75 5.1 FOCAL LENGTH OF A LENS . . . . . . . . . . . . . . . . . . . . . . . . . . . . . . . . . . . . . . . . . . . . . . . . . . B-76 5.2 POLARIZATION . . . . . . . . . . . . . . . . . . . . . . . . . . . . . . . . . . . . . . . . . . . . . . . . . . . . . . . . . . . . . B-77 5.3 ULTRAVIOLET (UV) LIGHT AND SKIN PROTECTION . . . . . . . . . . . . . . . . . . . . . . . . . . . . . B-78 5.4 PINHOLE CAMERA . . . . . . . . . . . . . . . . . . . . . . . . . . . . . . . . . . . . . . . . . . . . . . . . . . . . . . . . . . B-79 5.5 CURVED MIRRORS . . . . . . . . . . . . . . . . . . . . . . . . . . . . . . . . . . . . . . . . . . . . . . . . . . . . . . . . . . B-80 5.6 CORRECTING VISION . . . . . . . . . . . . . . . . . . . . . . . . . . . . . . . . . . . . . . . . . . . . . . . . . . . . . . . . B-81 5.7 REFLECTION AND REFRACTION. . . . . . . . . . . . . . . . . . . . . . . . . . . . . . . . . . . . . . . . . . . . . . . B-82


LIGHT, SIGHT, AND RAINBOWS B-1
UNIT B
LIGHT, SIGHT, AND RAINBOWS
©Corbis Digital Stock
“...if by means those [vibrations] of unequal bigness [length] be separated from one another, the largest beget a Sensation of a Red Colour, the least or shortest a deep Violet, and the intermediate ones, intermediate colours; much after the manner that bodies, according to their several sizes, shapes and motions, excite vibrations in the Air of various bignesses, which according to those bignesses, make several Tones in Sound.” –Sir Isaac Newton
0 OBJECTIVES
1. To understand how we see the world around us.
2. To observe, classify, and describe various characteristics of light.
3. To use basic tools to measure properties of light such as intensity.
4. To understand how a simple lens can model the eye.
5. To use a prism and a diffraction grating to separate light into its constituent colors.
6. To learn why we see colors.
7. To analyze rainbow formation.
8. To use the concept of scattering to explain why the sky is blue and sunsets are red.
9. To learn more about the nature of light, vision, and the process of scientific research by undertaking an independent investigation.

B-2 EXPLORATIONS IN PHYSICS
0.1 OVERVIEW
Sight provides us with more information about the physical world than any of our other senses. Think how helpless we are in a dark room, stumbling over objects we easily avoid in the light. Yet sight is the most mysterious sense. Unlike touch, taste, or even smell and hearing, sight extends over an incredible distance. Look outside on a clear day. Your eyes easily detect the sun almost 100 million miles away! Yet you also read these words, mere inches from your face. How is sight so flexible? How does it work? How does information, whether from the sun or this page, reach your eyes? What do your eyes do with this information?
In this unit you will make observations that will help you develop a theory for vision and sight. You will discover how information reaches your eyes and how your eyes then organize this information. In the process you will also discover the role light plays in vision, how eyeglasses improve vision, what makes an object “colored,” and how rainbows form.
One reason for vision’s mystery is its reliance on light, an external agent. To taste an ice cream cone requires ice cream and a mouth. But to see the ice cream requires the ice cream, our eyes, and light. Why? This question has puzzled scientists and philosophers for over 2000 years. Even the seemingly simple question, “what is light,” went unanswered for thousands of years. Although we will not attempt to answer this question, we can learn a great deal about vision without knowing exactly what light is. Instead, we will deal with the more straightforward question, “how does light behave?” Answering this question will lead us to investigate how light travels, how it interacts with objects, and how it enables us to see colors.
Figure B-1: The main questions we will investigate in this unit.
Vision is a complex phenomenon. Thus, it will be useful to break our study of vision down into smaller, more manageable, pieces. Figure B-1 illustrates the three primary questions we will investigate in this unit. First, we will investigate how visual information gets to our eyes. Do our eyes “go out and get it,” or does the information travel to our eyes? Once visual information gets to our eyes, it must be collected in a form that our brains can interpret. Therefore, a second valuable question is “how do our eyes collect visual information?” Our eyes collect more information than just the shape and location of objects. They also tell us about color. Thus, a third question is, “How do we see color?” None of these questions addresses the concept of perception, i.e., the interpretation of visual information by the brain. While perception is a fascinating field of psychology, it is beyond the scope of this course. We will not pursue the question of how the brain interprets information from the eye.
Section 1: How does visual information get to our eyes?
Section 2: How does the eye collect visual information for the brain?
Sections 3 & 4: How do we see color and what causes colorful visual phenomena like rainbows and sunsets?
©Corbis Digital Stock ©PhotoDisc, Inc.

LIGHT, SIGHT, AND RAINBOWS B-3
1 HOW IS INFORMATION TRANSMITTED TO OUR EYES?
Let's begin with the first of the three processes needed to understand sight by asking, “how does the information about the outside world get to our eyes?” What is light’s role, if any, in this process?
Your group will need some of the following equipment for the activities in this section:
• Completely darkened room [1.1] • Mini-Maglite™ flashlight (AA size) [1.1 - 1.3] • Cardboard tube [1.1] • Clear rectangular plastic container filled with water [1.1] • Powdered creamer [1.1] • Black Ping-Pong ball with 3-5 pinpricks and 1 larger hole to
fit over Maglite bulb [1.2] • Small block of wood [1.2] • Ray box [1.3] • Mirror [1.3] • MBL system and electronic light sensor [1.3] • Black body (light-tight box with small hole) [1.3]
1.1 LIGHT, DARK, AND SIGHT
Seeing is so much a part of our lives that most people haven’t thought much about what it means to actually “see” something. The following activity poses the seemingly obvious, but intriguing question, “can we see in the dark?”
Activity 1.1.1 Can You See in the Dark?
a) Consider the following statements by two students:
Student 1: “Light is necessary to see. We can’t see in the dark.”
Student 2: “I disagree. By waiting for our eyes to become “dark adapted” we can see in dark rooms or outside on dark nights. Light helps us see better, but it is not necessary.”
Discuss the above opinions with your partner. Do you agree with either student? Both? Neither? What is necessary for us to see? Below, write your thoughts on the matter.

B-4 EXPLORATIONS IN PHYSICS
b) If you go into your bedroom, close the blinds (or curtains), and then turn out the lights, do you think you will be able to see? Will things look any different after a minute or so?
c) Now imagine going into the closet in your room where there is no window or light, closing the door, and stuffing rags into the cracks at the bottom of the door. Do you think you will be able to see? Will anything change after a few minutes?
d) Your instructor may be able to put you in a room that has been made “light proof.” If so, briefly describe the experience (Could you see? Did things change after a minute or so?).
e) Based upon your observations, do you believe the presence of light is necessary for us to see?

LIGHT, SIGHT, AND RAINBOWS B-5
Most people have never experienced complete darkness and are surprised to find out that they can’t see anything at all. One fad in the late 1980’s was the “sensory deprivation tank” where a person would enter a completely dark and soundproof chamber. Some people claimed that the complete lack of sight and sound led them to a “higher” state of consciousness. Others found the experience disturbing and emerged shaken. Still others were just plain bored.
So we can’t see in the dark! Put another way, the presence of light is absolutely necessary for sight. Thus, if we are going to try and understand how we see things, it is important to understand something about how light behaves. We all know that if we look directly at a light bulb, we can see light. But, is this the only way to see light? People often talk about flashlights producing a “beam” of light. Cartoons frequently show a visible beam emanating from lights. The question we want to answer is under what circumstances does your eye detect light? If light is passing by your face, can you see it?
Activity 1.1.2 Can You See the Light?
a) Do you think you can see a flashlight beam from the side? What prior experiences of yours support your idea?
b) Look through a cardboard tube while your partner shines the light sideways past the tube, being careful not to get any light inside the tube. Can you see the beam? (Focus your attention on the beam itself, not on whether you see the light on the wall or on the inside of the tube.) Does this surprise you at all? Explain.

B-6 EXPLORATIONS IN PHYSICS
c) Below is a side view of an experiment in which a flashlight beam is pointed at a clear, rectangular container of water with a piece of paper behind it. Make a prediction as to what, if anything, you think you will see in the air between the flashlight and the container? In the water? On the paper? What, if anything, do you expect to see in these situations.
Focused Maglite
Rectangular container
filled with waterScreen (piece of white paper)
d) Now shine the flashlight through the water and onto the paper. Can you see a beam of light in the air or in the water? What do you see on the paper?
e) Do you think light from the flashlight passes through the water? Give evidence to support your answer.

LIGHT, SIGHT, AND RAINBOWS B-7
f) How is the light from the flashlight involved with what you see on the paper? (Are you seeing light from the flashlight? Are you seeing the paper? Are you seeing both?) Explain as best as you can.
Developing a Hypothesis You have just generated a hypothesis about the nature of light. A hypothesis is a conjecture (nothing more!) based upon a few general observations. Your statement about whether there is light in the water is a hypothesis, as is your idea about what you see on the paper. For the moment, you have no direct evidence supporting or contradicting your opinions. If left unsupported, a hypothesis is about as valuable as the paper on which this activity guide is printed (i.e., very little). The value of a hypothesis is that it is an idea about the world that can be tested. Everyone can generate opinions. The difficult task is developing hypotheses specific enough to be tested by experiment, or devising an experiment that tests a hypothesis. As more observations support a hypothesis it gains credibility and at some point, if it passes enough tests, the hypothesis is considered a theory or a law. We will say more about theories later.
Testing Your Hypothesis Having developed a hypothesis, the next step is to subject it to a controlled test. That is how ideas in science are verified through observation. One aspect of science that is generally not well-understood or appreciated is that an idea can be supported with lots and lots of experimental evidence, but it can never be proven correct. However, it only takes one experiment to disprove an idea. This is what is known as falsification. A scientific idea is always open to falsification. If an idea cannot be tested and shown to be incorrect, it is not considered scientific.
Activity 1.1.3 Testing Your Hypothesis
a) Suppose you add powdered creamer to your glass of water so that it becomes slightly cloudy. Predict what will happen to the light on the paper as you add creamer. What do you think you will see when you look into the water. Explain the reasoning behind your predictions.

B-8 EXPLORATIONS IN PHYSICS
b) Add a small amount of powdered creamer to the water. You can always add a little more if needed. What happens to the spot of light on the paper as you make your water slightly cloudy? Does this agree with your prediction?
c) Now look into the water. What, if anything, do you see? Explain carefully what you see.
d) How does the light produced by the flashlight affect what you see in the water? How is the cream involved? (Are you seeing light from the flashlight, and if so, how is it getting in the water or to your eyes? Are you seeing cream particles? Are you seeing both?)
e) Do you think there is any connection between the dimming of the spot on the paper and the “beam” of light in the water? Explain.
Checkpoint Discussion: Before proceeding, discuss your ideas with your instructor.

LIGHT, SIGHT, AND RAINBOWS B-9
In the last section, you saw that a beam of light is only visible in certain situations. In fact, there seems to be some correlation between the dimming of the spot on the paper and our ability to see the beam.1 Light from a flashlight “lights up” whatever object the flashlight is aimed at. Since light is produced in the flashlight and the object that gets “lit up” is further away, it is natural to assume that light travels from the flashlight to the object. Experiments to confirm this theory, however, are beyond the scope of our class. Because light travels so fantastically fast (about 186,000 miles every second), it is extremely difficult to track its motion. We can, however, study some of the other characteristics of how light travels.
1.2 HOW DOES LIGHT TRAVEL?
To investigate how light travels, you will use is a special Ping-Pong ball painted black on the outside and inside with several tiny holes drilled in it. When a light source is placed inside the ball, some light escapes to the outside through the holes. Your task is to discover under what conditions you can observe this light.
Activity 1.2.1 How Can You “See the Light?”
a) Predict what you will observe when you put a small light into the middle of a black Ping-Pong ball with small holes in it (see following sketch). Keeping your head at least 6 inches from the Ping-Pong ball, predict where you should hold your head so that you can see the small light bulb directly? (Draw a sketch if you think it is helpful.)
b) After your instructor dims the room lights, turn on your light source and slide the ball over the top so that the source is roughly in the middle of the ball. Hold a piece of white paper near the Ping-Pong ball in various places and describe your observations.
1 You may have also noticed that the spot on the paper starts to turn a bit orange after adding the creamer. We will return to this phenomenon later in the unit.
a)
b) Figure B-2: a) Mini-Maglite with reflector removed. b) same maglite with Ping-Pong ball (painted black inside and out)

B-10 EXPLORATIONS IN PHYSICS
c) Place one eye at least 6 inches from the Ping-Pong ball and look at the light bulb through one of the holes (close the other eye). Make sure you are seeing the actual light bulb; it should be quite bright. What path do you think the light is taking between the source, the hole, and your eye? Draw a rough sketch of where your eye needs to be to see the bulb and include the path of the light from the bulb that reaches your eye.
Ping-Pong ball
with one small
hole shown
Mini-Maglite
Cut-away View
d) If you were to remove the Ping-Pong ball, could you see the light source regardless of your eye’s location? What does this tell you about where light goes once produced in a light bulb? Discuss this with your group and make a formal statement about how light travels from a light bulb and where your eye must be in order to see it. Consider both the masked and unmasked cases.
LIGHT, SIGHT, AND RAINBOWS B-11
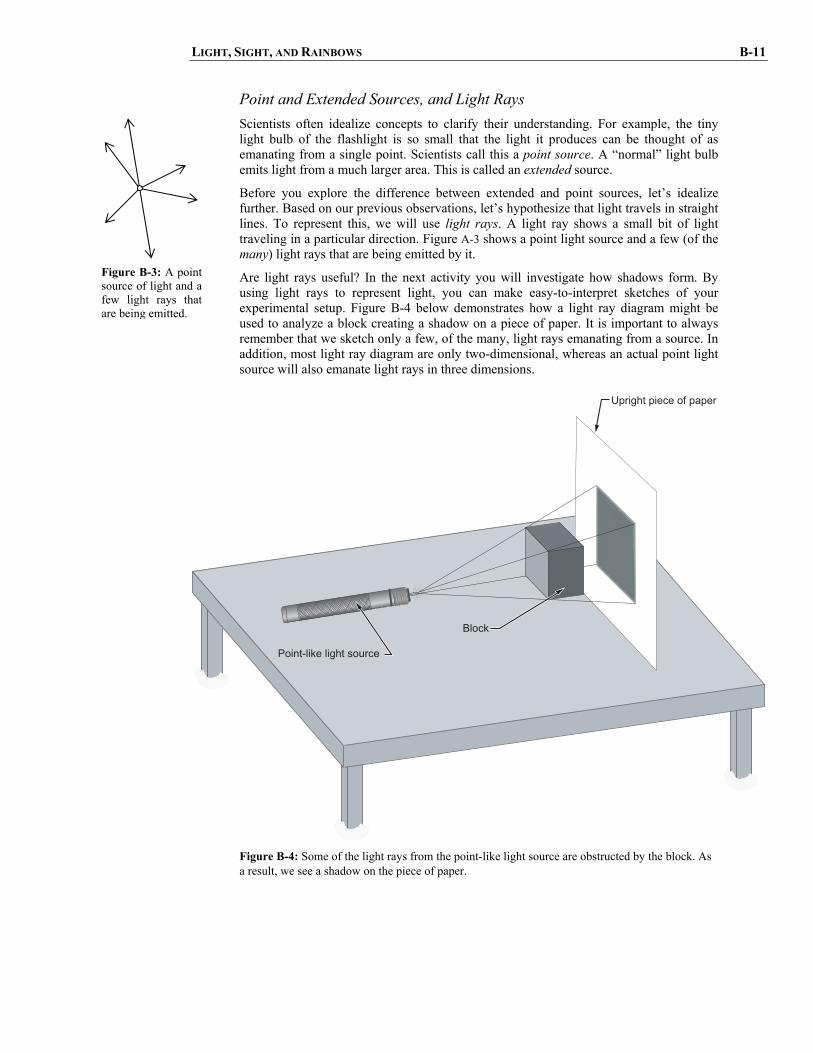
Point and Extended Sources, and Light Rays Scientists often idealize concepts to clarify their understanding. For example, the tiny light bulb of the flashlight is so small that the light it produces can be thought of as emanating from a single point. Scientists call this a point source. A “normal” light bulb emits light from a much larger area. This is called an extended source.
Before you explore the difference between extended and point sources, let’s idealize further. Based on our previous observations, let’s hypothesize that light travels in straight lines. To represent this, we will use light rays. A light ray shows a small bit of light traveling in a particular direction. Figure A-3 shows a point light source and a few (of the many) light rays that are being emitted by it.
Are light rays useful? In the next activity you will investigate how shadows form. By using light rays to represent light, you can make easy-to-interpret sketches of your experimental setup. Figure B-4 below demonstrates how a light ray diagram might be used to analyze a block creating a shadow on a piece of paper. It is important to always remember that we sketch only a few, of the many, light rays emanating from a source. In addition, most light ray diagram are only two-dimensional, whereas an actual point light source will also emanate light rays in three dimensions.
Upright piece of paper
Block
Point-like light source
Figure B-4: Some of the light rays from the point-like light source are obstructed by the block. As a result, we see a shadow on the piece of paper.
Figure B-3: A point source of light and a few light rays that are being emitted.

B-12 EXPLORATIONS IN PHYSICS
Activity 1.2.2 ShadowsEnlightenment from Darkness
a) A top view of a light source, a block of wood, and a piece of paper follows. Draw in at least six light rays emanating from the source. Include some that hit the block and some that don’t. Show exactly where the block’s shadow will be located.
Light Source
Wood Block
Paper Screen
b) Now consider what happens when there are two point sources of light. Again, draw about six light rays from each source and indicate where the shadow will be. Explain how this shadow is different from the shadow cast with only one light source?
Wood Block
Light Sources
Paper Screen

LIGHT, SIGHT, AND RAINBOWS B-13
c) Set up these two experiments and describe how the shadows cast by one source and by two sources look. Are there any differences? Were your predictions from parts a) and b) correct?
d) Based on your observations, how do you think the shadow would change if there were a third light source in between the other two? If there were 100 light sources? (After answering, you might want to try it to confirm your hypothesis.)
e) Based on our earlier observations about viewing light through small holes in a Ping-Pong ball, we have been drawing light rays as if the light travels in perfectly straight lines. Is this assumption consistent with your observations from this activity? Cite evidence to support your position.
f) Your instructor may have an extended light source for you to use. If not, use the room lights to cast a shadow of the wood block on a piece of paper. Does the shadow have sharp or fuzzy edges? Explain why it appears the way it does. Use a drawing if it will help.

B-14 EXPLORATIONS IN PHYSICS
What Makes a Good Point Source of Light? Many factors affect whether a light source is effectively a point source. One is the size of the light source itself. The smaller the light source, the more it will look like a point source. Another is how close you are to the source. Even a fairly large light source will look like a point source if you get far enough away from it. In general, the further away a light source is, the more it will look like a point source. A common example of an extended light source acting almost like a point source is the sun. Because it is 93 million miles away, the sun is, for many purposes, an adequate point source even though it is almost 575,000 miles in diameter. Nevertheless, there are some subtle reminders that the sun is in fact not a point source. If you go outside on a sunny day and look at your shadow, you will see that the edges are blurry. The blurry edge you see is a sign that the light source is not quite a point source. If you go back and cast a shadow with your point source, you will see a nice sharp edge to it. The more extended the light source, the less sharp are the shadows. Next time you have a chance, take a look at your shadow (if you can find it) when standing under a long fluorescent light (a very extended source).
1.3 LIGHT AND OBJECTS: REFLECTION AND SCATTERING
Let’s take a moment to review. Our goal is to understand how we see the world around us. Our first conclusion was that light is a necessary component of vision. We therefore spent the last section learning how light travels in transparent materials, such as air or water, once it is produced in a light source. In fact, we have developed hypotheses about how one sees light from a source. We have also observed what happens when light passes through water and when it hits objects that are not transparent such as wood blocks, paper or creamer particles. Now let’s extend our study of light by investigating how light interacts with a mirror.
Activity 1.3.1 Reflections on Reflection
a) Below is a sketch of a light ray hitting a mirror at a certain angle from a line perpendicular to the surface (called the normal line). Draw in your prediction for how the light ray will travel from the mirror. Do you think the direction of the outgoing light ray depends on the angle with which the incoming ray hits the mirror? Explain briefly.
θi
Normal
Mirror

LIGHT, SIGHT, AND RAINBOWS B-15
b) The figure below is designed to help familiarize you with normal lines. Normal lines have been drawn in for three of the dots already. Complete the diagram by drawing a normal line for each of the remaining dots.
c) Using a ray box, arrange a thin beam of light so that it travels
along the direction shown below. Find at least 3 different places to put a mirror so that the ray passes through the center of the dot on the right (•). Mark the location and orientation of the mirror and the path of the light ray for each case. (Use a ruler when sketching in your light rays.)
d) Are your sketches consistent with your prediction from part a)? Give a precise rule that describes how the light beam is affected by the mirror.
Ray Box

B-16 EXPLORATIONS IN PHYSICS
e) Based on your observations, predict the orientation of a mirror that, centered on the “X”, would reflect a beam of light from the ray box through the center of the dot (•). Sketch your prediction with a dashed line, and include any other lines (normal lines, etc.) you used to make your prediction.
f) Now try the experiment. Place a mirror, centered on the X, so that it reflects the light through the center of the dot. Draw a solid line to indicate the orientation of the mirror. Does your prediction agree with your observation?
Checkpoint Discussion: Before proceeding, discuss your ideas with your instructor.
You have just developed a theory of reflection from flat surfaces. A scientific theory is not just an opinion. It has been supported by observations, and makes accurate predictions about some new observations. You used your theory to predict the location of the mirror in the previous activity. This prediction also served as a test for your theory. As previously mentioned, a theory about how the world works can never be proven correct in the philosophical or logical sense. It only takes one experiment to prove that it is incorrect. Thus, we cannot say with certainty that such an experiment won’t be found in the future.2 Nevertheless, as more and more observations support a theory we begin to put more faith in its ability to describe how the world works.
2 Even a technically incorrect theory can be profoundly useful. Newton’s laws of motion, for example, have been superseded by Einstein’s theory of relativity. These two theories differ significantly only in very extreme cases, however, and so Newton’s laws are still accurate and useful in most practical applications.
Ray Box
X

LIGHT, SIGHT, AND RAINBOWS B-17
Measuring Light Intensity Electronically Because we could see the light ray on the paper in the previous activity, we didn't need any special tools to determine where the light was. This is not always the case. Although our eyes are quite sensitive to the presence of light, they are not as sensitive at detecting differences in brightness. Put another way, you can quite readily see even tiny amounts of light but it is difficult to distinguish between a little light and a little more light. A light sensor, on the other hand, is capable of measuring small differences in light intensity.
You might know that as a light gets farther from your eye it appears less bright. For example, although many stars are much brighter than our sun, they are also much farther away and thus appear less bright than the sun. This is why we don’t see stars when the sun is up. Here we will investigate how lights dim as they get farther away from our eyes. In the process, we will familiarize ourselves with the light sensor.
Activity 1.3.2 Sensing Light
a) After your instructor explains how to set up and use the light sensor, use it to detect light from a flashlight. Your instructor may have to darken the room. How must the sensor be oriented with respect to the flashlight in order to detect light? Can it detect the light from the side? Is this consistent with your observations when you tried to see the flashlight with your eyes (Activity 1.1.2)? Explain briefly.
b) Now use the light sensor to detect light from a point source. What happens to the intensity as you move the sensor away from the light? Is this similar to what you observe with your eyes?
The previous activity may not seem very profound, but it is important to realize that the light sensor behaves in a similar manner to our eyes when it comes to brightness. As already mentioned, there will be situations when we cannot distinguish with our eyes whether there is more or less light in a particular experiment. In these situations, we can use the light sensor to help us.

B-18 EXPLORATIONS IN PHYSICS
Activity 1.3.3 Light on an Object: Part I
a) Use your ray box to produce a wide beam of light and shine it on a mirror as shown below (the dotted line shows where the center of the beam will hit the mirror). Use your law of reflection and the normal line to make a rough sketch of where the beam goes after it hits the mirror.
b) In the preceding diagram, you will see three points labeled A, B, and C. Place the light sensor at each of these points and aim it directly at the spot where the light is hitting the mirror. Describe the results of the light sensor. Where does the light appear to be going after it hits the mirror?
Mirror
C
B
A
Ray Box

LIGHT, SIGHT, AND RAINBOWS B-19
c) Is there one point or many points from which you (using your eyes) can see light from the flashlight in the mirror? Is this consistent with the light sensor measurements?
d) Now tape a white piece of paper directly to the front of the mirror, and make the same set of measurements. Is there one place or many from which the light sensor detects an appreciable amount of light? What does this imply about where the light goes once it hits the paper? Note: The room lights may need to be dimmed for this experiment.
e) Is there one point or many from which you (using your eyes) can see light from the flashlight on the paper? Is this consistent with the light sensor measurements?
f) What do you think the paper is doing to the light that the mirror is not doing? Why might the paper do this? Explain briefly.

B-20 EXPLORATIONS IN PHYSICS
There is a big difference between light hitting the paper and light hitting a mirror. In the case of a mirror, the light goes off in one direction, which depends on the angle that the incoming light makes with the mirror. With the paper, however, the light seems to bounce off in all directions. We will distinguish between these two types of behavior with the terms reflection and scattering respectively.3
Scattering simply means that when incoming light strikes an object, the outgoing light travels in all different directions. Reflection, on the other hand, is when most of the incoming light goes off in one particular direction. Reflection typically occurs when the surface is very smooth. A lake on a windless day acts very much like a mirror, making beautiful reflections of whatever is behind it. When the surface of the water is rough, however, light scatters in all directions and the mirror-like behavior disappears. Most objects both scatter and reflect light. What we see depends upon whether more light is scattered or reflected. This difference is very important to our ability to see objects, as you will discover in the following activities.
What are You Seeing When Looking at an Object? So far, we have specifically avoided the most important question of this whole section. That is, “what are we seeing when we look at an object?” We know from a previous activity that without light we cannot see. We also know that in order to actually see light that is produced in a light source, our eye must be on an unobstructed line with the source. Nonetheless, we can see objects that do not produce light. The next activity addresses the question of how we see objects that reflect but don’t produce light.
Activity 1.3.4 Light on an Object: Part II
a) Below is a top-view sketch of a flashlight shining on one side of a cardboard box with rough sides. Based on your observations in the previous activity, predict what will happen to the light after it hits the box. Which of the labeled points (A, B, or C) will receive light from the box?
A
B
CCardboard Box
3 It is also common to refer to these two phenomena as specular reflection (reflection) and diffuse reflection (scattering).

LIGHT, SIGHT, AND RAINBOWS B-21
b) Now set up the above situation and use one of your eyes (keeping the other one closed) to determine whether or not light is being received by the box at each of the points A-C. Then use the light sensor to measure whether light from the box reaches points A-C. Explain both sets of observations.
c) Consider the following statements by two students:
Student 1: “We see objects because light hits the object and then comes to our eyes. We don’t see the object, we see the light.”
Student 2: “I disagree. Once the light makes the object visible by shining on it, we can see it without any light coming to our eyes.
Discuss the above opinions with your partner. Do you agree with either student? Write your thoughts below.
The next activity should help you resolve the students’ argument in the last activity. This activity puts together much of what has been learned so far. It is recommended that you take your time and make certain you understand each question. In the next activity you will examine a “black body”, which is nothing more than a closed, empty box with a small hole cut in one side. The box should be sealed so that the only way light can get in or out is through the small hole.
Looking through the
hole in the box
A “Black Body”
Figure B-5 : A black body is simply a sealed box with a small hole cut in the side.

B-22 EXPLORATIONS IN PHYSICS
Activity 1.3.5 A Black Body
a) Look carefully through the hole from different distances and describe what you see. Can you tell what color the inside of the box is? From your observations, do you think there is any light leaving the hole? Can you tell why such an object is called a “black body”?
b) Place the light sensor directly against the side of the box and take readings as you slide it back and forth over the hole a few times. Do you see any change in reading when the sensor is over the hole or not? Explain what this tells you about whether light emerges from the box or not.
c) Now imagine that there is a small light source inside the box such that you cannot see the bulb directly, as shown in the sketch below. Explain carefully what happens to light from the bulb, and what, if anything, you will see when looking into the hole. Do you think you will be able to tell what color the inside of the box is? Include a rough sketch that supports your answer.

LIGHT, SIGHT, AND RAINBOWS B-23
Looking through the
hole in the box
A “Black Body”
Small Point Light Source (Mini-
Maglight with reflector removed)
d) Now try the experiment. Fasten a small point source of light (your Mini-Maglite in “candle” mode works well) to the inside of the box and seal it up. Keeping your eye about 6-12 inches from the hole, can you tell the color of the inside of the box?
e) Finally, use the light sensor to measure whether any light is emerging from the hole by placing the light sensor directly against the side of the box and sliding it back and forth over the hole a few times. Do you see any change in the readings when you do this? What does this tell you?

B-24 EXPLORATIONS IN PHYSICS
f) Must light travel to your eyes in order for you to see? Explain what observations support your conclusions.
Checkpoint Question: Before proceeding, discuss your ideas with your instructor.
At this point, you should have a fairly solid understanding of what it means to see an object. If you have any questions about this, make sure you talk to you partners and your instructor before moving on. The rest of the unit will rely on you having a solid understanding of these concepts.

LIGHT, SIGHT, AND RAINBOWS B-25
2 FROM LIGHT TO SIGHT
In the last section we observed different characteristics of light. We observed that light travels straight through air and water, and how light interacts with objects, reflects off of mirrors and scatters off of rougher surfaces. We also saw compelling evidence that when you see an object, light from that object is entering your eye. However, it is not obvious whether that light carries information about the object to our eyes or whether its presence is merely coincidental.
Assuming that the light is somehow conveying information to our eyes raises some questions. For example, in a well-lit room, our eyes are bombarded with light scattering from every object in the room. How do our eyes “focus” on one particular object? That is, when you look at one particular object in a room, you may see many other things out of your peripheral vision. Nevertheless, you are clearly looking at one specific object. How do our eyes accomplish this?
In this section, we will investigate what the eye might do with light that falls upon it. While eyes are often said to be the “window to the soul”, they are all surprisingly similar. A picture of the front surface of an eye is shown in Figure B-7. Using basic observations on how the eye responds to changes in the surrounding environment we will construct a simple model that mimics the behavior or the eye. We will finish this section by refining this simple model and developing a more sophisticated model of the eye.
You will need some of the following equipment for the activities in this section:
• Mini-MagliteTM flashlight (AA size) [2.1] • Ruler [2.1] • Bright light source (e.g. slide projector) [2.1, 2.2] • Optical bench [2.1, 2.2] • Variable aperture [2.1, 2.2] • Small objects (3.5 inches) [2.1] • Small pencil (golf pencil) [2.1] • Black screen w/2 different colored circles [2.1] • 4 lens/screen holders [2.1] • White screen [2.1] • +10 cm focal lens [2.1] • Small Plexiglas rectangle/trapezoid with frosted face [2.2] • Protractor [2.2] • Ray box [2.2] • 2-Dimensional bi-concave and bi-convex Plexiglas lenses [2.2]
2.1 MODELING THE EYE
In the following activity you will begin to observe how the eye looks and behaves. Based on these observations, you will design a physical model to try and understand how the eye works. Let’s begin by exploring what function the pupil serves.
IrisIris
PupilPupil
Figure B-6: A photograph of the human eye showing the iris and the pupil. (©Adam Hart-Davis/Photo Researchers)

B-26 EXPLORATIONS IN PHYSICS
Activity 2.1.1 Examining the Outside of the Eye
a) Carefully look into one of your partner’s eyes. Shine a flashlight on or near the eye and record how it responds to the increased light over a period of several seconds. What happens to the black spot found in the center of the eye (the pupil) when the light is increased or decreased?
b) Estimate the diameter of your partner’s pupil in both bright and dim light. Warning: Do not stick anything in your partner’s eye. Write down your results below.
c) Why do you think the pupil changes its size? List as many reasons as possible.
d) People’s irises are different colors but the pupils are always black. Why do you think the pupil is black? What might be happening to the light that impinges on the pupil? Hint: Might this be related to any of the observations you made in Activity 1.3.5?

LIGHT, SIGHT, AND RAINBOWS B-27
e) Do you think that the world would look different to us if our pupils were not round but slit-like, similar to a cat’s pupils? Explain briefly.
The “Hole” Eye We have had two experiences with something appearing very black. One was in the completely darkened room, in which everything was completely black. The other was when we looked through a small hole into a sealed box (the black body). In this case, the hole itself looked completely black. Because of these two experiences, you may have concluded in the above activity that the pupil was a small hole. Since there is no tiny light inside our eyes, we can’t see inside the “box.” Maybe this is why optometrists shine a bright light into patient’s eyes when they look into the eye (so they can see inside). Perhaps the pupil gets larger or smaller to control the amount of light that enters the eye. This seems reasonable, so let’s assume for now that the pupil is in fact such a hole and explore what happens when light from an object passes through a small hole.
In examining the behavior of a small hole and how light is affected by it, we will be drawing lots of light rays from objects. When doing so, use a ruler to help you draw straight lines.
Activity 2.1.2 The “Hole” Eye
a) The following diagram shows a pencil illuminated by a bright light. Our model of the eye is simply a small hole (representing the pupil) with a screen behind it (representing the back of the eye). Just like a piece of paper or a box, light that hits the pencil will scatter off in all directions. Draw at least five light rays that scatter from the tip of the pencil and travel towards the viewing screen including one that makes it through the small hole. Do the same for five light rays that scatter from the blunt end of the pencil. Do you think anything will be seen on the screen when the light is on? Explain briefly.

B-28 EXPLORATIONS IN PHYSICS
60 cm 15 cm
Variable
Aperature
Screen
Bright Light
Source
(Projector)
b) Now try the experiment. Use a very bright light, such as a slide projector, and an easily recognizable object (a pencil or some colored circles). The room light should be dimmed for this experiment. Describe below what you see on the screen (look carefully). Also describe what happens as you move the screen closer to and farther away from the hole. Try using your hand as the object.
c) The following sketch shows the same set-up, but the pencil has been replaced by a piece of black paper with two colored circles on it. Sketch in several light rays to determine where the image of the circles will be (you can use colored pencils if you have them). Note: You should draw at least four light rays; one from the top and bottom of each circle, that pass through the hole and hit the screen. Don’t forget to use a ruler.

LIGHT, SIGHT, AND RAINBOWS B-29
60 cm 15 cm
Variable
Aperature
Screen
Bright Light
Source
(Projector)
Red
Blue
d) Are the colors on the screen in the same order (top to bottom) as they are on the card?
e) Given the distances shown in this sketch, predict the size of the images of the circles compared to the size of the original circles. Hint: How would the size of the image change if the viewing screen or the object was further away?
f) Now set up this experiment and test your prediction. Make the space between the aperture and the screen 15 cm and the distance between the circles and the aperture 60 cm. What size is the image compared to the object? How does this compare with your

B-30 EXPLORATIONS IN PHYSICS
prediction? Does moving the object or the viewing screen cause the image size to change as you would expect?
Most people are quite surprised to find that a small hole can produce an image. As you have just observed, it is not necessary to have anything more than a small hole to form an image of an object on the screen. So is that all there is to our eyes? Although this simple model can indeed form an image of an object, this next activity will demonstrate some discrepancies between this crude model and our actual eyes.
Activity 2.1.3 Big Holes, Small Holes
a) Dim the light on the object slightly by placing a piece of frosted glass or waxed paper in front of the light. What happens to the image on the screen?
b) What could you do to restore the image to its original, bright, appearance? Hint: How does your pupil respond to dim light? Do not actually try out your ideas at this time.
c) Before performing the experiment, let’s predict what will happen as our “pupil” dilates. In the sketch that follows, the hole between the dots and the screen is now much larger. This means that many more light rays will pass through the hole. To get an understanding of what effect this will have on the image, let’s choose one point on each of the colored circles and look at where light from these

LIGHT, SIGHT, AND RAINBOWS B-31
points ends up on the viewing screen. Draw at least five light rays that scatter from the very top of the upper circle; at least three of which pass through the hole. Do the same for light scattering from the very bottom of the lower circle. Note: Using colored pencils will make your sketch much easier to understand.
60 cm 15 cm
Variable
Aperature
Screen
Bright Light
Source
(Projector)
Red
Blue
d) Examine your drawing carefully. Since the light rays you drew all come from exactly one point on each circle (which could be any point on the circle), do you expect to see a crisp clear image of the circles on the screen? Explain why or why not. How will things change if the pupil is made even larger?
e) Based on your drawing in part c), what do you think will happen to the brightness, size, and sharpness of the image of the red and blue circles in your model eye if you enlarge the aperture.

B-32 EXPLORATIONS IN PHYSICS
f) Now try the experiment. First, increase the size of the aperture to about 8 mm. This is approximately the size of a real pupil in dim light. Then, continue increasing the size of the aperture a little at a time, as you carefully watch the image. Record your observations below. Was your prediction correct?
Checkpoint Discussion: Before proceeding, discuss your ideas with your instructor.
You have observed that light that has been scattered from an object can pass through a small hole and form an image of that object on a screen. This only works, however, if the object is brightly illuminated and if the hole is very small. In dim light the image fades. Enlarging the hole to allow more light to pass through succeeds in brightening the image but results in a blurry image. As you have already observed, the hole in our real eye does change size, but objects don’t tend to get fuzzy when this happens. Therefore, if the eye somehow forms an image for the brain to interpret, there must be some other component that helps to keep the image sharp when the pupil changes size.
Creating a More Sophisticated Model of the Eye As you are probably well aware, our eye consists of more than just a hole. Medical scientists have dissected the eye and a picture of their findings is shown in Figure B-7. Note the pupil at the front of the eye and the retina at the back. From our previous experiments, you can see that the role of the viewing screen was to mimic the retina.
You may have noticed that one rather obvious component of the eye that we left out of our earlier model is the lens. Is it possible that the lens is responsible for creating a sharper image when the pupil is dilated? To investigate this question we will use a glass lens. Lenses are pieces of clear material with curved surfaces, and are used in eyeglasses, magnifying glasses, microscopes, and other optical instruments. In the following activity, you will observe how light behaves as it passes through a lens. Your observations should allow you to understand how the eye reorganizes the light to form a clear image, regardless of the size of the pupil.
Ciliary
muscle
Cornea
Pupil
Iris
Lens
Retina Optic
nerve
Figure B-7: A cutaway diagram of the human eye, showing some of its major components.

LIGHT, SIGHT, AND RAINBOWS B-33
Activity 2.1.4 Observing a Lens in Action
a) Set up the following arrangement with the aperture opened to the size of the pupil in dim light (about 8mm). Place the lens between the aperture and the screen and slide it back and forth. Describe what you see. Can you obtain a clear image with the large aperture?
60 cm 15 cm
Variable
Aperature
Screen
Bright Light
Source
(Projector)
Red
Blue
Lens
b) After making the image as clear as possible, predict how the image will change (if at all) if you further enlarge the aperture.

B-34 EXPLORATIONS IN PHYSICS
c) Now slowly increase the size of the aperture. Describe what happens to the size and appearance of the image on the screen as the aperture becomes larger?
The ability of our model eye to cast a small, sharp, image of an object on the screen is rather impressive. In fact, if you haven’t already tried it, use your hand as the object. The image is absolutely fantastic! Seeing such an accurate image on the viewing screen provides powerful evidence that the light that is scattered from the object does in fact carry information about that object. We might therefore conclude that the information carried by the light can be passed on to us if this light happens to fall upon our eyes, which organize this information into an image, presumably in a similar manner to that of our simple model. Interpretation of this image is left to the brain, which receives the information via the optic nerve. There remains one major question left to answer. How, exactly, does the lens organize light into an image?
2.2 CHANGING THE DIRECTION OF LIGHT
We began the last series of activities by creating a simple hypothetical model of the eye consisting of a hole to represent the pupil and a screen to represent the retina. This simple model created focused images of brightly illuminated objects when the hole was very small. When the object was poorly illuminated, however, a larger diameter hole was needed to cast more light on the screen, which led to a fuzzy image. When we added a glass lens to our eye to create a more sophisticated model, we saw that the image became sharp again. How does the lens accomplish this task? What is the lens doing to the scattered rays of light in order to create a sharp image of the object?
How Does a Lens Sharpen an Image? The sketch that follows shows three of the many rays of light scattering from a tiny red spot on an object we are trying to “see” with our more sophisticated model of the eye. The dotted segments of the light rays show where each ray would have gone in the absence of the lens.
Activity 2.2.1 How Does a Lens Work?
a) On the following diagram, draw in where the three light rays shown must travel if they are to create a sharp image of the tiny dot on the screen.

LIGHT, SIGHT, AND RAINBOWS B-35
Variable
Aperature
Screen
Bright Light
Source
(Projector)
Tiny Red
Spot
Lens
Image of
Tiny Red
Spot
b) Do you think any of the light rays will change direction as they pass through the lens? If so, do they change direction in the same way? If not, can you give some kind of rule that might explain how a ray changes directions?
c) Can you think of any way that the shape of the lens might account for the bending behavior observed? Explain briefly.

B-36 EXPLORATIONS IN PHYSICS
Why Does Light Bend? While it may seem obvious that the lens does in fact cause some light rays to bend, you probably noticed that they don’t all bend in the same way. In fact, one of the rays in the above diagram doesn’t bend at all. What determines the way these light rays bend? To try and understand this question, we will focus our attention on an investigation that will allow us to learn about the behavior of light as it enters or leaves a material like glass. For simplicity, we will be using a rectangular piece of Plexiglasa material that has optical properties similar to those of glass (or water). Because we will be dealing with light rays that enter the Plexiglas at different angles, it is very convenient to use a normal line to as a reference for these angles. If you are uncomfortable with your understanding of normal lines, you should review Activity 1.3.1.
Activity 2.2.2 Light Entering Plexiglas
a) The following diagram shows a beam of light entering a piece of Plexiglas at an angle. Make a rough sketch of your prediction as to the path of the light ray as it enters, travels through, and then exits the Plexiglas. Use a ruler to draw precise lines.
b) Now, send a single beam of light from a ray box into a piece of Plexiglas. Accurately sketch with a ruler your Plexiglas rectangle and the light ray as it enters and leaves. First, let’s concentrate on the light ray as it enters the Plexiglas. Draw a normal line that coincides with the point where the light beam enters the Plexiglas. Does the light ray change direction so as to be closer to or further away from the normal line (as opposed to if it hadn’t changed direction at all)?
Plexiglas Rectangle
The “normal”
Incident light beam

LIGHT, SIGHT, AND RAINBOWS B-37
c) Aim the incoming light beam so that it strikes the Plexiglas at different angles. Does it always bend in the same direction as it enters the Plexiglas? Does it always bend by the same amount? Is there any angle in which it doesn’t bend at all? Explain in your own words this behavior. (You might want to use a protractor to help convince yourself what is happening.)
d) Now let’s focus our attention on what happens when the light ray leaves the Plexiglas. Accurately sketch with a ruler your Plexiglas rectangle and the light ray as it enters and leaves. Draw in a normal line that coincides with the point where the light beam leaves the Plexiglas. Does the light ray change direction so as to be closer to or further away from the normal line (as opposed to if it hadn’t changed direction at all)?

B-38 EXPLORATIONS IN PHYSICS
e) Compare the behavior of light passing from air into Plexiglas with that of light moving from Plexiglas into air. How are the behaviors similar? How are they different?
Checkpoint Discussion: Before proceeding, discuss your ideas with your instructor.
Light travels inside Plexiglas as it travels in air—in a straight line. Nevertheless, as you undoubtedly noticed, something interesting happens at the interface between the Plexiglas and the air. The fact that light changes directions at an interface (boundary) between two materials is called refraction. Thus, when light travels from air to glass, from glass to water, or from water back to air, some refraction occurs. The actual amount of the bending depends upon the specific materials and angles involved.
You now have the basic knowledge needed to understand how simple lenses work. The following activity should make this clear
Activity 2.2.3 Understanding a Simple Lens
a) Sketch the path of the light beam in the following figure. The beam begins in air, travels through some glass and ends up back in air. Draw a normal line where the beam enters the glass and show the how you expect the light ray to bend towards or away from the normal at that point. Continue the light ray’s path straight through the glass. Draw a normal line through the point where the ray exits the glass and show roughly how the ray will bend as it passes back into air. (If you need help, try passing a light ray through your Plexiglas rectangle.) Use a ruler to draw precise lines.
Air Air Glass

LIGHT, SIGHT, AND RAINBOWS B-39
b) Repeat your sketch for the following situation.
c) And lastly, sketch the predicted refraction for the following situation.
d) Now let’s put all this all together. A converging lens can be thought of as being made up from the three sections you just studied (a real converging lens would be nice and smooth, but this works as a simple model). Shown below is a sketch of this kind of a lens, along with three light rays traveling towards the lens. Using a ruler, make a rough sketch of the path of these light rays (you should use the results from the last three questions to roughly determine what the path of these light rays will be). Why do you think this kind of a lens is called a converging lens?
Air Glass Air
Air Air Glass

B-40 EXPLORATIONS IN PHYSICS
2.3 A LENS IN ACTION
Now that you have some idea how a converging lens works, lets try out the real thing. For this next activity you will use the ray box so that 5 small beams of light are being emitted parallel to each other. These beams should look similar to the rays drawn in the sketch in the previous activity.
Activity 2.3.1 A Converging Lens
a) Place the converging lens on top of the sketch below and orient the ray box so that the beams of light go through the lens approximately as shown. Sketch how each beam changes direction both when it enters and exits the lens. Do the light rays behave as you predicted in the last activity?
b) In most cases, the light rays from an object do not travel parallel like those from the ray box in the previous question. Shown below is a 2 to 1 scale drawing of a 3 1/2” golf pencil and a converging lens. Draw 4 or 5 of the many light rays that leave the tip of the pencil and hit the lens. How do these light rays differ from the ones produced by the ray box? Sketch your prediction for what the path of the light rays will be after they pass through the lens. (Use a ruler to draw precise lines.)

LIGHT, SIGHT, AND RAINBOWS B-41
c) Will light that scatters from the tip of the pencil hit every part of the lens? Will light from other parts of the pencil also hit every part of the lens? Explain.
d) To find out what happens to light from the tip of a real pencil, perform the following experiment. On the following page is a full size sketch of a golf pencil and the two-dimensional converging lens, about 15 cm apart. Place a pencil and lens in these positions so that they don’t move. Tape the pencil in place and sketch in the position of your lens so that if it moves, you can replace it. Arrange the ray box so that a single thin beam of light grazes the tip of the pencil and hits the lens (avoid the extreme edges of the lens). Sketch the path of the beam going into the lens and coming out of the lens, all the way to the edge of the paper. Next, rotate the ray box so that the beam still grazes the tip of the pencil, but hits a different spot on the lens. Sketch the path of this beam. Do this for 4 or 5 different beams of light. What happens to light from the tip of the pencil that passes through the lens? Repeat this for light that scatters from the other end of the pencil. When you are finished, use a ruler to do a careful scale drawing on the following half-scale diagram of the light beams you traced on the big piece of paper.

B-42 EXPLORATIONS IN PHYSICS

LIGHT, SIGHT, AND RAINBOWS B-43
A More Careful Study of Your Model Eye The previous activity should help you see how a lens can focus many light rays coming from one part of an object to a specific spot, while simultaneously focusing many light rays coming from a different part of the object to a different spot. In fact, light rays coming from every part of the object are being focused to different spots in a similar manner. It is quite amazing that the lens can focus light from so many different places, yet keep things organized so an image is formed!
Now it’s time to come back to the question posed earlier in this section. Set up the system you used in Activity 2.1.5. That is, place an aperture, a lens, and a screen on an optical bench. Set an object about 60 cm from the lens and illuminate it with a MagLite flashlight.
Activity 2.3.2 What About a Cat’s Eye?
a) Keeping everything else at a fixed position, slowly move the object until you see a sharp image on the screen. Predict what will happen to the image if you cover up half the lens. Will it matter if you cover up the right half or the left half? Hint: Is light from every part of the object hitting every part of the lens?
b) Now cover half the lens with a piece of paper and record your observations. Can you explain what you observe?

B-44 EXPLORATIONS IN PHYSICS
c) Explain what happens to the image if you try covering up different parts of the lens. What does this imply about the shape of the pupil? Would we see the world differently if our pupils were slits (like a cat’s) instead of round? Explain briefly.
Checkpoint Discussion: Before proceeding, discuss your ideas with your instructor.
How the Eye Adjusts Your model eye, consisting of an aperture, lens, and screen, works very well at creating a small, sharp image of an object at a particular distance. But as you well know, our eyes are capable of focusing on objects at many different distances. You might wonder how a real eye avoids this limitation of our simple model. To gain some insight into this, try the following experiment. With one eye closed, hold your finger about six inches in front of the open eye. Now focus on your finger and then change your focus to something in the distance and then back again. You will notice that in fact our eyes do suffer from this drawback a bit. When looking at a distant object, your finger will appear blurry, and vice-versa. You will also notice that something allowed your eye to change your focus from your finger to the distant object. This “something” is the subject of the next activity.
Activity 2.3.3 How the Eye Adjusts
a) Set up your model eye and adjust the position of the object until you have a nice clear image on the screen. Now, try to find any other locations of the object that will give you a clear image. To do this, slowly move the object toward the lens and away from the lens keeping everything else fixed. Describe your observations.
b) Place the object so that you have a sharp image. Then, get another lens from your instructor, one that is a little thicker than the one you already have (a 5-10 cm focal length works well). Without changing anything else, replace the lens in your model eye with the

LIGHT, SIGHT, AND RAINBOWS B-45
second lens, and slowly move the object until the image on the screen is in focus. How did you have to move the object in order to focus the image? Is there any difference in how the image looks now compared to when the original lens was in place? Explain.
c) Our eyes are not capable of changing lenses each time you want to focus on a different object On the other hand, they are capable of re-focusing. How do you think your eyes can accomplish this task? Hint: Refer back to Figure B-7, which shows a cut-a-way diagram of the human eye and note that the lens is not rigid like glass, but rather slightly deformable.
d) Some people’s eyes are not capable of focusing on objects that are too close or too far away. Explain how using a lens in front of the eye might help these people to see better. (If you think it will be helpful, feel free to sketch a diagram.)
The Real Eye Your physical model for the eye is admittedly a bit crude. Making a working model doesn’t prove conclusively that the eye works like an optical lens. But your observations on how lenses work, combined with medical pictures of the eye, provide powerful evidence that the eye does organize light into an image on the retina. There exists a scientific principle known as Occam’s Razor that instructs one to make as few assumptions as possible. If two theories equally well explain an observation, Occam’s Razor advises us to side with the simpler model. This does not mean that all complicated

B-46 EXPLORATIONS IN PHYSICS
models are wrong; just that we should not make things unnecessarily complicated. Your model of the eye is elegantly simple. Light scatters off of objects, travels to the eye, and then an image is formed on the retina. The optic fiber then conveys this image to the brain for interpretation. Should an observation be found to contradict this simple model then we might look for more complicated solutions. For now, however, there is no reason to look beyond this simple model.
A slightly more detailed side view of the eye is shown in Figure B-8. Note the large curvature of the cornea. You can also observe this by looking at a friend’s eye from the side. From your earlier observations you know that when light hits a curved interface it bends. It may not surprise you then, to learn that most of the bending of the light that hits our eye occurs not from the lens, but rather from the very-curved shape of the aqueous humor. The aqueous humor is a liquid region that bends the light that hits it towards the pupil. The lens in the eye is used primarily for minor adjustments necessary to focus on objects at different distances. This is accomplished with the aid of the ciliary muscles, which subtly reshapes the lens so as to produce clear image.
Despite our model’s crudity, it does capture the essential features of how our eyes work. The aqueous humor, lens, and vitreous humor act together on light in exactly the same way our single lens does in our model eye. Scientists often begin with a simplified model of the phenomena they are investigating in order to get an understanding of the central features. Then, once they understand these elementary properties, they introduce more subtle additions to the model to help account for more of the observed features. Generally, these features are less dramatic than some of the basic features and are also typically more complicated. Thus, the model gets more and more complicated as your understanding gets more and more thorough.
Cornea
Iris
Lens
RetinaOpticnerve
AqueousHumor
VitreoúsHumor
Ciliarymuscle
Figure B-8: A slightly more detailed cutaway sketch of the human eye showing all the main components.

LIGHT, SIGHT, AND RAINBOWS B-47
3 COLOR: HOW CAN WE SEE IT?
In the preceding sections we have investigated how information from the outside world might reach our eyes and also how our eyes might organize this information. Our model of the eye as a simple lens system, along with the idea that light scatters and can travel to our eye, does explain how information such as the shape, size, and texture of an object might be conveyed from the object to your brain. These are geometric properties, and it isn’t too far fetched to believe that light, which travels in a straight line, might keep this information as it travels.
A feature that we haven’t discussed, however, is color. What is color? Why do we see some things blue and others red? Is color a property of light, of physical objects, or of both? We are familiar with colored light and certainly we see colored objects, but is there a relation between the color of light and the color of an object? You may have noticed that our model eye reproduced colors beautifully. But this doesn’t tell us much about why objects appear colored. Trying to understand color will be the subject of this section.
You will need some of the following equipment for the activities in this section:
• Set of high quality RGB and CMY filters for demo [3.1] • Prism or Plexiglas trapezoid [3.1] • White light ray box [3.1] • Colored filters and gels for student use [3.1] • Diffraction grating spectrometer [3.2] • Flashlights [3.2] • Crayons (Red, Orange, Yellow, Green, Blue, and Violet) [3.2] • Optional: Gas discharge light sources (H, He, etc.) [3.2]
3.1 COLOR AND LIGHT
We will begin by investigating whether light itself has color. Can one change the color of light and, if so, how? Can you turn red light into blue light? Green light into orange light?
Activity 3.1.1 A First Look at Color
a) Discuss amongst your group how you might turn white light red. Do you believe it is possible? What about turning red light blue? Be prepared to discuss your conclusions with the rest of the class.
b) Your instructor will demonstrate some aspects of color by placing various combinations of filters on an overhead projector that sends out white light. For each case, predict the color of light you will observe on a screen. Record the color actually observed. Were you correct? There are extra rows in the table for additional combinations you or your instructor might want to look at.

B-48 EXPLORATIONS IN PHYSICS
Filter Combination Predicted Color Observed Color
Red
Red + Blue
Magenta + Cyan
Blue + Cyan
c) Based upon your observations, can you turn red light blue? Cite evidence supporting your position. Does this imply that the light itself is becoming colored as it passes through a filter or not? Explain briefly.
Ptolemy once said, “color is not seen unless light cooperates.” In the above activity, light certainly didn’t seem to cooperate in a predictable manner! The observations you made above are difficult to reconcile with our everyday experience. This is because few people have direct experience with colored light. After all, we are surrounded with white lights. Light bulbs and fluorescent lights are white, and even the sun is practically white. Yet when white light shines on certain objects we often see a color other than white. Our investigation of light and color begins with white light, and asks the question: “What is the color white?”
In investigating white light, scientists as far back as the 17th century made use of a triangular piece of glass known as a prism. The prism has a startling effect on white light that passes through it, one that you no doubt have observed before.

LIGHT, SIGHT, AND RAINBOWS B-49
Activity 3.1.2 “White” Light and Prisms
a) Below is a sketch of a light ray entering a prism. Use what you learned about the refraction of light through Plexiglas to make a rough sketch of the path of the light ray as it passes through the prism. Hint: Draw a normal line that passes through the point where the light ray hits the prism. What do you think you will observe when the white light exits the prism?
b) Place the flat side of a prism on the table and use the ray box to shine a single, narrow beam of white light into it at about the angle shown above. Slowly twist the prism back and forth until the exiting beam of light is spread out as much as possible as it leaves the prism. Sketch what you see.
White Light
Plexiglass
Prism

B-50 EXPLORATIONS IN PHYSICS
c) You should have seen that the emerging light has several colors. What do you think the prism is doing to the incoming light? Do you think the color is in the light before it reaches the prism or is the prism adding the color to the beam? Explain.
d) Place a two-dimensional converging lens behind the prism so that the light passes through the lens after it passes through the prism, as in the figure below. Rotate the lens back and forth until the emerging beam becomes as narrow as possible. What happens to the light after it passes through the lens (at the narrowest part)?
White Light
Prism
Red
Blue
Converging
Lens
Where do Colors Come From? When white light refracts through a prism, it spreads out into a “rainbow” of colors. When this rainbow is refocused by a lens, the colors combine to again form white light. This raises many questions. Is all white light composed of colored light or is there a separate color “white?” Is the light that enters the prism colored even though it appears

LIGHT, SIGHT, AND RAINBOWS B-51
white? Is the prism “coloring” the light somehow similar to the way a crayon changes the color of white paper? How do blue light, red light, and white light differ?
We began this section on color by observing the combined effect of various filters on the color of light. At that time we did not attempt to understand how the filters were affecting the light. The natural idea that the filters “color” light is only partially correct, as you discovered when you attempted to use a blue filter to turn red light blue. The following activity has a dual purpose. First, you will investigate the light that passes through the filter in an attempt to answer some of the questions raised above. Second, you will learn more about how filters affect light that passes through them.
Activity 3.1.3 Colored Light and Filters
a) Predict what you will observe when you put a red filter in the path of the beam after it exits the prism as in the following sketch. What do you think you’ll see after the light has passed through the filter?
White Light
Prism
Red
Filter
Red
Blue
b) Now try the experiment. Place the red filter in the path of the beam after it exits the prism. What do you observe? What do you think happened to the green and blue light that left the prism?
c) How does a red filter affect a “rainbow” of light?

B-52 EXPLORATIONS IN PHYSICS
d) Now predict what you will observe if you place the red filter in the path of the light beam before it enters the prism, as shown in the following sketch.
White Light
Prism
Red
Filter
e) Now try the experiment. Place the red filter in the path of the beam before it enters the prism. What do you observe? Is the end result similar to or different from the previous experiment?
f) Do you think the white light entering the prism contains colored light? What evidence leads you to make this assertion?
Checkpoint Discussion: Before proceeding, discuss your ideas with your instructor.

LIGHT, SIGHT, AND RAINBOWS B-53
Are all Colors in the Spectrum? In the last activity you observed that a prism appears to separate white light into different colors, called a spectrum, and that a colored filter prevents the full spectrum from appearing. You may also have noticed that some everyday colors were not present in the spectrum. Brown, for example, is conspicuously absent from the spectrum, as are gray, magenta and cyan. Nevertheless, if you look around you will certainly perceive some objects as brown or gray. Where do they come from if they are not in the spectrum?
One of the more remarkable aspects of vision is our ability to perceive a combination of light not as the sum of its parts, but as a distinctly different color. For example, when you used your lens to refocus the spectrum back down to a spot you saw it not as a jumble of red, orange, yellow, green, and blue, but as white. We will conclude our investigation of colored light by looking at exactly what makes up different colors of light.
3.2 TRANSMISSION GRAPHS AND THE SPECTRUM OF LIGHT
We will use a diffraction grating spectrometer4, rather than a prism, to reveal the spectrum of light. A diffraction grating causes the colors in the spectrum to “bend,” just like in a prism, but is much easier to use. Your instructor will show you how to use a spectrometer, but essentially you hold it up to your eye and look slightly to the side of a light source.
Representing Spectra of Light When you look at a light through the spectrometer you see the colors of the spectrum. If you look at the sun or a white incandescent light source (a “normal” light bulb) through a diffraction grating, the spectrum will look like a “full rainbow” (all of the colors are bright). We can represent this spectrum with the following graph, which shows that each of the “rainbow” colors (Red, Orange, Yellow, Green, Blue, Indigo, and Violet) is present.5
If you pass this white light through a colored filter and look at the spectrum, you would see that some of the colors are absent, or at least not as bright as some of the others. In this case, you might make a sketch that showed only some of the colors being present. An example is shown in Figure B-10, which shows a spectrum that has light in the blue-green part of the spectrum but nothing else. This kind of graph is called a transmission graph because it shows which portion of the spectrum has been transmitted through the filter.
4 An optical spectrometer is any device that separates the colors of light so that you can inspect the spectrum (color distribution) of the light. Both the prism and the diffraction grating are used as spectrometers in this unit. 5 Of course, if you look carefully, you will see that these colors blend smoothly from one to the other. There are, in fact many more colors present than the seven listed here. We list he colors of the rainbow as ROYGBIV for convenience.
Figure B-9: A transmission graph showing a “full rainbow” of colors.
Figure B-10: A transmission graph showing only the blue-green portion of the spectrum.
Figure B-11: A transmission graph showing three sharp lines.
R O Y G B I V
R O Y G B I V
R O Y G B I V

B-54 EXPLORATIONS IN PHYSICS
Finally, sometimes the colors do not form broad bands but instead they form rather sharp lines. In this case, we draw a thin line indicating the color. A spectrum with three narrow lines, one orange, one yellowish-green, and one slightly darker than indigo, is shown in Figure B-11 below.
Activity 3.2.1 The Primary Colors
a) Look through your spectrometer at “normal” incandescent light, such as the flashlight you have been using. Using either crayons or colored pencils, fill in the transmission graph below.
b) Make a rough sketch of the transmission graph when using your red, blue, and green filters in front of your flashlight.
Primary Colors You may have noticed that the transmission graph for the red filter has a higher intensity in the red-orange portion of the spectrum (the bottom third, roughly), and lower intensities everywhere else. The green filter has a higher intensity in the yellow-green portion of the spectrum (the middle third, roughly), and lower intensities everywhere else. The blue filter has a higher intensity for the blue-indigo portion of the spectrum (the upper third), and lower intensities everywhere else. Because of this, scientists often speak of the red, green, or blue portions of the spectrum. In fact, one can define primary colors (red, green, and blue) as those colors that have only the bottom, middle or upper third of the spectrum in them. The plastic filters you have been using transmit more than just the primary colors. Your instructor may have a set of precision-made filters to demonstrate what these “colors” really look like.
Notice that the three primary colors each contain about ⅓ of the full spectrum and that they don’t overlap with each other. It seems reasonable then, that if one could somehow arrange to “add” these three primary colors together, that you would end up with the full
R O Y G B I V “Normal” Light
R O Y G B I V Red Filter
R O Y G B I V Blue Filter
R O Y G B I V Green Filter

LIGHT, SIGHT, AND RAINBOWS B-55
spectrum, or white light. In fact, this kind of color addition can be used to create millions of different colors and is used in television and computer screens. Note: If you use a magnifying glass to look very closely at your television or computer screen you’ll see lots of small red, green and blue dots. We will explore this topic later on in this unit.
As another example of spectra and transmission graphs, your instructor may have a sampling of gas light sources such as hydrogen, helium, neon, etc. These light sources have very interesting spectra. If so, complete the following activity.
Activity 3.2.2 Spectral Fingerprints
a) Examine two light sources and describe their color. Then, look at the spectra and make a rough sketch of it below. Don’t forget to indicate what your light source is.
b) Describe how these spectra differ from the “full rainbow” you observed earlier.
You should have noticed that the spectra of these light sources are quite different from each other. In fact, every gas can be excited to emit light like this when a high voltage is applied, and each gas has its own unique spectral fingerprint. Astronomers use these fingerprints to identify the materials that are present in stars by analyzing their spectra. For example, the lines observed in the spectra of a star are compared to the spectra of specific elements we’ve observed here on Earth. These lines and their relative intensities give astronomers information about which elements these distant stars are made of.
Checkpoint Discussion: Before proceeding, discuss your ideas with your instructor.
3.3 REAL OBJECTS
So far we’ve been dealing with light, be it colored or white (by now you should realize that such a distinction is essentially meaningless). Now we will try to answer our original
R O Y G B I VSpectral light source:
R O Y G B I VSpectral light source:

B-56 EXPLORATIONS IN PHYSICS
question of why we see color in objects. Is the color a property of the object, of the light, or both?
Activity 3.3.1 What Happens to the Colors?
a) When you look through a green filter at a light source, the light looks green. Since the white light actually contains a “rainbow” of colors, explain which colors make it to your eyes and what happens to those that don’t.
b) Now imagine looking at a white object in a room filled with white light. Describe the light that reaches your eyes. What if you were to look at this object through a green filter? What light would reach your eyes?
c) Now imagine looking at a green object in a room filled with white light (without looking through any filters). What do you think is the color of the light that reaches your eye? Explain.
d) Since white light is made up of the full spectrum of colors, what happens to the non-green light that hits this green object? Does any of it reach your eyes? Explain.

LIGHT, SIGHT, AND RAINBOWS B-57
e) What color do you think a primary green object would appear to be if you were to view it through a primary red filter? Explain.
f) What color do you think this primary green object would appear to be if it was illuminated with only primary blue light? Is this at all similar to looking through a blue and green filter at the same time? Explain.
If you had any trouble with the above activity, perhaps it will help to think in terms of the light that reaches your eyes. If something appears green, or blue, or red, or some other color, what does that tell you about the light that is reaching your eyes? Of course, the light that is shining on the object also plays some role, for you have already observed that red light does not contain the whole “rainbow.” These next few activities deal with the question of colored light on colored objects. Note: Even though there are many different shades of red, green, and blue, when we refer to these colors throughout the rest of this unit, we mean primary red, primary green, and primary blue.
Activity 3.3.2 Colored Light, Colored Objects I
a) A red object and a white object are set up in a completely darkened room. Recall that you cannot see anything in a completely darkened room. Now, imagine shining a red light on these objects. What color will the objects appear? Sketch the path of several light
Red incoming
light
Red incoming
light

B-58 EXPLORATIONS IN PHYSICS
rays scattering off the objects, and indicate the color of this scattered light.
b) Based on the above scenario, do you think your eye would see a difference between these two objects? Explain why or why not
c) Now, let’s try the experiment. Place a sheet of red cardboard partially over a similar piece of white cardboard in a darkened room. Shine a narrow-beamed flashlight through a red filter so that the bright spot is on both pieces of cardboard at once. Comment on what you observe compared to what it looks like when the flashlight is not going through a red filter. Note: If possible, the red filter and the red cardboard should be the same shade of red. This experiment should be done in a very dark room to reduce contamination by outside (not red) light sources.

LIGHT, SIGHT, AND RAINBOWS B-59
d) Based on these observations, explain how someone might mistake a white object for one of a different color. This could cause some confusion when discussing the color of an object with a friend. How could you define the color of an object so to avoid this confusion? Write your definition below.
If the color of the filter and the color of the paper used in the previous activity weren’t exactly the same, you may have noticed a slight difference between the red and white objects when illuminated with red light. The more closely the color of the object and the filter match each other, the more difficult it is to tell the red object from the white object. Unfortunately, most colored filters and colored pieces of paper have a reasonably large spectrum of colors in them. Thus, even though an object looks red, it may have some blue and green and yellow in it as well. Clearly, most colors are not primary colors. Keep this in mind when performing the following activity.
Activity 3.3.3 White Light, Colored Objects
a) White light containing a full spectrum of colors falls upon a colored (say, primary red) object and is scattered. Since it is this scattered light that makes its way to your eyes, and you see a red object, this means that red light must be coming to your eyes. What do you think happens to the blue and green light contained in the incoming white light?
Incoming “white” light contains the full spectrum of colors

B-60 EXPLORATIONS IN PHYSICS
b) What do you think you would observe if you passed the white light through a primary blue filter, as shown below? Draw in some light rays and explain your answer.
c) Now try the experiment. You might want to try red light on a blue object, or blue light on a red object. These combinations typically work the best (can you explain why?). You can also just look through a red filter at a blue object. Play around a little, and give a summary of what you observe.
This aspect of colored light on colored objects is often surprising and confusing. As already mentioned, one reason for some of the difficulties is that most of the colors that we observe in the everyday world are not “pure.” This means that when an object looks
Red Object
Some of the scattered light rays
Incoming “white” light
Blue Filter
Red Object

LIGHT, SIGHT, AND RAINBOWS B-61
“red,” there are typically more colors in it than just red (including some blue and green). Your instructor may have a demonstration of “red light on a blue object” using some precision filters. The results are much more dramatic than using the inexpensive filters.
Checkpoint Discussion: Before proceeding, discuss your ideas with your instructor.
Color Subtraction So far, we have been talking about colored filters and colored objects. You may have noticed that in both of these cases, only a portion of the spectrum that is initially present is scattered from the object (or transmitted through the filter). Thus, when looking at white light, we begin with a full spectrum of colors and end up with only a portion of the spectrum. We call this a subtractive process, because we only end up with a portion of what we started with. In essence, the object or filter has “removed” some of the colors from the spectrum.
When we “see” an object, what we see is light that comes from the object. This light has been affected by the object in some way. Some of the colors are scattered, and some are absorbed. Thus, the light coming from an object carries information about the object (i.e., which colors it scatters and which it absorbed). Our eyes then organize this light through the lens/pupil/retina combination to form an image of the world so that our brains can make sense of it. But as mentioned in the introduction, we will not pursue the question of how our brains make sense of this information.
Color Addition We will complete this section with an activity that brings our discussion of color full circle. Since colored objects and filters subtract out some of the colors, you might be wondering if colors can also be added together. This is the topic of the following activity. Note: This activity may be done as a demonstration by your instructor.
Activity 3.3.4 Adding Colors
a) Consider the following situation where we shine three narrow beams (they do not overlap) of different colored light onto a white object in a completely darkened room. If you were looking at this object, describe which colors are being scattered and what you would observe. Does it depend on where you look? Explain briefly. Hint: What portion of the spectrum does a white object scatter?

B-62 EXPLORATIONS IN PHYSICS
Red Green Blue
b) Now imagine that all three colored lights are shining on the same spot, as shown below. Describe the scattered light and what you think you would observe. Does it depend on where you look? Explain briefly.
RedGreen
Blue
LIGHT, SIGHT, AND RAINBOWS B-63
c) What do you think you would see if only two of the three lights were shining on the same spot? Explain
d) Now try the experiment. Remember, you need to shine different colored light onto a white object in a completely darkened room. Describe what you observe. Were you surprised?
If you are not able to carry out these observations due to equipment limitations, your instructor should be able to demonstrate the various situations for you. This is one of the more interesting and “colorful” things you can do with color.

B-64 EXPLORATIONS IN PHYSICS

LIGHT, SIGHT, AND RAINBOWS B-65
4 THE REAL WORLDRAINBOWS, BLUE SKIES, AND SUNSETS
Now that we know quite a bit about light and color, we will consider a few of the most common natural occurrences that involve light and color. What makes a rainbow? Why is the sky blue? Why does the sky turn reddish-orange when the sun sets? These are phenomena that are so common, most people just take them for granted without giving them much thought. In this section, we will consider these phenomena from a scientific perspective using the knowledge we have gained so far.
You will need some of the following equipment for the activities in this section:
• White light ray box [4.1] • Petri dish [4.1] • Tank of water with powdered creamer [4.2] • MBL system [4.2] • Colorimeter [4.2]
4.1 RAINBOWS
We begin with perhaps the most beautiful, naturally occurring phenomena involving light and colorthe formation of a rainbow. After having learned some of the basic features of light and color, you are now in a position to analyze how rainbows are formed from a scientific perspective.
Activity 4.1.1 Initial Thoughts
a) Do you think it is possible to see a rainbow while standing in the rain? Do you think it is possible to see a rainbow when you are not standing in the rain?
b) The word “rainbow” suggests that rain is needed to form a rainbow, but sunlight is also necessary. As we’ve already seen, light is necessary if we want to see anything. For a rainbow, the source of this light is usually the sun. Below, make a sketch indicating where you think you, the sun, and rain must be in order for you to see a rainbow. Also draw the path of the light from the sun to your eyes.

B-66 EXPLORATIONS IN PHYSICS
As always, we would like to begin with the simplest model we can think of. This allows us to focus our attention on the most important features of the phenomenon. If needed, we can always add more complexity to our model. To begin, we must ask ourselves what is absolutely essential in the formation of a rainbow. Certainly, the sun and some rain are necessary. There may be other factors that influence the rainbow’s brightness and size, but let’s see what we can learn by considering only the sun and the rain.
Since we are assuming both the sun and the rain are essential ingredients, it seems pretty obvious that the sunlight must interact with the raindrops in some way. So we will begin by shining light from our ray box (to model the light rays from the sun) into a circular Petri dish filled with water (to model a raindrop). Whenever we try and model a physical phenomenon, there is always the possibility that the results of our model won’t quite agree with the physical situation. As previously mentioned, we are only interested in understanding the primary ingredients in the formation of a rainbow. If there are small differences between what we see using our model and what is observed in reality, we can address those issues later.
Activity 4.1.2 Making a Rainbow
a) Begin by filling the Petri dish about half full of water and placing it on top of a piece of white paper. In a darkened room, use your ray box to send a wide beam of light into the side of a Petri dish filled with water. Then, slowly move your slice of “raindrop” up and down through the light and look carefully on the white paper for any exiting light that resembles a rainbow. Note: The room lights should be dimmed for this experiment. You will need to look carefully; since we are only dealing with one raindrop, the rainbow will be small.
a)
Wide beam of light
Petri dish full of water, representing a
raindrop
Slowly move Petri dish (raindrop) up and down until you spot the rainbow

LIGHT, SIGHT, AND RAINBOWS B-67
b) Once you have found the rainbow, try to determnine the path that the light is taking, inside the raindrop. You can do this by sending a thin beam of light into the drop and moving it until you reproduce the rainbow. (If you’re having trouble, try sending the beam in at a grazing angle.) Then, look at the direction of the incoming light ray and look at the direction of the outgoing light ray and try to deduce the path in the raindrop. (You might be able to see the path of the light beam on the white paper. If not, you can put your finger in the water and follow the path by keeping the light on your finger.) When you understand the path of the light, make a reasonably accurate sketch below (use a ruler) showing the complete path of the light ray.

B-68 EXPLORATIONS IN PHYSICS
c) Clearly, we can’t see a rainbow from everywhere, otherwise we’d see a rainbow whenever it rained. So, where do we have to be and where do we have to look in order to see a rainbow? Shown below is a sketch of some raindrops and incoming light rays (from the sun) with a person in five different locations. Based on your results from part b), indicate in which of the five positions (A-E), the person will be able to see a rainbow. For those who can see the rainbow, where in the sky should they look? Should they be looking at the same part of the sky? Explain why or why not.
Rays of
Sunlight
A B C D E
Now that you understand how a rainbow forms, the next time you see one, you should take a little time to contemplate everything you have learned about light and color. Hopefully, this will add to your enjoyment of the rainbow.

LIGHT, SIGHT, AND RAINBOWS B-69
4.2 THE SUN AND THE SKY
“Why is the sky blue?” is probably one of the most frequently asked questions of all time. Although this is a fairly complicated phenomenon, your understanding of light and color is solid enough to attempt an explanation to this age-old question.
Activity 4.2.1 The Color of Air
a) Can you see air? If so, what color is it?
b) Can you see the sky? What color is the sky?
c) If you can see the sky, and the sky is nothing more than air, does that mean you are seeing the air? Why or why not?

B-70 EXPLORATIONS IN PHYSICS
d) What about at night? What color is the sky at night? Why do you think the color of the sky changes between day and night? What clues does this provide you regarding the blue sky? Explain briefly.
In the beginning of this unit, you saw a demonstration of how a light beam (flashlight or LASER light) was invisible in air unless there was something to scatter it to your eyes (such as powdered milk in water, or chalk dust in air). The next activity uses this concept to try to explain the color of the sky.
Activity 4.2.2 Atmospheric Scattering
a) On a clear sunny day when the sun is high in the sky, if you look away from the sun, you will see a nice blue sky. This is a clear sign that blue light is coming to your eyes. What is the source of this light? Hint: What color is the sky at night?

LIGHT, SIGHT, AND RAINBOWS B-71
b) If you were foolish enough to look directly at the sun when it is high in the sky (which you should never do), you would see that it appears slightly yellowish. Assuming that the light emitted from the sun is perfectly white, what color has been removed before it reaches your eyes? Hint: Which of the primary colors combine to give yellow?
c) With your group, try to determine a hypothesis that can explain your answers to parts a) and b). Hint: Consider the possibility that the air scatters light in some way. What color and in what direction(s) should light be scattered to be consistent with parts a) and b)? Make a sketch on the diagram below showing how this scattering can account for both a blue sky and a yellowish sun.
Direction
to the Sun
Direction
to Blue Sky

B-72 EXPLORATIONS IN PHYSICS
d) You may have also noticed that when the sun is very low in the sky (sunrise or sunset), it appears orange or even red (instead of the more yellowish appearance it has when it is high in the sky). What colors have been removed from the white light so that the sun appears red? Using the ideas developed in this activity, can you account for this observation? Explain briefly. Ddo you think the amount of sky the sunlight travels through has any effect?
Your instructor will have a demonstration using milky water that exhibits the blue-sky/red-sunset scattering phenomenon. While this demonstration does not precisely mimic the conditions of the sun and the sky, it acts as a model of the atmosphere that illustrates how it is possible to scatter different colors of light by different amounts. Recall that one of the first activities you preformed in this unit was to shine a flashlight through some water with some powdered creamer in it. You may have noticed that the light passing through the milky water had an orange tint. Can you now explain why?
Measuring Color Transmission You might be wondering if there is any way of measuring this phenomenon. It turns out that there is. The amount of blue and red light that “survives” the journey through the atmosphere can be measured with a device called a colorimeter. A colorimeter is a device that measures the amount of transmission of a particular color of light. In our case, we want to look at how much blue and red light survive a journey through a small sample of our model atmosphere (the milky water).
The way the colorimeter works is fairly straightforward. You have a choice of three very specific colors of light, which are aimed towards a sensor that measures light intensity. If you place something between the light and the sensor that absorbs or scatters some of the light, then only a portion of the light will get to the sensor. To see exactly how much light gets through to the sensor, we must make two measurements. The first is a measurement using clear water so that we know how much blue or red light gets through the water and the container. The second measurement will use the milky water and will tell us exactly how much of the blue or red light gets through as a percentage of how much got through the clear water.
For the following activity, you will use milky water from the demonstration (or you can make your own). Fill a small container with water and shine a flashlight though the water and onto a white piece of paper. Then slowly add a small amount of powdered creamer and stir the water until it is well mixed. Keep adding creamer, a bit at a time, until the light passing through the water has an orange tint to it. Note: Be careful not to add too much creamer. It doesn’t take much.

LIGHT, SIGHT, AND RAINBOWS B-73
Activity 4.2.3 Measuring Color Transmission
a) Perform a red light transmission measurement. Note: You will need to perform a measurement on clear water first, and then do the measurement with milky water. Print out a copy of your graph and write your result below, explaining precisely what it means.
b) Now perform a blue light transmission measurement. Note: you will need to perform a new measurement with clear water to calibrate for the blue light. Then make a measurement of the milky water. Write your result below. Was more blue or red light transmitted?
c) The light that is no longer reaching the sensor in the colorimeter is being scattered away by the milk particles. Using your results above, is there more red light or blue light in this scattered light?
d) Do you think green light is also being scattered? If so, would it be scattered more or less than blue light? More or less than red light? Explain. (If you have time, you should make a green light transmission measurement and check your prediction!)

B-74 EXPLORATIONS IN PHYSICS
e) Discuss these results with your group and describe how they support the idea of scattering in the atmosphere being responsible for blue skies and red sunsets.
One comment needs to be made. Human perception of color is extremely complicated and not fully understood. For example, in music, when two tones are played simultaneously, we hear a harmony.6 Someone who is well-versed in music will be able to distinguish precisely what the two notes are. When viewing color, however, this is not the case. As we have seen, when viewing two colors “on top of each other,” we see a completely different color for which it is not in general possible to distinguish the constituent colors. To further complicate matters, our eye’s sensitivity actually depends on the color of the incoming light, something we have not considered at all. This does not mean that our conclusions are invalid, but it does mean that we shouldn’t push them too far. There are a number of optical phenomena that cannot be explained with the simple ideas we have developed. This is what makes the study of light (and the sciences in general) so exciting!
At this point, we would like to share a few things about light and color that scientists have learned that we were not able to cover in this unit. The most important of these is that light is an electromagnetic wave, identical in form to radio waves, x-rays, and microwaves. The only differences between these waves are their wavelengths, and the amount of energy they contain. The wavelength of visible light is about 400-700 nanometers (a nanometer is one billionth of a meter). You might have noticed that there are numbers inside your diffraction grating spectrometer. The spectrometers are calibrated so that these values correspond to the wavelength of the light below the number.
The atmosphere blocks a large portion of the light spectrum (which consists of all electromagnetic waves). This is important because there is a large amount of harmful radiation (electromagnetic waves are also referred to as electromagnetic radiation) that is blocked by the atmosphere. Nevertheless, a small “window” in the atmosphere allows visible light (as well as some other wavelengths) to penetrate. Presumably, our eyes have evolved to be sensitive to this portion of the electromagnetic spectrum because of this window in the atmosphere!
This finishes our classroom study on light and color. Although we have studied only a small number of phenomena that deal with light and color, we hope that your understanding of this aspect of the physical world has deepened. Also, we hope you have noticed an increase in your confidence about performing scientific work and the process involved in inquiry based learning.
6 In fact, this is not always true. Complex tones are made up of multiple frequencies but sound as if they are just one frequency. This phenomenon is similar to our perception of colors and is why we are able to distinguish people’s voices so easily without seeing them.

LIGHT, SIGHT, AND RAINBOWS B-75
5 PROJECT IDEAS
It is now time for you to take on the role of scientific investigator and to design a research project focused on some aspect of this unit that you found particularly interesting. On the pages that follow, you will find a number of project suggestions. Please do not feel limited by these suggestions. You may modify any of these or come up with a completely new one on your own. We have found that many of the best projects are those dreamt up by students. We therefore encourage you to develop your own project on a topic that you find interesting. You should of course consult with your instructor as some projects require too much time or impossibly large resources. Nevertheless, anything involving light, vision or color is fair game. So use your imagination and have fun!
Your instructor may ask you to write a brief proposal that outlines the goals of your project and how you plan to accomplish them. You may find it helpful to refer to the project proposal guidelines included in Appendix . Try to plan your project in stages, so that if you run into difficulties early on you will at least be able to complete the data collection, analysis, and interpretation. To this end, it is important to note that the project proposals listed here are intended to foster your creativity, not to tell you exactly what to do. In most cases, answering all the questions in one of these proposals would take far more time than you have. So, choose a few questions that interest you or generate some of your own, but try to keep your project focused.
You will probably want to keep a lab notebook to document your project as it unfolds. Also keep in mind that you may be presenting your project to your classmates, so be prepared to discuss your results, how you measured them, and what conclusions you can draw from them. You may find it helpful to look over the oral presentations guidelines and project summary guidelines in Appendix as you work. These guidelines may give you a better idea of what is expected from a typical student project. Be sure to consult with your instructor about their requirements for your project as they may differ from the guidelines laid out in Appendix B.
Good luck, and have fun!
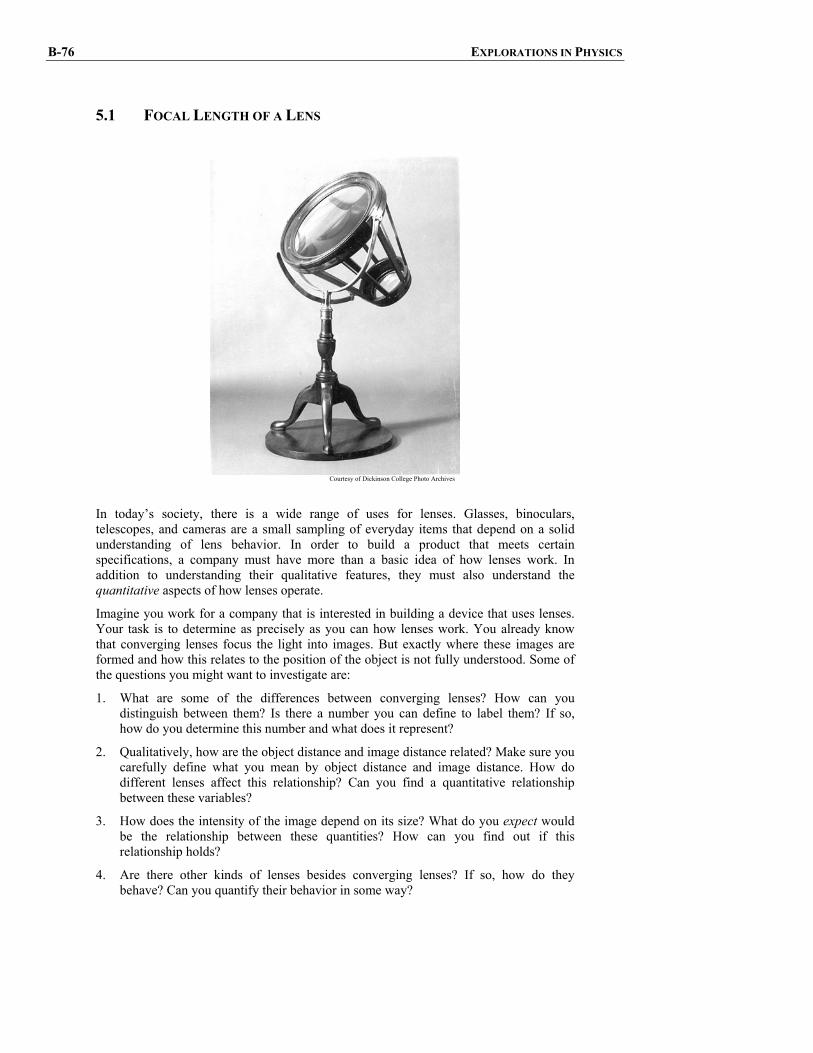
B-76 EXPLORATIONS IN PHYSICS
5.1 FOCAL LENGTH OF A LENS
Courtesy of Dickinson College Photo Archives
In today’s society, there is a wide range of uses for lenses. Glasses, binoculars, telescopes, and cameras are a small sampling of everyday items that depend on a solid understanding of lens behavior. In order to build a product that meets certain specifications, a company must have more than a basic idea of how lenses work. In addition to understanding their qualitative features, they must also understand the quantitative aspects of how lenses operate.
Imagine you work for a company that is interested in building a device that uses lenses. Your task is to determine as precisely as you can how lenses work. You already know that converging lenses focus the light into images. But exactly where these images are formed and how this relates to the position of the object is not fully understood. Some of the questions you might want to investigate are:
1. What are some of the differences between converging lenses? How can you distinguish between them? Is there a number you can define to label them? If so, how do you determine this number and what does it represent?
2. Qualitatively, how are the object distance and image distance related? Make sure you carefully define what you mean by object distance and image distance. How do different lenses affect this relationship? Can you find a quantitative relationship between these variables?
3. How does the intensity of the image depend on its size? What do you expect would be the relationship between these quantities? How can you find out if this relationship holds?
4. Are there other kinds of lenses besides converging lenses? If so, how do they behave? Can you quantify their behavior in some way?

LIGHT, SIGHT, AND RAINBOWS B-77
5.2 POLARIZATION
Figure B-12: The two pictures above were taken of the same scene. The picture on the left was taken with a polarizing filter, while the picture on the right was taken without a filter. What does a polarizing filter do and why does it reduce the glare from water? Why do you think fishermen often wear polarizing sunglasses?
Imagine you are working for a sunglass manufacturing company and your competitor has just released a new product called polarizing sunglasses. They are hyping these new glasses as the “greatest thing since sliced bread,” particularly good for using when the sun is low in the sky or when spending time at the beach. Your company finds that sales are declining after the introduction of these new glasses and the president calls an important meeting.
At the meeting, the president throws down a pair of these polarizing sunglasses and frantically exclaims, “These things are going to put us out of business unless we can figure out how they work and make some of our own!” Your team has been put in charge of finding out what they do and explaining it to the rest of the company when you are done. Some of the suggestions from your co-workers at the meeting were:
1. Try to determine under what general conditions these glasses work well and also when they don’t work so well. Do they really work well when the sun is low in the sky? What exactly does it mean to work well?
2. Come up with some ideas about how these sunglasses might work, and test your ideas in the lab and outside. If the sunglasses work well when the sun is low, what happens when you tilt your head from side to side?
3. Try taking two pieces of the polarizing material and looking at light as it comes through both of them. What happens when you twist one of them? What happens when you twist both of them?
4. Since these sunglasses are supposed to work well for fisherman, how is light reflected from water affected by these sunglasses? Does the angle that the light hits the water matter?

B-78 EXPLORATIONS IN PHYSICS
5.3 ULTRAVIOLET (UV) LIGHT AND SKIN PROTECTION
©Peter Cade/Stone
The presence of UV rays in sunlight is of major concern to people afraid of getting skin cancer. The loss of ozone in the Earth’s upper atmosphere allows increasing amounts of this light component to reach the surface of the Earth. It has been well established that UV light causes changes in the skin that can eventually lead to skin cancer. In certain places, the problem is particularly bad due to holes in the protective ozone layer of the atmosphere. In Australia, for example, children at taught at an early age to “slip, slap and slop”slip on a long sleeve shirt, slap on a hat, and slop on protective skin cream.
Imagine that you work for a consumer’s watch group that is interested in evaluating the claims of skin lotion manufacturers. A major chain store, Floor-Mart, has just released a new skin protective lotion that they claim is “twice the protection for twice as long for only half the price” compared to typical competing products. You are asked to make preliminary evaluations about the claims made regarding Floor-Mart’s new skin product. In order to carry this out, you need to determine how much UV passes through a coating of various protective products. You may also want to evaluate the “staying” power of the creams when exposed to water, dust, etc. Your plan of action is as follows:
1. Decide on how you might measure the amount of UV transmitted through a layer of lotion.
2. Once you have a working detection system, measure the relative amounts of UV transmitted through a thin coating of different products. (Is it important to have the coatings equally thick? If so, how can you make sure that you have equally thick coatings?)
3. Investigate how the product’s blocking ability ages. How does water or dust affect it?
4. Plot a graph showing stopping power versus cost and show which products give you the most protection for the buck.
5. How does the SPF rating come into play. Does a higher SPF rating indicate that the sunscreen actually blocks more light?

LIGHT, SIGHT, AND RAINBOWS B-79
5.4 PINHOLE CAMERA
©David Lees/Corbis Images
Possibly the world’s simplest optical device is the so-called pinhole camera. One of the most frequent uses of such a device is to aid in viewing a solar eclipse. The idea is simple enough, you just make a small hole in a thin piece of cardboard or tin foil and then place a piece of frosted glass behind it (wax paper should work). The object must be fairly bright in order to see a good image (that’s why it works pretty well for the sun). To help in viewing the image, you should screen your eyes from any extraneous light by covering your head with a piece of black cloth (like an old-fashioned camera).
Your objective is to determine what is going on. That is, how do these pinhole cameras work? You might try:
1. Building a few of these pinhole cameras, altering some of the variables involved. For example, try changing the size of the pinhole or changing the distance between the pinhole and the viewing screen. How do these changes affect the image?
2. Determine what makes the image bigger, smaller, brighter, dimmer, sharper, or less focused. Make some appropriate graphs to help you determine how this thing works. For example, you might try graphing the image size as a function of the distance between the pinhole and the viewing screen.
3. Once you have some quantitative data that gives you some clues as to what is happening in the formation of the image, come up with a theory as to how the camera works.
4. Try taking some actual pictures with your camera using Polaroid film. Does it work?

B-80 EXPLORATIONS IN PHYSICS
Figure B-13: The mirror inside the Hubble Space Telescope is shaped so that light entering along the axis of the telescope will be reflected to a focus at a single point. Because the mirror on Hubble is so large, it is possible to see very dim objects. (Courtesy NASA)
5.5 CURVED MIRRORS
The images formed by a flat mirror are common. Less common are the images formed by curved mirrors. For example, if you take a spoon and look at your reflection on the inside or the outside of the spoon, you may not know what to expect. Imagine that you were doing this and you noticed that there were some potentially lucrative uses for curved mirrors. In fact, you would like to go into business and make these mirrors to sell but you don’t have the money to get started. A friend of yours puts you in contact with a venture capitalist firm which supplies money to start-up companies that they think are worthwhile endeavors. The problem is, you must convince them that you have a useful product and that you have an exceptional understanding of what is going on.
In order to get a better understanding of these mirrors, you decide to gather a few of your friends together and try and figure out exactly how they work. In order to satisfy the venture capitalists, you might want to consider the following:
1. What can these curved mirrors do? What do you see when you look at a concave mirror or a convex mirror?
2. Exactly what kind of uses these mirrors have and who might want to buy them.
3. How do these mirrors work? Can you make a diagram of the beams of light from an object and show how the mirror deflects these beams to form an image? Are there any differences between the types of images seen in these mirrors?

LIGHT, SIGHT, AND RAINBOWS B-81
5.6 CORRECTING VISION
©Corbis Digital Stock
Many people wear either glasses or contact lenses to correct their visions. If you look at a pair of glasses or contact lenses, however, you’ll notice that they don’t quite look like the converging lenses we used in class. So how do these lenses help us see?
Clearly, corrective lenses are designed to work with our eyes. Therefore, it may be beneficial to begin with a model of the eye and then to introduce lenses in front of the eye. You can investigate the properties of corrective lenses by themselves to see if this helps you understand how they will help fix a particular vision problem. As you work, you may want to keep in the mind the following questions.
1. What happens to the image formed by a model eye when a lens is placed in front of it? Does it appear in the same place? Does it depend on the kind of lens? Does it matter where this new lens is positioned in front of the eye?
2. How are myopia (near-sightedness) and hyperopia (far-sightedness) treated with lenses? Are the same kinds of lenses used?
3. Can the corrective lenses form images all by themselves? Try using both glasses and contact lenses.
4. What are bi-focals (and tri-focals)? Why would someone want to wear such glasses?

B-82 EXPLORATIONS IN PHYSICS
5.7 REFLECTION AND REFRACTION
©PhotoDisc, Inc
In class, you observed that in the formation of a rainbow, light is refracted as it enters the drop of water, then it’s reflected off the inner back surface, and then it’s refracted once again as it leaves the raindrop. One thing that you may have noticed is that there was actually both reflection and refraction taking place each time the light encountered an interface (the boundary between air and water). Now, the refracted part of the light is transmitted past the interface while the reflected part is not. These ideas can be used to develop “light guides” (fiber optic cables) that take light from one place to another without significant attenuation.
Imagine that you were the first person to realize that these light guides had the potential to carry more information that regular phone cables. In fact, you became convinced that you could start a profitable business if you just understood how transmission and reflection at an interface depended on factors such as angle. To explore this idea, you might want to consider the following questions:
1. How does the angle of the refracted light beam depend on the angle of the incident light beam? Is this relationship the same for all materials?
2. Does the amount of reflected/transmitted light depend on the angle at which it strikes the interface? If so, how?
3. How can a beam of light be kept inside a fiber optic cable?
APPENDIX I: USEFUL PHYSICAL QUANTITIES
CONVERSIONS
Length
1 m = 39.37 in = 3.281 ft
1 in. = 2.54 cm
1 mi = 1.609 km

USEFUL PHYSICAL QUANTITIES I-1
Force
1 N = 1 kg m/s2
Pressure
1 Pa = 1 N/m2 = 10-2 millibar = 1.45×10⁻⁴ lb/in2
1 atm = 1.013×10⁵ Pa = 1013 millibar = 14.7 lb/in2
1 atm = 760 mm Hg = 760 torr
Area
1 m2 = 104 cm2 = 1550 in2
1 km2 = 106 m2
Volume
1 ml = 1 cm3 = 1 cc
1 m3 = 106 cm3
1 gal = 3.786 liters
1 liter = 103 ml = 1.0576 qt
PREFIXES
tera = ×1012
giga = ×109
mega = ×106
kilo = ×103
centi = ×10-2
milli = ×10-3
micro = ×10-6
nano = ×10-9
PHYSICAL CONSTANTS AND PROPERTIES
Acceleration of gravity g 9.80 m/s2
Specific weight of water 2H Oρ 1 g/cm3
Specific heat of water 2H Oc 1 cal/(g ºC)
Specific weight of air airρ 1.20 × 10⁻³ g/cm3
Specific heat of air airc 0.239 cal/(g ºC)
II-2 EXPLORATIONS IN PHYSICS
APPENDIX II: SUGGESTED PROJECT GUIDELINES
PROJECT PROPOSAL GUIDELINES
Your project proposals are meant to make certain that you have done some preliminary planning regarding your project. They actually offer your instructor an opportunity to assess the difficulty of the project you are planning and to help you plan a project that can be completed in the appropriate time frame. Although these proposals are mostly for your benefit, you should adhere to the following guidelines:
Format:
Your proposal should be typed on standard 8 x 11 inch paper. In addition, you should avoid the use of typestyles that make it difficult to read. Typically, a proposal should be one page in length with an equipment list on a separate page. Put your names and project title on all sheets.
Elements to be included in the Summary:
Basically, your proposal should give a reasonable idea of what you plan to accomplish and how. You will not be required to stick completely to the proposal once you begin your project. However, because of time constraints, totally changing the focus of your project is seldom a good idea.
• Brief statement of the purpose of the project. • A plan for any data measurement techniques you will be using.
You should include a list of any equipment you will need to complete your project so that your instructor can gather this equipment before the next class.
• What kinds of graphs you might be making. • If the continuation of your project depends on preliminary
results that you will be making, do your best to explain how you will continue once these results are obtained.
• A project timeline. While your actual experiment may deviate from this timeline, it is a good idea to plan out what you will need to do in the next few class days to complete your project. Planning ahead may allow you to avoid some unpleasant delays.
One final word of advice. Working on your projects is your responsibility. Due to the independent nature of the work, there is a tendency for students to put off the project until the deadline for completion nears. Because there are usually unforeseen problems when attempting any scientific experiment, you are urged to begin your projects early. One of the skills we hope you learn is how to deal effectively with unforeseen (and sometimes difficult) problems.
Furthermore, there will probably not be enough class time available for you to complete a substantial project. Thus, you will be expected to spend some time outside of class working on your projects (there is no homework assigned during the projects). In fact, you should use class time to discuss some of the problems you may be having with your instructor. Also keep in mind that you will need to plan a 10 minute group presentation of your project and write a summary as well. Putting things off till the last minute is a sure way to cause you a lot of problems and frustration.

SUGGESTED PROJECT GUIDELINES II-1
ORAL PRESENTATION GUIDELINES
Your oral presentation is a group effort. As such, it is important that you plan in advance who will discuss each section of the presentation. You are presenting your project to your fellow class mates, so you can assume they have an understanding of the material at the level we covered in class (do not assume too much from your audience or they might not understand your presentation).
Format:
You are allowed 10 minutes to present your project, followed by a 5 minute question and answer session. This is not a lot of time, so you should plan accordingly. Each person is required to give a portion of the presentation, so you may want to rehearse together at least once. At the end of 9 minutes, you will be given a signal that you have only one minute left.
You may draw on the board, use overhead transparencies, make posters, or use whatever visual aids you might need to describe your project. In general, you are not allowed to bring out the experimental set-up to demonstrate, we would like you to describe it instead.
Elements to be included in the Presentation:
Although your presentation might not contain all of the elements listed below (or it may contain some that are not mentioned), here are some common features of typical project presentations:
• Brief Statement of the purpose of the project. Remember, no one knows what you have done for your project.
• Description of the investigation, along with background information, if appropriate. The procedure used to obtain data should be stated along with any diagrams or figures, if this is helpful.
• Data should be presented in tables that include units. • Graphs of data and/or modeling attempts. Ideally, spreadsheets with
graphing tools should be used. Be sure to label the axes and use units on your graphs.
• Conclusions based on analysis of the data. This is important!! What does the data tell you? You should interpret, not speculate.
• Discussion of the results. Do your results make sense? What kinds of difficulties did you run into? How might the project be improved?
• Brief conclusion of the project.
Keep in mind that 10 minutes goes by very fast. You may not be able to discuss every aspect of your project in the time allotted. Therefore, you may need to leave out portions that are not critical to understanding the project.

II-4 EXPLORATIONS IN PHYSICS
PROJECT SUMMARY GUIDELINES
You should write your project summaries as if a fellow physical science student (one not on your project team) is reading it. They should be able to understand exactly what you did and why you did it. In addition, there should be enough detail to allow the reader to re-create the experiment and obtain similar results. Thus, if you devise a unique method for making a measurement, your technique should be described in reasonable detail. The following guidelines should help you to organize your written summaries.
Format:
Your summary should be typed on standard 8 -1/2 x 11 inch paper. In addition, you should avoid the use of typestyles that make it difficult to read. The first page should contain the project title, course name, date, project team members, and author. Next comes the actual summary, which is described in more detail below. Last, you should attach an Individual Performance Assessment form.
Elements to be included in the Summary:
Although your project might not contain all of the elements listed below (or it may contain some that are not mentioned), here are some common features of typical project summaries:
• Brief Statement of the purpose of the project. • Description of the investigation, along with background
information, if appropriate. The procedure used to obtain data should be stated along with any diagrams of figures, if this is helpful.
• Data should be presented in tables that include units. • Graphs of data and/or modeling attempts. Ideally, spreadsheets
with graphing tools should be used. Be sure to label the axes and use units on your graphs.
• Conclusions based on analysis of the data. This is important!! What does the data tell you? You should interpret, not speculate.
• Discussion of the results. Do your results make sense? What kinds of difficulties did you run into? How might the project be improved?
• Brief conclusion of the project.
While there is no length requirement for the project summaries, a typical summary might be two or three pages (double-spaced), not including data and graphs.

SUGGESTED PROJECT GUIDELINES II-3

INDEX
A aperture ........................................................ B-30 atmosphere
model....................................................... B-72
B black body................................ B-21, B-23, B-27
C color
addition ................................................... B-61 human perception of................................ B-74 primary.................................................... B-54 subtraction............................................... B-61 transmission ............................................ B-72
Color ............................................................ B-47 colorimeter................................................... B-72 cornea................................................. B-32, B-46
D dark ................................................................ B-3
seeing in the ...................................... B-3, B-5 diffraction grating........................................ B-53 diffuse reflection .......................................... B-20
E electromagnetic waves ................................. B-74 eye...................................................... B-25, B-32
adjusting focus ........................................ B-44 cat's.......................................................... B-43 ciliary muscles......................................... B-46 cornea...................................................... B-46 iris ................................................. B-25, B-46 lens .......................................................... B-32 model....................................................... B-43 model of .................................................. B-32 physiology............................................... B-46 pupil .............................................. B-25, B-46 retina ....................................................... B-46
F falsification .................................................... B-7 filter.................................................... B-47, B-59
and colored light...................................... B-51 focus............................................................. B-25
G graph
transmission............................................. B-53
H Hubble Space Telescope .............................. B-80 hypothesis ...................................................... B-7
about the nature of light ............................ B-7 testing ........................................................ B-7
I image............................................................ B-34
pinhole..................................................... B-30 sharp ........................................................ B-34
iris ................................................................ B-32
L law.................................................................. B-7 lens ..................................................... B-32, B-33
converging........................... B-40, B-41, B-50 corrective................................................. B-81 focal length.............................................. B-76
light ................................................................ B-3 bending.......................................... B-36, B-38 extended source ....................................... B-14 in water...................................................... B-6 measuring intensity ................................. B-17 necessary for sight..................................... B-5 point source ............................................. B-14 ray.............................. B-28, B-29, B-30, B-36 rays .......................................................... B-11 reflection ..........B-14, B-17, B-18, B-20, B-82 refraction ................................................. B-82 scattering ......................B-6, B-14, B-18, B-20 shadow .................................................... B-20 sources..................................................... B-11 speed of ..................................................... B-9 ultraviolet ................................................ B-78 white.............................................. B-49, B-59
light sensor ................................................... B-17
M mirror
curved...................................................... B-80 model
of the eye ................................................. B-30
N normal
to the surface ................................. B-14, B-15 normal line ............................... B-14, B-15, B-36

O Okham’s Razor ............................................ B-45
P perception....................................................... B-2 Petri dish ...................................................... B-66 pinhole camera ............................................. B-79 points source ................................................ B-11 polarization .................................................. B-77 Preface .........................................................iii, vi primary color................................................ B-54 prism ............................................................ B-49 pupil ............................................................. B-32
as a hole......................................... B-25, B-27 dilation of ................................................ B-25
R rainbow .............................................. B-50, B-65
location of................................................ B-68 raindrop........................................................ B-66 ray box ..................................... B-15, B-16, B-17 reflection ............................................ B-20, B-82 refraction ................................. B-38, B-41, B-82 retina ............................................................ B-45
S scattering ..................................................... B-20
atmospheric ............................................. B-70
sunrise and sunset....................................B-72 seeing
light ...........................................................B-5 sensor
light .........................................................B-17 shadow ..................................... B-11, B-12, B-14 sky
blue..........................................................B-69 spectral fingerprint .......................................B-55 spectrometer
diffraction grating.......................... B-53, B-74 Spectrum ......................................................B-53 specular reflection ........................................B-20
T theory ............................................................. B-7
reflection..................................................B-16 transmission graph .......................................B-53
U ultraviolet light .............................................B-78
V vision
and light...................................................B-25 correction....................................... B-45, B-81
W wavelength ...................................................B-74


