everyday minerals · web viewhardness test – scratching testers with minerals to determine...
TRANSCRIPT
VANDERBILT STUDENT VOLUNTEERS FOR SCIENCEhttp://studentorgs.vanderbilt.edu/vsvs
Everyday Uses of MineralsElementary grade - Spring 2013
Goal: To demonstrate everyday uses of minerals and mineral resources by 1) recognizing characteristics of a few important minerals, and 2) matching minerals with their common-day materials and uses.
LESSON OUTLINEI. Introduction
Discuss the definition of a mineral and the difference between rocks and minerals. Tell students where we get minerals (e.g., mining) and that we use minerals all the time because different minerals have different properties which the students will explore in this lesson.
II. Where do minerals come from?A. Mining – removing minerals from the earthB. Effects of mining – harm to the environment and depleting, or using up, natural resources
III. Properties of minerals and mineral testsA. Streak test – rubbing minerals across screak plates to determine color of powderB. Hardness test – scratching testers with minerals to determine hardnessC. Magnetism test – testing a compass need with a magnet and magnetite
IV. Common materials of mineralsA. Their hand samples – matching student samples with a bag of common household itemsB. Other examples – Handout #2 with some other images of mineral usage
V. Acid test on TUMS
Materials:Note: VSVS members will also need one of each of the following for demonstrations8 boxes (with dividers) containing the following:
Numbered minerals: hematite, galena, quartz, gypsum, garnet, talc, graphite, and magnetite8 bags containing the following:
Steel, lead fishing sinker, drywall, sandpaper, bag of baby powder, a sharpened pencil16 compasses32 observation sheets (one per student)16 Other Mineral Examples sheets (1 per pair)16 Mineral Investigation Kits containing:
1 hand lens1 piece of copper1 piece of iron1 piece of glass1 black streak plate1 white streak plate1 magnet
2 pie plates2 dropper bottles of 0.5 M hydrochloric acid solution2 pieces of marble4 Tums1 answer sheet in sheet protector2 pair of goggles for a VSVS member
Have students divide into group of 4 with 2 pairs of students per group if the teacher has not already done so.
I. Introduction – What are minerals?Write the following words on the board: rock, mineral, element, ore, hardness test, streak test, magnetism test

Ask students, “What is the difference between a rock and a mineral?” They may not know. If not, tell them that rocks are made of 2 or more minerals, but minerals are
pure compounds made of elements like those in the Periodic Table of Elements. A piece of earth made of only one mineral is simply called a mineral rather than a rock.
Give the mineral definition: Minerals are solid crystals that form naturally in the earth. They are not made by plants or animals, but plants and animals use minerals to get nutrients (example: salt). Tell them that plastic is not a mineral because it is not naturally occurring.
Tell students there are more than 3500 different minerals, but only about 30 common ones which we use frequently. Tell students scientists can tell minerals apart by testing different properties which the students will try today.
II. Where do minerals come from?“If it can’t be grown, it must be mined.”
A. MiningAsk students if they know where we get minerals.
Answers include from the earth, from mines, mining, from mountains. Tell students that we extract minerals from the earth through mining. Tell students that mining is not only associated with fossil fuels but mining special rocks called ore. Ore is simply a rock with lots of minerals containing something we want like copper, iron, aluminum, or other elements of interest within the ore’s minerals.
B. Effects of MiningAsk students to give some negative effects of mining.
Answers include harm to the environment like pollution, changing the natural living space of plants and animals, and depleting resources.
Make sure they understand that, unlike farming which can produce something we need every year, mining is limited, and once a location has been mined of all of its minerals, it will not be replenished. Once we use up our mineral resources, we cannot get any more. Recycling is an effort to reuse old minerals. This is why recycling aluminum cans and glass are helpful and a good idea.
III. Properties of minerals and mineral testsTell students that minerals have properties that make them useful, including:
They can be melted and mixed to form new materials (e.g., steel) They can be used as a source of metals like iron They can be used by themselves (gemstones are one common example)
Tell students they will explore some of these properties with the streak test, hardness test, and magnetism test.
A. Streak TestMaterials for VSVS members and students1 box of minerals (per group of 4) Specifically, they will need hematite, galena, quartz, and gypsum from the kit1 Mineral Investigation Kit (per student pair)1 observation sheet per student
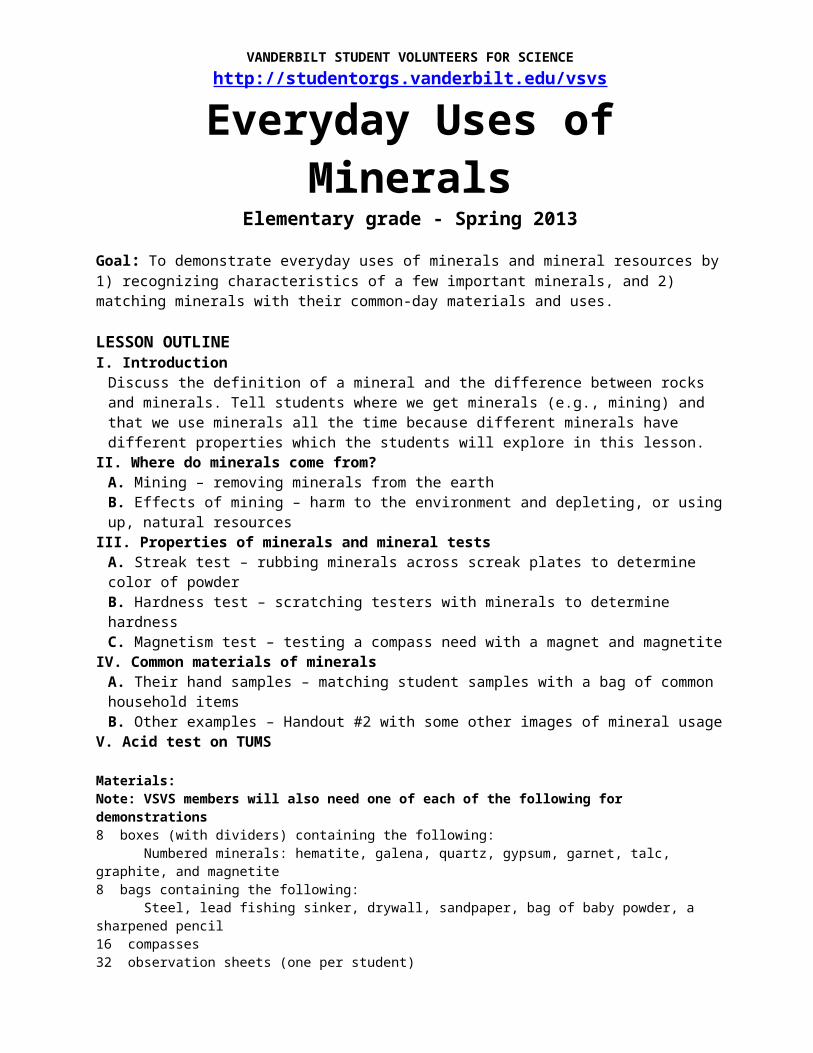
Tell students that some minerals look different when ground into a powder. The streak test is used to distinguish similar-looking minerals from one another.
A "streak” is the color of a mineral when it is ground down to a powder. A streak test is a test that you do by pushing a mineral across a plate.
This crushes up the mineral, allowing you to see a diagnostic color that a specific mineral has. The mark left on the tile is the mineral’s streak.
Pass out the mineral boxes, mineral investigation kits, and observation sheets. Tell students to take out the quartz and black streak plate and set the streak plate on the table. Demonstrate how to perform a streak on the plate while it is on the table by firmly making one line on the plate. Explain that keeping the plates flat keeps them from snapping.
Tell the students to:1. Gently stroke the edge of the quartz across the black streak plate.
Note: Ask students to make only one streak per mineral since the tiles and minerals are needed for other classes.
2. Record the color that the streak produces. Quartz has a white or colorless streak
3. Tell the students to repeat the test for gypsum (black plate), and hematite and galena (white plate).4. Record the results on their observation sheet.
If no streak is visible on either plate, the students should record "not visible”.
Tell students to take 1 minute to discuss possible uses of the mineral with their partner. Go over the predictions as a class, and give some of the following uses for students to record on their sheet:
Quartz: used in glass (source of silica); source of silicon for electronics; jewelry (amethyst and citrine are both colored quartz); watches and clocks (it allows them to tick); used as a component in many ceramics and cements
Gypsum: used to prevent cement from drying to quickly; used in fertilizers; hair products like shampoo; plasters and home building materials
Hematite: the most common source of iron in iron ore; source of red pigment; used in jewelry Galena: the most important mineral in lead ore which is a source of lead; lead is used in car
batteries; radioactive insulator
When they have finished, tell them to set these three minerals aside in preparation for the next test.
B. Hardness TestMaterials for VSVS members and students (1 per pair)1 box of minerals Specifically, they will need garnet, talc, and graphite1 Mineral Investigation Kit
Another clue to a mineral’s identity is its hardness - that is, what will it or will it not scratch? Tell students that geologists have come up with a scale based on different minerals to determine hardness.
Diamond is the hardest mineral to scratch, and has the highest hardness of any natural material. Talc is one of the easiest to scratch.
A mineral’s hardness reflects how strong the mineral structure is. Tell students that mineral hardness is part of why minerals are useful. Examples:
Diamonds, in addition to being gemstones, are powdered and set on saw blades to increase cutting ability
Softer minerals like talc are used in cosmetics as a fine powder.
Tell the students they will test hardness for themselves.
NOTE: Ensure that all testers, especially the glass plate, are flat on the table surface while scratching (like this image). If held aloft, the glass will snap in half.
Tell the students to:1. find the hardness of garnet by scratching the testers with the garnet

in the following order (from hardest to softest):1. piece of glass (hardest)2. piece of iron3. piece of copper4. fingernail (softest)
Once a mineral scratches a tester, do not continue to try to scratch softer testers (because it will!). Remember these testers and minerals will be used by other classes.
Tell students to write the hardest test garnet scratched on their observation sheet. Answer: glassTell students to repeat this test with talc and graphite. Answer: none; they’re both too soft to scratch fingernails.
Tell students to take 1 minute to discuss possible uses of the mineral with their partner. Go over the predictions as a class, and give some of the following uses for students to record on their sheet:
Garnet: gemstones; used as an abrasive (or smoothing agent) in industrial purposes; mixed with high-pressure water to cut steel
Talc: talcum powder; paint and coatings, pharmaceuticals (medicines) and cosmetics (make-up); crayons; soap; used in making paper; added to foods to improve texture; ceramics
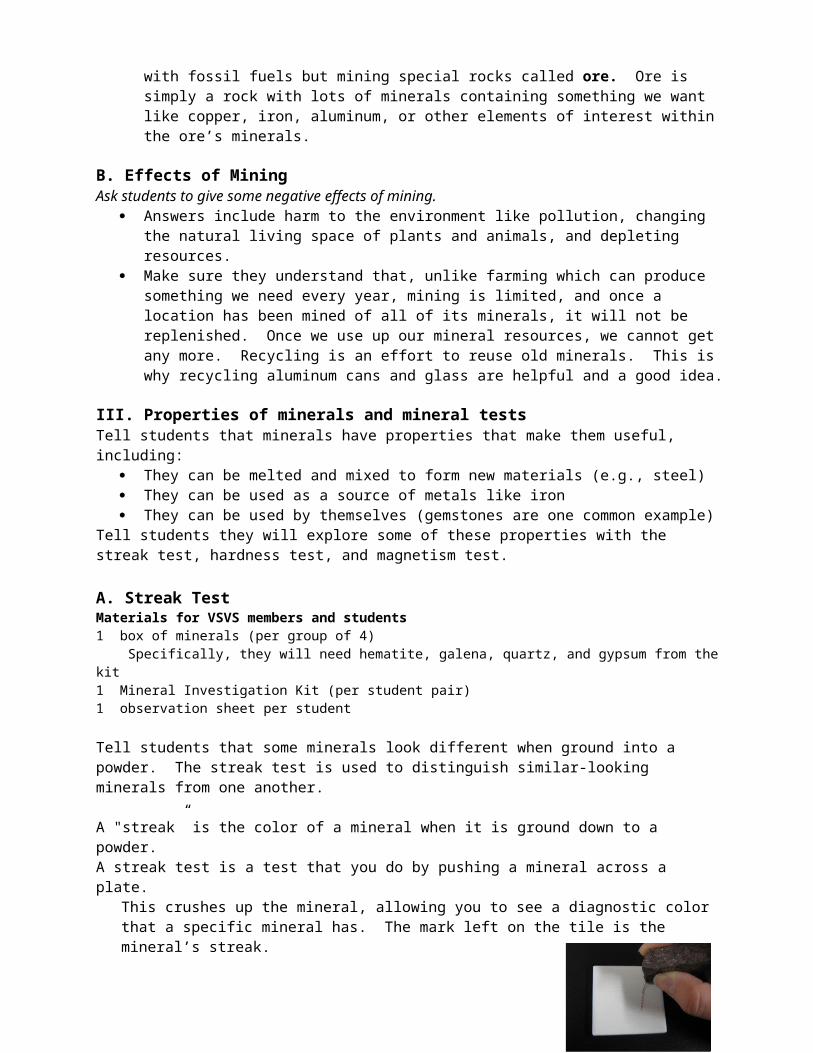
Graphite: lithium batteries; used to make steel (which is an iron and carbon mixture); used in vehicle brakes; art supplies
C. Magnetism TestMaterials for VSVS members and students (1 per pair)1 magnetite mineral 1 compass1 Mineral Investigation Kit
Tell students that some minerals contain lots of iron that make them magnetic. Students will test this property now.
1. Place the compass on the table.2. Tell students to move the magnet in a circle around the compass and observe the needle.3. Tell students to do the same thing with the piece of magnetite and observe the needle.4. Tell students to place the magnet on the magnetite and record their observations on their answer
sheet.
Tell students to take half a minute to discuss possible uses for magnetite, then go over the answers: Magnetite: another source of iron ore; used in making steel; magnets and compasses
IV. Common materials of mineralsMaterials for VSVS members and students8 bags containing daily items (listed at beginning of lesson)1 Mineral Investigation Kit
A. Their hand samplesPass out the 1 bag of everyday items to each group of four. Tell students they will also need their glass plates from their mineral investigation kits.
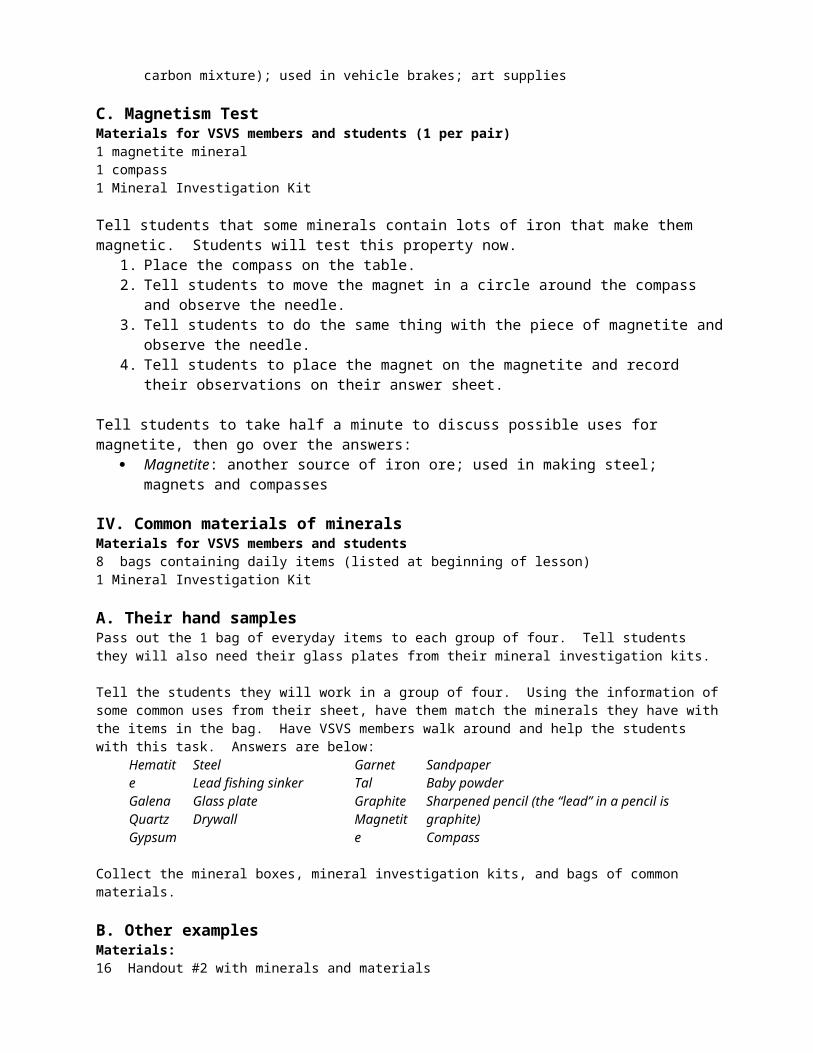
Tell the students they will work in a group of four. Using the information of some common uses from their sheet, have them match the minerals they have with the items in the bag. Have VSVS members walk around and help the students with this task. Answers are below:
HematiteGalenaQuartzGypsum
SteelLead fishing sinkerGlass plateDrywall
GarnetTalGraphiteMagnetite
SandpaperBaby powderSharpened pencil (the “lead” in a pencil is graphite)Compass

Collect the mineral boxes, mineral investigation kits, and bags of common materials.
B. Other examplesMaterials:16 Handout #2 with minerals and materials
Pass out one Handout #2 to each pair of students. Share the following facts with them. Apatite (sounds like appetite): Teeth are the hardest substance in our body, and they are partly made of the
mineral apatite. Pure apatite looks green, but apatite in our teeth are combined with other substances produced by our bodies, so the mineral is not pure and thus looks white. Fluoride in toothpaste mixes with the apatite mineral which makes teeth resist cavities.
Rutile (ROO-teal): a reddish brown mineral in crystal form, but when it is powdered, it looks white (remind students of the streak tests they performed and how powdered mineral looks different from whole sample). Powdered rutile is a source of titanium, a metal that looks white. Titanium is used as a white pigment in many paints and even food, like the filling of Oreo cookies.
Kaolinite (kay-OH-len-ite): this is a soft white clay that is often used in food and cosmetics. It is soft and holds water well, so it prevents foods from sticking together and is used as a filler in toothpaste to help it squeeze out of tubes. Kaolinite is much softer than the mineral apatite in our teeth, so it won’t scratch or damage them (remind students of the hardness test they performed).
Calcite (KAL-site): Calcite is a clear mineral found in limestone. Tell students they seem limestone all the time in middle Tennessee as the grey rock walls on the highways. When limestone is heated by the earth, it turns into marble which is white (middle image), and marble is used in buildings and sculptures because it is easier to cut and shape. This is because calcite is a softer mineral which makes marble a softer rock. Calcite is also used in medicines
Let students look at calcite on the handout for the last exercise
V. Acid test on TUMSMaterials for VSVS members2 pieces of marble2 whole TUMS2 TUMS broken into several pieces2 dropper bottles of 0.5 M hydrochloric acid solution2 pie plates2 pair of goggles
Two VSVS members will perform this test while walking to the different groups to show them. VSVS members must wear the goggles and tell students to observe from a distance at their tables.
Tell students that calcite, the last mineral on their handout, is used in some medicines because it is a base and reacts with acid. Tell students that their stomach contains strong acids that help dissolve food, but sometimes the stomach makes too much acid. The calcite in TUMS helps by reacting with acid to lower the level of stomach acid, and they will see this reaction now.
Place the piece of marble, a whole TUMS, and a broken TUMS into the pie plate. While wearing the goggles, the VSVS member will walk to each group of 4 and show students the piece of
marble and the TUMS. Carefully drop one drop of acid on the marble and let students observe the reaction. Tell students that breaking the TUMS helps the reaction go faster; this is why TUMS are chewable. Carefully drop one drop of acid on a broken piece of TUMS and ask students if the reaction is the same as
with the marble. Answer: yes, they both fizz.
Students should make observations on their observation sheet.A third VSVS member should walk behind the two members performing acid tests and collect Handout #2.
Lesson by: Pete Berquist (Vanderbilt University) Pat Tellinghuisen (VSVS/Vanderbilt University) Sylvia McCarthy (MNPS) Kyle Broach (VSVS/Vanderbilt University)
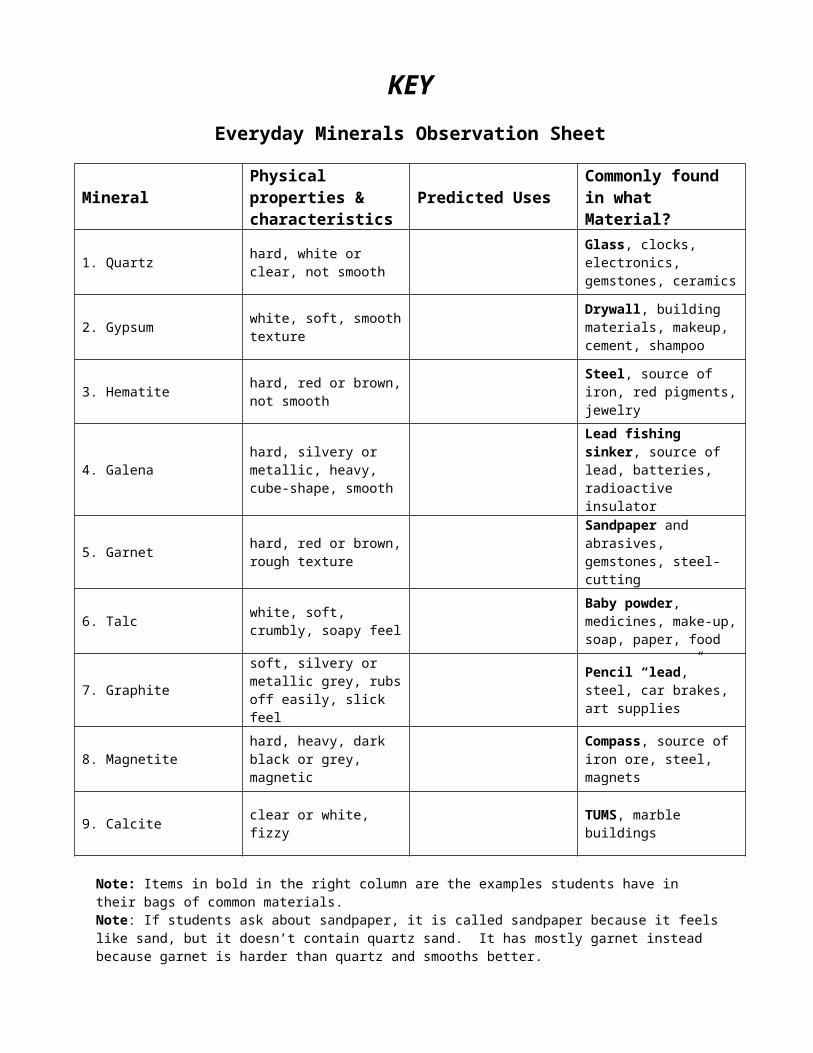
KEYEveryday Minerals Observation Sheet
Mineral Physical properties & characteristics Predicted Uses Commonly found in
what Material?
1. Quartz hard, white or clear, not smooth
Glass, clocks, electronics, gemstones, ceramics
2. Gypsum white, soft, smooth texture
Drywall, building materials, makeup, cement, shampoo
3. Hematite hard, red or brown, not smooth
Steel, source of iron, red pigments, jewelry
4. Galenahard, silvery or metallic, heavy, cube-shape, smooth
Lead fishing sinker, source of lead, batteries, radioactive insulator
5. Garnet hard, red or brown, rough texture
Sandpaper and abrasives, gemstones, steel-cutting
6. Talc white, soft, crumbly, soapy feel
Baby powder, medicines, make-up, soap, paper, food
7. Graphitesoft, silvery or metallic grey, rubs off easily, slick feel
Pencil “lead,” steel, car brakes, art supplies
8. Magnetite hard, heavy, dark black or grey, magnetic
Compass, source of iron ore, steel, magnets
9. Calcite clear or white, fizzy TUMS, marble buildings
Note: Items in bold in the right column are the examples students have in their bags of common materials.Note: If students ask about sandpaper, it is called sandpaper because it feels like sand, but it doesn’t contain quartz sand. It has mostly garnet instead because garnet is harder than quartz and smooths better.
Apatite

Apatite
Rutile
Kaolinite
Handout #1
Names:
Everyday Minerals Observation Sheet
Mineral Physical properties & characteristics Predicted Uses Commonly found in
what Material?
1. Quartz
2. Gypsum
3. Hematite
4. Galena
5. Garnet
6. Talc
7. Graphite
8. Magnetite