egyptian earrings - rhinogold.jp‚¨ジプトイヤリング018... · 1 rhinogold tutorial series...
TRANSCRIPT

1 RhinoGold Tutorial Series
Raster to Vector
Under the Artistics tab with the Raster to Vector tool,
in the top view, we can obtain the curves from a
image, in this case is the egyptian eye.
1 Scale 2D
Now, under the Transform tab with the Scale 2D tool
we can adjust the curves measure as the above
image.
2
Circle
Under the Drawing tab with the Circle tool in the
top view we can make a circle to start defining the
earrings, in this case with 26mm diameter.
3 Curve Shell
Now, under the Modelling tab with the Curve Shell
tool we can define the parameters of the solid as
the above image.
4
Egyptian Earrings
In this tutorial we will try out some of the most useful com-
mands in RhinoGold. Powerful tools as Raster to Vector, Tex-
ture 3D, Bend and Curve Shell.

2 RhinoGold Tutorial Series
Extrude
In this step, with the Extrude tool under the Mode-
lling tab to define the eye thickness, in this case with
1mm to the bottom direction as the above image.
5 Boolean Union
Now, still under the Modelling tab with the Boolean
Union tool we can unite all the parts created before
in a single object.
6
Variable Fillet
Then, under the Modelling tab with the Variable
Fillet tool we can define round edges as the above
image. In this case the fillet angle is 1mm.
7 Bend
At this time we need to adjust the earrings shape,
for this, under the Transform tab with the Bend tool
in the front view to do it. It’s important to activate the
symmetry option under the command line.
8
Bend
Now we should repeat the previous process but in
the right view,for this, with the Bend tool under the
Transform tab and use the same parameters as the pre-
vious step.
9 Torus
Then, under the Modelling Tab with the Torus tool in
the top view to define a support to the ear wire and
we just need to define the pretended measures.
10
3 RhinoGold Tutorial Series
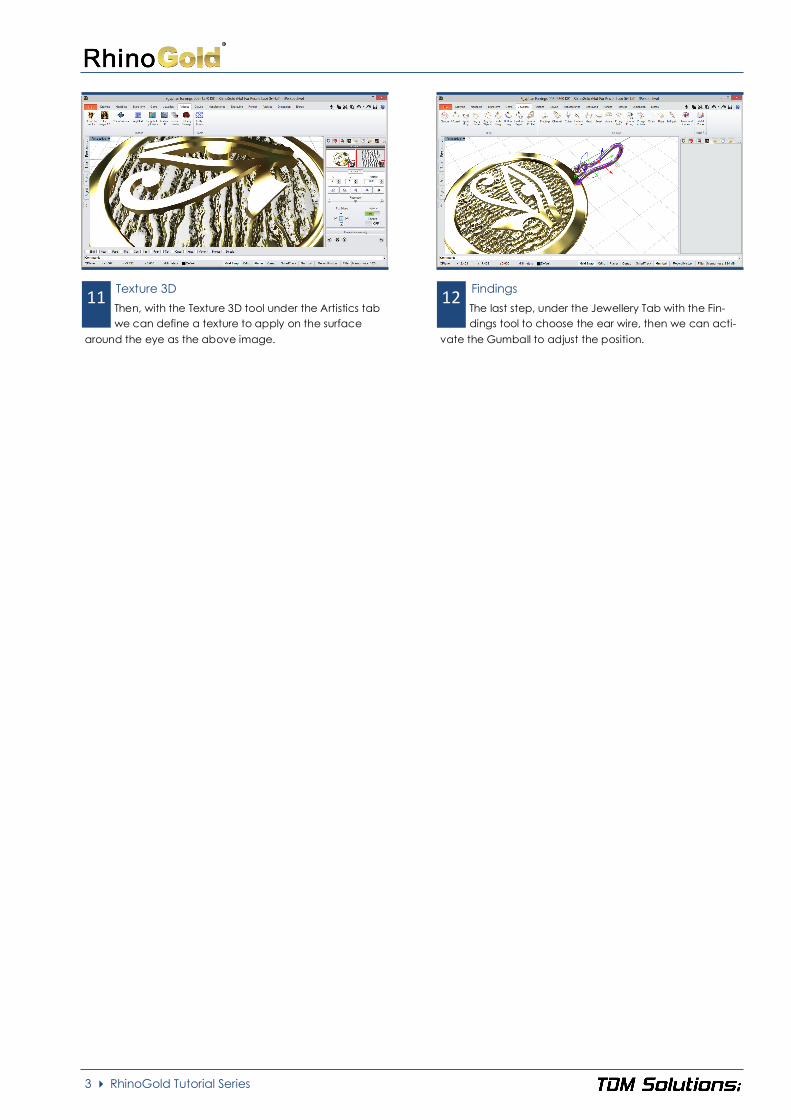
Texture 3D
Then, with the Texture 3D tool under the Artistics tab
we can define a texture to apply on the surface
around the eye as the above image.
11 Findings
The last step, under the Jewellery Tab with the Fin-
dings tool to choose the ear wire, then we can acti-
vate the Gumball to adjust the position.
12