e46 fuel filter change · e46 fuel filter change pics from 2001 330ci i am combining the...
TRANSCRIPT

E46 FUEL FILTER CHANGEPics from 2001 330CI
I am combining the information from this thread: Click Here and adding photos.
From the above post with edits (Mine are in Bold):
Changing the fuel filter is very straight forward. It is extremely easy. Follow the numerous DIY on this board regarding changing the OEM fuel filter.
Here are some tips that you might find useful.
1) The fuel filter is located directly underneath the driver seat on the under carriage of the car.
1a) Remove Fuse #54 (Fuel Filter) This will stop the flow of gas. After you have removed Fuse #54, turn over the car until you cannot start it. Itshouldn't take long... mine did it the first time, of course I turned it over a few more times to make sure I removed the most gas I could from the lines.)
Bellows Expansion JointsMetal Bellows Expansion Joints inEvery Style from Flexicraftwww.FleXicraft.com/Metal_Bellows
Ask a BMW Mechanic Now11 BMW Mechanics Are Online. Aska Question, Get an Answer ASAP.BMW.JustAnswer.com
Denso Iridium Spark PlugsMore Horsepower & Fuel Efficiency.Find Your Part and Where to Buy It.www.DensoAftermarket.com
http://bimmerinfo.com/diy/fuel-filter/
1 of 10 5/3/2010 1:48 PM

http://bimmerinfo.com/diy/fuel-filter/
2 of 10 5/3/2010 1:48 PM
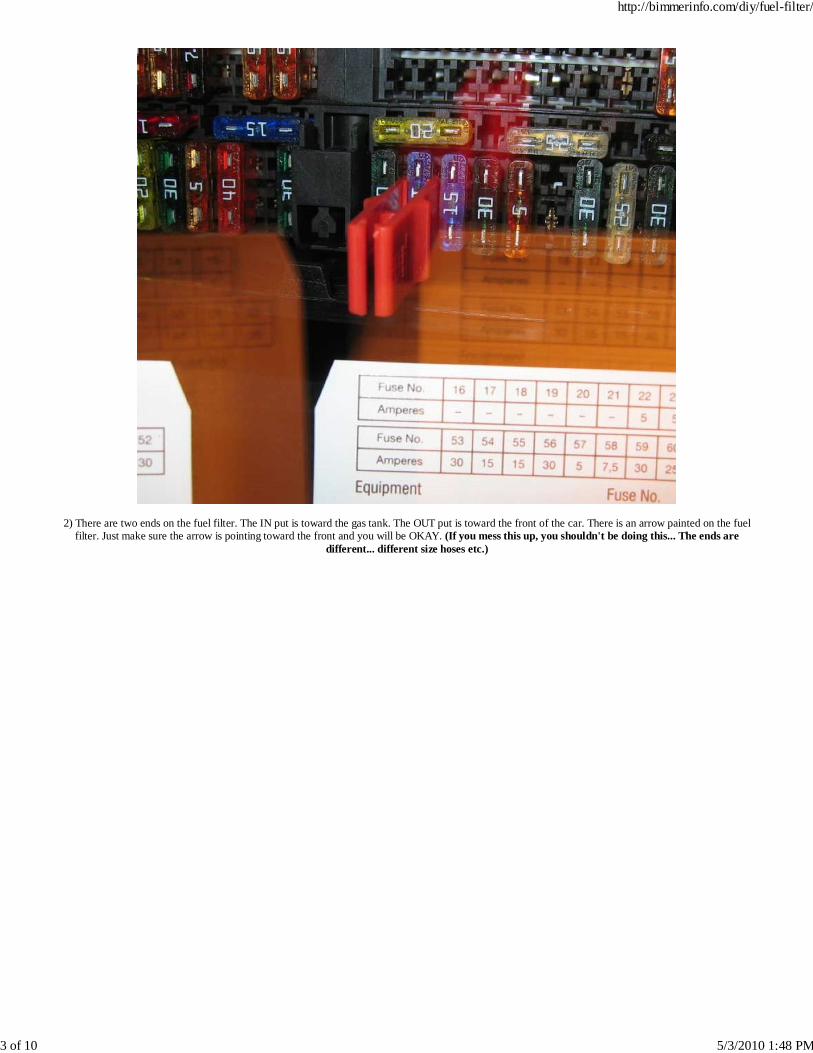
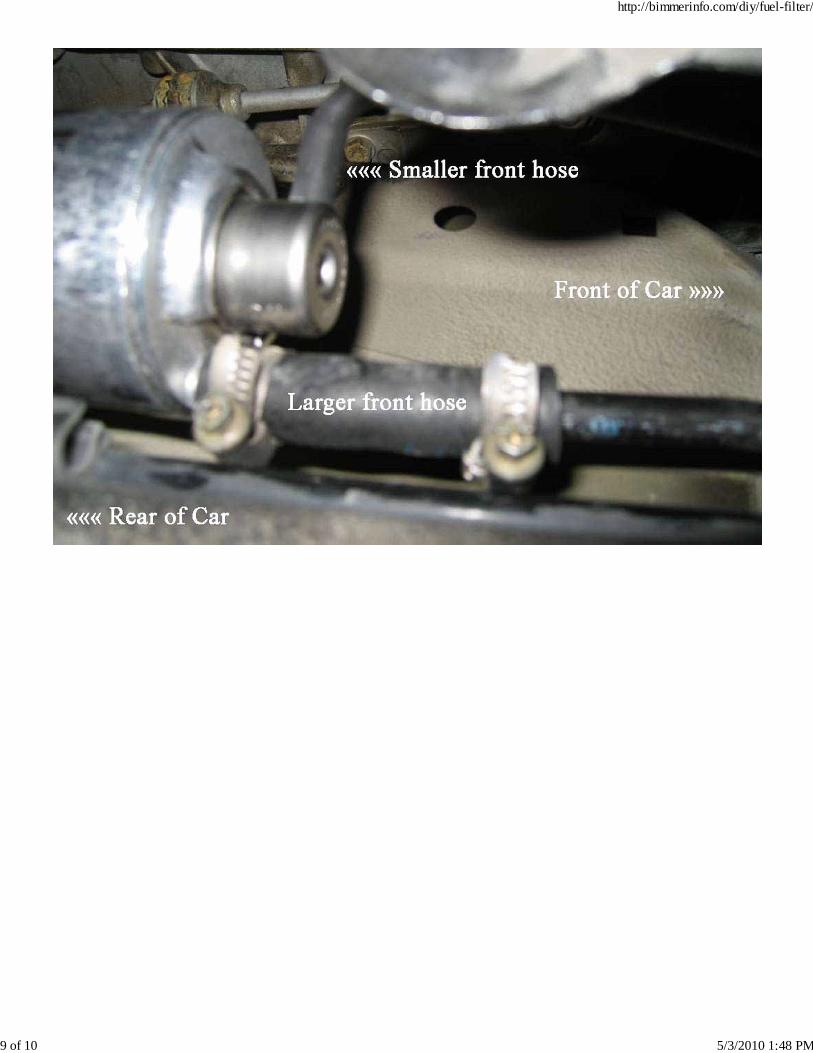
2) There are two ends on the fuel filter. The IN put is toward the gas tank. The OUT put is toward the front of the car. There is an arrow painted on the fuelfilter. Just make sure the arrow is pointing toward the front and you will be OKAY. (If you mess this up, you shouldn't be doing this... The ends are
different... different size hoses etc.)
http://bimmerinfo.com/diy/fuel-filter/
3 of 10 5/3/2010 1:48 PM
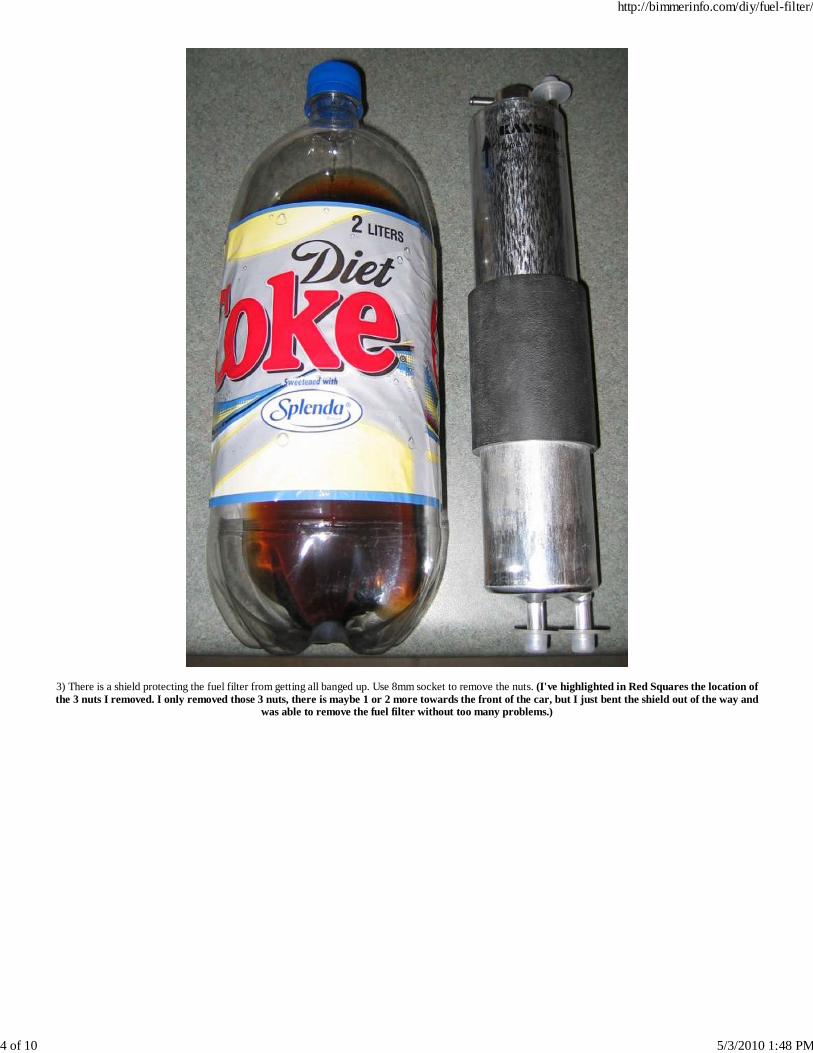
3) There is a shield protecting the fuel filter from getting all banged up. Use 8mm socket to remove the nuts. (I've highlighted in Red Squares the location ofthe 3 nuts I removed. I only removed those 3 nuts, there is maybe 1 or 2 more towards the front of the car, but I just bent the shield out of the way and
was able to remove the fuel filter without too many problems.)
http://bimmerinfo.com/diy/fuel-filter/
4 of 10 5/3/2010 1:48 PM
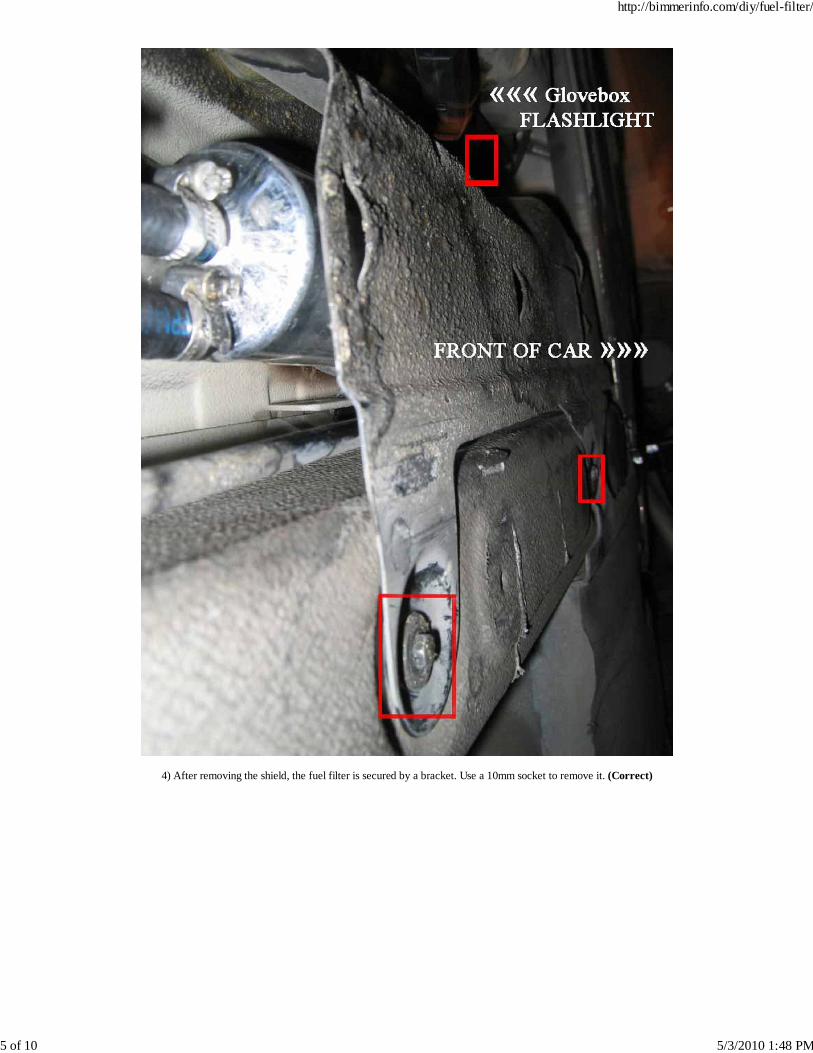
4) After removing the shield, the fuel filter is secured by a bracket. Use a 10mm socket to remove it. (Correct)
http://bimmerinfo.com/diy/fuel-filter/
5 of 10 5/3/2010 1:48 PM
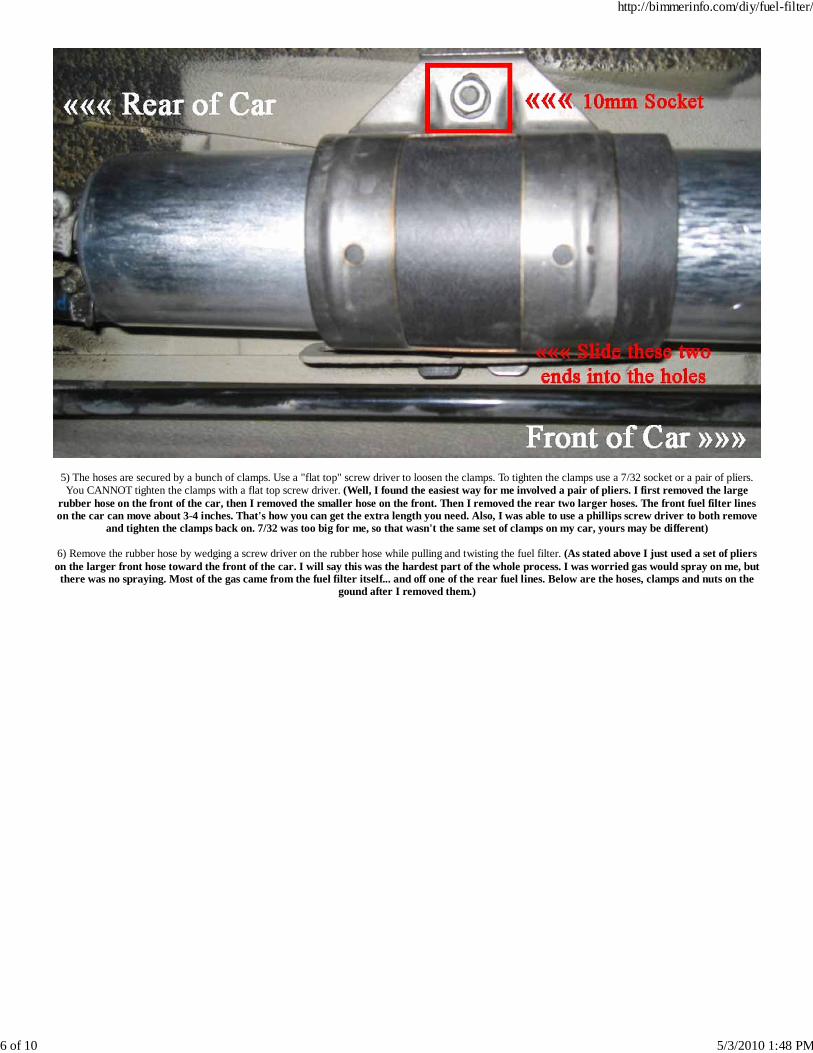
5) The hoses are secured by a bunch of clamps. Use a "flat top" screw driver to loosen the clamps. To tighten the clamps use a 7/32 socket or a pair of pliers.You CANNOT tighten the clamps with a flat top screw driver. (Well, I found the easiest way for me involved a pair of pliers. I first removed the large
rubber hose on the front of the car, then I removed the smaller hose on the front. Then I removed the rear two larger hoses. The front fuel filter lineson the car can move about 3-4 inches. That's how you can get the extra length you need. Also, I was able to use a phillips screw driver to both remove
and tighten the clamps back on. 7/32 was too big for me, so that wasn't the same set of clamps on my car, yours may be different)
6) Remove the rubber hose by wedging a screw driver on the rubber hose while pulling and twisting the fuel filter. (As stated above I just used a set of plierson the larger front hose toward the front of the car. I will say this was the hardest part of the whole process. I was worried gas would spray on me, butthere was no spraying. Most of the gas came from the fuel filter itself... and off one of the rear fuel lines. Below are the hoses, clamps and nuts on the
gound after I removed them.)
http://bimmerinfo.com/diy/fuel-filter/
6 of 10 5/3/2010 1:48 PM

7) Be prepare to have lots and lots of fuel leakage. Clean fuel immediately. Fuel will evaporate faster when smear around rather than sitting in a puddle. (Havesomething to catch the gas, as you will have some spill, unless you are simply amazing. You can use clamps on the rubber hoses, but I see no real need.
Have something metal or hard plastic to catch the gas. otherwise the gas will melt through many things.)
8) After you have attached the hoses and put everything back to it's original condition, put in fuse #54 and turn the car to position #2. Don't turn thecar over! - If you do you might just get and error code thrown on the car possibly or not a smooth flow of gas, just turn it to position #2 then off... then#2 and off. Do this 3-4 times and then you can start up the car. I did this and my car started right up the first time, and I had no error codes and then I
drove the car 350 miles the next day with no problems.
SAFETY TIPS
1) Change fuel filter only in well ventilated area. I was changing my fuel filter outside and yet I still feel sick. (Agree... have a fan so it blows the fuel fumesaway from you.)
2) Have a fire extinguisher ready in case. Would you rather take the time to buy or find a fire extinguisher than have your car destroy or blow up? (I didn't...why would anything blow up? If I had a fire extinguisher I would of had one present though.)
3) When removing the fuel line or when fuel are leaking out, make sure you priodically ground yourself from static electricity. Just touch all the metal/stealcomponents underneath your car every two-three minutes or so. (Hehe, I was always touching the car car, but I didn't do that... I'm still alive.. whooo
hooo!)
Below are some more photos...
http://bimmerinfo.com/diy/fuel-filter/
7 of 10 5/3/2010 1:48 PM

http://bimmerinfo.com/diy/fuel-filter/
8 of 10 5/3/2010 1:48 PM
http://bimmerinfo.com/diy/fuel-filter/
9 of 10 5/3/2010 1:48 PM
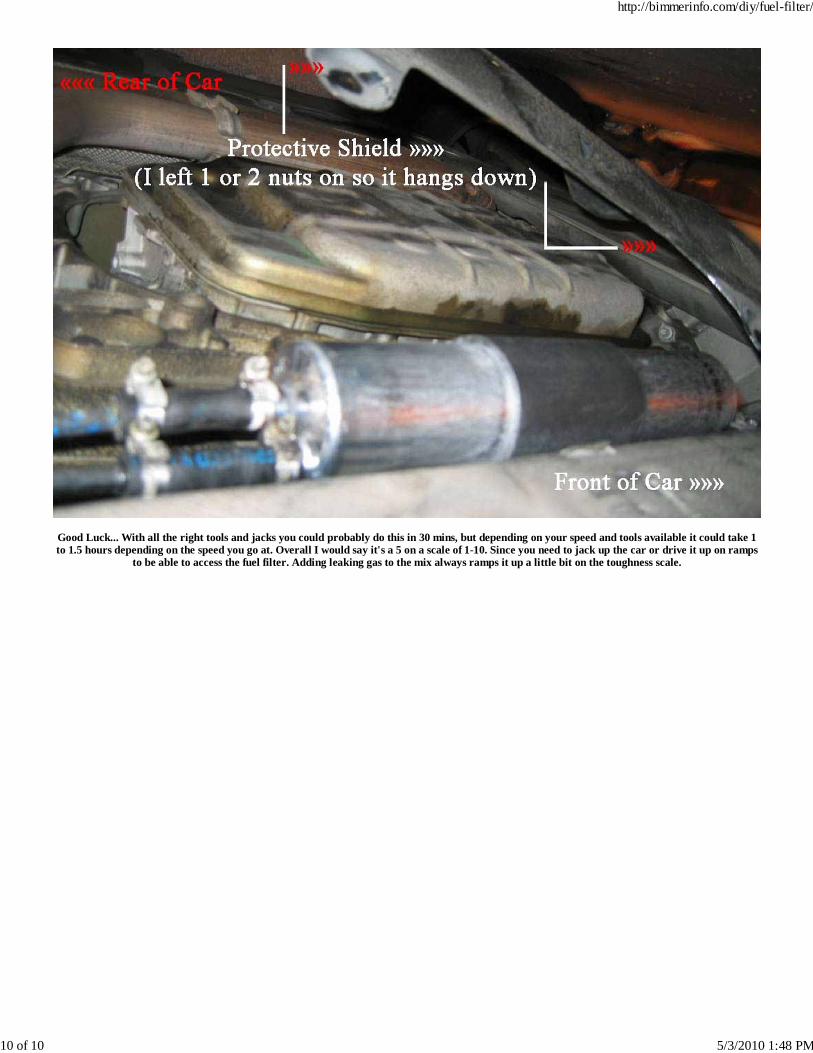
Good Luck... With all the right tools and jacks you could probably do this in 30 mins, but depending on your speed and tools available it could take 1to 1.5 hours depending on the speed you go at. Overall I would say it's a 5 on a scale of 1-10. Since you need to jack up the car or drive it up on ramps
to be able to access the fuel filter. Adding leaking gas to the mix always ramps it up a little bit on the toughness scale.
http://bimmerinfo.com/diy/fuel-filter/
10 of 10 5/3/2010 1:48 PM