draft your own peasant blouse pattern - kate & · pdf filedraft your own peasant blouse...
TRANSCRIPT
Draft Your Own Peasant Blouse Pattern(tutorial by Kate & Rose for Soma Patterns)
Sylvie, thank you for the opportunity to post this tutorial! Zero or low-waste sewing is important to me - not least because I grew up in Cold War-era Hungary. My grandma was an incredible recycler-upcycler-reuser, she could figure out so many ways to use things rather than throw them away. I know that one of the goals of Soma Patterns is to make patterns that reduce fabric waste, which is something central to folklore sewing, and also very important to me.
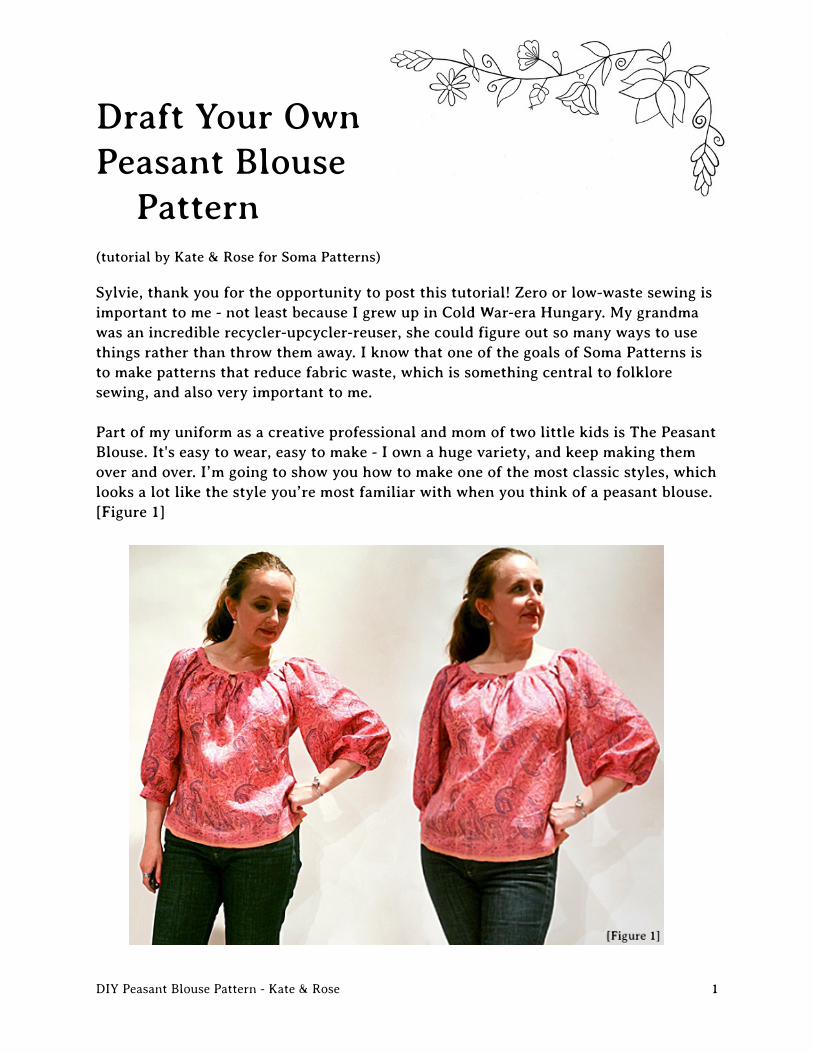
Part of my uniform as a creative professional and mom of two little kids is The Peasant Blouse. It's easy to wear, easy to make - I own a huge variety, and keep making them over and over. I’m going to show you how to make one of the most classic styles, which looks a lot like the style you’re most familiar with when you think of a peasant blouse. [Figure 1]
DIY Peasant Blouse Pattern - Kate & Rose ! 1
But there’s a twist: I’m going to show you the old-school way to do it, the way it was made of homespun linen in Eastern European villages, India, Rennaissance-era Italy, and much longer ago... It’s a way to make clothes that’s been around for many hundreds of years, before easy access to scissors that let you cut curves easily, before people stopped worrying about wasting fabric by cutting curved pattern pieces. I mean, if you made the fabric yourself, you’ll probably want to use every last scrap of it, wouldn’t you?
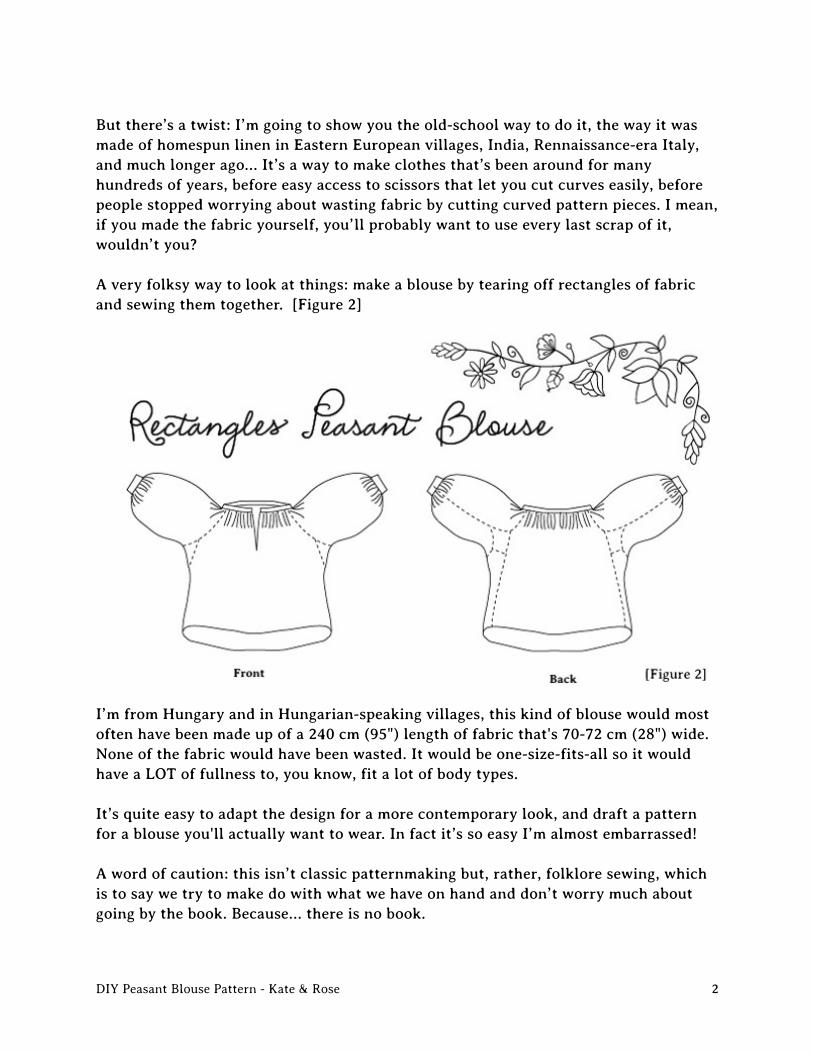
A very folksy way to look at things: make a blouse by tearing off rectangles of fabric and sewing them together. [Figure 2]
I’m from Hungary and in Hungarian-speaking villages, this kind of blouse would most often have been made up of a 240 cm (95") length of fabric that's 70-72 cm (28") wide. None of the fabric would have been wasted. It would be one-size-fits-all so it would have a LOT of fullness to, you know, fit a lot of body types.
It’s quite easy to adapt the design for a more contemporary look, and draft a pattern for a blouse you'll actually want to wear. In fact it’s so easy I’m almost embarrassed!
A word of caution: this isn’t classic patternmaking but, rather, folklore sewing, which is to say we try to make do with what we have on hand and don’t worry much about going by the book. Because... there is no book.
DIY Peasant Blouse Pattern - Kate & Rose ! 2

OK, let’s get started! First, gather your supplies:
- notebook- measuring tape- scissors or rotary cutter or cutting device of your preference, a quilting ruler might come in handy too- fabric - traditionally you would of course use linen, hemp or cotton but really, use anything you want. I prefer lightweight fabrics with some drape and a soft hand like cotton voile, lightweight silks or rayon, lightweight linen - - thread, sewing machine, and - if you like - a bit of embroidery thread
We’ll begin by taking some measurements. You’ll need your bust circumference, the length you’d like your blouse to be in the center back, and the length you’d like for your sleeve. Wear something with a neckline you like and measure the desired sleeve length starting at the neckline. [Figure 3]
My bust is 36” (91.5 cm); I’d like the blouse to be roughly hip-length, which for me is 23” (58.5 cm), and I wanted a 3/4-ish sleeve so the sleeve length from neckline to sleeve hem should be about 22” (56 cm).
We’ll need a few more measurements: for the width of the sleeve, the width of the cuffs, and the neckline of the blouse.
To measure for the sleeve width, make a circle of the tape, slip it over your hand and adjust it so it comfortably encircles your arm around your shoulder and armpit, and measure this.
DIY Peasant Blouse Pattern - Kate & Rose ! 3

For the cuff, tighten this circle and fit it loosely at the point where you’d like the sleeve to end, making sure it’s wide enough to go over your hand.
For the neckline, lay a large circle of tape around your shoulders, roughly where you’d like the neckline to be. This is why it really helps to wear something with a neckline you like, you can just use it as your guide. (I really like the front neckline of this old leotard left over from my flamenco-dancing days - though obviously the low back is entirely unsuitable for a blouse ;) [Figure 4]
My armhole width came to 15” (38 cm), my cuff 10” (25.5 cm), and my neckline 32” (81 cm).
Now let’s turn these measurements into pattern pieces. Here are the pattern pieces we’ll need with the traditional proportions and pattern piece sizes [Figure 5]:
DIY Peasant Blouse Pattern - Kate & Rose ! 4

We’ll use our own measurements to personalize them.
Take half your bust measurement (for me - 36:2=18"), we’ll add to this number to create nice fullness. I like far less bulk than the average peasant blouse so I’ll only add 4" (10 cm). You can arrive at your own preferred number by the highly scientific method of laying your favorite blouse flat, measuring it across the bustline, and comparing it to your bust measurement. By this method, the width of my bodice pieces comes to 22" (56 cm), and the length will be the center back length I wanted: 23” (58.5 cm).
Let’s do the sleeves. Take the measurement you took round the armhole, we’ll add to it to create comfy and cute fullness in the sleeves. Peasant blouses will add at least 1/2 to this measurement (mostly more than that), but 1/2 extra works out to a pretty nice-looking sleeve so that’s what I’m going to use. My armhole measurement was 15” (38 cm), I’ll add 7.5 (19), so I have 22.5” (57 cm) for the width of the sleeve. The sleeve length I wanted was 22” or 56 cm.
We’ll also need underarm gussets (two squares sewn into the armpit area) to shape the flat and motionless sleeves and bodice to our 3-dimensional and mobile bodies. The pattern in Figure 5 used 10cm by 10 cm (4” by 4”) squares for the gussets, another common size is 15 cm by 15 cm (6” by 6”). I prefer the larger ones because they work better with skinnier sleeves.
We’ll finish the sleeves with cuffs: I measured 10” (25.5 cm) so I’ll take that plus twice the width of the seam allowance for the length, and I’ll use 4” (10 cm) for the width because it looks nice (and also, that’s how my fabric worked out).
Finally, the neckline binding: 32” (81 cm) plus twice the width of the seam allowance will be the length (for me that’s 32 7/8” or 83 cm), and 2-3” (5-7 cm) in width, 2 1/2 is what my fabric allows.
One last thing: I didn’t add seam allowance to the sleeves and bodice pieces because I felt they were plenty wide enough the way they were, but you most certainly can, if you prefer. About seam allowance: my (fairly stern) grandma taught me to sew with a 1 cm (3/8”) seam allowance and now I feel like I’m wasting fabric if I use more. Plus, by now I can eyeball 1 cm anywhere and why would I waste that skill?
DIY Peasant Blouse Pattern - Kate & Rose ! 5

Here are my personal pattern pieces [Figure 6]:
This is where we can begin economizing! You may or may not have enough fabric to fit all of these pattern pieces in exactly these sizes. Some of the measurements are non-negotiable: the bodice width, the sleeve width, the neckline length and the cuff length, but others are much more open to interpretation. I used a vintage sari of mysterious fabric make-up for my blouse, with a width of 42” (110 cm). I wanted to use the border print at the bottom of the blouse, and on the cuffs and neck binding, but then I didn’t have quite enough fabric to fit the full length of my sleeve pieces, so I made them a bit shorter. I wanted to be all traditional so I added extra width to the cuffs and neck binding and folded them under instead of using interfacing (because you’re unlikely to find interfacing in a very traditional peasant blouse).
To assemble the blouse, stitch the side seams, leaving 24-25cm or 9.5-10" open at the top. It’s the width of the gusset (15 cm or 6”) plus the area where you’ll attach the sleeve (another 10 cm or 4”- roughly). Insert two adjacent sides of each gusset into the opening at the top of the side seams, matching the corner to the point where you stopped stitching. Sew from the center points outwards. [Figure 7]
DIY Peasant Blouse Pattern - Kate & Rose ! 6

Stitch the sleeve seam, leaving 20 cm or 8 inches open at the top, just like you did with the bodice. (I finished the seam allowances together but you can finish and press them apart, if you prefer.) Line up the open portion of the sleeve seam with the armhole you created, making sure that tip of the gusset fits into to the end of the opening in the sleeve seam. [Figure 8]
Stitch, then repeat on the other side. Finish seam allowances and press towards the sleeve. Traditional dancewear is also often topstitched on all seams but my fabric was a little thin for this.
DIY Peasant Blouse Pattern - Kate & Rose ! 7
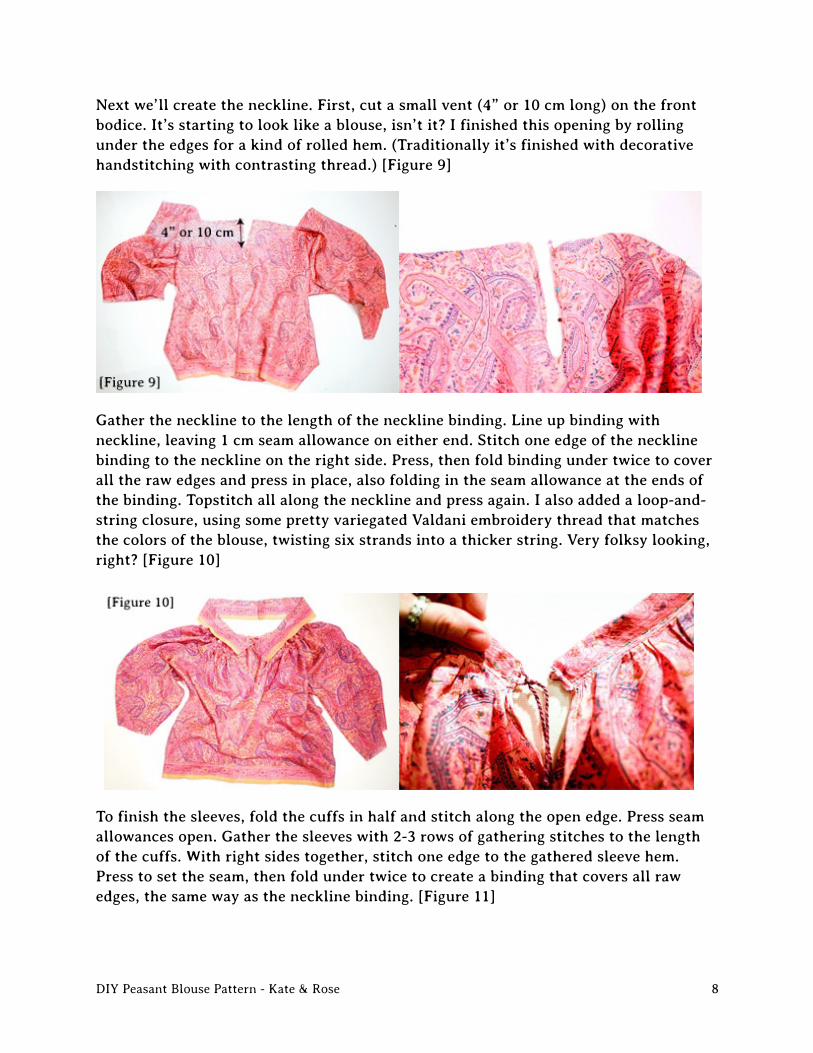
Next we’ll create the neckline. First, cut a small vent (4” or 10 cm long) on the front bodice. It’s starting to look like a blouse, isn’t it? I finished this opening by rolling under the edges for a kind of rolled hem. (Traditionally it’s finished with decorative handstitching with contrasting thread.) [Figure 9]
Gather the neckline to the length of the neckline binding. Line up binding with neckline, leaving 1 cm seam allowance on either end. Stitch one edge of the neckline binding to the neckline on the right side. Press, then fold binding under twice to cover all the raw edges and press in place, also folding in the seam allowance at the ends of the binding. Topstitch all along the neckline and press again. I also added a loop-and-string closure, using some pretty variegated Valdani embroidery thread that matches the colors of the blouse, twisting six strands into a thicker string. Very folksy looking, right? [Figure 10]
To finish the sleeves, fold the cuffs in half and stitch along the open edge. Press seam allowances open. Gather the sleeves with 2-3 rows of gathering stitches to the length of the cuffs. With right sides together, stitch one edge to the gathered sleeve hem. Press to set the seam, then fold under twice to create a binding that covers all raw edges, the same way as the neckline binding. [Figure 11]
DIY Peasant Blouse Pattern - Kate & Rose ! 8

Oh hey whaddya know! It’s a peasant blouse!
You can of course change and modernize the look any way you like. If you want to make a tunic or night gown or smock dress (OK - not that modern) and would like to add more fullness towards the bottom of your garment, you can easily do so by cutting two more long rectangles of fabric, cutting both in half to form right-angled triangles, and sewing them to the sides of the bodice pieces before closing the side seams. [Figure 12]
Or you can get yourself some funky fabric and make a HUGE underarm gusset to make a batwing blouse! [Figure 13]
DIY Peasant Blouse Pattern - Kate & Rose ! 9

DIY Peasant Blouse Pattern - Kate & Rose ! 10