diy ribbon ornament - · pdf filetitle: diy ribbon ornament by modesty matters author: j....
TRANSCRIPT
Page 1 of 7 Copyright © 2011 • Modesty Matters, LLC • All Rights Reserved
Please do not copy, sell, or otherwise distribute this material in whole, or in part, without written permission.
DIY Ribbon Ornament
My children LOVE making these! They choose the recipients, and they choose the ribbon based on who they are making it for. It keeps those little fingers busy, hearts happy, and minds thoughtful. Traditionally these are made with fabric, but I LOVE ribbon. This is a great gift for less than $5 that is sure to please! If you have an hour before bed, you can even make these as a last minute gift for someone special. You can keep it traditional Christmas colors (reds, greens, silver & gold), or you can tailor the gift. Materials:
A Plethora of Satin Pins or Appliqué Pins (size 17 or smaller)
A Small Styrofoam Ball (2½ inches works well)
A Spool or Two of Your Favorite Ribbon(s) (⅞"or 1½" wide)
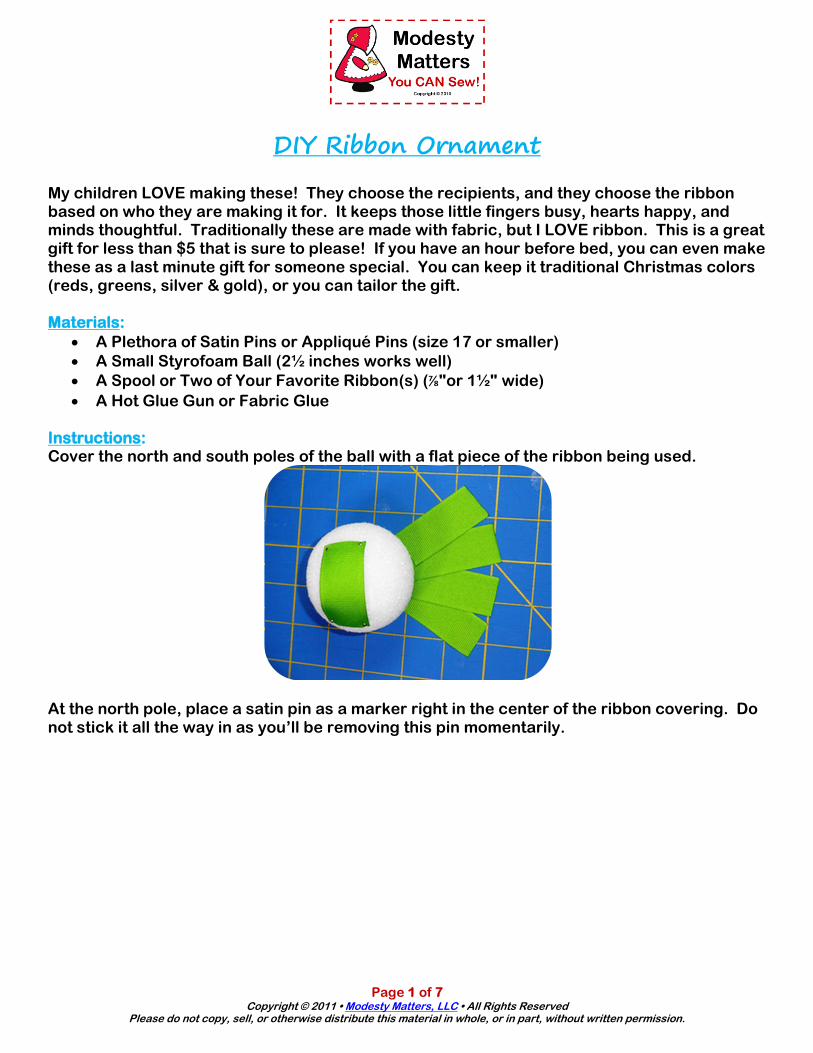
A Hot Glue Gun or Fabric Glue Instructions: Cover the north and south poles of the ball with a flat piece of the ribbon being used.
At the north pole, place a satin pin as a marker right in the center of the ribbon covering. Do not stick it all the way in as you’ll be removing this pin momentarily.

Page 2 of 7 Copyright © 2011 • Modesty Matters, LLC • All Rights Reserved
Please do not copy, sell, or otherwise distribute this material in whole, or in part, without written permission.
Then, cut strips of ribbon twice as long as the width. If you are using 1.5" wide ribbon, you’ll want to cut 3” strips of ribbon. If you are using ⅞" wide ribbon, just round off the length to 2"
per strip. Choose a starting point to begin the placement of your strips. Center a strip of ribbon, up-side-down, according to the pin marker. Pin the ribbon at the top center.
Next, take the top right corner of this same strip and fold it toward the center bottom of the strip, creating a triangle which shows the “pretty side” of the ribbon. Repeat with the upper left corner.
Page 3 of 7 Copyright © 2011 • Modesty Matters, LLC • All Rights Reserved
Please do not copy, sell, or otherwise distribute this material in whole, or in part, without written permission.
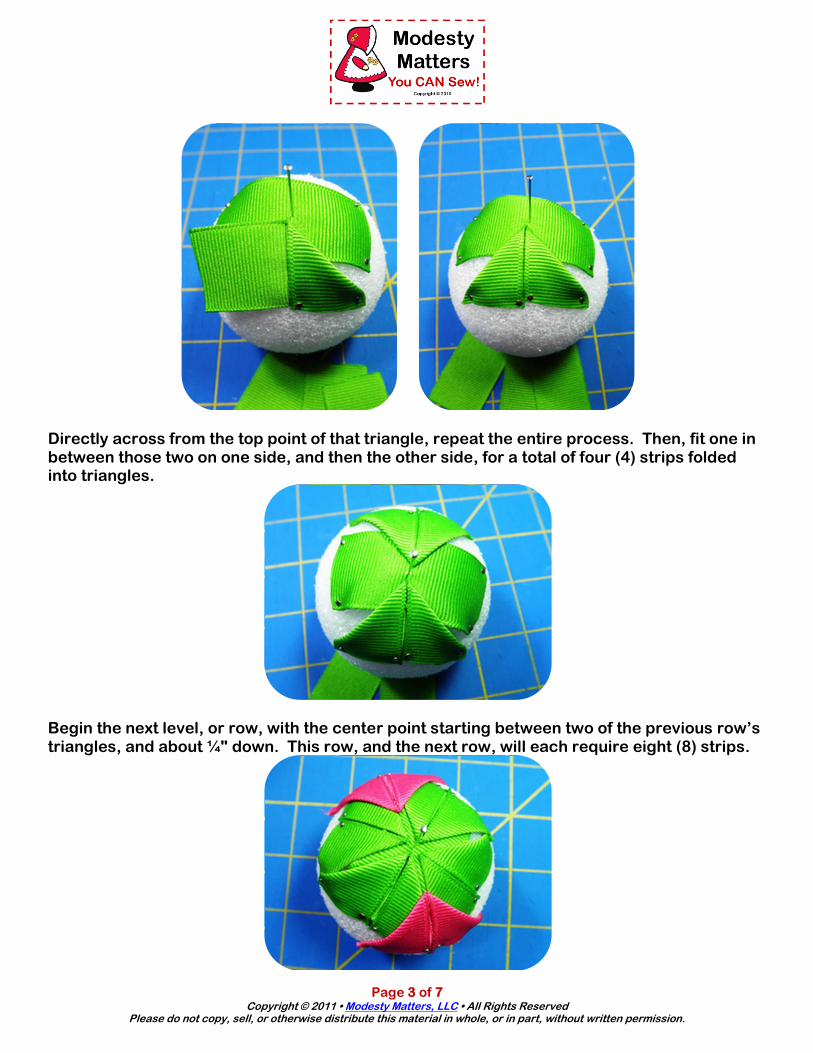
Directly across from the top point of that triangle, repeat the entire process. Then, fit one in between those two on one side, and then the other side, for a total of four (4) strips folded into triangles.
Begin the next level, or row, with the center point starting between two of the previous row’s triangles, and about ¼" down. This row, and the next row, will each require eight (8) strips.

Page 4 of 7 Copyright © 2011 • Modesty Matters, LLC • All Rights Reserved
Please do not copy, sell, or otherwise distribute this material in whole, or in part, without written permission.
Then, move to the next available position between triangles, and so on.
Do this until half of the ball is covered, and then begin all over again at the south pole until the two sections meet.
Page 5 of 7 Copyright © 2011 • Modesty Matters, LLC • All Rights Reserved
Please do not copy, sell, or otherwise distribute this material in whole, or in part, without written permission.
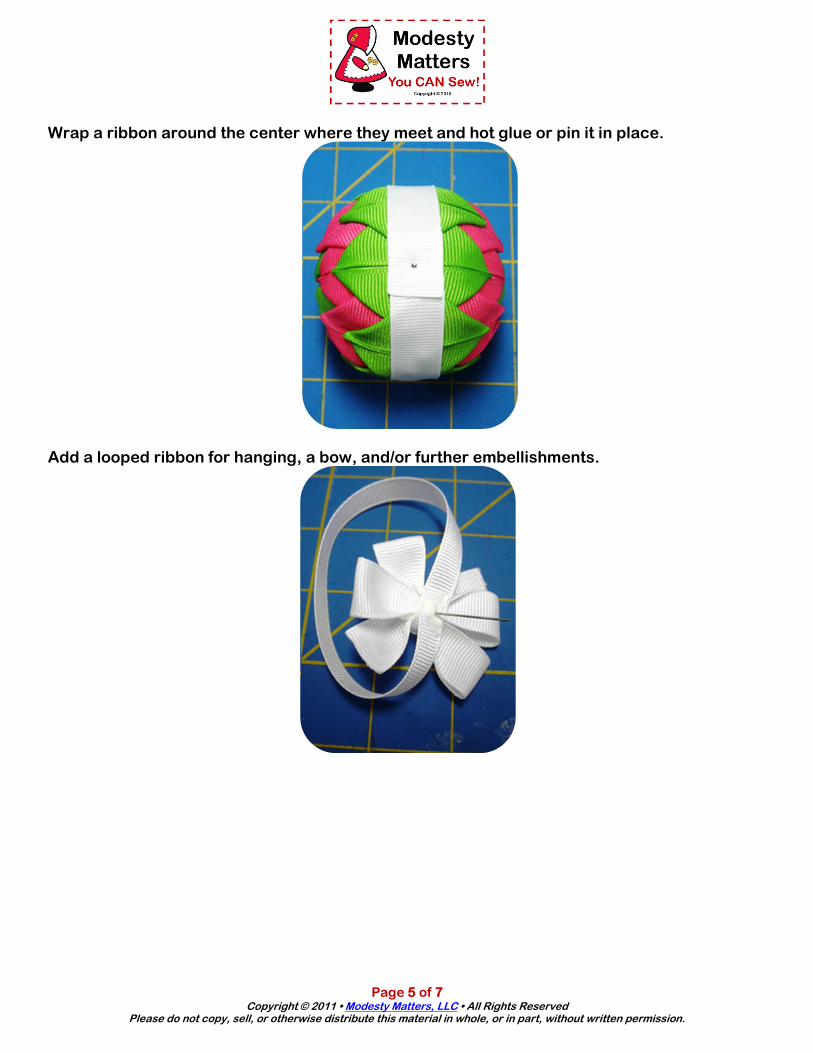
Wrap a ribbon around the center where they meet and hot glue or pin it in place.
Add a looped ribbon for hanging, a bow, and/or further embellishments.

Page 6 of 7 Copyright © 2011 • Modesty Matters, LLC • All Rights Reserved
Please do not copy, sell, or otherwise distribute this material in whole, or in part, without written permission.
This is the ornament my daughter made for a special teacher.

Page 7 of 7 Copyright © 2011 • Modesty Matters, LLC • All Rights Reserved
Please do not copy, sell, or otherwise distribute this material in whole, or in part, without written permission.
My son made this ornament for his daddy, because daddy loves football:
Be creative, but more importantly, have fun!