department of landscape digital design and communication .../file/workshop_1.pdf · department of...
TRANSCRIPT

Digital Design and Communication Teaching (DiDACT)Department of LandscapeA
utoC
ad -
Wor
ksho
p 1
INTRODUCTION:
In this workshop we will look at the basics of Autocad 2011, including: HowtoopenanewAutocadfile SettingupyourAutocadworkspace Drawing simple lines to scale Howtosaveyourwork
Proposed seating(600 x 1800 x 450mm)
Proposed turf
Proposed hedge - Buxus sempervirens(planting position centres marked)
Paving
FVLi
Li
FVMpMpOb
Ov
ObTv
MoFVMoMp
ObRo
Ro
5m
6m
10m
2m 20m
Proposed planting -Miscanthus sinensis
Site BoundaryProposed treeplanting -Betula utilisvar. jacquemontii
Proposed planting -Eupatorium purpureumsubspp. maculatum'Atropurpureum'
Proposed planting -Salvia nemorosa'Amethyst'
Proposed planting -Filipendula rubra'Venusta'
Proposed planting -Origanum'Rosenkuppel'
Proposed herb planting -See Notes, TABLE 1Drawing number L101
Drawing Name:
Smith Residence
Drawing Number:L101
Drawing Scale:1:100@A3
TABLE 1: Herb species:
3x Foeniculum Vulgare2x Lavandula x intermedia2x Melissa officinalis3x Mentha piperta3x Ocimum basilcum2x Origanum vulgare1x Rosmarinus officinalis1x Thymus vulgaris
Proposed Plan
Plants to be planted in position shown
FVLiMoMpObOvRoTv
NotesKey:
OUTCOMES OF WORKSHOPS:
These Workshops are designed tobeasimpleintroductiontoAutocad 2011, with the eventual outputbeingaverysimplegarden design similar to the one opposite (Image 1).
Theideaistogetyoufamiliarwith the basic tools and workings of what is a useful but complex programme.
The design opposite is a simple garden design drawn in Autocad,andbyfollowingtheseWorkshopsyouwillbeabletocreate something similar, with each one building towards the finisheddesign.ItisthereforeadvisedthatyoufollowtheseWorkshops in sequence to get the most from them.
Image 1

Digital Design and Communication Teaching (DiDACT)Department of LandscapeA
utoC
ad -
Wor
ksho
p 1
HOW TO OPEN A NEW AUTOCAD DRAWING: DoubleclickontheAutocadicononyourcomputer Closethe“WelcomeScreen”ifoneappears,andyoushould be faced with a screen similar to Image 2 on the right. This is thestandard2011workspacesetup.However,itdoesnotaccuratelyreflectthesetupofpreviousversionsofAutocadwhicharestillusedinlandscapeofficesandwhichyoumaywellencounterintheworkplace.Forthisreason,weneedtochangethelayoutbygoingto: 2DDraftingandAnnotation>AutocadClassic(asinImage3)
This will setup the screen in the classic Autocad workspace from whichyoucanstartworking(seenextpage).
Image 2
Image 3

Digital Design and Communication Teaching (DiDACT)Department of LandscapeA
utoC
ad -
Wor
ksho
p 1
You should now be faced with a screen similar to Image 4 - the “Classic”Autocadworkspace.Thenextstepistoedititsothatyouhavetheusefulandregularlyusedtoolseasilyavailabletoyou. Firstlyclosethe“ToolsPalettes”and“SmoothMesh”boxes(seeImage4)byclickingonthewhitecrossattheendoftheboxes.
NextclickonthePropertiesicon(Image5)oralternativelyhold
“Ctrl” and “1”
ThiswillbringupthePropertiesBox(Image6),whichisaveryusefulmeansofeditingdifferentpartsofyourdrawingandforfindingoutinformationaboutpartsofyourworksuchastheareaofashapeandthelayerthattheshapeorobjectisin.
Youmaywanttodragthisboxtothelefthandsideofyourpagebyitsgreytitlebarsothatitdoesn’thoveroverthedrawingspace(see Image 7 on the next page).
Image 4 - Autocad classic screen including Smooth Mesh and Tools Palettes Boxes
Image 5 - Properties icon
NB/ Ifyou’renotsurewhataniconortooldoes,youcanhoverthecursoroveritforafewsecondsanditwillgiveyouinformationonitsfunctionandquickkeysforusingit.
Image 6 - Properties Box

Digital Design and Communication Teaching (DiDACT)Department of LandscapeA
utoC
ad -
Wor
ksho
p 1
Image7belowillustratesthebasicworkspacelayoutyoushouldnowhave.Theblackareaofthescreenislikeyourpaper,youdrawontothisusingdifferenttoolswithinAutocad.Itisreferredtoasthe“Model”spaceandisintheoryinfinitelybig.
NotetheCommandBoxatthebottomofthescreen-thisiswherealltheactionsyoudoinAutocadarerecorded-youcanseeitsays“command:_properties”initasthatwasthelastactionwedidintheprogramme(openingthepropertiesboxandmovingit).Itwillalsopromptyouwithwhatyouwanttodonext(seeWorkshop2formore details in drawing shapes)
AlsonotethecompassinthetoprighthandoftheModelspace.Thiswillpointto“North”inyourdrawingandisparticularyusefulwhenyoubringinOrdnanceSurverydata to work on.
Image 7 - Workspace
NB/ Everyonehasdifferentwaysofsettingup their workspace. This setup should provide youwitheasyaccesstotoolsandfunctionsinAutocad that are most useful, however, once youfeelmoreconfidentinAutocad,youshouldset up the workspace inawaythatyoufeelisbestforyourpurposes.

Digital Design and Communication Teaching (DiDACT)Department of LandscapeA
utoC
ad -
Wor
ksho
p 1
SET THE CORRECT UNITS IN YOUR DRAWING:
Thisisveryimportanttodoasitwillaffectthedimensionsandscaleofallyourdrawings.Yousimplygoto:
Format>Units
andtheboxinImage8willappear.Thedefaultsettingsshouldbecorrectbutyouneedtomakesurethattheunitsaresettomillimetersbyclickingonthe“InsertionScale”pulldownmenuandchoosing millimeters. Also choose “Decimal” and “Decimal Degrees” forthe“Length”and“AngleTypes”respectivelyandsettheprecisionto 0.000.
Thismeansthatnoweverythingyoudrawwillbeinmillimeters.Thereasons this unit is chosen over other, perhaps easier units such as metres are: Itmeansyoucandrawatarangeofscalesfromlargemasterplanningtosmallconstructiondetailsinthesamedrawing Scaling drawings to print is easier (see Workshop 4) Millimetersareoftenusedwhenmeasuringdimensionsondrawingssoit’susefultogetintothehabitofworkingtothem. Itisoftenthestandardtodrawinmillimetersinlandscapepractices.
However,thisdoestakesomegettingusedto-forexampleifyouwantedtodrawa1mlineyouwouldhavetotype1000intothecommandline.A5mlinewouldbe5000,20mwouldbe20000,a0.1m line would be 100 and so on.
Thebestthingtodoispractice,sothenextstepistohaveagodrawing lines and shapes...
Image 8 - Drawing Units
NB/ ForvariousprojectsyoudoatuniandinworkyoumayberequiredtobringinOrdnanceSurveyDatafromDigimap(seeonlineresourcesforinstructionsondownloadingdatafromDigimap).Thedatayoudownloadwillbeinmeters,whichmeansthatitwillneedscalinguptosuitthedrawingsetupyouhavehere.Thisiseasytodo;justselecteverythinginthedownloadedOrdnanceSurveydrawing(makingsureallyourLayersareon-seeWorkshop2forLayers)goingtoEdit>Selectallorbyclickingthecursorinthetoprighthandareaofthedrawingandthendraggingitoverallthedrawingandclickingagaininthetopleftofthedrawing.Thentype:
“S” rtn, “0,0,0” rtn “1000” rtn
Thisisbasicallyscalingthewholedrawingby1000sothatitisnowinmillimeters.The0,0,0isthepointfromwhichyouscalethedrawing,andmaybethoughtofasthebottomleftofthedrawingwhere the “X and Y axis” is.

Digital Design and Communication Teaching (DiDACT)Department of LandscapeA
utoC
ad -
Wor
ksho
p 1
DRAW POLYLINES:
ApolylineispossiblythemostfrquentlyusedtoolinAutocad-itissimplyalineorseriesoflinesthatyoucandrawtoformtheplans,sections,detailsetcthatyouneed.Itcanbedrawntoscale,haveanynumberofpointsandformcurvedorstraightlines.Commonexamplesfortheuseofpolylinesisdrawingpathsinplans,andwholeconstructiondetails.
Youcanclickonitsicon(Image9)tostartusingitorsimplytype:
“PL” and press rtn
intothecommandline(youdonothavetoactivelyclickontothecommandlinetostarttyping-anythingyoutypewillautomaticallyappear in it and the text box next to the cursor).
Thecommandlinewillthenaskyouto“specifyastartpoint”-i.e.whereyouwanttostartthelinefrom.Aswehavenospecificpointstostartfromatthemoment,youcanclickanywhereinthemodelspaceanditwillstarttheline,andaskyouto“specifiythenextpoint”.Youcankeepondoingthisuntilyouhavedrawntheshapeyouwant,andthenpressthe“escape”buttononyourkeyboardtostopdrawingtheline.
Becausewehavesettheunitstomillimeters,wecanstartdrawingaccuratedistances-startapolylineagainbutthistime,whenitasksyouto“specifiythenextpoint”,typeinadistancelike4000(i.e.4m)andpressreturn.Thelinedrawnwillbeexcatly4minthedirectionthecursorwashovering,soifyouwerehoveringitdirectlyaboveyourstart point, it will draw 4m north. You can control the angle it draws atbyspecifyingtheangleinthecommandline.Youdothisbytypingthedistancefollowedbytheangle;soifyouwanteda4mlineat45degrees(i.enorth-east)youwouldtype:
“PL”andpressrtn,thenspecifythefirstpointonthescreen,thentype“@4000<45”andpressreturn
Trydoingthisnow,withdifferentdistancesandangles,togetthehangof it.
Image 9 - Polyline icon
Image 10 - Drawing Polylines NB/ Ifyou’rehavingtroubleseeingthewholedrawingyoucan “zoomextents”whichiswhereyouzoomouttosee everythinginyourModelspace.Justtype: “Z” and press rtn, then “E” and press rtn

Digital Design and Communication Teaching (DiDACT)Department of LandscapeA
utoC
ad -
Wor
ksho
p 1
NB/ If at any time you make a mistake or want to undo what you’ve done, simply hold: “Ctrl” and “Z” together like you would in any other programme. This can undo as many actions as you want it to and can be very useful!
You’llnoticealotofcontrollingforcesondrawingthelines-itwilltrytogodirectlyhorizontalandvertical,andmaytrytojoinor“snap”topartsofotherlinesdrawn.Thesearetoolsdesignedtohelpyoudrawaccuratelyandquicklybutcanbeabitannoyingatfirst.Theycanbeturnedonandoffandtheirsettingsalteredverysimply.
BelowtheCommandBarareaseriesofsymbolsthatrelatetodifferentcontrollingfactorsonyourdrawing(seeImage11).Fornow,itisbesttoturnmostoftheseoff(byclickingthemsothattheyaregreyincolour).
PolarTrackingmaybeonethatyouwanttoleaveonasitisveryusefulfordrawingstraighthorizontalandverticallinesquickly.
ObjectSnapcanalsobeveryuseful.Itmeansthatwhenyou’redrawingormovinganobject,itwillautomaticallysnaptokeypointsinyourdrawing,liketheendormiddleoflines.Itssettings(i.e.whatyousnapto)canbeeditedbyrightclickingovertheSnapsymbolandclickingon“Settings”.AboxwillthenappearliketheoneinImage11.itisprobablybesttoun-checkalltheboxesapartfrom“Endpoint”,“Midpoint”,“Centre”,“Intersection”,and“Perpendicular”.Butyoucanalwayschangethisifyoufindyouneeddifferentsettings.
Image 12 - Object Snap
Image 11
TASK: UsingthePolylinetool,trydrawing: Asquarewithsides4.5mx4.5m Arectanglewithsides2mx13.75m Arightangledtrianglewitha45cmbase Anequilateraltrianglewithsides7500mmlong
Digital Design and Communication Teaching (DiDACT)Department of LandscapeA
utoC
ad -
Wor
ksho
p 1
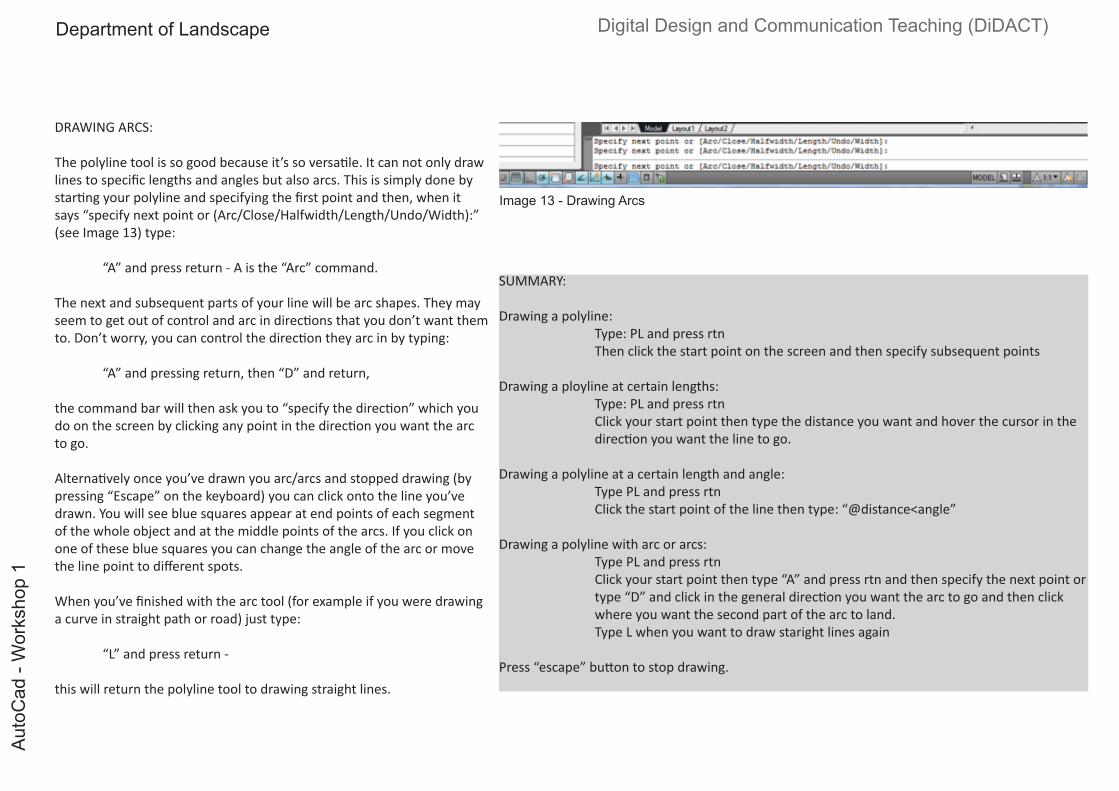
DRAWING ARCS:
Thepolylinetoolissogoodbecauseit’ssoversatile.Itcannotonlydrawlinestospecificlengthsandanglesbutalsoarcs.Thisissimplydonebystartingyourpolylineandspecifyingthefirstpointandthen,whenitsays“specifynextpointor(Arc/Close/Halfwidth/Length/Undo/Width):”(seeImage13)type:
“A” and press return - A is the “Arc” command.
Thenextandsubsequentpartsofyourlinewillbearcshapes.Theymayseemtogetoutofcontrolandarcindirectionsthatyoudon’twantthemto.Don’tworry,youcancontrolthedirectiontheyarcinbytyping:
“A” and pressing return, then “D” and return,
thecommandbarwillthenaskyouto“specifythedirection”whichyoudoonthescreenbyclickinganypointinthedirectionyouwantthearcto go.
Alternativelyonceyou’vedrawnyouarc/arcsandstoppeddrawing(bypressing“Escape”onthekeyboard)youcanclickontothelineyou’vedrawn. You will see blue squares appear at end points of each segment ofthewholeobjectandatthemiddlepointsofthearcs.Ifyouclickononeofthesebluesquaresyoucanchangetheangleofthearcormovethelinepointtodifferentspots.
Whenyou’vefinishedwiththearctool(forexampleifyouweredrawingacurveinstraightpathorroad)justtype:
“L” and press return -
thiswillreturnthepolylinetooltodrawingstraightlines.
Image 13 - Drawing Arcs
SUMMARY: Drawingapolyline: Type:PLandpressrtn Thenclickthestartpointonthescreenandthenspecifysubsequentpoints
Drawingaploylineatcertainlengths: Type:PLandpressrtn Clickyourstartpointthentypethedistanceyouwantandhoverthecursorinthe directionyouwantthelinetogo.
Drawingapolylineatacertainlengthandangle: TypePLandpressrtn Clickthestartpointofthelinethentype:“@distance<angle”
Drawingapolylinewitharcorarcs: TypePLandpressrtn Clickyourstartpointthentype“A”andpressrtnandthenspecifythenextpointor type“D”andclickinthegeneraldirectionyouwantthearctogoandthenclick whereyouwantthesecondpartofthearctoland. TypeLwhenyouwanttodrawstarightlinesagain
Press“escape”buttontostopdrawing.

Digital Design and Communication Teaching (DiDACT)Department of LandscapeA
utoC
ad -
Wor
ksho
p 1
SAVING YOUR WORK:
Havingcreatedyourdrawingandworkedinit,itisveryimportanttosaveitandthencontinuallysaveitasyouwork.Itisalsorecomendedthatyousavethefiletoavarietyofsourcestoensureyouhavebackups.
Saving is simple. Go to:
File>SaveAs
andthenchoosealocationtosavethework.Itissuggestedforthepurposeoftheseworkshopsthatyoucreatea“Autocad”Folderinyouruniversityaccountharddriveandsaveallworkinthat,soyouknowwhereitis.
SavethegardendrawinghereandopenthiswhenyouarestartingWorkshop2.
TASK:
Startdrawingtheoutlineofthegardendesign;thiswillinvolveusingthepolylinetooltothedimesionsspecifiedinImage14below.Savethisdrawingas“Garden”(seebelow for saving).
10m
12m
2m
6m 20m
Image 14 - Basic design dimensions