decoupage mirror - lowe's canada · now it's time to stir up some homemade decoupage...
TRANSCRIPT

DECOUPAGE MIRRORTM
TM

DIY MIRROR FRAMEPage 2

Page 3
Safety First!
Use eye protection, always!
Use ear protection with loud power tools
Stay with children while they work!
Follow tool manufacturers’ safety guidelines

TOOLS
Page 4
HandsawJapanese-style pull saw (recommended) or traditional hand saw
Clamp2-4 Irwin one-handed clampsSeveral Bessey ratcheting spring clamps
Drill drill bit - 1/8 inchdriver bit to fit screws
Scissors
Tape measure
Pencil
Sponge brush (for glue)
Hair dryer
Putty knife
Adult-only jobsJobs for kids and adults together

Plywood back
One 24” x 48” sheet of ¼-inch plywood [0.635 cm x 60.96 cm x 121.92 cm]
Cut one piece measuring 18” x 20” [45.72 cm x 50.8 cm] TIP: Lowe’s will cut plywood to these dimensions for you if you can’t cut it at home!
Frame 5 feet of 1” x 3” poplar [2.54 cm x 22.86 cm x 152.4 cm]
Cut one piece at 18 inches [45.72 cm] Cut two pieces at 14 inches [35.56 cm]
2 feet of 1” x 4” poplar [2.54 cm x 10.16 cm x 60.96 cm]Cut one piece at 13 inches [33 cm]
Mirror One 12-inch [30.48 cm] square of mirror tile (with optional beveled edge)
Carpenter’s glue
White glue
Interlocking picture hanging hardware
Fabric sample squares
Glitter (optional)
Paint
Gap-filling adhesive (such as No More Nails)
Sand paper or sanding sponge
SUPPLIES
Page 5

Page 6
OverviewMaking a mirror is really fun, especially when you build your own frame and decorate it with paint and colourful swatches of cloth!
1. SortStart by sorting fabric squares into piles of your favourite colours. (If you don't have a fabric stash at home you can buy pre-cut fabric swatches at quilting shops or search for 'quilt squares' on eBay.)
2. CutThe next step is to cut the plywood back for the mirror. Lowe's will cut plywood to size for you, but it's just as easy to cut it at home using a Japanese-style handsaw, which cuts on the pull stroke so it's never frustrating or awkward. The dimensions are in the cut list on Page 5.
3. SandAfter cutting, the edge will be a bit rough; remove slivers with a sanding sponge.
Watch the video at: www.lowes.ca/kidsvideos
Page 7
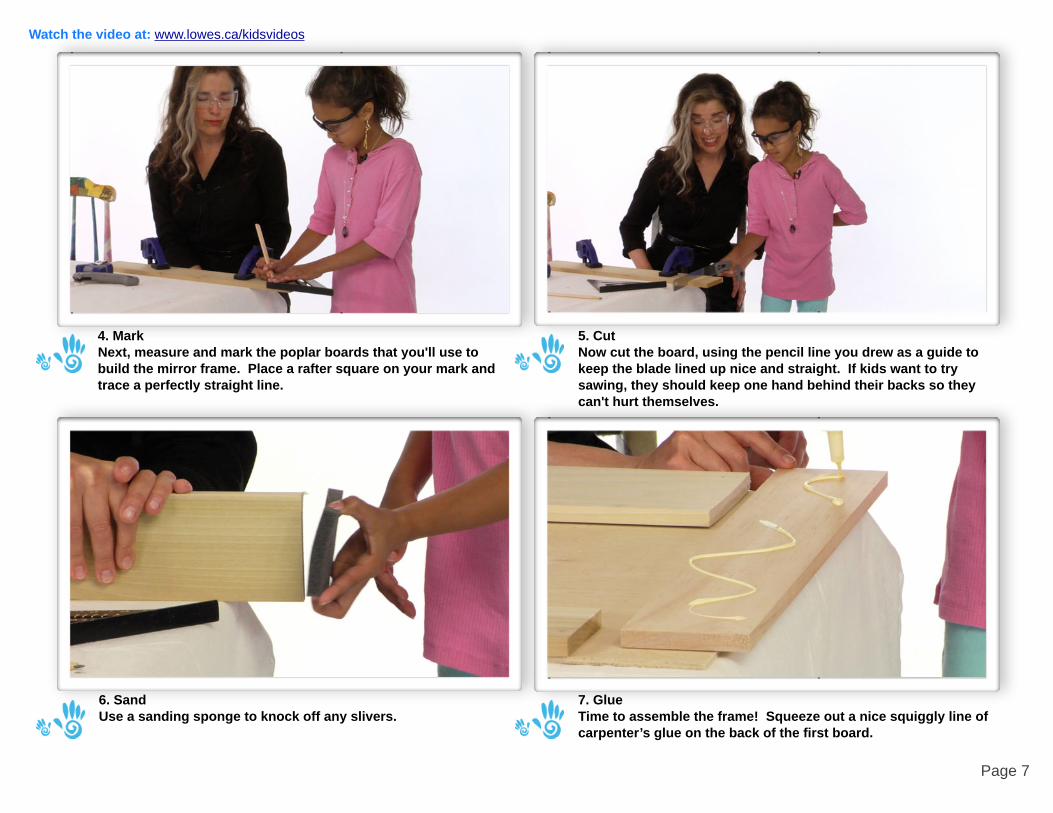
4. Mark Next, measure and mark the poplar boards that you'll use to build the mirror frame. Place a rafter square on your mark and trace a perfectly straight line.
5. CutNow cut the board, using the pencil line you drew as a guide to keep the blade lined up nice and straight. If kids want to try sawing, they should keep one hand behind their backs so they can't hurt themselves.
6. SandUse a sanding sponge to knock off any slivers.
7. GlueTime to assemble the frame! Squeeze out a nice squiggly line of carpenter’s glue on the back of the first board.
Watch the video at: www.lowes.ca/kidsvideos
Page 8
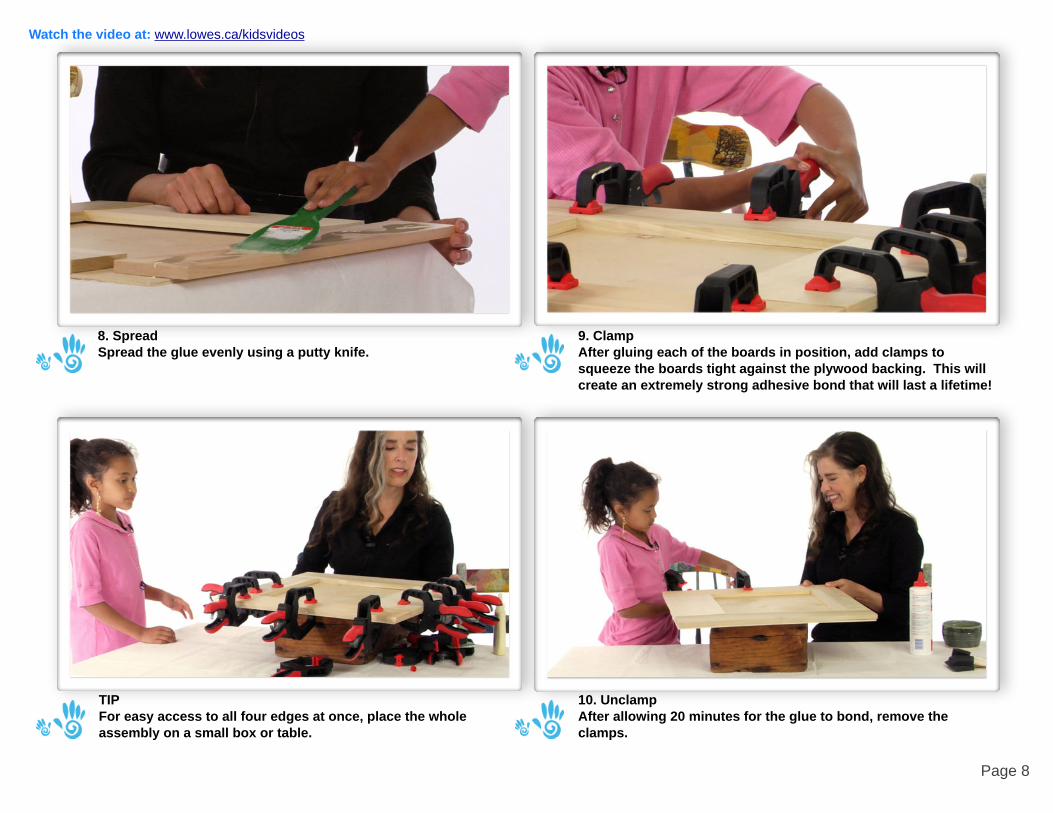
8. SpreadSpread the glue evenly using a putty knife.
9. ClampAfter gluing each of the boards in position, add clamps to squeeze the boards tight against the plywood backing. This will create an extremely strong adhesive bond that will last a lifetime!
TIPFor easy access to all four edges at once, place the whole assembly on a small box or table.
10. UnclampAfter allowing 20 minutes for the glue to bond, remove the clamps.
Watch the video at: www.lowes.ca/kidsvideos

Page 9
11. MixNow it's time to stir up some homemade decoupage medium. Use a foam paintbrush to gently blend equal parts white glue and water.
TIPWhen it's properly mixed, the decoupage medium should be about the consistency of table cream.
12. ApplyNext, spread decoupage medium onto one section of the frame.
13. Position fabric Start placing fabric squares on the frame, making sure to keep the bed of glue wet.
Watch the video at: www.lowes.ca/kidsvideos

Page 10
14. DecoupageAfter positioning each fabric square, paint over it with decoupage medium, which goes on milky but dries clear.
15. More decoupageNow keep adding squares! Don't forget to wrap the squares around the edges of the frame so the mirror looks nice from all angles.
TIPIf you’re short on cloth pieces or if you just love painting, leave spaces between fabric squares and paint after you’re done with decoupaging.
16. Glitter it up (optional)You can add sparkles to wet paint and/or decoupage medium to make the mirror frame even more dazzling.
Watch the video at: www.lowes.ca/kidsvideos
Page 11
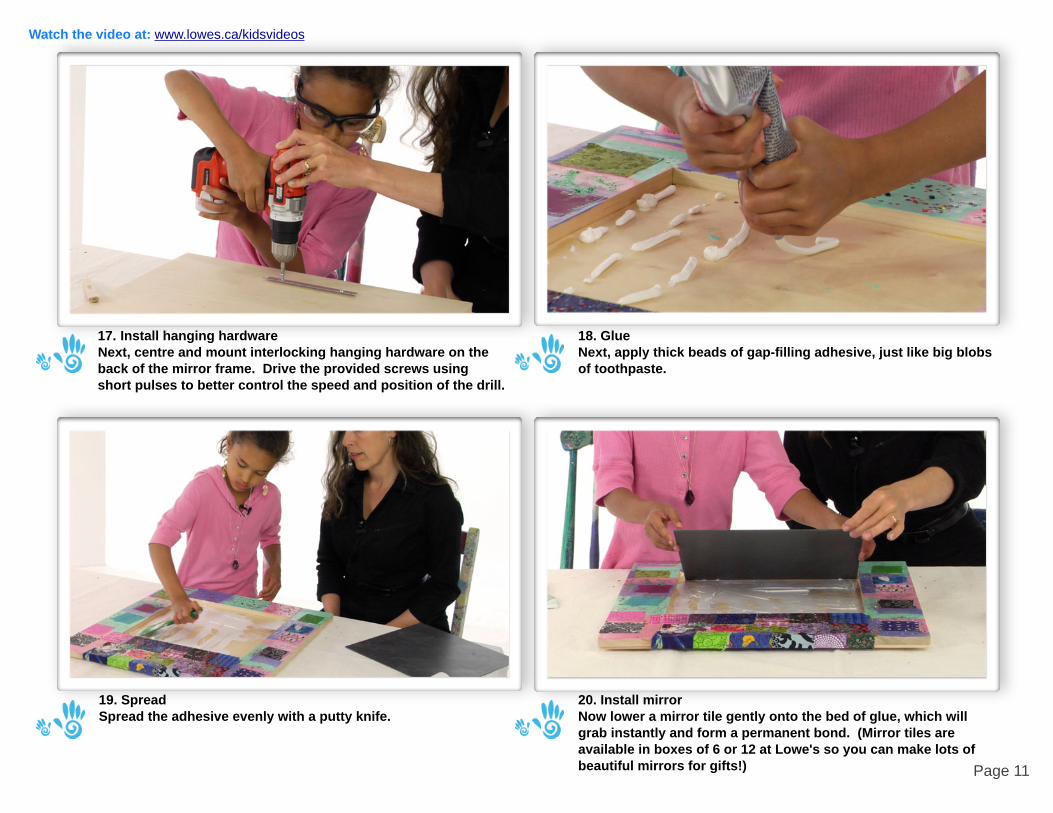
17. Install hanging hardwareNext, centre and mount interlocking hanging hardware on the back of the mirror frame. Drive the provided screws using short pulses to better control the speed and position of the drill.
18. GlueNext, apply thick beads of gap-filling adhesive, just like big blobs of toothpaste.
19. SpreadSpread the adhesive evenly with a putty knife.
20. Install mirrorNow lower a mirror tile gently onto the bed of glue, which will grab instantly and form a permanent bond. (Mirror tiles are available in boxes of 6 or 12 at Lowe's so you can make lots of beautiful mirrors for gifts!)
Watch the video at: www.lowes.ca/kidsvideos

Page 12
21. PressPress the tile, making sure to move your hands over the whole surface so that the tile is firmly embedded in the adhesive.
22. Sparkle-ify (optional) If you've got some extra adhesive still visible around the edges, just add more sparkles or wait till it skins over and then paint it.
Watch the video at: www.lowes.ca/kidsvideos
Page 13
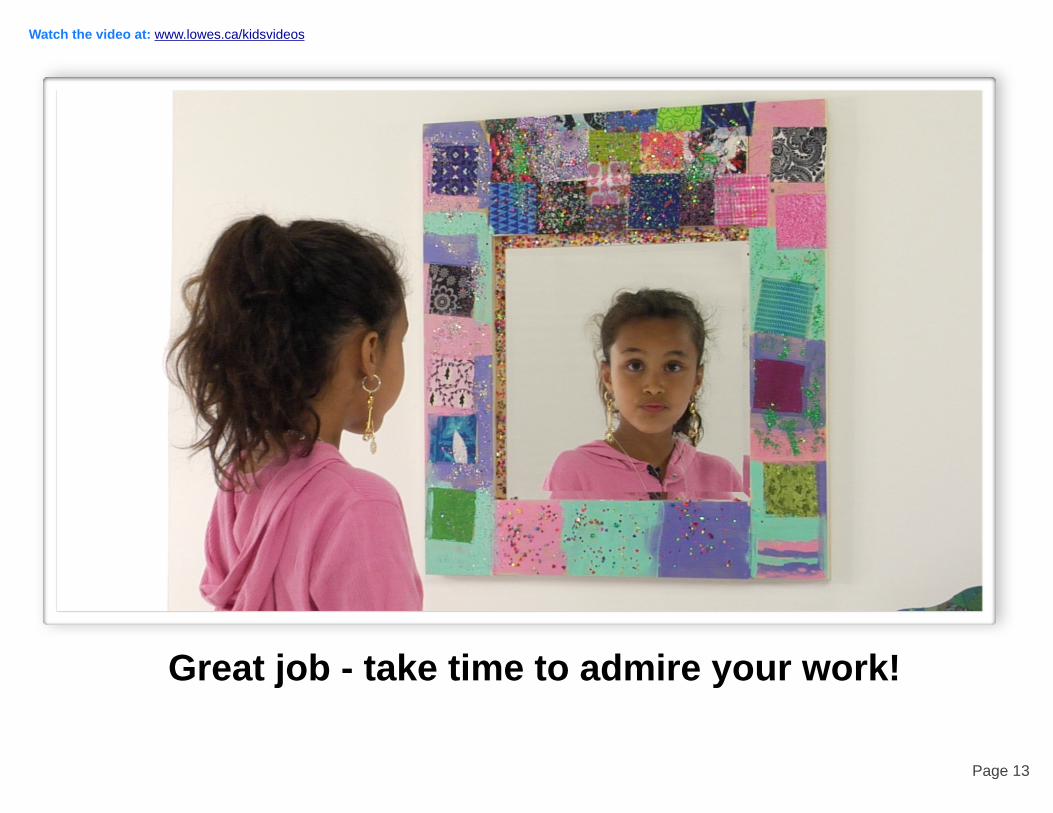
Great job - take time to admire your work!
Watch the video at: www.lowes.ca/kidsvideos

Page 14

DISCLAIMER
Page 15
Almost any do-it-yourself project involves risk of some sort. Your tools, materials, and skill will vary, as will the conditions of your project site. Lowe’s Companies Inc., and its subsidiaries ("Lowe’s") have made every effort to be complete and accurate in the instructions and other content contained in this publication. However, neither Lowe’s nor the publisher will assume any responsibility or liability for damages or losses sustained or incurred in the course of your home improvement or repair project or in the course of your use of the item you create or repair. Always follow the manufacturer’s operating instructions in the use of tools, check and follow your local building codes, and observe all standard safety precautions. Prices and supply may vary, so check the cost of materials and labour in your area before beginning any home improvement project. We strive to be accurate, but unintentional errors may occur and we reserve the right to correct any error. See a Lowe’s store for information regarding product warranties and any available protection plans. All prices, products and promotions are limited to Canada locations only.
This “Family Fun™” video is for informational purposes only. Lowe’s assumes no responsibility for the accuracy of the information contained herein and disclaims any liability for omissions, errors or the outcome of any project. Lowe’s assumes no responsibility or liability for damages, losses, or injuries sustained in the course of your project or in the course of your use of any item you repair or create. Always follow the manufacturer’s operating instructions in the use of tools, and take proper safety precautions when taking on any project. It is your responsibility to ensure that participants engage in age-appropriate activities and that children are appropriately supervised. If there is any question or doubt with regard to any element of a project, please consult with a licensed professional. No part of this video may be reproduced in any form or by any means without prior written permission of Lowe’s. Lowe’s, the gable design, and Lowe’s Family Fun Projects™ and Learning Through Building are trademarks of LF, LLC. All rights reserved.