create your own secure vpn network - mum.mikrotik.com · biodata pribadi – irfan dhia irsyad –...
TRANSCRIPT
Irfan Dhia Irsyad
PT Validata Teknologi, Bandung, Indonesia
MUM Indonesia 2016, Jakarta
Create Your Own Secure VPN
Connection Using OpenVPN

Biodata Pribadi
– Irfan Dhia Irsyad
– Bandung
– 28 Oktober
– Jl. Cihampelas Blk. 16 Komp. Perumahan
Flat Kimia Farma No. B.09 Kota Bandung
– Server Architect at PT Validata Teknologi, Insan Mulia Building Jl. Soekarno Hatta No. 550 Bandung
– IT Consultant based in Bandung
– 085797246688
– MTCNA
– Find me on all social media : irdhirs
Why?
• All available infrastructures can’t reach existing location
• ISP difference at each spot
• Limited at budgeting
• Free, but secure
• etc.
How To Create It?
• Certificate creation
– Generate in OpenSSL (linux server required)
– Generate in MikroTik router
• Import the certificates
• Set OpenVPN server at head office side
• Set OpenVPN client at branch office side
• Add network routing
• Configuration testing
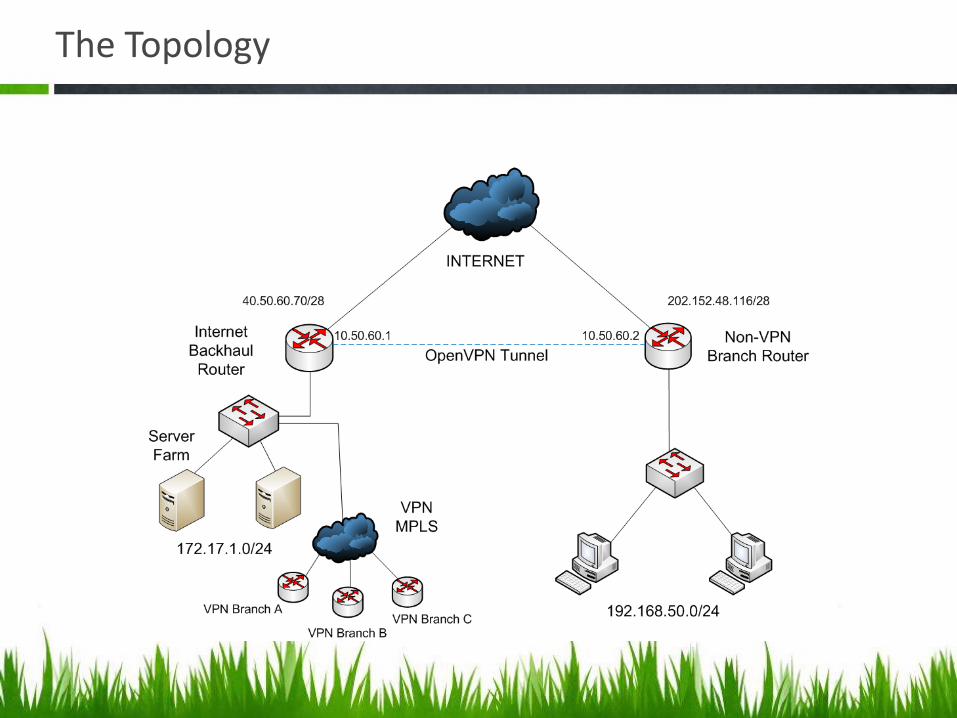
The Topology
CERTIFICATE CREATION USING OPENSSL
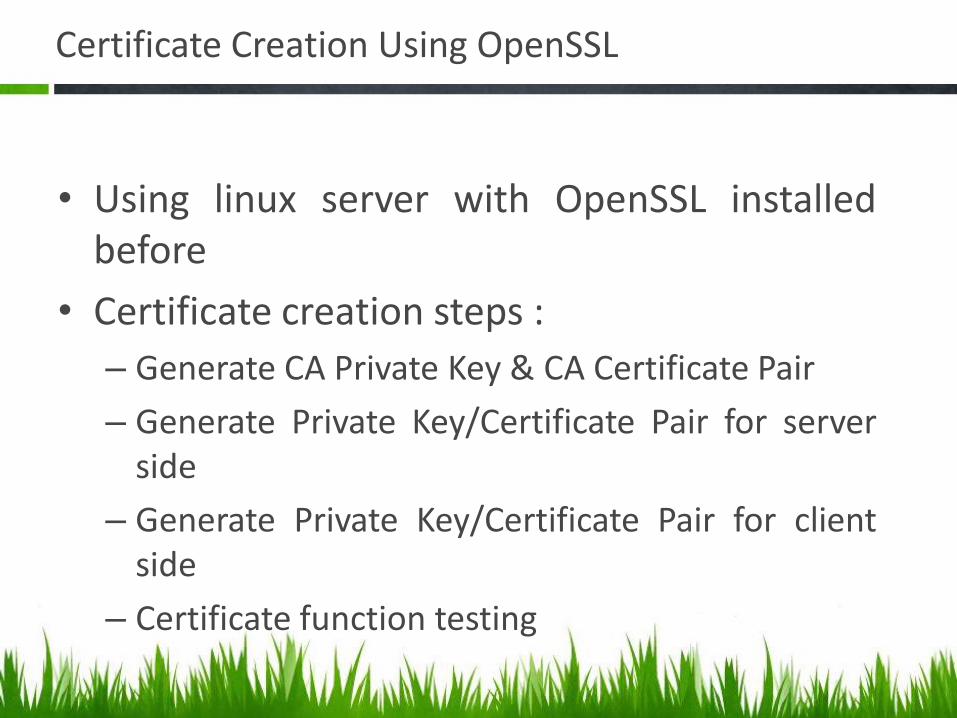
Certificate Creation Using OpenSSL
• Using linux server with OpenSSL installed before
• Certificate creation steps :
– Generate CA Private Key & CA Certificate Pair
– Generate Private Key/Certificate Pair for server side
– Generate Private Key/Certificate Pair for client side
– Certificate function testing

Generate CA Private Key & CA Certificate Pair
• 1. Use this command in linux server : openssl genrsa -des3 -out ca.key 4096 • 2. While generating RSA private key, we’re asked to
provide passphrase. For example, we used passwordkita for the passphrase. Then enter.

Generate CA Private Key & CA Certificate Pair
3. Generate CA Certificate file using this command : openssl req -new -x509 -days 3650 -key ca.key -out ca.crt
4. Provide the passphrase which is created before : passwordkita. Then provide the information needed for CA Certificate such as Common Name (CN), Organization, State or province, etc.
Generate CA Private Key & CA Certificate Pair
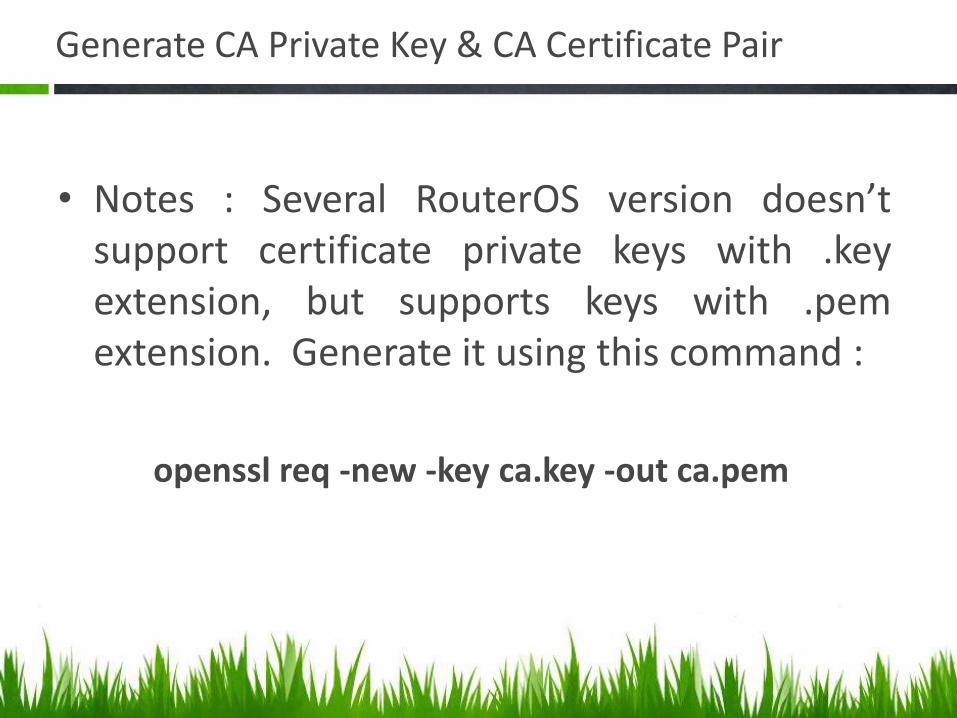
• Notes : Several RouterOS version doesn’t support certificate private keys with .key extension, but supports keys with .pem extension. Generate it using this command :
openssl req -new -key ca.key -out ca.pem

Generate CA Private Key & CA Certificate Pair
• Provide the information needed.
Generate Private Key/Certificate Pair for server side
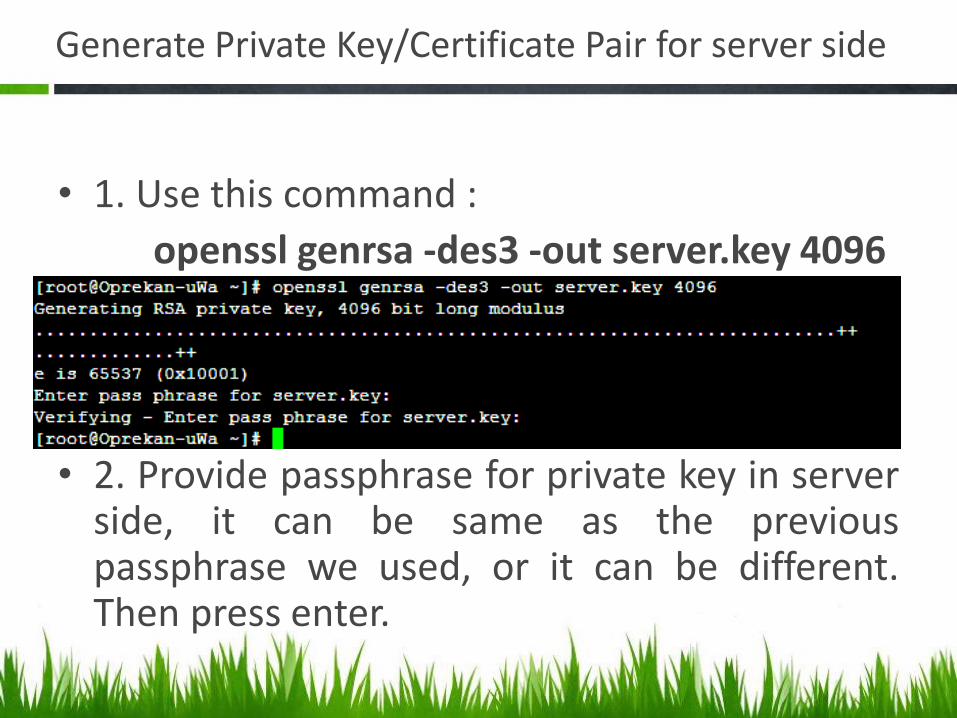
• 1. Use this command :
openssl genrsa -des3 -out server.key 4096
• 2. Provide passphrase for private key in server side, it can be same as the previous passphrase we used, or it can be different. Then press enter.
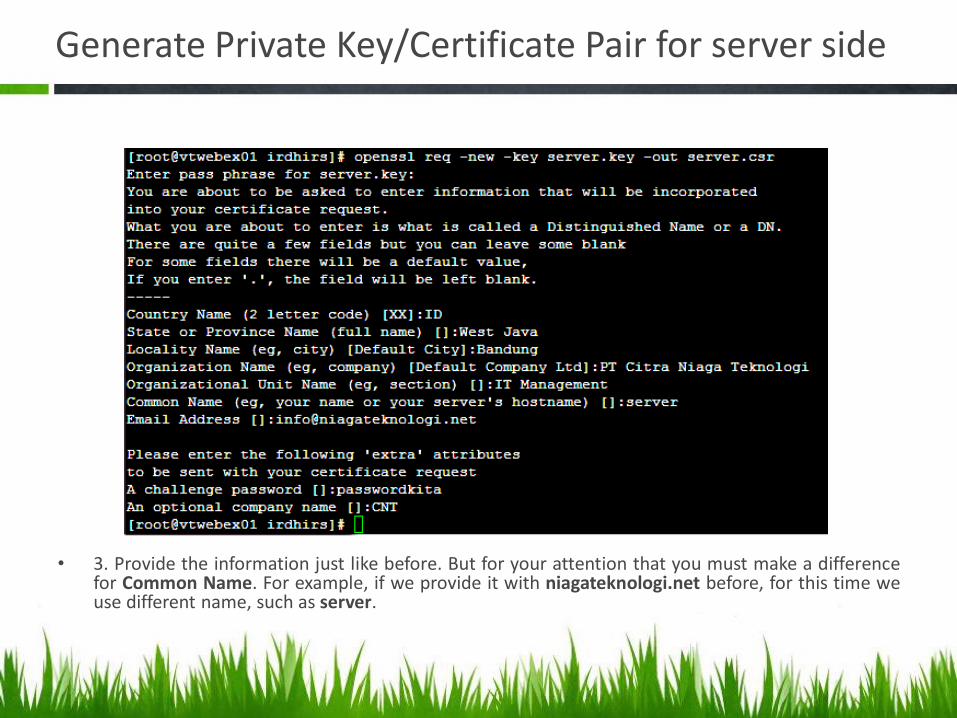
Generate Private Key/Certificate Pair for server side
• 3. Provide the information just like before. But for your attention that you must make a difference for Common Name. For example, if we provide it with niagateknologi.net before, for this time we use different name, such as server.
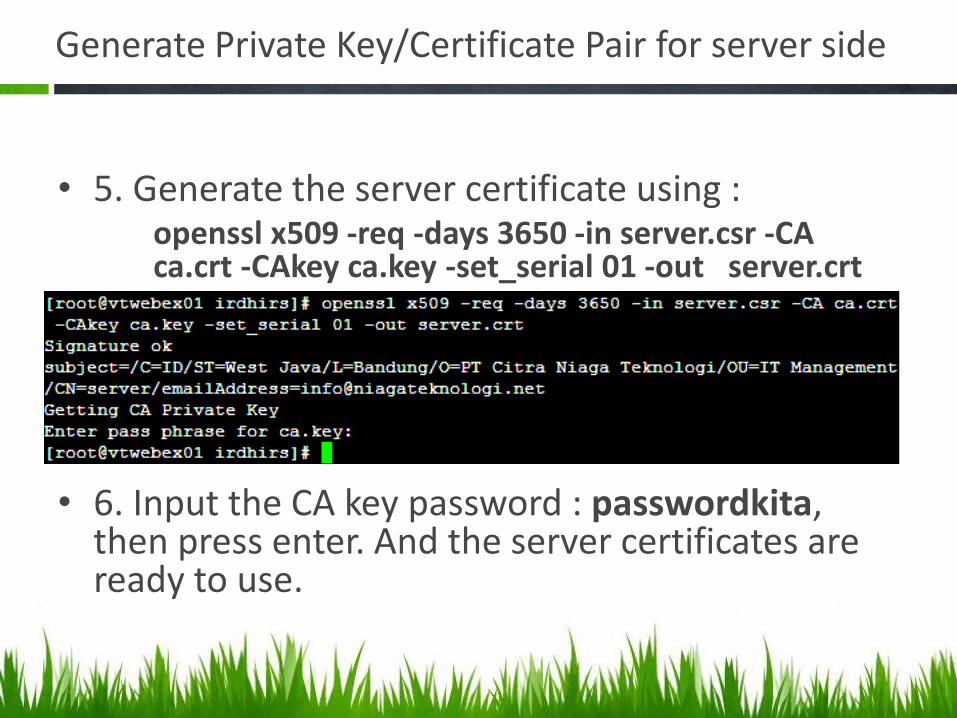
Generate Private Key/Certificate Pair for server side
• 5. Generate the server certificate using : openssl x509 -req -days 3650 -in server.csr -CA ca.crt -CAkey ca.key -set_serial 01 -out server.crt
• 6. Input the CA key password : passwordkita, then press enter. And the server certificates are ready to use.
Generate Private Key/Certificate Pair for server side
• Notes : Several RouterOS version doesn’t support certificate private keys with .key extension, but supports keys with .pem extension. Generate it using this command :
openssl req -new -key server.key -out server.pem

Generate Private Key/Certificate Pair for server side
• Provide the information just like before.
Generate Private Key/Certificate Pair for client side
• To generate certificates for client side, just repeat the steps while we generated the server side certificates, but it needs a difference in data and information we provide later, especially for Common Name.
• The commands : – openssl genrsa -des3 -out client.key 4096 (for generating
client key) – openssl x509 -req -days 3650 -in client.csr -CA ca.crt -CAkey ca.key -set_serial 01 -out client.crt (for generating Client Certificate). – openssl req -new -key client.key -out client.pem (for
generate key with .pem extension)
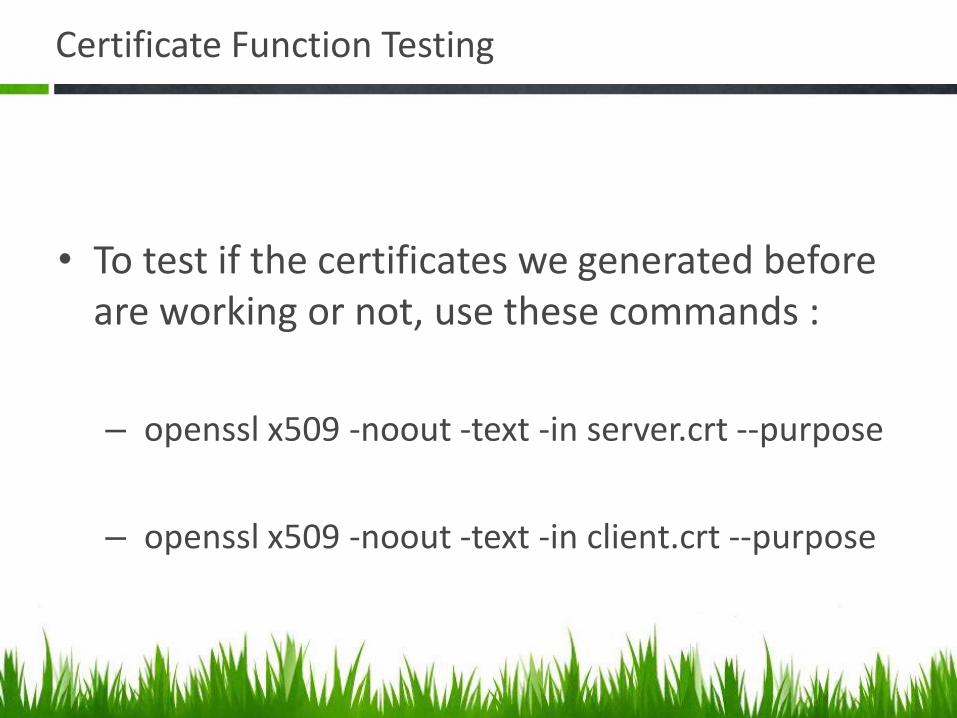
Certificate Function Testing
• To test if the certificates we generated before are working or not, use these commands :
– openssl x509 -noout -text -in server.crt --purpose
– openssl x509 -noout -text -in client.crt --purpose
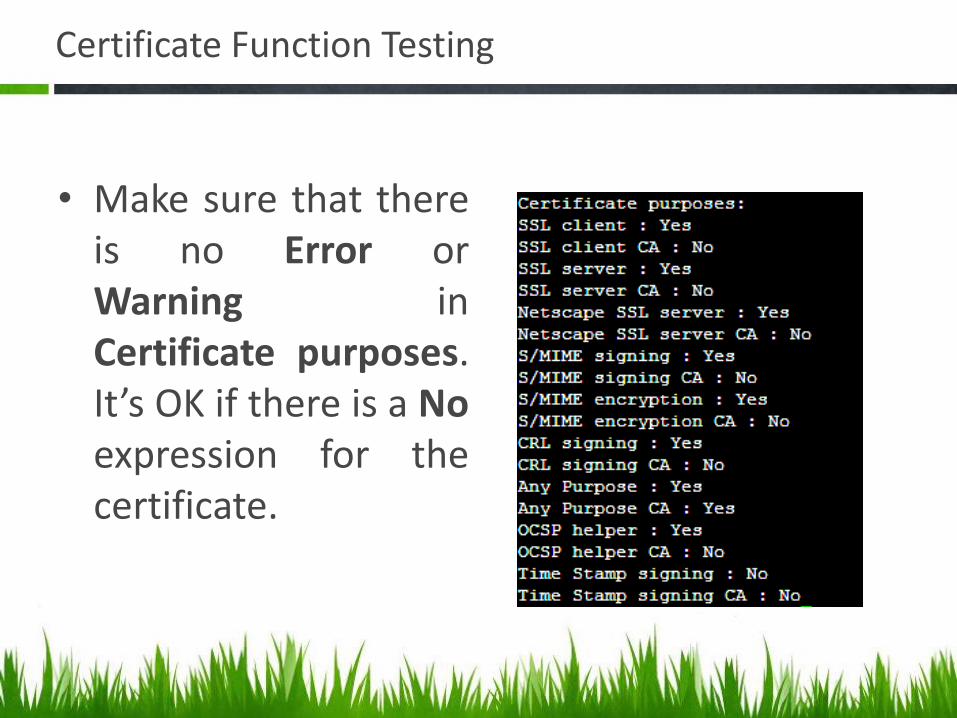
Certificate Function Testing
• Make sure that there is no Error or Warning in Certificate purposes. It’s OK if there is a No expression for the certificate.
CERTIFICATE CREATION USING MIKROTIK ROUTER
Certificate Creation Using Mikrotik Router
• Using commands or features in MikroTik Terminal or WinBox.
• Certification creation steps – Make a template for each certificate (CA, server,
client)
– Certificate signing
– Set sertifikat to be ‘trusted’
– Export certificates to each routers (server or client)
Certificate Creation Using Mikrotik Router
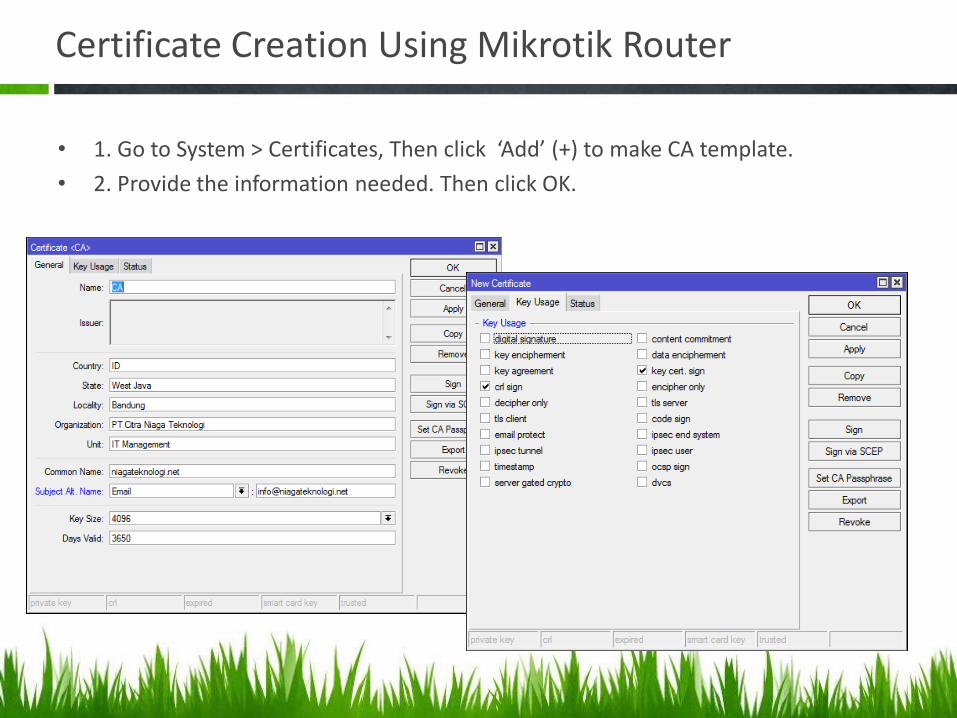
• 1. Go to System > Certificates, Then click ‘Add’ (+) to make CA template.
• 2. Provide the information needed. Then click OK.
Make A Template For Certificates
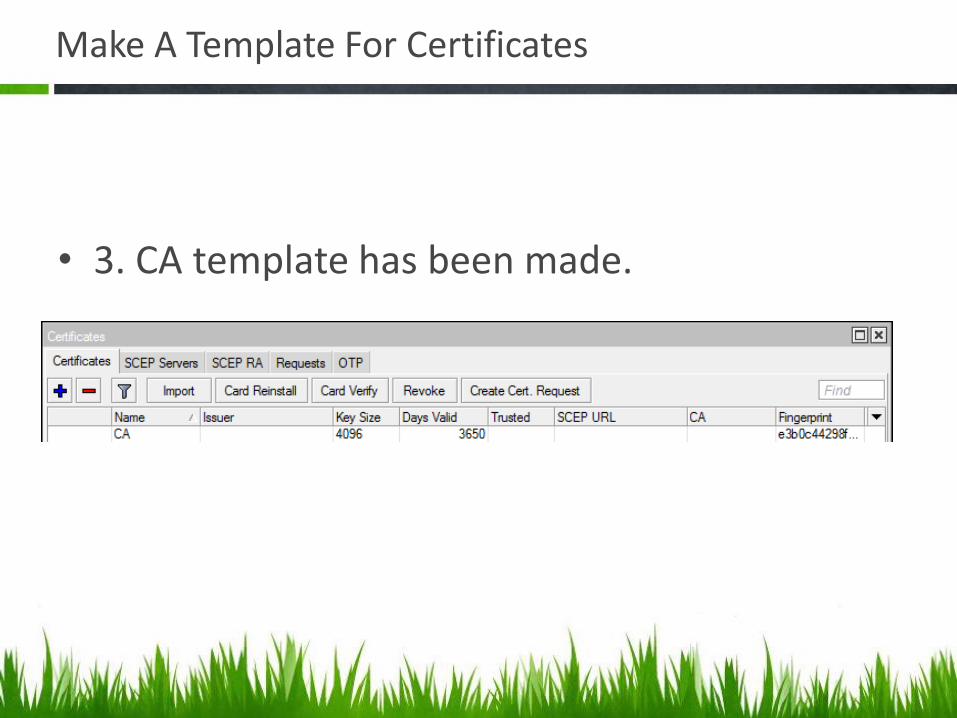
• 3. CA template has been made.
Make A Template For Certificates
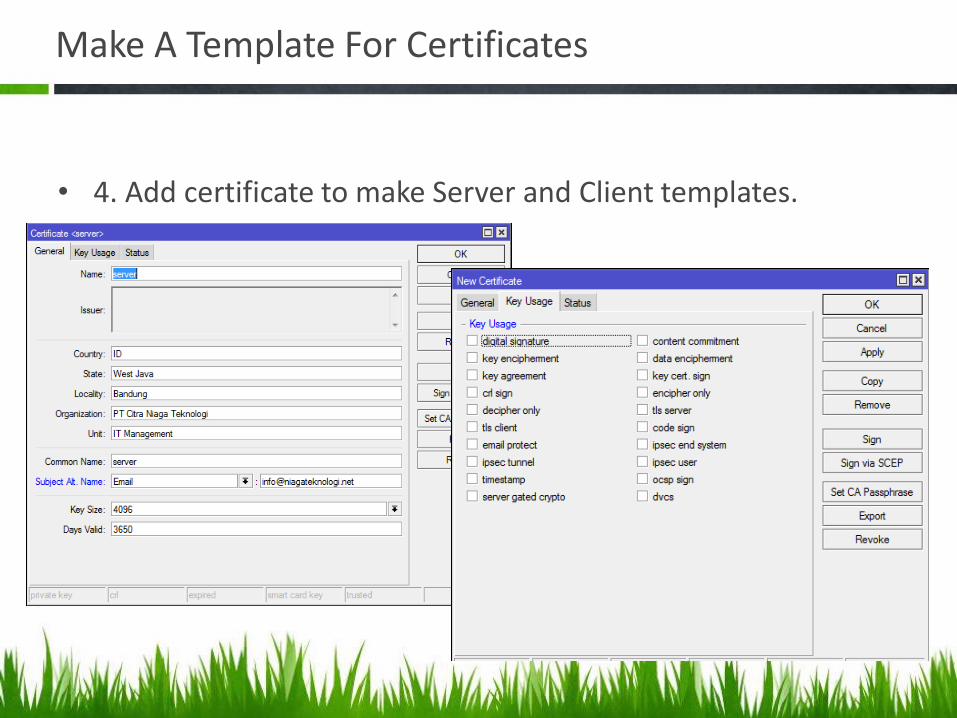
• 4. Add certificate to make Server and Client templates.
Make A Template For Certificates
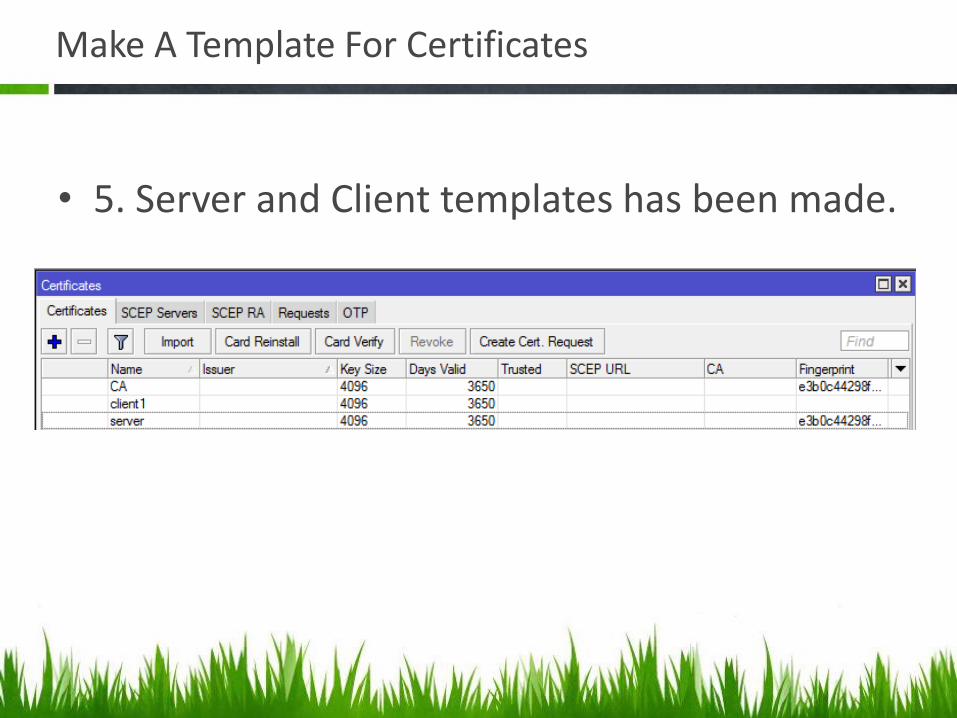
• 5. Server and Client templates has been made.
Certificate Signing
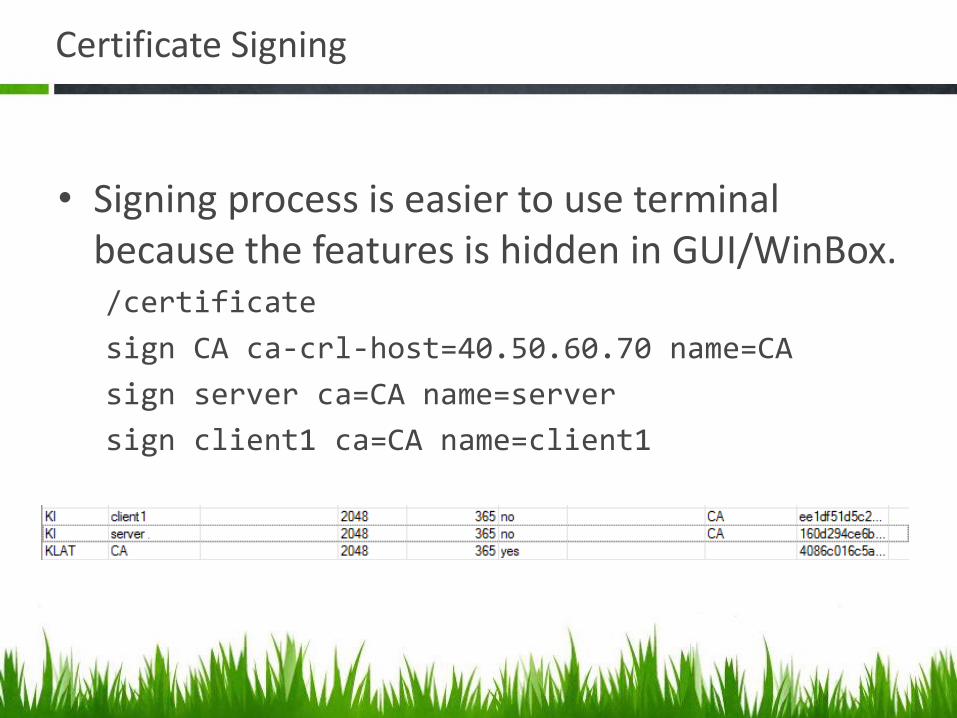
• Signing process is easier to use terminal because the features is hidden in GUI/WinBox. /certificate
sign CA ca-crl-host=40.50.60.70 name=CA
sign server ca=CA name=server
sign client1 ca=CA name=client1
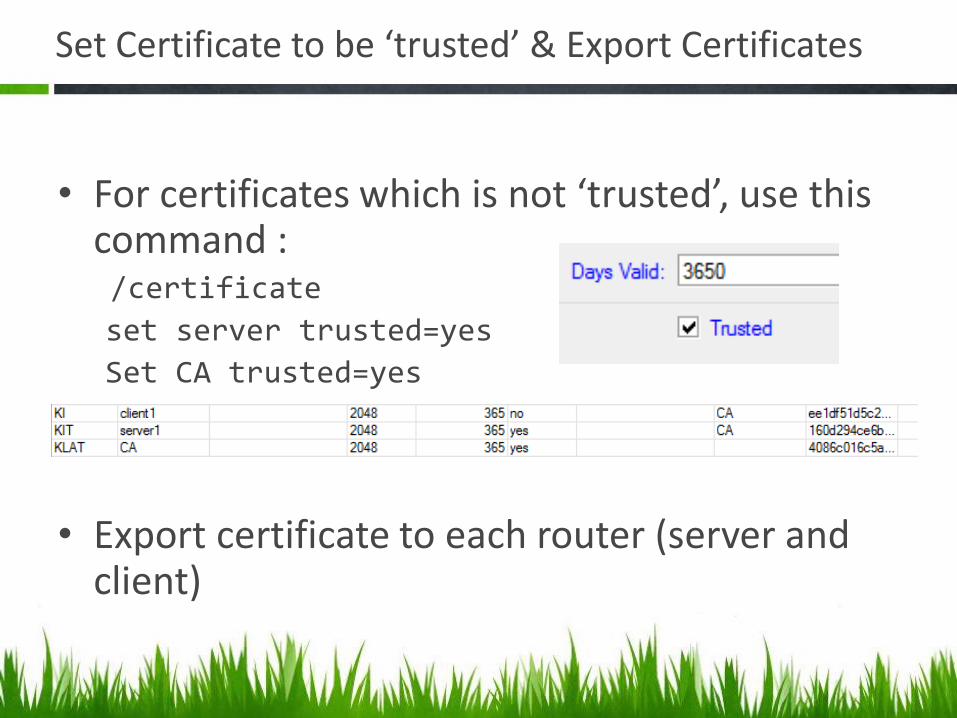
Set Certificate to be ‘trusted’ & Export Certificates
• For certificates which is not ‘trusted’, use this command :
/certificate
set server trusted=yes
Set CA trusted=yes
• Export certificate to each router (server and client)
IMPORT CERTIFICATES INTO MIKROTIK ROUTER
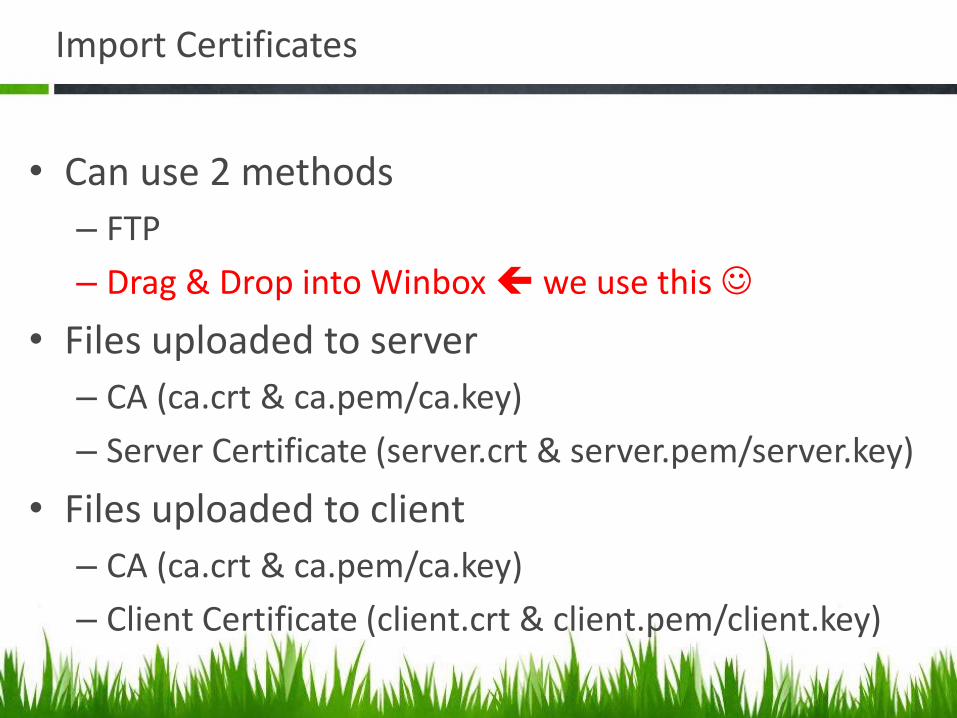
Import Certificates
• Can use 2 methods
– FTP
– Drag & Drop into Winbox we use this
• Files uploaded to server
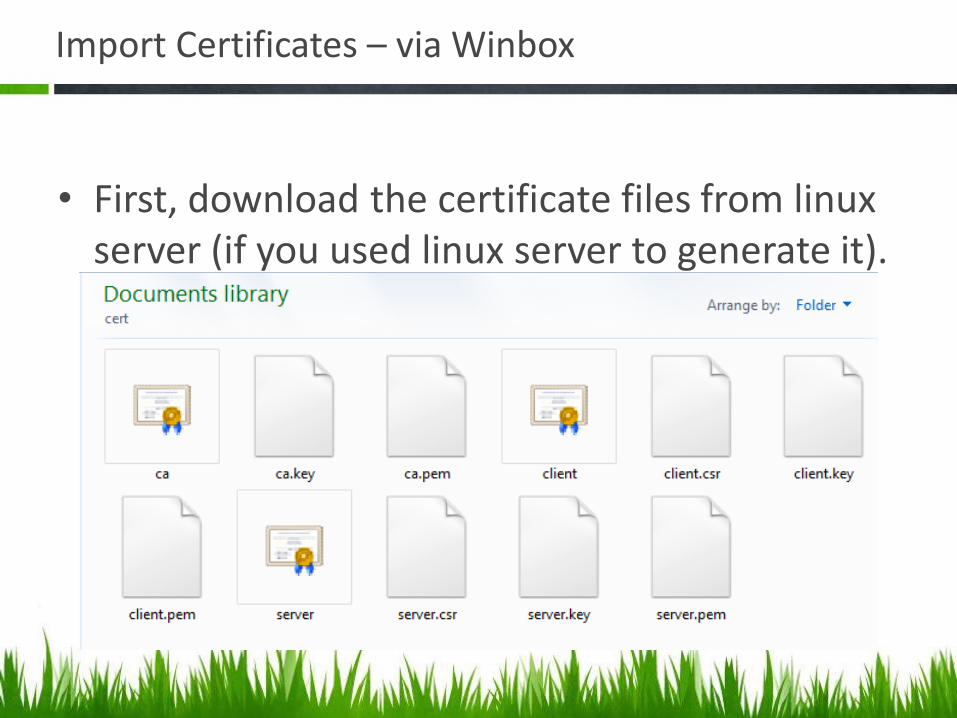
– CA (ca.crt & ca.pem/ca.key)
– Server Certificate (server.crt & server.pem/server.key)
• Files uploaded to client
– CA (ca.crt & ca.pem/ca.key)
– Client Certificate (client.crt & client.pem/client.key)
Import Certificates – via Winbox
• First, download the certificate files from linux server (if you used linux server to generate it).
Import Certificates – via Winbox
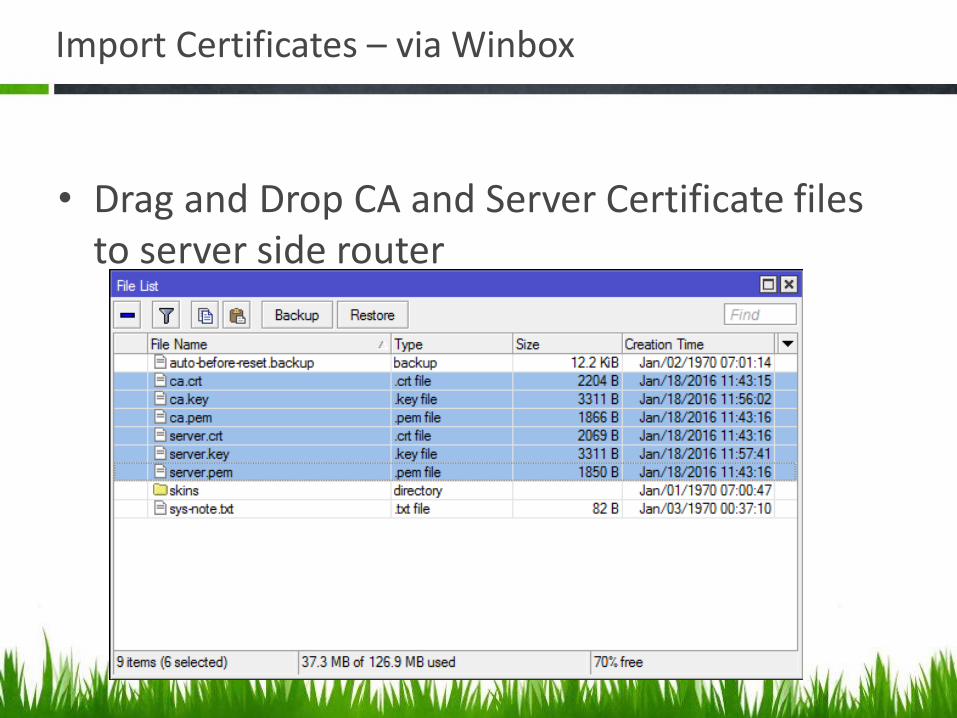
• Drag and Drop CA and Server Certificate files to server side router
Import Certificates – via Winbox
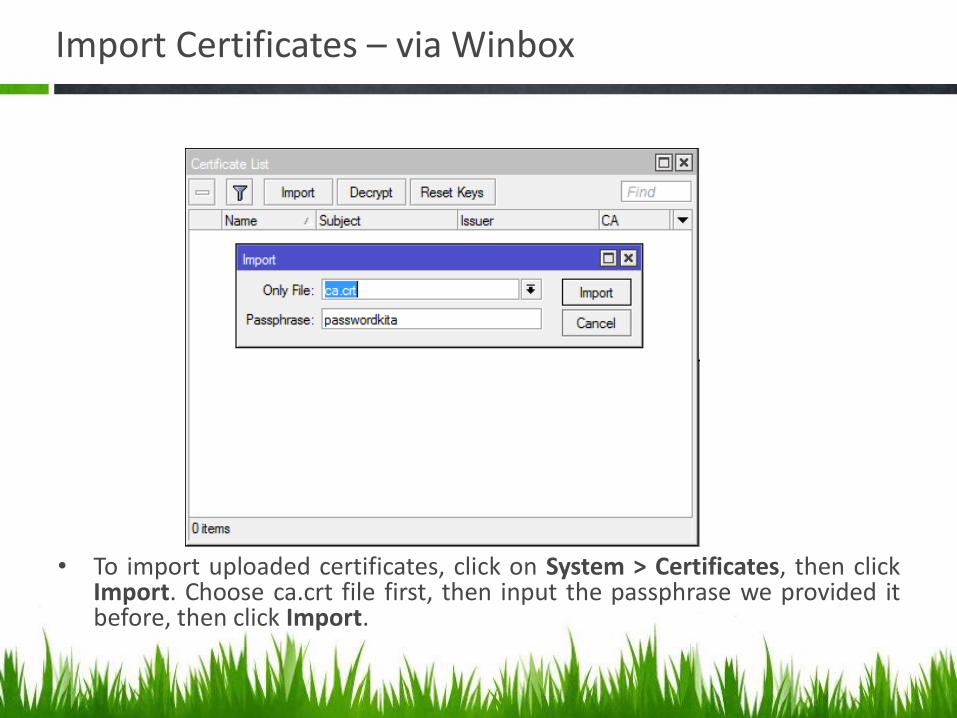
• To import uploaded certificates, click on System > Certificates, then click Import. Choose ca.crt file first, then input the passphrase we provided it before, then click Import.
Import Certificates – via Winbox
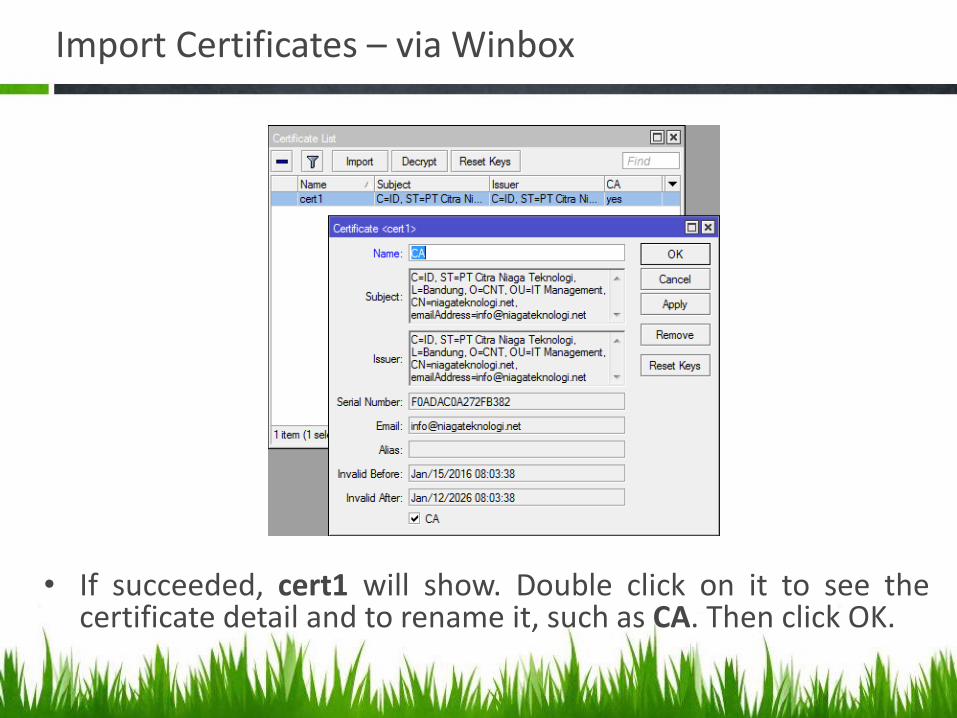
• If succeeded, cert1 will show. Double click on it to see the certificate detail and to rename it, such as CA. Then click OK.
Import Certificates – via Winbox
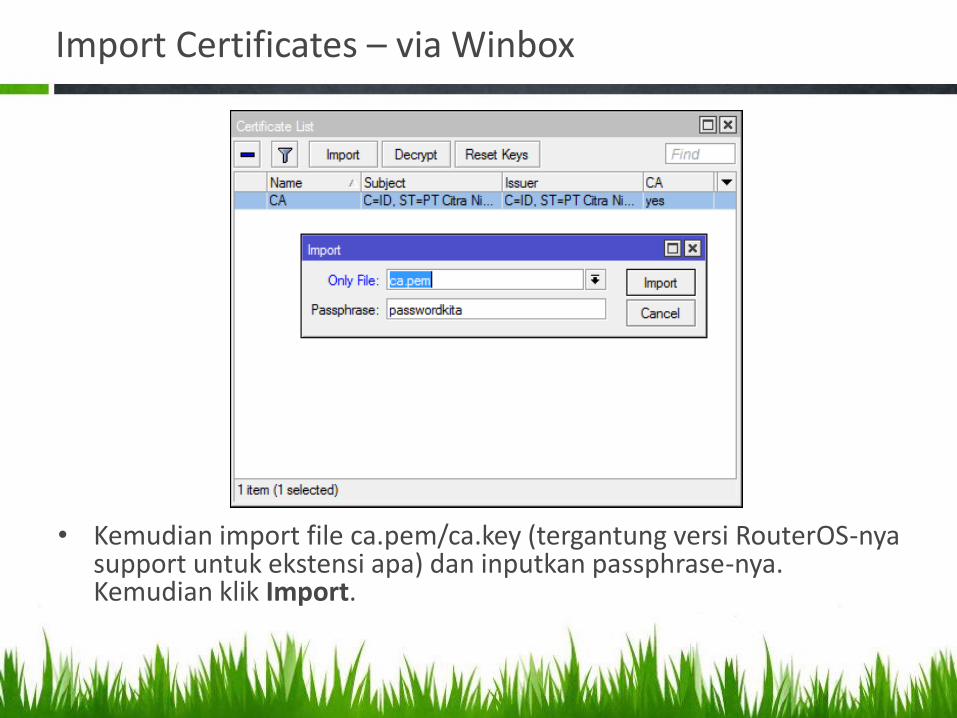
• Kemudian import file ca.pem/ca.key (tergantung versi RouterOS-nya support untuk ekstensi apa) dan inputkan passphrase-nya. Kemudian klik Import.
Import Certificates – via Winbox
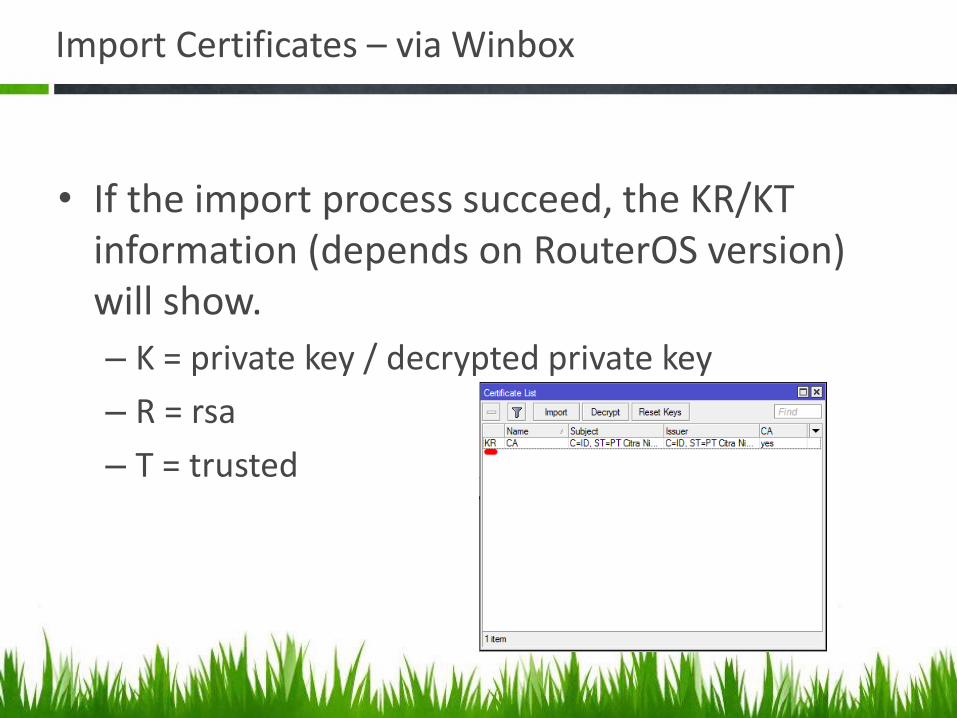
• If the import process succeed, the KR/KT information (depends on RouterOS version) will show.
– K = private key / decrypted private key
– R = rsa
– T = trusted
Import Certificates – via Winbox
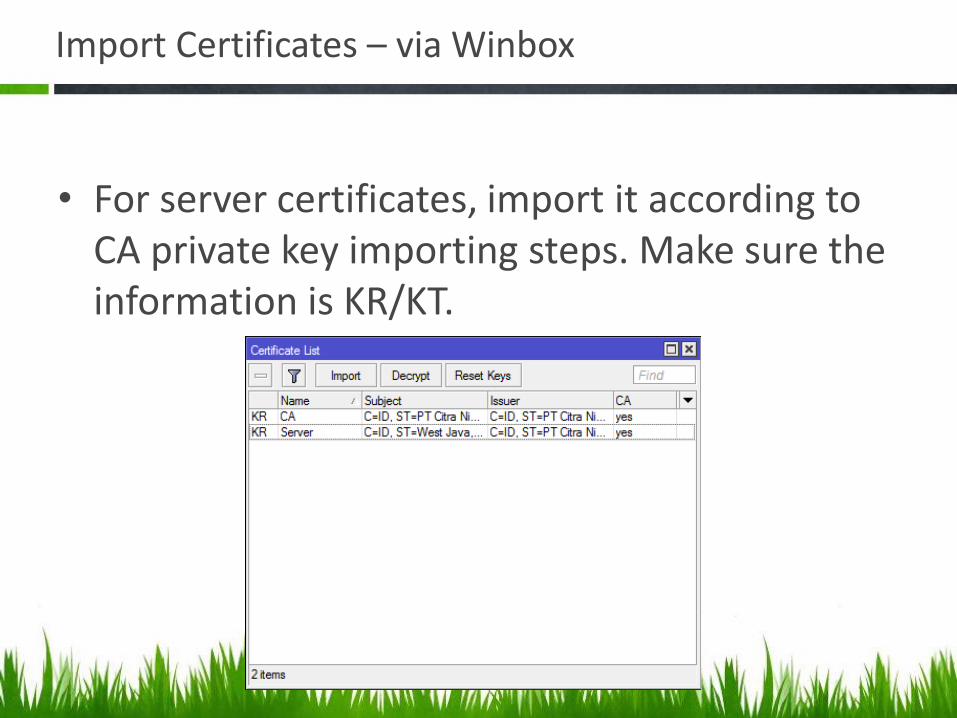
• For server certificates, import it according to CA private key importing steps. Make sure the information is KR/KT.
Import Certificates – via Winbox
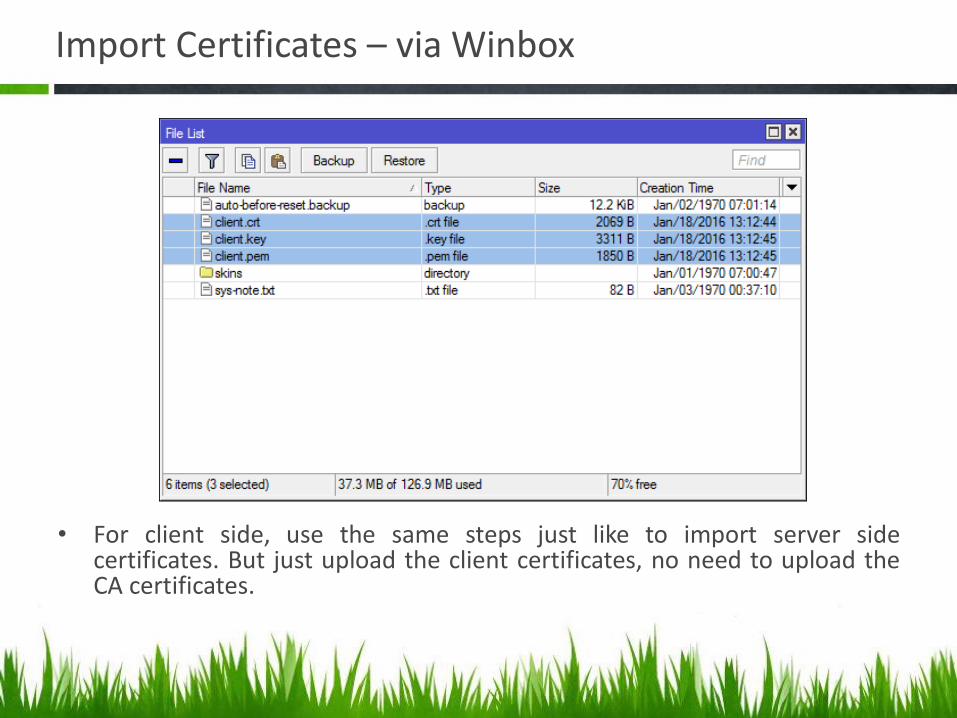
• For client side, use the same steps just like to import server side certificates. But just upload the client certificates, no need to upload the CA certificates.
Import Certificates – via Winbox
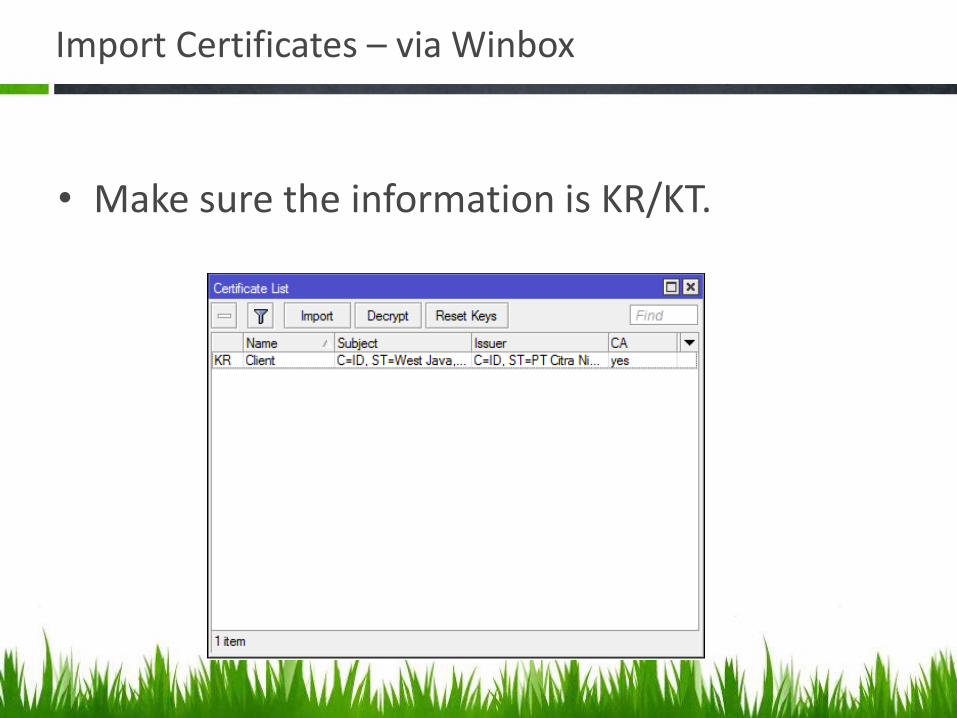
• Make sure the information is KR/KT.
SET OPENVPN SERVER AT HEAD OFFICE SIDE
Set OpenVPN Server at Head Office Side
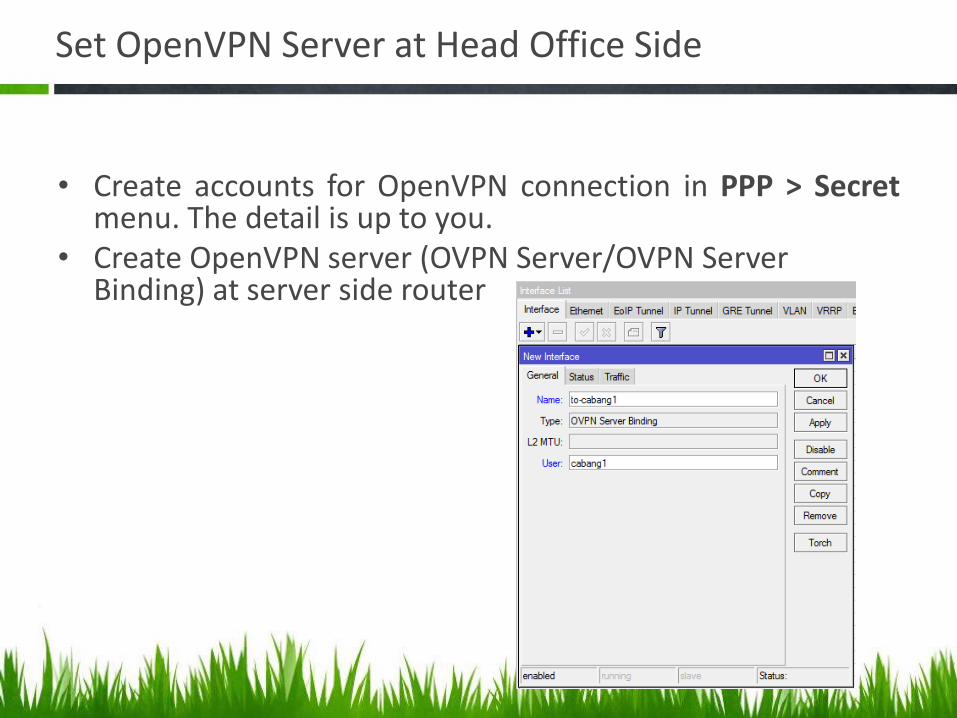
• Create accounts for OpenVPN connection in PPP > Secret menu. The detail is up to you.
• Create OpenVPN server (OVPN Server/OVPN Server Binding) at server side router
• n

SET OPENVPN CLIENT AT BRANCH OFFICE SIDE
Set OpenVPN Client at Branch Office Side
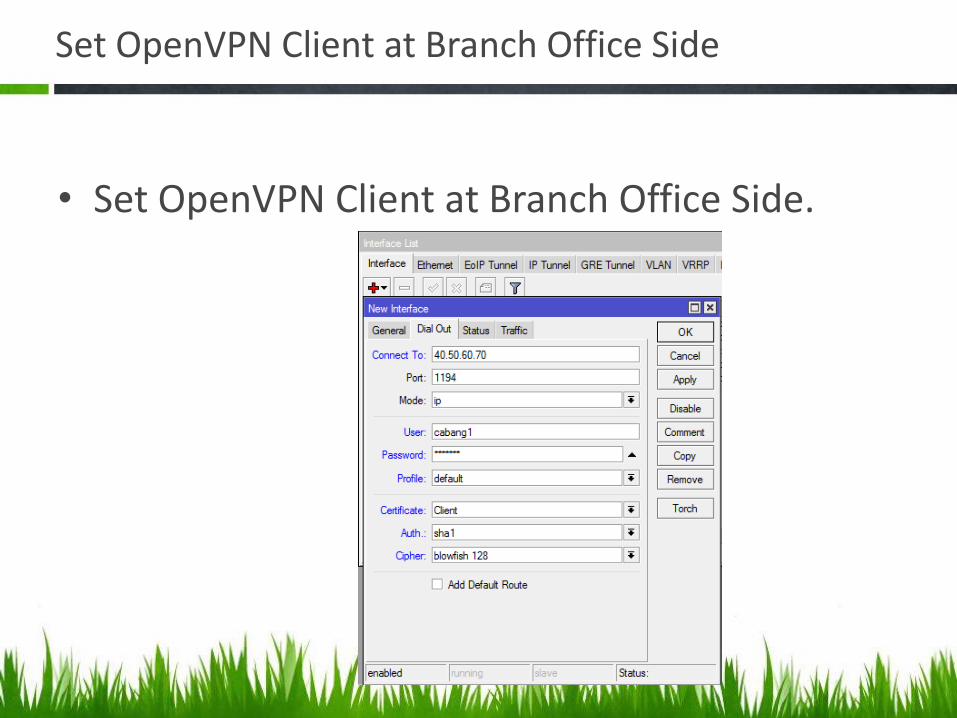
• Set OpenVPN Client at Branch Office Side.
ADD NETWORK ROUTING
Add Network Routing
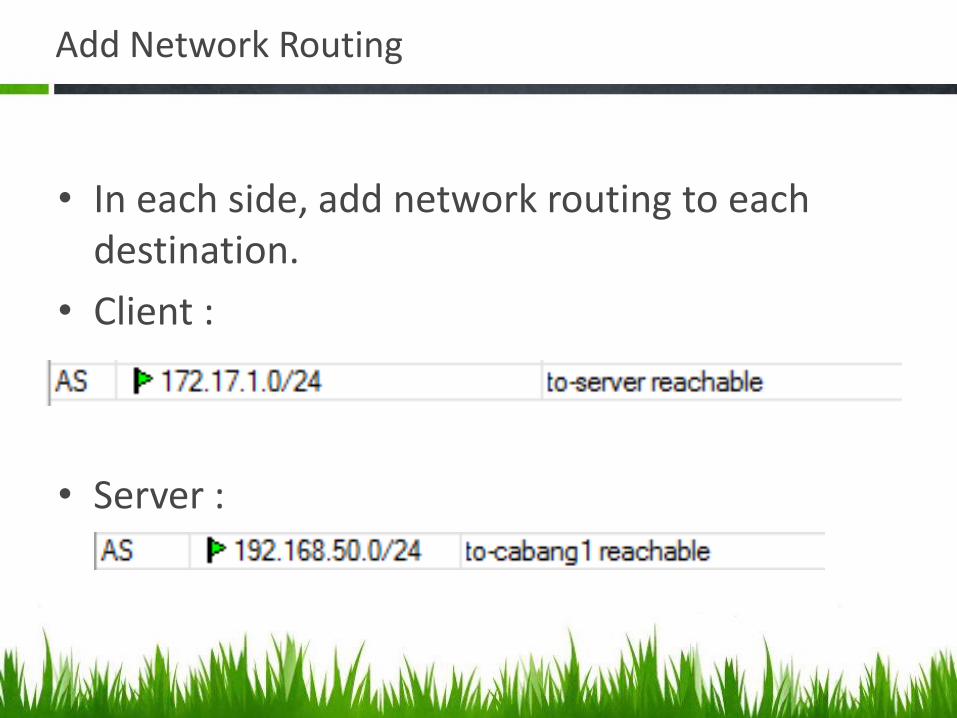
• In each side, add network routing to each destination.
• Client :
• Server :

CONFIGURATION TESTING
Configuration Testing
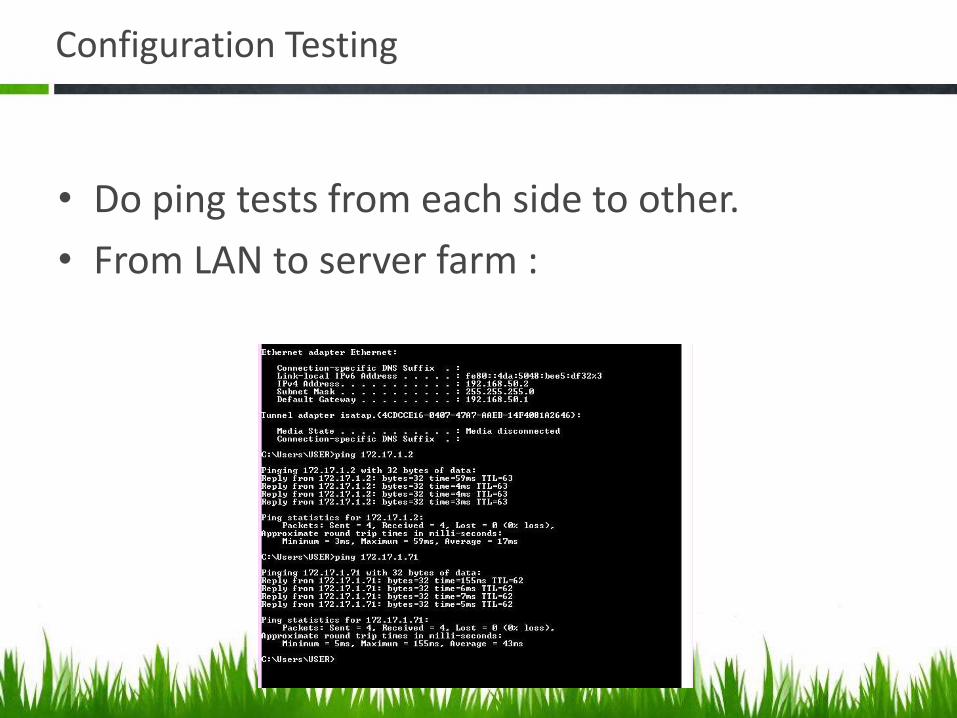
• Do ping tests from each side to other.
• From LAN to server farm :
Configuration Testing
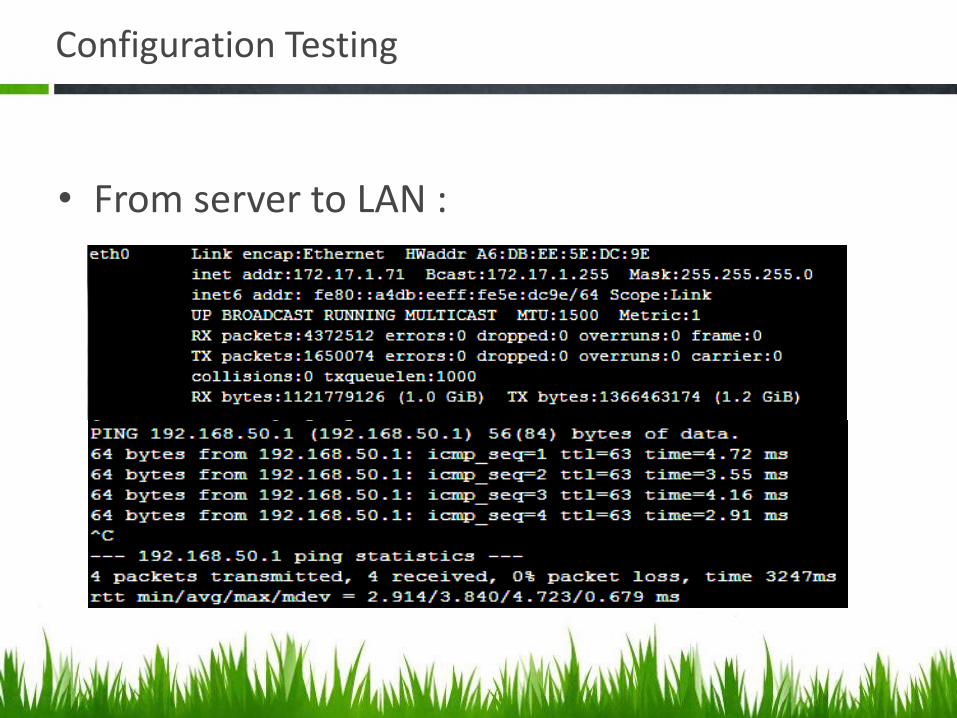
• From server to LAN :

Easy, isn’t it?
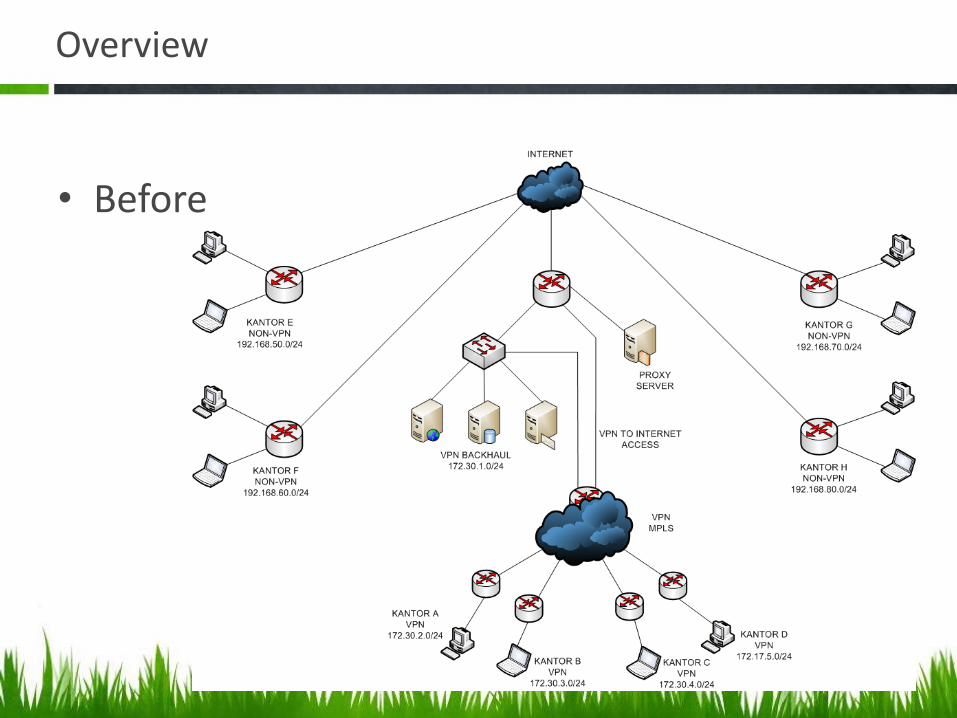
Overview
• Before

Overview
• After

Terima kasih. ====================
Thank You.